


COMPOUND MITRE SAW KH2909 - MOUNTING INSTRUCTIONS
ÚKOSOVÁ PÍLA KH2909 - MONTÁŽNY NÁVOD
POKOSOVÁ PILA KH2909 - NÁVOD K MONTÁŽI
Importateur/Dovozce/Dovozca
KOMPERNASS GMBH
BURGSTRASSE 21
44867 BOCHUM, GERMANY
www.kompernass.com
B
q
w
45º/54º/60º/67,5º/75º/90º 15º/22,5º/30º/36º/45º/90º
e
- 1 -
Safety instructions / Operating instructions
Cleaning and Maintenance
• Do not overburden the saw and saw blade.
• Never use damaged saw blades.
• Use a saw blade that is appropriate for the work piece.
• Ensure that the saw blade and the grip are firmly seated.
• The saw blade must be aligned and centred within the frame.
• Tension the saw blade before use to achieve an exact and clean cut.
• Release the saw blade after use.
• The work piece should be as rectangular and straight as possible.
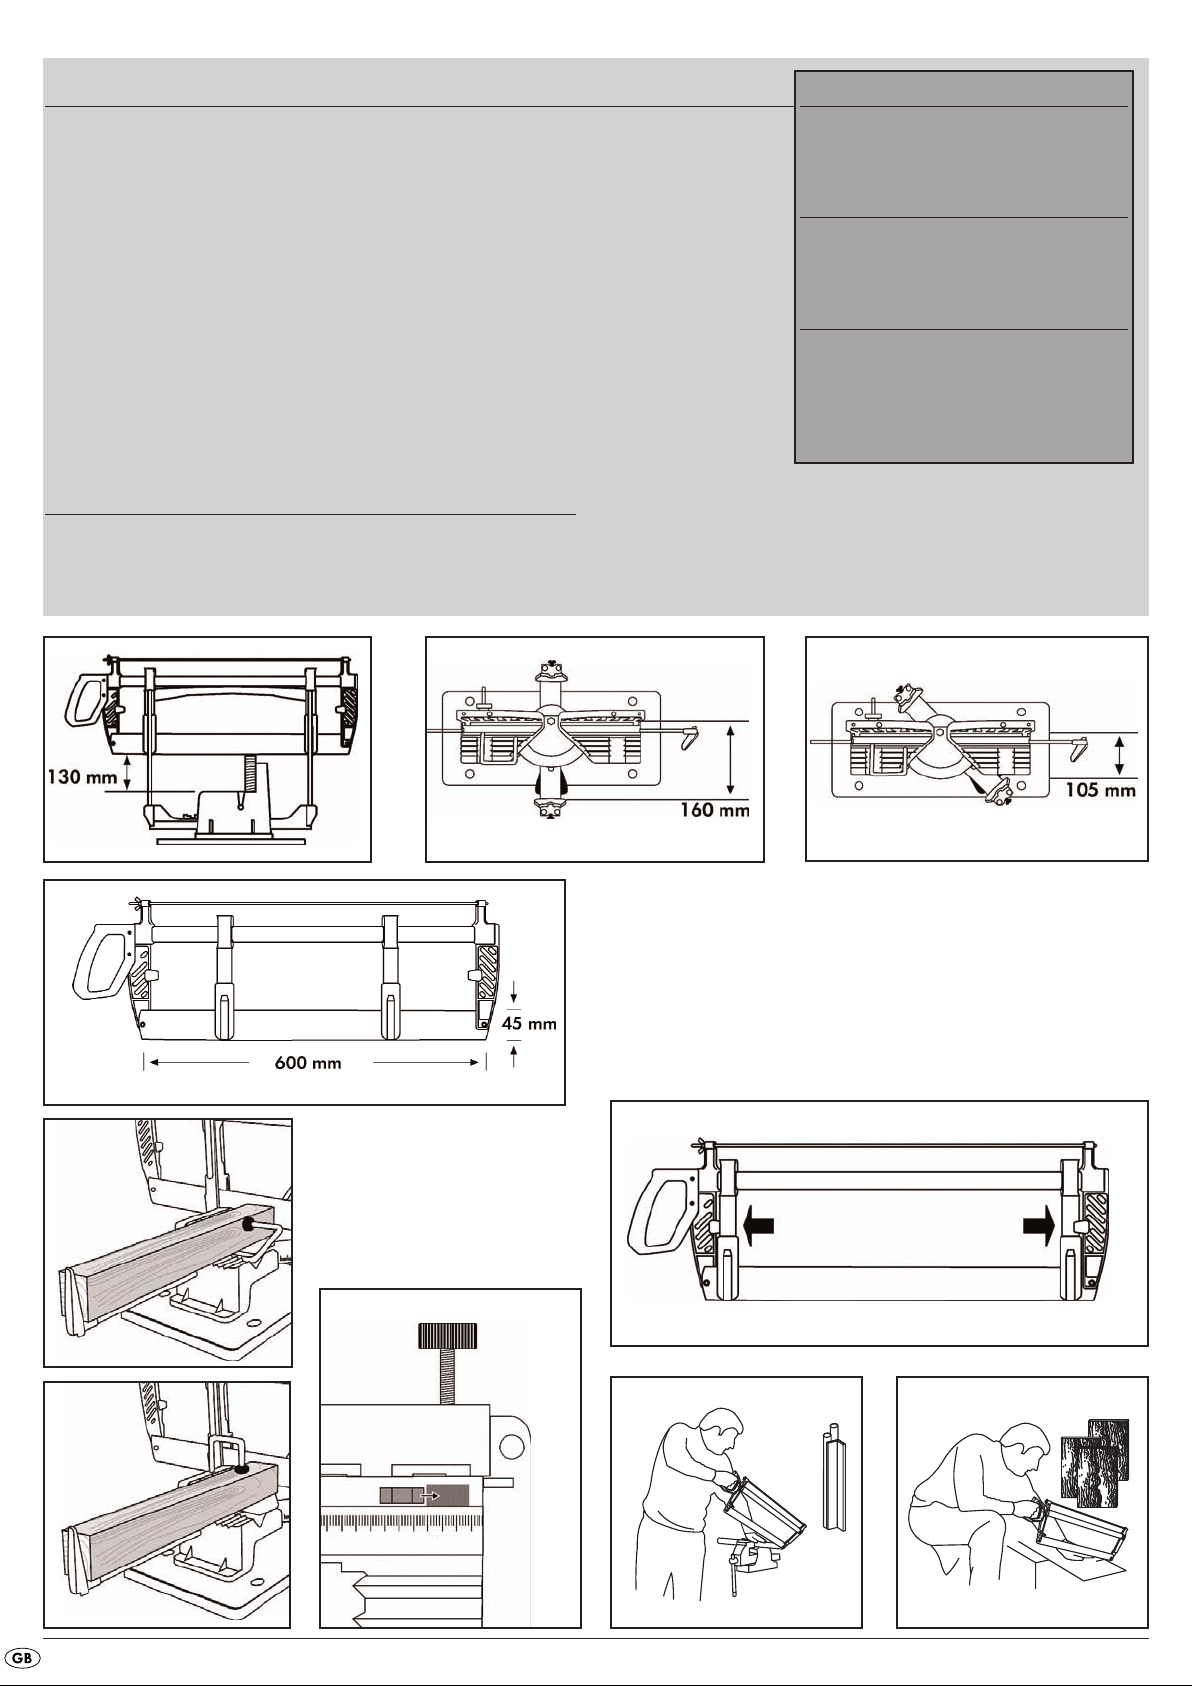
• Clamp the workpiece to the saw table (see Figs. 5a-c).
• Fasten the saw table to your workbench using the four pre-drilled holes.
• Wear the necessary protective gear, such as gloves and protective goggles.
• Never permit children to use the saw without supervision.
• This saw is not intended for commercial applications.
• Do not use the saw for any purpose other than the intended one.
Technical Data (Fig. 4a-d):
- Cutting width at 90°: 160 mm
- Cutting width at 45°: 105 mm
- Max. cutting height: 130 mm
After use, clean the mitre saw with a brush and
smear the saw blade with oil.
Maintenance
All components of the mitre saw are maintenance-free.
Disposal
Dispose of the appliance through an approved
dis-posal centre or at your community waste facility. Observe the currently applicable regulations. In case of doubt, please contact your waste disposal centre.
- Table length: 485 mm
- Blade length: 600 mm
- Blade width: 45 mm
r
r
t
t
a
r
b
r
c
d
a
c
t
y
b
- 2 -
y
a
y
b
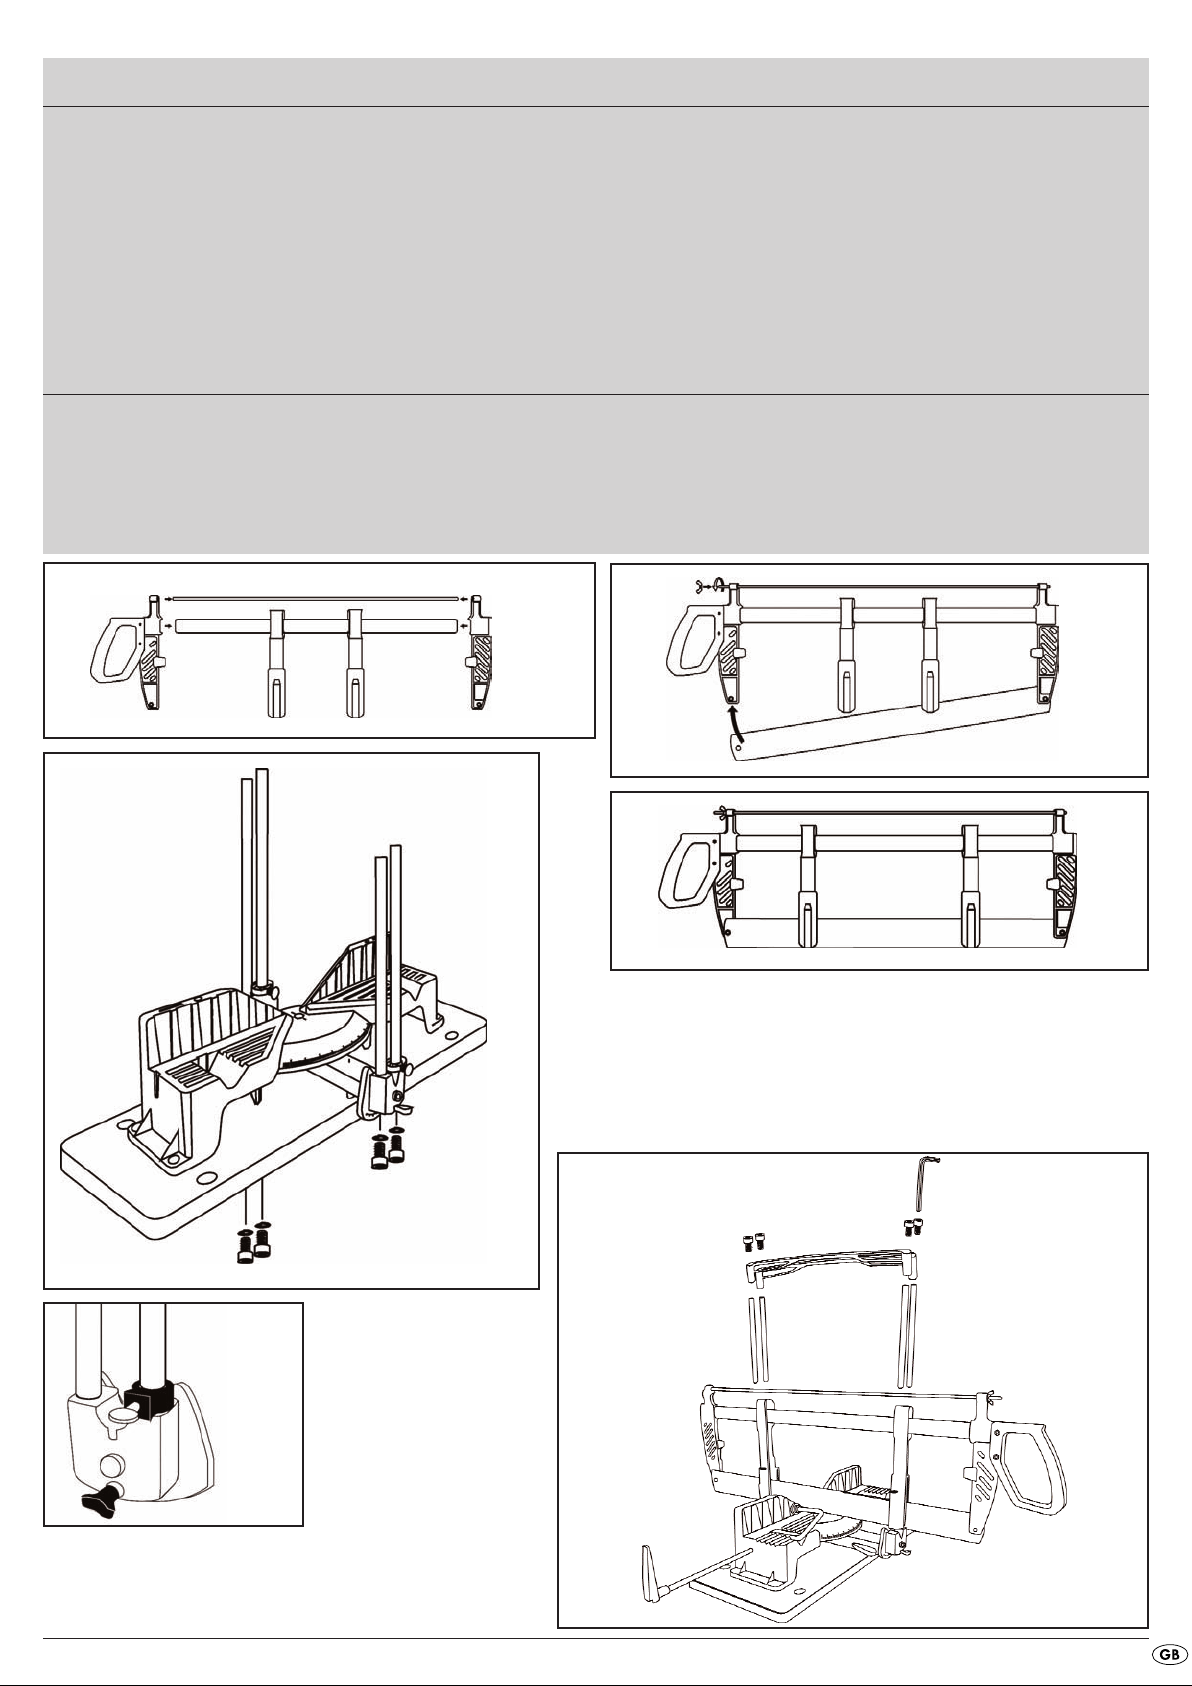
Assembly/Disassembly
• Place the guide piece in the saw support and then connect it to the saw arms (Fig. 7).
• Fit the saw blade and then put it under tension by tightening the wing nut on the tension bar (Figs. 8+9).
• Firmly fit the four guide rods to the saw table with the screws and washers (Fig. 10).
• Fit the spacers at the front and rear each onto one of the guide rods (Fig. 11)
• Guide the saw over the guide rods.
• Fit the carrying handle on to the top of the guide rods with the screws (Fig. 12).
To be able to use the saw without a table, the carrying handle must first be released from the guide rods (Fig. 12).
Slide the guide pieces outwards until they engage (Fig. 6).
Setting the cutting angle:
• To set a cutting angle of 36°, for example, count to the right or left of the 90° line 90°-36°=54°. Obtain the lock position of 54° on the saw table by
lifting the lever on the cross beam upwards and then releasing it after turning the saw to the position 54°. The cross beam then locks into this position.
• To adjust to an angle of inclination, if necessary loosen the securing screws at the front and rear ends of the cross beam (Fig.3). Then pull the latching bolts
down and incline the saw until until the bolts engage in the next position..
a
u
i
o
d
s
- 3 -
 Loading...