

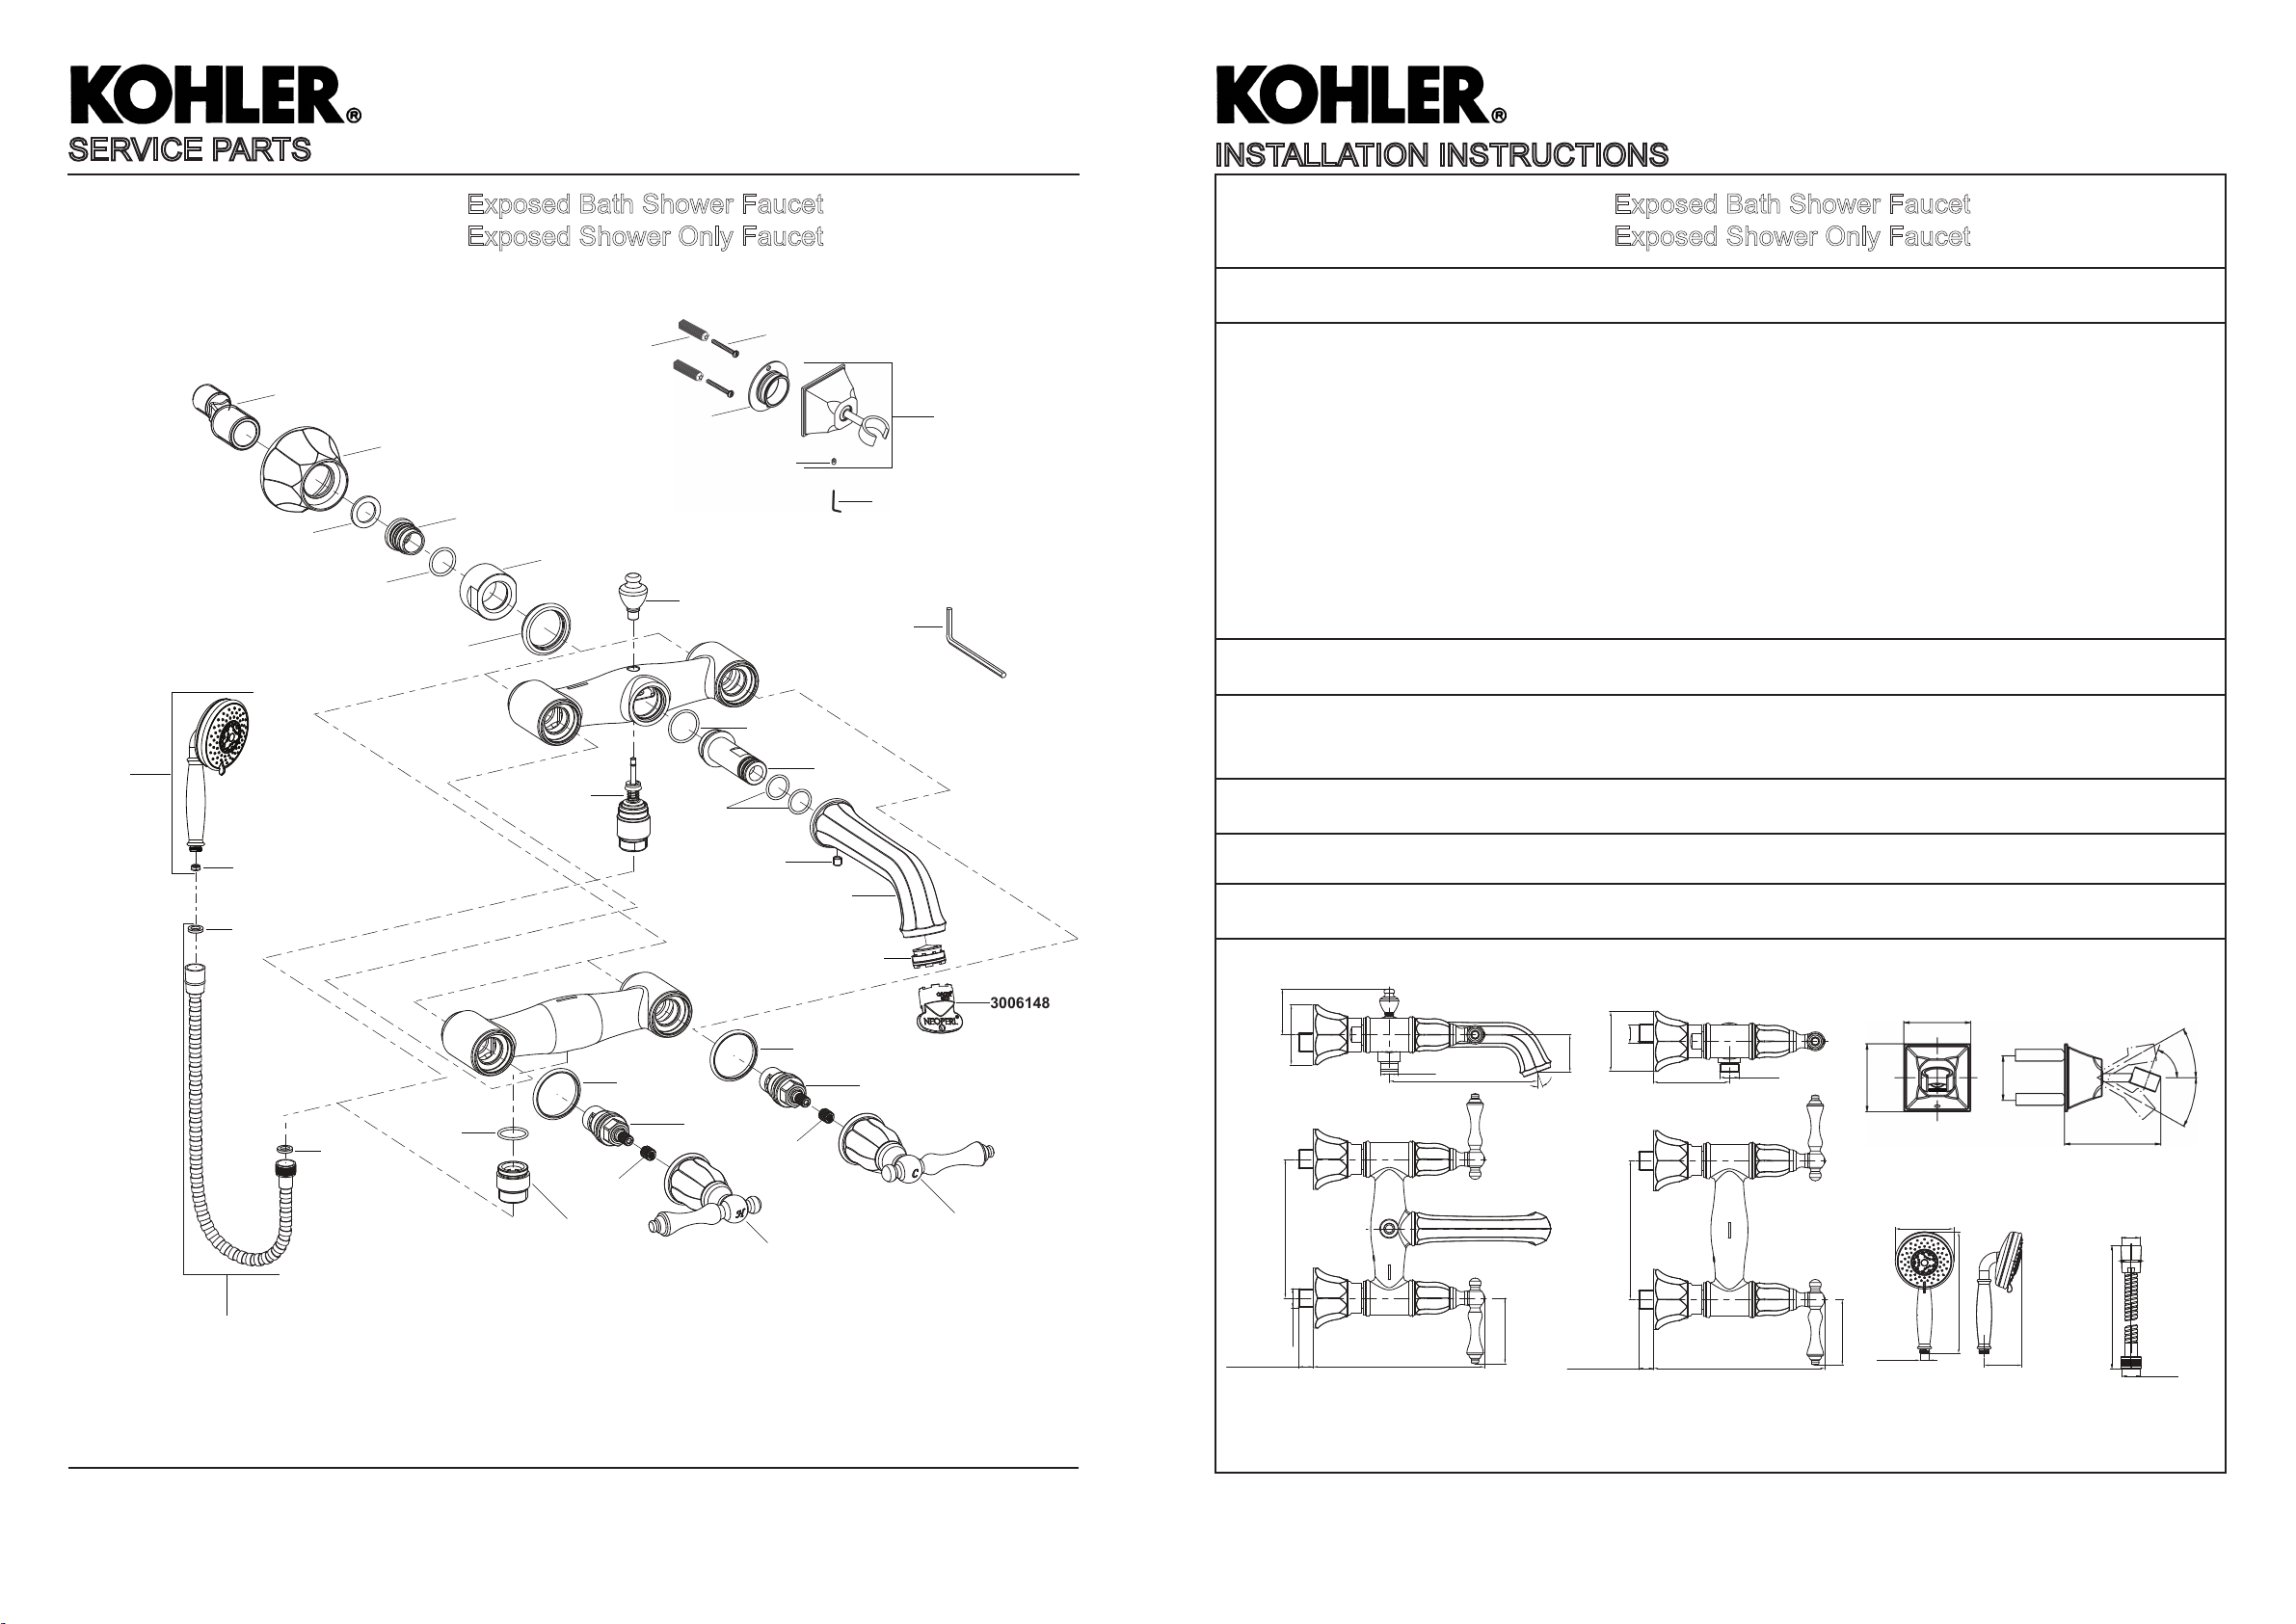
SERVICE PARTS
3006148
INSTALLATION INSTRUCTIONS
KELSTONKELSTON
1189866**
1170944**
1218659
99030T-4 Exposed Bath Shower Faucet
99031T-4 Exposed Shower Only Faucet
1119427
56283
77954
870992
1213393**
1213391**
864471
865225**
1214971**
1120988
1032149**
1213392**
870944
1213399
77434
834638
1045299**
99030T-4 Exposed Bath Shower Faucet
99031T-4 Exposed Shower Only Faucet
BEFORE YOU BEGIN
All information is based on the latest product information available at the time of publication. Kohler Co. reserves
the right to make changes in product characteristics, packaging, or availability at any time without notice.
Please leave these instructions for the consumer. They contain important information.
NOTES:
1. Flush the water supply pipes thoroughly to remove debris.
2. The minimum inlet water pressure for the diverter is 0.05MPa(0.5bar).
3. The highest working pressure for handspray & showerhead is 0.5MPa(5bar). If it exceeds 0.5MPa(5bar),
a pressure reducer is needed. The highest water and environment temperature is 60ºC. Please keep handspray,
showerhead and the shower arm away from heater, or it may become damaged and cause injury to the user.
HANDLE OPERATION
Left handle opens with turning counter-clockwise, right handle opens with turning clockwise. Lift the diverter button
gently, handspray works.
STANDARD APPLICABLE
1030624
880010
1213390**
870721
880010
78125
864922**
99030T/99031T-4-RGD:831727**
99030T/99031T-4-2BZ:1202014**
99030T/99031T-4-CP:1248781**
3002768
1213400**
3005148
1213390**
837207
837206
78125
1214821**
1214820**
**Color code must be specified when ordering.
NOTE: For all Asia pacific regions (excluding China) add SP (SPxxxxxxx**) in front of the part number when ordering.
Special model meets or exceeds the following at date of manufacture: TIS
ROUGH-IN DIMENSIONS
49.5
G1/2˝
Ø65
40.5
MAX 15.7
150±15
82.3
G1/2˝
71
185.3
99031T-499030T-4
150±15
MAX 15.7
Ø65
G1/2˝
G1/2˝
185.3
160
20º
71
62
62
Multi-function Handspray Hose
Ø122
G1/2˝
40.6
255
79
89
G1/2˝
1500
G1/2˝
70º
29º
29º
1213402-2A-E 4
1213402-2A-E 1

INSTALLATION
INSTALLATION CHECKOUT
How to Install the Faucet
To perform installation, installer must provide G1/2˝ female supply fittings,
spaced 150mm apart and horizontally. The supply fittings should be
vertical and not beyond the finished wall. Hot supply pipe must be located
on the left.
Install the two offset connectors(1) into the hot and cold supply fittings.
Use appropriate thread sealants or thread tape onto the threads.
Adjust the center-to-center distance between the connectors to 150mm
and horizontally. They should extend 44 to 50mm beyond the finished
wall. Apply a ring of plumbers putty around the back edge of the
escutcheon(2). Thread the escutcheons onto the connectors until they
are against the finished wall. Remove any excess putty.
Put the washers(4) into the nuts(3) and tighten the nuts with strap
wrench.
Install the regulator(9) of handspray(5) as needed(shown in regulator
installation instruction). Washers(6) provided with hose(7) must be
installed in each end. Connect the faucet outlet(8) and handspray with
hose.
Hot
Hot
4
3
44~50mm
8
6-2
2
Cold
1
150mm
5
6-1
Cold
Ensure that all connections are tight. Ensure that the handles are in the
off position.
Turn on the drain and main water supply, and check for leaks. Repair as
5
needed.
Bath & Shower Faucet:
Remove the handspray(5) and aerator (17) by the key(16). Run hot and
cold water through the faucet for about one minute to remove any debris.
Check for leaks. Remove any debris from the aerator. Shut off the faucet.
Reinstall the aerator and handspray.
17
16
Shower Faucet:
5
Remove the handspray
9
about one minute to remove any debris. Check for leaks. Shut off the
(5). Run hot and cold water through the faucet for
faucet. Reinstall the handspray.
How to Install the Bracket
Determine a suitable location on the finished wall to install the bracket.
Mark bracket support(11) mounting hole locations on the wall according
to the dimension. Drill two holes on the finished wall, the holes should
match the anchors(10). Install the anchors. Tighten screws(12) to secure
bracket support. Apply a ring of plumbers putty or sealant around the
back surface of the bracket(13). Keep the mounting hole facing
downwards, install the bracket onto the bracket support. Secure the
bracket by tightening the screw(14) with hex wrench(15). Remove any
excess puttty or sealant.
▲
▲
40.6
12
10
14
15
7
CLEANING INSTRUCTIONS
11
13
All Finishes: Clean the finish with mild soap and warm water. Wipe entire surface completely dry with clean soft
cloth. Many cleaners may contain chemicals, such as ammonia, chlorine, toilet cleaner etc, which could adversely
affect the finish and are not recommended for cleaning.
Do not use abrasive cleaners or solvents on Kohler faucets and fittings.
1213402-2A-E 2
1213402-2A-E 3
 Loading...