

Page 1
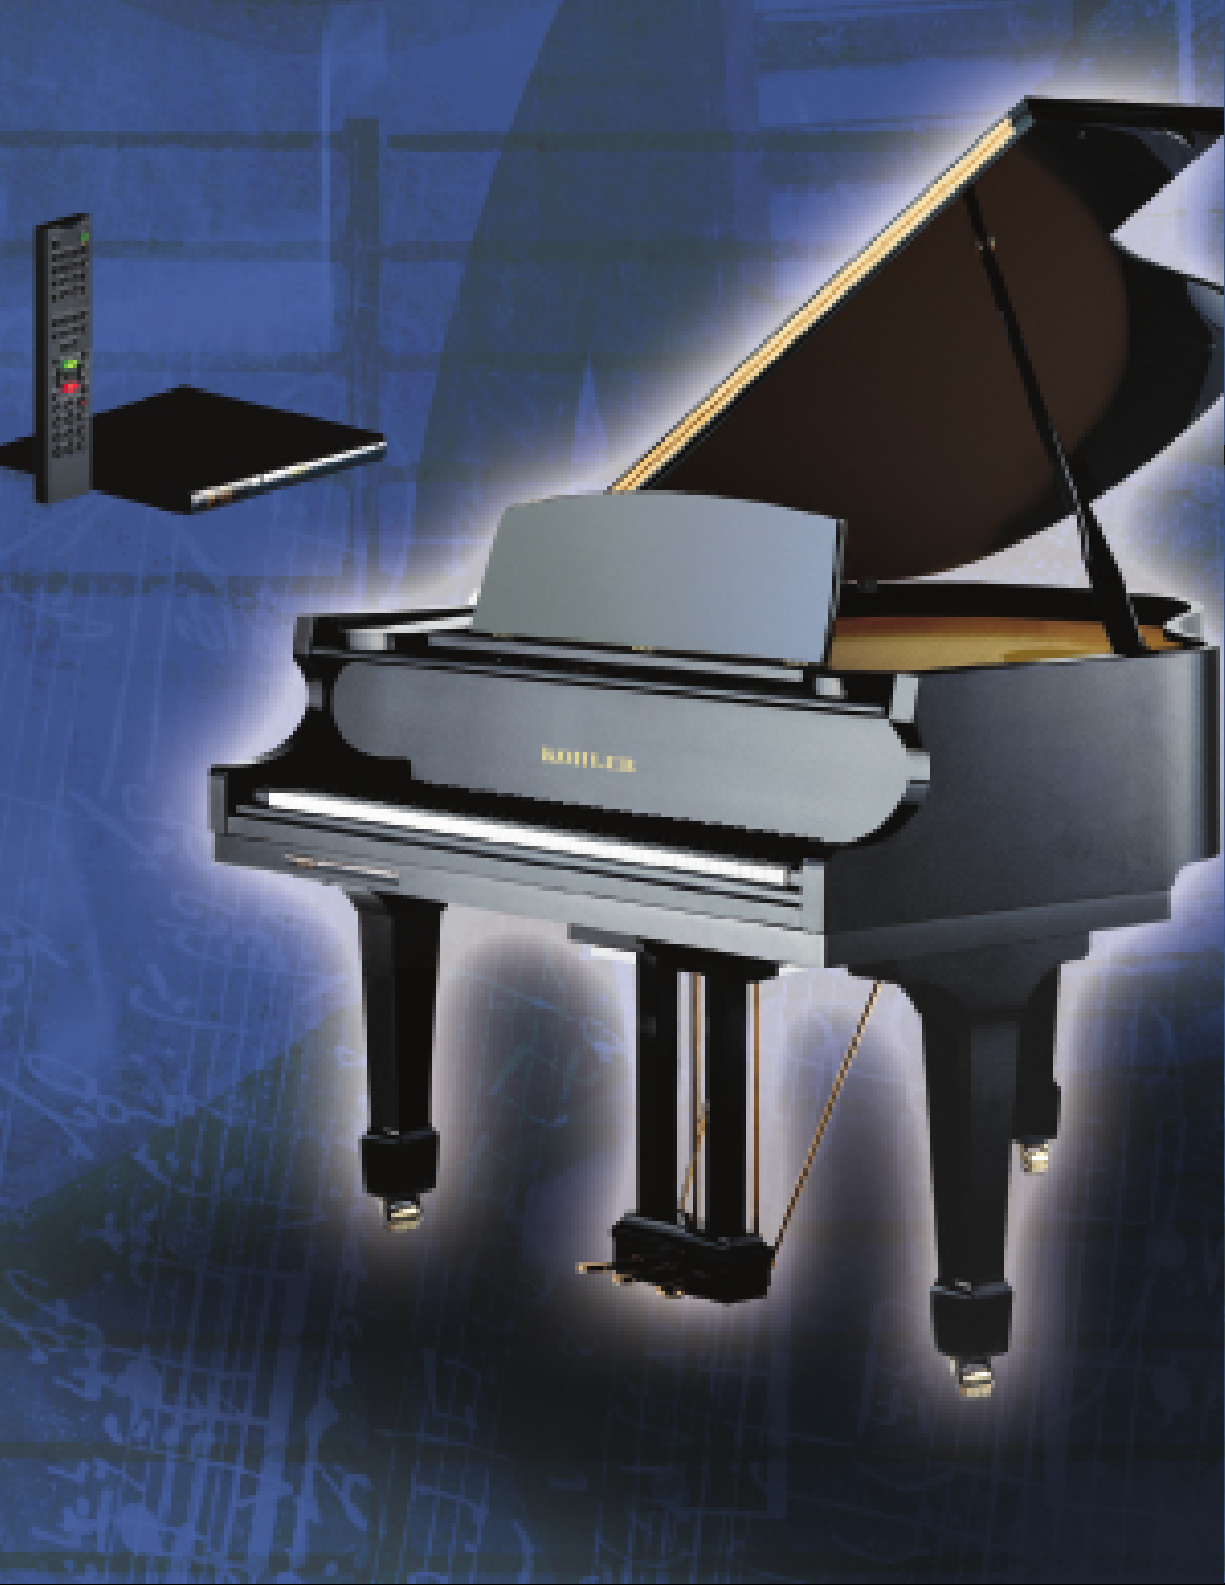
KOHLER
KD-7
User Guide
Page 2

INSTRUCTIONS PERTAINING TO A RISK OF FIRE, ELECTRIC SHOCK, OR INJURY TO PERSONS
The ligh tn in g fla sh with a rrowh e a d s ym bol, w ithin an eq uila te ra l triangle, in intende d to ale rt the us er to th e p resence of u n-insulated
“dang e ro us voltag e ” within the produc t’s e nclosu re tha t m ay be of su fficie n t m agnitud e to constitu te a ris k of electric shoc k to
persons.
The exclam ation point with in a n equ ilateral tria n gle is intende d to a le rt the use r to th e presence of im portant operating an d
m aintenance (servicin g) instructions in the literature acc om pan ying the produ ct
GR O UND IN G INS TRUC TIO N S: T his produc t must be groun ded. If it sh ould m alfu nction or b reakdo wn, g rou n ding p rovide s a path
of leas t resis tance fo r e le ctric curre n t to reduce th e ris k of e lectric s hock. T his product is e q uippe d with a cord hav ing a n equ ip m ent-
groun ding con d uctor and a groun ding plug. The plug m ust be plugg ed into an app ro p ria te outlet that is pro perly installed a nd
groun ded in acc o rd anc e w ith all local c odes and o rd in a nce s .
DANGER - Im prope r con n ection of th e equip m ent-g ro u nding c o ndu c to r ca n result in a risk of elec tric sh ock. C heck with a qu alified
elec tricia n o r s e rv iceman if you are in doubt as to wh e the r the product is p ro p e rly g rounded. Do not m o dify the plug provide d with the
product - if it will no t fit the o utle t, ha v e a proper outlet in sta lle d b y a qua lified elec tric ia n
CAUTION: TO REDUCE THE RISK OF ELECTRIC SHOCK,
DO NOT REMOVE COVER
NO USER SERVICABLE PARTS INSIDE
REFER SERVICING TO QUALIFIED PERSONNEL.
C A U T IO N
1
Page 3

Introduction
Welcome
Cong ra tula tio ns on choos ing the Kohler KD-7 pla yer p iano s ys tem! A g rea t
adv ancem en t over pla yer p ianos of ye ste rda y, the Kohler KD-7 sets seve ral ne w
sta ndards for ease -of-use , vers atility, co nvenie nce , and m us ical re alis m . W hether you wa nt so ft
background m usic for co nversa tio n, the gen tle m o od created by an up bea t ja zz trio, o r a po werful
sym p hon ic experience the Perfomance will a ccom modate you w ith years o f u nsu rpasse d m usic al
enjoym ent.
Overview
The M ode lKohler - KD-7playe r p iano system is a M ID I equip ped m u sic pla yback and reco rd
system M ID I is an acron ym fo r M usical Instrum ent D igital Interface .
It is a univ ersa l la ngu age ad op ted by th e m usic al ins trum e nt m an ufactu rers so
variou s M ID I eq uipp ed de vice s ca n talk to each o the r. M ID I is a form o f com mun ication .
The KD-7 player system has two m a in pa rts, th e Stationary C ontro ller (the centra l brain ) an d the
soleno id ra il (or en gine). All 88 notes on the pia no have a corresp ond ing so lenoid .
The KD-7 system pe rfo rm s the M ID I m e ssag es s en t from eithe r the in te rnal CD-R OM, Internal
Library or external USB device. A message received by the KD-7 prompts the key solenoid to rise, hitting
the tail of the piano key.
Choosing a Good Location
To preve nt e xc essive interna l h eat b uild up in the ele ctronic com p onents , place the p iano in a lo cation
with su fficie nt a ir circulation.
Do n ot insta ll the p iano:
• Ne ar heat so urce s such as ra diato rs or hot air d ucts.
• In direct sun lig ht.
• In pla ce s w he re exc essive dust, me chanical vibra tio n or sho cks e xist.
2
Page 4
Introducon/Welcome
2
Geng started
3
What media to play?
3
Source/Library
4, 5,
Volume and Balance
6
Tone control/Expression/Tempo/Transpose
7
Help/Repeat/Random/Menu
8
Aenon/Addional Features
9
Quick start
10
Unlock/Copy
11, 12, 13, 14
A-B Repeat
13
Internal Library Structure
15. 16
Playlist Funcon
17
IR Remote
18, 19, 20
Funcons - Update - Remote Assistant
21
Solenoid Controller Setup
22
Split Play - Split Note - Help - Random
23, 24
Repeat - Tone - Pan - Tempo - Transpose
25
Add/Playlist - All - Delete - Rename - Copy
26
The Source Buons
27
USB
28, 29
CD
30
CD Auto Play
31
Accompaniment Volume
32
Menu
33, 34, 35, 35,
37, 38, 39, 40
41, 42
Connecons
42
Playback Sources
43
Index
44, 45
Internal Library Song List
46, 47
Warranty
48
KD-7 TOC
Page 5
In order to start operating your Kohler KD-7, first:
Make sure that the power cord is connected to a wall outlet (110V)
Turn on the power supply mounted under the piano
Performance will now go through a 60 second “self check” process.
Now we are ready to use all the features of the Kohler player system.
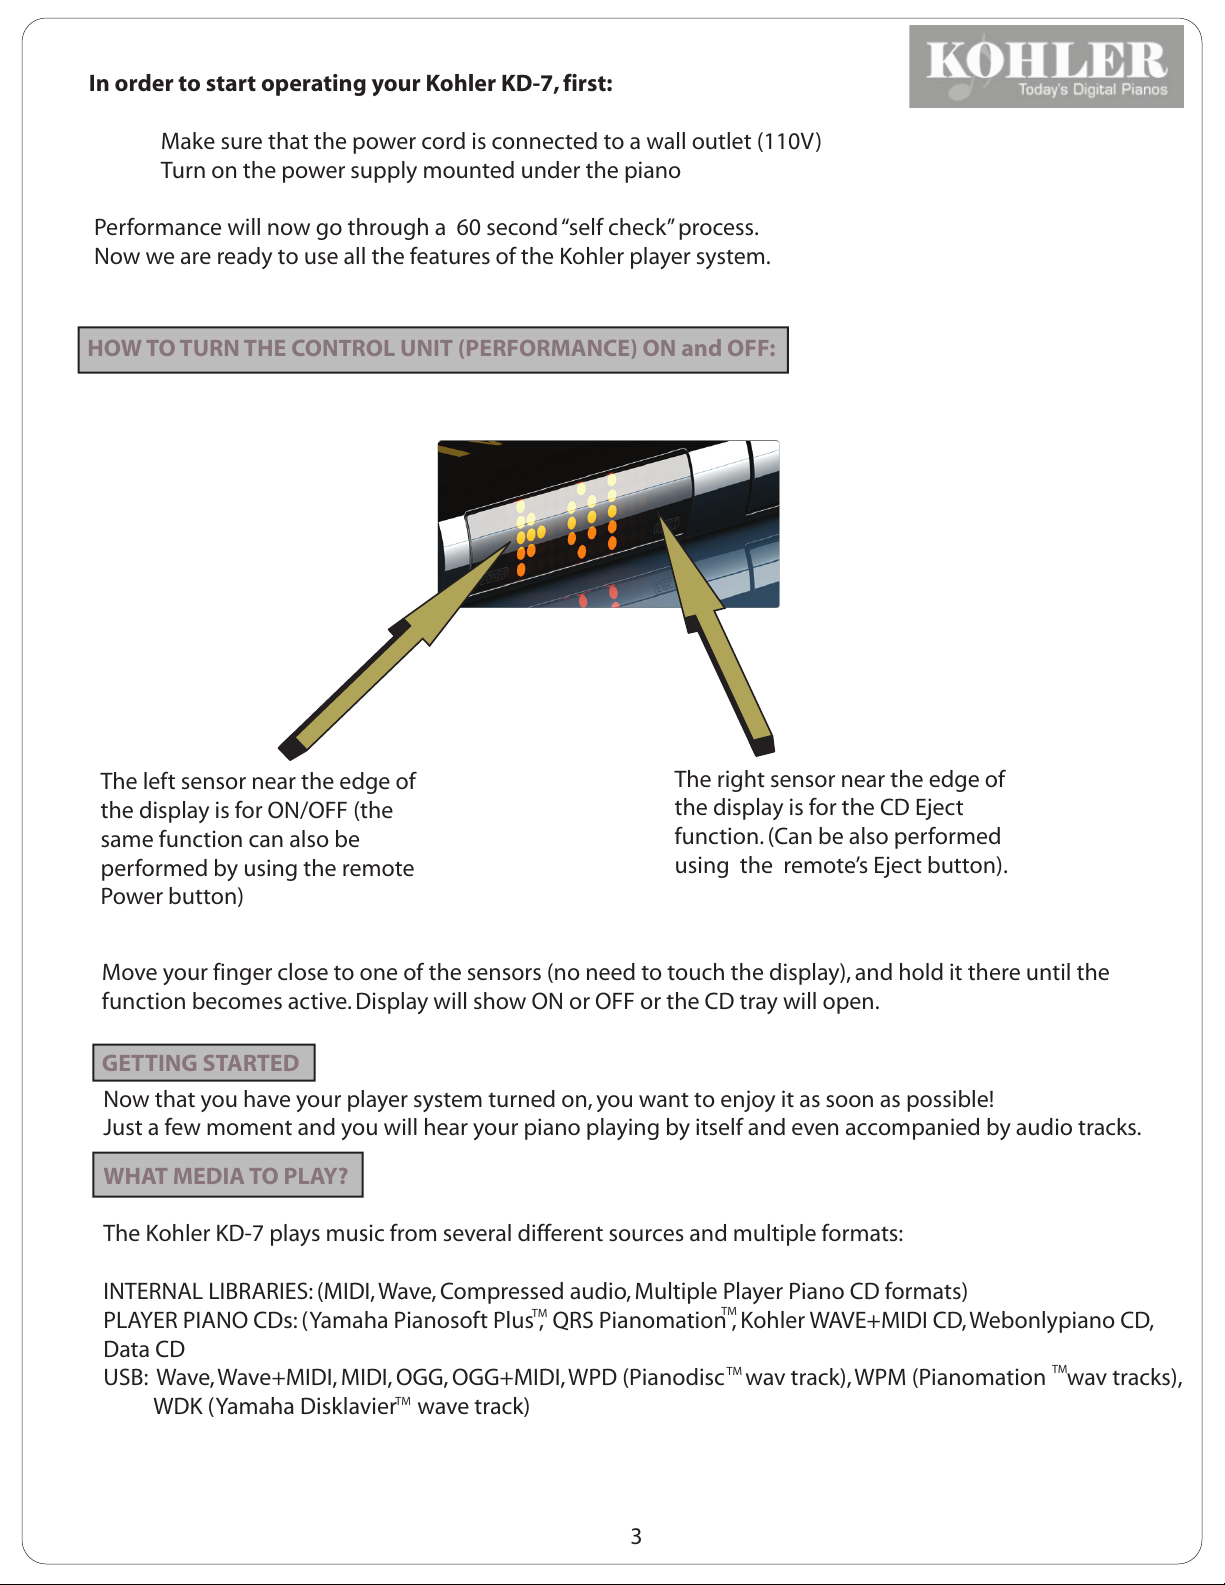
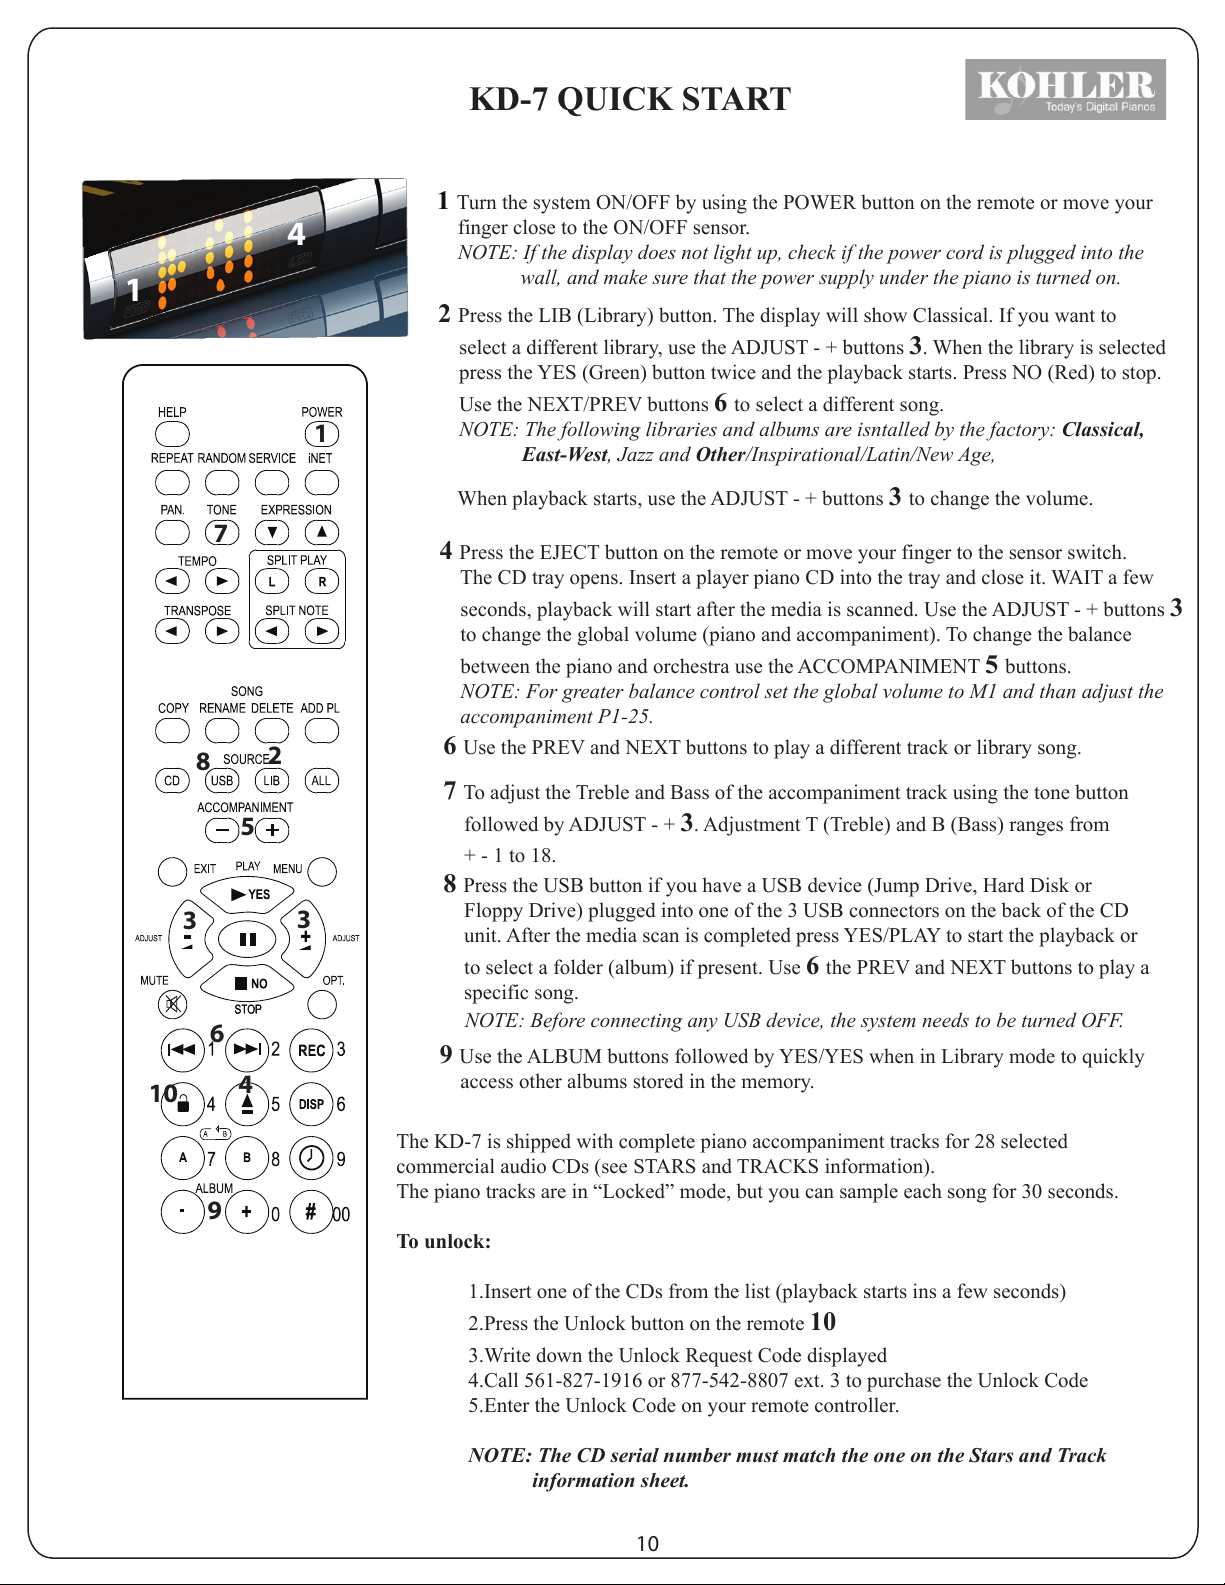
HOW TO TURN THE CONTROL UNIT (PERFORMANCE) ON and OFF:
The left sensor near the edge of
the display is for ON/OFF (the
same function can also be
performed by using the remote
The right sensor near the edge of
the display is for the CD Eject
function. (Can be also performed
using the remote’s Eject button).
Power button)
Move your finger close to one of the sensors (no need to touch the display), and hold it there until the
function becomes active. Display will show ON or OFF or the CD tray will open.
GETTING STARTED
Now that you have your player system turned on, you want to enjoy it as soon as possible!
Just a few moment and you will hear your piano playing by itself and even accompanied by audio tracks.
WHAT MEDIA TO PLAY?
The Kohler KD-7 plays music from several different sources and multiple formats:
INTERNAL LIBRARIES: (MIDI, Wave, Compressed audio, Multiple Player Piano CD formats)
PLAYER PIANO CDs: (Yamaha Pianosoft Plus , QRS Pianomation , Kohler WAVE+MIDI CD, Webonlypiano CD,
TM
TM
Data CD
USB: Wave, Wave+MIDI, MIDI, OGG, OGG+MIDI, WPD (Pianodisc wav track), WPM (Pianomation wav tracks),
WDK (Yamaha Disklavier wave track)
TM
TM
TM
3
Page 6
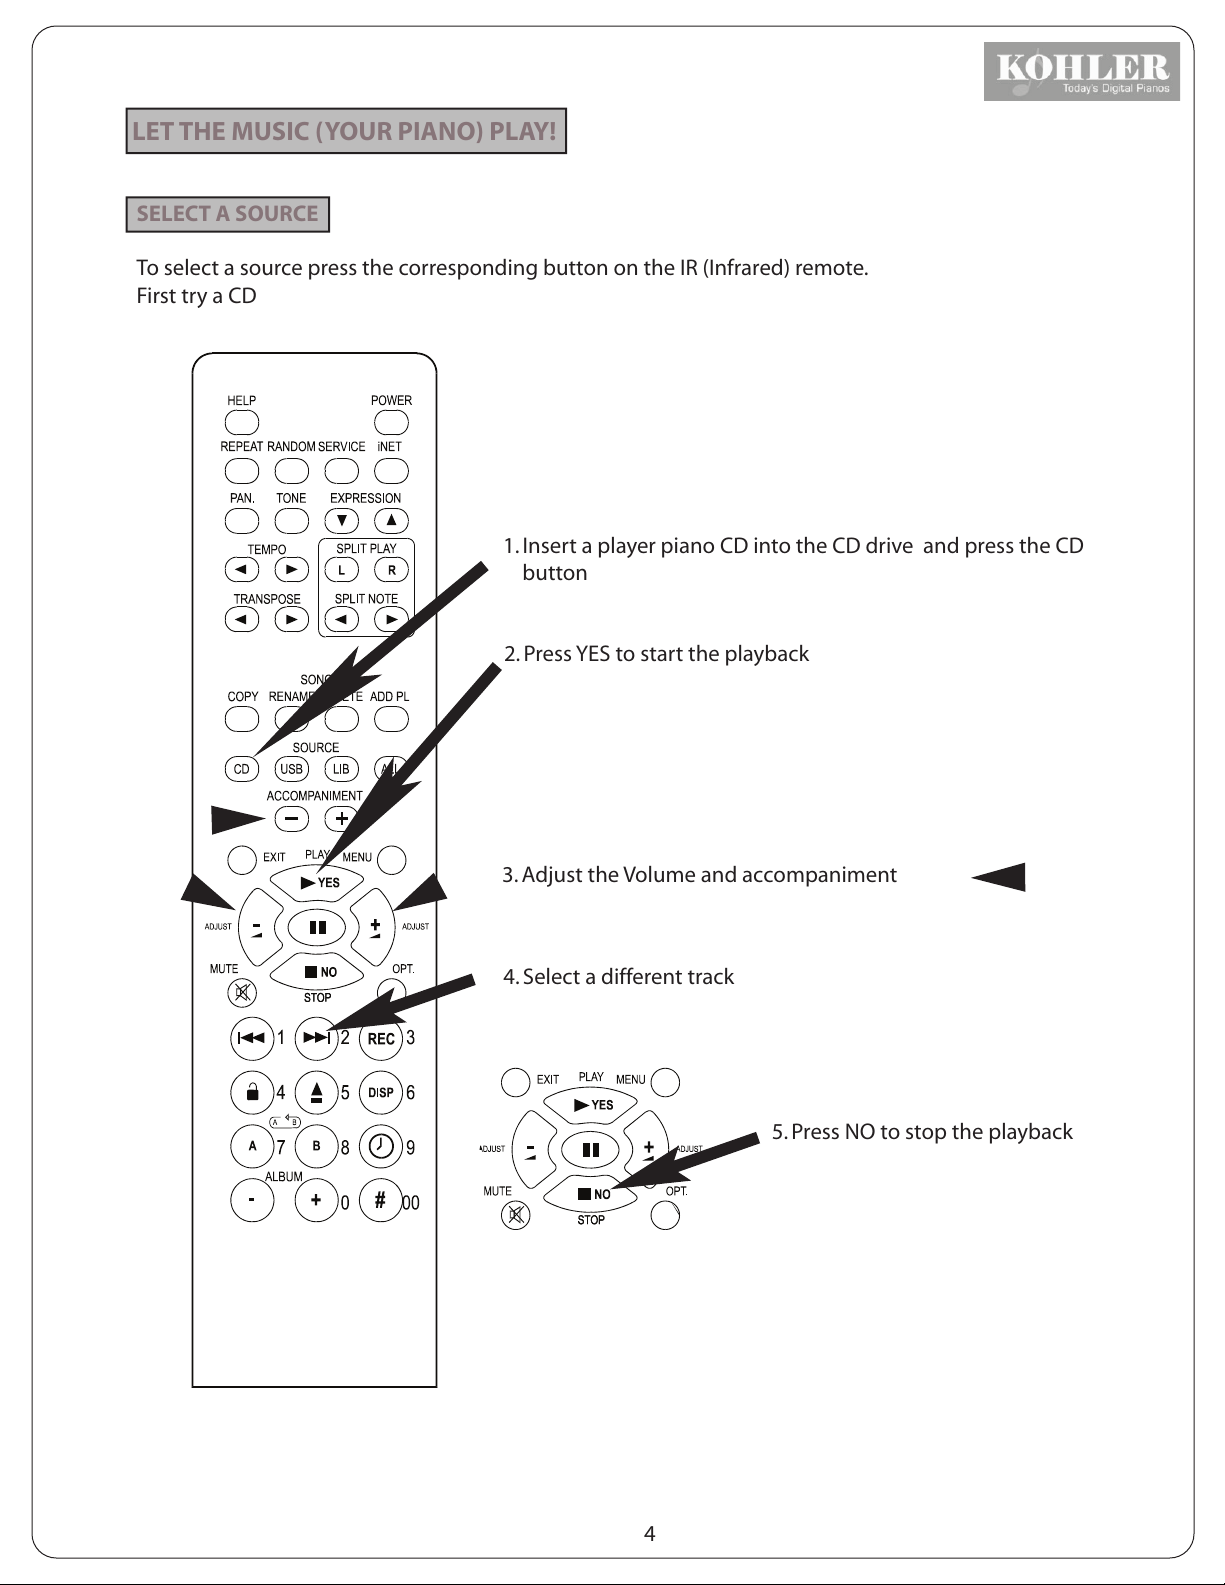
LET THE MUSIC (YOUR PIANO) PLAY!
SELECT A SOURCE
To select a source press the corresponding button on the IR (Infrared) remote.
First try a CD
1. Insert a player piano CD into the CD drive and press the CD
button
2. Press YES to start the playback
-
KOHLER
3. Adjust the Volume and accompaniment
4. Select a different track
5. Press NO to stop the playback
4
Page 7

DISCOVER THE INTERNAL LIBRARIES
The Kohler KD-7 comes with pre-loaded music libraries.
To select one of the internal libraries
Press the LIB (Library) button
The display showsthe current library (ex. -CLASSICAL VOL 1)
If you want to listen to music from the CLASSICAL VOL 1 library, press YES
The display shows MIDI Demo
Press YES
The display shows: the first song in the Library
Press YES - piano starts to play
KOHLER
To select a different library press the LIB (Library) button again
Press the + and - buttons to scroll through the libraries
Press YES to activate the library
Press the PREVIOUS or NEXT button to select an album
Press YES
Display shows the first song in the album
Press YES - Piano will start to play
To select or play another song press the NEXT or PREVIOUS button
To stop the playback press the NO button
When an Album is selected from the internal library, these buttons can
also be used to go to the previous or next album.
5
Page 8
HOW TO ADJUST THE VOLUME AND BALANCE
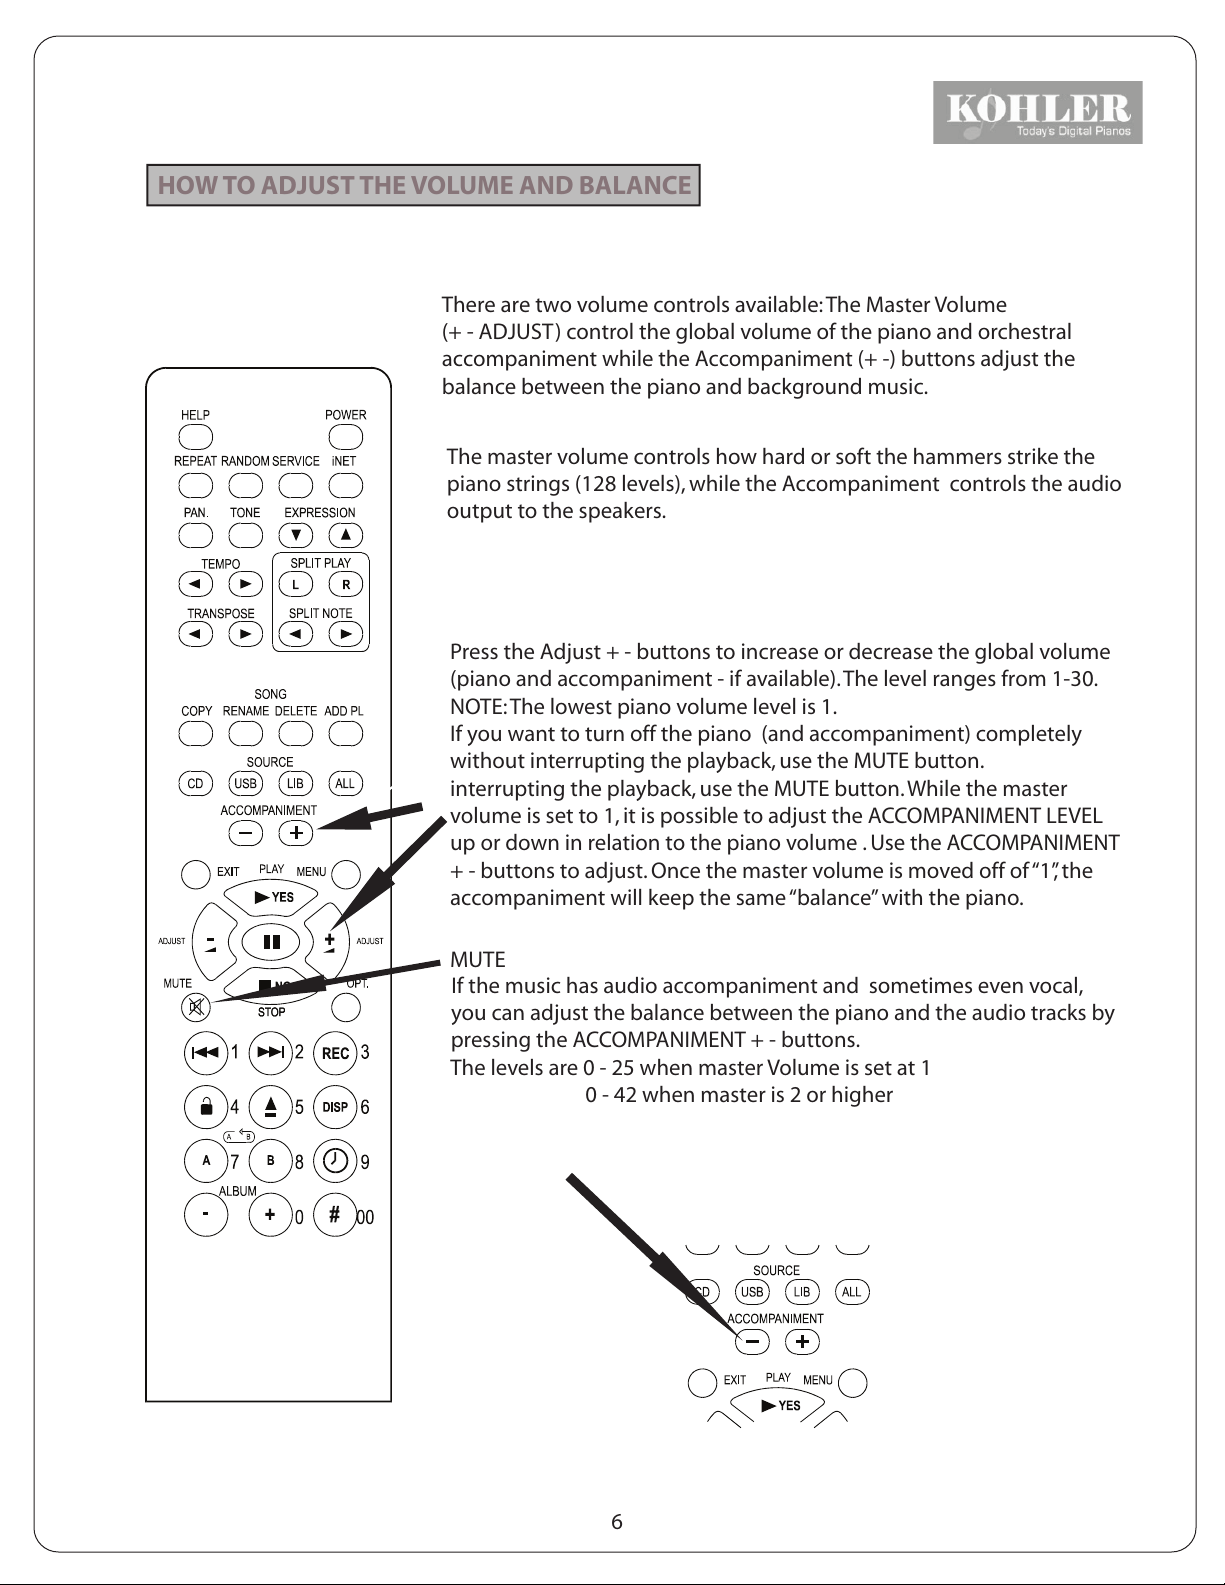
There are two volume controls available: The Master Volume
(+ - ADJUST) control the global volume of the piano and orchestral
accompaniment while the Accompaniment (+ -) buttons adjust the
balance between the piano and background music.
The master volume controls how hard or soft the hammers strike the
piano strings (128 levels), while the Accompaniment controls the audio
output to the speakers.
Press the Adjust + - buttons to increase or decrease the global volume
(piano and accompaniment - if available). The level ranges from 1-30.
NOTE: The lowest piano volume level is 1.
If you want to turn off the piano (and accompaniment) completely
without interrupting the playback, use the MUTE button.
interrupting the playback, use the MUTE button. While the master
volume is set to 1, it is possible to adjust the ACCOMPANIMENT LEVEL
up or down in relation to the piano volume . Use the ACCOMPANIMENT
+ - buttons to adjust. Once the master volume is moved off of “1”, the
accompaniment will keep the same “balance” with the piano.
MUTE
If the music has audio accompaniment and sometimes even vocal,
you can adjust the balance between the piano and the audio tracks by
pressing the ACCOMPANIMENT + - buttons.
The levels are 0 - 25 when master Volume is set at 1
0 - 42 when master is 2 or higher
KOHLER
6
Page 9
R
TONE CONTROL, EXPRESSION and more
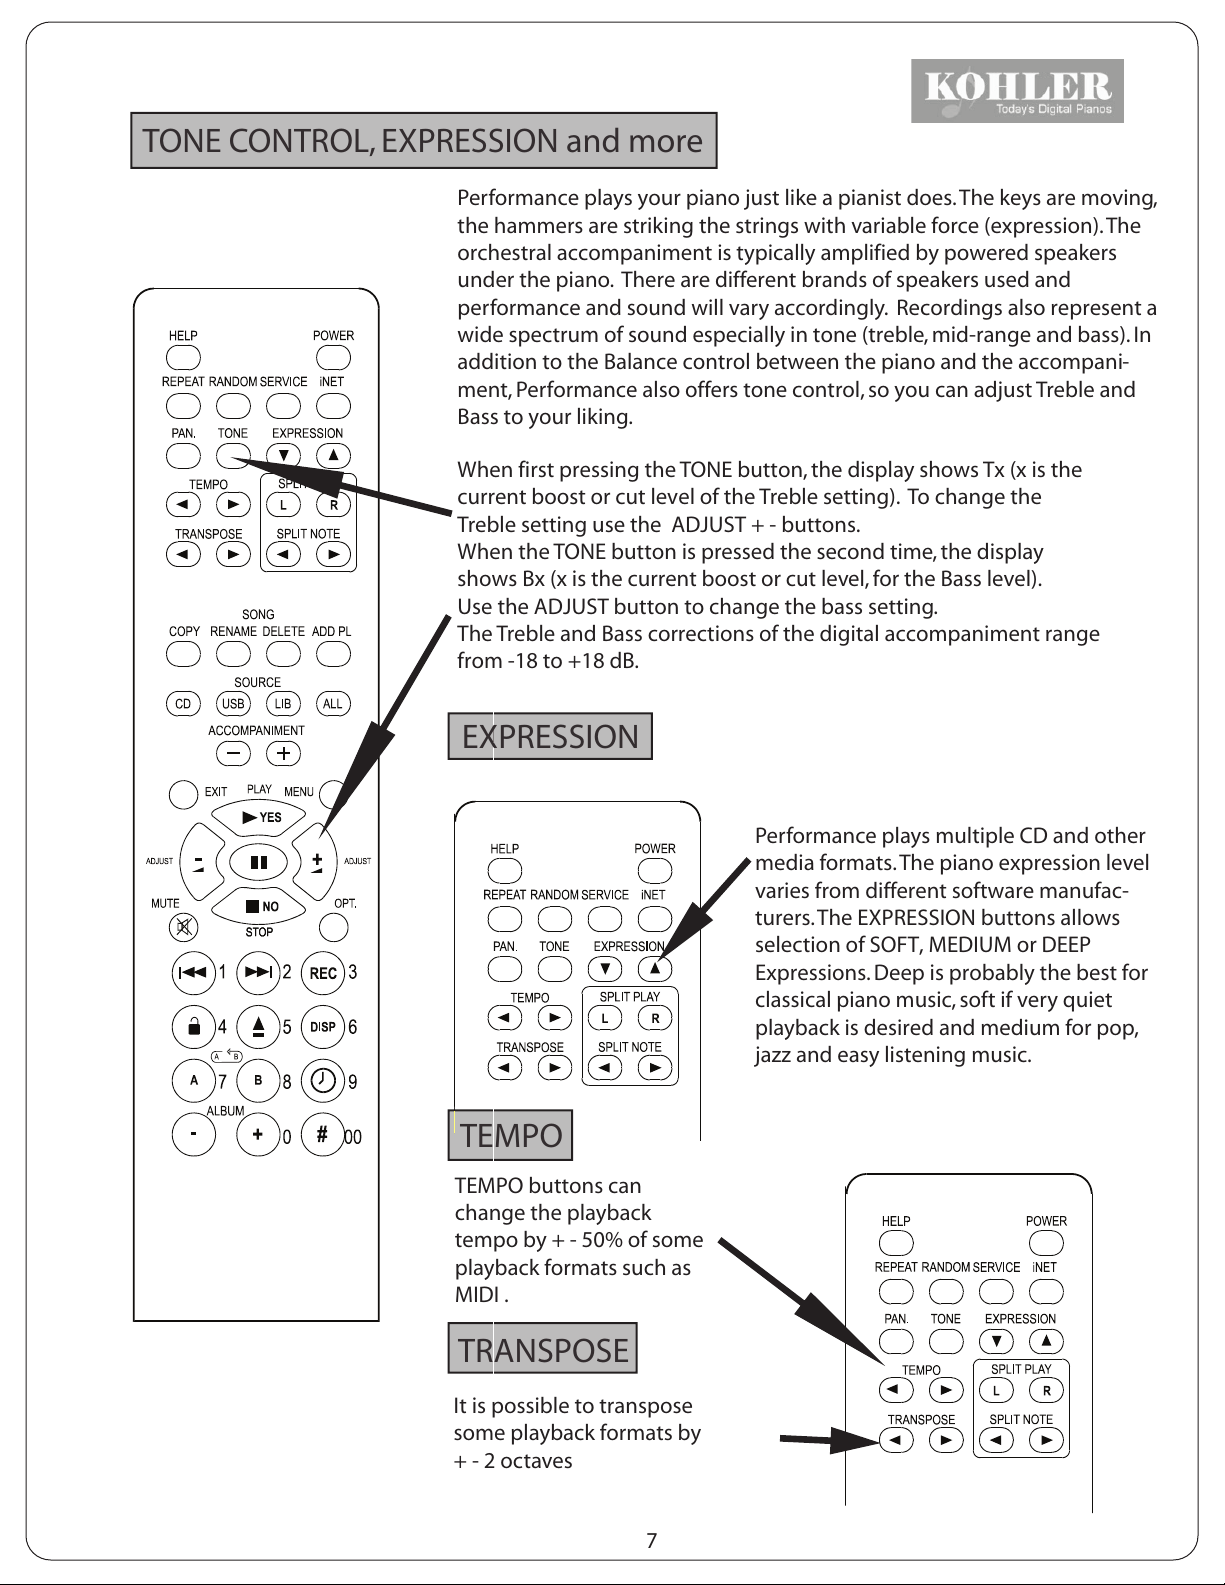
Performance plays your piano just like a pianist does. The keys are moving,
the hammers are striking the strings with variable force (expression). The
orchestral accompaniment is typically amplified by powered speakers
under the piano. There are different brands of speakers used and
performance and sound will vary accordingly. Recordings also represent a
wide spectrum of sound especially in tone (treble, mid-range and bass). In
addition to the Balance control between the piano and the accompani-
ment, Performance also offers tone control, so you can adjust Treble and
Bass to your liking.
When first pressing the TONE button, the display shows Tx (x is the
current boost or cut level of the Treble setting). To change the
Treble setting use the ADJUST + - buttons.
When the TONE button is pressed the second time, the display
shows Bx (x is the current boost or cut level, for the Bass level).
Use the ADJUST button to change the bass setting.
The Treble and Bass corrections of the digital accompaniment range
from -18 to +18 dB.
KOHLER
EXPRESSION
Performance plays multiple CD and other
media formats. The piano expression level
varies from different software manufac-
turers. The EXPRESSION buttons allows
selection of SOFT, MEDIUM or DEEP
Expressions. Deep is probably the best for
classical piano music, soft if very quiet
playback is desired and medium for pop,
jazz and easy listening music.
TEMPO
TEMPO buttons can
change the playback
tempo by + - 50% of some
playback formats such as
MIDI .
TRANSPOSE
It is possible to transpose
some playback formats by
+ - 2 octaves
7
Page 10
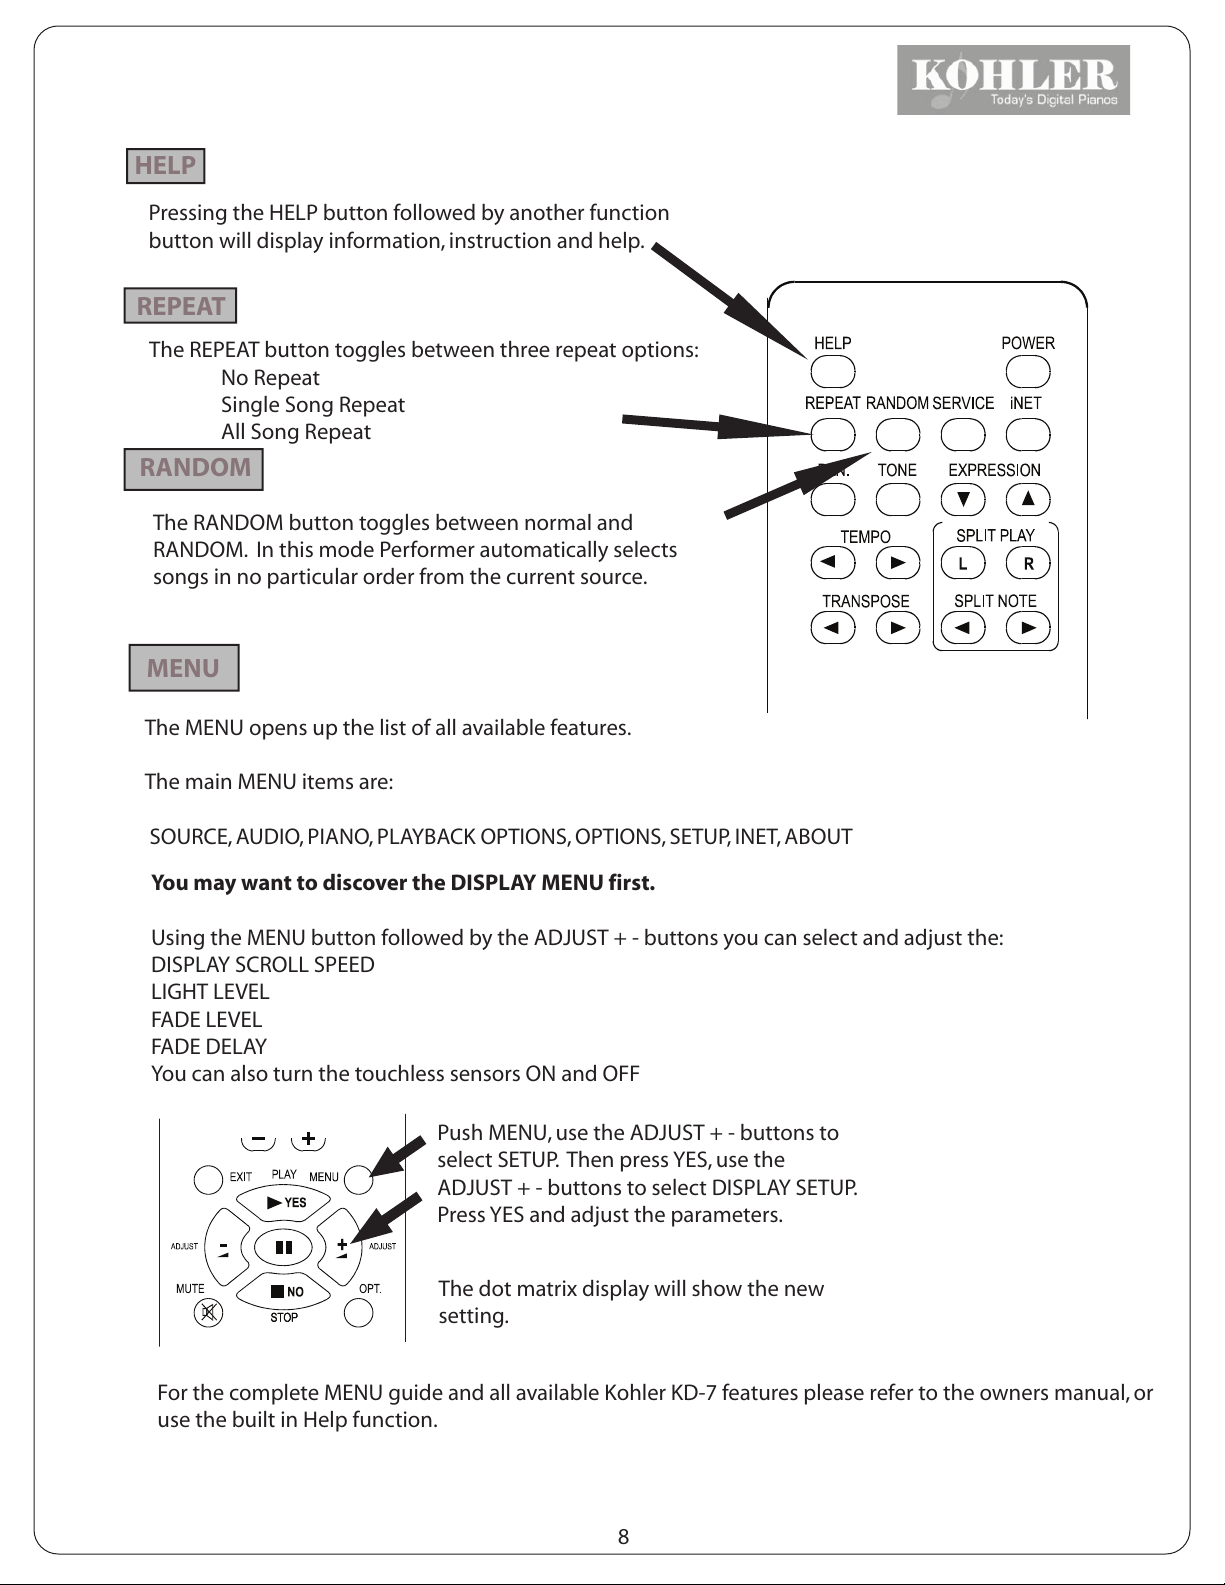
HELP
Pressing the HELP button followed by another function
button will display information, instruction and help.
REPEAT
The REPEAT button toggles between three repeat options:
No Repeat
Single Song Repeat
All Song Repeat
RANDOM
The RANDOM button toggles between normal and
RANDOM. In this mode Performer automatically selects
songs in no particular order from the current source.
MENU
The MENU opens up the list of all available features.
The main MENU items are:
SOURCE, AUDIO, PIANO, PLAYBACK OPTIONS, OPTIONS, SETUP, INET, ABOUT
You may want to discover the DISPLAY MENU first.
Using the MENU button followed by the ADJUST + - buttons you can select and adjust the:
DISPLAY SCROLL SPEED
LIGHT LEVEL
FADE LEVEL
FADE DELAY
You can also turn the touchless sensors ON and OFF
Push MENU, use the ADJUST + - buttons to
select SETUP. Then press YES, use the
ADJUST + - buttons to select DISPLAY SETUP.
Press YES and adjust the parameters.
The dot matrix display will show the new
setting.
For the complete MENU guide and all available Kohler KD-7 features please refer to the owners manual, or
use the built in Help function.
8
Page 11
ATTENTION !
Your piano is shipped with internal music libraries. Some of the music is
in LOCKED status. All the LOCKED songs will play a 30 second sampler
and then stop. THIS IS NOT A FUNCTIONAL ERROR! You can unlock the
album or the songs by purchasing a User Activation Code from
Pianoforce. To order your activation code call Pianoforce at
877-542-8807 ext. 3
ADDITIONAL FEATURES
Fast Forward and Rewind - Any song, MIDI, AMI or CD can be fast forwarded or rewound during
playback by holding down the FWD or REW buttons
Help Button Displays help and instruction for function buttons and menus
Display light adjustment User programmable (display dimmer at selected delay time)
Firmware update It is possible to update the operating system via the
Internet. Plug in an ethernet cable into the CD player, turn on your
your piano and you will be notified is a newer verson is available
Internal library 99 groups available, each group can contain 999 albums and each
album can contain 999 songs
Copy MIDI files It is possible to copy MIDI files from extarnal media to the internal
library
Naming Song and CD name can be set and changed (Options/Rename/Album)
Synchronization MIDI files can be synchronized to audio CDs
OGG Files OGG compressed files are recognized
OGG Auto Compression AMI, Audio CD or Wav file can be compressed to OGG format
AMI to MIDI conversion AMI signal can be converted to MIDI when copied from player piano
audio CD (Song /Album/Copy)
Copy AMI CD AMI CD can be copied to internal library as MIDI file and/or OGG
file with autodetection of song accompaniment.
Timer Set daily wake up playback or snooze with selected album
(clock/daily schedule)
Share folder Songs and albums can be shared with other players over the Internet
Tree Structure Removable media (USB, Data CD) can be browsed in folders and
sub-folders
A/B loop Set repeat points for sections of MIDI songs
Numeric Song Selection Select songs from remote by button #, type number of song)
9
Page 12
KD-7 QUICK START
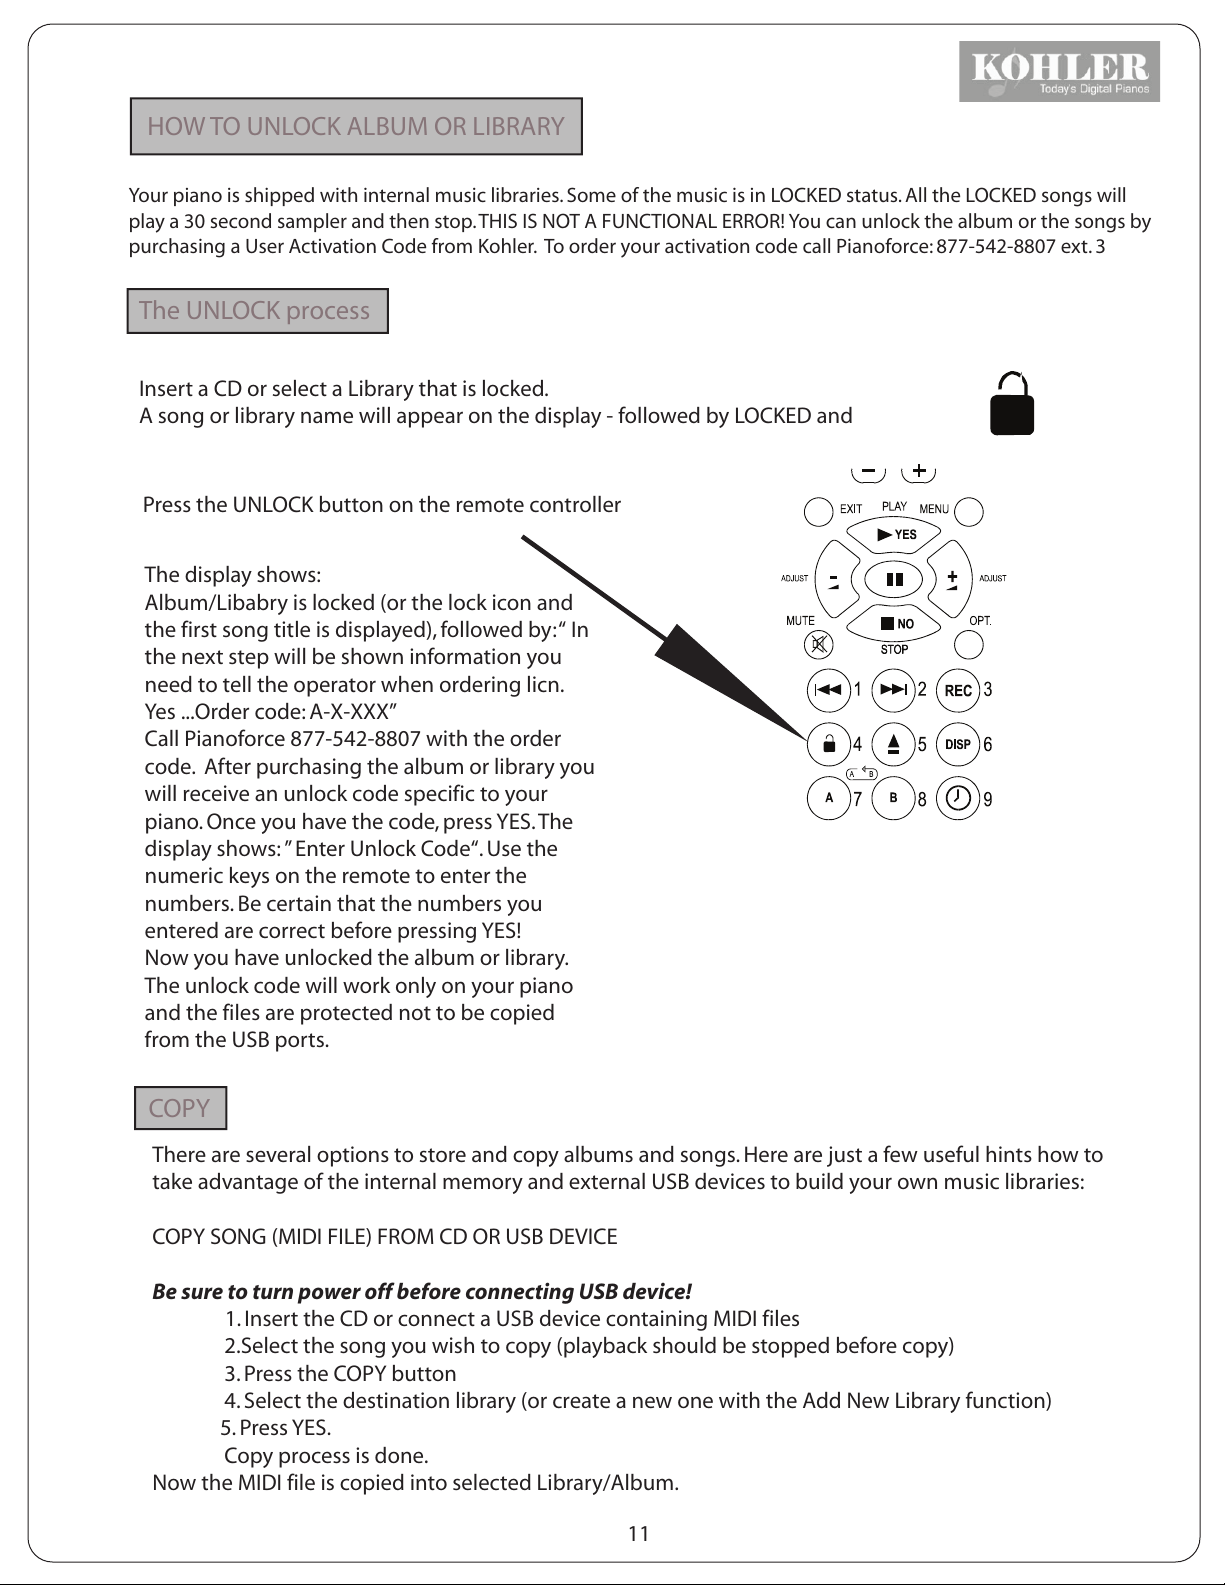
1 Turn the system ON/OFF by using the POWER button on the remote or move your
4
finger close to the ON/OFF sensor.
NOTE: If the display does not light up, check if the power cord is plugged into the
wall, and make sure that the power supply under the piano is turned on.
1
2 Press the LIB (Library) button. The display will show Classical. If you want to
select a different library, use the ADJUST - + buttons 3. When the library is selected
press the YES (Green) button twice and the playback starts. Press NO (Red) to stop.
Use the NEXT/PREV buttons 6 to select a different song.
1
NOTE: The following libraries and albums are isntalled by the factory: Classical,
East-West, Jazz and Other/Inspirational/Latin/New Age,
When playback starts, use the ADJUST - + buttons 3 to change the volume.
10
7
4 Press the EJECT button on the remote or move your finger to the sensor switch.
The CD tray opens. Insert a player piano CD into the tray and close it. WAIT a few
seconds, playback will start after the media is scanned. Use the ADJUST - + buttons 3
to change the global volume (piano and accompaniment). To change the balance
between the piano and orchestra use the ACCOMPANIMENT 5 buttons.
NOTE: For greater balance control set the global volume to M1 and than adjust the
accompaniment P1-25.
8
2
6 Use the PREV and NEXT buttons to play a different track or library song.
7 To adjust the Treble and Bass of the accompaniment track using the tone button
5
followed by ADJUST - + 3. Adjustment T (Treble) and B (Bass) ranges from
+ - 1 to 18.
8 Press the USB button if you have a USB device (Jump Drive, Hard Disk or
3
3
6
Floppy Drive) plugged into one of the 3 USB connectors on the back of the CD
unit. After the media scan is completed press YES/PLAY to start the playback or
to select a folder (album) if present. Use 6 the PREV and NEXT buttons to play a
specific song.
NOTE: Before connecting any USB device, the system needs to be turned OFF.
9 Use the ALBUM buttons followed by YES/YES when in Library mode to quickly
4
access other albums stored in the memory.
9
KOHLER
The KD-7 is shipped with complete piano accompaniment tracks for 28 selected
commercial audio CDs (see STARS and TRACKS information).
The piano tracks are in “Locked” mode, but you can sample each song for 30 seconds.
To unlock:
1.Insert one of the CDs from the list (playback starts ins a few seconds)
2.Press the Unlock button on the remote 10
3.Write down the Unlock Request Code displayed
4.Call 561-827-1916 or 877-542-8807 ext. 3 to purchase the Unlock Code
5.Enter the Unlock Code on your remote controller.
NOTE: The CD serial number must match the one on the Stars and Track
information sheet.
10
Page 13
HOW TO UNLOCK ALBUM OR LIBRARY
Your piano is shipped with internal music libraries. Some of the music is in LOCKED status. All the LOCKED songs will
play a 30 second sampler and then stop. THIS IS NOT A FUNCTIONAL ERROR! You can unlock the album or the songs by
purchasing a User Activation Code from Kohler. To order your activation code call Pianoforce: 877-542-8807 ext. 3
The UNLOCK process
Insert a CD or select a Library that is locked.
A song or library name will appear on the display - followed by LOCKED and
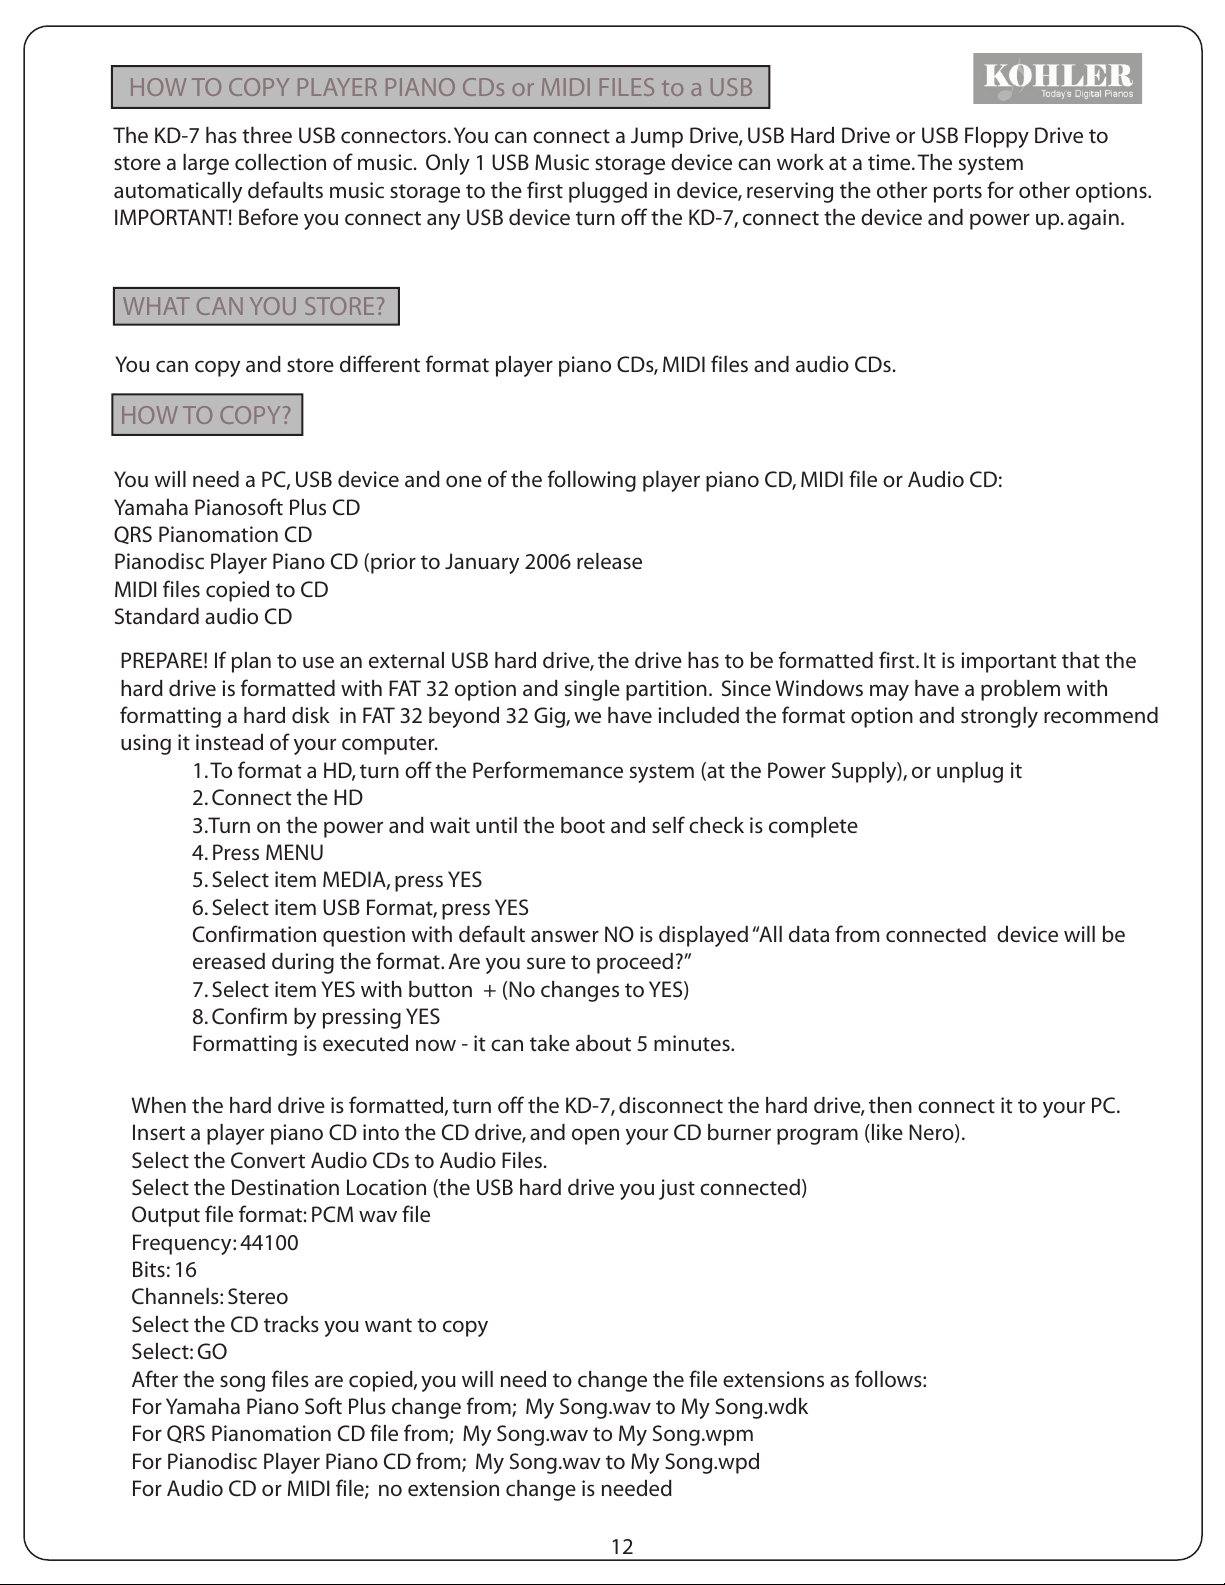
Press the UNLOCK button on the remote controller
The display shows:
Album/Libabry is locked (or the lock icon and
the first song title is displayed), followed by: “ In
the next step will be shown information you
need to tell the operator when ordering licn.
Yes ...Order code: A-X-XXX”
Call Pianoforce 877-542-8807 with the order
code. After purchasing the album or library you
will receive an unlock code specific to your
piano. Once you have the code, press YES. The
display shows: ” Enter Unlock Code“. Use the
numeric keys on the remote to enter the
numbers. Be certain that the numbers you
entered are correct before pressing YES!
Now you have unlocked the album or library.
The unlock code will work only on your piano
and the files are protected not to be copied
from the USB ports.
COPY
There are several options to store and copy albums and songs. Here are just a few useful hints how to
take advantage of the internal memory and external USB devices to build your own music libraries:
COPY SONG (MIDI FILE) FROM CD OR USB DEVICE
Be sure to turn power off before connecting USB device!
1. Insert the CD or connect a USB device containing MIDI files
2.Select the song you wish to copy (playback should be stopped before copy)
3. Press the COPY button
4. Select the destination library (or create a new one with the Add New Library function)
5. Press YES.
Copy process is done.
Now the MIDI file is copied into selected Library/Album.
11
Page 14
HOW TO COPY PLAYER PIANO CDs or MIDI FILES to a USB
The KD-7 has three USB connectors. You can connect a Jump Drive, USB Hard Drive or USB Floppy Drive to
store a large collection of music. Only 1 USB Music storage device can work at a time. The system
automatically defaults music storage to the first plugged in device, reserving the other ports for other options.
IMPORTANT! Before you connect any USB device turn off the KD-7, connect the device and power up. again.
WHAT CAN YOU STORE?
You can copy and store different format player piano CDs, MIDI files and audio CDs.
HOW TO COPY?
You will need a PC, USB device and one of the following player piano CD, MIDI file or Audio CD:
Yamaha Pianosoft Plus CD
QRS Pianomation CD
Pianodisc Player Piano CD (prior to January 2006 release
MIDI files copied to CD
Standard audio CD
PREPARE! If plan to use an external USB hard drive, the drive has to be formatted first. It is important that the
hard drive is formatted with FAT 32 option and single partition. Since Windows may have a problem with
formatting a hard disk in FAT 32 beyond 32 Gig, we have included the format option and strongly recommend
using it instead of your computer.
1. To format a HD, turn off the Performemance system (at the Power Supply), or unplug it
2. Connect the HD
3.Turn on the power and wait until the boot and self check is complete
4. Press MENU
5. Select item MEDIA, press YES
6. Select item USB Format, press YES
Confirmation question with default answer NO is displayed “All data from connected device will be
ereased during the format. Are you sure to proceed?”
7. Select item YES with button + (No changes to YES)
8. Confirm by pressing YES
Formatting is executed now - it can take about 5 minutes.
When the hard drive is formatted, turn off the KD-7, disconnect the hard drive, then connect it to your PC.
Insert a player piano CD into the CD drive, and open your CD burner program (like Nero).
Select the Convert Audio CDs to Audio Files.
Select the Destination Location (the USB hard drive you just connected)
Output file format: PCM wav file
Frequency: 44100
Bits: 16
Channels: Stereo
Select the CD tracks you want to copy
Select: GO
After the song files are copied, you will need to change the file extensions as follows:
For Yamaha Piano Soft Plus change from; My Song.wav to My Song.wdk
For QRS Pianomation CD file from; My Song.wav to My Song.wpm
For Pianodisc Player Piano CD from; My Song.wav to My Song.wpd
For Audio CD or MIDI file; no extension change is needed
12
Page 15
IMPORTANT!
Windows has the Auto-Hiding of known file extension.
TO RENAME THE FILE CORRECTLY YOU SHOULD FIRST TURN OFF AUTO-HIDING EXTENSION FEATURE IN
WINDOWS:
1. Open the Windows menu
2. Select Tools
3. Choose Folder Options
4. Select View
5. Uncheck Hide extensions for known file types
6. Select OK/Apply
SONG FILES CAN BE IN ROOT POSITION OR IN FOLDERS. FOLDERS ARE RECOMENDED!
AFTER SONG FILES ARE COPIED AND RENAMED, BE SURE THAT THE HDD OR ANY USB DEVICE IS
DISCONNECTED FROM THE PC CORRECTLY. USE “UNPLUG USB DEVICE” (green icon near the clock), BEFORE
HDD IS PHYSICALLY DISCONNECTED. When this function is used - the system stores all unstored sectors
onto disk.
HOW TO COPY MULTIPLE SONG FILES (MIDI) FROM CD OR USB DEVICE
1. Insert a CD containing MIDI files in to the tray, or connect a USB device
2. Press the OPTION button
3. Select Copy Album
4. Select a destination library (My is recomended)
5. Enter the name of the new album (for example My Songs)
To enter letters, numbers or characters use the Adjust + - buttons. After the first character is entered, press
the Next button to move the cursor.
6. When the new album name is entered, press the YES button.
7. Wait until copy is completed
To play songs from the new location, select:
1.Library
2. My Songs
3. Press YES
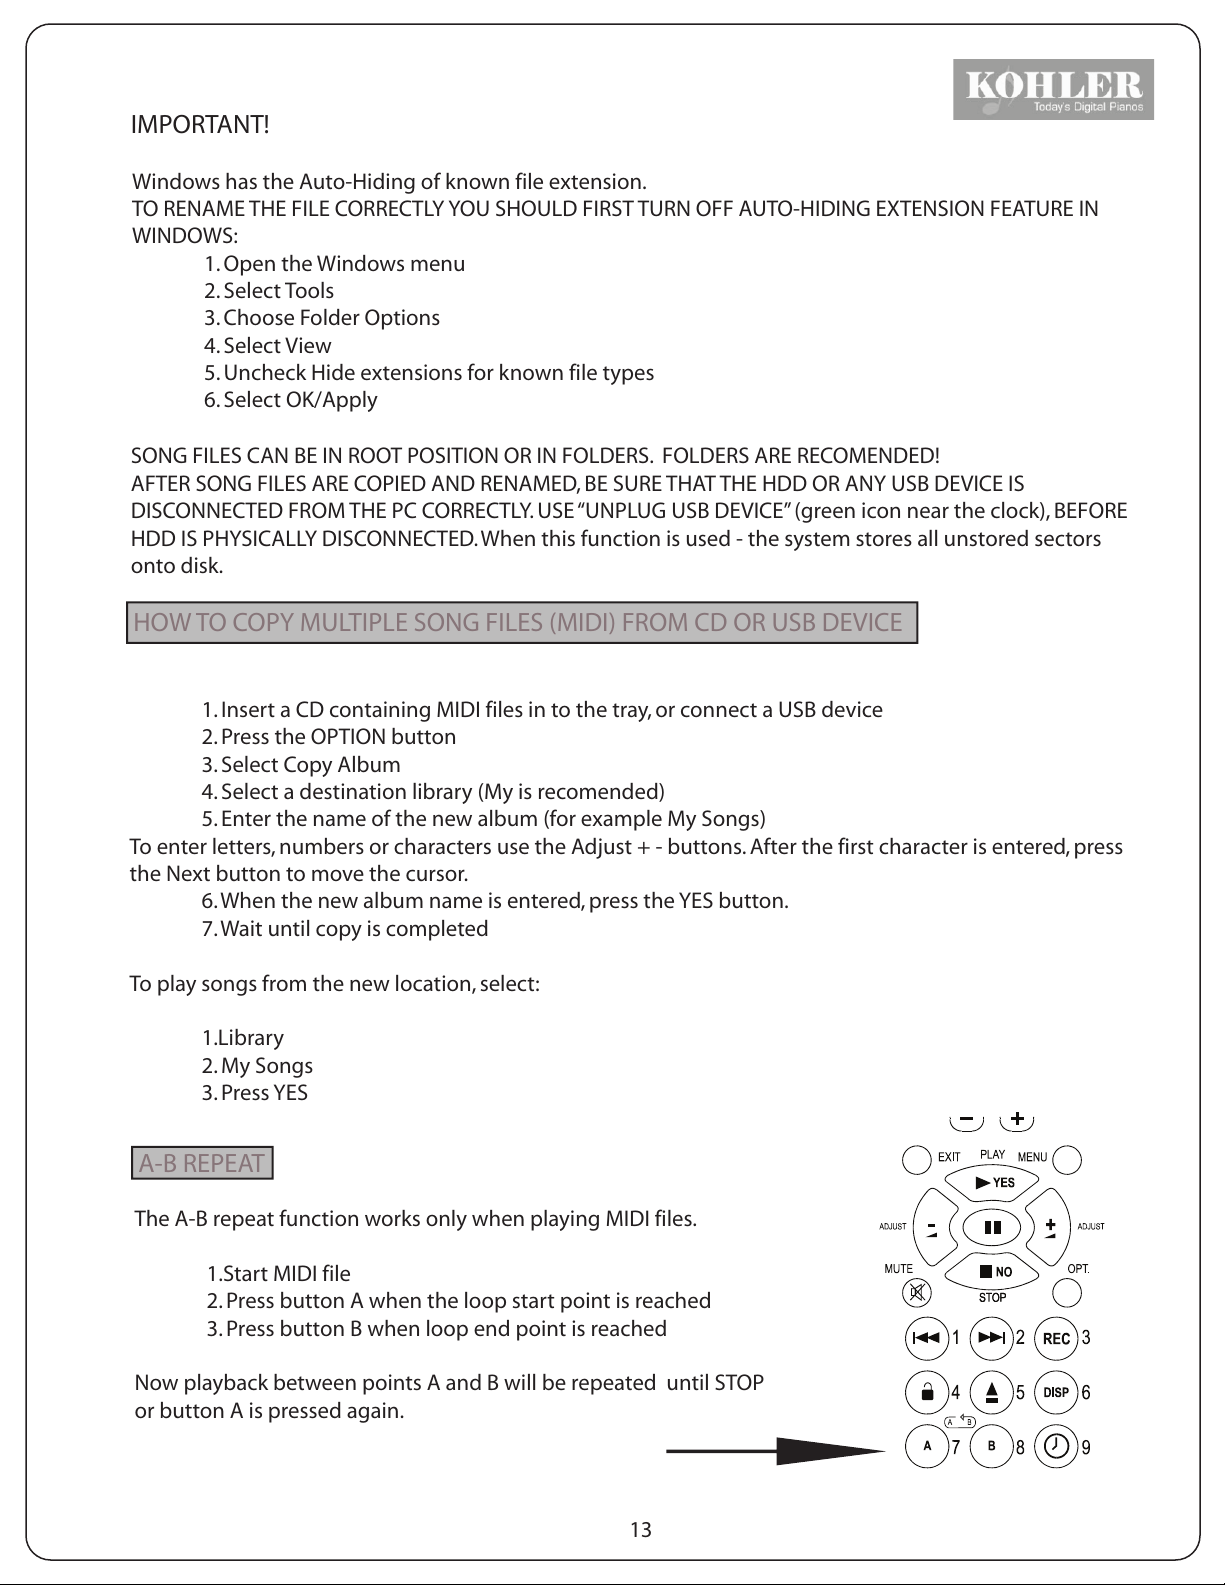
A-B REPEAT
The A-B repeat function works only when playing MIDI files.
1.Start MIDI file
2. Press button A when the loop start point is reached
3. Press button B when loop end point is reached
Now playback between points A and B will be repeated until STOP
or button A is pressed again.
13
Page 16

4
KOHLER KD-7 Copy
1
Songs (MIDI files and audio files) can be copied from different sources to Libraries and Albums.
HOW TO COPY A SONG ?
Select a song from a source (CD, USB or LIBRARY) like you are
1
going to play it.
2
Press the SONG COPY or OPTION/Copy Song button
Display reads:
Select the destination LIBRARY or add a new using the NEXT or
2
1
1
1
3
PREVIOUS buttons
For example:
Copy-Select Destination
Press 3
the library named MY
the NEXT button repeatedly to select
3
KOHLER
4
2
3
Press YES
Display reads:
Press YES
Display reads:
Create a new Album name using the ADJUST + - buttons
3
Press YES
Display reads:
Now copy is completed !
4
To a New Album
4
New Album Name
4
Copy
Press YES or wait until
cursor appears
14
Page 17

KOHLER KD-7 Internal Library Structure
The KOHLER KD-7 has 256 Mb Internal memory allowing to store MIDI and audio files. There are several
libraries setup and the user can create a large number of additional ones. The “tree structure” makes
navigation easy.
1
The following LIBRARIES contain ALBUMS when your KD-7 is
CLASSICAL
4
Press the SOURCE LIB (Library) button
The display shows: Classical
To select another library press the ADJUST + - button
You will find the following libraries: Classical, Country, Download, Jazz, My,
Other, Popular, Rock, Shared, Quick Record
Add New Library
NOT ALL THE LIBRARIES CONTAIN MUSIC !
TO FIND AND PLAY MUSIC FROM A LIBRARY, YOU HAVE TO SELECT AN
ALBUM. ALBUMS ARE SUB-DIRECTORIES WITHIN THE LIBRARY.
Press
COUNTRY (empty)
DOWNLOAD (empty)
JAZZ
Press
Classical Vol 1 (ALBUM) 17 songs
East-West
OR
Press
Locked ! See unlock information in the Quick Guide
Press
Jazz Vol 1 Press
Standards (ALBUM) Press
Jazz Vol Press
Pop
16 Songs
15
Page 18

MY (empty)
OTHER
POPULAR (Empty)
ROCK (Empty)
SHARED (Empty)
QUICK RECORD (Empty) - When recording, the new song is stored in this library until copied to other
library or source. There is only one song at a time stored in this library!
Press
Inspirational (ALBUM) 10 Songs
Press
or press
Latin (ALBUM) 16 Songs Press
to start playing Album
New Age (ALBUM) 15 Songs
ADD NEW LIBRARY - create new library here
Press
Display shows: NEW LIBRARY NAME
To enter the new library name:
Use the ADJUST - button
for upper case letters
Use the Next and Previous buttons
to move the cursor
Library Capacity
Then cursor blinks
Use the ADJUST + button
for lower case letters
When finished, press
99 LIBRARIES 999 ALBUMS
16
999 SONGS IN EACH ALBUM
Page 19

KOHLER KD-7 PLAYLIST FUNCTION
PLAYLIST is a temporary list of selected songs. They can be from different libraries or sources.
How to create a PLAYLIST?
Select a song from one of the sources (CD, LIBRARY or USB)
1
Press the SONG/ADD PL button to add a new song to the playlist
2
Select a new song from one of the sources (CD, LIBRARY or USB)
1
Press the SONG/ADD PL button to add a new song to the playlist
2
1
1
4
KOHLER
2
1
3
How to play a PLAYLIST?
Repeat the select and add functions as many times as needed
5
4
The button SOURCE/ALL
Press ALL
Press the ADJUST + - buttons
Select the library PLAYLIST
Press YES
NOTE !
3
to start playback
5
selects all available playback sources
3
to scroll through the available libraries
4
PLAYLIST IS TEMPORARY AND IT IS NOT MEMORIZED AFTER THE
INSTRUMENT IS TURNED OFF !
17
Page 20

Pianoforce PERFORMER IR Remote
BAL
Almost all the Performer functions are
selected and activated from the IR
(Infrared) remote controller. The remote
controller operates on two 1.5 V AAA
batteries. Although the batteries have a
long life time at average use, it is necessary
sometimes to replace them for
uninterrupted operation.
Note: If for any reason the remote controller
is not operational, Performer has CD
Autoplay default feature, meaning that
using the touchless sensor on the CD units
display can open the tray. After a CD is
inserted and the tray is closed, Performer will
start the CD playback automatically at the
default main and accompaniment volume
setting.
KOHLER
The following pages will describe each
button on the remote and guide you
through the related functions.
18
Page 21

Description of the remote controller buttons
[1] Power – turns the CD control unit on or places it into standby mode
[2] Service – accesses service functions like ECR Calibration or firmware update (see menu Service)
[3] iNet – internet access functions
[4] Expression up/down – to select playback expression Soft, Medium or Deep (see menu Piano/Expression)
[5] Split L,R – playback split hand on/off buttons. When L is pressed, the left hand playback is muted.
To un-mute, press L again. When R is pressed, the right hand playback is muted. To unmute press R.
[6] Split note – to select the Split Note. The Split Note divides the keyboard into Left and Right playback.
Pressing the split up/down buttons select the next or previous split note. Note: When Split note
is changed the selected key is softly depressed indicating the new Split note.
[7] Help – displays help information. Press the Help button followed by another you wish to access the
help and information about.
[8] Random – selects between random or normal song playback.
[9] Repeat –selects between No Repeat, Single Song Repeat and All Songs Repeat
[10] Tone – selects the audio tone adjustment. When first pressed , the display shows “T” and a number.
the Treble can be increased or decreased by+18 -18dB using the Ajust + - buttons. Pressing the Tone
button again, (display shows BX) the Bass can be increased or decreased by +18 - 18dB by using the
Adjust + - buttons.
[11] Balance – audio BAL left and right adjustment (when 2 speakers installed) When pressing the PAN
button (display shows PX), the audio sound can be shifted left to right in the stereo field using
the Adjust + - buttons. Center position is P0, hard left is P-10, hard right is P+10
[12] Tempo – to change playback tempo of currently played MIDI file. When pressed
(display shows SX) and current tempo can be changed (+ - 50%).
[13] Transpose – to change playback pitch of currently played MIDI file. When
pressed (display shows TX). The current MIDI file can be transposed by + -24 steps.
Note: It is possible to transpose AMI song, (player piano CD) by 12 tone increments, but
the audio portion of the CD remains the same.
[14] Add to Playlist – to add the current song to the Playlist. Note: Playlist can be selected with
button Source All [16] and select the Playlist by browsing all sources with buttons –[25]
and +[26].
[15] Library – to select an internal library and album. When pressed display shows the last
selected Group of albums in the internal library. A different group of albums can be selected by
using the Adjust + - buttons. To enter the desired group press YES. Use the Adjust buttons to
select an Album and press YES.
[16] All Sources – to select one of the sources, like Quick record or Playlist.
[17] Copy/Rename/Delete – to perform any of these functions with the current song.
[18] USB source select – to select and access the currently connected USB drive as source of
playback.
[19] CD source –to select CD as the source of playback.
[20] Accompaniment Decrease – Decrease relative volume of the accompaniment
[21] Accompaniment Increase – Increase relative volume of the accompaniment
[22] Menu – Opens main menu. When pressed the display shows the last selected menu item.
To select a different item use the Adjust buttons. Enter menu by pressing Yes [24]. If deeper
menu item exists - the last selected item is displayed.
19
Page 22

[23] Exit – Exits current display context (e.g. menu). Basic context is the current song name.
[24] Yes/Play – confirms current selection or starts playback.
[25] - Decrease – to decrease the current value, volume and scroll through selections
[26] + Increase – to increase the current value, volume and scroll through selections.
Note: buttons [25][26] when menu is selected show next or previous menu item.
When value is selected, - + buttons change current value. When nothing is selected
(song name or song time is displayed), - + buttons change Main volume.
[27] No/Stop – to abort current selection or stop the playback.
[28] Options – to open current context menu with options (see menu/options)
[29] Mute – to mute/un-mute playback. If playback is muted – it is the same as setting the main
volume to zero (0).
[30] Previous song / Fast rewind – to select the previous song. When the button is pressed and held
for 2 seconds, fast rewind is engaged. If the song playback is advenced more than 6 seconds,
then pressing button [30] will rewind it to the current song start.
[31] Next song / Fast forward – to selection the next song. When the button is pressed and held for 2
seconds fast forward.
Note: When a song name (or other text) is edited on the player display - pressing the Previous [30]
will delete the last letter. Button Next [31] will accept current letter and forward
editing to of the next letter.
[32] Eject – Ejects CD from drive. When playback from CD is active, playback will be stopped before ejecting.
[33] Unlock – When the selected album/group is locked, player shows: “Album/group is locked”,
followed by the information you need to order Unlock code.
The ordering information shows (e.g. Yes: Order code A-593-8315). Press YES,
the display will ask to enter the Unlock Code (e.g. 1234.5678.9123). This code
can be entered directly from the remote by using numeric buttons [30-41]. E.g. to enter code 1234,
press the buttons [30][31][38][33]. For details – see section: Digital Right Management.
[34] Set B point – When button B is pressed the end of MIDI song loop point is set.
[35] Set A point – When button A is pressed the start of MIDI song loop point is set.
[36] Previous album – When an album from one of the internal libraries is active, press this button to select
the previous album.
[37] Next album – When an album from one of the internal libraries is active, press this button to select
the next album.
[38] Record – Start a single track tracord. The optional Record Strip device
has to be installed to be able using this function The file will be automatically stored after the Stop
button is pressed. To access the song press Source All/Quick Record. The song can be copied to any
library or USB location, and it can be renamed.
[39] Display – selects one of the three options: Song name, Song time and Album name with the number of
songs stored in the album.
[40] Clock – to set the the timer options (Sleep, Daily Schedule, Set Date/Time). For details
see menu Setup/Timer.
[41] Numeric keys activation – When entering an Unlock Code, the user can toggle between function
of number and function keys. It can also be used for entering a song number (e.g buttons [41][30][33]
will select song 14.), album number or menu. is started.
20
Page 23

THE SERVICE FUNCTIONS
KD-7 FUNCTIONS
1. POWER - Like the touchless sensor on the
FCD this button turns the control unit ON or
sets it into STANDBY mode.
NOTE: Use the ON/OFF switch on the
on the power supply (under the piano) for
complete power down. Wait 20-30 seconds
before re-starting the whole system.
2. SERVICE - Access to Solenoid Controller Setup,
Touch Sensor Setup, Firmware Upgrade,
Remote Access
Note: Service functions should only be used by
certified Pianoforce technician!
Press SERVICE
Available functions are: Upgrade Firmware
Remote Assistant
Solenoid Controller Setup
Upgrade Firmware
New features, improvements or corrections can be added by operating system updates . Updates can
simply be made by connecting the KD-7 to the Internet. Power down the system completely by turning off
the power supply under the piano. Wait about 45 seconds. Connect a high speed Ethernet cable to the back
of the CD controller (ETHERNET 10M/100M). Turn on the power supply. When the start up is completed, a
nd if a new operating system version is available for your piano, the message “Yes, New Update Is Available ...
Do you want to update?” will appear. If you want to upgrade, press the Yes button and follow the
instructions on the display.
If a high speed Internet connection is not available, ask Pianoforce or your dealer for the latest firmware
version on a CD. Updating with CD is very easy. Open the CD tray, insert the CD labeled Pianoforce
KD-7 Firmware Update Version X.XX. By default KD-7 has CD Auto Play. If this function is not disabled by the
user, after the tray is closed the update will start automatically. Follow the instructions on the display. DO
NOT TURN OFF THE SYSTEM WHILE UPDATING THE OPERATING SYSTEM. When the update is completed,
remove and store the CD.
Remote Assistant
To access the Remote Assistant, a high speed Internet connection is necessary. Power down the player
system by turning off the power supply under the piano. Connect the Ethernet cable to the back of the CD
unit. Turn on the power and wait until the start up is completed. Press SERVICE, select the Remote Assistant
function by pressing the ADJUST + or - buttons. Press YES and follow the directions on the display. With the
Remote Assistant you can connect to online service support. Your system can be tested, anaylized and in
some cases even repaired this way. Please contact the Pianoforce service department at 877-542-8807 ext, 2.
before connecting to the Remote Assistant.
21
Page 24

Solenoid Controller Setup
WARNING! These functions should only be used by certified
Kohler technician !
The Solenoid Controller Setup functions are intented to be used by qualified installer technician only.
Here is a description of the functions:
Ca: Calibration advanced - this function is very important to achieve the best possible playback and
has to be performed by the installer technician!
Ca will adjust the expression levels for each key solenoid, tests if each
solenoid is performing correctly and performs an analysys before auto-
matically storing the information. Ca is the highest calibration level and
depending on the firmware version it can take 45-90 minutes. During
calibration the lid of the piano should be open and a quiet enviroment
is necessary.
To start the advenced calibration press the YES button while the display shows: Ca:Calibration advanced
Cq: Calibration quick - this is a faster but less detailed calibration.
An: Analyse of calibration - this function can be used to review the calibration result. By pressing YES
the system performs a calibration test and displays the result.
Ck: Key Calibration - allowing single key calibration. When pressing YES Kxx will be displayed.
(xx) indicating the key number). Pressing the Forward or Rewind buttons any of the keys between
K05-K84 can be selected. Once the key is selected, pressing the YES button will start calibrating the
selected key.
HC: Key Hold Force - allows to set the optimal key solenoid hold force. Piano actions, key weights are
different on each piano. It is important to select the best Key Hold Force value for the particular piano.
Available value ranges from 0-99. Pressing the ADJUST + and - buttons will increase or lower the force.
If the hold force is too low, the piano will play short (staccato) notes even if it was recorded as a long
(legato) one. Adjust the hold force level and listen carefully triggering several keys accross the
keyboard. Keys can be selected by pressing the Forward or rewind buttons. The default value is set
to 6. By our experience Key Hold Force level 6 is optimal for most small to mid size grand pianos.
RC: Key Release Force - controls how fast the plunger returns to the rest position. This is another
very important parameter to set to the optimal value. Available value ranges from 0-99. The lower the
value, the faster the plunger returns to its rest position. This will allow the solenoid to “fire” faster
resulting better note repetition. Higher value slows down the plunger return, resulting quieter
plunger movement, but decreasing repetition rate. Select different values testing several keys
accross the keyboard. Listen to a piano piece you know very well, especially with fast repeating
notes. Select the optimal release value. Factory setting is 13.
SC: Sustain Force - adjusts the force of the pedal solenoid. The Susutain Force is not calibrated
automatically. It is important to select a value that will lift the damper rail without delay
and at the minimum mechanical noise. Pressing YES will display the current force level. Pressing
the ADJUST + and - buttons will increase or decrease the solenoid force. It is important that all
trapwork related mechanical adjustments are correct (loss motion, solenoid travel, susutain lever)
before the SC value is selected. The default setting is 23. Once the optimal value is established, it is
recomended adding +2 digits. During extended playback the solenoid heats up and needs
additional power to perform correctly.
22
Page 25

SR: Susutain Release - controls the return of the solenoid and the damper rail. Lower value allows the
dampers to return faster, higher value helps reducing mechanical noise. Default setting is 32.
The ADJUST + and - buttons change the value and the Forward and Rewind buttons activate the
sonenoid to monitor and adjust the damper rail return to the optimal setting.
SD: Sustain Release Delay - adjusts the time delay before force is applied to the pedal solenoid.
This setting has significant effect on lowering the sustain pedal noise. Default and typical
setting is 32.
It is very important that the SC, SR and SD are working in conjunction and set to the correct values.
ST: Store Parameters - after the Key Solenoid Hold, Release, Sustain Force, Sustain Release and
Susutain Release Delay values are set, the new information has to be stored in the internal memory.
When the display shows: St: Store Parameters, press the YES button. The display shows: “Ok: Stored”
Once the new values are stored, they will remain in the internal memory until new values are selected
and stored again. After the Store function is completed press the NO button to return to the CD mode.
iNET FUNCTIONS
3. iNET - Internet connection:
The KD-7 can be connected to the Internet
via high speed LAN connection or with a USB
wireless module. For information about the
current or new Internet fuctions contact
Kohler or visit the web site.
The following selections are available after the iNet
button is pressed:
Download (available soon), Status,
Device Name and Connections.
Firmware update via Internet: Power the system
down (turn Off the power supply under the piano).
Connect a high speed internet cable to the back of the
KD-7’s ETHERNET connection (on the back of the CD
unit). Turn on the power on the power supply.
After the boot is complete and there is Internet
connection, KD-7 will search for the latest operating
system version. If a newer version is available than
yours, it will display:
“Yes: A new firmware version is available. do you want
to download?” Prtess YES and follow the simple steps.
EXPRESSION
A correctly selected expression type can further
enhence the reproduction of the original performance.
There are 3 Expression playback choices:
SOFT (minimum expression)
MED (medium expression)
DEEP (highest playback expression levels)
For classical piano music select DEEP to enjoy full
expression. Medium expression is recomended for jazz,
pop and similar styles. Selecting SOFT will result little or
no expression.
23
Page 26

HELP
BAL
SPLIT PLAY
The SPLIT PLAY function allows muting the left or right
5.
hand playback, so you can play along, learn or practice
one hand at a time. Pressing the button once mutes
the left hand, pressing the button once mutes the
right hand playback. To turn on the playback again, press
the L or R buttons again.
SPLIT NOTE
With the SPLIT NOTE buttons you can
6.
change the key where the keyboard is split. The default
is C4 (middle C). By pressing one of these buttons
repeteadly a new split note can be selected
Press any of the buttons on the remote followed by
7.
the HELP button. Detailed instruction or information
will be displayed.
RANDOM
By pressing this button the KD-7 will play songs in
random mode from the selected source.
Press LIB (Library), select the CLASSICAL/CLASSICAL
VOL 1. Press YES followed by the RANDOM button. The
display shows: “Rnd playback mode” and Perfrmer will
select tracks randomly. To stop the RANDOM play press
RANDOM again. Now the display will show:
“1 2 3 normal order mode”.
RANDOM play mode can be engaged in any source (CD,
LIB, USB or ALL).
BAL
24
Page 27

REPEAT
The following repeat options are available for each play
9.
source:
R: all - repeat all songs
R: 1 - repeat one song
R: No repeat song mode
TONE
This is an audio adjustment function. By pressing the TONE
button the first time the display shows TX (X = the actual
value) for treble setting. By pressing the ADJUST buttons
the audio treble can be adjusted between + - 18.
By pressing the TONE button again, the display shows:
BX (X = the actual value) for the Bass setting.
By pressing the ADJUST buttons the audio bass can be
adjusted between + - 18.
BAL
BAL
The PAN (BALance) is also an audio function. If two speakers
are connected, the accompaniment tracs can be adjusted
in the left and right stereo field. When pressing the BAL
button on the remote the display shows P0 (default).
The ADJUST + - or the REV/PREV and FWD/NEXT can pan
the audio sound in the left and right stereo field.
TEMPO
The TEMPO buttons can slow down or speed up
the playback by + - 50%. After selecting a song and then
pressing one of the TEMPO buttons the display shows: S0
Pressing the left button slows down the playback, the right
one speeds it up.
NOTE: Tempo can only be changed if the song is saved in
MIDI format.
BAL
BAL
TRANSPOSE
The Transpose buttons allow transposing
the currently playing song by + - 24 steps. This function is
available only if the song is saved in MIDI format. When
playing a player piano CD, only the piano track will be
transposed by 1 octave at a time. The maximum range is
+ - two octaves.
25
Page 28

THE SONG FUNCTION BUTTONS
14. ADD/PLAYLIST
PLAYLIST is a temporary list of selected songs. Songs can be selected
from different libraries and sources. To add a song to the playlist first
select the song, then press the SONG/PLAYLIST/ADD button.
16. ALL
To start the PLAYLIST press SOURCE/ALL/PLAYLIST. Songs will play as a
single album in the order they were added. Playlist is not stored in the
memory when the system is powered down.
DELETE
Select a song you wish to delete. Press the DELETE button. The display
will read: “Yes: Are you sure to delete (song name)?” Press YES to delete.
RENAME
Songs pre-loaded into the internal libraries by the manufacturer are
copyrighted and cannot be renamed. Songs cannot be renamed on
external devices (USB memory drive, HD or CD). Songs saved into
a library by the user can be renamed.
How to rename a song?
1. Select the song
2. Press RENAME
3. Use the FWD/NEXT and REW/PREV buttons to select the
character you wish to change (cursor)
4. Use the AJUST + - buttons to select the new character
5. When finished, press YES
6. The new name is now stored
COPY
Songs pre-loaded into the internal libraries are copyrighted and
cannot be copied. User material can be copied from CD or USB
device to libary, from library to library, from library to USB device.
How to copy?
1. Select the song you wish to copy
2. Press the COPY button (display reads: copy-select
destination
3. Use the FWD/NEXT and REW/PREV buttons to select
the destination then press YES. (display reads: To A New
Album)
4.Press YES, then enter the new album name using the
ADJUST buttons for characters and the FWD/NEXT/REW/PREV
for cursor movement
5. When finished, press YES
26
Page 29

THE SOURCE BUTTONS
There are four SOURCE buttons representing access to internal music
libraries, the CD drive, USB devices and the user programable playlist.
ALL
Press the ALL/PLAYLIST (16) to start playing the previously created
temporary playlist. All the songs previously added to the playlist will
play as a single album in the order they were entered.
LIB (LIBRARY)
The KD-7 has internal libraries.
The following libraries are pre-programmed by the manufacturer:
Classical
Country - empty
Downloaded - empty
East-West (on early releases)
Jazz (Albums from East-West were moved to here now)
My - empty
Other
Popular
Rock - empty
Shared - empty
Quick Record - empty
Add New Library - empty
Hide locked
The KD-7 has 256 Mb Internal memory which allows it to store MIDI and audio files. There are several libraries
setup and the user can create a large number of additional ones. The “tree structure” makes navigation easy.
4
1
Here is an overview how the KD-7s Libraries and Albums are or can be organized:
Press the SOURCE LIB (Library) button
The display shows: Classical
To select another library press the ADJUST + - button
NOT ALL THE LIBRARIES CONTAIN MUSIC !
TO FIND AND PLAY MUSIC FROM A LIBRARY, YOU HAVE TO SELECT AN
ALBUM. ALBUMS ARE SUB-DIRECTORIES WITHIN THE LIBRARY.
27
Page 30

USB
USB storage devices, like a memory stick (jump drive), USB hard
drive and USB floppy drive, can be connected to the KD-7.
Some of these devices have large storage capacity and can hold
hundreds or thousands of MIDI and audio files. For safe
operation and file recognition it is recomended to power down
the system before connecting a USB device.
FORMATS THAT BE PLAYED FROM USB
MIDI files 0 and 1, player piano CD tracks copied to the USB device, OGG audio format and WAV audio .
Song files can be stored in folders or in root position. If folders and root position files are mixed, the ones
saved in root position have priority. To store large number of songs we recomend the folder structure.
WHAT CAN YOU STORE
You can copy and store different format player piano CDs, MIDI files and audio CDs.
HOW TO COPY
You will need a PC, USB device and one of the following player piano CDs, MIDI file or Audio CD:
Yamaha Pianosoft Plus CD
QRS Pianomation CD
Pianodisc Player Piano CD (prior to January 2006 release)
MIDI files copied to CD
Standard audio CD
PREPARE! If you plan to use an external USB hard drive, the drive has to be formatted first. It is important that
the hard drive is formatted with FAT 32 option and single partition. Since Windows may have a problem with
formatting a hard disk in FAT 32 beyond 32 Gb, we have included the format option and strongly recommend
using it instead of your computer.
1. To format HD, turn off your Performemance (Power Supply)
2. Connect the HD
3.Turn on the power and wait until the boot and self check is complete
4. Press MENU
5. Select item MEDIA, press YES
6. Select item USB Format, press YES
Confirmation question with default answer NO is displayed “All data from connected device will be
ereased during the format. Are you sure to proceed?”
7. Select item YES with button + (No changes to YES)
8. Confirm by pressing YES
Formatting is executed now - it can take about 5 minutes.
28
Page 31

After the hard drive is formatted, turn off the KD-7, disconnect it, then connect it to your PC.
Insert a player piano CD into the CD drive, and open your CD burner program (like Nero).
Select the Convert Audio CDs to Audio Files.
Select the Destination Location (the USB hard drive you just connected)
Output file format: PCM wav file
Frequency: 44100
Bits: 16
Channels: Stereo
Select the CD tracks you want to copy
Select: GO
After the song files are copied, you will need to change the file extensions as follow:
For Yamaha Piano Soft Plus change from; My Song.wav to My Song.wdk
For QRS Pianomation CD file from; My Song.wav to My Song.wpm
For Pianodisc Player Piano CD from; My Song.wav to My Song.wpd
For Audio CD or MIDI file; no extension change is needed
IMPORTANT !
Windows has the Auto-Hiding of known file extension.
TO RENAME THE FILE CORRECTLY YOU SHOULD FIRST TURN OFF AUTO-HIDING EXTENSION FEATURE IN
WINDOWS:
1. Open the Windows menu
2. Select Tools
3. Choose Folder Options
4. Select View
5. Uncheck Hide extensions for known file types
6. Select OK/Apply
SONG FILES CAN BE STORED IN ROOT POSITION OR IN FOLDERS. NOTE: ROOT POSITION HAS PRIOROTY!
IT IS RECOMENDED TO ORGANIZE YOUR SONGS IN FOLDERS. IF LONG UNINTERRUPTED PLAYBACK IS
REQUIRED, CONSIDER CREATING A FOLDER AND COPY LARGE NUMBER OF SONGS INTO IT.
AFTER THE SONG FILES ARE COPIED AND RENAMED, BE SURE THAT THE HDD OR ANY USB DEVICE IS
DISCONNECTED FROM THE PC CORRECTLY. USE “UNPLUG USB DEVICE” (green icon near the clock), BEFORE
HDD IS PHYSICALLY DISCONNECTED. When this function is used - the system stores all unstored sectors
onto disk.
When the data is not stored, disk content can be corrupted.
29
Page 32

CD
CD is the most popular format for player pianos.
Player piano CDs are specially recorded. They contain MIDI
information (converted to analog) to command the key
solenoids moving the keys up and down. This information is on
one of the CD tracks (left or right). The other track is used for the
audio accompaniment (if any). The CD track configuration varies
by the different brands. (QRS Pianomation: AMI left, audio right.
Yamaha Disklavier: AMI right, audio left. Pianodisc: AMI right,
audio left, Webonlypiano: available in all the above formats.
KD-7 can play multiple player piano CD formats:
Yamaha Pianosoft Plus
QRS Pianomation CD
Pianodisc CD (released prior to 2005)
Webonlypiano
KD-7 also plays MIDI files stored on CD. The midi files can be organized in folders or saved in root
position. MIDI files use very little memory, so a single CD can hold thousands of songs. It is recomended
that MIDI files saved on CD are in folders for easy navigation. Each folder can hold 999 song files. If the
song title was entered following standard procedure, they will be displayed on KD-7s scrolling display. (If
you want to use your PC to name MIDI files, use Cakewalk/Edit/Info).
Standard audio CDs can also be played but the keys will not move and the piano will not play.
KD-7 also recognizes audio files in OGG compressed format. It is not recomemded to save player piano
CD content in OGG format. The Stars and Tracks software by Kohler is a new exciting software for player
pianos. When inserting a standard audio CD from a selected library, the matching piano file is found in
the internal memory and starts to play in sync with the audio recording. You will find more information
about the audio and MIDI sinchronization in the OPTION section.
HOW TO PLAY A CD ?
The right sensor near the edge of
the display is for the CD Eject
function. (Can be also performed
using the remote’s Eject button).
Insert a CD. Make sure it snaps into the right position. Support the CD tray with with your hand from
underneath. Spin the CD with your fingers assuring that it is positioned correctly. Close the tray.
There is an AUTO PLAY function by default. After few seconds the CD is scanned and the playback starts.
The CD AUTO PLAY is not only a convenient feature, but also practical in case the remote is misplaced or
the battery is empty. The CD auto play function can be disabled then saved as new default setting.
30
Page 33

HOW TO DISABLE/ENABLE THE CD AUTO PLAY FUNCTION ?
1. Press the MENU button
2. Use the ADJUST + - buttons toselect SETUP
3. Press YES
4. Use the ADJUST + - buttons to select MEDIA
5. Press YES
6. Use the ADJUST + - buttons to select CD AUTOPLAY
7. Press YES
8. Use the REW/PREV and FWD/NEXT buttons to select ENABLE or DISABLE
9. Press YES to confirm
The CD AUTOPLAY ON is a factory default setting. If you wish to keep the function disabled even after the
system is powered down (on the power supply), you have to save the setting.
TO SAVE CURRENT SETTINGS
1. Press MENU
2. Using the ADJUST + - buttons select SETUP
3. Press YES
4. Using the ADJUST + - buttons select Store Current Setting
5. Press YES - the display reads: Yes: Do you want to store current settings
as power-up defaults?
6. Press YES to confirm
31
Page 34

ACCOMPANIMENT VOLUME
KD-7 has two volume controls. M (Master Volume) and
A (Accompaniment Volume). The accompaniment + - buttons adjust the
audio portion of the playback (orchestral accompaniment). There are two
accompaniment default settings. When the master volume is set to 1 for the
lowest level piano playback, the Accompaniment level defaults to 10. The
available range at this setting is 0-25. When the Master volume is set 2 or
higher (maximum range is 30), the Accompaniment defaults automatically
to 24. Maximum range is 30. To adjust the Accompaniment volume simply
press the + - buttons. Default setting can be changed and saved by the user.
Press MENU/SETUP/STOEW CURRENT SETTINGS if you prefer your new
settings at
system power up.
The Accompaniment buttons control the audio output level. To hear the orchestral accompaniment
amplified speaker(s) or a stereo receiver has to be connected to the LINE OUT/OPTICAL OUT on the back of
the CD control unit. This is a stereo output, use 1/8” stereo mini plug.
For best result it is recomended to connect two amplified speakers. Although many of the player piano CDs
have only monoral audio accompaniment, Kohler has a new format that allows full stereo with inbeded MIDI.
The Stars and Tracks software allows audio and MIDI synchronization, meaning that the original standard
stereo audio CD (selected library) is accompanied by the player piano.
32
Page 35

MENU BUTTON
Source
Playback sources are:
CD
USB
Library
Album (saved in Library)
Audio
The options are:
Accompaniment volume
Pianissimo Accompaniment (default level is 10)
Main Volume to adjust piano and accompaniment level (default 15)
Bass tone - to adjust the low frequencies of the accompaniment
Treble tone - to adjust the high frequencies
Panorama - to shift the sound from center position (P0) to left or right.
The range is + - 10.
Acoustic mode - selection between acoustic piano playback and
headphone. Acoustic player pianos have to be
equipped with the optional record strip and GM
(GeneralMIDI) sound card for headphone operation.
PIANO
The options are:
Split - Disable or Enable the keyboard split (after pressing YES, use
the REW/PREV and FWD/NEXT buttons to select)
Left Hand - to turn LH on and off
Right Hand - to turn RH on and off
Split Note - to change the default key (C4). Press YES, The display
reads C4. Use the REW/PREV key to move the split note
more to the left, or the FWD/NEXT to move the split
note more to the right. If you want to store the new
split point as default, select MENU/SETUP/Store current
settings.
Sync Time - If the speakers are located far away from the piano,
the Sync Time may need to be adjusted. This function
may also be engaged if for some reason the piano and
accompaniment are not in sync. The Sync Time can be
adjusted by approximatelly + - 80 milliseconds. Press
YES. The display reads: S0 Use the REW/PREV or
FWD/NEXT buttons to change the Sync Time.
Expression - to select one of the expression options:
Soft - notes will play with smaller expression depth
Medium - notes will play with original note velocities
Deep - songs will play with wide expression range.
Pianissimo. Piano and mezzoforte notes will play softer.
33
Page 36

Playback Modes
The options are:
Normal play sequence - songs plays in the order they were saved or recorded
Random Sequence - songs are selected in random order from the current
source.
Repeat Off - no repeat
Repeat Song - The currently selected song will repeat until STOP is pressed
Repeat Album - The current album is repeated until STOP is pressed
Options
The selections are:
Add to playlist - add song to playlist from any source
Copy album - copy all songs from the currently selected source (CD or
USB) to a selected album. The system will ask you to select
destination album. You can also create a new album.
SETUP
The selections are:
Store Current Setting - This funcion allows you to customize KD-7’s
settings including: Main Volume, Accompaniment
Level,Treble and Bass settings, Split None, Display
settings and many more.
SERVICE
Upgrade Firmware - To upgrade firmware, you can connect
KD-7 to the Internet, or insert a CD
containing the latest operating system.
Remote Assistant - by selecting this function you enable the
connection to supporting remote
operator who can help to solve
problems with your piano. High speed
Internet connection is required.
Solenoid Control Setup - These functions should only be
accesed and operated by certified
installer technician
Touch Sensors Setup - to select the touch sensor setup.
The options are:
Calibrate Sensors (the system will auto
calibrate the sensors to the current
light conditions)
Show status of sensors (after pressing
YES, the sensor status is displayed)
Monitor sensor level (after pressing YES
the sensor level is displayed)
34
Page 37

iNet
Connections
Download
Status
When selecting iNet, you can access the Internet related
functions and settings.
- to display the current network addresses and status
- many of the iNet functions were still under development
at the time this manual was prepared. With Operating
System version 1.84 the Download function works as
follows: If the user saves albums in the Share library, those
can be downloaded by other users connected to the
Internet.
- displays the current download status. When the album
download is completed, the album is automatically activated.
Device name
- displays the name specific to your player system. Other owners
of the same system can also view this device name. This is
useful when sharing your own albums.
ABOUT
Version
Medium
- displays the current Operating System (OS) version as well
as the Ethernet IP address.
- after pressing yes, the current operating system version is
displayed for example:
Ok: Built 1.XX, Kohler KD-7 Ext., ECR
V 3.XX, FP V. 1.XX., ECRSN xxxxxxxxxxx
- displays the current medium and song type
Storage
- displays the available storage memory for example:
OK Lib: Used XX % of full capacity, XXX.XM.
35
Page 38

EXIT
PLAY - YES
ADJUST +
- to Exit current menu or dialog without any additional action
taken.
- use the PLAY - YES button to start to play the currently
selected song, or to confirm the selected item.
ADJUST -
STOP - NO
MUTE
- use this button to increase the main volume (MXX), to view next
menu item or increase the selected parameter.
- use this button to decrease the main volume (MXX), to view
previous menu item or decrease the selected parameter.
- use this button to stop playback, exit menu item or go to lower
level function item.
- mutes and un-mutes the song playback.
36
Page 39

REC - RECORD
FWD/NEXT
- press the Record button to start the Quick Record.
Note: The optional record system has to be installed in order to
record.
When record is active, the display reads: “Now Recording”
When finished, press the STOP button. The recorded song
will be saved in the temporary Quick Record library.
- use the NEXT/FORWARD button to select the next song to play,
select the next character when entering new song, library or
album name. When a song is playing, hold this button for
2 seconds to engage fast forward.
REW/PREV
- use the REWIND/PREVIOUS button to select the previous song
to play, select characters when entering or editing new song,
library or album name. When a song is playing, hold this
button for 2 seconds to engage fast rewind.
DISP - DISPLAY
- toggles between the 3 display options:
1. Displaying play time in minutes and seconds
2. Displaying album information (name, number of songs)
3. Displaying the title and track number of the currently
playing song.
EJECT
- when pressing this button the CD tray openes just like
when using the touchless eject sensor on the display.
37
Page 40

UNLOCK
CLOCK
SLEEP
-press this button to open the UNLOCK function menu.
In order to use this function one of the Stars and Tracks
original audio CD has to be incerted into the CD drive.
After the playback starts the display reads that the song or
album is locked. Press YES to read the direction and the
unlock code request number for the particular CD.
See Digital Rights management section!
- to enter the timer menu (Sleep, Daily Schedule, Set Date/Time)
- press the CLOCK button followed by YES. Use the ADJUST + -
buttons so select SLEEP if other function is displayed.
Press YES. The displays shows: SXX (XX is the number of minutes
the timer is set to turn off the player system. To change and set the
desired minutes for the sleep mode, use the ADJUST + - buttons
or the PREV/REW FWD/NEXT buttons. Press YES to confirm and
activate the sleep function. To turn the SLEEP mode off, press NO
while the sleep time is displayed.
DAILY SCHEDULER
- the Daily Scheduler function allows to set and save the time of
the day for automated playback start and stop.
Note: before setting up Sleep Mode or Daily Schedule please check
if the date and time is set correctly for your location!
To program the daily playback start time press the CLOCK button.
Use the ADJUST + - to select Daily Schedule. Press YES and select
the On Time. Press YES, the display will show XX:XX for hours and
and minutes (in 24 hour mode). XX:XX will be underlined first
prompting to enter the desired hour setting. Use the ADJUST + -
buttons to set the time. When the hour is set, use the FWD/NEXT
button to move the blinking line to underline the minutes
displayed: XX:XX. Set the desired minutes with the Adjust + -
buttons. Enable the Daily Schedule function to Enable (using
the NEXT/FWD or PREV/REW buttons followed by YES.
38
Page 41

Set Date/Time
- to adjust current date and time. Press YES: display shows:
Set Date/Time. Press YES. The current date is displayed MM/DD/YY
where the MM is underlined with the flashing cursor. To change
the number use the ADJUST + - buttons. To move the cursor
(flashing underline) use the REW/PREV or FWD/NEXT buttons.
When the new date snd time is selected, press YES to confirm.
The display will confirm that the new date/time was saved.
A - B REPEAT
- the A - B repeat function loops a selected section of a song.
This is a useful function if you want to learn a song part by
part (this function can be also used together with the TEMPO
adjust buttons, to slow down the section you want to learn).
During playback press B at the point you want to set the loop
start to. Press B again at the point you want the loop to end.
To stop the loop function and return to normal play, press A.
NUMBER BUTTON
- to select the Number Mode. After the Number Button is
pressed, a specific song or album can be selected by the
numeric buttons. For example to select song number 89
first press the # button and shortly after the number 8 and 9
buttons. Then press the YES/PLAY butto to start the selected
song.
ALBUM
- the ALBUM + button selects the next Album in the internal
library. The ALBUM - button selects the previous album from
the internal library.
Note: Source LIB (Library) has to be selected to use the ALBUM + -
selection buttons!
39
Page 42

MENU ITEMS
MENU-MENU
Source - When selecting the Source, you can choose a new source for song playback. This can be either CD,
USB or one of the internal libraries and albums.
Audio -When selecting Audio, you can adjust the audio outputs volume and tone.
Piano - When selecting Piano, ou can set the piano playback and recording parameters.
Playback modes - When selecting the Playback modes, you can set different playing modes such playing songs
in random order or repeat all songs from the selected album.
Options - When selecting Options, you can start features like copy current song or album to another, rename
song or album and other special functions.
Setup - When selecting Setup, you can access most of the optional functions like display light level.
iNet - when selecting iNet, You can access all the Internet functions .
About - When selecting About, you can get diagnostic information about system details such Version of firmware
or Ethernet IP Address.
MENU-AUDIO
Accompaniment Volume - when selecting Accompaniment volume, you can adjust the audio accompaniment.
Main Volume - When selecting Main volume, you can adjust the main volume. Press the ADJUST - + buttons
on IR remote controller in basic mode.
Bass level -When selecting Bass, you can increase or decrease the low frequencies to the audio output.
Treble level - When selecting Treble, you can increase or decrease the high frequencies to the audio output.
BAL (Balance) - When selecting BAL (balance), you can shift the sound from the center position
more right or left optimizing the imaging to your current listening position.
Acoustic mode - when selecting Acoustic mode, you can select either Acoustic mode enable (acoustic piano
playback, or Acoustic mode disable for Headphones monitoring without the pianos action activated by the solenoids.
Note: The optional record system has to be installed for this feature!
MENU-PIANO
Split - When selecting Split, the piano keyboard will be split on a defined point (see Split Note) to two parts:
left and right. These parts can be then enabled or disabled e.g. for practicing left or right hand play.
Left Hand - When selecting Left split, the playback of the left part of keyboard will be enabled or disabled.
When it is disabled, you can practice the bass part of song with your left hand.
Right Hand - When selecting Right split, the playback of the right part of keyboard will be enabled or disabled.
When it is disabled, you can practice playing the melody part of song with your right hand.
Split Note -When selecting split note, you can select the key where piano keyboard is virtually split into left and right
parts. See Left split or Right split.
Expression - When selecting Expression, you can select the softness of piano automation playback performance.
Three options are available: soft, medium and deep expression.
40
Page 43

MENU-PIANO-EXPRESSION
Soft - when selecting Soft piano playback Expression, piano automation will play most of notes with smaller
expression levels.
Medium - when selecting Medium piano playback Expression, piano automation will be playing the songs with
original note velocities.
Deep - When selecting Deep piano playback Expression, piano automation will play the songs with increased
notes velocity levels. Piano and mezzoforte notes will be played quieter.
MENU-PLAYBACK-MODES
Normal Sequence - When selecting Normal Sequence, songs will be played in normal order from track 1 to 999.
Random Sequence - When selecting Random Sequence, songs will be played in random order.
Repeat Off - When selecting Repeat Off, no song will be repeated.
Repeat Song - When selecting Repeat Song, current song will be repeated.
Repeat Album - When selecting Repeat Album, all songs within current album will be repeated.
MENU-OPTIONS
Copy song - When selecting Copy song function, you can copy the currently selected song to other selected album.
System will ask you for target album. While selecting of target album, you can also create a new one.
Rename song - When selecting Rename song function, you can change the name of the selected song.
Delete song - When selecting Delete song function, you can delete the current song. You will be asked to confirm
this operation because after the song is deleted, there is no way to recover it or undo the delete.
Add to Playlist - Add song to user created playlist. You can play your playlist after selecting Playlist source from the
Source menu.
Copy album - When selecting Copy album function, you can copy all songs from the selected album to any
other selected album. The system will ask You for a target. The system will create a new one.
Rename album - when selecting Rename album function, you can change the name of the selected album.
Delete album - When selecting Delete album function, you can delete the selected album together with all the
songs stored ib it. You will be asked to confirm this operation because after the album is deleted, there is no way to
recover any of ther songs from the deleted album.
Add to library - When selecting Add to library function, you can add the current album to a destination group.
Change position - Change Song position (order) in the current album.
Sync with - when selecting Sync with function, you can synchronize current selected MIDI song with the selected
CD Audio track. Note: Song, to be synchronized to CD has to be MIDI format.
Remove Sync - When selecting Remove Sync function, you can remove the synchronization of the currently
selected song with synchronized MIDI file.
Unlock album - When selecting Unlock album, you can enter unlock key for this album.
MENU-SETUP
Store Current Settings - When selecting Store Current Settings, you can store all current settings like defaults.
After device power-up the system will have the current audio volumes, current selected album will be set, current
playbackmode will be set and some others.
Service - When selecting Service, ou can access the service functions such as Setup of ECR.
Display Setup - When selecting Display Setup, you can enter all the display setup functions.
Network Setup - When selecting Network Setup, you can setup WiFi networks if WiFi access device is connected.
41
Page 44

Status - When selecting Status, you can get information of the current album download status.
When download is finished ,while status is displayed, the downloaded album will be automatically activated
for playback.
Device Name - When selecting Device Name, you can see the name of your player system. Other player system
owners online will also see your system name. This is useful when you want to share some our albums with friends,
who have the same player system. They will see our player’s name in iNet/Download.
MENU-ABOUT
Version - When selecting Version, the system displays the current firmware version number.
Medium - By selecting Medium, the player shows information about the current medium and song type.
Storage - When selecting Storage, the player displays the remaining capacity of the internal library and
the connected USB storage device.
Network - When selecting Network, the player shows the current network interface addresses.
MENU-SERVICE
Solenoid Controller Setup - When selecting Calibration Solenoid Controller, you can enter all the setup
functions of the playback engine. Note: These functions are intended to be used by certified installers.
Touch Sensors Setup - When selecting Touch Sensors Setup, you can check touch sensors or turn them
on and off.
Upgrade Firmware - When selecting Upgrade software, you can start upgrading the operating system
software.
Service - When selecting Service, you can access the system’s service functions such Setup of ECR.
MENU-SERVICE-SENSORS
Calibrate Sensors - Wen selecting Sensors Calibrate, you can recalibrate the display touch sensors
to adapt to the new conditions.
Show status of Sensors - When selecting Sensors Status, you can check touch sensors status.
Touch Sensors Setup - When selecting Touch Sensors Setup, you can test the touch sensors, or turn them
on and off.
CONNECTIONS
Gear - ECR 1 (Compatiblr with Ensemble CD
Record Strip (optional)
MIDI I/O
Headphones (on the left front side)
Line Out L/R
Line In L/R
Microphone Input
SPDIF Optical (Integrated with Line Out Connector)
Ethernet - Connection to Internet or LAN for controlling
with PC or home automation
USB - storage class media (Flash Drive, Hard Disc, USB
Floppy Drive, WIFI wireless Internet connection
42
Page 45

KOHLER KD-7
Playback sources and media formats
Playback Sources
AMI CD Playback Formats
USB File Playback Formats
Internal Library (256MB-80GB)
USB Srorage Class
Audio-CD
AMI-CD (Player Piano CD Format)
Data CD (MIDI files)
Pianomation CD
PianoDisc CD (Released prior to 01/01/05)
Yamaha Disklavier CD (Piano Soft Plus)
WebOnlyPiano
Stars and Tracks (Piano to audio CD sync)
WAV
WAV+MIDI
MIDI
OGG (stereo 48-192 kbps)
OGG+MIDI
WPD - Pianodisc wav track
WPM- Pianomation wav track
WDK- Yamaha Disklavier wav track)
43
Page 46

A
A/B loop 9, 39
About 35
Accompaniment volume 32
Adjust 36
Album 39
All 26, 27
AMI CD playback format 43
AMI to Midi conversion 9
Audio 33
B
Balance 6
C
CD 30
CD auto play 30
Choosing a location 2
Clock 38
Connections 35, 42
Copy 9, 11, 12, 14, 26, 28, 29
Copy midi files 9
D
Daily scheduler 38
Date/Time 39
Delete 26
Device name 35
Display 9, 37
Download 35
E
Eject 37
Exit 36
Expression 7, 23, 33
F
Fast forward 9
Features 9
Firmware update 9, 21
Forward/Next 37
G
Getting Started 3
Help
Help 8, 9, 24
I
iNet 23, 35
Internal libraries 5, 9
L
Libraries 3, 27
Library structure 15, 16
Line out 32
M
Medium 35
Menu 40, 42
Menu about 42
Menu audio 40
Menu options 41
Menu piano 40
Menu piano expression 41
Menu playback modes 41
Menu service 42
Menu service sensors 42
Menu setup 41
Mute 36
N
Naming 9
New features 44, 45
Numeric song selection 9, 39
O
OGG file 9
On/Off 3
Options 34
Overview 2
P
Pan 25
Piano 33
Play CD 30
Play/Yes 36
Playback 5
Playback modes 34
Playback services 43
Player piano CD 3
Playlist 17, 26
Q
Quick start 10
R
Random play 8, 24
Record 37
Remote 18, 19, 20
Remote assistant 21, 34
Rename 26
Repeat 8, 25
Rew/Prev 37
INDEX
44
Page 47

S
Select a source 4
Select a track 4
Sensors 3
Service 34
Service functions 21
Setup 34
Share folder 9
Sleep mode 38
Solenoid control setup 22, 23
Source 27, 33
Split play 24, 33
Start playback 4
Stop/No 36
Storage 35
Store current setup 34
Sync time 33
Synchronization 9
T
Tempo adjustment 7, 25
Timer 9
Tone control 7, 25
Touch sensor setup 34
Transpose 7, 25
Tree structure 9
U
Unlock 10, 38
USB 3, 28
V
Version 35
Volume 6
W
Warranty 46
Welcome 2
What can you store 12, 28
45
Page 48

KD-7 Internal Library Song List
The KD-7 has several internal libraries and albums. Here is a list of songs you will find in the libraries:
LIBRARY: CLASSICAL
Album: Classical 1
Nocturne
Schubert Minuette
Schubert Minuette 2
Etude in Major, Op.10 No 5
Romanian Folk Dances
Liszt 11
Chopin C# Minor
Scherzo No 2 in B Flat Minor Op 31
Etude No 15 Op 58
El Pele
Prekude in B Flat Major Op, No 2
Brahms Cziffra Hungarian Dance No 5
Traumerei
Romance Without Words
Ravel Odine
Polonese
LIBRARY: CLASSICAL
Album: Chopin, Frederic
LIBRARY: CLASSICAL
Album: Bach, Johann
Sebastian
Preludium C Major WTC 1
Fuga C Major WTCI
2 Part from piano concerto
LIBRARY: CLASSICAL
Album: Liszt, Franz
LIBRARY: CLASSICAL
Album: Beethoven
Ludwig van
Moonlight Sonata
Sonate Nr. 14 cis mol op 27.2
Pathetique-Grave-Allegro di molto
e con brio
Pathetique - Adagio cantabile
Pathetique - Rondo Allegro
LIBRARY: CLASSICAL
Album: Schubert, Franz
Impromtu No 4 C# Minor
Waltz Op. Posth. 69, No 1 A Flat Major
Waltz Op. 64, Nr. 1 D Flat Major Minute
Nocturno Op. 9, Nr. 2
LIBRARY: CLASSICAL
Album: Mozart, Wolfgang
Amadeus
Rondo Alla Turca KV 331 Part 3
Rhapsody Nr. 2
Piano Piece - Serenade
1
Page 49

KD-7 Internal Library Song List
LIBRARY: JAZZ
Album: Jazz 1
Smile
Someday
Fly Me To The Moon
Black Orpheus
Green Dolphin Street
In a Sentimental Mood
Mercy Mercy Mercy
C Jam Blues
Summertime
Autumn Leaves
All Blues
LIBRARY: OTHER
Album: Inspirational
LIBRARY: JAZZ
Album: Jazz 2
Cantaloupe
Moarnin
Nature Boy
Nearness of You
Night and Day
Over The Rainbow
Summer Sumba
Take 5
Wonderful
All The Things You Are
Lola Be
LIBRARY: OTHER
Album: Latin Love Songs
LIBRARY: JAZZ
Album: Standards
Once In A While
All The Way
Smoke Gets In Your Eyes
I’m In The Mood For Love
It was A Very Good Year
Stardust
Night And Day
For Sentimantal Reasons
Softly As You Leave Me
Someone To Watch Over Me
The Way You Look Tonight
I Had A Craziest Dream
At Last
As Time Goes By
All The Things You Are
Skylark
LIBRARY: OTHER
Album: New Age
LIBRARY: POPULAR
Album: Pop
Don't Worry Be Happy
Heal The World
I Shot The Sheriff
Killing Me Softly
Kiss From Rose
Perfect Day
Shape
Sunny
Unbreake My Heart
Kingdom Life Now
Wayfaring Stranger
When I Survey The
Wondering Cross
While On The See
Just As I Am
To God To Be The Glory
How Firm Is The
Foundation
Joy To The World
Holy Holy Holy
My Shephard Would
Supply My Need and
Amazing Grace
It's Impossible
Maria Elena
Without You
More
With All My Heart
Acancao
All Of You
Quando Calienta Del Sol
Historia De Un Amor
Mucho Corason
Always In My Heart
Feelings
Dindi
De Nina Muher
Momentos
You Belong To My Heart
Christoferi
Ashokan
Somewhere
Shadow
Rainbow Connection
Mistname
Homecoming
Romeo and Juliet
Interlude
somemel
Lovesolo
Angeleye
Sonatame
Leaveson
Somwhere Out There
2
 Loading...