

Kohler K-T6808, K-T6810, K-6812, K-T6809 Installation And Care Manual
Installation and Care Guide
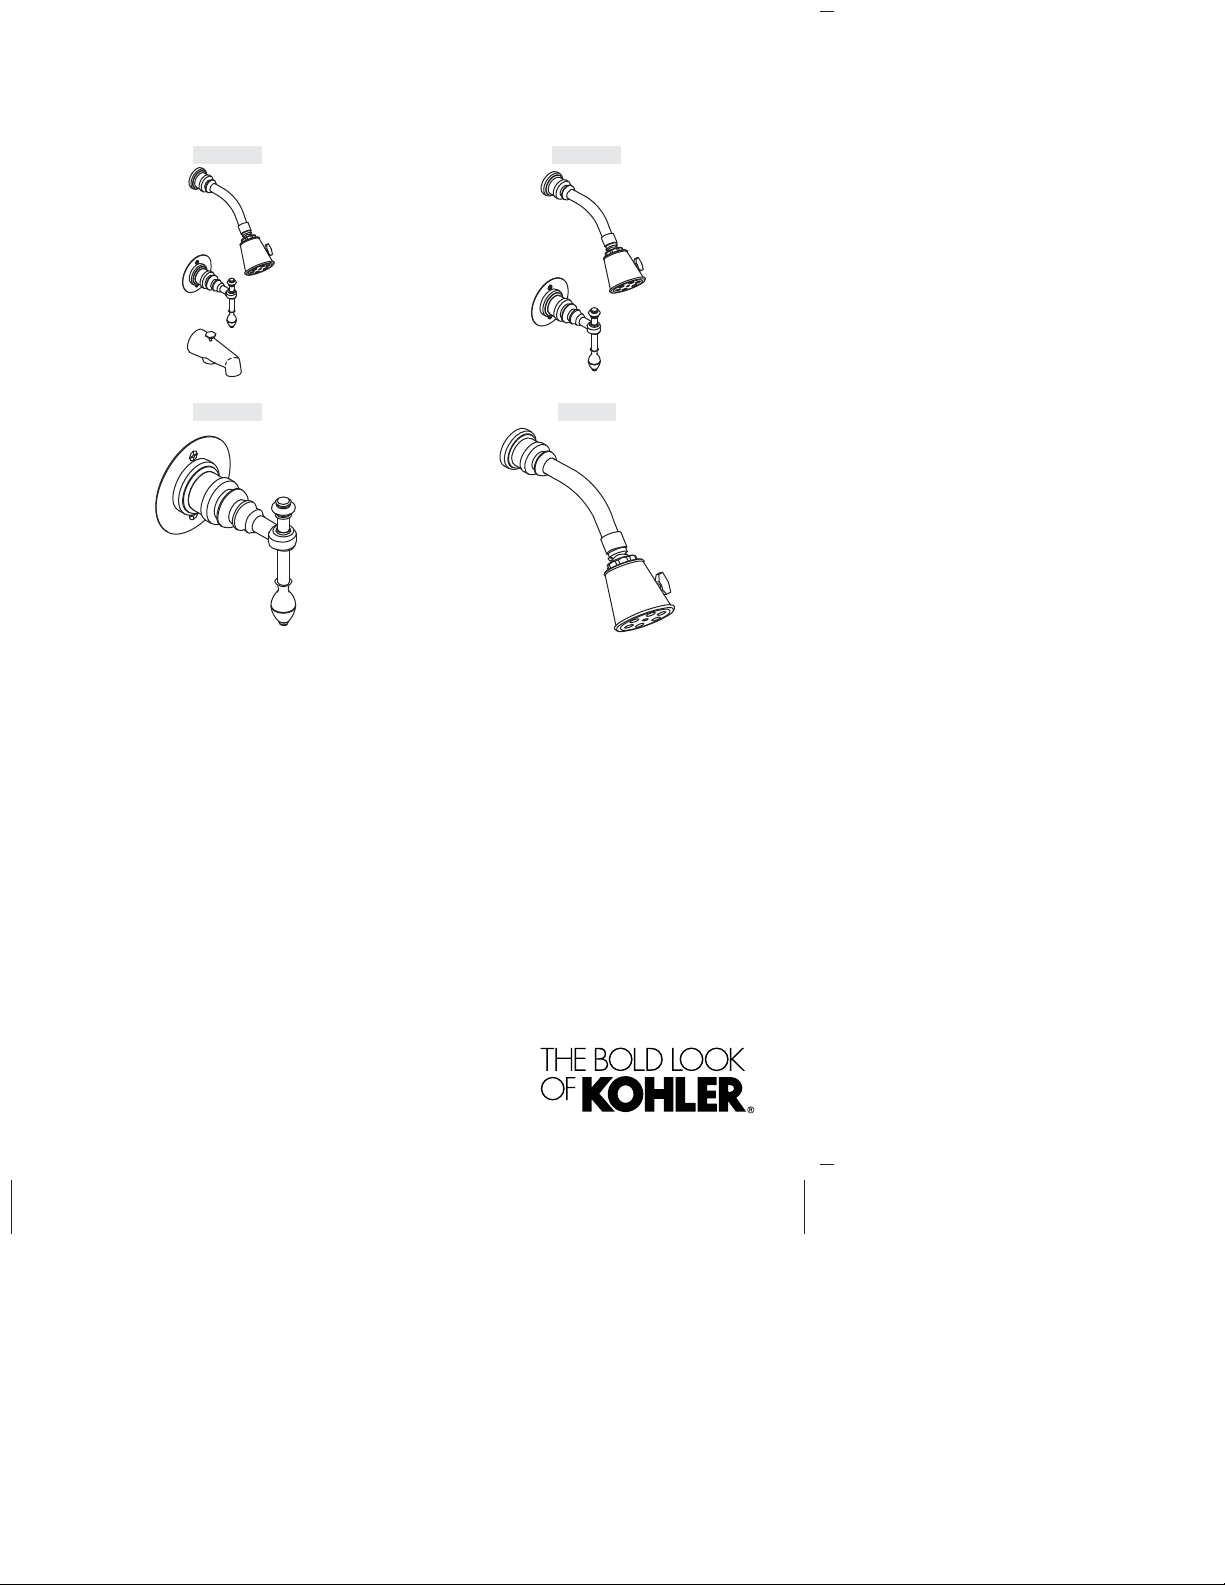
Single-Control Bath and Shower Trim
K-T6808 K-T6809
K-T6810 K-6812
M product numbers are for Mexico (i.e. K-12345M)
Los números de productos seguidos de
M corresponden a México (Ej.
K-12345M)
Français, page “Français-1”
Español, página “Español-1”
1088008-2-C
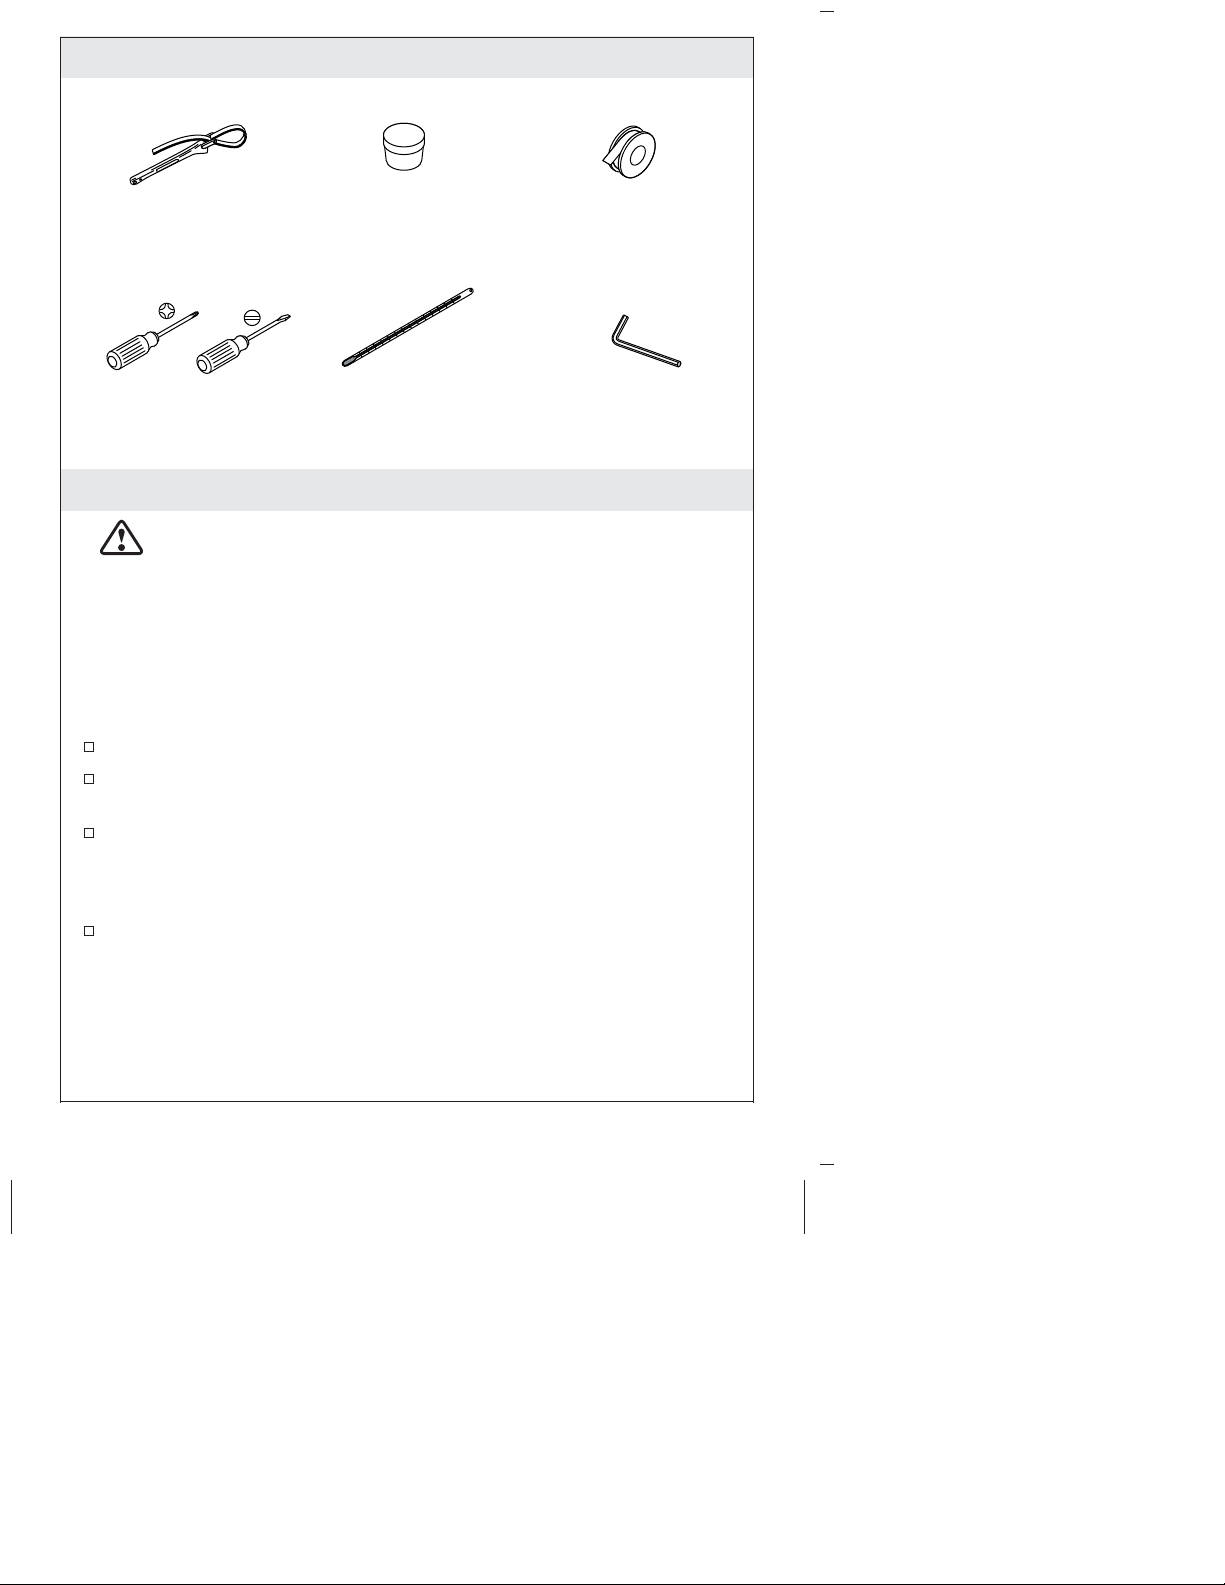
Tools and Materials
Strap Wrench
Thermometer
Thread Sealant TapePlumbers Putty
3/32" Hex Wrench
Before You Begin
WARNING: Risk of scalding. High water temperature can
cause severe burns. Set the water temperature at or below
120°F (49°C) following the adjustment procedure in the valve
Installation and Care Guide.
CAUTION: Risk of product damage. Long screws, for installing
trim, can damage the K-2971-KS valve. When using this valve and
trim in a fiberglass or acrylic installation, use the 88526 Thin Wall
Installation Kit.
Observe all local plumbing and building codes.
The finished wall or bath/shower unit must be installed prior to
installing this trim.
Before installing the trim, determine if the maximum water
temperature is acceptable to the user. If temperature adjustment is
needed, refer to the ″Optional Temperature Limiting Adjustment″
section of this guide.
The valve shuts off by water pressure. Do not force the handle in
any direction. To turn the valve off, gently turn it to the ″OFF″
position.
1088008-2-C 2 Kohler Co.
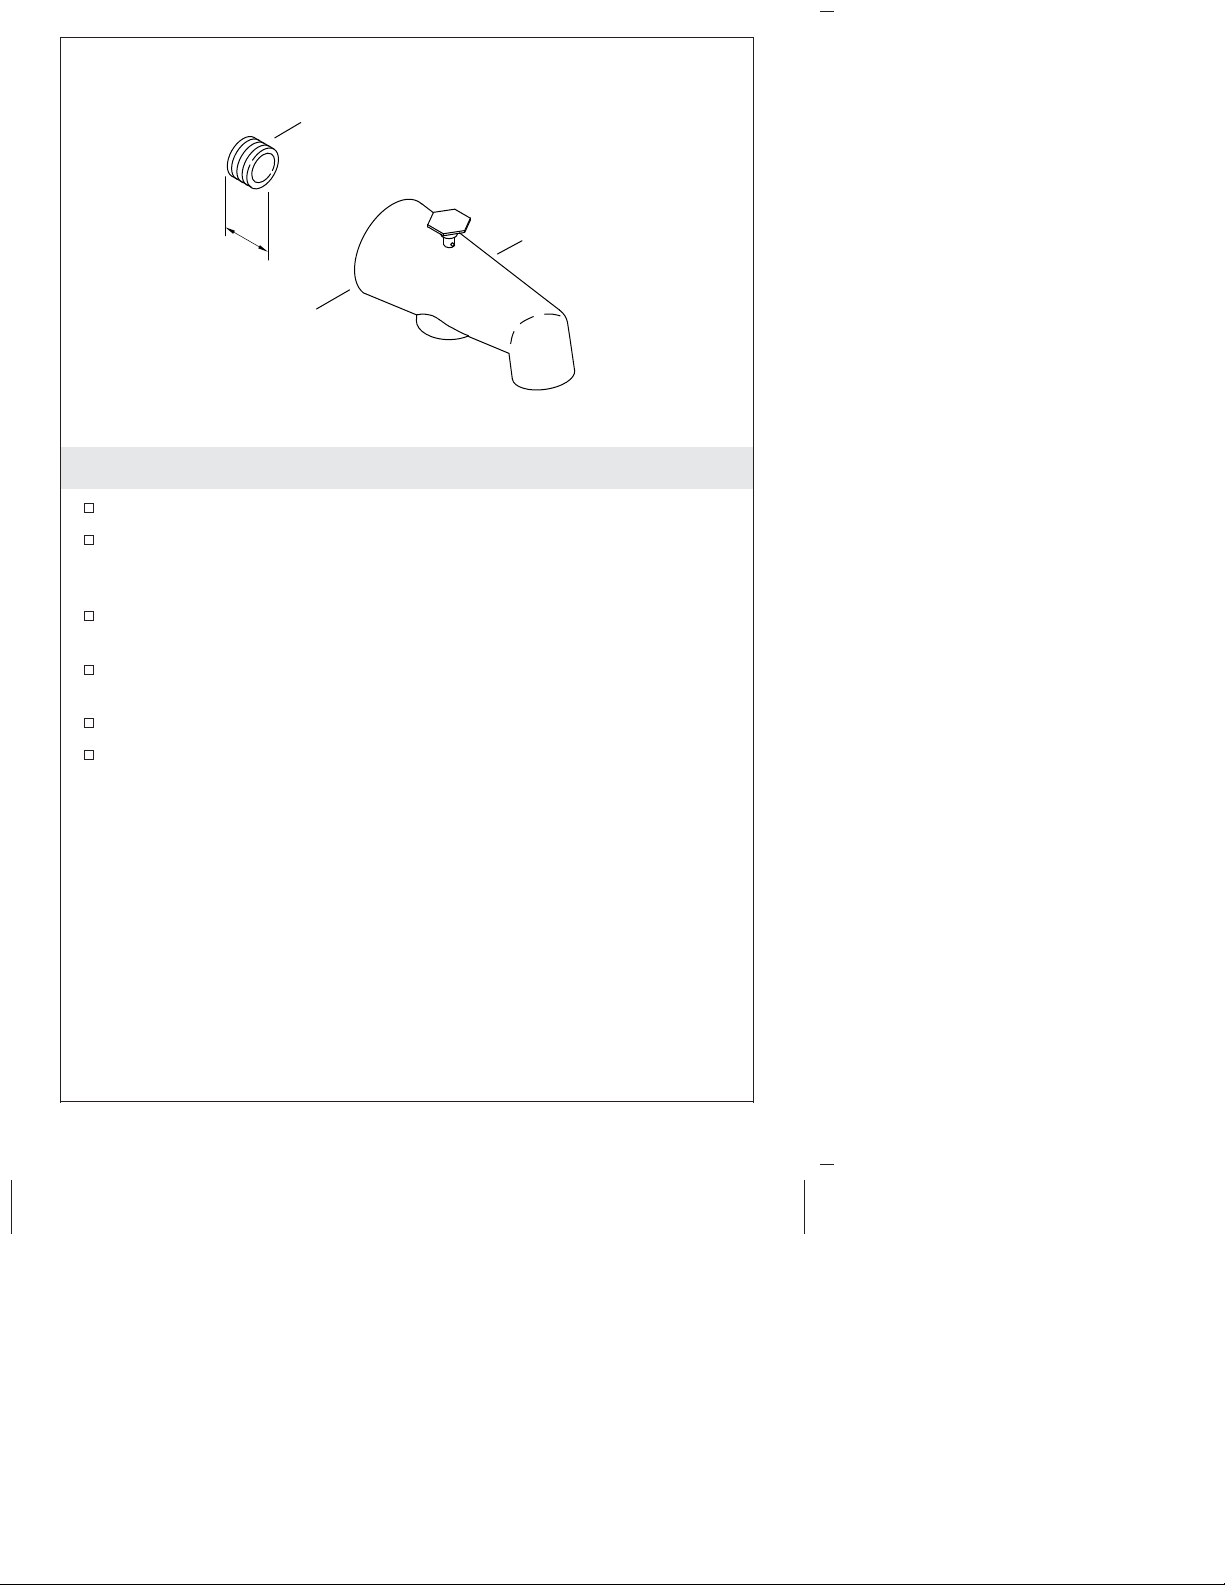
1/2" Nipple
4-7/8" (124 mm) Spout
7/16" (11 mm)
Apply plumbers putty.
1. Install the Spout
Remove the temporary nipple from the bath elbow.
Apply thread sealant to a 1/2″ NPT nipple and install it to the
bath elbow so it extends 11/16″ (17 mm) beyond the finished
wall.
Apply a bead of plumbers putty around the inlet end of the spout
according to the manufacturer’s instructions.
Apply thread sealant to the nipple, and install the spout to the
nipple.
Carefully tighten with a clean strap wrench.
Remove excess putty.
Kohler Co. 3 1088008-2-C
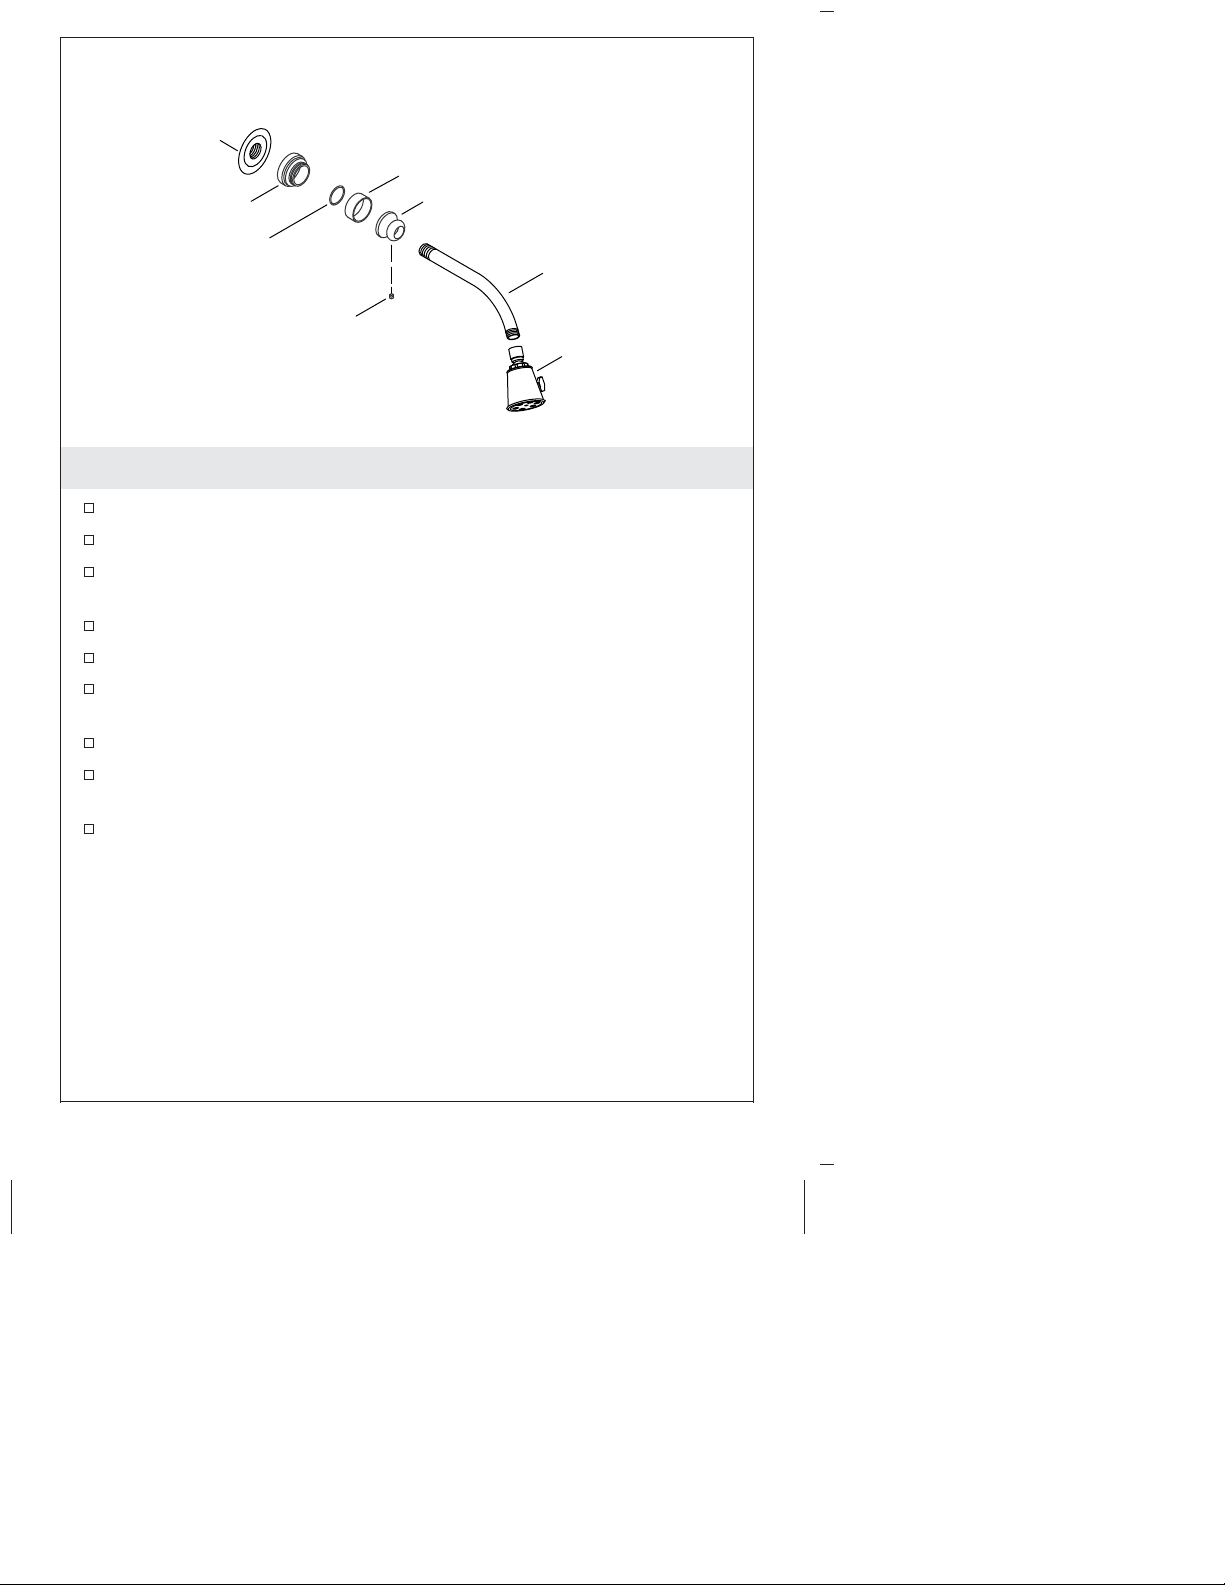
Shower Elbow
Sleeve
Escutcheon
O-Ring
Setscrew
Collar
Shower Arm
Showerhead
2. Install the Showerhead
Remove the temporary nipple from the shower elbow.
Slide the collar, sleeve, and escutcheon onto the shower arm.
Apply thread sealant tape and install the shower arm to the
shower elbow.
Carefully tighten with a clean strap wrench.
Press the escutcheon and the sleeve against the finished wall.
Slide the collar tight against the sleeve and the escutcheon, and
secure with the setscrew.
Turn the water supply on.
Run hot and cold water through the shower arm to flush out dirt
and debris.
Apply thread sealant tape to the shower arm and thread the
showerhead to the shower arm.
1088008-2-C 4 Kohler Co.

High Flow Valve
Standard Valve
Tab
Collar
Valve Stem
Setscrew
Valve Label
Tab
Collar
Valve Stem
Setscrew
O-Ring
3. Water Temperature Adjustment
CAUTION: Risk of personal injury. To eliminate the risk of
scalding, the water temperature should never be set above
120°F (49°C).
NOTE: Do not remove the O-ring and collar at this time. Removing
the O-ring and collar will change the factory setting for the
maximum water temperature.
Turn the valve clockwise to the full open position and let the hot
water run for several minutes. Position a thermometer in the
water stream and check the temperature.
For minor water temperature changes, adjust the setscrew, and
recheck the water temperature.
For major water temperature changes, remove the O-ring and the
collar from the valve stem. Slowly rotate the valve stem until the
desired maximum water temperature is reached.
Reinstall the collar on the valve stem with the setscrew against
the side of the tab.
Reinstall the O-ring, rotate the valve stem counterclockwise to
turn the water off.
Recheck the water temperature.
Complete the information on the valve label (if supplied).
Kohler Co. 5 1088008-2-C
Valve Stem
Valve Stem
Faceplate
Short Sleeve
Discard plaster
guard with dome.
Washer and
Escutcheon
Assembly
Sleeve
Bonnet
Screws
O-Ring
Long Sleeve
Screw
Handle Arm
4. Install the Faceplate and Lever Handle
IMPORTANT! For K-2971-KS valve: If the finished wall is
fiberglass or acrylic, do not use the screws provided. Use the
shallow wall kit listed in the Specification Sheet.
Remove and discard the plaster guard when installed.
Fit the faceplate and the washer and escutcheon assembly with
two screws onto the valve stem.
Unthread the end cap.
Remove the washer and the short sleeve.
Unthread the handle arm with the long sleeve and the O-ring.
Remove the center cap.
Fit the sleeve and the bonnet over the valve stem.
Using a 3/32″ hex wrench, secure the screw to the bonnet.
Position the center cap on the bonnet with the holes aligned.
Ensure that the long sleeve and the O-ring are on the handle arm.
Insert the handle arm through the center cap and bonnet.
Install the short sleeve, curved end first, and washer onto the
handle arm.
Thread the end cap onto the handle arm and hand tighten.
End Cap
Washer
Center Cap
1088008-2-C 6 Kohler Co.

Care and Cleaning
For best results, keep the following in mind when caring for your
KOHLER product:
•
Use a mild detergent such as liquid dishwashing soap and warm
water for cleaning. Do not use abrasive cleaners that may scratch
or dull the surface.
•
Carefully read the cleaner product label to ensure the cleaner is
safe for use on the material.
•
Always test your cleaning solution on an inconspicuous area
before applying to the entire surface.
•
Do not allow cleaners to sit or soak on the surface.
•
Wipe surfaces clean and rinse completely with water immediately
after cleaner application. Rinse and dry any overspray that lands
on nearby surfaces.
•
Use a soft, dampened sponge or cloth. Never use an abrasive
material such as a brush or scouring pad to clean surfaces.
For detailed cleaning information and products to consider, visit
www.kohler.com/clean. To order Care & Cleaning information, call
1-800-456-4537.
Warranty
KOHLER®Faucet Lifetime Limited Warranty
Kohler Co. warrants its Faucets* manufactured after January 1, 1997, to
be leak and drip free during normal residential use for as long as the
original consumer purchaser owns his or her home. If the Faucet
should leak or drip during normal use, Kohler Co. will, free of charge,
mail to the purchaser the cartridge necessary to put the Faucet in good
working condition. This warranty applies only to Kohler Faucets
installed in the United States of America, Canada or Mexico (″North
America″).
Kohler Co. also warrants all other aspects of the faucet or accessories
(″Faucet″)*, (except gold, non-Vibrant
of defects in material and workmanship during normal residential use
for as long as the original consumer purchaser owns his or her home.
This warranty applies only to Kohler Faucets installed in North
America. If a defect is found in normal residential use, Kohler Co. will,
at its election, repair, provide a replacement part or product, or make
appropriate adjustment. Damage to a product caused by accident,
misuse, or abuse is not covered by this warranty. Improper care and
Kohler Co. 7 1088008-2-C
, non-chrome finishes) to be free
®

Warranty (cont.)
cleaning will void the warranty**. Proof of purchase (original sales
receipt) must be provided to Kohler Co. with all warranty claims.
Kohler Co. is not responsible for labor charges, installation, or other
incidental or consequential costs. In no event shall the liability of
Kohler Co. exceed the purchase price of the Faucet.
If the Faucet is used commercially or is installed outside of North
America, or if the finish is gold, non-Vibrant or a painted or powder
coated color finish, Kohler Co. warrants the Faucet to be free from
defects in material and workmanship for one (1) year from the date the
product is installed, under Kohler Co.’s standard one-year limited
warranty.
If you believe that you have a warranty claim, contact Kohler Co.,
either through your Dealer, Plumbing Contractor, Home Center or
E-tailer, or by writing Kohler Co., Attn.: Customer Care Center, 444
Highland Drive, Kohler, WI 53044, USA. Please be sure to provide all
pertinent information regarding your claim, including a complete
description of the problem, the product, model number, color, finish,
the date the product was purchased and from whom the product was
purchased. Also include your original invoice. For other information,
or to obtain the name and address of the service and repair facility
nearest you, call 1-800-4-KOHLER (1-800-456-4537) from within the
USA and Canada, and 001-800-456-4537 from within Mexico, or visit
www.kohler.com within the USA, www.ca.kohler.com from within
Canada, or www.mx.kohler.com in Mexico.
KOHLER CO. AND/OR SELLER ARE PROVIDING THESE
WARRANTIES IN LIEU OF ALL OTHER WARRANTIES,
EXPRESSED OR IMPLIED, INCLUDING BUT NOT LIMITED TO
THE IMPLIED WARRANTIES OF MERCHANTABILITY AND
FITNESS FOR A PARTICULAR PURPOSE. KOHLER CO. AND/OR
SELLER DISCLAIM ALL LIABILITY FOR SPECIAL, INCIDENTAL
OR CONSEQUENTIAL DAMAGES. Some states/provinces do not
allow limitations of how long an implied warranty lasts or the
exclusion or limitation of such damages, so these limitations and
exclusions may not apply to you. This warranty gives the consumer
specific legal rights. You may also have other rights that vary from
state/province to state/province.
This is Kohler Co.’s exclusive written warranty.
*Trend
components; WaterHaven
faucets, MasterShower®tower, BodySpa systems and
®
tower, systems and components; Tripoint
®
®
faucets, Polished Gold, non-Vibrant and painted or powder coated
finishes, fittings; all items within the ″Fixture Related″ section of the
Kohler Faucets Price Book, drains, Duostrainer
sink strainers,
®
1088008-2-C 8 Kohler Co.

Warranty (cont.)
soap/lotion dispensers, Moxie
Wireless Speaker; and faucets used in
®
commercial settings, and outside North America, are covered by
Kohler Co.’s one-year limited warranty.
**Never use cleaners containing abrasive cleansers, ammonia, bleach,
acids, waxes, alcohol, solvents or other products not recommended for
chrome. This will void the warranty.
Kohler Co. 9 1088008-2-C
 Loading...