

Kohler K-2362 Series, K-2362-8, K-2362-4, K-2362-1 Installation Manual

Installation Guide
Pedestal Lavatory
K-2362
M product numbers are for Mexico (i.e. K-12345M)
Los números de productos seguidos de
M corresponden a México (Ej.
K-12345M)
Français, page “Français-1”
Español, página “Español-1”
1020683-2-E
Thank You For Choosing Kohler Company
We appreciate your commitment to Kohler quality. Please take a few
minutes to review this manual before you start installation. If you
encounter any installation or performance problems, please don’t
hesitate to contact us. Our phone numbers and website are listed on
the back cover. Thanks again for choosing Kohler Company.
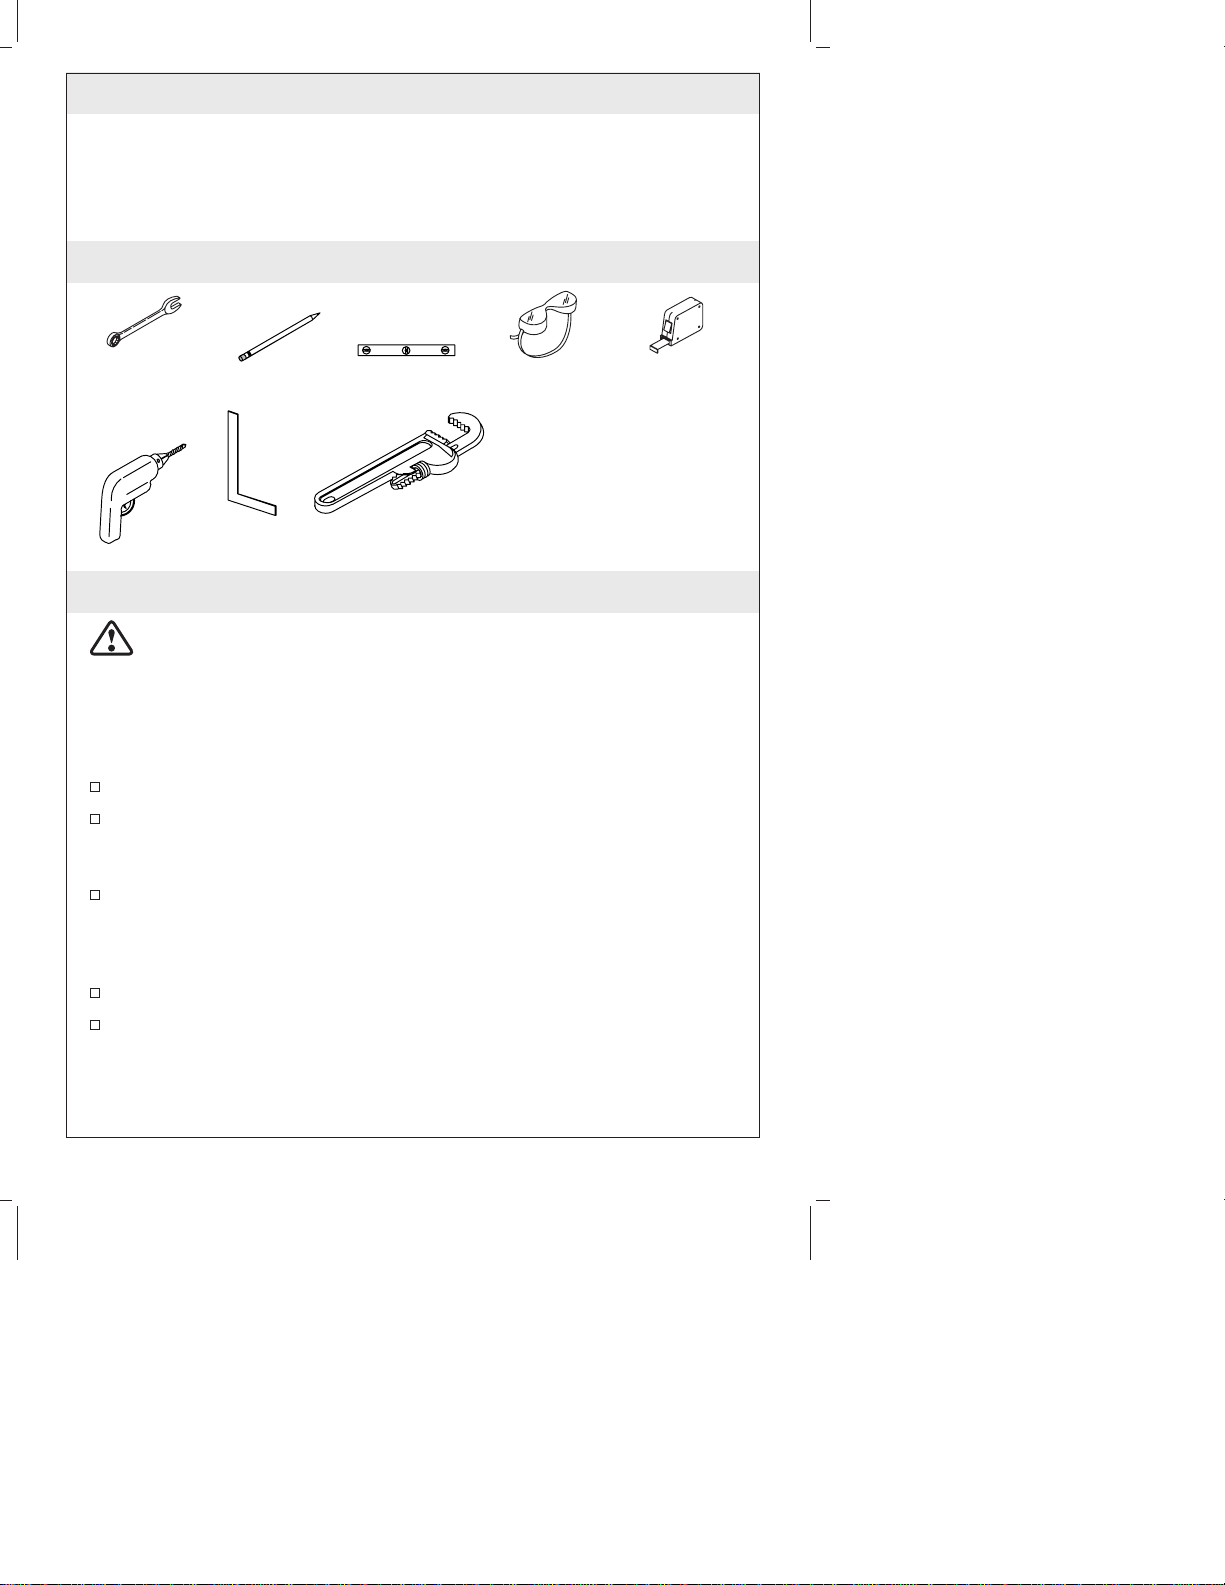
Tools and Materials
1/2" and 9/16"
Combination
Wrenches
Drill
Pencil
Square
Level
Pipe
Wrench
Safety
Glasses
Plus:
• Common Woodworking
Tools and Materials
• 3/16" Drill Bit
Tape
Measure
Before You Begin
CAUTION: Risk of personal injury. This pedestal lavatory is
heavy. Do not attempt to lift or install the pedestal lavatory
without assistance.
IMPORTANT! The lavatory must be supported by a pedestal. Do
not install the lavatory as a wall-mount unit, undermount, or
sell-rimming lavatory.
Observe all local plumbing and building codes.
Prior to installation, unpack the new lavatory and inspect it for
damage. Return the lavatory to its protective carton until you are
ready to install it.
This installation guide provides installation steps for attaching the
lavatory to wood frame construction. For other installations,
supply suitable bracing and fastening devices of sufficient size
and strength.
The walls and the floor must be square, plumb, and level.
Fixture dimensions are nominal and conform to tolerances in
ASME Standard A112.19.9M.
1020683-2-E 2 Kohler Co.
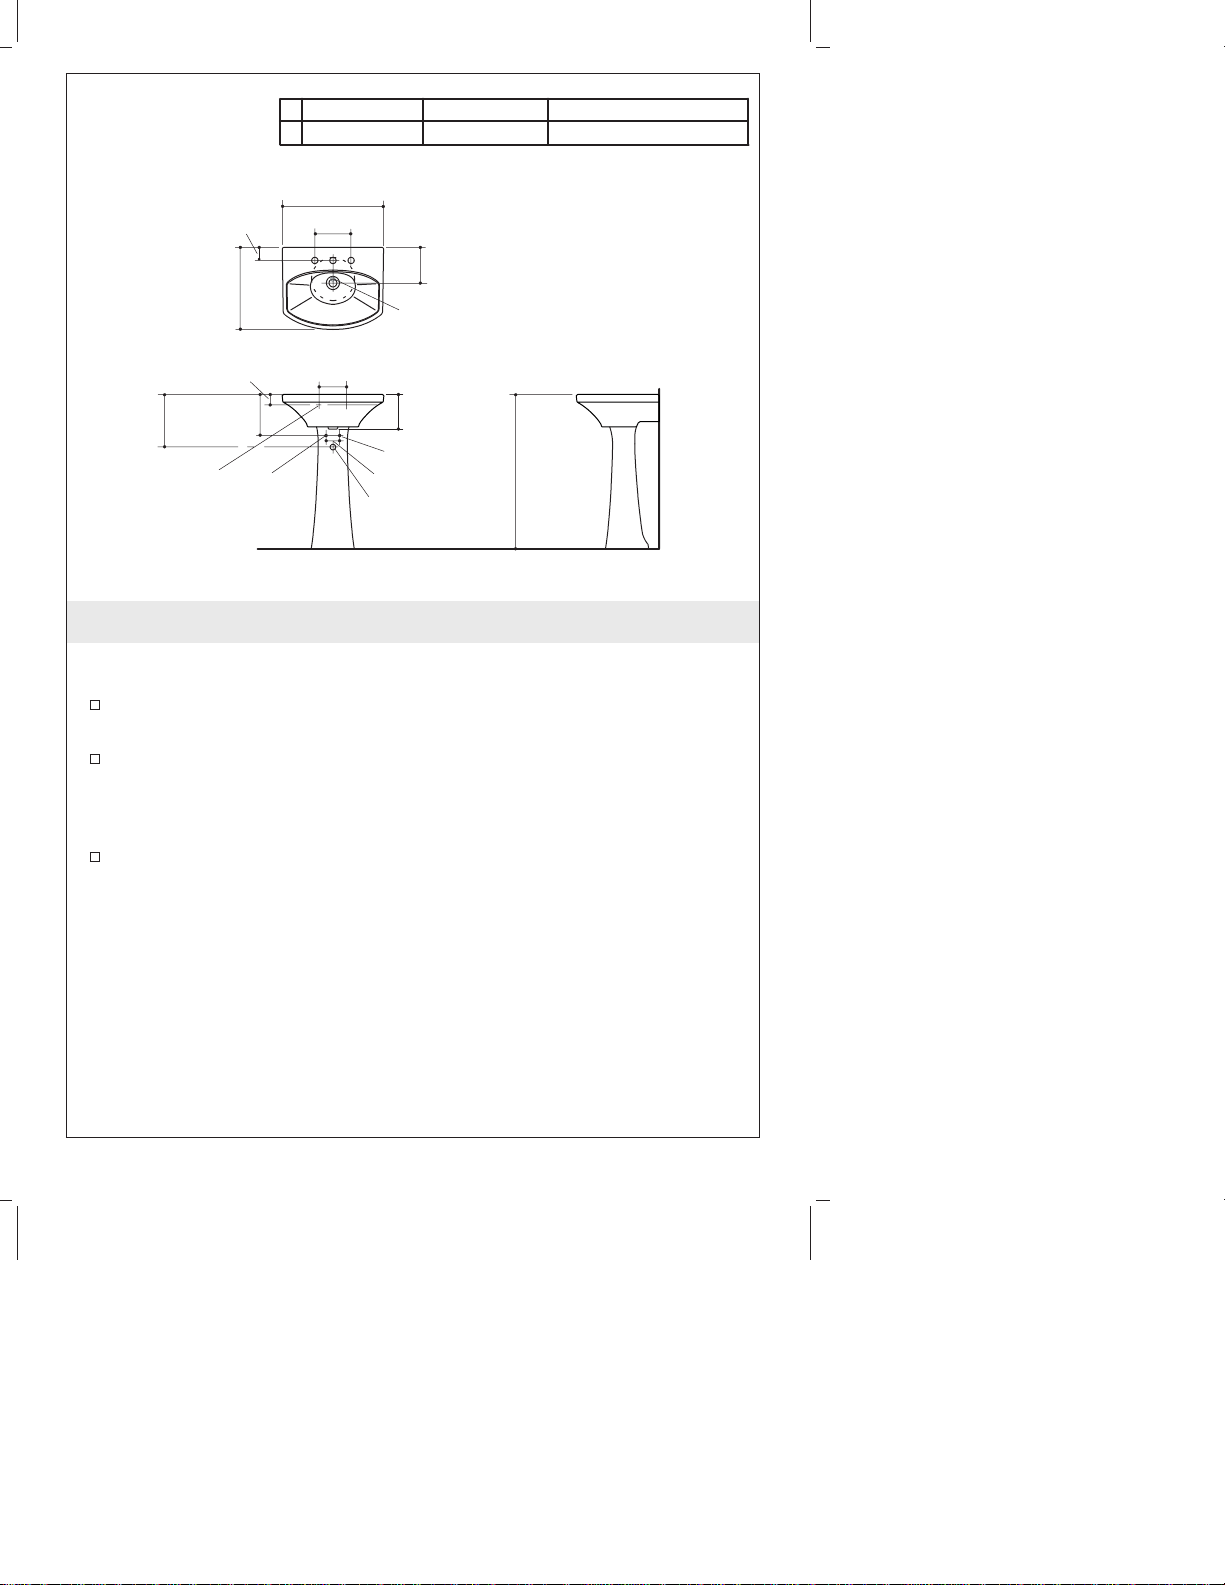
K-2362-4 K-2362-8 K-2362-1
A 4" (10.2 cm) 8" (20.3 cm) Single Hole
2-5/8"
(6.7 cm)
18-7/8"
(47.9 cm)
2-1/4"
(5.7 cm)
11-1/2"
(29.2 cm)
1/2" (1.3 cm) D.
Anchor Holes in
Lavatory
9"
(22.9 cm)
22-3/4" (57.8 cm)
A
6" (15.2 cm)
3/8" Hot
8-1/8"
(20.6 cm)
1/2" (1.3 cm) D. Mounting
Hole in Pedestal
7-11/16"
(19.5 cm)
3/8" Cold
4" (10.2 cm)
1-1/4" (3.2 cm)
OD
Finished Floor
34-1/2"
(87.6 cm)
1. Prepare the Site
NOTE: The open position of the supply stop handles must not
extend more than 4-1/2″ (11.4 cm) from the finished wall.
Install the 3/8″ water supply lines and 1-1/4″ drain piping
according to the roughing-in information.
Install wood backing behind the finished wall to provide a secure
material for the anchoring devices. The combined thickness of the
wood backing and the finished wall material must be a minimum
of 1-1/2″ (3.8 cm).
Complete the finished wall.
Finished
Wall
Kohler Co. 3 1020683-2-E
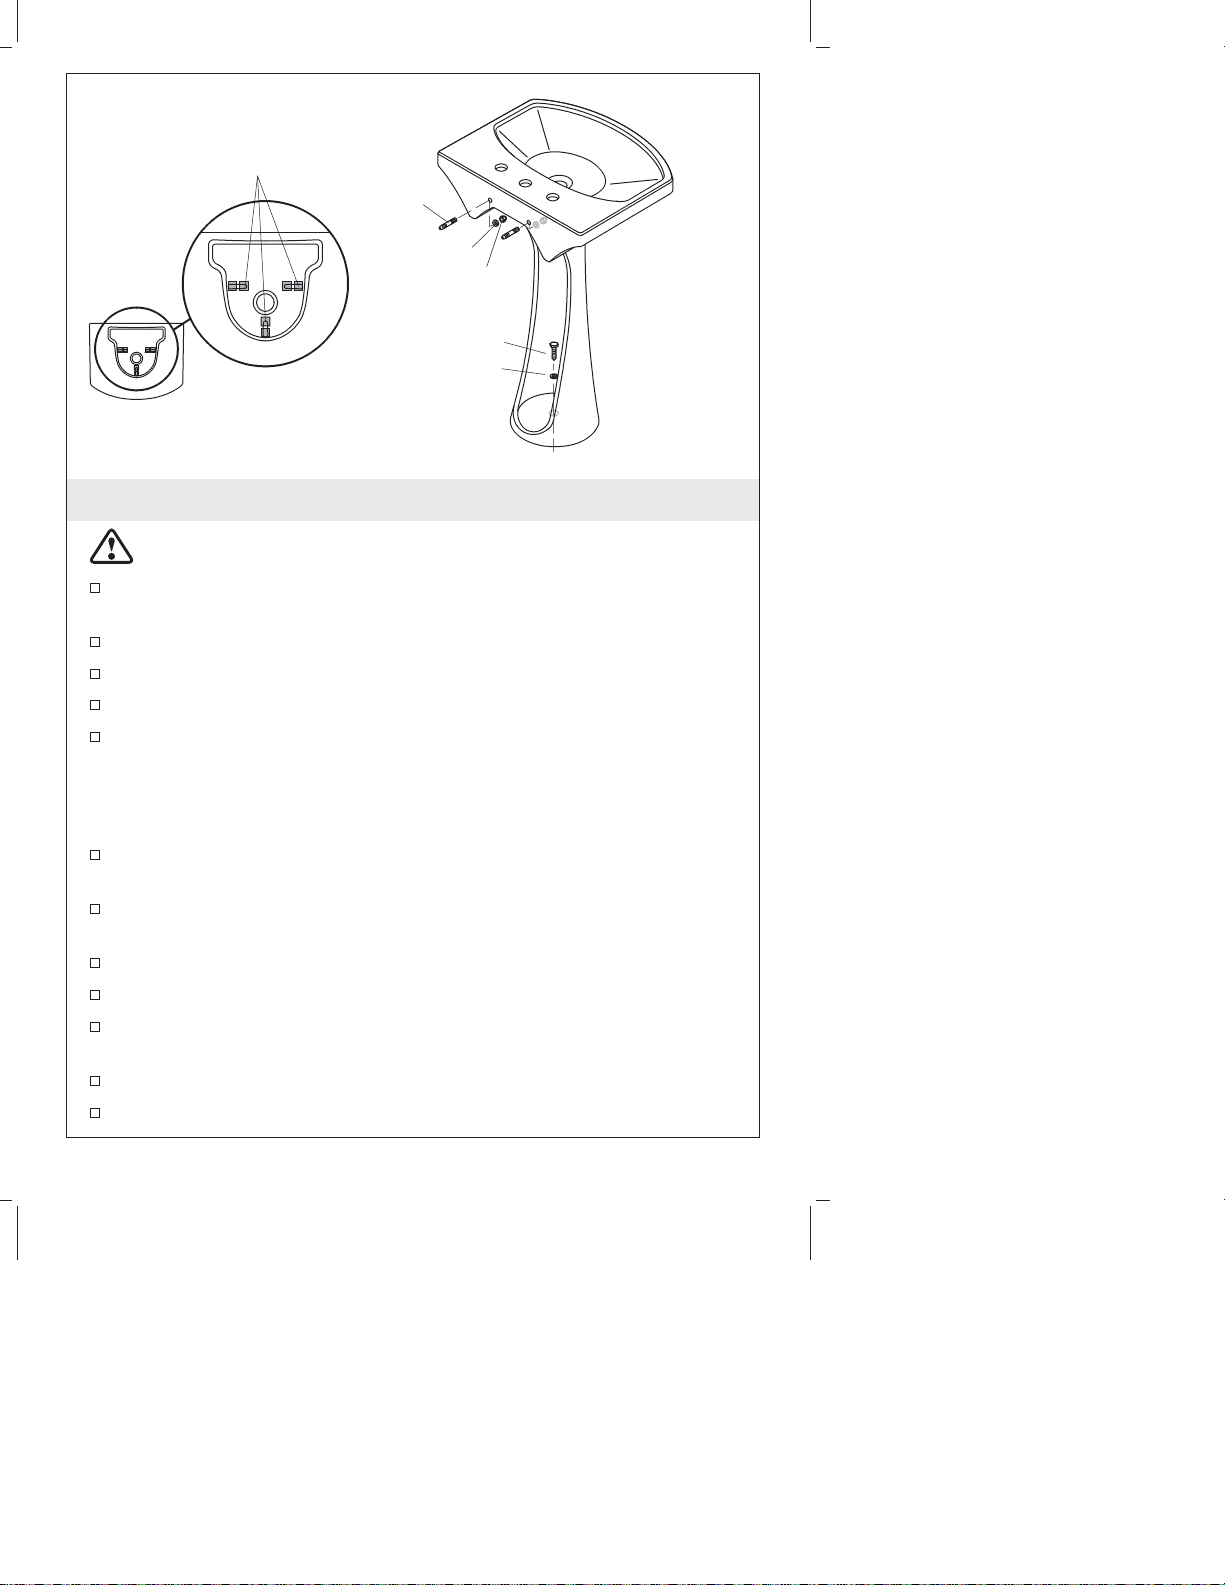
Apply two self-adhesive
pads to the underside of
the basin.
Hanger Bolt
Washer
Cap Nuts
The drain and
faucet are not
shown to
improve clarity.
Lag Bolt
Washer
Pedestal
2. Install the Lavatory
CAUTION: Risk of personal injury. Vitreous china is heavy. Do
not attempt to lift or install this product without assistance.
Apply two self-adhesive pads to the underside of the lavatory
basin.
Mark the centerline of the pedestal on the floor with a pencil.
Align the center of the pedestal on the marked centerline.
Place the lavatory onto the pedestal.
Verify the lavatory is level and flush against the finished wall.
Adjust or add self-adhesive pads as needed.
NOTE: If the bottom of the lavatory contacts the pedestal, reposition
the self-adhesive pads.
Mark the two lavatory anchoring hole locations on the finished
wall with a pencil.
Mark the pedestal anchoring hole on the floor through the hole in
the pedestal bottom.
Remove the lavatory from the pedestal. Set the lavatory aside.
Set the pedestal aside.
Drill 3/16″ holes at the marked locations on the finished wall and
the floor.
Install the hanger bolts to the wood backing material.
Thread the cap nuts onto the hanger bolts.
1020683-2-E 4 Kohler Co.

Install the Lavatory (cont.)
Thread the hanger bolts into the finished wall until each hanger
bolt is exposed 1-1/2″ (3.8 cm) between the cap nut and the
finished wall.
Remove the cap nuts.
Install the faucet and drain to the lavatory according to the
manufacturer’s instructions.
Move the pedestal back into position.
Place the lavatory over the hanger bolts. Ensure the lavatory is
flush against the pedestal and the finished wall.
Remove the lavatory from the pedestal. Set the lavatory aside.
CAUTION: Risk of product damage. Do not overtighten the
washer and lag bolt. Overtightening may damage the product.
Thread a washer and lag bolt through the hole in the pedestal
and into the floor until the washer contacts the pedestal. Do not
overtighten.
Carefully set the lavatory on the pedestal so the hanger bolts
extend through the lavatory anchoring holes.
Verify the installation is level and properly positioned.
CAUTION: Risk of product damage. Do not overtighten the cap
nuts. Overtightening may damage the product.
Thread a cap nut and washer over each hanger bolt until the
washer and the cap nut are tight against the lavatory.
Secure the P-trap to the drain.
Connect the water supply lines to the faucet according to the
manufacturer’s instructions.
Kohler Co. 5 1020683-2-E
 Loading...