

Page 1
Installation Guide
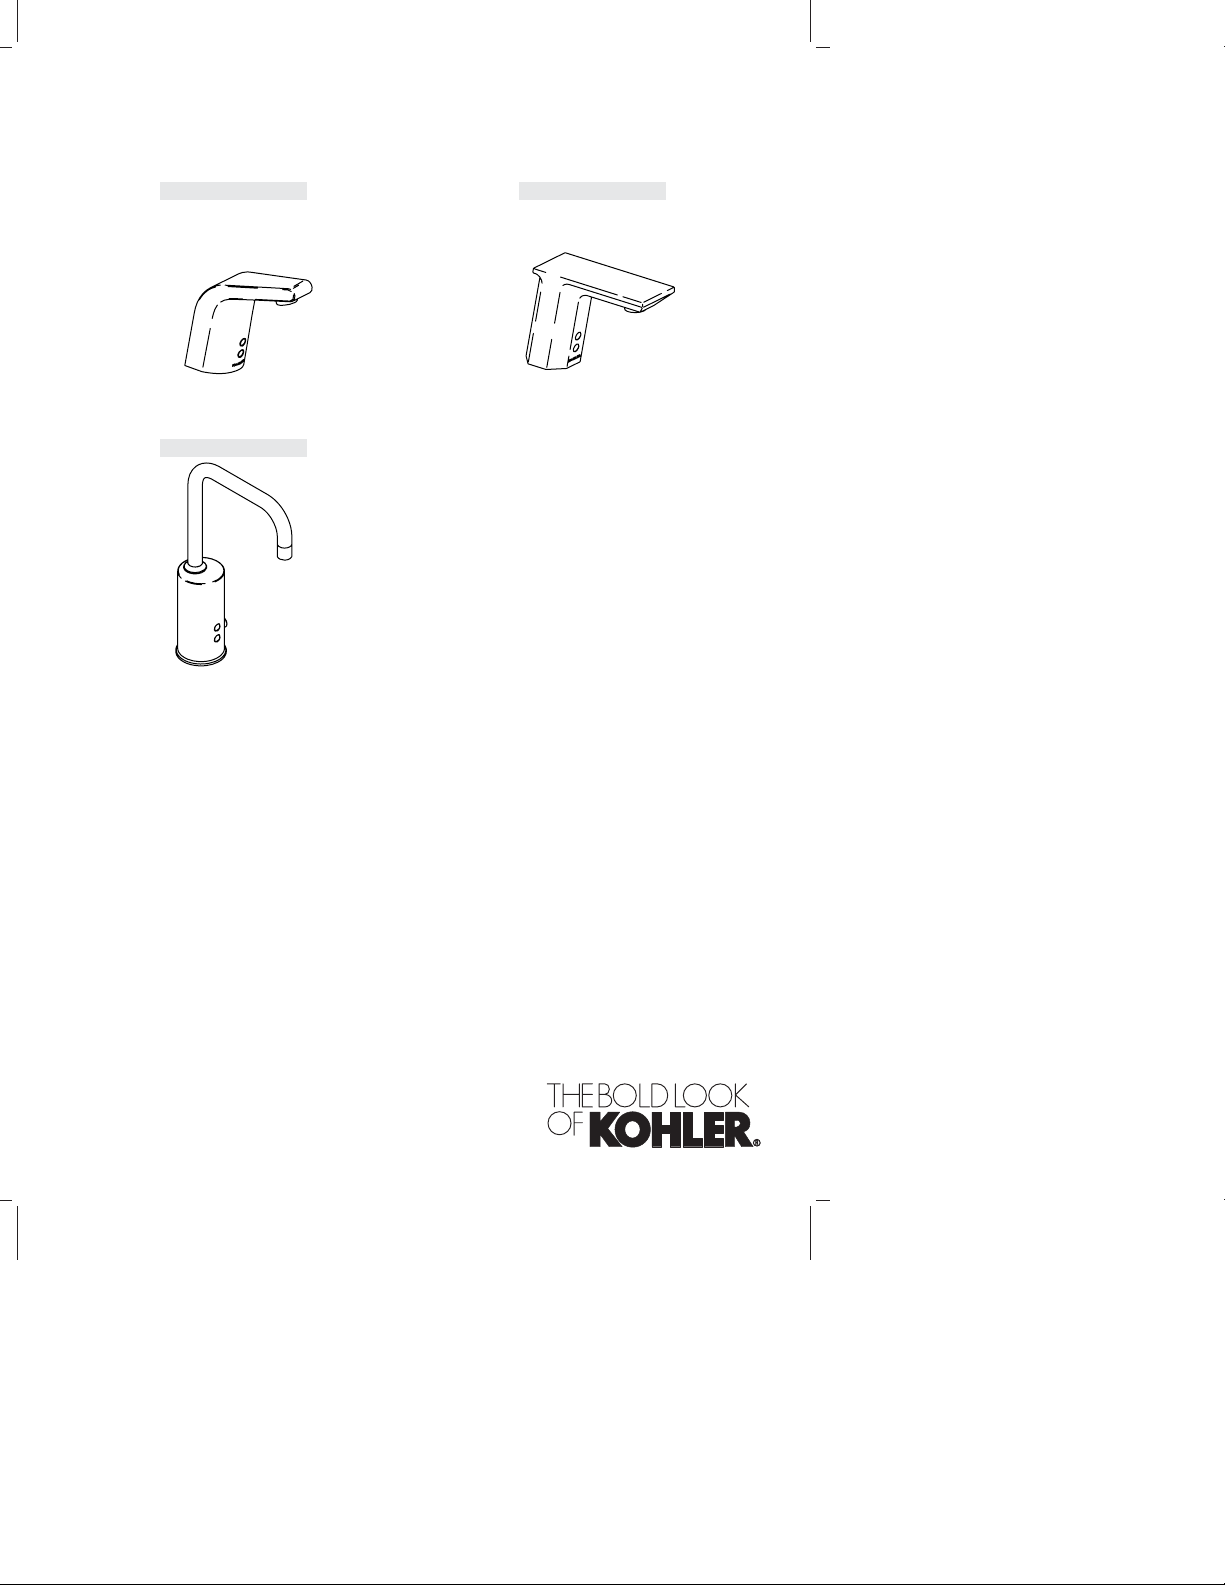
Electronic Lavatory Faucet
K-13460, K-13461 K-13466, K-13467
K-13472, K-13473
M product numbers are for Mexico (i.e. K-12345M)
Los números de productos seguidos de
M corresponden a México (Ej.
K-12345M)
Français, page “Français-1”
Español, página “Español-1”
1102759-2-B
Page 2
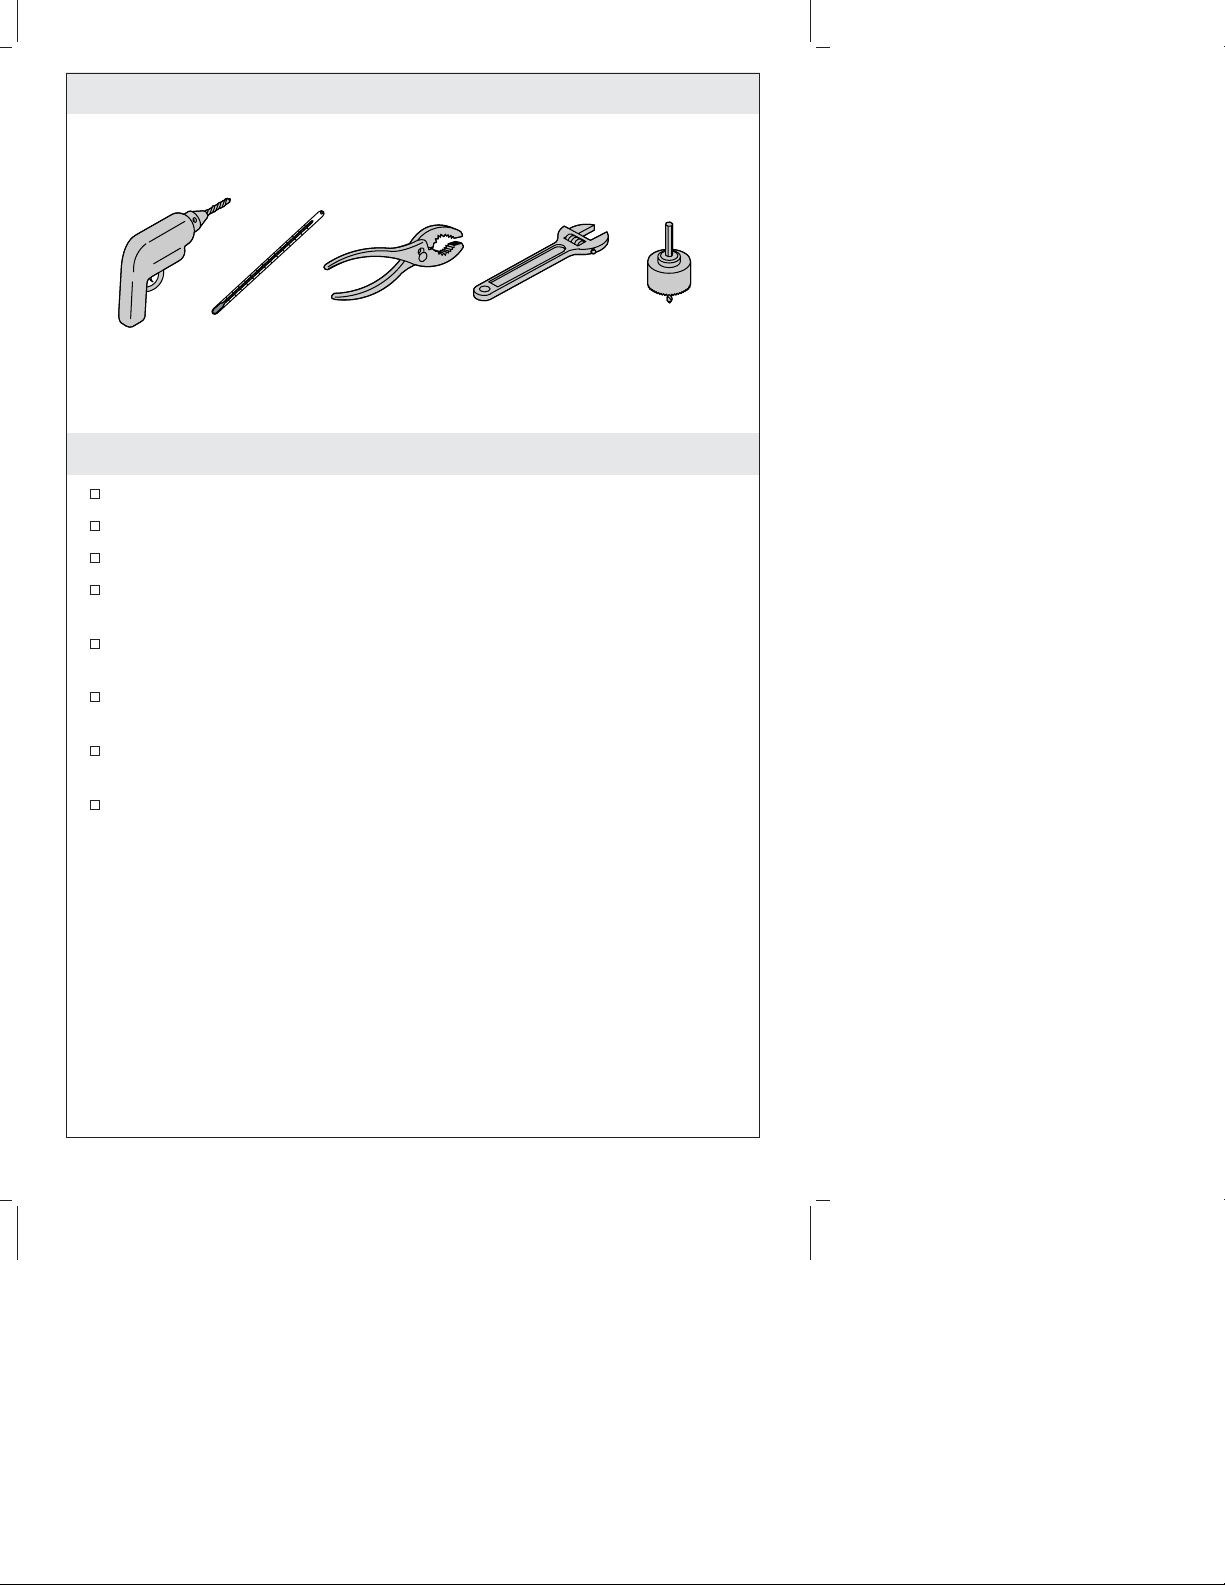
Tools and Materials
1-1/4" D. to
2-1/2" D.
Hole Bit
Before You Begin
Observe all local plumbing and building codes.
Shut off the main water supply.
This faucet is for use on a single-hole lavatory.
For new installations, install the faucet and drain to the lavatory
before installing the lavatory.
The faucet shown in this guide may differ from your actual
product. The installation steps still apply.
In order for this faucet to function properly, install the faucet so
the sensor points directly toward the user.
The faucet is rated at6VDC1Wandisoperated by two AAA
DC batteries (provided and pre-installed).
Kohler Co. reserves the right to make revisions in the design of
faucets without notice, as specified in the Price Book.
1102759-2-B 2 Kohler Co.
Page 3

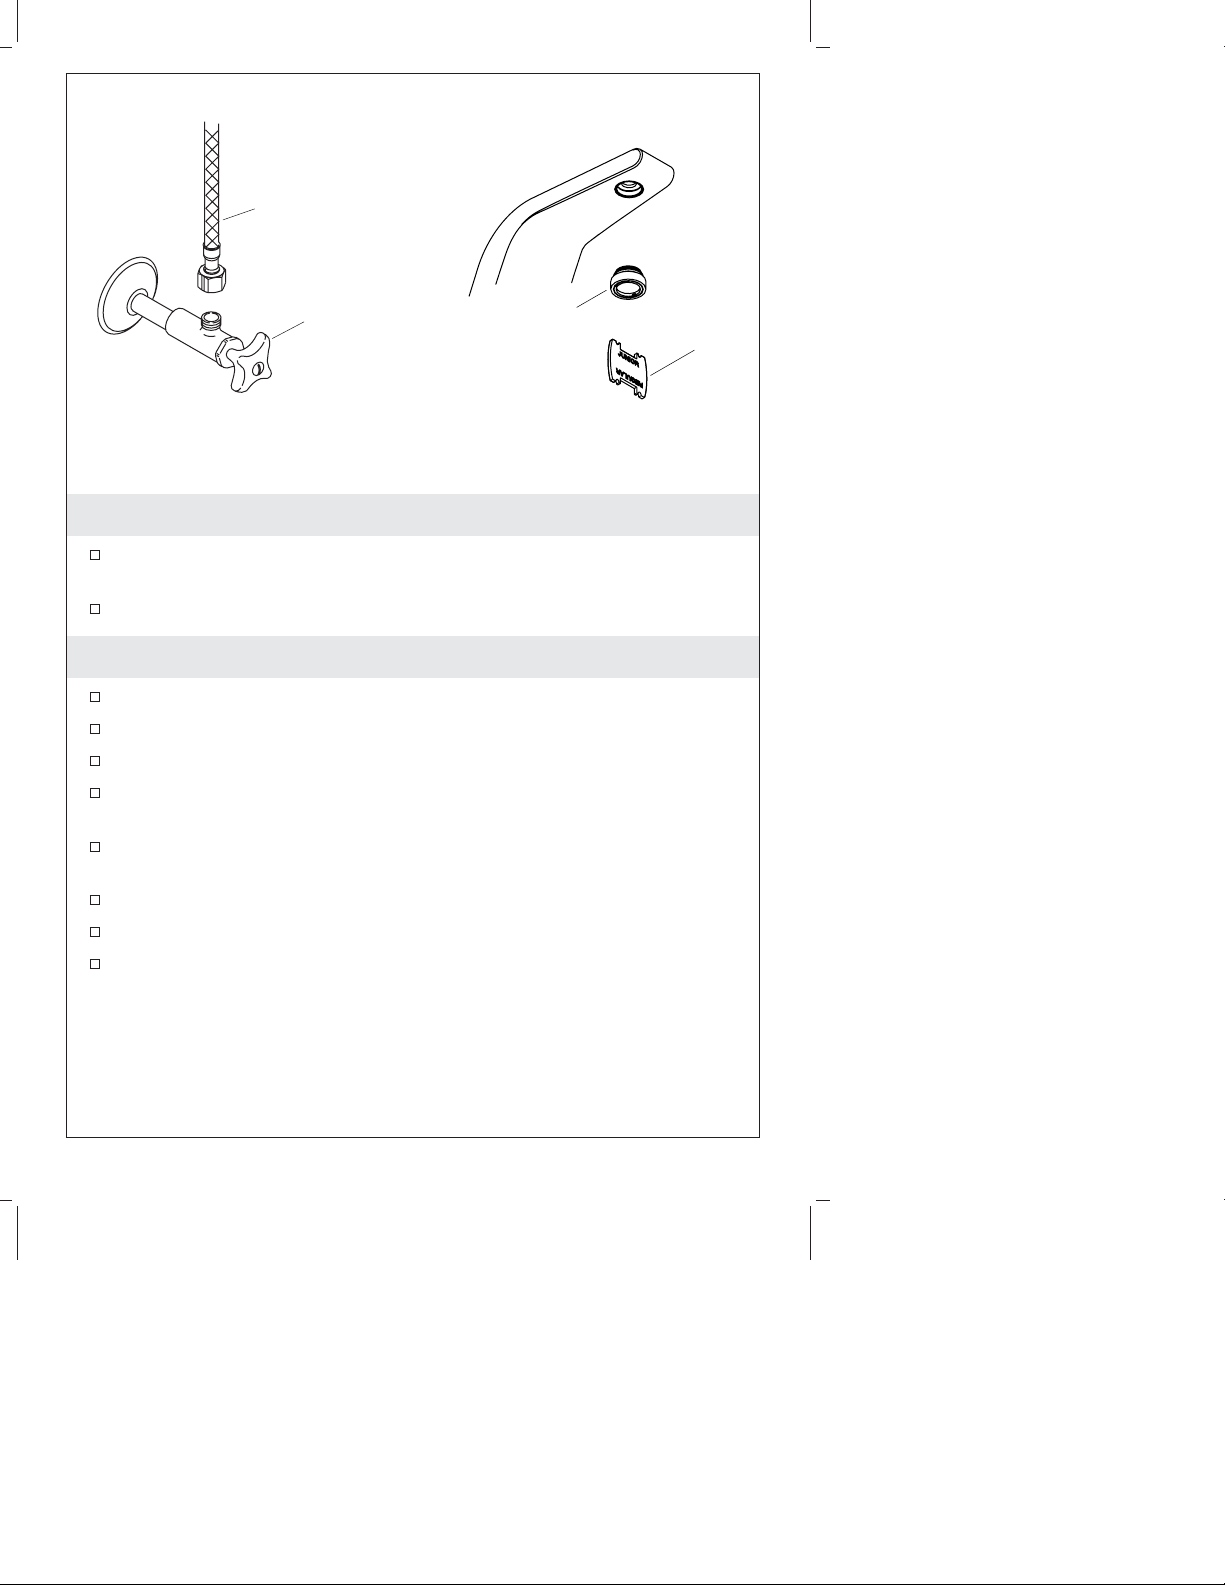
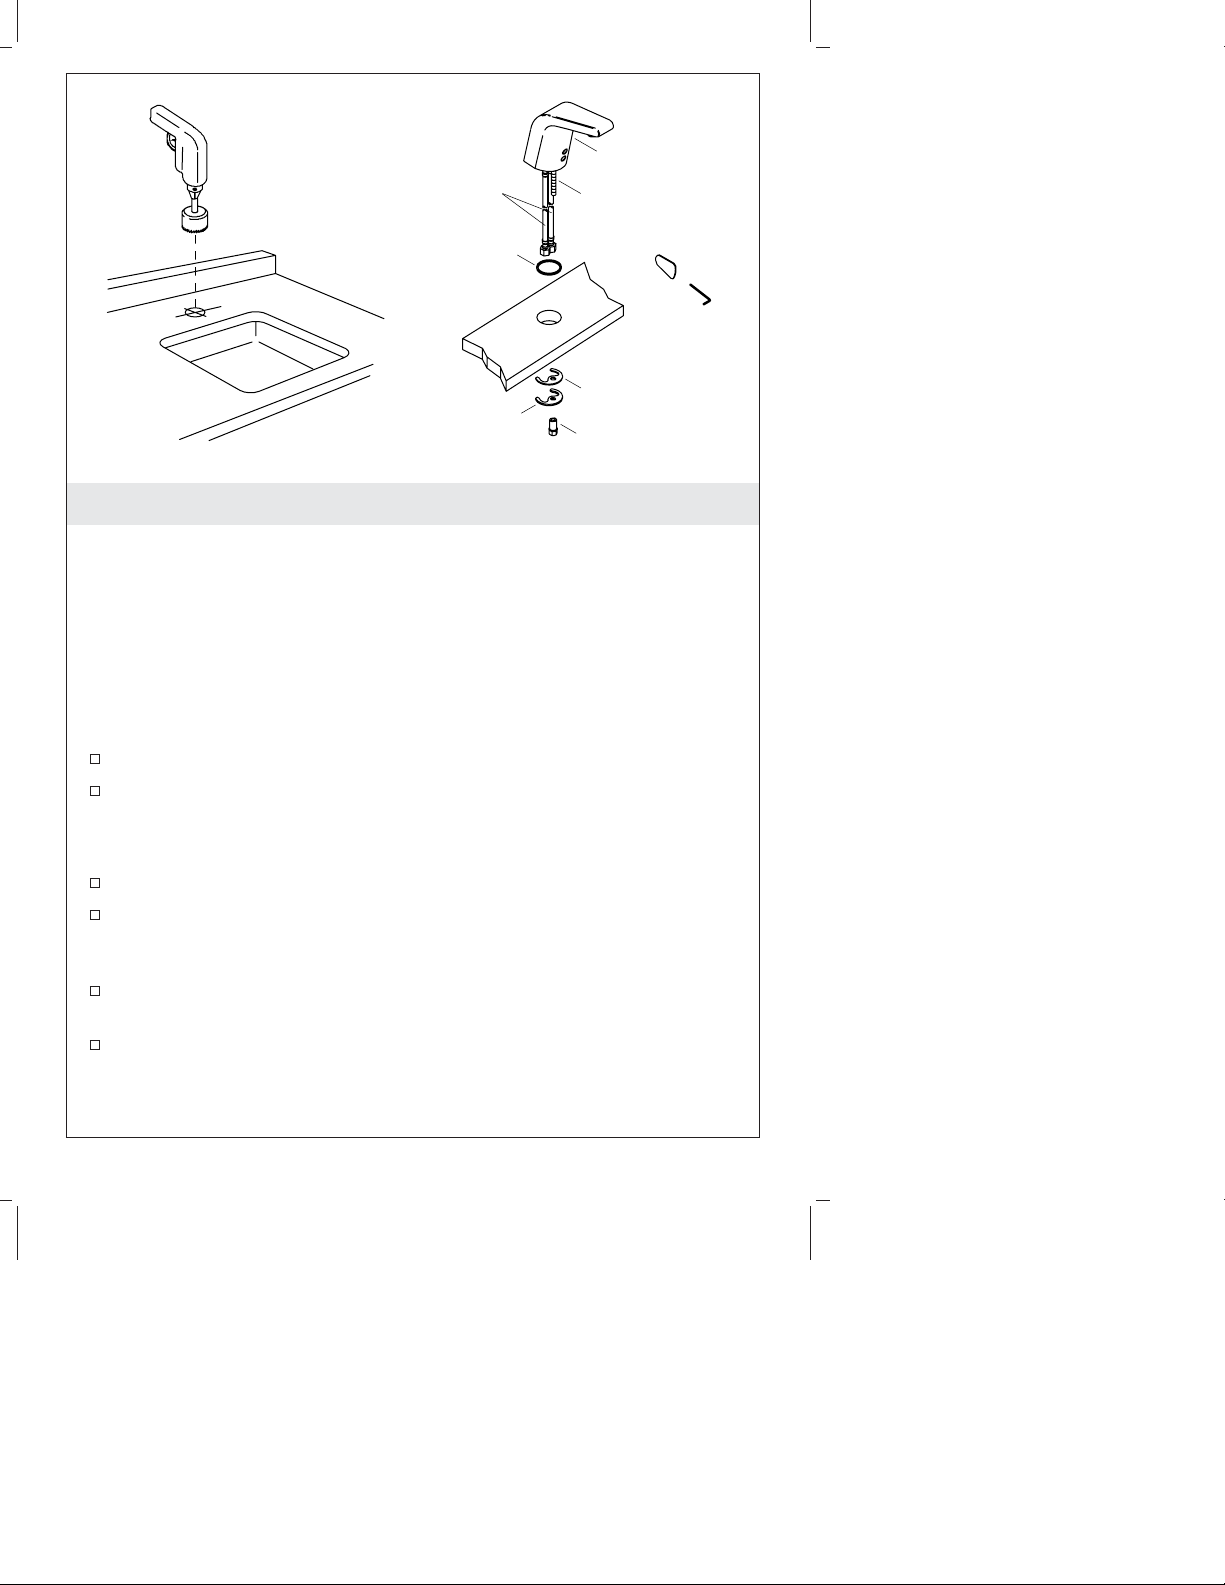
Without Escutcheon
Spout
Supply Hoses
Gasket
Bracket
Stud
Rubber Washer
Nut
1. Install the Faucet
Prepare the Site
NOTE: Before drilling the mounting hole, use the following
provisions for proper placement: (1) A 1-1/4″ (3.2 cm) minimum to
2-1/2″ (6.4 cm) maximum diameter mounting hole is required. (2) A
minimum distance of 1-3/4″ (4.4 cm) is required between the back
of the faucet spout and the wall to allow access to the screw. (3) A
1-1/8″ (2.9 cm) maximum distance is required between the lavatory
basin edge and the base of the faucet spout.
Determine the mounting hole location.
Drill a hole through the mounting surface according to the
surface manufacturer’s instructions.
Install the Faucet
Install the stud to the underside of the faucet.
Slide the gasket over the flexible hoses and stud, then seat the
gasket in the groove on the underside of the spout.
Insert the spout with flexible hoses and stud through the
mounting hole.
From under the lavatory, slide the rubber washer and bracket
onto the stud.
Thread the nut onto the stud to secure the faucet to the mounting
surface.
Kohler Co. 3 1102759-2-B
Page 4
Supply
Hose
Supply
Stop
Faucet Aerator
2. Connect the Supplies
Connect the supply hoses to the supply stops. Left is hot. Right is
cold.
Tighten the connections with an adjustable wrench.
3. Installation Checkout
Connect the drain tailpiece into the P-trap.
Using the key provided, remove the aerator from the spout.
If applicable, uncover the drain.
Turn on the main water supply and check for leaks. Adjust as
needed.
Allow the water to run through the spout for about one minute to
remove any debris. Check for leaks and adjust as needed.
Close the water supplies.
Using the key provided, reinstall the aerator to the spout.
Turn on the water supplies.
Key
1102759-2-B 4 Kohler Co.
Page 5

Troubleshooting
Symptoms Probable
1. No water
flow.
Causes
A. Filter is
plugged.
B. Sensor eyes
are dirty.
C. Water not
turned on.
D. Incorrect
installation.
E. The aerator
is plugged.
F. Sensor eyes
are scratched.
G. A flex hose
is kinked.
H. Batteries
have just been
replaced.
I. Battery life
expired.
J. Bleed hole
in diaphragm
is plugged or
debris exists
on the seal.
K. Solenoid is
broken.
Recommended Action
A. Clean or replace the filter.
B. Wipe the sensor eyes with a
damp soft cloth. Wipe dry with a
dry soft cloth.
C. Verify that the water supply is
turned on and that pressure is at
least 20 psi (137 kPa).
D. Verify that the faucet is
mounted as instructed in the
installation guide. Ensure that the
sensor eyes are above the rim of
the lavatory. Refer to the
installation instructions.
E. Remove and clean the aerator.
For calcium/mineral deposits, soak
the plastic insert in a 50:50 mix of
water and vinegar. Soak only the
plastic insert.
F. Replace the sensor assembly.
G. Check the flex hoses to make
certain they are not kinked. If a
flex hose is kinked, disconnect it,
straighten, and reconnect.
H. Wait 2 minutes after replacing
batteries as the sensor cycles
through the automatic sensing
distance.
I. Remove faucet from body and
replace batteries. Use two standard
AAA batteries.
J. Clean or replace the diaphragm.
K. Order a new solenoid service
kit.
Kohler Co. 5 1102759-2-B
Page 6
Troubleshooting (cont.)
Symptoms Probable
2. Low flow. A. Filter is
3. Constant
water flow.
4. Sporadic
water flow.
5. Sensor flashes
once
approximately
every 2
seconds. The
product
continues to
operate.
6. Sensor flashes
once
approximately
every 2
seconds. The
product does
not operate.
Causes
plugged.
B. Supply
pressure is
low.
C. Aerator is
plugged.
A. Filter is
plugged.
B. Diaphragm
seal is
damaged or
dirty.
C. Solenoid is
not working.
A. The faucet
is angled
incorrectly to
deck or
misaligned
with user area.
B. The wires
are pinched or
damaged.
A. The battery
power is low.
A. The battery
power is
insufficient to
allow the
product to
operate.
Recommended Action
A. Clean or replace the filter.
B. Check incoming water pressure.
Pressure should be at least 20 psi
(137 kPa).
C. Remove the aerator and clean it.
For calcium/mineral deposits, soak
the aerator plastic insert in a 50:50
mixture of vinegar and water. Soak
only the insert and no other
components.
A. Clean or replace the filter.
B. If the diaphragm is cut or torn,
order a new diaphragm assembly.
Clean or replace the diaphragm.
C. Order and install a new
solenoid assembly.
A. Verify that the faucet is
mounted according to the
installation directions. Ensure that
the faucet is installed in a position
that is above the rim of the
lavatory.
B. Remove the spout and verify
that the wires are tucked inside the
spout before reassembling.
A. Remove faucet from body and
replace batteries. Use two standard
AAA batteries.
A. Remove faucet from body and
replace batteries. Use two standard
AAA batteries.
1102759-2-B 6 Kohler Co.
Page 7

Guide d’installation
Robinet de lavabo électronique
Outils et matériels
Avant de commencer
Respecter tous les codes de plomberie et de bâtiment locaux.
Couper l’alimentation d’eau principale.
Ce robinet est conçu pour des lavabos à un orifice.
Pour de nouvelles installations, installer le robinet et le drain au
lavabo avant d’installer celui-ci.
Le robinet illustré dans ce guide peuvent différer du produit
actuel. Les étapes d’installation s’appliquent tout de même.
Pour que ce robinet fonctionne correctement, installer celui-ci de
manière à ce que le capteur soit directement dirigé vers
l’utilisateur.
Le robinet est a une valeur nominale de6Vc.c.1Wetfonctionne
avec deux piles c.c. AAA (fournies et préinstallées).
Kohler Co. se réserve le droit d’apporter toutes modifications au
design des robinets et ceci sans préavis, comme spécifié dans le
catalogue des prix.
Mèche de Ø
1-1/4" à 2-1/2"
Kohler Co. Français-1 1102759-2-B
Page 8
Sans applique
Flexibles
d'alimentation
Joint
Support
Bec
Montant
Rondelle en
caoutchouc
Écrou
1. Installer le robinet
Préparer le site
REMARQUE : Avant de percer l’orifice de montage, suivre les
instructions suivantes pour assurer une mise en place appropriée :
(1) Un diamètre d’orifice de montage de 1-1/4″ (3,2 cm) minimum à
2-1/2″ (6,4 cm) maximum est requis. (2) Une distance minimum de
1-3/4″ (4,4 cm) est requise entre l’arrière du bec du robinet et le mur
pour permettre un accès à la vis. (3) Une distance maximum de
1-1/8″ (2,9 cm) est requise entre le bord du bassin du lavabo et la
base du bec du robinet.
Déterminer l’emplacement de l’orifice de fixation.
Percer un orifice par la surface de fixation en fonction de la
surface dans les instructions du fabricant.
Installer le robinet
Installer le montant sur le dessous du robinet.
Faire glisser le joint d’étanchéité par-dessus les tuyaux flexibles et
le montant, puis placer le joint dans la rainure sur le dessous du
bec.
Insérer le bec avec les tuyaux flexibles et le montant dans l’orifice
de fixation.
À partir du dessous du lavabo, faire glisser le support et la
rondelle en caoutchouc sur le montant.
1102759-2-B Français-2 Kohler Co.
Page 9

Installer le robinet (cont.)
Visser l’écrou sur le montant pour sécuriser le robinet à la surface
de montage.
Kohler Co. Français-3 1102759-2-B
Page 10

Tuyau
d'alimentation
Arrêt
d'alimentation
Aérateur
du robinet
2. Connecter les alimentations
Connecter les tuyaux d’alimentation aux arrêts. Gauche est chaud.
Droite est froid.
Serrer les connexions avec une clé à molette.
3. Vérification de l’installation
Connecter la pièce de raccordement du drain dans le siphon en P.
Retirer l’aérateur du bec à l’aide de la clé fournie.
Le cas échéant, découvrir le drain.
Ouvrir l’alimentation d’eau principale et rechercher des fuites.
Ajuster au besoin.
Faire couler l’eau à travers le bec pendant à peu près une minute
pour chasser tous les débris. Vérifier s’il y a des fuites et ajuster
au besoin.
Fermer les alimentations d’eau.
Réinstaller l’aérateur sur le bec à l’aide de la clé fournie.
Ouvrir les alimentations d’eau.
Clé
1102759-2-B Français-4 Kohler Co.
Page 11

Dépannage
Symptômes Causes
1. Pas de débit
d’eau.
probables
A. Le filtre est
bouché.
B. Yeux
capteurs sont
sales.
C. L’eau n’est
pas ouverte.
D. Installation
incorrecte.
E. L’aérateur
est bouché.
F. Les yeux
capteurs sont
rayés.
G. Le tuyau
flexible est
pincé.
H. Le piles
viennent
d’être
remplacées.
I. Les piles
sont expirées.
J. L’orifice
d’écoulement
dans le
diaphragme
est bouché ou
débris sont
présents sur le
joint.
Action recommandée
A. Nettoyer ou remplacer le filtre.
B. Essuyer les yeux capteurs avec
un chiffon doux et humide. Sécher
avec un chiffon doux et sec.
C. Vérifier que l’alimentation d’eau
soit ouverte et que la pression est
d’un minimum de 20 psi (137 kPa).
D. Vérifier que le robinet est monté
selon les instructions du guide
d’installation. S’assurer que les
yeux capteurs soient au-dessus du
rebord du lavabo. Se référer aux
instructions d’installation.
E. Retirer et nettoyer l’aérateur.
Pour les dépôts de calcium et
minéraux, laisser tremper avec un
mélange à moitié d’eau et à moitié
de vinaigre. Laisser simplement
tremper l’insertion en plastique.
F. Remplacer l’ensemble du
capteur.
G. Vérifier les tuyaux flexibles
pour vous s’assure qu’ils ne soient
pas pincés. Si un tuyau flexible est
plié, déconnecter le tuyau, étirer,
puis reconnecter.
H. Attendre 2 minutes après avoir
remplacé les piles pendant que le
capteur effectue un cycle à travers
la distance de détection
automatique.
I. Retirer le robinet du corps et
remplacer les piles. Utiliser deux
piles standard AAA.
J. Nettoyer ou remplacer le
diaphragme.
Kohler Co. Français-5 1102759-2-B
Page 12

Dépannage (cont.)
Symptômes Causes
probables
K. Le
solénoïde est
cassé.
2. Faible débit. A. Le filtre est
bouché.
B. Pression
d’alimentation
basse.
C. L’aérateur
est bouché.
3. Débit d’eau
constant.
A. Le filtre est
bouché.
B. Le joint du
diaphragme
est
endommagé
ou sale.
C. Le
solénoïde ne
fonctionne
pas.
4. Débit d’eau
sporadique.
A. Le robinet
à un mauvais
angle avec le
comptoir ou à
été mal aligné
avec l’espace
de l’utilisateur.
B. Les câbles
sont pincés ou
endommagés.
Action recommandée
K. Commander un nouveau kit de
dépannage de solénoïde.
A.Nettoyer ou remplacer le filtre.
B. Vérifier la pression
d’alimentation d’eau. La pression
devrait être d’au moins 20 psi (137
kPa).
C. Retirer l’aérateur et nettoyer.
Pour les dépôts de
calcium/minéraux, laisser tremper
l’insertion de l’aérateur en
plastique dans un mélange à
moitié d’eau et à moitié de
vinaigre. Ne laisser tremper
uniquement que l’insertion et pas
d’autre composant.
A. Nettoyer ou remplacer le filtre.
B. Si le diaphragme est sectionné
ou cassé, commander un nouvel
ensemble de diaphragme. Nettoyer
ou remplacer le diaphragme.
C. Commander et installer un
nouvel ensemble de solénoïde.
A. Vérifier que le robinet est monté
selon les instructions d’installation.
S’assurer que le robinet soit installé
en position au-dessus du rebord
du lavabo.
B. Retirer le bec et vérifier que les
câbles soient bien enfoncés dans le
bec avant de le ré-assembler.
1102759-2-B Français-6 Kohler Co.
Page 13

Dépannage (cont.)
Symptômes Causes
probables
5. Le capteur
clignote
environ toutes
A.
L’alimentation
est faible.
les 2
secondes. Le
produit
continue à
fonctionner.
6. Le capteur
clignote
environ toutes
les 2
secondes. Le
produit ne
fonctionne
A.
L’alimentation
est insuffisante
pour
permettre au
produit de
fonctionner.
pas.
Action recommandée
A. Retirer le robinet du corps et
remplacer les piles. Utiliser deux
piles standard AAA.
A. Retirer le robinet du corps et
remplacer les piles. Utiliser deux
piles standard AAA.
Kohler Co. Français-7 1102759-2-B
Page 14

Guía de instalación
Grifería electrónica de lavabo
Herramientas y materiales
Antes de comenzar
Cumpla con todos los códigos locales de plomería y construcción.
Cierre el suministro principal de agua.
Esta grifería está diseñada para utilizarse en lavabos de un solo
orificio.
Para instalaciones nuevas, monte la grifería y el desagüe en el
lavabo antes de instalar el lavabo.
La grifería ilustrada en esta guía puede ser diferente del producto
que haya adquirido. Los pasos de instalación aun aplican.
Para que esta grifería funcione correctamente, instale la grifería de
manera que el sensor apunte directamente hacia el usuario.
La grifería es de6VCC1Wyesactivada por dos pilas de CC
tamaño AAA (provistas y preinstaladas).
Kohler Co. se reserva el derecho de modificar el diseño de la
grifería sin previo aviso, tal como se especifica en la lista de
precios.
Corona
perforadora
de 1-1/4" D.
a 2-1/2" D.
Kohler Co. Español-1 1102759-2-B
Page 15

Sin chapetón
Mangueras
de suministro
Empaque
Soporte
Surtidor
Varilla roscada
Arandela de goma
Tuerca
1. Instale la grifería
Prepare el sitio
NOTA: Antes de taladrar el orificio de fijación, tome en cuenta las
provisiones siguientes para la colocación correcta: (1) Se requiere
un orificio de fijación con un diámetro mínimo de 1-1/4″ (3,2 cm) a
máximo de 2-1/2″ (6,4 cm). (2) Se requiere una distancia mínima de
1-3/4″ (4,4 cm) entre la parte posterior del surtidor de la grifería y la
pared para permitir acceso al tornillo. (3) Se requiere una distancia
máxima de 1-1/8″ (2,9 cm) entre el filo del lavabo y la base del
surtidor de la grifería.
Determine el lugar del orificio de fijación.
Taladre un orificio a través de la superficie de montaje según las
instrucciones del fabricante de la superficie.
Instale la grifería
Instale la varilla roscada en el lado inferior de la grifería.
Deslice la arandela en las mangueras flexibles y varillas roscadas,
luego asiente el empaque en la ranura en el lado inferior del
surtidor.
Inserte el surtidor con las mangueras flexibles y la varilla roscada
a través del orificio de fijación.
Por debajo del lavabo, deslice la arandela de goma y el soporte en
la varilla roscada.
Kohler Co. Español-2 1102759-2-B
Page 16

Instale la grifería (cont.)
Enrosque la tuerca en cada varilla roscada para fijar la grifería a
la superficie de montaje.
1102759-2-B Español-3 Kohler Co.
Page 17

Manguera del
suministro
Llave de
paso
Aireador de
la grifería
2. Conecte los suministros
Conecte las mangueras de suministro a las llaves de paso. La
izquierda es caliente. La derecha es fría.
Apriete las conexiones con una llave ajustable.
3. Verificación de la instalación
Conecte el tubo final a la trampa en P.
Con la llave provista, retire el aireador del surtidor.
Si aplica, destape el desagüe.
Abra el suministro principal de agua y verifique que no haya
fugas. Ajuste de ser necesario.
Deje correr agua por el surtidor durante aproximadamente un
minuto para eliminar los residuos. Verifique que no haya fugas y
ajuste según sea necesario.
Cierre los suministros de agua.
Con la llave provista, vuelva a instalar el aireador al surtidor.
Abra los suministros de agua.
Llave
Kohler Co. Español-4 1102759-2-B
Page 18

Procedimiento para resolver problemas
Síntomas Causas
1. No hay flujo
de agua.
probables
A. El filtro
está obstruido.
B. Los ojos del
sensor están
sucios.
C. El agua no
está abierta.
D. Instalación
incorrecta.
E. El aireador
está obstruido.
F. Los ojos del
sensor están
rayados.
G. Una
manguera está
doblada.
H. Las pilas se
acaban de
reemplazar.
I. La pila está
gastada.
J. El orificio
de purga en el
diafragma está
obstruido o
hay partículas
residuales en
el sello.
Acción recomendada
A. Limpie o reemplace el filtro.
B. Limpie los ojos del sensor con
un paño húmedo y suave. Seque
con un paño seco y suave.
C. Verifique que el suministro de
agua esté abierto y que la presión
sea de 20 psi (137 kPa), como
mínimo.
D. Verifique que la grifería esté
instalada como se indica en la guía
de instalación. Asegúrese de que
los ojos del sensor estén por
encima del borde del lavabo.
Consulte las instrucciones de
instalación.
E. Quite y limpie el aireador. Para
eliminar los depósitos
calcáreos/minerales, remoje el
inserto de plástico en una solución
de agua y vinagre a partes iguales.
Remoje sólo la pieza de plástico.
F. Reemplace el montaje del sensor.
G. Revise las mangueras para
asegurarse de que no estén
dobladas. Si una manguera flexible
está doblada, desconéctela,
enderécela y vuelva a conectarla.
H. Espere 2 minutos después de
reemplazar las pilas para que el
sensor cicle a través de la distancia
de sensor automática.
I. Retire la grifería del cuerpo y
reemplace las pilas. Utilice dos
pilas AAA estándar.
J. Limpie o reemplace el
diafragma.
1102759-2-B Español-5 Kohler Co.
Page 19

Procedimiento para resolver problemas (cont.)
Síntomas Causas
probables
K. El
solenoide se
ha averiado.
2. Flujo bajo. A. El filtro
está obstruido.
B. La presión
del suministro
es baja.
C. El aireador
está obstruido.
3. Flujo de agua
constante.
A. El filtro
está obstruido.
B. El sello del
diafragma está
sucio o
dañado.
C. El
solenoide no
funciona.
4. Flujo de agua
esporádico.
A. El ángulo
en el que se
ha instalado la
grifería a la
cubierta es
incorrecto o la
grifería está
desalineada
con el área del
usuario.
B. Los cables
están
pellizcados o
dañados.
Acción recomendada
K. Pida un nuevo kit de servicio
del solenoide.
A. Limpie o reemplace el filtro.
B. Verifique la presión del agua
entrante. La presión debe ser 20 psi
(137 kPa) como mínimo.
C. Desmonte el aireador y
límpielo. Para eliminar los
depósitos calcáreos/minerales,
remoje la pieza de plástico del
aireador en una solución de agua y
vinagre a partes iguales. Remoje
solamente la pieza de plástico, no
remoje ningún otro componente.
A. Limpie o reemplace el filtro.
B. Si el diafragma está cortado o
rasgado, pida un montaje de
diafragma nuevo. Limpie o
reemplace el diafragma.
C. Pida e instale un montaje de
solenoide nuevo.
A. Verifique que la grifería esté
instalada como se indica en la guía
de instalación. Asegúrese de que la
grifería quede instalada en una
posición que esté por encima del
reborde del lavabo.
B. Desmonte el surtidor y verifique
que los cables estén metidos dentro
del surtidor antes de volver a
montarlo.
Kohler Co. Español-6 1102759-2-B
Page 20

Procedimiento para resolver problemas (cont.)
Síntomas Causas
probables
5. El sensor
parpadea una
A. La pila está
baja.
vez casi cada
2 segundos.
El producto
continúa
funcionando.
6. El sensor
parpadea una
vez casi cada
2 segundos.
El producto
no funciona.
A. La pila no
tiene suficiente
potencia para
que el
producto
funcione.
Acción recomendada
A. Retire la grifería del cuerpo y
reemplace las pilas. Utilice dos
pilas AAA estándar.
A. Retire la grifería del cuerpo y
reemplace las pilas. Utilice dos
pilas AAA estándar.
1102759-2-B Español-7 Kohler Co.
Page 21

1102759-2-B
Page 22

1102759-2-B
Page 23

1102759-2-B
Page 24

USA/Canada: 1-800-4KOHLER
México: 001-877-680-1310
kohler.com
©2009 Kohler Co.
1102759-2-B
 Loading...