

Page 1
Installation Guide
Removable Apron
K-1234 K-1284
M product numbers are for Mexico (i.e. K-12345M)
Los números de productos seguidos de M corresponden a México
(Ej. K-12345M)
Français, page “Français-1”
Español, página “Español-1”
1011308-2-D
Page 2
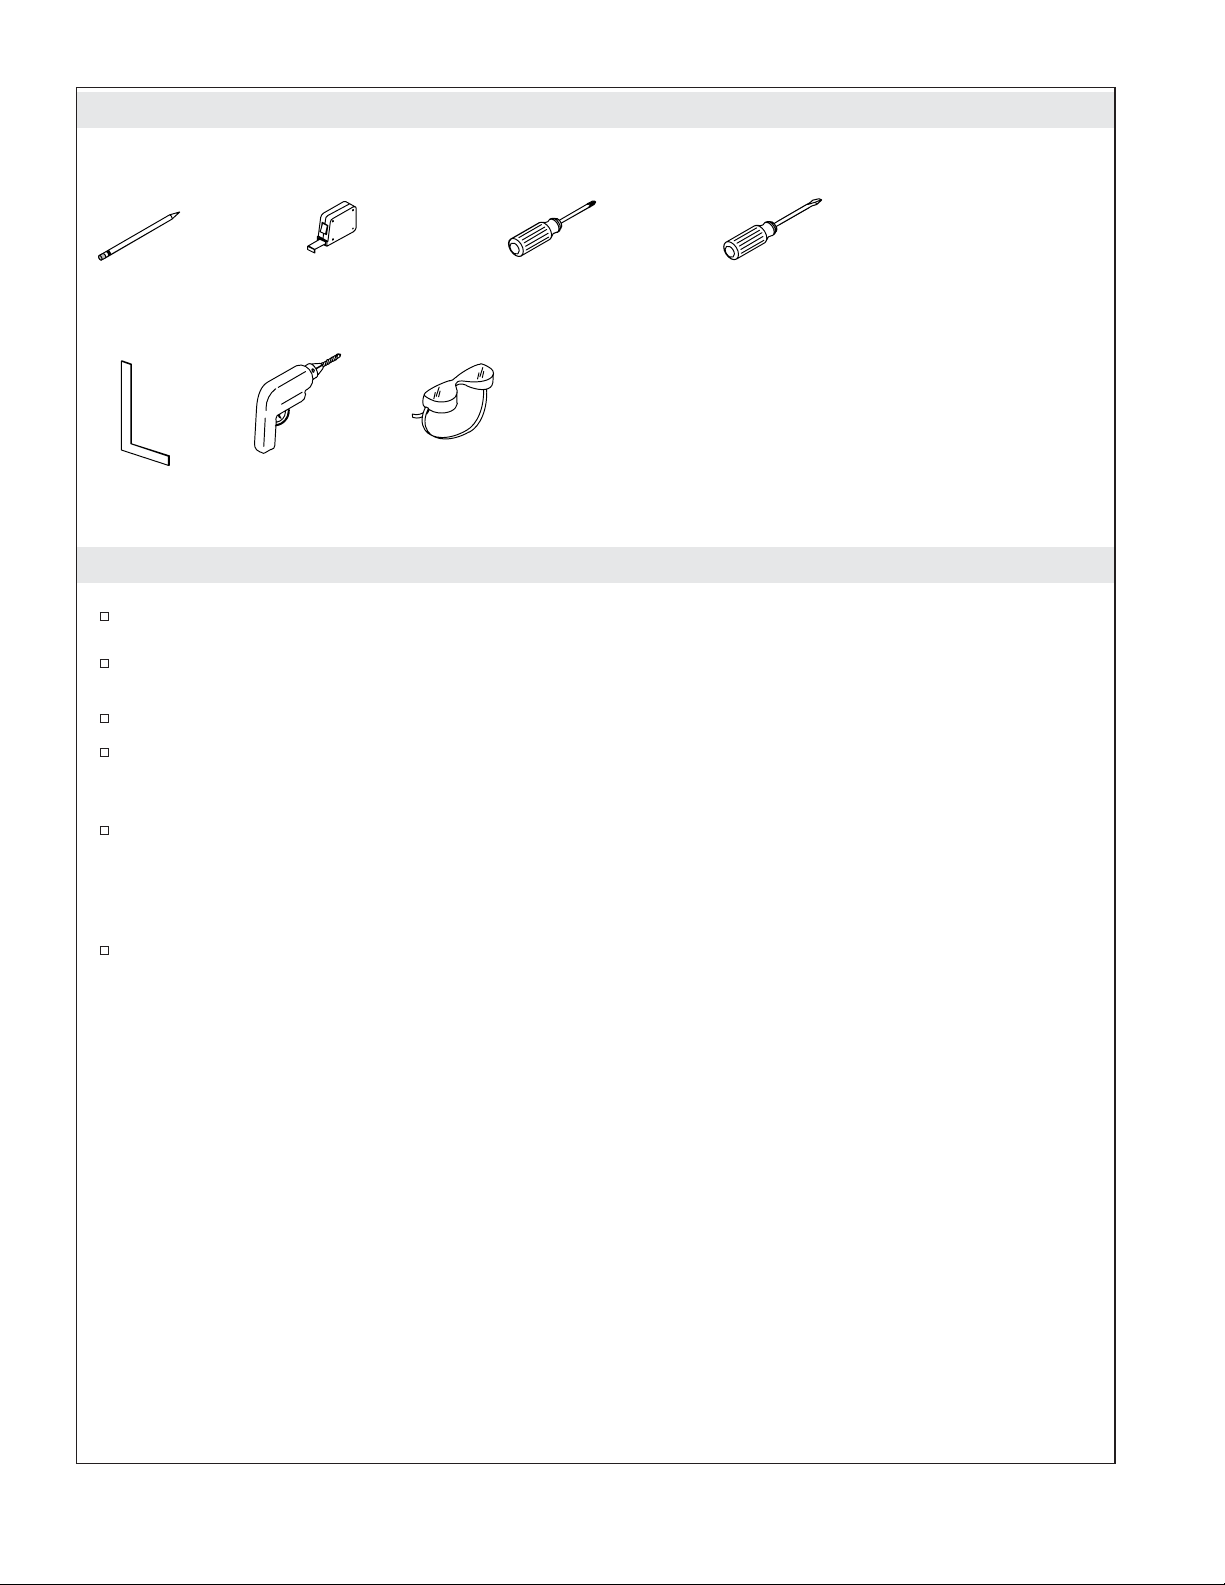
Tools and Materials
Pencil
Square
Tape
Measure
Drill/
Drill Bits
Safety
Glasses
Phillips
Screwdriver
Plus:
• Construction Adhesive
• Conventional Woodworkng Installation Tools and Materials
• Support Structure Materials (2x2s or 2x4s)
• Shimming Material (as needed)
Flat-Blade
Screwdriver
Before You Begin
Observe all local plumbing and building codes.
Unpack and inspect the apron for damage. Return the apron to the carton until you are ready to
install it.
The apron must be installed before the finished floor and wall materials are installed.
This apron system is designed to have the finished wall materials [1-1/2″ (3.8 cm) maximum
thickness] go over the apron columns. It is also designed to have the finished floor materials [2″ (5.1
cm) maximum thickness] butt up against the channel.
The apron can be used as an access to the whirlpool pump and controls, when applicable. However,
additional access may make servicing of the pump and controls easier.
NOTE: Before installing the apron, fill the bath/whirlpool with water and check the drain system for
leaks. If applicable, test the whirlpool system for leaks and proper operation.
Kohler Co. reserves the right to make revisions in the design of products without notice, as specified
in the Price Book.
1011308-2-D 2 Kohler Co.
Page 3
Bath
Support Structure
Apron
Support Structure
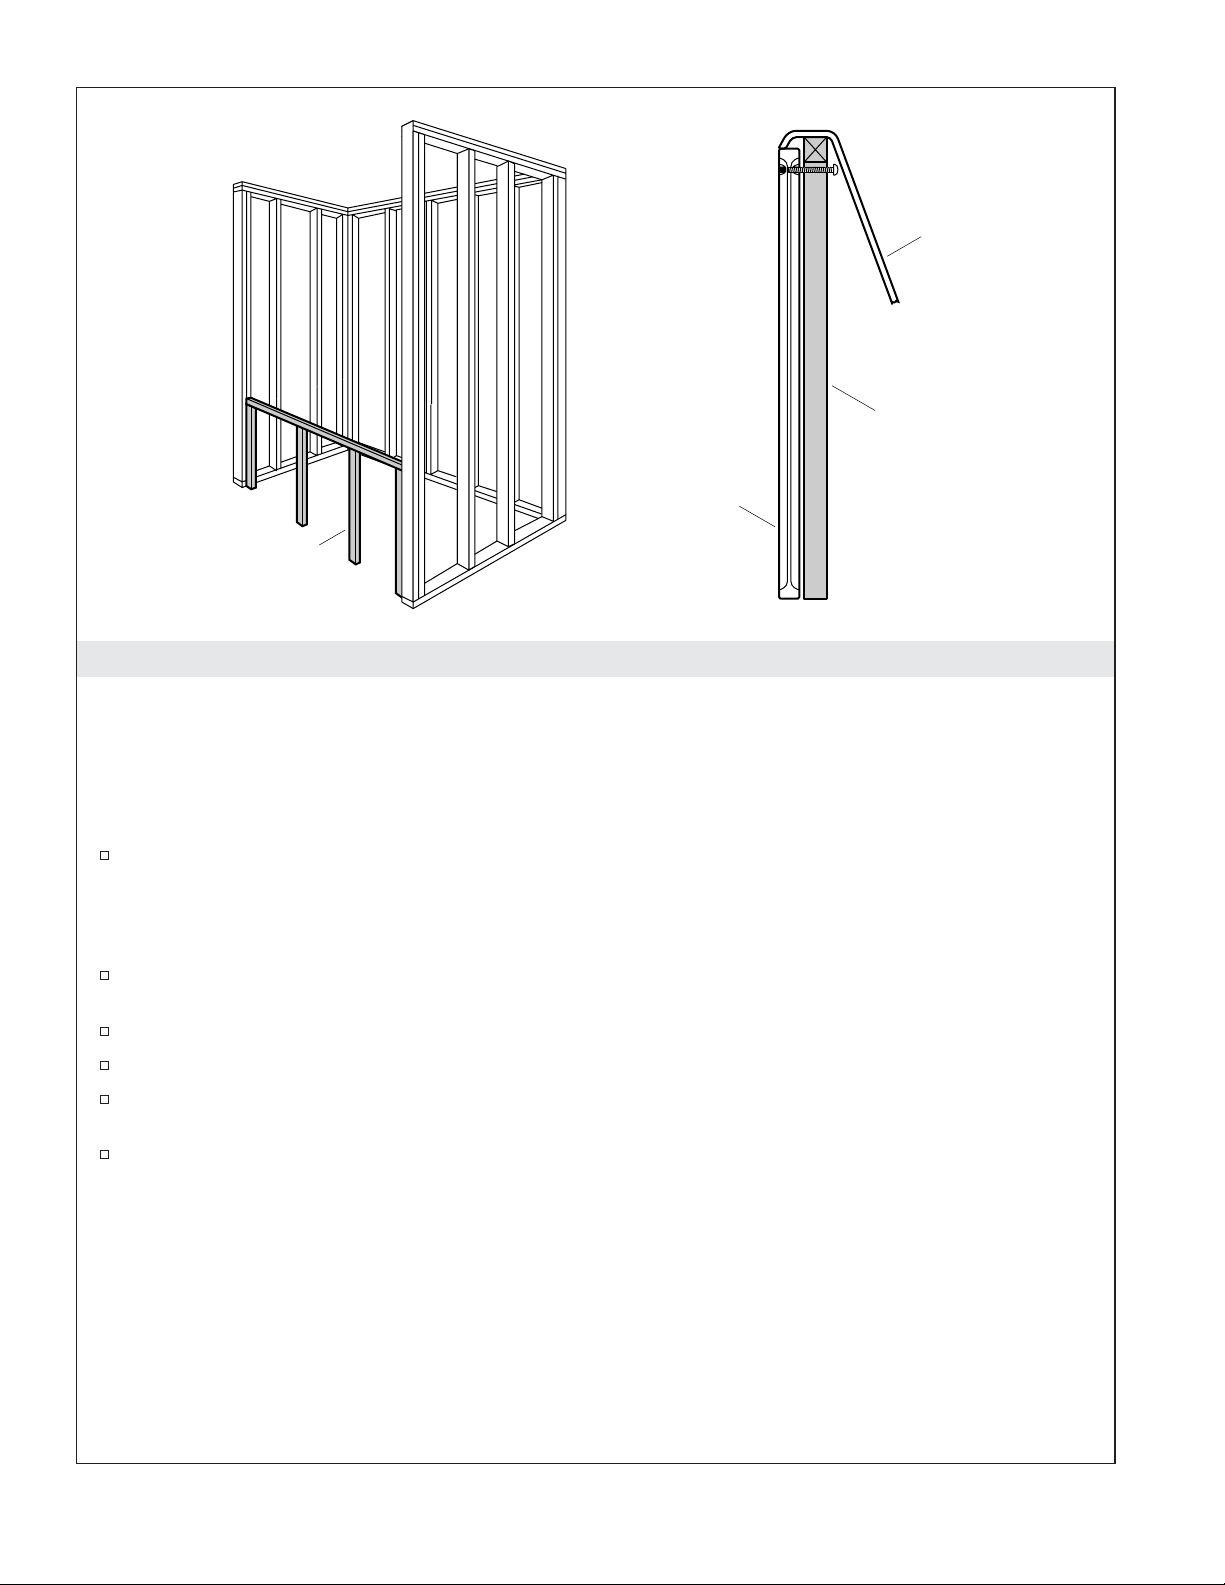
1. Construct the Support Structure
NOTICE: An additional support structure is required. To avoid fatigue cracking to the bath/whirlpool
deck, construct a support structure under the entire front edge of the bath/whirlpool deck. Refer to the
illustration as an example.
NOTICE: Do not use the additional support structure to carry the load of the bath/whirlpool. The
bath/whirlpool must be supported by its feet.
If you have not already done so, prepare the site for the bath/whirlpool. Refer to the installation
instructions and rough-in packed with your bath/whirlpool.
NOTICE: Ensure the support structure does not interfere with the whirlpool harness (if applicable), apron
adjustment, plumbing lines, and faucet mounting.
Secure two studs vertically at the front corners of the bath/bath whirlpool and at spaced intervals
in-between.
Secure a stud horizontally across the vertical studs.
Apply construction adhesive to the horizontal stud.
Set the bath/whirlpool in place, affixing the underside of the bath/whirlpool deck to the horizontal
studs.
Complete the bath/whirlpool installation at this time. Refer to the installation instructions packed
with your bath/whirlpool.
Kohler Co. 3 1011308-2-D
Page 4

Frame
Frame
Rim
Wing
Nut
Flat
Washer
Push
Frame
Up
Panel
Frame
2. Attach the Apron
Remove the panel from the frame, then set the panel aside.
Insert the bottom of the frame under the rim of the bath/whirlpool.
Center and push the frame up until it contacts the underside of the rim.
Thread one wing nut and one flat washer onto the carriage bolt.
Insert the carriage bolt assembly into the upper center hole in the back of the frame.
Loosely assemble the second flat washer and wing nut to the carriage bolt from the front of the
frame. Do not tighten at this time.
Rim
Carriage
Bolt
Support
Structure
1011308-2-D 4 Kohler Co.
Page 5
Secure Frame
Square
Carriage
Bolt
Secure Panel
Service
Bath/
Support
Structure
Whirlpool
Frame
Shim,
if necessary.
Subfloor
Screw
Fastener
Panel
Flat-Blade
Screwdriver
Frame
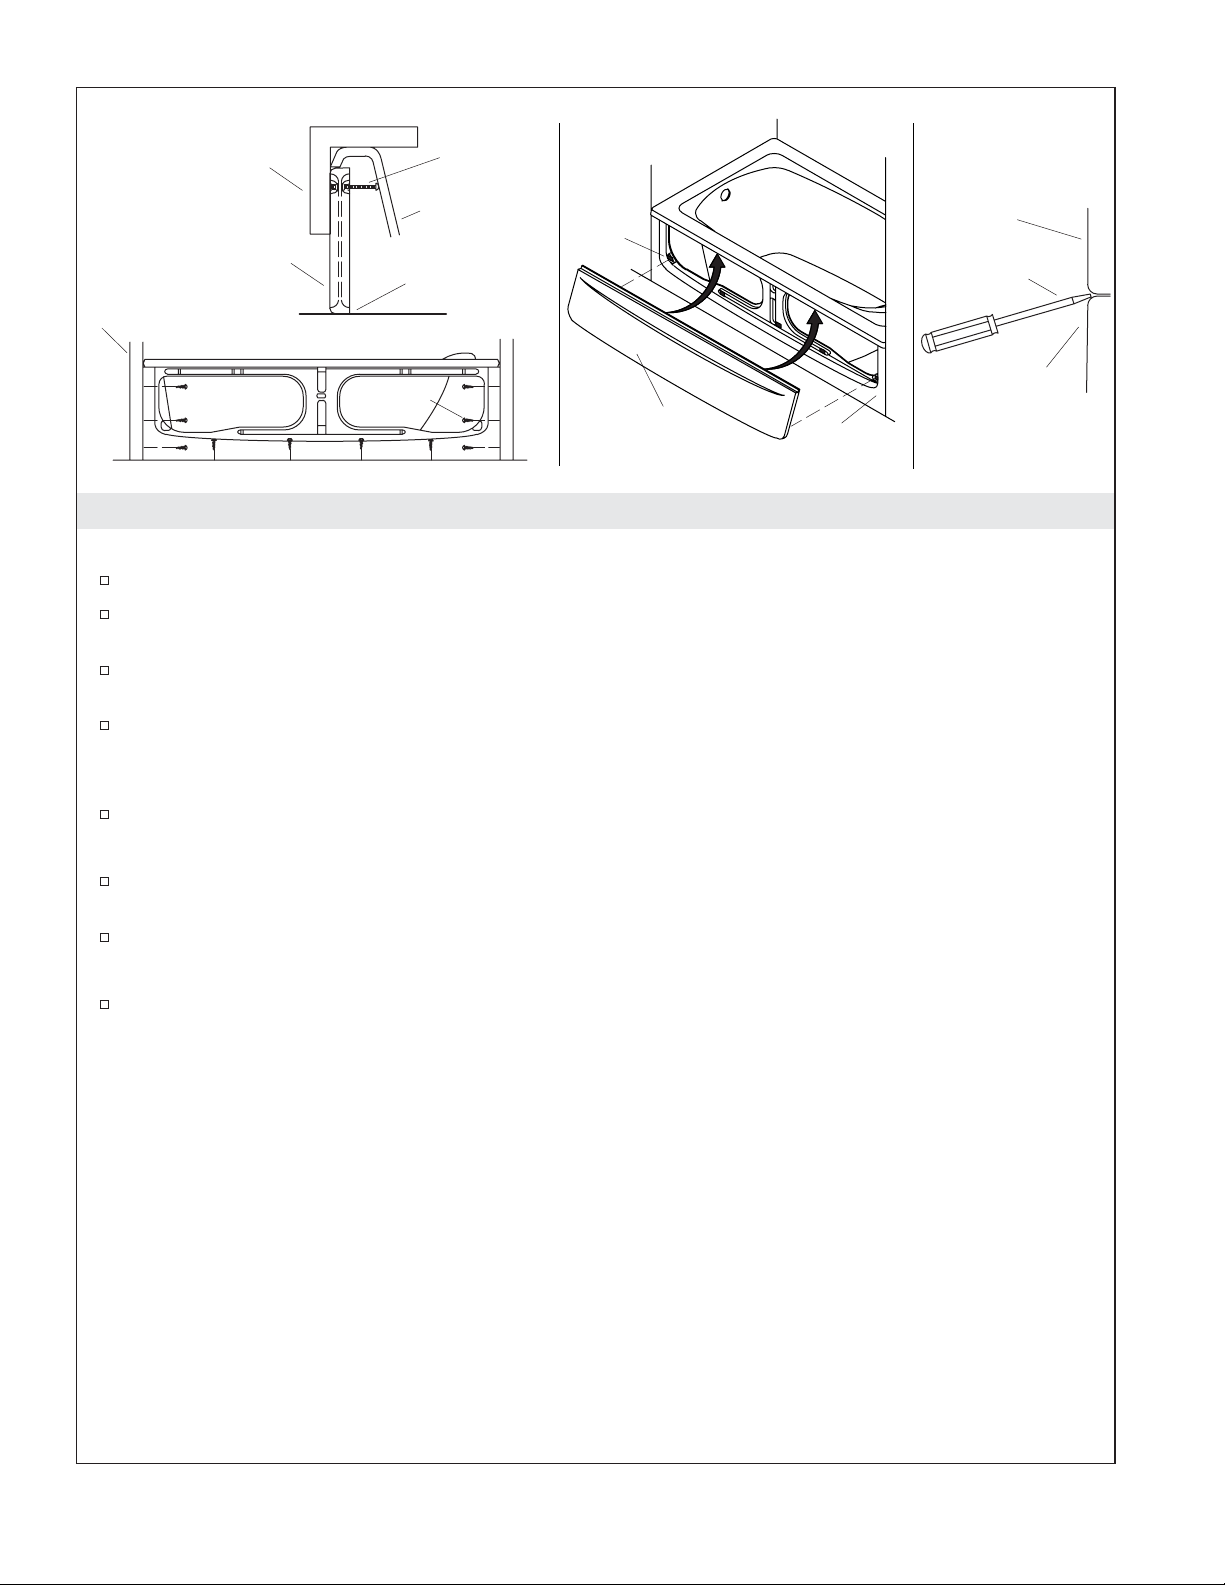
3. Complete the Installation
Secure Frame
Square the frame to the rim of the bath/whirlpool.
Secure the sides of the frame to the studs with the screws provided. Shim as necessary to fill any
gaps.
Secure the bottom of the frame to the subfloor with screws or floor anchors. Shim as necessary to fill
any gaps.
Thread the carriage bolt out until it makes contact with the bath/whirlpool. Then secure by
tightening the two wing nuts.
Panel
Frame
Secure Panel
Center the panel on the frame. Press the panel onto the frame so that each of the fasteners engage.
Finish the Installation
Install water-resistant wall material [1-1/2″ (3.8 cm) maximum thickness] to complete the finished
wall.
Install flooring material [2″ (5.1 cm) maximum thickness] to complete the finished floor.
Service
Using a flat-blade screwdriver, gently pry the bottom of the apron panel away from the apron
frame.
Kohler Co. 5 1011308-2-D
Page 6

Guide d’installation
Bandeau amovible
Outils et matériels
Crayon à papier
Carré
Mètre
ruban
Perceuse et
Mèches de
Perceuse
Lunettes
de
protection
Tournevis
cruciforme
Plus:
• Adhésif de construction
• Outils conventionnels de menuiserie et matériels
• Matériaux du structure de support (2x2 ou 2x4)
• Cales (si besoin)
Tournevis à
lame plate
Avant de commencer
Respecter tous les codes de plomberie et de bâtiment locaux.
Déballer et examiner le bandeau soigneusement pour en déceler tout dommage. Remettre le
bandeau dans son emballage en attendant de l’installer.
Le bandeau doit être installé avant d’installer le sol fini et les matériaux du mur.
Ce système de bandeau est conçu de façon à ce que les matériaux du mur fini [1-1/2″ (3,8 cm)
épaisseur max.] passent sur les colonnes du bandeau. Il est aussi conçu pour que les matériaux du
sol fini [épaisseur maximum 2″ (5,1 cm)] buttent contre le canal.
Le bandeau peut être utilisé comme accès à la pompe et aux commandes de la baignoire à
hydromassage, lorsqu’applicable. Néanmoins, tout accès additionnel pourrait faciliter l’entretien de
la pompe et des commandes.
REMARQUE : Avant d’installer le bandeau, remplir la baignoire/la baignoire à hydromassage avec de
l’eau et vérifier l’absence de fuites du système de drainage. Si applicable, tester la baignoire à
hydromassage pour les fuites et le bon fonctionnement.
Kohler Co. se réserve le droit d’apporter toutes modifications sur le design des produits et ceci sans
préavis, tel que spécifié dans le catalogue des prix.
Kohler Co. Français-1 1011308-2-D
Page 7

Baignoire
Structure de support
Bandeau
Structure de support
1. Construire une structure de support
AVIS : Une structure de support supplémentaire est requise. Pour éviter une fissuration par fatigue de la
plate-forme de la baignoire/de la baignoire à hydromassage, construire une structure de support sous le
bord avant complet de la plate-forme de la baignoire/de la baignoire à hydromassage. Se reporter à
l’illustration fournie en exemple.
AVIS : Ne pas utiliser la structure de support supplémentaire pour prendre en charge le poids de la
baignoire/de la baignoire à hydromassage. La baignoire/la baignoire à hydromassage doit être supportée
par ses pieds.
Si cela n’a pas encore été effectué, préparer le site pour la baignoire/la baignoire à hydromassage. Se
reporter aux instructions d’installation et de raccordement accompagnant la baignoire/la baignoire à
hydromassage.
AVIS : S’assurer que la structure de support n’interfère pas avec le faisceau de la baignoire à
hydromassage (le cas échéant), l’ajustement du bandeau, les conduites de plomberie, et le support du
robinet.
Fixer deux montants verticalement, aux coins avant de la baignoire/de la baignoire à hydromassage,
et à des intervalles espacés entre ces points.
Fixer un montant horizontalement à travers les montants verticaux.
Appliquer un adhésif de construction sur le montant horizontal.
Mettre la baignoire/la baignoire à hydromassage en place, en affixant le dessous de la plate-forme
de la baignoire/de la baignoire à hydromassage sur les montants horizontaux.
Terminer alors l’installation de la baignoire/de la baignoire à hydromassage. Se reporter aux
instructions d’installation accompagnant la baignoire/la baignoire à hydromassage.
Kohler Co. Français-2 1011308-2-D
Page 8

Cadre
Cadre
Rebord
Écrou à
oreilles
Rondelle
plate
Pousser
le cadre
Vers le
haut
Panneau
Cadre
2. Fixer le bandeau
Retirer le panneau du cadre, puis le mettre de côté.
Insérer le bas du cadre sous le rebord de la baignoire/baignoire à hydromassage.
Centrer puis pousser le cadre vers le haut, jusqu’à ce qu’il entre en contact avec la partie inférieure
du rebord.
Visser un écrou papillon et une rondelle plate sur le boulon de carrosserie.
Insérer l’écrou de carrosserie dans l’orifice central supérieur situé à l’arrière du cadre.
Assembler sans serrer la deuxième rondelle plate et l’écrou papillon au boulon de carrosserie à
partir de l’avant du cadre. Ne pas serrer à ce moment.
Rebord
Boulon de
carrosserie
Structure
de support
1011308-2-D Français-3 Kohler Co.
Page 9

Fixer le cadre
Carré
Cadre
Boulon de
carrosserie
Baignoire/
Baignoire à
hydromassage
Fixer le panneau
en place
Fixation
Caler si
Structure
de support
nécessaire.
Plancher
Vis
Panneau
Cadre
3. Terminer l’installation
Fixer le cadre
Placer le cadre à angle droit contre le bord de la baignoire/de la baignoire à hydromassage.
Fixer les côtés du cadre sur les montants à l’aide des vis fournies. Caler au besoin.
Fixer le bas du cadre sur le sous-plancher avec des vis ou des dispositifs d’ancrage au sol. Caler au
besoin.
Visser le boulon de carrosserie jusqu’à ce qu’il soit en contact avec la baignoire/baignoire à
hydromassage. Fixer ensuite en place en serrant les deux écrous papillon.
Service
Panneau
Tournevis à
lame plate
Cadre
Fixer le panneau en place
Centrer le panneau sur le cadre. Presser le panneau sur son cadre de manière à ce que les fixations
s’engagent.
Compléter l’installation
Installer le matériau mural hydrorésistant [épaisseur maximum de 1-1/2″ (3,8 cm)] pour terminer le
mur fini.
Installer le revêtement de sol [épaisseur maximum de 2″ (5,1 cm)] pour terminer le plancher fini.
Service
À l’aide d’un tournevis à lame plate, soulever doucement le bas du panneau du bandeau pour
l’éloigner du cadre du bandeau.
Kohler Co. Français-4 1011308-2-D
Page 10

Guía de instalación
Faldón desmontable
Herramientas y materiales
Lápiz
Escuadra
Cinta para
medir
Lentes de
seguridadTaladro/brocas
Destornillador
Phillips
Más:
• Adhesivo de construcción
• Herramientas y materiales convencionales de carpintería
• Materiales para estructura de soporte (2x2 ó 2x4)
• Material para acuñar (de ser necesario)
Destornillador
plano
Antes de comenzar
Cumpla con todos los códigos locales de plomería y construcción.
Desembale el faldón y revise que no tenga daños. Coloque el faldón en la caja hasta el momento de
la instalación.
El faldón debe instalarse antes que los materiales de acabado del piso y la pared.
Este sistema de faldón está diseñado para que los materiales de acabado de la pared [espesor
máximo de 1-1/2″ (3,8 cm)] recubran las columnas del faldón. También está diseñado para que los
materiales de acabado del piso [espesor máximo de 2″ (5,1 cm)] queden a tope contra el canal.
El faldón puede utilizarse para acceder a la bomba y a los controles de la bañera de hidromasaje,
cuando sea pertinente. Sin embargo, es posible que el acceso adicional facilite el mantenimiento de
la bomba y los controles.
NOTA: Antes de instalar el faldón, llene la bañera/bañera de hidromasaje de agua y verifique que no haya
fugas. De ser el caso, pruebe el sistema de la bañera de hidromasaje para verificar que no haya fugas y
que el funcionamiento sea apropiado.
Kohler Co. se reserva el derecho de modificar el diseño de los productos sin previo aviso, tal como
se especifica en la lista de precios.
Kohler Co. Español-1 1011308-2-D
Page 11

Bañera
Estructura de soporte
Faldón
Estructura de soporte
1. Construya la estructura de soporte
AVISO: Se requiere una estructura de soporte adicional. Para evitar fisuras de fatiga de la cubierta de la
bañera/bañera de hidromasaje, construya una estructura de soporte bajo todo el filo frontal de la cubierta
de la bañera/bañera de hidromasaje. Consulte la ilustración como un ejemplo.
AVISO: No utilice la estructura de soporte adicional para portar el peso de la bañera/bañera de
hidromasaje. La bañera/bañera de hidromasaje se debe soportar sobre sus pies.
Si aún no lo ha hecho, prepare el lugar para la bañera/bañera de hidromasaje. Consulte las
instrucciones de instalación y el diagrama de instalación que se incluyen con su bañera/bañera de
hidromasaje.
AVISO: Asegúrese de que la estructura de soporte no interfiera con la tubería de la bañera de hidromasaje
(si aplica), ajuste del faldón, líneas de plomería e instalación de la grifería.
Asegúrese que haya dos postes de madera verticalmente en las esquinas delanteras de la
bañera/bañera de hidromasaje y a intervalos espaciados entre éstos.
Fije un poste de madera horizonalmente atravesando los postes verticales.
Aplique adhesivo de construcción al poste de madera horizontal.
Coloque la bañera/bañera de hidromasaje en su lugar, fijando el lado inferior de la cubierta de la
bañera/bañera de hidromasaje a los postes de madera horizontales.
Termine la instalación de la bañera/bañera de hidromasaje en este momento. Consulte las
instrucciones de instalación que se incluyen con su bañera/bañera de hidromasaje.
Kohler Co. Español-2 1011308-2-D
Page 12

Marco
Marco
Borde
Tuerca
de
mariposa
Arandela plana
Presione
la
estructura
Panel
hacia
arriba
Marco
2. Fije el faldón
Retire el panel de la estructura, luego coloque el panel a un lado.
Inserte la parte inferior de la estructura por debajo del borde de la bañera/bañera de hidromasaje.
Centre y presione la estructura hacia arriba hasta que entre en contacto con la parte inferior del
borde.
Enrosque una tuerca de mariposa y una arandela plana en el perno de cabeza de hongo.
Inserte el montaje del tornillo de cabeza de hongo en el orificio central superior en la parte posterior
de la estructura.
Por el frente de la estructura, ensamble sin apretar la segunda arandela plana y la tuerca de
mariposa en el perno de cabeza de hongo. No apriete en este momento.
Borde
Perno de
cabeza de
hongo
Estructura
de soporte
1011308-2-D Español-3 Kohler Co.
Page 13

Fije la estructura
Escuadra
Marco
Perno de
cabeza de
hongo
Bañera/
Bañera de
hidromasaje
Fije el panel
Herraje
Utilice cuñas si
Estructura
de soporte
es necesario.
Subpiso
Tornillo
Panel
Marco
3. Termine la instalación
Fije la estructura
Encuadre la estructura con el borde de la bañera/bañera de hidromasaje.
Fije los lados de la estructura en los postes de madera con los tornillos incluidos. Utilice cuñas
según sea necesario para eliminar las separaciones.
Fije la parte inferior de la estructura al subpiso con tornillos o con anclajes para el piso. Utilice
cuñas según sea necesario para eliminar las separaciones.
Enrosque el perno de cabeza de hongo hasta que entre en contacto con la bañera/bañera de
hidromasaje. Luego, fije apretando las dos tuercas de mariposa.
Servicio
Panel
Destornillador
plano
Marco
Fije el panel
Centre el panel en la estructura. Presione el panel en la estructura de forma que todos los
sujetadores queden engranados.
Termine la instalación
Instale el material de pared resistente al agua [espesor máximo de 1-1/2″ (3,8 cm)] para terminar la
pared acabada.
Instale el material del piso [espesor máximo de 2″ (5,1 cm)] para terminar el piso acabado.
Servicio
Utilice un destornillador plano para sacar apalancando suavemente el panel del faldón de la
estructura del faldón.
Kohler Co. Español-4 1011308-2-D
Page 14

1011308-2-D
Page 15

1011308-2-D
Page 16

USA/Canada: 1-800-4KOHLER
México: 001-877-680-1310
kohler.com
©2008 Kohler Co.
1011308-2-D
 Loading...