

Page 1
BEFORE YOU BEGIN
BEFORE YOU BEGIN
ROUGHING-IN
INSTALLATION INSTRUCTIONS
BATHROOM ACCESSORIES
K-11797T/K-11798T/K-11799T
!!Congratulation on your purchase of this high
quality Bathroom Accessory. Before
proceeding with the installation, please
carefully read this installation instruction in
order to ensure proper care and assembly of
this accessory.
Please keep this installation instruction for
future reference.
Prior to drilling into walls, check there
are no hidden electrical wires, cables or
water supply pipes with the aid of ar,
electronic detector. If you use power
tools do not forget:
1. Wear eye protection.
2. Unplug equipment after use.
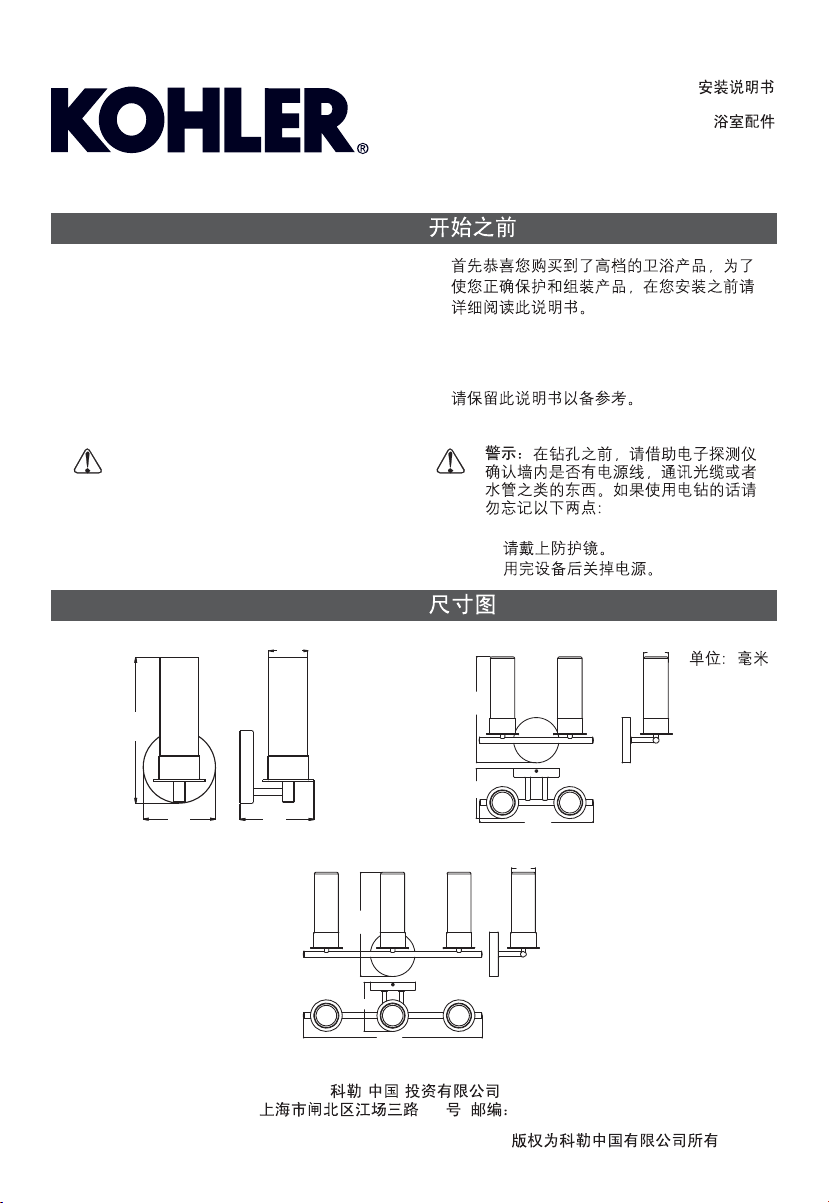
65
244
121
K-11797T K-11798T
125
!
!
1.
2.
UNIT : mm
65
283
134
304
65
1110777-T01-A1110777-T01-A
1115671-T01-A
283
134
485
K-11799T
()
-1-
158 200436
ã
ã
Copyright Kohler China Ltd., 2009
, 2009
Page 2
PREPARE THE SITE
PREPARE THE SITE
INSTALLATION
NOTE:
1. For the sake of your safety, please turn off
the electricity before installation, dismantling
or cleaning.
2. The installation is suggested to be executed
by certified electrician, and the ground wires
Should be properly connected.
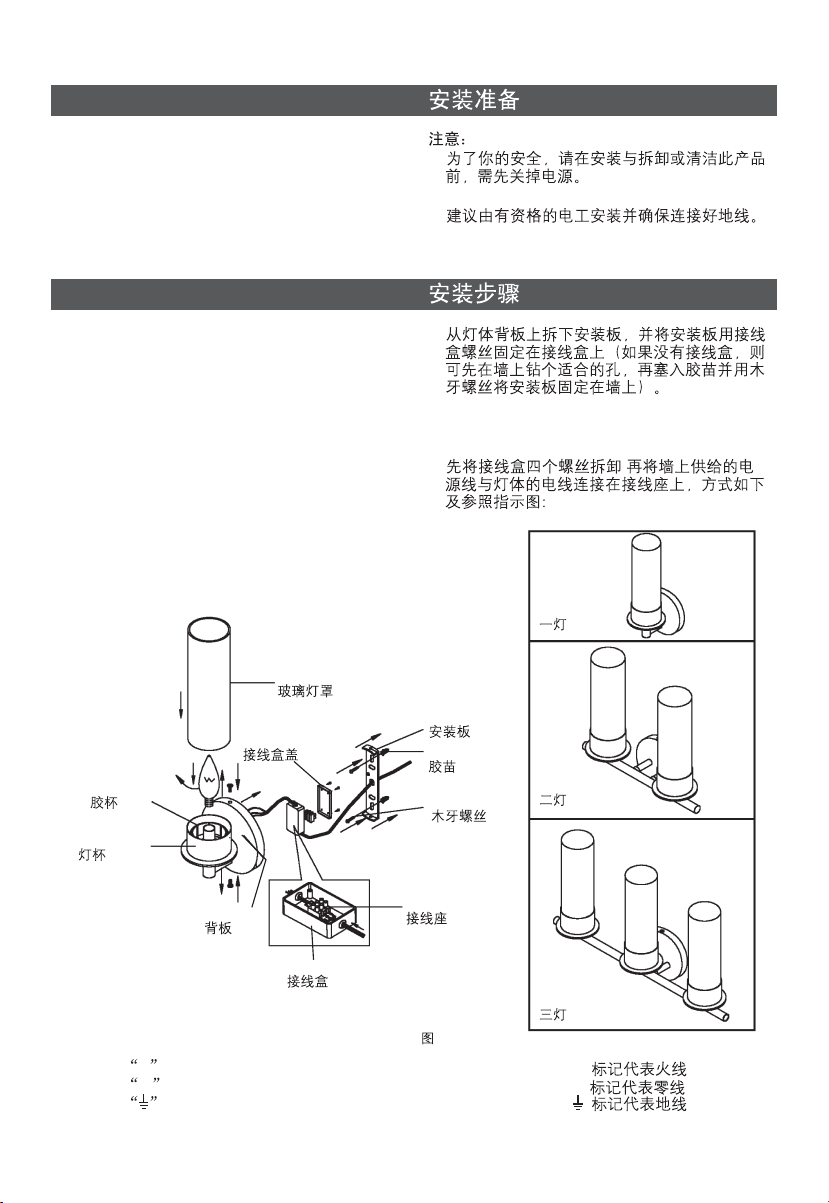
1. Remove the mounting plate from the
backplate of the fixture. Securely tighten the
mounting plate to outlet box with the
mounting screws. (If there is no outlet box,
drill a proper hole on the wall, insert wall
plugs into it and then tighten the mounting
plate on the wall.)
2.
Remove the four screws of the outlet box,
onnect the electrical wires with the
than c
wires of the fixture on the wire holder. See
Figure 1 and below.
Glass Dlffuser
Outlet Box Cover
1.
2.
1.
2. ,
Mounting Plate
Wall Plug
Rubber Cup
Socket Cup
Backplate
Mark L means hot wires.
Mark N means neutral wires.
Mark means ground wires.
1115671-T01-A
Screw
Wire Holder
Outlet Box
Fig #1
1
L
N
-2-
Page 3

2.1 Loose the wire-tightening screws of the wire
holder with the slotted screwdriver for
certain space in order to insert the electrical
wires into the connecting holes. Tighten the
screws with the screwdriver till the wires are
well fixed.
2.2 After connecting the wires, securely screw
the threaded clamp to fix the position of the
wires.
3. Arrange the wires neatly and then fix the
backplate of the fixture on the tightened
mounting plate with screws.
4. Insert the bulb of E14 spec which can be
contained in the glass diffuser into the socket
cup. (Please note that the power rating of the
bulb should within the limit of power rating
which listed on the label.)
5. Carefully set the glass diffuser into rubber
cup in the socket cup, and make sure that it
is fixed on the socket cup securely.
6. After the installation and checking, power on
and a scone is ready to be used.
Note: Please use glass sealant to fill the
clearance between the upper part of
the backplate and the finished wall if
the installation place is suspected to
have water sprayed in. That is to
prevent the water from entering into
the backplate and cause any possible
accident.
2.1
2.2
3.
4. E14
5.
6.
1115671-T01-A
-3-
 Loading...