

Page 1

CS4000-00_en
KODAK RVG Digital Radiography
Systems
User’s Guide
Page 2

Notice
© Eastman Kodak Company, 2006. No part of this publication may be reproduced, stored
in a retrieval system, translated to another language, or transmitted in any form by any
means, electronic, mechanical, photocopied, recorded, or otherwise, without prior written
permission.
NEITHER EASTMAN KODAK COMPANY NOR ANY OF ITS SUBSIDIARIES
MAKE ANY WARRANTY OF ANY KIND WITH RESPECT TO THIS MATERIAL,
INCLUDING, BUT NOT LIMITED TO, THE IMPLIED WARRANTIES OF
MERCHANTABILITY, NONINFRINGEMENT, AND FITNESS FOR A PARTICULAR
PURPOSE.
The information in this document is subject to change. Neither Eastman Kodak Company
nor any of its subsidiaries shall be liable for errors contained herein or for incidental
damages in conjunction with the furnishing, performance, or use of this material.
Kodak and RVG are trademarks of Eastman Kodak Company.
RINN is a trademark of Dentsply International, Inc.
All other trademarks and registered trademarks are the property of their respective
holders.
Current Dental Terminology copyright © 2002, 2004 American Dental Association
U.S. Federal law restricts the Kodak RVG sensor to sale by or on the order of a dentist or
physician.
Manual Name: KODAK RVG Digital Radiography Systems User’s Guide
Part Number: CS4000_en
Revision Number: 00
Print Date: June 2006
This document was originally written in English.
The names of persons and the data reflected in this guide are fictitious and are not intended
to represent any real individual, event, or condition. Any resemblance or similarity of the
names of persons or data reflected in this guide to any actual person’s name or any event
or condition is purely coincidental and unintended.
Made in France by Kodak-Trophy
A Subsidiary of Eastman Kodak Company
Marne-la-Vallée, France
Page 3

KODAK RVG Digital Radiography Sy stems User’s Guide (CS4000_en) iii
About This Guide
This manual contains information on using the
following products:
• KODAK RVG 5100 digital radiography sensor
• KODAK RVG 6100 digital radiography sensor
The following list describes information contained in
each chapter of this guide:
1 Compliance and Safety Describes compliance
information and indicates
potential risks to personnel or
equipment.
2 Getting Started Describes preliminary use of the
sensor .
3 Acquiring Images Describes the procedures for
acquiring images.
4 Disinfecting and
Maintaining the Sensor
Describes the procedures for
disinfecting and maintaining the
sensor.
5 Troubleshooting Images Describes techniques for
producing better images.
Note
Contact your Kodak
dealer for any additional
information you may
need.
Page 4

Foreword
iv About This Guide
Foreword
For optimum image display and processing quality, use
the sensor with the Kodak dental imaging software.
The Kodak dental imaging software is specifically
designed to make the most of the capabilities of the
sensor.
The sensor is a class I device in accordance with
annex VII of directive 93/42/EEC concerning medical
devices. The CE marking guarantees compliance with
the main requirements of this directive.
A thorough review of this user guide is necessary to
fully use the sensor.
Page 5

KODAK RVG Digital Radiography Sy stems User’s Guide (CS4000_en) 1–1
Chapter 1
Compliance and Safety
This chapter includes the following topics:
• Ensuring Compliance with Applicable Standards
on page 1–1
• Directive 93/42/CEE Concerning Medical
Devices on page 1–2
• Marking and Labeling Symbols on page 1–2
• Non-Medical Devices on page 1–3
Ensuring Compliance with
Applicable Standards
The electronics used in the sensor are designed to
observe all applicable standards.
Do the following to ensure compliance with the
applicable standards:
• After installation, ensure that the system does not
represent any risk to the operator or patient.
• Ensure all equipment associated with the system
bears a CE marking.
• Check that the electrical network complies with
the current standards of the country of installation.
Page 6

Directive 93/42/CEE Concerning Medical Devices
1–2 Compliance and Safety
Directive 93/42/CEE
Concerning Medical
Devices
The sensor belongs to class I of the Directive
Concerning Medical Devices. The sensor is an active
device that temporarily penetrates the body through a
body orifice for diagnostic purposes. The applicable
European standards are the General requirements
for Safety (IEC/EN 60601-1 and collaterals) and
Electromagnetic Compatibility (EN 60601-1-2).
Marking and Labeling
Symbols
Table 1–1 describes the applicable marking and
labeling symbols.
Table 1–1 Marking and Labeling Symbols
Label Description
Type BF Device
The sensor is a Type BF device.
WEEE Symbol
In the European Union, this symbol indicates
that when the last user discards this product,
it must be sent to appropriate facilities for
recovery and recycling. Contact your
local Kodak representative or refer to
www.kodak.com/go/recycle for additional
information on the collection and recovery
programs available for this product.
Page 7

Non-Medical Devices
KODAK RVG Digital Radiography Systems User’s Guide (CS4000_en) 1–3
Non-Medical Devices
Non-Medical Device
Warning
This warning symbol means: “Warning: Consult
the accompanying documents” and refers to this
document. Using accessories that do not meet the
equivalent sensor security requirements could result in
a lower level of security for the entire system. When
choosing an accessory , take into account its use around
the patient and ensure that it complies with the
harmonized standards IEC/EN 60 601-1 and IEC/
EN 60 601-1-1. Install and use computer or video
peripheral equipment while closely following the steps
in this manual to ensure compliance with these
standards.
Page 8

Non-Medical Devices
1–4 Compliance and Safety
Page 9

KODAK RVG Digital Radiography Sy stems User’s Guide (CS4000_en) 2–1
Chapter 2
Getting Started
This chapter includes the following topics:
• Understanding the Ima gi ng Chain on page 2–1
• Adjusting Exposure Time on page 2–5
• Sharing the Sensor Between Workstations on
page 2–9
• Acquiring a Good Image on page 2–10
• Enhancing the Digital Image on page 2–16
Understanding the Imaging
Chain
The imaging chain consists of the following
components:
• Sensor and remote control
• X-ray generator
• Timer
• Computer and monitor
Sensor and Remote Control
The sensor consists of two inseparable parts:
• Sensor
• Remote control
Note
To determine the
exposure time and
create an exposure
time table for your
sensors, see
“Customizing the
Exposure Chart” on
page 2–7.
Note
Because these sensors
are used in the same
manner, this manual
references use of the
size 1 sensor.
Page 10
Understanding the Imaging Chain
2–2 Getting Started
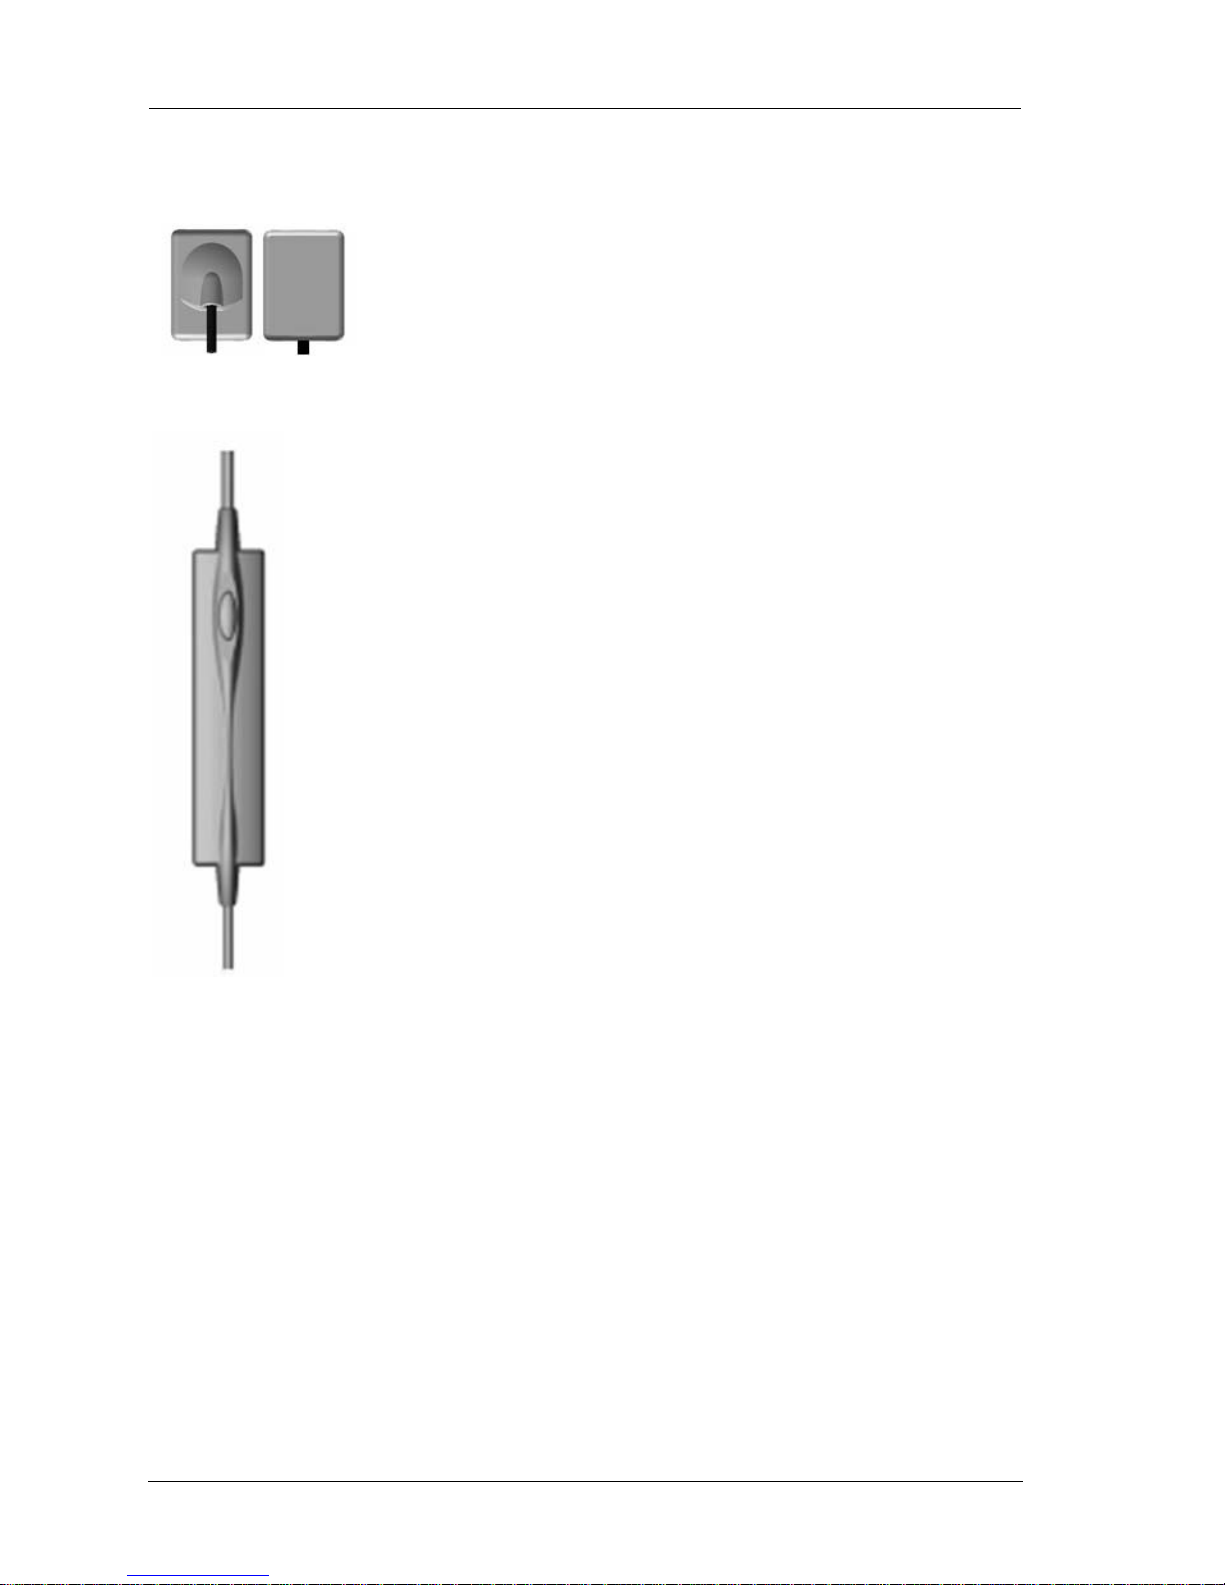
Sensor
Sensor
The sensor is radio-sensitive. The active surface is the
flat surface marked with the Kodak logo. The marking
#0, #1 or #2 indicates the size of the sensor,
respectively size 0, 1, or 2. The back of the sensor,
non-reactive to x-rays, is rounded and contains the
cable attachment.
Remote Control
The use of your sensor depends on the kit ordered:
• Size 1, universal, sensor—Use for regular
periapical and retro-coronary procedures.
• Size 2 sensor—Use for bitewings and peri-apical
procedures.
• Size 0 sensor—Use for pediatric intraoral exams.
The Size 0 sensor requires less x-ray doses and has
a very small size to fit in a child’s mouth.
Remote Control
The remote control contains all the electronics of the
sensor. The button on the remote control activates, at a
distance, the acquisition in the Kodak dental imaging
software. See “Preparing the Software” on page 2–10.
Page 11

Understanding the Imaging Chain
KODAK RVG Digital Radiography Systems User’s Guide (CS4000_en) 2–3
The remote control is connected to the computer with
its USB 2 connector . You can connect the remote
control with the power on, when the computer is
switched on. You do not need to start the Kodak dental
imaging software before you connect the sensor.
However, you can acquire the image only in the
imaging module. You can disconnect the remote
control with the power on, but do not disconnect the
remote control when you are acquiring an image. This
can damage the sensor.
X-ray Generator
The x-ray generator has a significant impact on image
quality. Due to its high sensitivity and capacity to store
an enormous quantity of inform ation, the sensor requires
high-energy rays generated over very short time periods.
This way , the im ages are formed by a ma ximum number
of gray levels and you can process the images digitally
to assist in extracting the clinical information. The
Kodak generators meet the requirements.
As a general rule, the sensor is compatible with all
generators provided the generator meets the current
standard of intraoral radiology. You can use a
high-frequency or conventional generator. The
generator must operate with a voltage of 60 to 70kV.
The generator head must have a long cone with a focal
point / film distance of at least 20 cm, to concentrate
the x-rays toward the sensor. Select a mechanism that
supports the generator and provides stability to avoid
any motion blurring due to vibration of the x-r ay sou rce.
Caution!
See “Acquiring
Images” on page 3–1
for the precautions
to take when
connecting and
disconnecting the
sensor in certain
operating modes.
Important
The power of a
generator decreases
over time. Have the
generator inspected
annually to determine
any difference
between its nominal
and effective power.
Important
The sensor is not
compatible with
generators of lesser
specifications.
Page 12

Understanding the Imaging Chain
2–4 Getting Started
Timer
Use the timer to control exposure times. Depending on
the technologies used, the selected exposure time does
not exactly represent the dose of x-rays output by the
generator since the timing does not systematically take
into account variations in the mains current. Avoid
x-ray sources of inconsistent quality. Use a digital
timer to compensate for current variations in
conventional generators.
You can connect the Kodak generators directly to
the electronics of the sensor to synchronize image
acquisition with the trigger action. This link provides
an ergonomic advantage that eliminates the need for
the operator to click on the acquisition icon prior to
each exposure. See “Preparing the Software” on
page 2–10.
Remember that the image quality for short exposures
is linked to the use of the physical synchronization
function of the sensor and the timer, in particular with
the very high-frequency Kodak intraoral x-ray units.
Page 13

Adjusting Exposure Time
KODAK RVG Digital Radiography Systems User’s Guide (CS4000_en) 2–5
Computer and Monitor
Place the computer and its monitor in or close to the
operating area, in the visual field of the practitioner
when he is at the chair. Provide visual access for the
patient, to encourage communication. This enables
you to access the RVG system and maintain the
working ergonomics at the chair.
Use a monitor with proper technical display
characteristics for the visualization of radiologi cal
images. Select and set up the monitor according to the
procedure described in the installation guide for the
sensor. Position the monitor to avoid direct light or
reflections that could hinder the reading of the clinical
information.
Adjusting Exposure Time
As in conventional radiology, the exposure time
depends on the following:
• Generator type
• Patient's morphology
• Tooth that is x-rayed
Caution!
A poor monitor
setting or a poor
quality monitor can
cause diagnostic
errors due to the
inability of the
equipment to display
the image properly.
Page 14

Adjusting Exposure Time
2–6 Getting Started
Using the Dose Indicator
Use the dose indicator to help you correctly determine
the exposure time for your generator. For each image
taken with a sensor, the dose indicator is displayed at
the bottom of the
Control Panel window. Use the dose
indicator to observe the quality of the image exposure.
Dose Indicator
• If the dose indicator band is displayed in red
and towards the left of the band, it indicates an
under-exposure of the image. Increase the x-ray
dose.
• If the dose indicator band is displayed in red and
towards the right of the band, it indicates an
over-exposure of the image. Decrease the x-ray
dose. Certain areas of the image can be saturated,
but depending on the areas of interest in the image,
the image can nevertheless contain desired
information, for instance in the areas that are
denser.
• If the dose indicator band is displayed in green and
anywhere in the middle of the band, it indicates a
correct exposure of the image.
Page 15

Adjusting Exposure Time
KODAK RVG Digital Radiography Systems User’s Guide (CS4000_en) 2–7
Customizing the Exposure Chart
Table 2–1 provides you with guidelines for exposure
times for an average generator at 70kV and 8mA.
These are approximate values. Adjust the values for
your specific generator.
Adjust the values for your generator:
• If the images are displayed too dark, reduce the
exposure settings.
• If the images are displayed too light, increase the
exposure settings.
Add the values for corrections in the second column of
Table 2–1.
Table 2–1 Sensor Exposure
Times
Acquisition Mode High Resolution
Seconds Correction
Adult with #1 or #2
Upper incisor/canine 0.18
Upper premolar 0.24
Upper molar 0.40
Lower incisor/ canine 0.12
Lower premolar 0.18
Lower molar 0.24
Note
The exposure times
in Table 2–1 are
suggested times.
Over time and with
experience, you can
identify the settings
specific to the
configuration in your
practice.
Page 16

Adjusting Exposure Time
2–8 Getting Started
Operating tips and recommended exposure times are
given for an average case, representing an adult
patient weighing approximately 80 kg. The distance
between the sensor and the generator's focal point
is approximately 23 cm. The exposure times varies
according to the patient and the angle used to take the
x-ray. Increase the dose proportionally to the square of
the distance.
Child with #0
Upper incisor/canine 0.11
Upper premolar 0.15
Upper molar 0.24
Lower incisor/ canine 0.075
Lower premolar 0.11
Lower molar 0.15
Table 2–1 Sensor Exposure
Times (Continued)
Note
The programmed time
varies as the square
of the distance. If the
distance sensor / focal
point of the generator
increases, increase the
dose.
Page 17

Sharing the Sensor Between Workstations
KODAK RVG Digital Radiography Systems User’s Guide (CS4000_en) 2–9
Sharing the Sensor
Between Workstations
You can share the sensor between several workstations
to provide access for several practitioners based on an
agreed-upon arrangement. The workstation must have
the Kodak dental imaging software and corresponding
drivers.
To share the sensor between several computers, move
it from workstation to workstation. When you connect
the sensor to a USB 2 port on the computer, the sensor
is recognized automatically and is operational.
To share images between workstations, you can
connect them to a network without having to change
the configuration described above. The Kodak dental
imaging software needs only to access a shared
database on the same workstation or on a remote
workstation.
You can print images either on a printer attached to
each computer or to a printer shared on the network.
Caution!
Do not disconnect
the sensor after you
click on the RVG
Acquisition button.
This can damage
your sensor.
Page 18

Acquiring a Good Imag e
2–10 Getting Started
Acquiring a Good Image
To obtain a good image in digital radiology, follow the
rules that apply to classic radiology . The same anatomy
limitations determine the positioning of the sensor in
the mouth. You may require time to adapt to the new
dimensions of the sensor.
Preparing the Sensor
To ensure maximum hygiene, cover the sensor with a
disposable protective sheath prior to using the sensor.
Use a new protective sheath for each patient. For
optimum performance, use protective sheaths
specifically designed for each size of sensor: size 0,
size 1 or size 2. You can obtain these from your Kodak
dental systems supplier.
Preparing the Software
RVG Acquisition
To prepare the software for an image acquisition,
click the
RVG Acquisition button or use F2 on the
keyboard.
• The button is red when it is not active.
• The button is green when it is active.
For greater flexibility and ergonomics, activate the
RVG Acquisition button from a distance. Press the
button on the remote control to activate the sensor.
Note
For the additional
instructions on
hygiene, see
“Disinfecting the
Sensor and
Maintaining Hygiene”
on page 4–2.
Note
You have 90 seconds
to acquire the image
Caution!
Never disconnect
the sensor during
the 90-second
countdown or during
image acquisition.
This can seriously
damage the sensor.
Page 19

Acquiring a Good Image
KODAK RVG Digital Radiography Systems User’s Guide (CS4000_en) 2–11
Using a Synchronization Link
If a Kodak generator is linked to the computer using a
synchronization link, you can acquire a new image
without using the F2 button, clicking on the RVG
Acquisition icon, or pressing the sensor remote control
button. The Kodak generator informs the software
that radiation is about to be produced and triggers the
appropriate receptive state in the sensor.When using a
synchronization link, the
RVG Acquisition button is
constantly green.
Orienting the Image
If you press F2 or click the RVG acquisition button,
by default, images are displayed vertically as though
an image of a tooth from the lower dental arch was
acquired.
To orient the image before acquisition, follow these
steps:
1. Press the button on the remote control.
2. Click the button until you reach the configuration
that is most fitting. The image is displayed in the
clinical sense.
Page 20

Acquiring a Good Imag e
2–12 Getting Started
Positioning the Sensor
Place the sensor in the mouth in the same way
regardless of the type of positioner used.
Figure 2–1 shows a positioning example.
Figure 2–1 Positioning Example
Positioning the Sensor for a
Mandibular Image
To position the sensor for a mandibular image, follow
these steps:
1. Have the patient draw the tongue towards the
back of the mouth. Insert the sensor holding it
horizontally.
2. Then turn the sensor downward to place it in a
vertical position.
Note
For more details on the
type of positioners, see
“Using the Different
Positioning Systems”
on page 2–14.
Page 21

Acquiring a Good Image
KODAK RVG Digital Radiography Systems User’s Guide (CS4000_en) 2–13
3. Center the sensor on the targeted tooth. Slide it
distally, and ask the patient to push the tongue to
the opposite side. Do not hesitate to compress the
mucous membranes to properly frame the apical
area. The patient can then relax the tongue, to
allow the sensor to fit naturally.
For premolars and incisors, move the sensor
towards the center of the mouth by compressing
the tongue when the mouth closes to relax the
muscles. The rigidity of the sensor and the
positioning system aids in obtaining the image.
Positioning the Sensor for a Maxillary
Image
To position the sensor for a maxillary image, follow
these steps:
1. Insert the sensor, maintaining it horizontally.
2. Turn the sensor upward so that it is vertical or
parallel to the axis of the target tooth.
3. Center the sensor on the tooth to be x-rayed
by sliding it distally. Do not hesitate to use the
roundness of the palatal arch and place the sensor
at the center of the cavity.
Page 22

Acquiring a Good Imag e
2–14 Getting Started
Using the Different Positioning
Systems
Apply the same rules for positioning the sensor in
the mouth that you use in classic radiology. You may
require time to adapt due to the rigidity of the sensor.
You can use different systems for positioning the
sensor in the mouth. None, however, can fulfill by
itself all possible needs. How you position the sensor is
dictated by the morphology of the patient, the habits of
the practitioner and what needs to be seen, rather than
the positioner itself. Use the tools according to the
restrictions dictated by the external parameters. You
can switch from the paralleling technique to the
bisecting technique, from holding the sensor with the
finger to using the holders.
Page 23

Acquiring a Good Image
KODAK RVG Digital Radiography Systems User’s Guide (CS4000_en) 2–15
Table 2–2 describes examples of positioning.
Table 2–2 Positioning Examples
Example Description
Upper posterior region
Use the roundness of the palate to place the sensor to frame the
apical area. Use Rinn type positioners for paralleling technique.
Maxillary Anterior region
Use a bisecting technique. Have the patient hold the sensor
against the tooth with a finger. For the paralleling technique,
move the lower part of the sensor away from the incisive edge
to place it parallel to the real axis of the teeth.
Lower Anterior Region
For a narrow mouth, move the sensor back parallel to the real
axis of the teeth while pushing back the tongue slightly. Use the
blunt edges of the sensor to depress the floor of the mouth to
better frame the apical area.
Page 24

Enhancing the Digital Image
2–16 Getting Started
Enhancing the Digital Image
The digital images of the sensor contain a vast quantity
of information. To explore the images fully, use the
tools in the Kodak dental imaging software.
See the online Help of the Kodak dental imaging
software for more information regarding the
visualization, the display organization, the acquisition
of full mouth series, the printing or sharing of images
as well as the use of the other sensors in the Kodak
range.
Enhancing Zones of Interest
The black and white of the film is replaced in digital
by a vast quantity of gray levels. It is difficult to
simultaneously distinguish the same level of detail in
the dense tissues and the soft tissues. Therefore, the
image is divided into zones of interest to enable you to
focus the reading of the image on a group of details:
• Crowns and inter-proximal zones
• Bone crest, soft tissues and the cervical part of the
tooth
• Apical region
Use the contrast management tools to enhance a
specific zone and extract information. Examine the
specific zone while the other zones are saturated with
black or white. The advantage of the digital image is
the possibility to move from one zone to another while
working on the same image, as if acquired with
different exposure settings.
Page 25

Enhancing the Digital Image
KODAK RVG Digital Radiography Systems User’s Guide (CS4000_en) 2–17
Managing Image Contrasts
Perio
To manage contrast after you acquire the image, use
the
Perio, Endo and Dentin-Enamel Junction (DEJ)
buttons to enhance the different zones of interest.
Endo
For more precision and freedom, use the Control Panel
window to gain access to the manual contrast and
brightness controls. Apply strong contrasts to create
zones of investigation.
DEJ
Using the Filters and Tools
Use the following filters and tools to enhance the
digital image:
• Sharpness filter
• Highlight tool
• Relief filter
• Measurement tool
Page 26

Enhancing the Digital Image
2–18 Getting Started
Using the Sharpness Filter
Sharpness Filter
Use the Sharpness filter to emphasize a radiological
feature that could go unnoticed in the pure image and
spot the subtleties of the image. The filter emphasizes
lateral ducts or small fissures, exaggerates details
that are already clearly visible on the image, such as
amalgams or any other high-density material. Always
compare the filtered image to the pure image.
To confirm the interpretation, remove the
Sharpness
filter and use a contrast tool such as the
Highlight tool.
Using the Highlight Tool
Highlight Tool
The Highlight tool reinforces contrasts locally in an area
of the image. This tool is useful for investigating
interproximal areas and detecting caries and fractures.
You can apply the tool on a reduced image as well as
on a real-size image 100% (1:1) or at 200% (2:1).
To use the
Highlight tool, click the Highlight button,
and click and hold the mouse button to activate the tool
on the area of the image you want to investigate.
To adjust the diameter of the contrast enhancement
circle, use the slider displayed above the
Control
Panel window . Move the slider left to decrease the size
or right to increase the size.
Note
The data from the
Highlight tool is
exempt of artifacts
and there is no
counter-indication to
its use.
Page 27

Enhancing the Digital Image
KODAK RVG Digital Radiography Systems User’s Guide (CS4000_en) 2–19
Using the Relief Filter
Relief Filter
The Relief filter interprets the gray shades in bulk. Use
the filter to distinguish and compare between similar
shades of gray.
For example, use this filter to distinguish the extremity
of an endodontic file placed in a canal that is confused
with Gutta Percha or cement.
To tweak the
Relief filter, manually adjust brightness
and contrast.
Using the Measurement Tool
Measurement Tool
Use the Measurement tool to calculate the distance
between points on an image. Measurements taken
on x-ray images always contain a certain degree of
uncertainty due to the properties of the radiological
examination itself. The projection phenomenon
renders a three-dimensional reality into a reduced
two-dimensional image. The curves positioned in the
axis of the x-ray beam are thus translated into straight
lines on the image.
Make sure the sensor positioning technique respects
the rule of parallel planes and that the targeted subject
does not contain any curves in the axis of the x-ray
beam. Depending on the distance object to sensor or
focal point to object, calibrate the tool to compensate
for the conic enlargement of the projection. Refer to
the Kodak dental imaging software online Help.
Caution!
The information
provided by the
filters is only
indicative. Confirm
diagnosis on a
non-filtered image.
Caution!
Take the
measurements in the
software with the
tools provided in
the Kodak dental
imaging software.
Do not take
measurements on a
printed image.
Page 28

Enhancing the Digital Image
2–20 Getting Started
Using Full Resolution
By default, images are displayed at a reduced size to
allow you to view several images at a time. To increase
the visible details in the image window, do the
following:
• To display the image at 100% or 1:1, double-click
the image, or right-click the image and select Full
Screen Actual Size.
• T o revert to the initial size, double-click the image,
or right-click the image and select Exit Full
Screen Mode.
• To display the image at 200% or 2:1, press the
space bar when at 100%, or right-click the image
and select Full Screen.
• To revert to the actual size, press the space bar, or
right-click the image and select Full Screen
Actual Size.
Tip
Step back from the
monitor to better
investigate an image.
Page 29

Enhancing the Digital Image
KODAK RVG Digital Radiography Systems User’s Guide (CS4000_en) 2–21
Saving Images
Save
Images are saved when you exit the imaging window.
The Kodak dental imaging software automatically
checks the images you have not saved and prompts
you to save each image. When you save the image,
you can specify a tooth number and add comments.
The saved images are stored in the patient file.
Printing Images
You can print images on any printer connected to the
computer and recognized by the Microsoft Windows
operating system. For optimal depiction, use a black
and white printer, either inkjet, or thermal. If you use a
printer that only has a color cartridge and constitute
the gray levels with base colors, the print is then not of
optimal quality.
Caution!
Regardless of the
paper quality, it is
impossible to faithfully
reproduce the content
of a digital image.
Therefore the true
clinical support
remains the digital file.
Page 30

Enhancing the Digital Image
2–22 Getting Started
Working with the Image
Windows
Images are displayed in windows that you can drag and
drop. Additionally, use the buttons in the taskbar to
manipulate the windows.
Table 2–3 describes the image window buttons.
Table 2–3 Image Window Buttons
Image Button Description
Full screen
Displays the image in a full
screen.
Restore Down
Displays the image in an image
window.
Minimize
Reduces the window to an icon
that is displayed at the bottom
of the screen. To restore the
image click the button, again.
Close
Closes the window.
Page 31

KODAK RVG Digital Radiography Sy stems User’s Guide (CS4000_en) 3–1
Chapter 3
Acquiring Images
This chapter describes the procedures for acquiring
images.
This chapter includes the following topics:
• Launching an Image Acquisition on page 3–1
• Using the Standard Procedure to Acquire Images
on page 3–1
• Using Templates to Acquire Images on page 3–3
Launching an Image
Acquisition
To launch an RVG image acquisition, click RVG
Acquisition on the toolbar.
Using the Standard
Procedure to Acquire
Images
To acquire a digital intraoral radiographic image,
follow these steps:
1. Cover the sensor with a barrier and place the
sensor in the applicable positioner.
2. Select the timer parameters for your generator.
Note
To determine the
exposure time and
create an exposure
time table for your
sensors, see
“Customizing the
Exposure Chart” on
page 2–7.
Page 32

Using the Standard Procedure to Acquire Images
3–2 Acquiring Images
3. Position the sensor and its positioner in the
patient’s mouth.
4. Position the beam indicating device as close as
possible to the patient.
5. Use the button on the sensor remote control to
activate the sensor.
The sensor image displays vertically by default, as
if from a tooth from the lower dental arch.
6. Use the sensor remote control to pre-orient the
image prior to acquisition.
7. Select the orientation by pressing the button on the
sensor remote control for the required position.
Each click rotates the sensor image 90°.
8. Make sure
RVG Acquisition still displays in
green. If not, click the button again or use the
sensor remote control button, align the beam
indicating device, and capture the image.
You have 90 seconds to capture the x-ray image.
The image is displayed after a few seconds.
9. Examine the image. If it is acceptable, capture the
next image.
Note
To prevent
cross-contamination,
use a new barrier for
each patient. For
optimum performance,
use barriers
specifically designed
for your sensor.
Note
If you are using an
FMS mount or a
display format, the
orientation of the
image is pre-selected
for you.
Caution!
Never disconnect the
sensor during the
90-second countdown
or image acquisition.
This can damage the
sensor.
Page 33

Using Templates to Acquire Images
KODAK RVG Digital Radiography Systems User’s Guide (CS4000_en) 3–3
Using Templates to Acquire
Images
Use a Full Mouth Series (FMS) to track and acquire
digital intraoral radiographic images. The templates
consist of boxes corresponding to a region of the
mouth with a preview frame displaying an enlarged
view of the selected image.
The templates are based on the type of sensor you are
using and the region of the mouth you are targeting.
If you select a Size 1 frame but try to insert a Size 2
image, the Size 2 image is inserted in the next free Size
2 frame.
Table 3–1 shows the sensor size and image type for
each template.
Table 3–1 Template Descriptions
Template
Sensor
Size
Image Type
RVG FMS #1
Size 1
Vertical PA images
RVG FMS #2
Size 1
Size 2
All Size 1 and Size 2 images
RVG FMS #3
Size 1
Size 2
All Size 1 vertical images; Size 1
and Size 2 bitewing images
RVG FMS #4
Size 1 Anterior images
Size 1
Size 2
Posterior images
Size 1
Size 2
Bitewing images
RVG FMS #5
Size 1 Bitewing images or PA images
RVG
Bitewing
format
Size 1 Four bitewing images
Size 2 Four bitewing images
Note
If you select an image
other than Size 1, it is
not inserted into the
RVG FMS #1; it is
opened in a single
window.
Page 34

Using Templates to Acquire Images
3–4 Acquiring Images
Using an FMS to Acquire Images
To use an FMS to acquire images, follow these steps:
1. Connect the sensors to the digital imaging dock.
2. Open the patient’ s record and launch the Imaging
window.
3. Select
Format > Use an FMS. The Select a
format
window is displayed.
4. Double-click a template.
5. Select a frame in which to insert the image. The
frame is highlighted in green.
6. Acquire the image using the steps in “Using the
Standard Procedure to Acquire Images” on
page 3–1.
After you acquire an image, you are automatically
advanced to the next frame in the template in
numerical order, although the next frame is not
highlighted.
7. Continue to insert images until you have
completed the template.
Save
8. When finished, click Save and close the mount.
Note
When you acquire
images in a template,
the images are
pre-oriented.
Page 35

Using Templates to Acquire Images
KODAK RVG Digital Radiography Systems User’s Guide (CS4000_en) 3–5
Using a Display Format to
Acquire Images
There are three display formats you can use to acquire
images:
• Manual Format—Used for single PAs, up to 40;
this is the default position.
• Operative Radiolog y Fo rma t—Used for vertical
PAs, displays four images simultaneously; useful
in endodontics and implantology.
• RVG Comparison Format—Used with the Size 1
sensor for obtaining images of pre-, peri-, and
post-operative treatments.
T o acq uire images using a display format, follow these
steps:
1. Click Manual Format on the toolbar.
2. Select the required format from the drop-down
list.
3. Acquire the image using the steps in “Acquiring
Images” on page 3–1.
The image is displayed in the designated location.
4. Continue to acquire images until you complete the
template.
5. When finished, click
Save.
Note
In RVG comparison
format, images are
displayed and viewed
in a vertical orientation.
Page 36

Using Templates to Acquire Images
3–6 Acquiring Images
Page 37

KODAK RVG Digital Radiography Sy stems User’s Guide (CS4000_en) 4–1
Chapter 4
Disinfecting and Maintaining
the Sensor
This chapter describes the procedures for disinfecting
and maintaining the sensor.
This chapter includes the following topics:
• Disinfecting the Sensor and Maintaining Hygiene
on page 4–2
• Cleaning the Cable and Sensor Remote Control on
page 4–3
• Storing the Sensor After Use on page 4–3
• Maintaining the Sensor on page 4–3
• Preventing Electrostatic Discharge on page 4–4
• Protecting Computer Data on page 4–4
Page 38

Disinfecting the Sensor and Maintaining Hygiene
4–2 Disinfecting and Maintaining the Sensor
Disinfecting the Sensor and
Maintaining Hygiene
Carefully follow the procedure detailed earlier in this
manual on how to prepare the sensor to ensure
maximum hygienic safety for the patient.
To disinfect the sensor and maintain proper hygiene,
follow these guidelines:
• Always use the sensor with a hygienic barrier.
Change the barrier between each patient.
• When selecting a disinfectant product, check the
list with the product manufacturer's information.
• Thoroughly disinfect the sensor after each patient.
Remove the hygienic protective sheath and
thoroughly clean the sensor with a disinfecting
wipe.
• Use only cold disinfecting products that are
authorized by local dental regulatory agencies.
• Follow the manufacturer's recommendations for
safety precautions when using the disinfectant
product.
• Between each patient, clean the sensor and the
first centimeters of the cable using a disinfecting
cloth. Wipe down the sensor with a sterile
solution. Keep the sensor and the remote control
off of the floor at all times.
Note
Our sensors are
supplied non-sterile.
Caution!
Never place the
sensor or remote
control in an
autoclave. This can
damage the system.
Caution!
Never immerse the
connector located on
the other end of the
cable, nor the remote
control.
Note
Immerse part of the
cable to guarantee a
good disinfection. Do
not immerse the remote
control.
Page 39

Maintaining the Sensor
KODAK RVG Digital Radiography Systems User’s Guide (CS4000_en) 4–3
Cleaning the Cable and
Sensor Remote Control
Clean the cable carefully, using a disinfecting wipe.
To clean the cable and sensor remote control, hold the
sensor in one hand and with the other hand run the
wipe from the end of the sensor over the first twelve
inches of the cable without pulling on the cable
insulation. Slide the wipe without force, pinching the
cable between the fingers with minimal pressure.
Storing the Sensor After
Use
It is strongly recommended that you store the sensor in
its case at the end of the day to prevent it from falling
or from coming into contact with abrasive cleaning
products when your office is being cleaned.
Maintaining the Sensor
To maintain the life of the sensor, do the following:
• Do not place the sensor in a sterilizer or autoclave.
• Do not pull on the cable, even when removing the
disposable protective sheath.
• Do not walk on or roll objects over the cable.
• Do not request the patient to bite on the sensor or
the cable.
Important
Follow these
guidelines to prevent
damage to the sensor.
Page 40

Preventing Electrostatic Discharge
4–4 Disinfecting and Maintaining the Sensor
• Do not disconnect the sensor during the 90-second
delay, in non-synchronized mode, or during
acquisition.
• Do not force, bend, or pull the cable at the sensor
side.
• Do not immerse the sensor remote control.
Preventing Electrostatic
Discharge
To prevent electrostatic discharge, do the following:
• When the sensor is not connected, store it in its
case.
• Never touch the monitor’s screen and the sensor
simultaneously. This can result in serious damage
to the sensor.
• Never touch the contact points of the USB
connector of the sensor.
Protecting Computer Data
Back up the database daily on several high capacity
magnetic media, streamer, ZIP, DAT, used alternately.
Ask for advice from your computer dealer. Store the
copies in a secure location.
Page 41

KODAK RVG Digital Radiography Sy stems User’s Guide (CS4000_en) A–1
Appendix A
Troubleshooting Images
When troubleshooting problems that you may
encounter with images, try to solve the problem
by using the following instructions. If the problem
persists, or if it is not outlined below, contact Kodak
dental imaging support.
Table A–1 outlines troubleshooting methods for
resolving most problems that you may encounter.
Table A–1 Troubleshooting
Tips
Symptom Cause and Corrective Action
After
triggering
the x-rays,
no image is
displayed.
• Make sure a patient record is open in
imaging mode.
• If the system is not connected to the
timer:
Check that the
RVG Acquisition button
is active, not grayed out. If the button is
grayed out, check the connection of the
sensor on the USB 2 port.
The acquisition function was not
activated, click on the
RVG
Acquisition
button. The button turns
green or use the button on the remote
control, take the X-ray image within
90 seconds.
• If the system is connected to the timer:
Check the connection with the timer.
Check that the hub is powered properly.
Contact your dealer
Page 42

A–2 Troubleshooting Images
The image is
pale and
grainy.
• The exposure time is too short; increase
it. The selected acquisition mode does
not correspond to the x-ray dose used.
• The generator voltage is too low
(<60 kV rms); have the generator
checked.
• The generator is too far from the patient
with respect to the selected dose.
• Check the monitor contrast and
brightness settings and ensure there are
no reflections on the screen.
The image is
too dark.
• The exposure time is too high; lower it.
• The selected acquisition mode does not
correspond to the x-ray dose used.
• Check the monitor settings (contrast
and brightness) and ensure there are no
reflections on the screen
The image is
blurred.
• Patient moved during exposure.
• Generator head was not stable.
• Use an image filter.
The image is
white.
• Active face of sensor was not exposed
to x-rays.
• X-ray dose is insufficient.
• Sensor is not connected, or is
improperly connected.
• Ensure the generator is producing
x-rays; have it checked by a certified
technician.
Table A–1 Troubleshooting
Tip s (Continued)
 Loading...