

Kodak EasyShare 4000, Easyshare Printer Dock 4000 User Manual
Kodak EasyShare
printer dock 4000
User’s Guide
Visit Kodak on the World Wide Web at www.kodak.com

Eastman Kodak Company
343 State Street
Rochester, New York 14650
© Eastman Kodak Company, 2003
Kodak and EasyShare are trademarks of Eastman Kodak Company.
All screen and print images are simulated.
P/N 6B8576
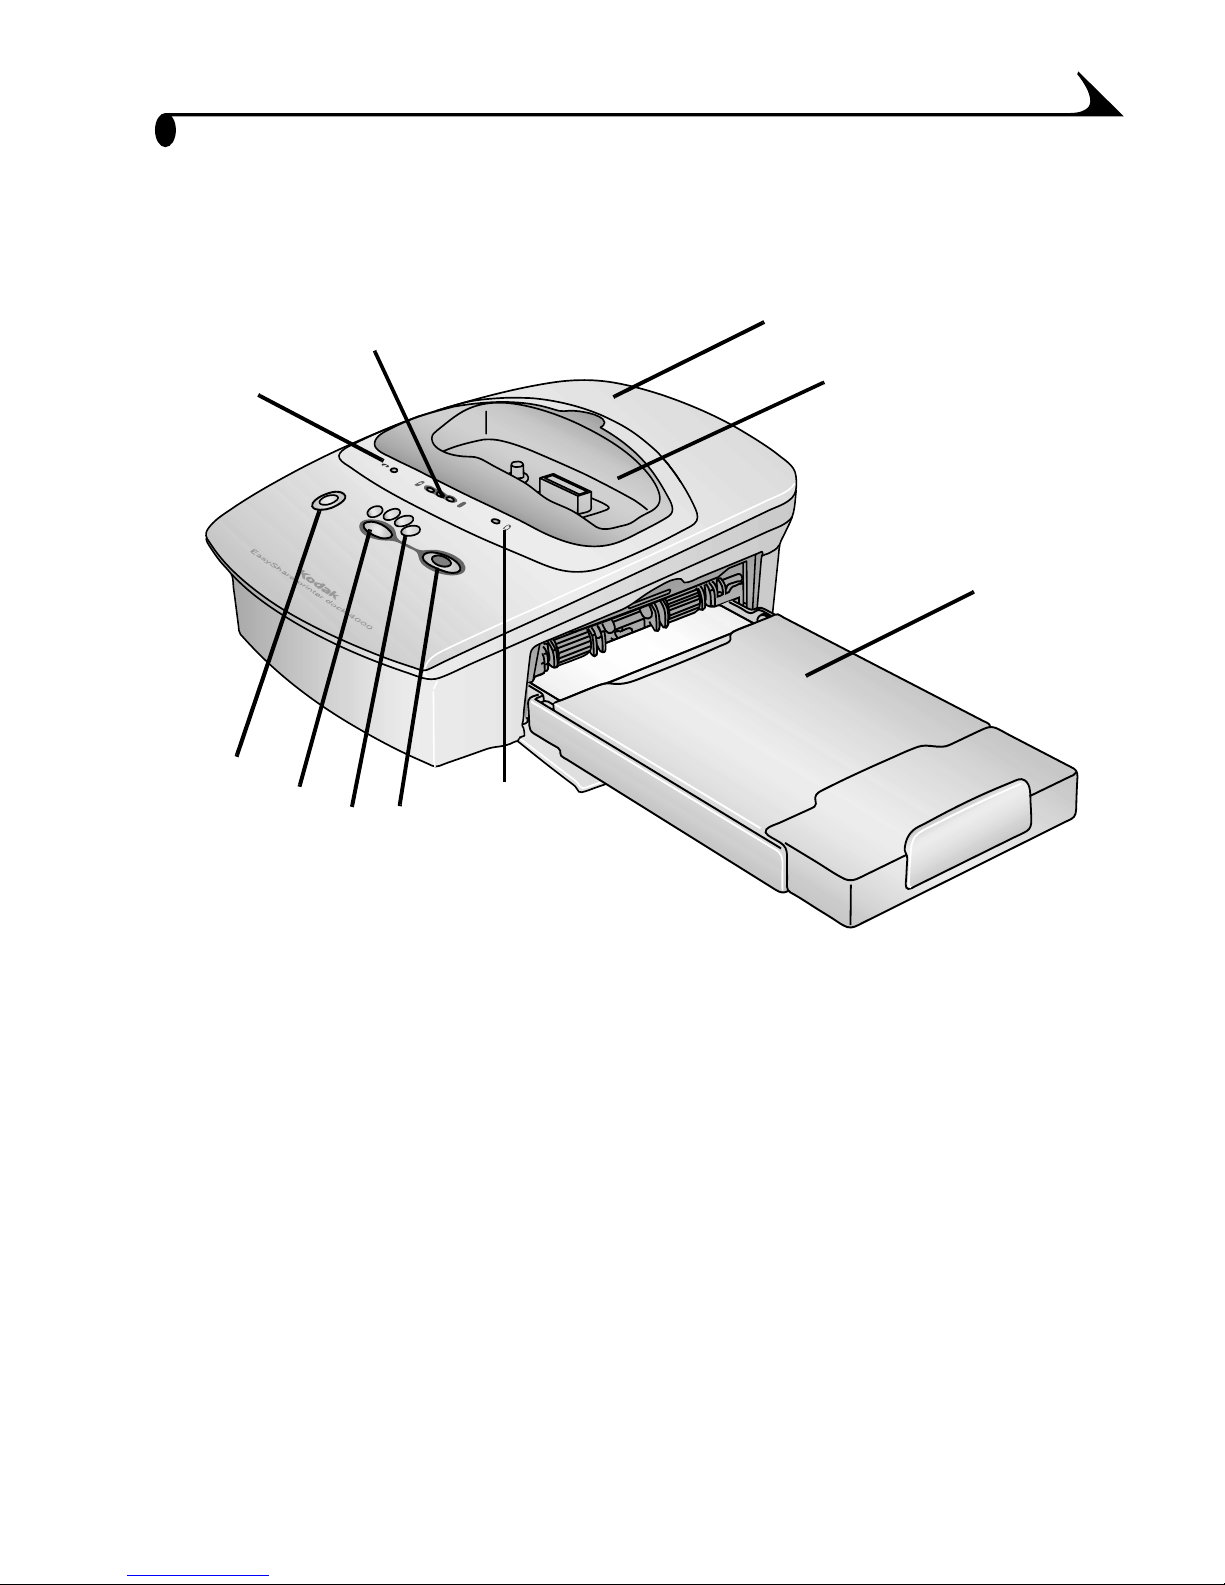
Front View
Product Overview
8
9
7
10
6
1
2
3
4
5
1 Printer dock
2 Universal insert
3 Paper tray
4 Paper indicator
5 Print button
6 Print mode lights
7 Print mode button
8 Transfer button
9 Color cartridge indicator
10 Battery charging lights
i
Back View
Product Overview
1
7
5
6
5
4
4
1 DC power connector
2 Color cartridge slot
3 Color cartridge door
4 USB connector
5 Paper tray door
2
3
ii

Side Views
Product Overview
1
1 Paper tray
2 Paper path
2
iii


Table of Contents
1 Getting Started with Your Printer Dock ......................1
Need This Guide in Larger Print?............................................1
What Can I Do With My Printer Dock? ..................................1
Printer Dock Package Contents ............................................2
Finding a Location for the Printer Dock............................. 3
Installing the Camera Insert.................................................. 4
Connecting the Power .............................................................. 5
Handling and Storing the Color Cartridge ........................ 6
Loading the Color Cartridge................................................... 6
Handling and Storing the Paper............................................7
Loading the Paper..................................................................... 8
Inserting the Paper Tray......................................................... 9
Indicator Lights and Buttons ..............................................10
2 Getting Started with Your Camera ............................ 11
Installing the Rechargeable Battery................................... 11
Setting Picture Quality ......................................................... 12
Selecting Pictures for Automatic Printing ...................... 12
Docking and Charging the Camera...................................... 14
3 Printing Without a Computer .......................................15
Printing from Your Camera ................................................... 15
Removing Perforated Tabs from Prints ............................16
Canceling Printing .................................................................... 17
v

4 Using the Printer Dock with a Computer ................. 19
System Requirements............................................................ 19
Installing the Software .......................................................... 21
Upgrading Your Software and Firmware.......................... 24
Connecting to a Computer................................................... 25
Transferring Pictures ............................................................26
Printing from a Computer .................................................... 27
Removing Perforated Tabs from Prints ...........................29
Status Monitor—Windows system only .........................30
Canceling Printing ...................................................................30
5 Care and Maintenance ................................................... 31
General Care.............................................................................. 31
Cleaning the Printer Dock...................................................... 31
Cleaning the Print Head........................................................32
Clearing a Paper Jam.............................................................33
Clearing a Color Cartridge Jam ..........................................34
Traveling with your Printer Dock.........................................35
6 Troubleshooting ...............................................................37
Printing Problems.................................................................... 37
Problems Transferring Pictures .........................................44
Printer Dock Status Lights.................................................45
7 Getting Help ...................................................................... 51
Helpful Web Links...................................................................... 51
Help in this User’s Guide ....................................................... 51
vi

Software Help ............................................................................51
Telephone Customer Support ............................................. 52
8 Appendix ............................................................................ 55
Printer Dock Specifications ................................................ 55
Accessories and Supplies.....................................................57
Safety Labels...........................................................................58
Regulatory Information......................................................... 58
Disposal Information .............................................................59
vii


1 Getting Started with Your
Printer Dock
Need This Guide in Larger Print?
For a large print version of this User’s Guide:
1 Go to the support page at www.kodak.com/go/printerdock.
2 Under Manuals/Guides, View PDF, click your language to open the User’s
Guide.
3 With the User’s Guide open on a Windows system-based computer:
! From the File menu, select Print.
! In the Print window, select Fit to Page.
With the User’s Guide open on Mac OS X:
! From the File menu, select Page Setup.
! Change Scale to 200%.
4 Print as usual.
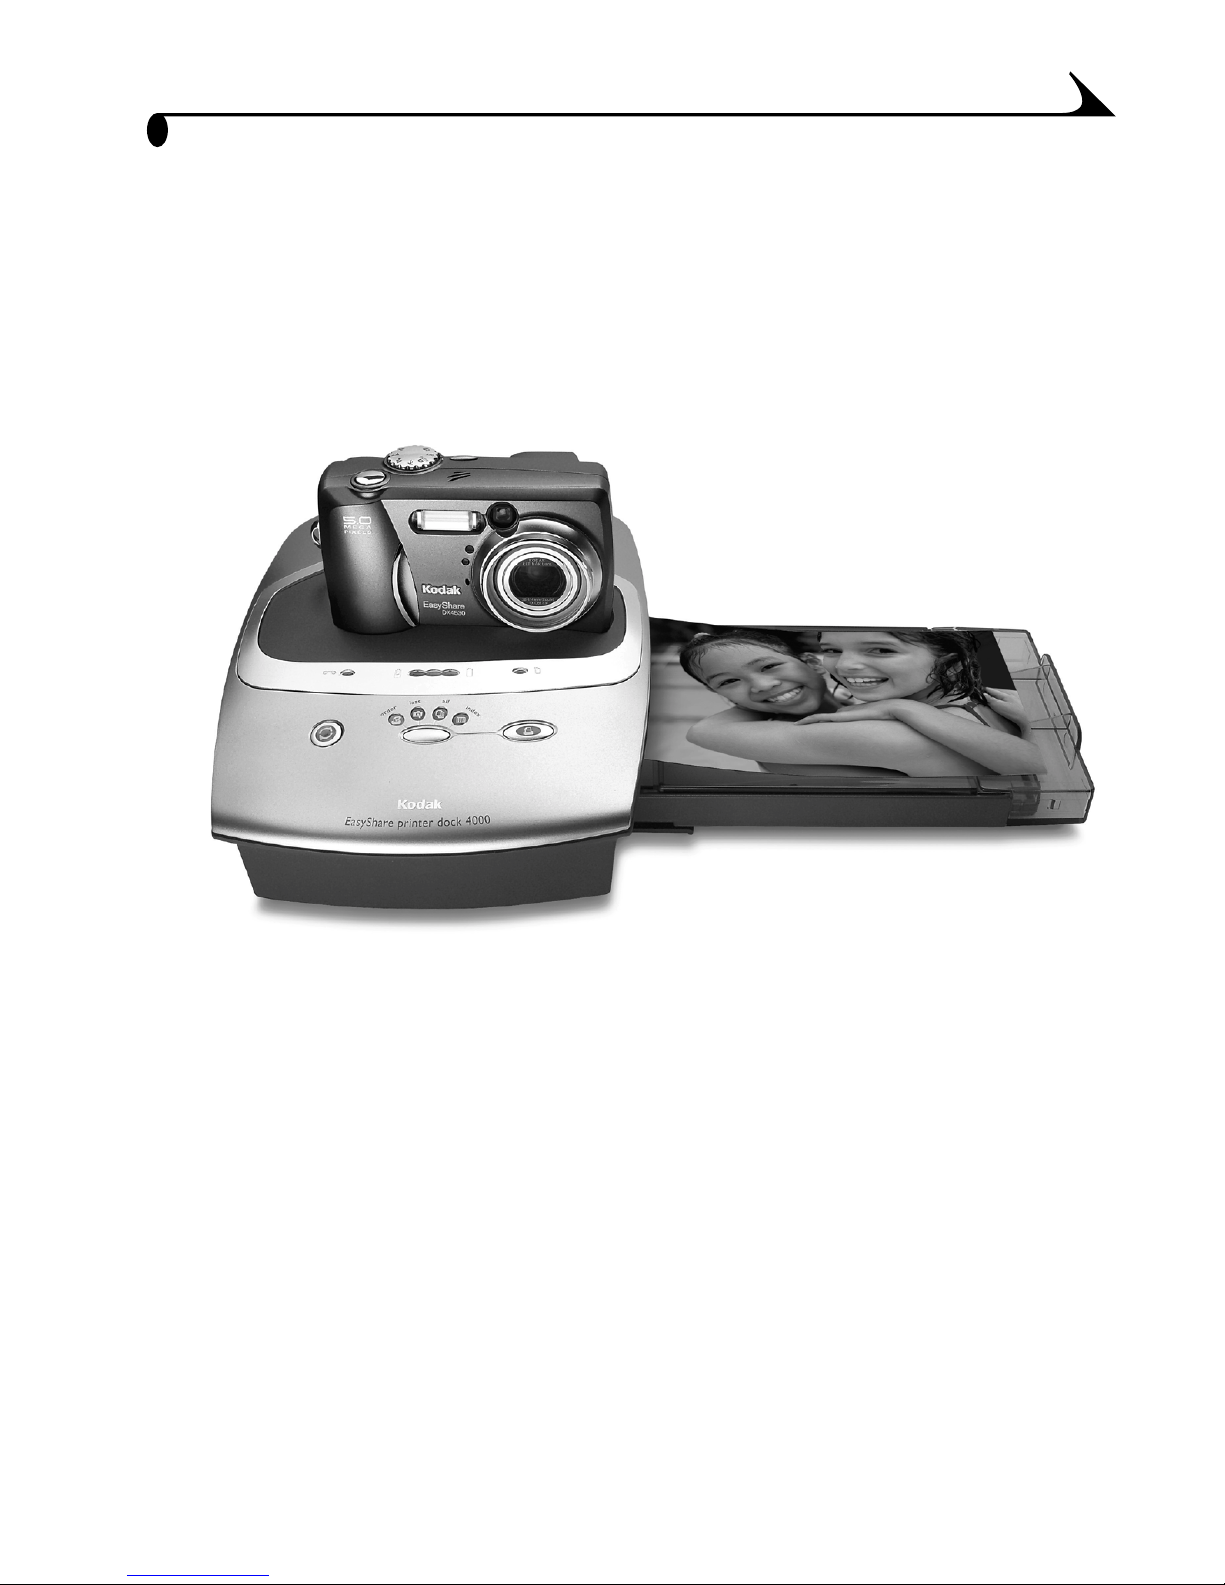
What Can I Do With My Printer Dock?
Use the Kodak EasyShare printer dock 4000 to make high-quality 4 x 6 in.
(102 x 152 mm) photos, with or without a computer.
The printer dock works with Kodak EasyShare CX/DX 3000 and 4000 series
digital cameras.
1
Chapter 1
Without a computer, you can:
! Print pictures directly from your camera
! Charge your camera battery pack
With a computer, you can:
! Transfer pictures from your camera to the computer
! Organize, edit, and print pictures
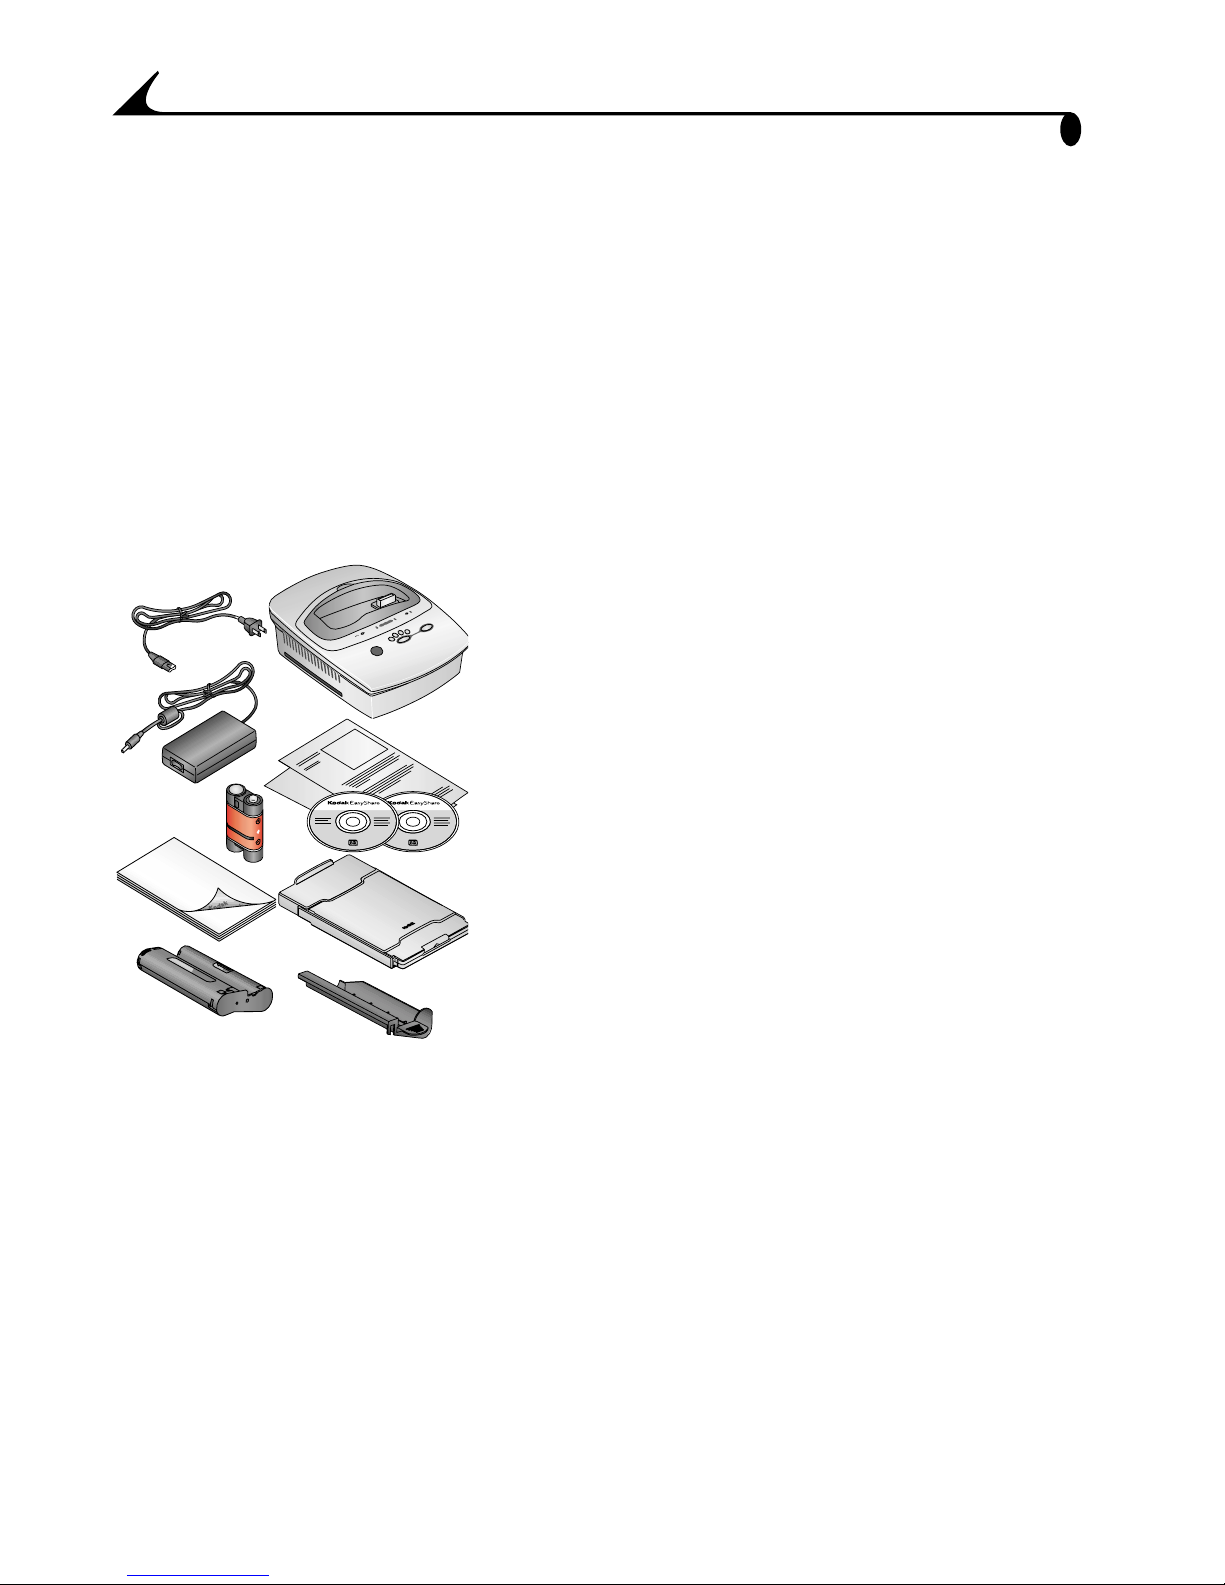
Printer Dock Package Contents
7
9
10
6
1
2
1 Printer dock
2 Universal insert (installed)
3 Welcome kit; includes user’s guide**, quick
start guide, registration card, Kodak
3
8
EasyShare software and printer dock
software CD.
4 Paper tray
5 Print head cleaning tool
4
6 AC power cord
7 AC power adapter
5
8 Kodak EasyShare Ni-MH rechargeable
battery pack
9 Sample photo paper pack (10 pack)
10 Sample color cartridge (10 pictures)
To purchase accessories, see a retail dealer of Kodak products or visit
www.kodak.com/go/printerdock.
**In some countries, the user’s guide is provided only on CD.
2
Chapter 1
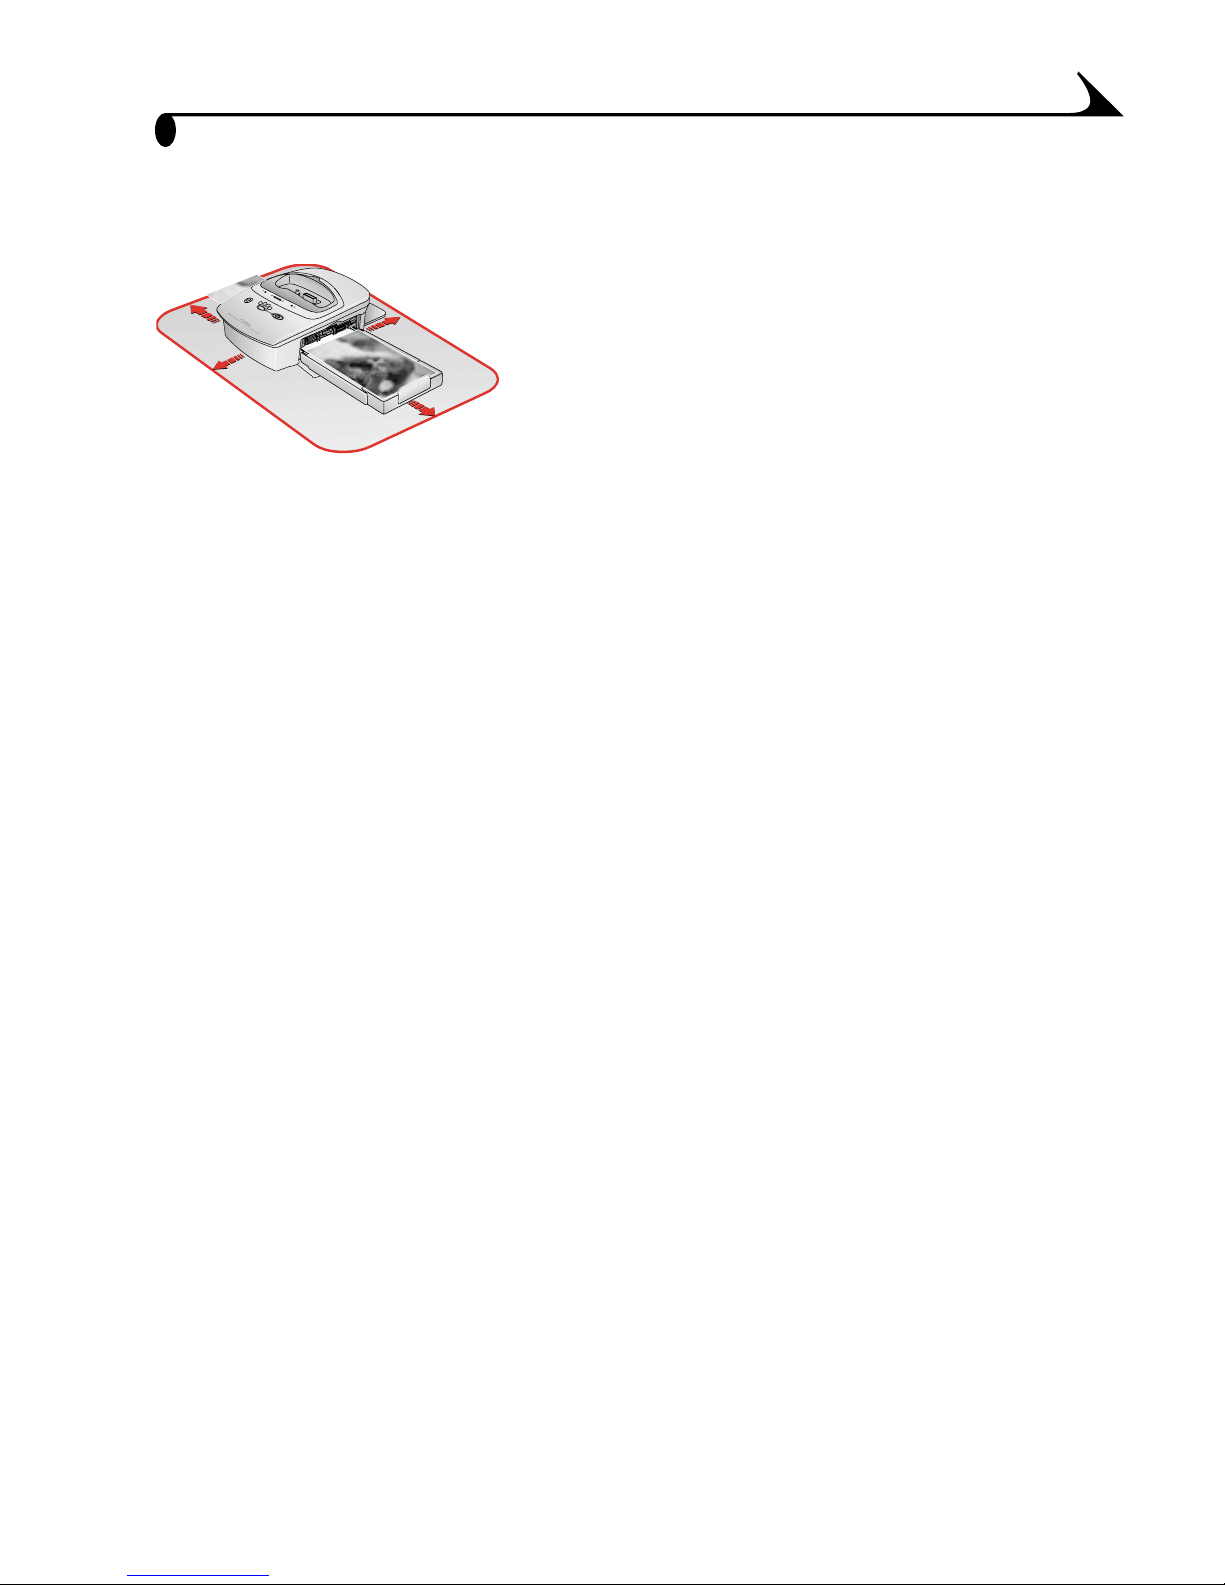
Finding a Location for the Printer Dock
! Allow 5 inches (12.7 cm) clearance on all
sides of the printer dock.
! Place the printer dock on a flat, clean, dust-
free surface, out of direct sunlight.
! Make sure airflow around the top and back
is not blocked.
! Do not place the printer dock on cloth or
carpeted surfaces.
! Avoid areas where ventilation ducts, open
doors, or frequent passersby might expose
the printer dock and paper to high levels of
dust and debris. Airborne dirt particles can
cause image-quality problems.
3
Chapter 1
Installing the Camera Insert
The printer dock comes with a universal camera insert installed, which is used
to fit the camera to the printer dock. The universal insert is used with most
cameras.
If your camera comes with a custom insert, use that one instead of the
universal insert. Do not discard the universal insert.
1 To remove the universal insert:
a Push the insert towards the front of the
printer and lift the back edge.
b Push the insert towards the rear of the
printer and lift out the front edge.
2 To install the custom insert (included with
your camera).
a Place the front tabs on the insert in the
slots in the front of the printer dock.
b Fit the back of the insert down into the
dock and snap the insert into place.
4
Chapter 1
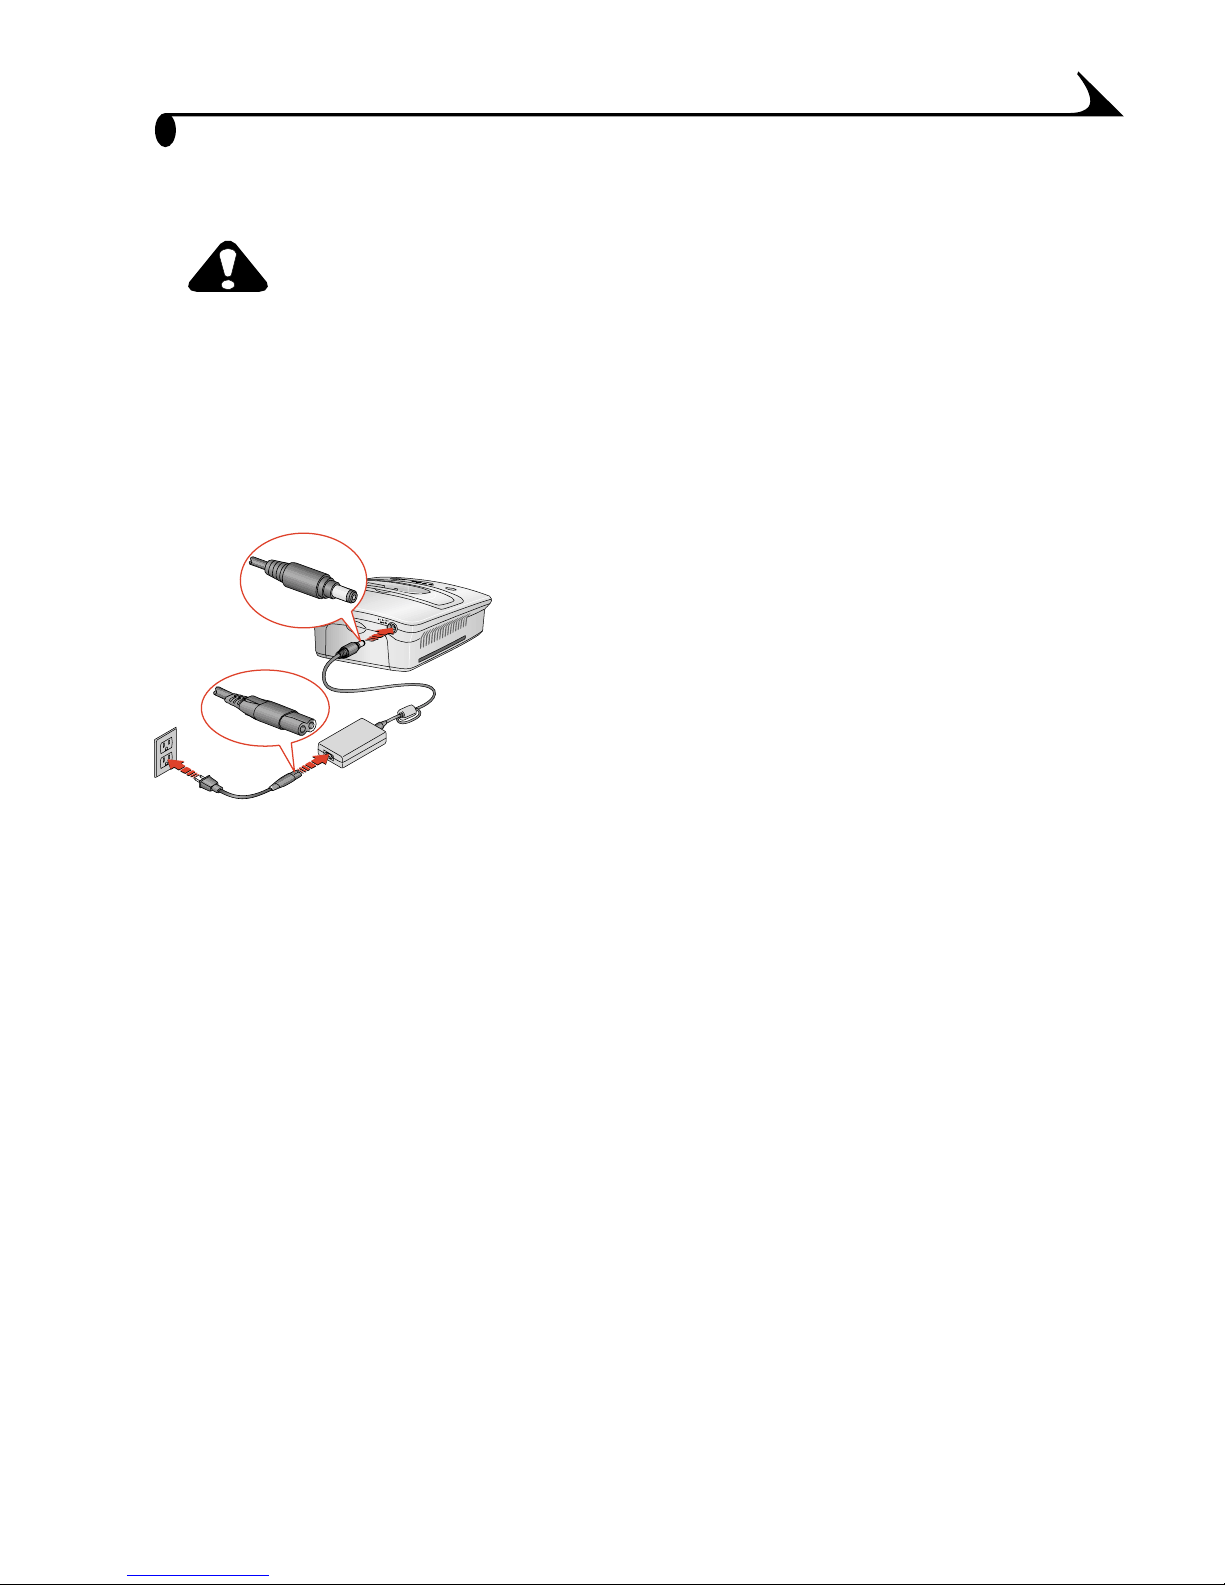
Connecting the Power
CAUTION:
Use only the AC adapter and power cord included with the
printer dock. Other adapters and cords can damage your
camera, printer dock, or computer.
IMPORTANT: Remove your camera from the printer dock when you
are connecting power.
1 Connect the AC power cord to the adapter,
then to the back of the printer dock.
2 Connect the AC power cord into a power
outlet.
NOTE: Your power cord may be different from
the one pictured. Use the plug that
accommodates your type of power
outlet.
5

Chapter 1
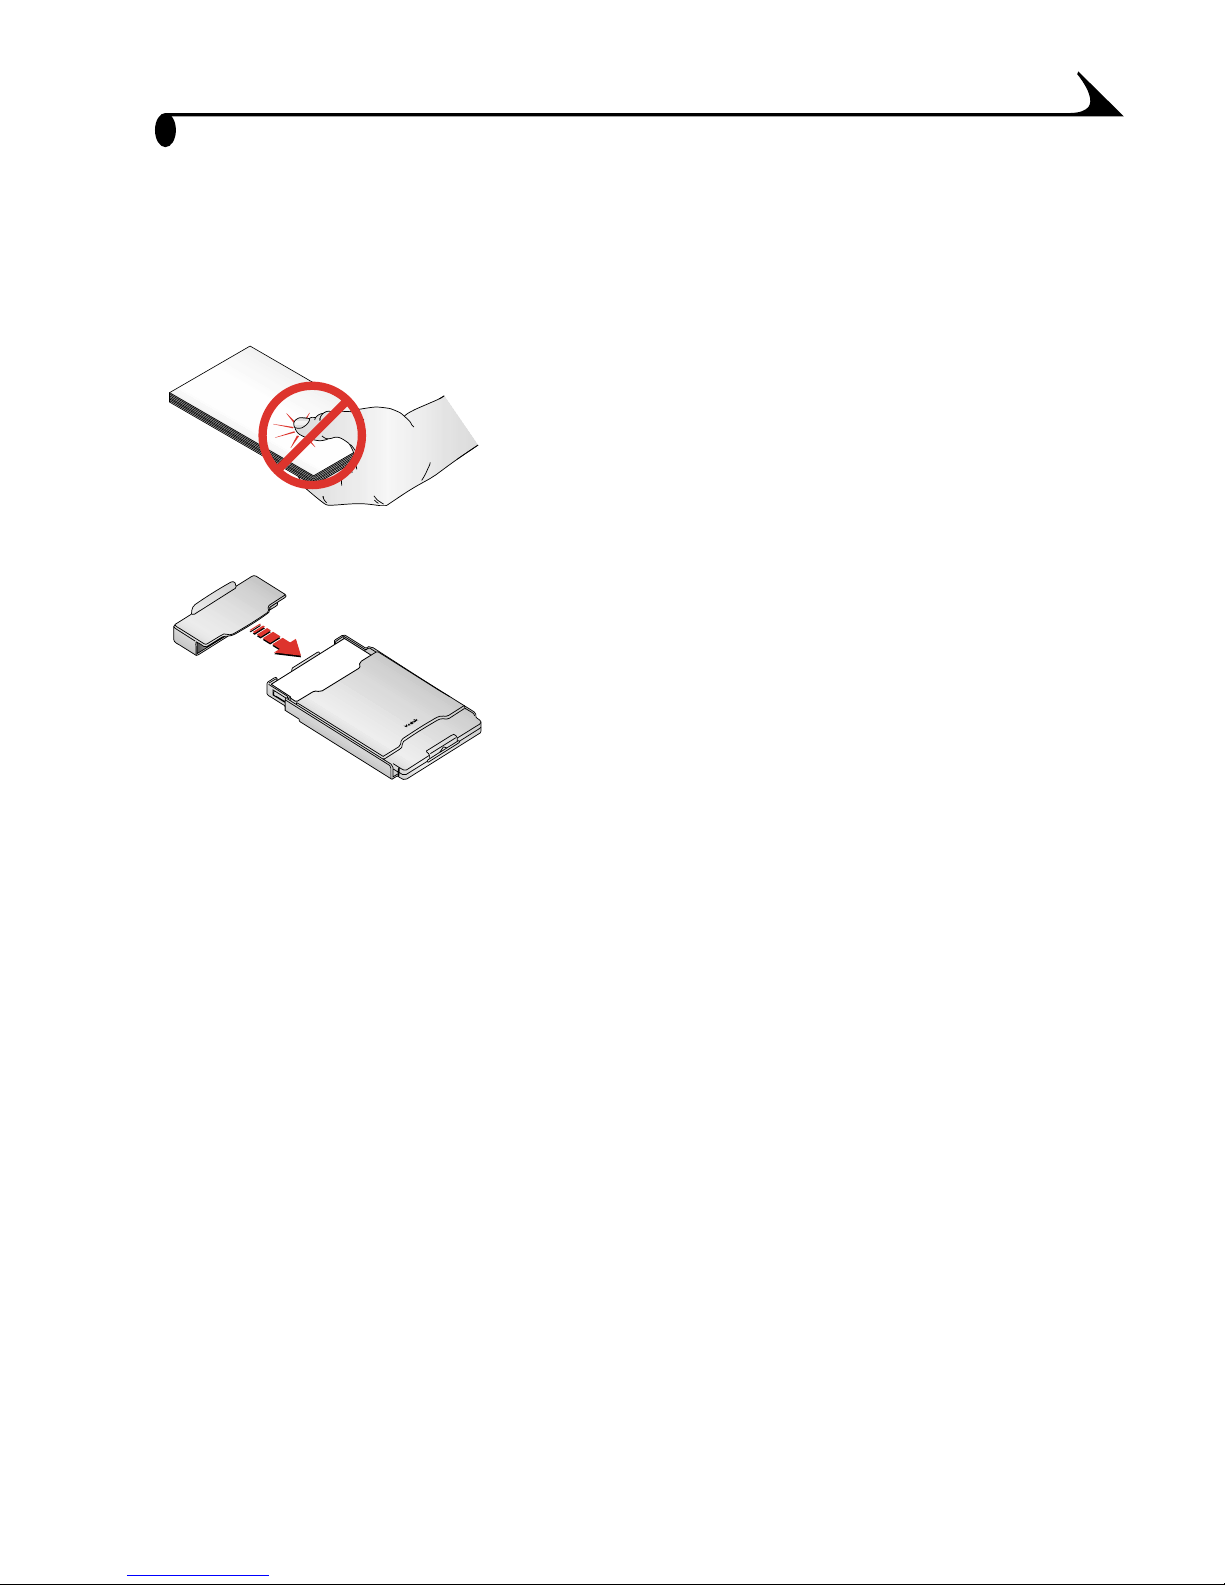
Handling and Storing the Color Cartridge
! For best quality prints, store the cartridge in a location where the
temperature does not exceed 85 °F (30 °C).
! To avoid fingerprints, handle the color cartridge by the spool ends.
! Store the color cartridge away from direct sunlight.
Loading the Color Cartridge
The color cartridge provides the dyes and a protective laminate coating for
making your photos.
A sample Kodak color cartridge & photo paper kit (10 pk) are included with
the printer dock. To purchase a color cartridge, photo paper kit, and other
accessories, see a retail dealer of Kodak products or visit www.kodak.com/go/
printerdock.
1 Open the color cartridge door on the back
of the printer dock.
2 Remove the slack in the color cartridge by
pushing in on the spool, then rotating the
cartridge spool in the direction of the arrow.
3 Slide the color cartridge in, label side up
and with the arrow pointing toward the
printer dock, until it locks into place.
6
CAUTION:
Do not force the cartridge into
the slot.
4 Close the color cartridge door.
Chapter 1
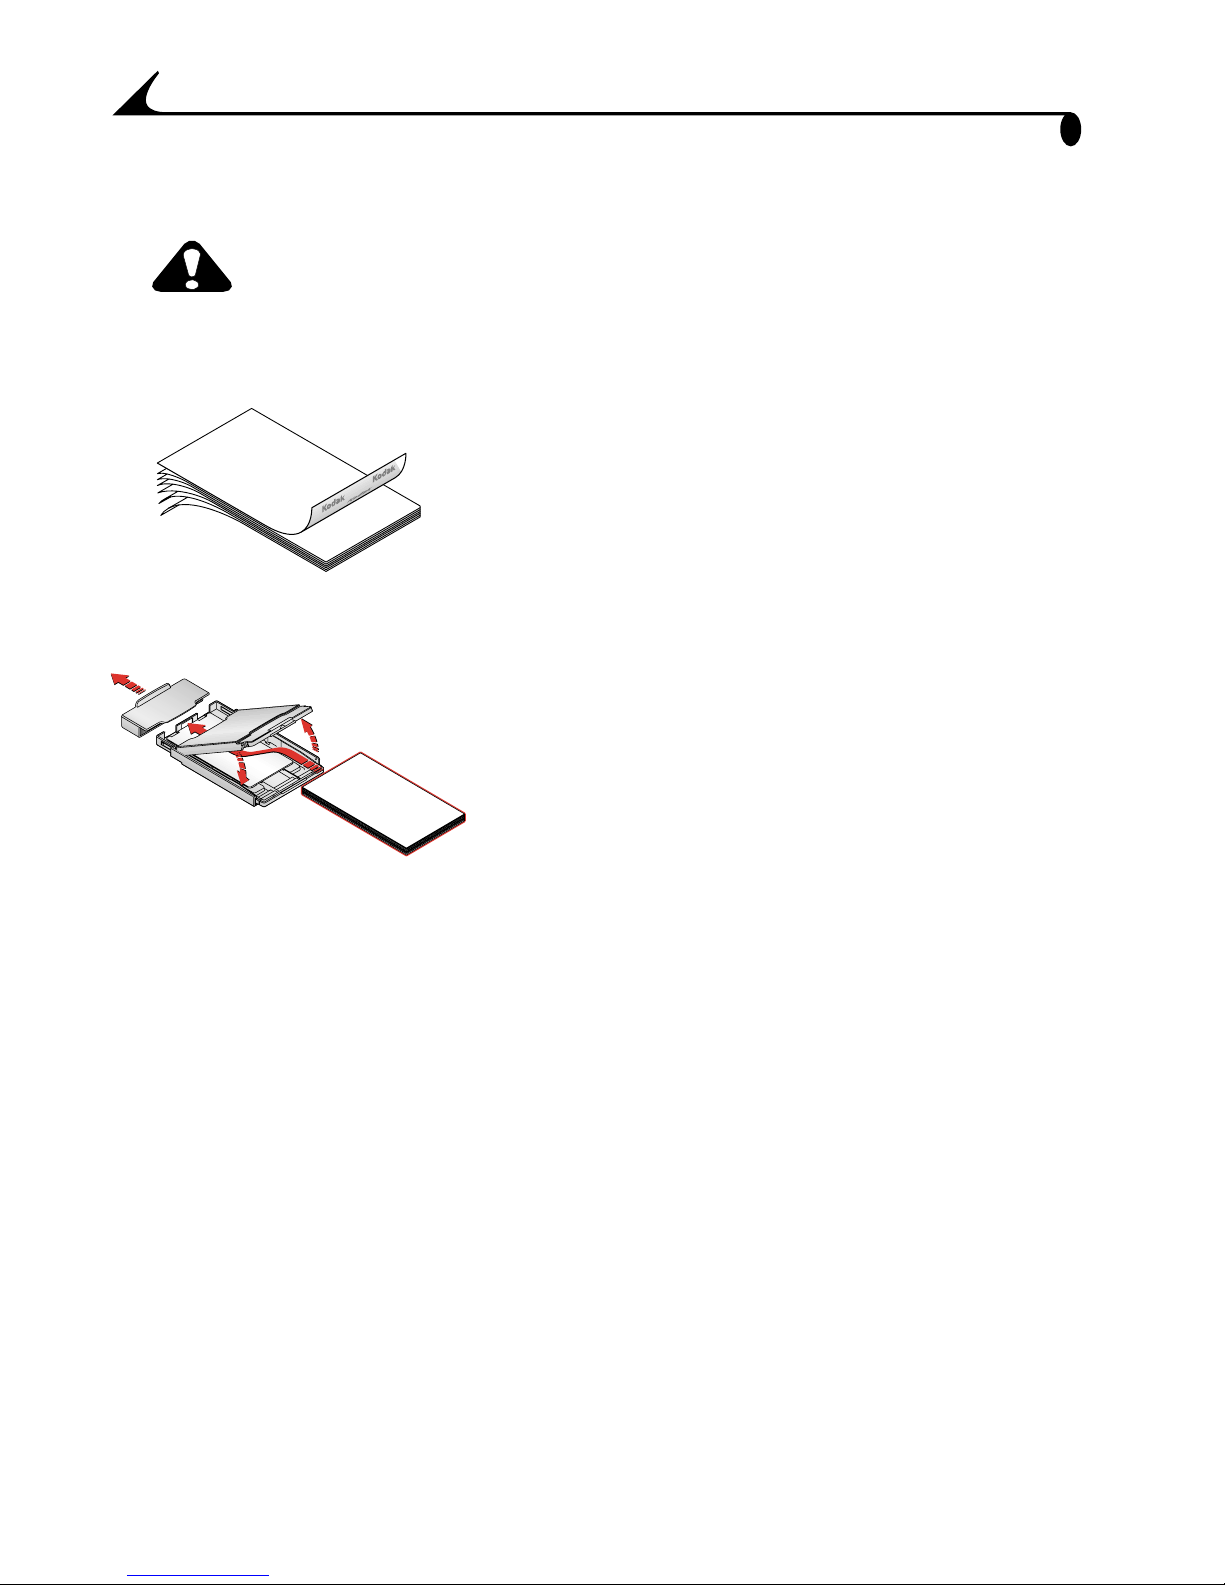
Handling and Storing the Paper
! To avoid fingerprints, handle the paper by
the edges or by the perforated tabs.
! Do not touch the glossy side of the paper.
! Store the paper away from dirt, debris, and
direct sunlight.
! When not in use, place the protective cap on
the other end of the paper tray to prevent
dirt and dust from getting on the paper.
7
Chapter 1
Loading the Paper
CAUTION:
Use only the Kodak color cartridge & photo paper kit. Do
not use inkjet paper.
1 Fan the paper before loading it into the
paper tray.
IMPORTANT: Do not load paper that is missing perforated tabs.
2 Remove the protective cap from the paper
tray. Do not discard.
3 Lift the paper tray cover.
4 Load a pack of paper (20 sheets) into the
paper tray, with the Kodak logo side facing
down and the glossy side up.
NOTE: Use the upper limit line inside the paper
tray as a guide to avoid overloading the
paper. Do not load more than 25 sheets
of paper.
5 Close the paper tray cover.
8
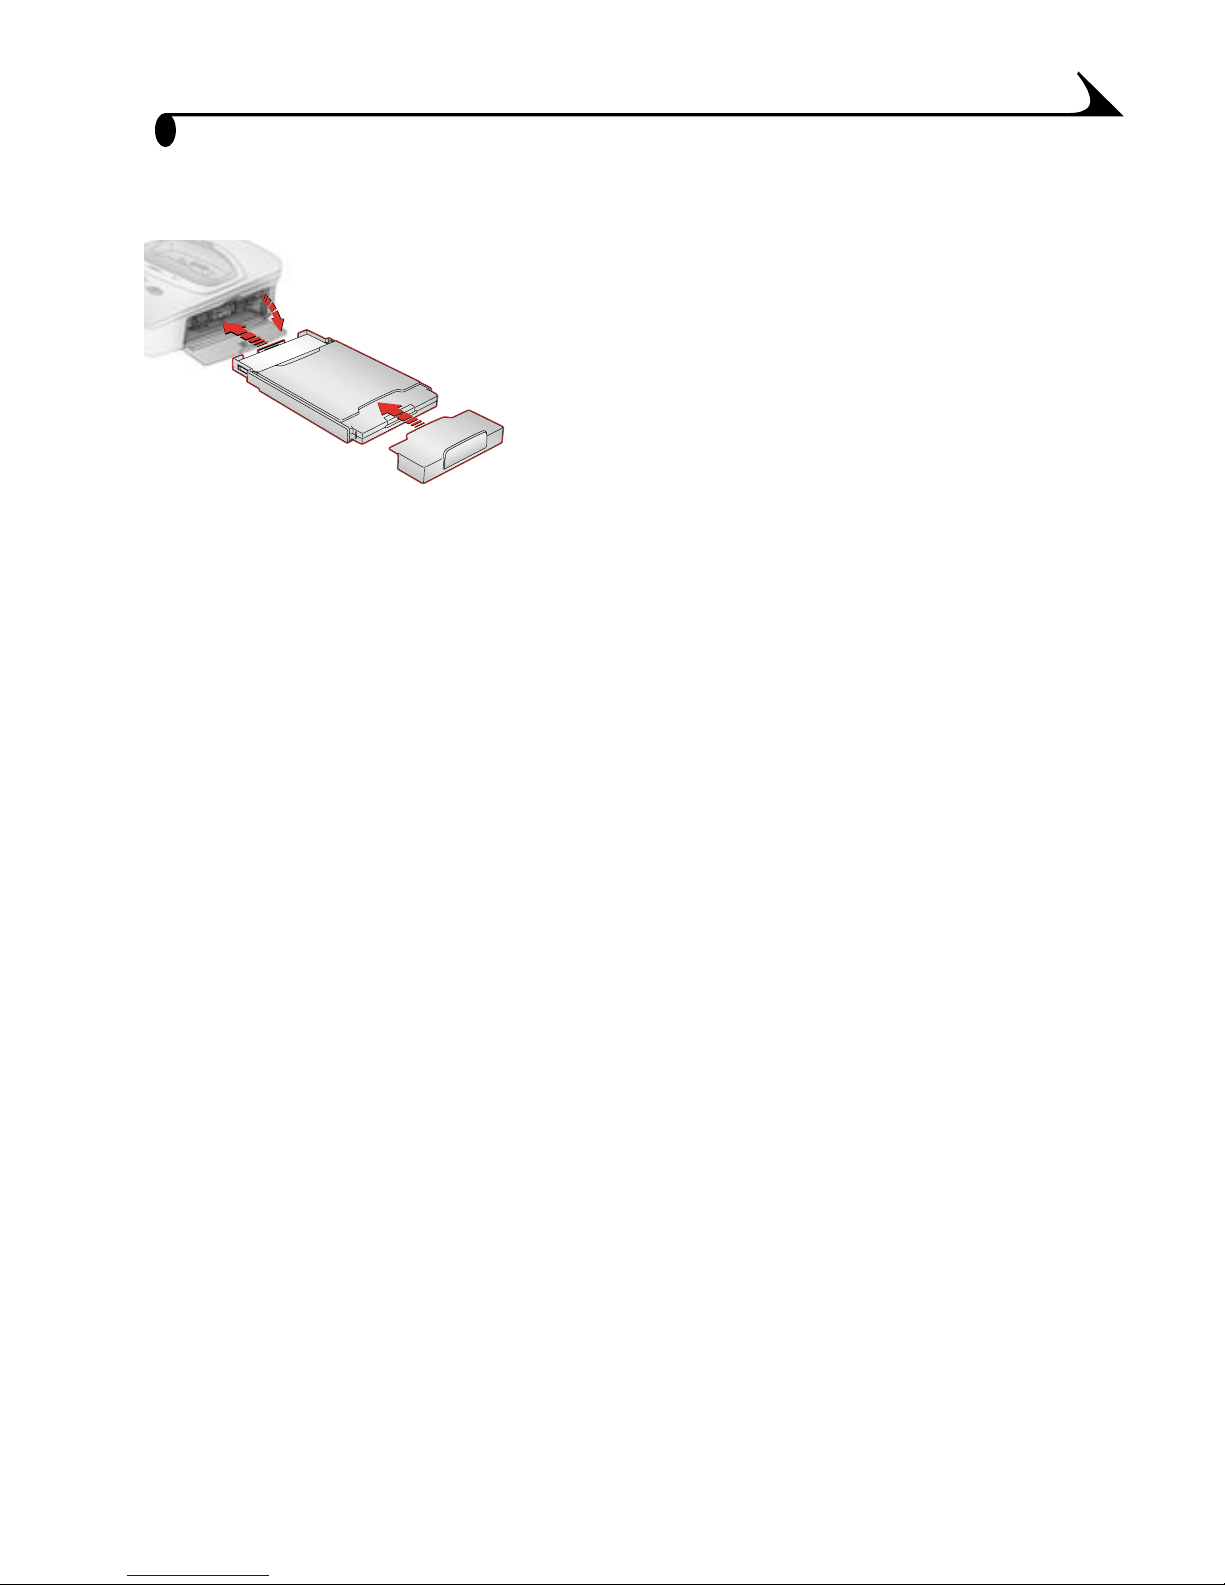
Chapter 1
Inserting the Paper Tray
1 Open the paper tray door.
2 Replace the protective cap on the front of
the paper tray to catch the completed prints.
3 Slide the paper tray in until the tray locks
into place.
NOTE: Keep the protective cap on the paper tray
at all times.
9
Chapter 1
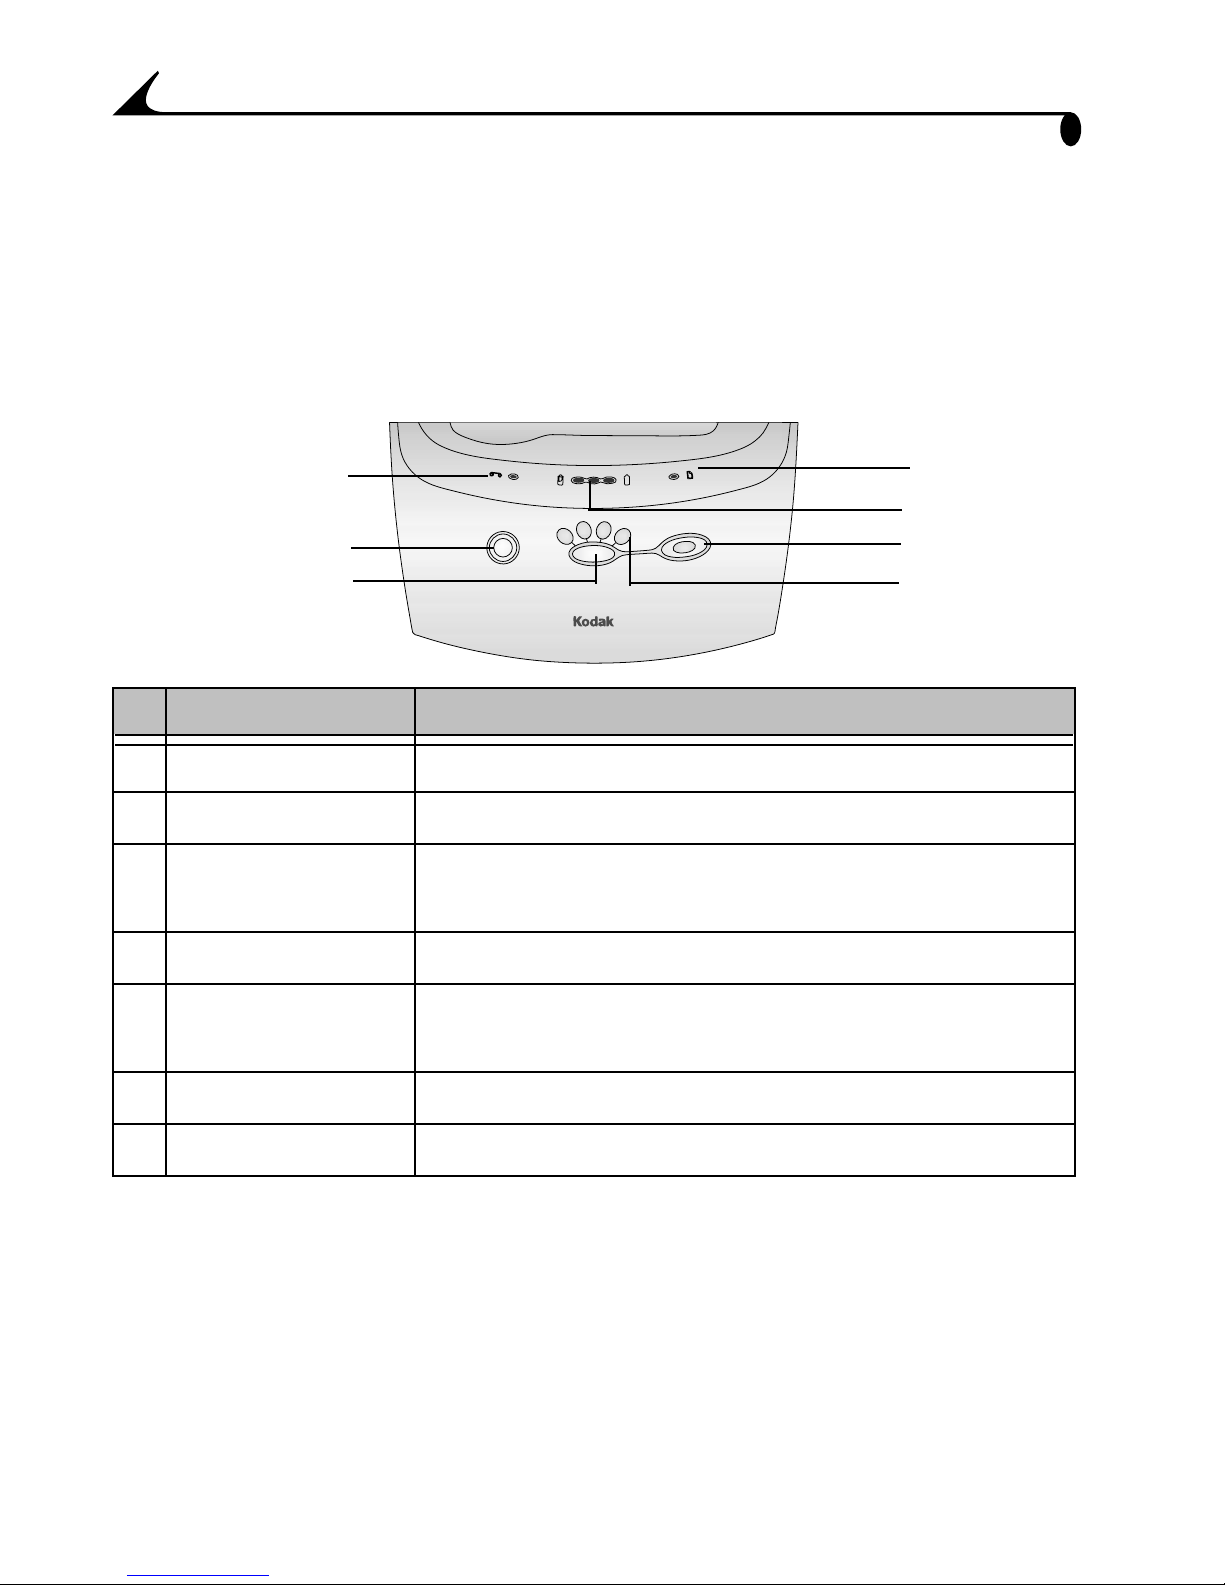
Indicator Lights and Buttons
The lights and buttons on the printer dock indicate the status of the printer
dock and the camera, as well as printing options based on the configuration of
your camera. For Troubleshooting information, see Printer Dock Status Lights,
page 45.
7
6
5
Lights/Buttons Function:
1 Paper light Indicates paper tray is empty or jammed.
2 Battery lights Indicates battery charge levels.
3 Print button Used to print pictures directly from your camera
without a computer.
4 Print Mode lights Indicates print selection: Order, Last, All, Index.
5 Print Mode button Used to select available print modes: Order, Last, All,
1
2
3
4
6 Transfer button Used to transfer pictures to a computer.
7 Cartridge light Indicates the color cartridge needs replacing.
10
Index.
2 Getting Started with Your
Camera
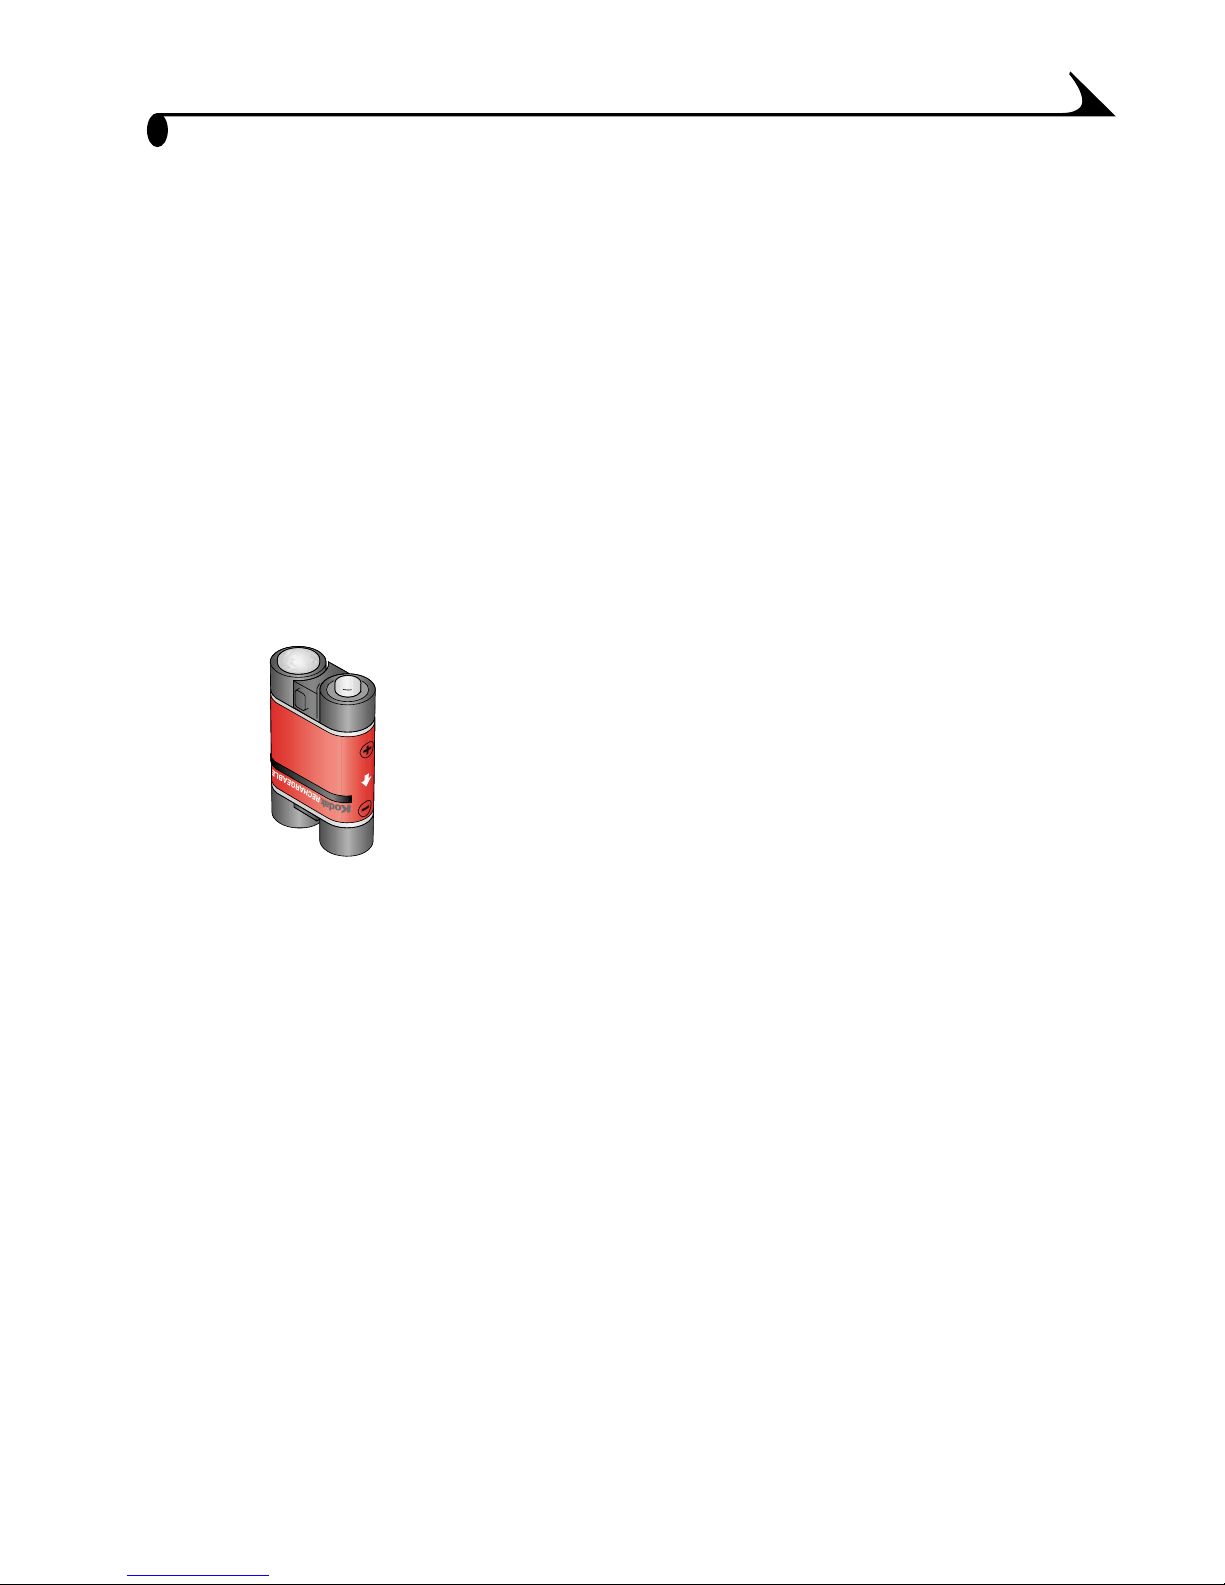
Installing the Rechargeable Battery
IMPORTANT: The printer dock charges only the provided Kodak
EasyShare Ni-MH rechargeable battery pack. If you use
any other batteries, rechargeable or not, no charging
takes place.
Install the Ni-MH rechargeable battery pack
(included with your printer dock) in your
camera. Do not use the non-rechargeable
starter batteries that came with your
camera.
NOTE: The battery pack is not charged when
you receive it. You must completely
charge the battery before using your
camera.
11

Chapter 2
Setting Picture Quality
Use your camera’s Quality setting to select your picture resolution. See your
camera user’s guide for details on setting picture quality.
! Best (3:2) (DX4530 only)—avoids
cropping and maximizes print quality.
! Best (other models)— maximizes
print quality.
Selecting Pictures for Automatic Printing
Follow the process below for your camera model, to tag and select the number
of copies for automatic printing, before you place your camera in the printer
dock. Camera settings vary depending on your camera model.
For camera models (DX4330, DX4530, CX4200, CX4210, CX4230,
CX4300):
1 Press the Review button, then locate a picture.
2 Press the Share button. Highlight Print , then press the OK button.
3 Press to select the number of copies (0-99). Zero removes the tag
for that picture.
The Print icon appears with the picture.
4 Press the OK button. Press the Share button to exit the Share menu.
12
Chapter 2
For camera models (DX3215, DX3700):
1 Slide the Mode selector to Setup .
2 Press the buttons to highlight the Review Options then the
buttons to highlight Print Order. Press Select.
3 Select All Pictures, then press Select.
4 Press button to select the desired number of prints. Press Select.
For camera models (DX3500, DX3600, DX3900, DX4900):
1 Turn the Mode dial to Review then press the Menu button.
2 Press the buttons to display the picture you want to select for
printing.
3 Highlight the Print Order menu then press the Select button.
4 Highlight the Print Order setting you want to use, then follow the on-screen
directions to complete your order.
5 Press Select.
The Print Order icon appears on the LCD screen with the pictures that
are marked for printing.
6 Press Select.
7 Press Menu to exit the Menu screen.
13
 Loading...