

Page 1

Capture Software
A-63054
User’s
Guide
Page 2

EASTMAN KODAK COMPANY SOFTWARE LICENSE AGREEMENT
Read the following terms and conditions carefully before using the enclosed software. Use of the software within this package indicates your
acceptance of these terms and conditions. If you do not agree with them, you should promptly return the package in its entirety and your money
will be refunded.
License
1. Grant of License. Eastman Kodak Company (“Kodak”) grant s you a license to use one c opy of the enclosed software program(s) (the
“Software”) subject to the license restrictions set forth below.
2. Restrictions on Use. You may use the software only on one computer at a time. For each additional computer on which the Software is
running at the same time, you will need an additional licensed copy of the software. You may copy the Software as necessary to use the
Software as described above.
3. Transfer of the Software. Y ou may permanently transfer the Software to another party if the other party agrees to accept the terms and
conditions of this license and you retain no copies of the Software.
4. Copyright. The Software is owned by Kodak or its suppliers and protected by copyright laws and International treaties. You may not copy
the Software other than as expressly provided in this license. You may not reverse engineer, decompile, or disassemble the Software.
5. Term. This license is effective until terminated. You may terminate it at any time by destroying the Software together with all copies in any
form. It will also terminate if you fail t o comply with any t erm or condition of this Agreement. Y ou agree upon such termination to destroy the
Software together with all copies in any form.
Limited Warranty
For a maximum period of up to one year, as evidenced by a copy of your purchase receipt, Kodak warrants (i) the Software will perform
substantially in accordance with the accompanying written materials, and (ii) the media on which the Software is furnis hed will be free from
defects in materials and workmanship under normal use.
Kodak does not warranty that the functions contained in the Software will meet your requirements or that the operation of the Software will be
uninterrupted or error free. You assume responsibility for operation of the Software to achieve your intended results, and for inst allation, use,
and results obtained from the Software.
KODAK MAKES NO OTHER WARRANTIES OF ANY KIND, EITHER EXPRESS OR IMPLIED, INCLUDING THE IMPLIED WARRANTIES
OF MERCHANTABILITY AND FITNESS FOR A PARTICULAR PURPOSE. Some states and countries do not allow the exclusion of implied
warranties, so the above exclusion may not apply to you. This warranty gives you specific legal rights and you may also have other rights.
Limitations of Remedies
Kodak’s entire liability and your exclusive remedy shall be, at Kodak’s option either (a) the repair or replacement of the Software or any media
not meeting Kodak’s “Limited Warranty” that is returned to Kodak or your dealer with a copy of your receipt, or (b) the return of the price you
paid for the Software, provided you have proof of the purchase price you paid. These remedies are not available if the failure of the Software or
media is the result of misuse, abuse, or a failure to follow the operating instructions in the accompanying written materials.
IN NO EVENT WILL KODAK OR ITS SUPPLIERS OR DEALERS BE LIABLE TO YOU FOR ANY INCIDENTAL OR CONSEQUENTIAL
DAMAGES, INCLUD I NG AN Y LOST PROFITS, LOST SAVINGS, OR OTHER DAMAGES ARISING OUT OF THE USE OR INABILITY TO
USE THE SOFTWARE EVEN IF ADVISED OF THE POSSIBILITY OF SUCH DAMAGES.
Some states and countries do not allow the limitation or exclusion of liability for incidental or consequential damages, so the above limitation
may not apply to you.
General
If the Software was purchased in the United States, this Agreement is governed by the laws of the State of New York. If purchased outside the
United States, this agreement is governed by the laws of the country in which it was purchased.
If you have any questions concerning this Agreement, contact your local KODAK representative.
U. S. Government Restricted Rights
The SOFTWARE and documentation are provided with RESTRICTED RIGHTS. Use, duplication, or disclosure by the Government is subject to
restrictions as set forth in subdivision (b)(3)(ii) of the Rights in Technical Data and Computer Software clause 252.227- 7013. Contractor/
manufacture is Eastman Kodak Company, 343 State Street, Rochester, New York, 14650.
European Community Provisions
If this Software is used within a county of the European Community, nothing in this Agreement shall be construed as restricting any rights
available under the European Community Software Directive, OJ. Eur. Comm. (No. L. 122) 42 (1991).
EASTMAN KODAK COMPANY
ROCHESTER, NEW YORK 14650
Page 3

Page 4

Contents
1 Introduction
Product description . . . . . . . . . . . . . . . . . . . . . . . . . . . . . . . . . . . . . . . . . . 1-1
Features . . . . . . . . . . . . . . . . . . . . . . . . . . . . . . . . . . . . . . . . . . . . . . . . . . 1-1
Lite version for i200 Series Scanners and i50, i60, and i80 Scanners . . . . 1-2
Supported scanners . . . . . . . . . . . . . . . . . . . . . . . . . . . . . . . . . . . . . . . . . 1-3
System requirements . . . . . . . . . . . . . . . . . . . . . . . . . . . . . . . . . . . . . . . . 1-4
Software . . . . . . . . . . . . . . . . . . . . . . . . . . . . . . . . . . . . . . . . . . . . . . . . 1-4
Hardware . . . . . . . . . . . . . . . . . . . . . . . . . . . . . . . . . . . . . . . . . . . . . . . 1-4
System development . . . . . . . . . . . . . . . . . . . . . . . . . . . . . . . . . . . . . . . . . 1-6
Using this manual . . . . . . . . . . . . . . . . . . . . . . . . . . . . . . . . . . . . . . . . . . . . 1-6
Terminology . . . . . . . . . . . . . . . . . . . . . . . . . . . . . . . . . . . . . . . . . . . . . . . . 1-6
2 Getting Started with Capture Software
Before you begin . . . . . . . . . . . . . . . . . . . . . . . . . . . . . . . . . . . . . . . . . . . . 2-1
Login procedure . . . . . . . . . . . . . . . . . . . . . . . . . . . . . . . . . . . . . . . . . . . . 2-1
Using Capture Software . . . . . . . . . . . . . . . . . . . . . . . . . . . . . . . . . . . . . . 2-3
Opening an application . . . . . . . . . . . . . . . . . . . . . . . . . . . . . . . . . . . . . 2-3
Creating a new batch . . . . . . . . . . . . . . . . . . . . . . . . . . . . . . . . . . . . . . 2-4
Opening a batch . . . . . . . . . . . . . . . . . . . . . . . . . . . . . . . . . . . . . . . . . . 2-6
Changing to another application . . . . . . . . . . . . . . . . . . . . . . . . . . . . . . 2-6
Starting and stopping the scanner in Capture Software . . . . . . . . . . . . 2-7
Exiting Capture Software . . . . . . . . . . . . . . . . . . . . . . . . . . . . . . . . . . . 2-8
Restarting if a transport time-out occurs . . . . . . . . . . . . . . . . . . . . . . . . 2-8
Recovering from a paper jam . . . . . . . . . . . . . . . . . . . . . . . . . . . . . . . . 2-9
Calibration . . . . . . . . . . . . . . . . . . . . . . . . . . . . . . . . . . . . . . . . . . . . . . . 2-9
3A Working in Capture Software
The main Capture Software window . . . . . . . . . . . . . . . . . . . . . . . . . . . . 3A-1
Program title bar . . . . . . . . . . . . . . . . . . . . . . . . . . . . . . . . . . . . . . . . . . . 3A-1
Menu bar . . . . . . . . . . . . . . . . . . . . . . . . . . . . . . . . . . . . . . . . . . . . . . . . . 3A-2
File menu . . . . . . . . . . . . . . . . . . . . . . . . . . . . . . . . . . . . . . . . . . . . . . 3A-3
Batch menu . . . . . . . . . . . . . . . . . . . . . . . . . . . . . . . . . . . . . . . . . . . . . 3A-6
View menu . . . . . . . . . . . . . . . . . . . . . . . . . . . . . . . . . . . . . . . . . . . . 3A-14
Changing zoom settings . . . . . . . . . . . . . . . . . . . . . . . . . . . . . . . . . . 3A-15
Document menu . . . . . . . . . . . . . . . . . . . . . . . . . . . . . . . . . . . . . . . . 3A-16
Index menu . . . . . . . . . . . . . . . . . . . . . . . . . . . . . . . . . . . . . . . . . . . . 3A-19
Tools menu . . . . . . . . . . . . . . . . . . . . . . . . . . . . . . . . . . . . . . . . . . . . 3A-22
Scanner menu . . . . . . . . . . . . . . . . . . . . . . . . . . . . . . . . . . . . . . . . . . 3A-24
Page menu . . . . . . . . . . . . . . . . . . . . . . . . . . . . . . . . . . . . . . . . . . . . 3A-33
Options menu . . . . . . . . . . . . . . . . . . . . . . . . . . . . . . . . . . . . . . . . . . 3A-37
Help menu . . . . . . . . . . . . . . . . . . . . . . . . . . . . . . . . . . . . . . . . . . . . . 3A-38
Scanner bar . . . . . . . . . . . . . . . . . . . . . . . . . . . . . . . . . . . . . . . . . . . . . . 3A-39
Default Scanner bar . . . . . . . . . . . . . . . . . . . . . . . . . . . . . . . . . . . . . 3A-39
Extended Scanner bar . . . . . . . . . . . . . . . . . . . . . . . . . . . . . . . . . . . 3A-40
Scanner bar context-sensitive menu . . . . . . . . . . . . . . . . . . . . . . . . . 3A-41
A-63054 February 2004 i
Page 5

Tool bar . . . . . . . . . . . . . . . . . . . . . . . . . . . . . . . . . . . . . . . . . . . . . . . . . 3A-42
Using the Tool bar . . . . . . . . . . . . . . . . . . . . . . . . . . . . . . . . . . . . . . . 3A-43
Tool bar context-sensitive menu . . . . . . . . . . . . . . . . . . . . . . . . . . . 3A-53
Document title bar . . . . . . . . . . . . . . . . . . . . . . . . . . . . . . . . . . . . . . . . . 3A-53
Image display area . . . . . . . . . . . . . . . . . . . . . . . . . . . . . . . . . . . . . . . . 3A-53
Image title bar . . . . . . . . . . . . . . . . . . . . . . . . . . . . . . . . . . . . . . . . . . . . 3A-54
Image context-sensitive menu . . . . . . . . . . . . . . . . . . . . . . . . . . . . . . . . 3A-55
Status bar . . . . . . . . . . . . . . . . . . . . . . . . . . . . . . . . . . . . . . . . . . . . . . . 3A-56
Button bar . . . . . . . . . . . . . . . . . . . . . . . . . . . . . . . . . . . . . . . . . . . . . . . 3A-57
Button bar context-sensitive menu . . . . . . . . . . . . . . . . . . . . . . . . . . . . 3A-57
3B Working in Capture Software for i50/i60/i80 Scanners
The main Capture Software window . . . . . . . . . . . . . . . . . . . . . . . . . . . . 3B-1
Program title bar . . . . . . . . . . . . . . . . . . . . . . . . . . . . . . . . . . . . . . . . . . . 3B-1
Menu bar . . . . . . . . . . . . . . . . . . . . . . . . . . . . . . . . . . . . . . . . . . . . . . . . . 3B-2
File menu . . . . . . . . . . . . . . . . . . . . . . . . . . . . . . . . . . . . . . . . . . . . . . 3B-3
Batch menu . . . . . . . . . . . . . . . . . . . . . . . . . . . . . . . . . . . . . . . . . . . . . 3B-6
View menu . . . . . . . . . . . . . . . . . . . . . . . . . . . . . . . . . . . . . . . . . . . . 3B-12
Changing zoom settings . . . . . . . . . . . . . . . . . . . . . . . . . . . . . . . . . . 3B-13
Document menu . . . . . . . . . . . . . . . . . . . . . . . . . . . . . . . . . . . . . . . . 3B-14
Index menu . . . . . . . . . . . . . . . . . . . . . . . . . . . . . . . . . . . . . . . . . . . . 3B-17
Tools menu . . . . . . . . . . . . . . . . . . . . . . . . . . . . . . . . . . . . . . . . . . . . 3B-20
Scanner menu . . . . . . . . . . . . . . . . . . . . . . . . . . . . . . . . . . . . . . . . . . 3B-22
Page menu . . . . . . . . . . . . . . . . . . . . . . . . . . . . . . . . . . . . . . . . . . . . 3B-24
Options menu . . . . . . . . . . . . . . . . . . . . . . . . . . . . . . . . . . . . . . . . . . 3B-27
Help menu . . . . . . . . . . . . . . . . . . . . . . . . . . . . . . . . . . . . . . . . . . . . . 3B-28
Scanner bar . . . . . . . . . . . . . . . . . . . . . . . . . . . . . . . . . . . . . . . . . . . . . . 3B-29
Default Scanner bar . . . . . . . . . . . . . . . . . . . . . . . . . . . . . . . . . . . . . 3B-29
Extended Scanner bar . . . . . . . . . . . . . . . . . . . . . . . . . . . . . . . . . . . 3B-30
Scanner bar context-sensitive menu . . . . . . . . . . . . . . . . . . . . . . . . . 3B-30
Tool bar . . . . . . . . . . . . . . . . . . . . . . . . . . . . . . . . . . . . . . . . . . . . . . . . . 3B-31
Using the Tool bar . . . . . . . . . . . . . . . . . . . . . . . . . . . . . . . . . . . . . . . 3B-33
Tool bar context-sensitive menu . . . . . . . . . . . . . . . . . . . . . . . . . . . . 3B-41
Document title bar . . . . . . . . . . . . . . . . . . . . . . . . . . . . . . . . . . . . . . . . . 3B-42
Image display area . . . . . . . . . . . . . . . . . . . . . . . . . . . . . . . . . . . . . . . . 3B-42
Image title bar . . . . . . . . . . . . . . . . . . . . . . . . . . . . . . . . . . . . . . . . . . . . 3B-43
Image
context-sensitive menu . . . . . . . . . . . . . . . . . . . . . . . . . . . . . . . . . . . . . 3B-44
Status bar . . . . . . . . . . . . . . . . . . . . . . . . . . . . . . . . . . . . . . . . . . . . . . . 3B-45
Button bar . . . . . . . . . . . . . . . . . . . . . . . . . . . . . . . . . . . . . . . . . . . . . . . 3B-45
Button bar context-sensitive menu . . . . . . . . . . . . . . . . . . . . . . . . . . . . 3B-45
ii A-63054 February 2004
Page 6

3C Working in Capture Software for i200 Series Scanners
The main Capture Software window . . . . . . . . . . . . . . . . . . . . . . . . . . . . 3C-1
Program title bar . . . . . . . . . . . . . . . . . . . . . . . . . . . . . . . . . . . . . . . . . . . 3C-1
Menu bar . . . . . . . . . . . . . . . . . . . . . . . . . . . . . . . . . . . . . . . . . . . . . . . . . 3C-2
File menu . . . . . . . . . . . . . . . . . . . . . . . . . . . . . . . . . . . . . . . . . . . . . . 3C-3
Batch menu . . . . . . . . . . . . . . . . . . . . . . . . . . . . . . . . . . . . . . . . . . . . . 3C-6
View menu . . . . . . . . . . . . . . . . . . . . . . . . . . . . . . . . . . . . . . . . . . . . 3C-13
Changing zoom settings . . . . . . . . . . . . . . . . . . . . . . . . . . . . . . . . . . 3C-14
Document menu . . . . . . . . . . . . . . . . . . . . . . . . . . . . . . . . . . . . . . . . 3C-15
Index menu . . . . . . . . . . . . . . . . . . . . . . . . . . . . . . . . . . . . . . . . . . . . 3C-18
Tools menu . . . . . . . . . . . . . . . . . . . . . . . . . . . . . . . . . . . . . . . . . . . . 3C-21
Scanner menu . . . . . . . . . . . . . . . . . . . . . . . . . . . . . . . . . . . . . . . . . . 3C-23
Page menu . . . . . . . . . . . . . . . . . . . . . . . . . . . . . . . . . . . . . . . . . . . . 3C-25
Options menu . . . . . . . . . . . . . . . . . . . . . . . . . . . . . . . . . . . . . . . . . . 3C-28
Help menu . . . . . . . . . . . . . . . . . . . . . . . . . . . . . . . . . . . . . . . . . . . . . 3C-29
Scanner bar . . . . . . . . . . . . . . . . . . . . . . . . . . . . . . . . . . . . . . . . . . . . . . 3C-30
Default Scanner bar . . . . . . . . . . . . . . . . . . . . . . . . . . . . . . . . . . . . . 3C-30
Extended Scanner bar . . . . . . . . . . . . . . . . . . . . . . . . . . . . . . . . . . . 3C-31
Scanner bar context-sensitive menu . . . . . . . . . . . . . . . . . . . . . . . . . 3C-31
Tool bar . . . . . . . . . . . . . . . . . . . . . . . . . . . . . . . . . . . . . . . . . . . . . . . . . 3C-32
Using the Tool bar . . . . . . . . . . . . . . . . . . . . . . . . . . . . . . . . . . . . . . . 3C-34
Tool bar context-sensitive menu . . . . . . . . . . . . . . . . . . . . . . . . . . . . 3C-42
Document title bar . . . . . . . . . . . . . . . . . . . . . . . . . . . . . . . . . . . . . . . . . 3C-43
Image display area . . . . . . . . . . . . . . . . . . . . . . . . . . . . . . . . . . . . . . . . 3C-43
Image title bar . . . . . . . . . . . . . . . . . . . . . . . . . . . . . . . . . . . . . . . . . . . . 3C-44
Image context-sensitive menu . . . . . . . . . . . . . . . . . . . . . . . . . . . . . . . . 3C-45
Status bar . . . . . . . . . . . . . . . . . . . . . . . . . . . . . . . . . . . . . . . . . . . . . . . 3C-46
Button bar . . . . . . . . . . . . . . . . . . . . . . . . . . . . . . . . . . . . . . . . . . . . . . . 3C-46
Button bar context-sensitive menu . . . . . . . . . . . . . . . . . . . . . . . . . . . . 3C-46
4 Application Setup
Accessing the Application Setup . . . . . . . . . . . . . . . . . . . . . . . . . . . . . . . . 4-1
Opening and setting up applications . . . . . . . . . . . . . . . . . . . . . . . . . . . . . 4-2
Scanner-specific settings . . . . . . . . . . . . . . . . . . . . . . . . . . . . . . . . . . . . . 4-5
DS 1500 and DS 2500 Options . . . . . . . . . . . . . . . . . . . . . . . . . . . . . 4-5
i200 Series Scanners Options . . . . . . . . . . . . . . . . . . . . . . . . . . . . . . 4-9
i800 Series Scanners Options . . . . . . . . . . . . . . . . . . . . . . . . . . . . . . 4-14
Application Setup tabs . . . . . . . . . . . . . . . . . . . . . . . . . . . . . . . . . . . . . . . 4-26
Images setup tab . . . . . . . . . . . . . . . . . . . . . . . . . . . . . . . . . . . . . . . . 4-26
Index setup tab . . . . . . . . . . . . . . . . . . . . . . . . . . . . . . . . . . . . . . . . . . 4-35
Output setup tab . . . . . . . . . . . . . . . . . . . . . . . . . . . . . . . . . . . . . . . . . 4-51
5 Patch Setup
About patch codes . . . . . . . . . . . . . . . . . . . . . . . . . . . . . . . . . . . . . . . . . . . 5-1
Using the Patch Setup dialog box . . . . . . . . . . . . . . . . . . . . . . . . . . . . . . . 5-2
Patch Setup dialog box . . . . . . . . . . . . . . . . . . . . . . . . . . . . . . . . . . . . . . . 5-3
Detecting patch code options . . . . . . . . . . . . . . . . . . . . . . . . . . . . . . . . 5-3
Batch separation options . . . . . . . . . . . . . . . . . . . . . . . . . . . . . . . . . . . 5-4
Document separation options . . . . . . . . . . . . . . . . . . . . . . . . . . . . . . . . 5-4
Create attachment options . . . . . . . . . . . . . . . . . . . . . . . . . . . . . . . . . . 5-5
A-63054 February 2004 iii
Page 7

6 Bar Code/OCR Setup
Bar Code/OCR Setup window for bar codes and OCR . . . . . . . . . . . . . . . 6-1
Bar Code and OCR Setup Tool bar . . . . . . . . . . . . . . . . . . . . . . . . . . . . 6-3
Image context-sensitive menu . . . . . . . . . . . . . . . . . . . . . . . . . . . . . . . 6-4
Scanning an image . . . . . . . . . . . . . . . . . . . . . . . . . . . . . . . . . . . . . . . . 6-6
Drawing and selecting bar code zones . . . . . . . . . . . . . . . . . . . . . . . . . . . 6-8
Bar Code and OCR Setup status bar for bar code zones . . . . . . . . . . . . . 6-9
Setting bar code zone properties . . . . . . . . . . . . . . . . . . . . . . . . . . . . . . 6-10
Using the Properties tab . . . . . . . . . . . . . . . . . . . . . . . . . . . . . . . . . . . 6-12
Testing bar codes . . . . . . . . . . . . . . . . . . . . . . . . . . . . . . . . . . . . . . . . 6-15
Using Separation and Deletion for bar code zones . . . . . . . . . . . . . . 6-16
Displaying bar code values . . . . . . . . . . . . . . . . . . . . . . . . . . . . . . . . . 6-20
Tips for using bar codes . . . . . . . . . . . . . . . . . . . . . . . . . . . . . . . . . . . . . . 6-21
OCR Indexing . . . . . . . . . . . . . . . . . . . . . . . . . . . . . . . . . . . . . . . . . . . . . 6-22
Drawing and selecting OCR zones . . . . . . . . . . . . . . . . . . . . . . . . . . . 6-22
Bar Code and OCR Setup status bar for OCR zones . . . . . . . . . . . . . . . 6-23
Setting OCR zone properties . . . . . . . . . . . . . . . . . . . . . . . . . . . . . . . . . 6-24
Using Separation and Deletion for OCR zones . . . . . . . . . . . . . . . . . 6-25
Tips for using OCR zones . . . . . . . . . . . . . . . . . . . . . . . . . . . . . . . . . . . . 6-27
Disclaimers . . . . . . . . . . . . . . . . . . . . . . . . . . . . . . . . . . . . . . . . . . . . . . . . 6-27
General Bar Code and OCR Properties . . . . . . . . . . . . . . . . . . . . . . . 6-28
7 Bar Codes, Patch Codes, and OCR Indexing with Color Scanners
Bar code and patch code reading and OCR indexing with
i50/i60/i80 Scanners . . . . . . . . . . . . . . . . . . . . . . . . . . . . . . . . . . . . . . . . 7-1
Bar code and patch code reading and OCR indexin g with Color
Scanners 3590C and 4500 . . . . . . . . . . . . . . . . . . . . . . . . . . . . . . . . . . . 7-1
Enabling binarization for bar code and patch code reading and
OCR indexing . . . . . . . . . . . . . . . . . . . . . . . . . . . . . . . . . . . . . . . . . . 7-1
Setting up bar code/OCR zones for color scanning . . . . . . . . . . . . . . 7-3
Bar code and patch code reading and OCR indexing with i200 Series
Scanners . . . . . . . . . . . . . . . . . . . . . . . . . . . . . . . . . . . . . . . . . . . . . . . 7-4
Bar code and patch code reading and OCR indexing with i800 Series
Scanners . . . . . . . . . . . . . . . . . . . . . . . . . . . . . . . . . . . . . . . . . . . . . . . 7-5
8 Blank Page Setup
Using the Blank Page Setup dialog box . . . . . . . . . . . . . . . . . . . . . . . . . . 8-1
Blank page separator option . . . . . . . . . . . . . . . . . . . . . . . . . . . . . . . . . 8-2
Batch separation option . . . . . . . . . . . . . . . . . . . . . . . . . . . . . . . . . . . . 8-2
Document separation options . . . . . . . . . . . . . . . . . . . . . . . . . . . . . . . . 8-2
Create attachment options . . . . . . . . . . . . . . . . . . . . . . . . . . . . . . . . . . 8-2
Blank page separation with i800 Series Scanners . . . . . . . . . . . . . . . . . . 8-3
Blank Page Setup for i50/i60/i80 Scanners and i200 Series Scanners . . . 8-4
Blank page separator option . . . . . . . . . . . . . . . . . . . . . . . . . . . . . . . . . 8-5
Batch separation option . . . . . . . . . . . . . . . . . . . . . . . . . . . . . . . . . . . . 8-5
Document separation options . . . . . . . . . . . . . . . . . . . . . . . . . . . . . . . . 8-5
Create attachment options . . . . . . . . . . . . . . . . . . . . . . . . . . . . . . . . . . 8-5
iv A-63054 February 2004
Page 8

9A Setting Up Page Properties
About Page Setup . . . . . . . . . . . . . . . . . . . . . . . . . . . . . . . . . . . . . . . . . . 9A-1
Using Page Setup with low volume, mid-volume, and high volume
scanners . . . . . . . . . . . . . . . . . . . . . . . . . . . . . . . . . . . . . . . . . . . . . . 9A-1
Scanner-specific page properties . . . . . . . . . . . . . . . . . . . . . . . . . . . . . . 9A-6
Additional page properties for the Scanner 1500 and Sca nner 2500 . 9A-6
Additional page properties for mid-volume scanners . . . . . . . . . . . . . . 9A-8
Additional page properties for color scanners . . . . . . . . . . . . . . . . . . . 9A-9
Using Page Setup with the i800 Series Scanners . . . . . . . . . . . . . . . . . 9A-11
Zone processing . . . . . . . . . . . . . . . . . . . . . . . . . . . . . . . . . . . . . . . . 9A-17
Using Image Setup with low volume, mid-volume, and high volume
scanners . . . . . . . . . . . . . . . . . . . . . . . . . . . . . . . . . . . . . . . . . . . . 9A-18
Filters tab . . . . . . . . . . . . . . . . . . . . . . . . . . . . . . . . . . . . . . . . . . . . . 9A-18
Check tab . . . . . . . . . . . . . . . . . . . . . . . . . . . . . . . . . . . . . . . . . . . 9A-25
Mask tab . . . . . . . . . . . . . . . . . . . . . . . . . . . . . . . . . . . . . . . . . . . 9A-26
Using Image Setup with the i800 Series Scanners . . . . . . . . . . . . . . . . 9A-29
i800 Series Scanners Filters tab . . . . . . . . . . . . . . . . . . . . . . . . . . 9A-29
i800 Series Scanners Check tab . . . . . . . . . . . . . . . . . . . . . . . . . . . . 9A-33
i800 Series Scanners Mask tab . . . . . . . . . . . . . . . . . . . . . . . . . . . . 9A-34
i800 Series Scanners Color Dropout tab . . . . . . . . . . . . . . . . . . . . . 9A-36
Using the Merge and Split options . . . . . . . . . . . . . . . . . . . . . . . . . . . . . 9A-37
9B Setting Up Page Properties for i50/i60/i80 Scanners
About Page Setup . . . . . . . . . . . . . . . . . . . . . . . . . . . . . . . . . . . . . . . . . . 9B-1
Using Page Setup . . . . . . . . . . . . . . . . . . . . . . . . . . . . . . . . . . . . . . . . . 9B-1
Using Image Setup . . . . . . . . . . . . . . . . . . . . . . . . . . . . . . . . . . . . . . . . 9B-5
Filters tab . . . . . . . . . . . . . . . . . . . . . . . . . . . . . . . . . . . . . . . . . . . . . . 9B-5
Color tab . . . . . . . . . . . . . . . . . . . . . . . . . . . . . . . . . . . . . . . . . . . . . . . 9B-6
Check tab . . . . . . . . . . . . . . . . . . . . . . . . . . . . . . . . . . . . . . . . . . . . . . 9B-7
Mask tab . . . . . . . . . . . . . . . . . . . . . . . . . . . . . . . . . . . . . . . . . . . . . . . 9B-8
Color Dropout tab . . . . . . . . . . . . . . . . . . . . . . . . . . . . . . . . . . . . . . . . 9B-9
Using the Merge and Split options . . . . . . . . . . . . . . . . . . . . . . . . . . . . . 9B-10
9C Setting Up Page Properties for i200 Series Scanners
About Page Setup . . . . . . . . . . . . . . . . . . . . . . . . . . . . . . . . . . . . . . . . . . 9C-1
Using Page Setup . . . . . . . . . . . . . . . . . . . . . . . . . . . . . . . . . . . . . . . . . . 9C-1
Using Image Setup . . . . . . . . . . . . . . . . . . . . . . . . . . . . . . . . . . . . . . . . . 9C-7
Filters tab . . . . . . . . . . . . . . . . . . . . . . . . . . . . . . . . . . . . . . . . . . . . . 9C-7
Check tab . . . . . . . . . . . . . . . . . . . . . . . . . . . . . . . . . . . . . . . . . . . . . 9C-10
Mask tab . . . . . . . . . . . . . . . . . . . . . . . . . . . . . . . . . . . . . . . . . . . . . . 9C-11
Color Dropout tab . . . . . . . . . . . . . . . . . . . . . . . . . . . . . . . . . . . . . . . 9C-13
Using the Merge and Split options . . . . . . . . . . . . . . . . . . . . . . . . . . . . . 9C-14
10 Recovery Procedure . . . . . . . . . . . . . . . . . . . . . . . . . . . . . . . . . . . . . . . . 10-1
11 System Ad ministration
Program Properties . . . . . . . . . . . . . . . . . . . . . . . . . . . . . . . . . . . . . . . . . 11-1
User profiles . . . . . . . . . . . . . . . . . . . . . . . . . . . . . . . . . . . . . . . . . . . . . . 11-2
User groups . . . . . . . . . . . . . . . . . . . . . . . . . . . . . . . . . . . . . . . . . . . . 11-4
Logging in using network user names . . . . . . . . . . . . . . . . . . . . . . . . 11-5
A-63054 February 2004 v
Page 9

A Installation
Before you begin . . . . . . . . . . . . . . . . . . . . . . . . . . . . . . . . . . . . . . . . . . . . A-1
Accessing the Capture Software Setup window . . . . . . . . . . . . . . . . . . . . . A-1
Required TWAIN datasource for i50/i60/i80 Scanners . . . . . . . . . . . . A-2
Required TWAIN datasource for i200 Series Scanners . . . . . . . . . . . . A-2
Installing Capture Software . . . . . . . . . . . . . . . . . . . . . . . . . . . . . . . . . . . . A-3
Updating the Windows ASPI layer . . . . . . . . . . . . . . . . . . . . . . . . . . . . . A-13
Installing the Scanner Validation Tool (SVT) for i200 Series Scanners . . A-14
Installing Demo Applications and Emulation Images . . . . . . . . . . . . . . . A-18
Installing Demo Applications only . . . . . . . . . . . . . . . . . . . . . . . . . . . . . . A-19
Uninstalling Capture Software . . . . . . . . . . . . . . . . . . . . . . . . . . . . . . . . A-20
Upgrading your Capture Software installation . . . . . . . . . . . . . . . . . . . . A-23
Index
vi A-63054 February 2004
Page 10

1 Introduction
Product description Kodak
Capture Software is a software application that enables all functions of
the entire family of
both simplex and duplex models.
Kodak
Scanners and Kodak Digital Science™ Scanners in
Features Some features of Capture Software:
• All functions are performed using this software, no special hardware
acceleration is required.
• Fast display in scale to gray of bitonal (i.e., black and white) images.
• Fast deskew, auto-cro p, and a uto-rotate of color, bitonal, and
grayscale images.
• Auto-delete with or without preview.
• Multi-image display (1, 2, 4, and 8 images can be displayed simult aneously).
• Easy-to-use Scanner bar and Button bar, and a Tool bar that provides to ols
to rescan, insert, delete and move pages. It also provides direct access to
threshold and contrast values.
• Programmable Batch Output formats make Capture Sof tware compatible
with a range of imaging systems on the market.
• Pre-defined set of image parameter templates.
• Patch code reading for document separation.
• Bar code reading for automatic indexing.
• Zonal OCR for automatic indexing.
A-63054 February 2004 1-1
Page 11

Lite version for
i200 Series Scanners
and i50, i60, and
i80 Scanners
The Kodak i200 Series Scanners, Kodak i50 Scanner, Kodak i60 Scanner, an d
Kodak i80 Scanner come bundled with the Lite version of Capture Software.
This is a production version that does not require a hardware key. However, all
features are not available.
Upgrade to the full version of Capture Software and receive these additional
features and functionality:
• Software bar code and patch code reading
• Indexing from bar codes, OCR text, or key data entry
NOTE: Only one index field is available in Capture Software Lite. Up to
10 index fields are available in the full version.
• Blank Page Separation
• Automatic Batch and Document Separation
• Auto-deletion of blank images
• Merge and Split of bitonal images
• User profiles
• Software length detection (e.g., flag errors on multifeeds)
• Post-Scanning Toolbar functions (Insert, Rescan, Crop, Blank, Move image,
Copy image [or image area], Split document)
• Calendar Duplex Mode
• Access to all Capture Software Batch Output Formats
(currently over 40 available)
NOTE: Capture Software Lite will not run in full production mode even with an
attached hardware key. You must upgrade to the full version to receive
full functionality.
1-2 A-63054 February 2004
Page 12

Supported scanners Capture Software supports the following scanner models:
• Kodak i50 Scanner
• Kodak i60 Scanner
• Kodak i80 Scanner
• Kodak i250 Scanner
• Kodak i260 Scanner
• Kodak i280 Scanner
• Kodak Digital Science Scanner 1500
• Kodak Digital Science Scanner 2500
• Kodak Digital Science Scanner 3500
• Kodak Digital Science Scanner 3510
• Kodak Digital Science Scanner 3520
• Kodak Digital Science Scanner 3590C
• Kodak Digital Science Scanner 4500
• Kodak Digital Science Scanner 5500
• Kodak Digital Science Scanner 7500
• Kodak Digital Science Scanner 7520
• Kodak Digital Science Scanner 9500
• Kodak Digital Science Scanner 9520
• Kodak Digital Science Scanner/Microimager 990
• Kodak Imagelink 500 Scanner
• Kodak Imagelink 900 Scanner
• Kodak Imagelink 923 Scanner
• Kodak i810 Scanner
• Kodak i820 Scanner
• Kodak i830 Scanner
• Kodak i840 Scanner
A-63054 February 2004 1-3
Page 13

System requirements Following are the minimum software and hardware re qu ire m en ts to run
Capture Software.
Software All systems require Windows 98, Windows Me, Windows NT 4.0, Windows
2000, or Windows XP.
NOTE: The i200 Series Scanners are on ly su pp or te d und er Window s 98SE,
Windows Me, Windows 2000, and Windows XP.
Hardware • IBM PC (or compatible) with a Pentium 667 MHz processor (m inimum)
Choosing the right processor is important. When the microprocessor is too
slow, your PC cannot keep up with the scanner’s speed, and overall
productivity decreases. See the followin g table for the processor required for
optimal scanning in certain scanning modes.
Scanner Model Scanning Mode Processor Required
i50 Scanner
i60 Scanner
i80 Scanner
i250 Scanner
i260 Scanner
i280 Scanner
Color Scanner 3590C
Color Scanner 4500
i820 Scanner
i840 Scanner
Black and white Pentium 667 MHz
Grayscale Pentium 1 GHz*
Color Pentium 1 GHz*
Black and white Pentium 2.5 GHz
Grayscale Pentium 2.5 GHz*
Color Pentium 2.5 GHz*
Color Pentium 1 GHz*
Color Pentium 1.5 GHz*
* For color and grayscale scanning, the PC must have MMX processing
capability and an Intel-based Pentium processor is recommended.
NOTE: If you plan to use the deskew, auto-cr op, and auto-rotate features
when color scanning in Capture Software, the fastest microprocessor
available (currently the Pentium IV 2.5 GHz) is recommended.
• 1 GB (<10 msec) hard disk
For color scanning with the i820 Scanner or i840 Scanner, two (2) SCSI
hard disk drives are recommended: one for the operating system and one
for storing the scanned images. Much more disk space will likely be required
for scanned image storage.
1-4 A-63054 February 2004
Page 14

• 128 MB of RAM
- For color scanning with the i50 Scanner, i60 Scanner, or i80 Scanner,
256 MB of RAM is recommended.
- For color scanning with the i200 Series Scanners, 512 MB of RAM is
recommended.
- For color scanning with the i820 Scanner or i840 Scanner, 512 MB of
RAM is recommended.
• SCSI controller
- An Adaptec 2940 controller is recommended. You can also use an
Adaptec 1542CP controller. Newer SCSI cards such as the Adaptec
19160 or 29160 may also be used.
- For the i800 Series Scanners, an Adaptec 29160 SCSI controller or
equivalent (Ultra-Wide2 SCSI) is required.
• IEEE-1394 (FireWire) controller
For the i200 Series Scanners, a plug-and-play IEEE-1394 (FireWire)
interface is required. Use only the FireWire card and cable that is supplied
with the i200 Series Scanner.
IMPORTANT: The i200 Series Scanner should be the only item plugged in to
the IEEE-1394 (FireWire) card on the host computer.
• Parallel/printer port (with DB25 female connector) for hardware
key installation.
USB ports are not supported.
• Display monitor and graphic controller
Most high-quality displays and graphic controllers are acceptable.
The display resolution should be set to at least 800 x 600.
- For black-and-white scanning, the display monitor should be set to at
least 256 Colors. For color scanning with the Kodak color scanners, set
the display monitor to True Color (24 bit or 16 million colors).
- For color scanning with the i820 Scanner and i840 Scanner, an
AGP (Advanced Graphics Processor) video card with 32 MB of
video RAM is recommended.
A-63054 February 2004 1-5
Page 15

System development The Capture Software program was developed by Eastman Kodak Company
and I.R.I.S. Group, Belgium.
Using this manual This User’s Guide describes the functions and procedures in Capture
Software. Chapters 2 and 3 are directed toward individua ls wh o ar e
responsible for scanning, manipulating images within a document, and
writing to image batches. These individuals must have a working knowledge of
IBM (or compatible) PCs and the Windows oper ating environment. In addition
to computer and scanner operations skills, a basic understanding of digital
imaging or image scanning is helpful.
Chapters 4 through 11 and Appendix A are intended for the system
administrator who is responsible for configuring the scanner and
Capture Software.
Differences between the Capture Software products specific to the low,
mid-, and high volume scanners will be identified throughout the manual
where appropriate.
NOTE: Many of the screen examples in this manual were captured using
Capture Software with a Scanner 3500. These examples, except
where noted, also apply to Capture Software support for the Kodak
scanners listed in this chapter.
Terminology Before you start, it is important to know how document, page, side, image,
and other terms are used in this guide.
Application—you can create an unlimited number of applications with
Capture Software (the actual number of applications allowed depends on
directory limits imposed by the operating system). Applications are
distinguished by the batch and document separation methods used
(e.g., patch codes, documen t/image counters, etc.), indexing requirements
(e.g., bar code) and Batch Output format requirements. With an application,
you can produce batches of an essentially unlimited number of documents
(up to 999999999) which are used in conjunction with other digital
document management systems and are available in several output
formats (e.g., IMR Alchemy, MO:DCA, eiStream WMS RBE).
Batch—a collection of documents. An application can contain several batches
(each up to 999999999 documents; essentially unlimited). Processing a batch
means converting the batch to a specific output format (e.g., IMR Alchemy,
single-page TIFF, MO:DCA, eiStream WMS RBE) and sending it to a batch
destination folder/subdirectory. Batches can be processed one by one
or together.
1-6 A-63054 February 2004
Page 16

Document—a paper document is a collection of pages; an electronic
document is a collection of images. A document containing many pages is
called a multi-page document (e.g., a file folder or article). A document
containing only one page is called a single-page document (e.g., a check).
Initially , every document is in p aper form and becomes an electronic do cument
after it is scanned; Capture Software gives every document a unique electronic
document number . This document number is cross-referen ced with index dat a
that can be uploaded to any document management system.
Document index—the document index links search fields (up to 10 search
fields) with the document number of each document. The document index can
be built manually or automatically with bar codes or default values.
Image—the scanner converts sides to images. Every image belongs to a
document with a unique document number. Capture Software gives every
image a sequential number inside its document. One document can contain
up to 999999999 (i.e., essentially unlimited) images. Capture Software
distinguishes between an image coming from the front or rear side of a
page. This allows Capture Software to perform side-specific processing
(e.g., deletion of blank/rear sides) where appropriate.
Capture Software also distinguishes between color, grayscale, and bitonal
(black and white) images and can perform color/grayscale versus bitonal
specific processing.
Example: Document 250 contains two double-sided pages and produces an
electronic document number 250, which contains four images (1-4).
Page—a page is always in paper form and is part of a paper document. A
page can produce one image (single-sided page), two images (double-sided
page), or four images (dual-stream; color and bitonal) after scanning.
Side—one page has two sides, front and rear. With sin gle-sid e d pages, the
rear is blank.
A-63054 February 2004 1-7
Page 17
2 Getting Started with Capture Software
Before you begin Before you begin make sure that the scanner is connected to the system and
powered on.
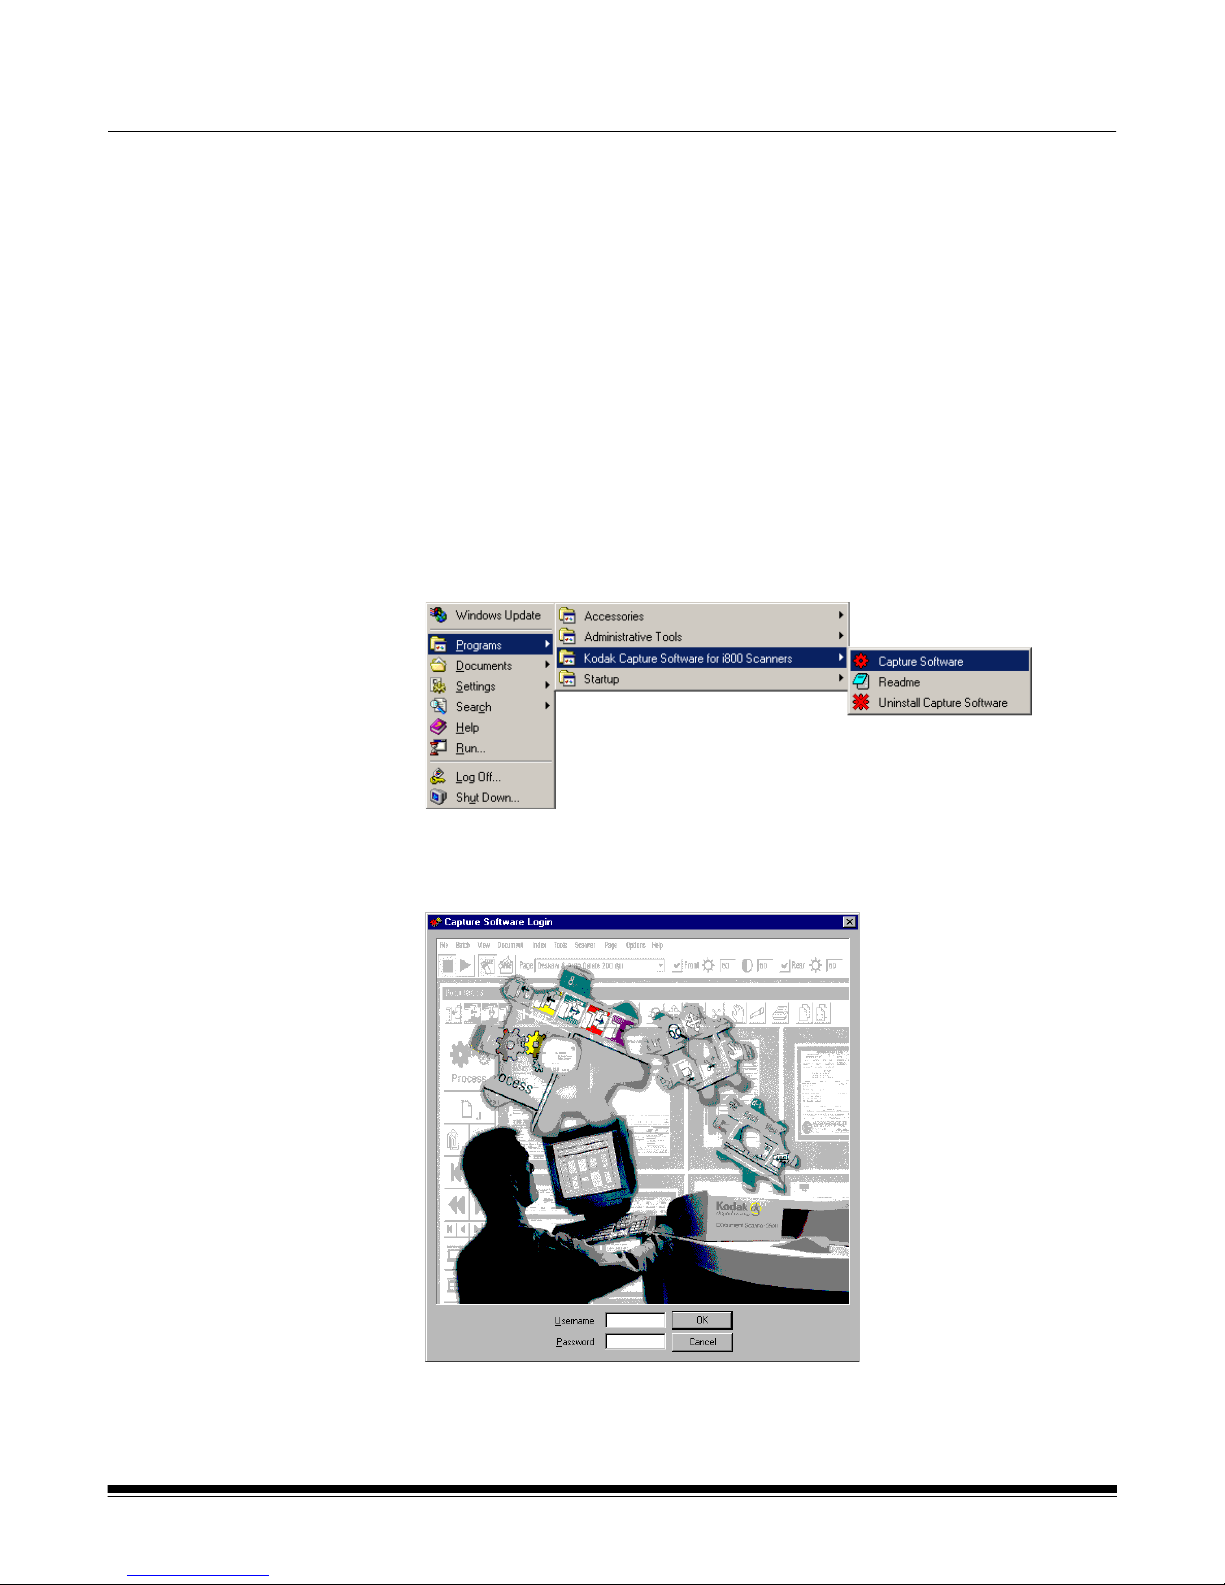
Login procedure 1. Click on Start (usually located in the bottom left corner) on the
Windows desktop.
2. Move the mouse arrow to Programs.
3. Move the mouse arrow to one of the following program icons
(depending on your scanner model):
- Kodak Capture Software for IL and DS Scanners
- Kodak Capture Software for i800 Scanners
- Kodak Capture Software for i50, i60, i80, i200 Scanners
4. Move the mouse arrow to the Capture Software icon.
If your system administrator has established user profiles for your
Capture Software installation, you may first be required to log in to
Capture Software.
A-63054 February 2004 2-1
Page 18
5. Enter your user name and password to complete the login procedure.
The Capture Software Open Application window appears.
2-2 A-63054 February 2004
Page 19
Using Capture
Software
Capture Software provides Produ ction applications and Template applications.
For more information on how to set up these templates, see Chapter 4,
Application Setup.
The sections that follow provide procedures for opening and closing an
application as well as opening and creating a new batch. Chapter 3,
Working in Capture Software, provide s detailed information on other
functions you can access from the Capture Software main window.
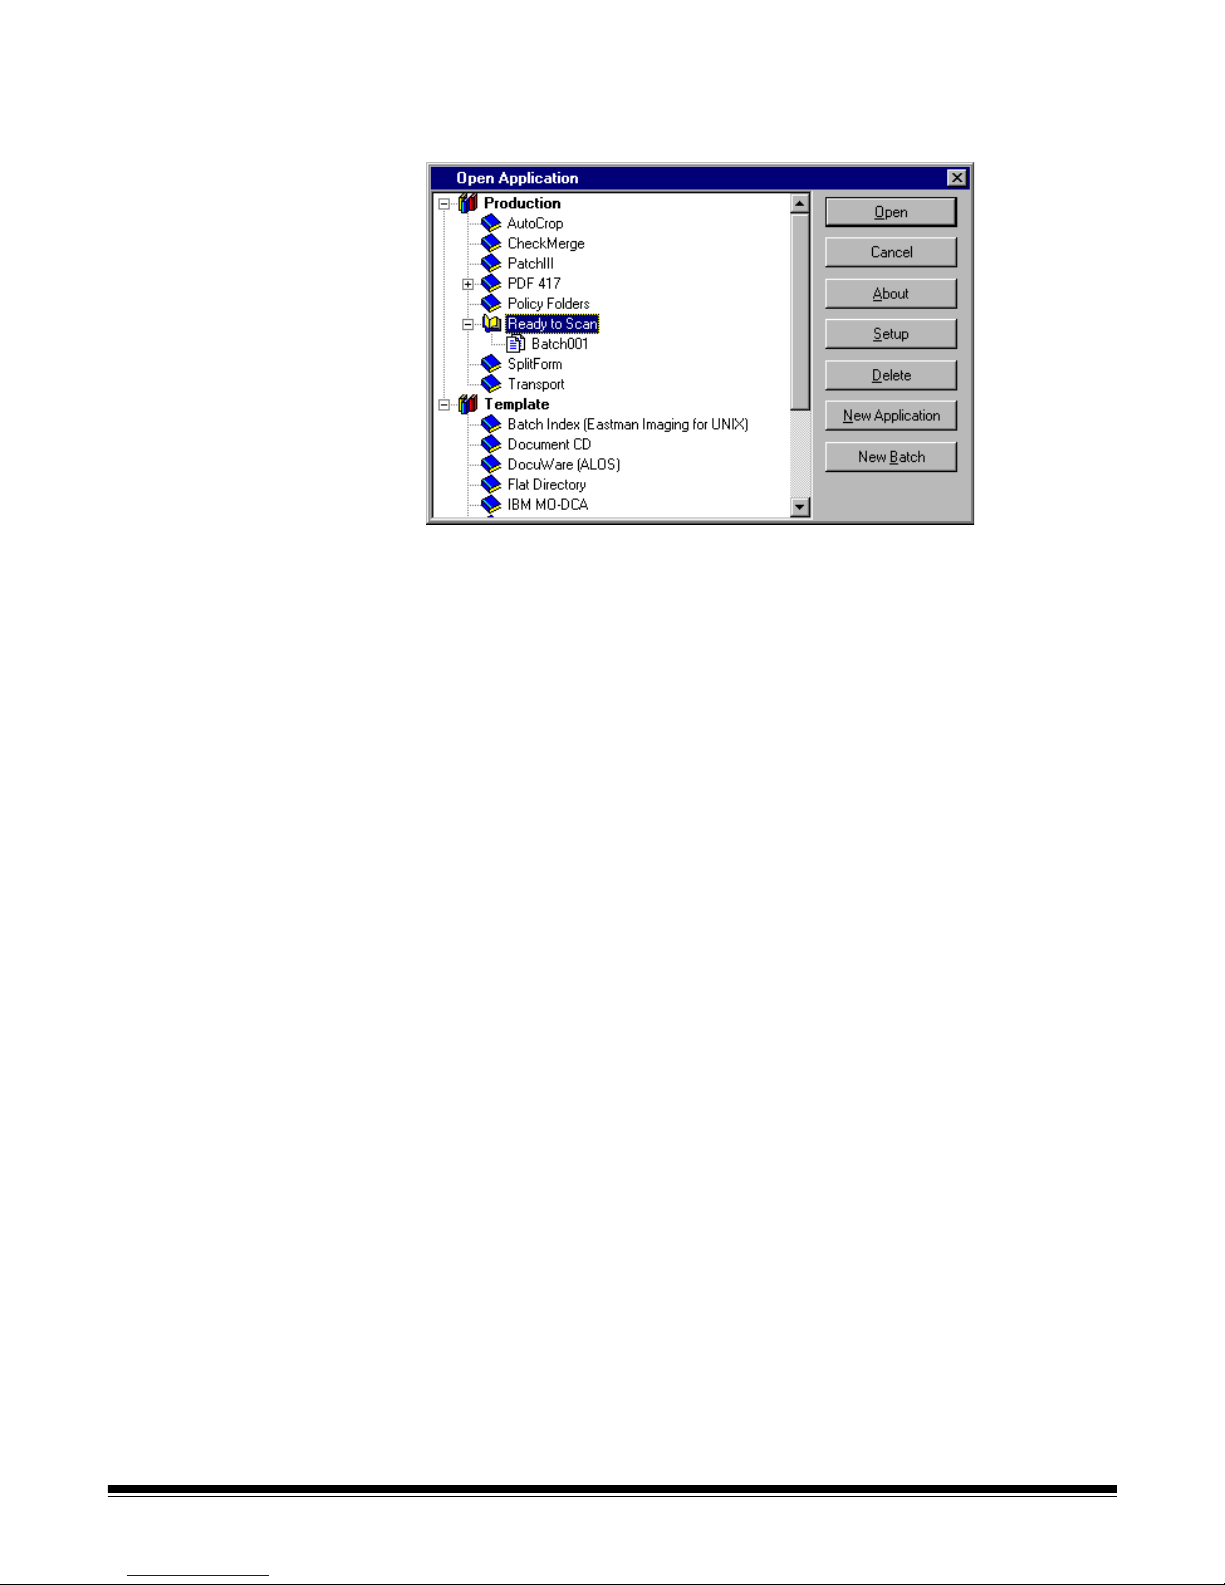
Opening an application To open an application:
1. Select File>Open Application.
The Open Application dialog box appears. You will see only applications
for which you have privileges.
2. Double-click on the application you want to open or highlight the
application and click Open.
The batches associated with the application appear.
3. Click Open to display the batch you selected.
A-63054 February 2004 2-3
Page 20
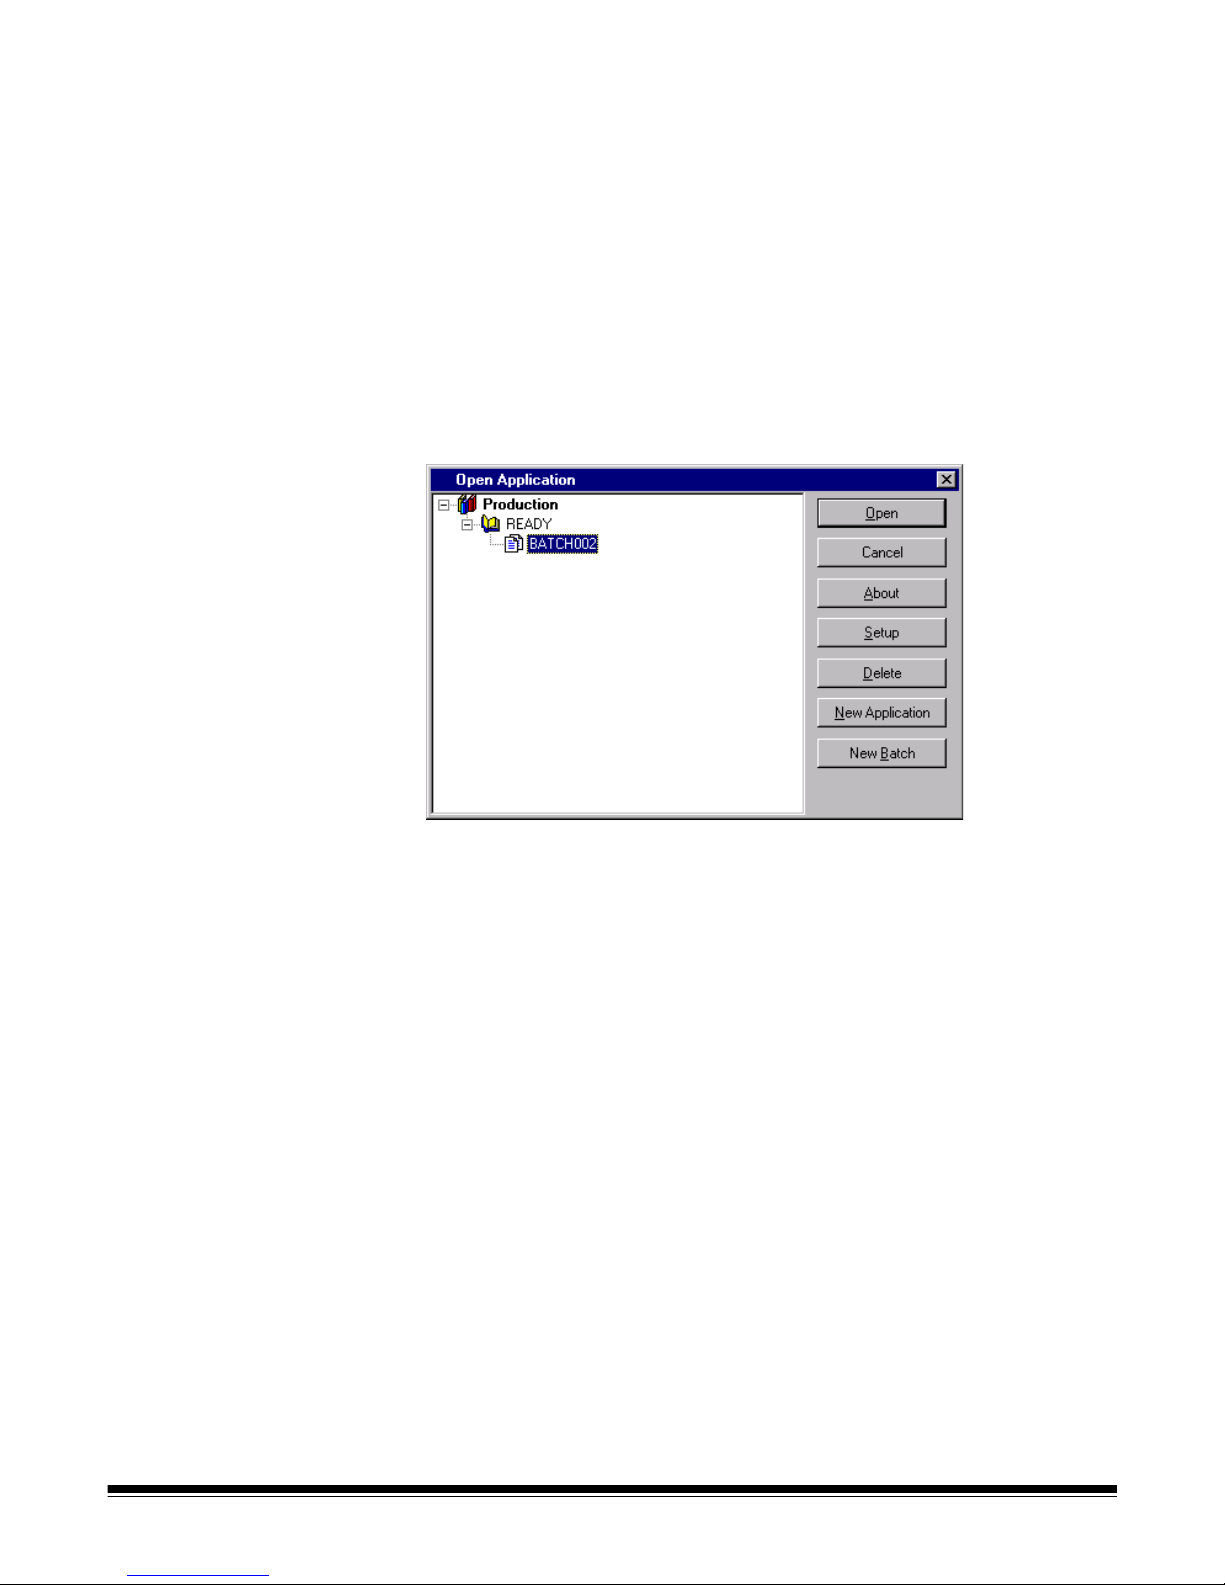
Creating a new batch To create a new batch, proceed as follows.
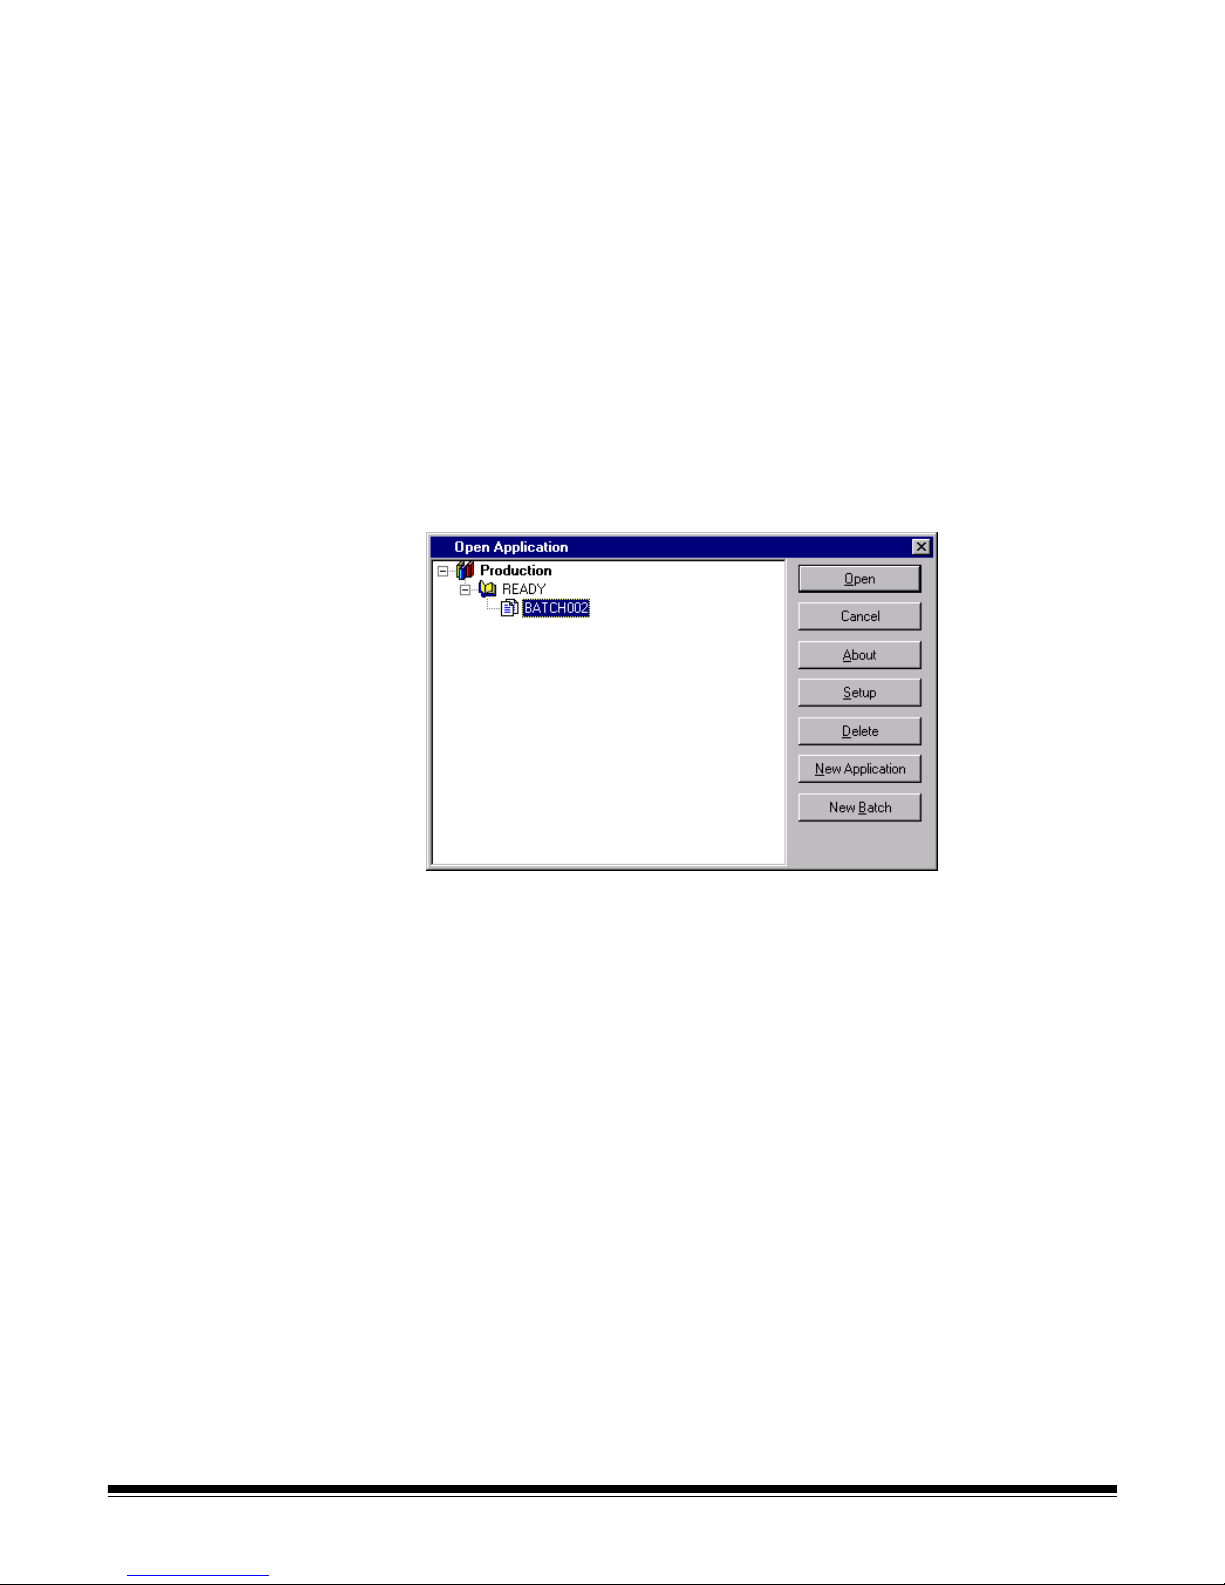
From the Open Application window:
1. Select an application where you want the new batch to reside.
2. Click New Batch.
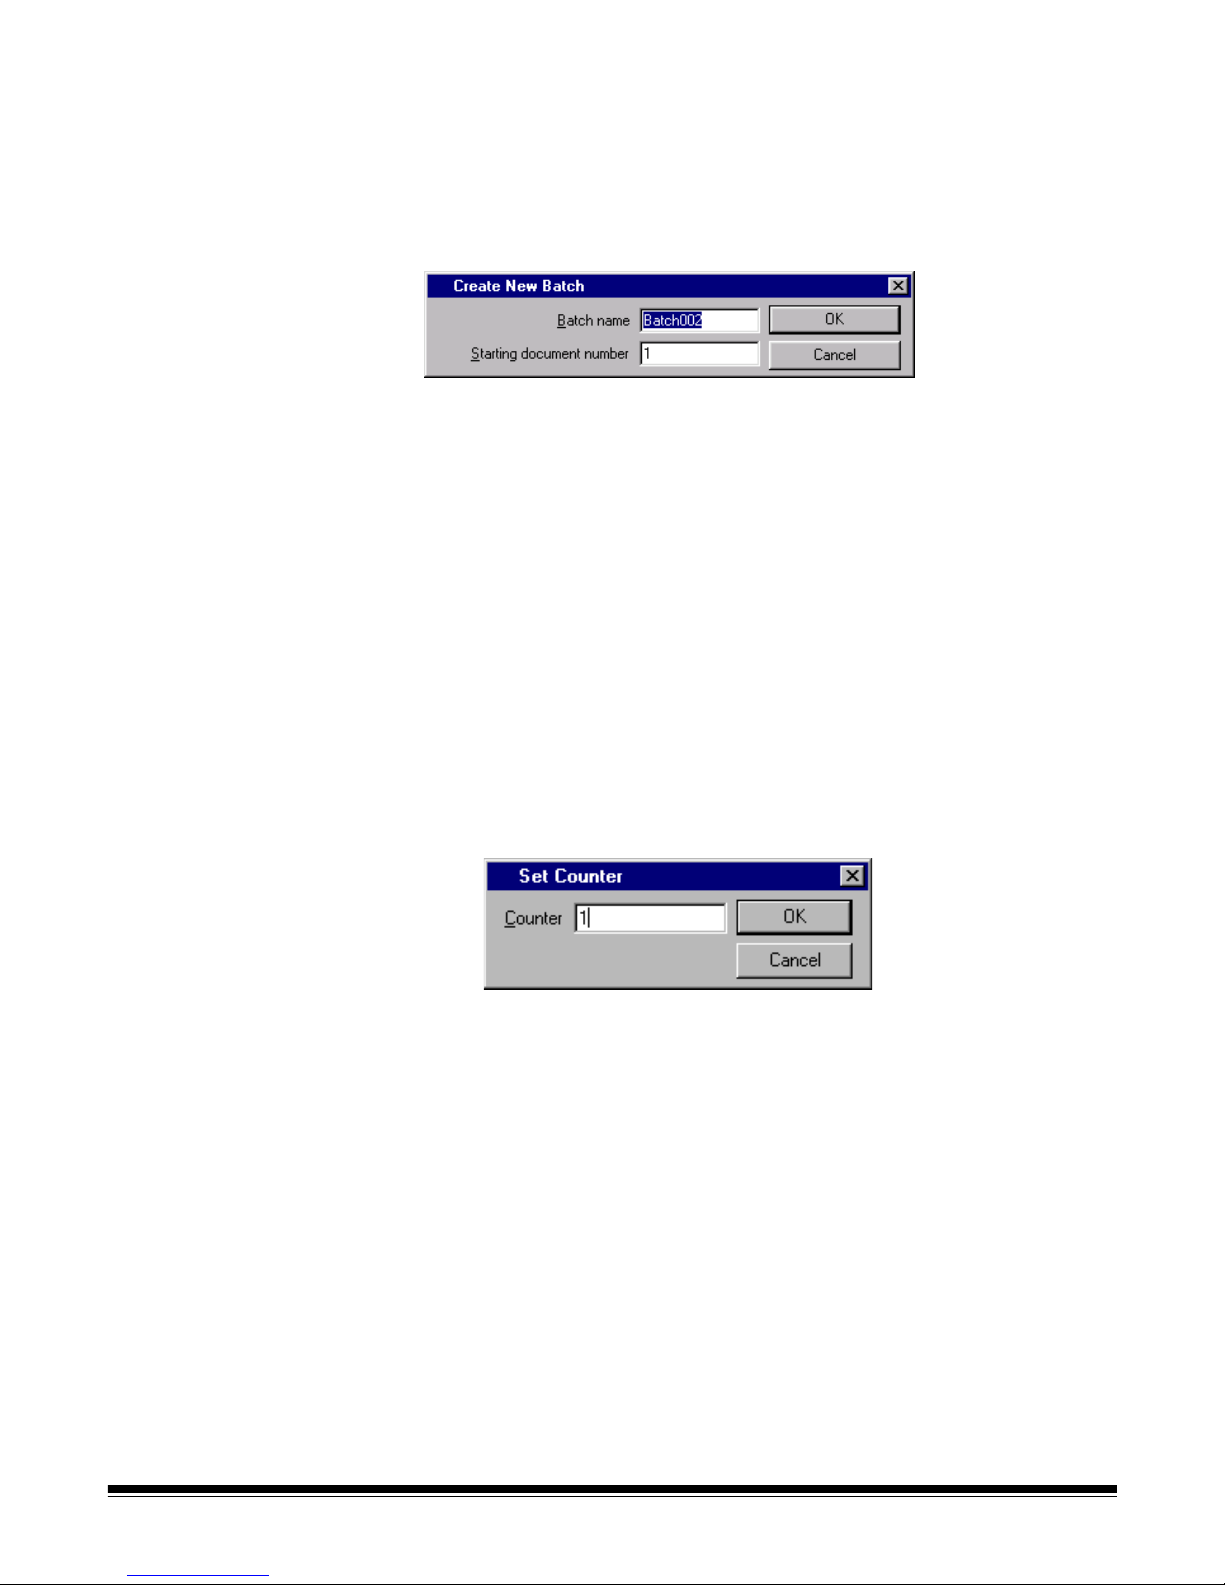
The Create New Batch dialog box appears.
3. Enter a new batch name in the Batch name field.
By default, Capture Software suggests a new batch name based upon the
last batch name created for the application (e.g., if the last batch name is
Batch002, then the new batch name default will be Batch003).
4. Enter the starting document number.
By default, Capture Software suggests a starting document number based
upon the Application Setup.
5. Click OK.
The main window appears with the batch name you assigned.
Depending on your User Profile settings and the Application Setup,
other dialog boxes may appear before the main Capture Software
window appears.
• For i200 Series Scanners, Scanner 1500, Scanner 2500, Scanner
3520DP, or Color Scanner 4500DP when document printing is enabled,
and the i800 Series Scanners, the Set Counter dialog box appears.
2-4 A-63054 February 2004
Page 21
Enter a starting counter number.
- For the i200 Series Scanners, the number will be downloaded and
printed on the first scanned page.
- For the Scanner 1500 or Scanner 2500, the number will be
downloaded to the scanner and will appear on the scanner’s
LCD display.
- For the Scanner 3520DP or Color Scanner 4500DP, the number will
be downloaded and printed on the first scanned p age when document
printing is enabled.
- For the i800 Series Scanners, the number is downloaded and
assigned (and optionally printed) to the first scanned page.
By default, with the exception of i200 Series Scanners, Capture
Software suggests a starting counter based upon the Application Setup.
For i200 Series Scanners, Capture Software keeps track of the counter
across scanned batches and will suggest a starting counter equal to
the counter of the last scanned pa ge + 1. When Capture Software is
restarted, the suggested starting counter is reset to “1.”
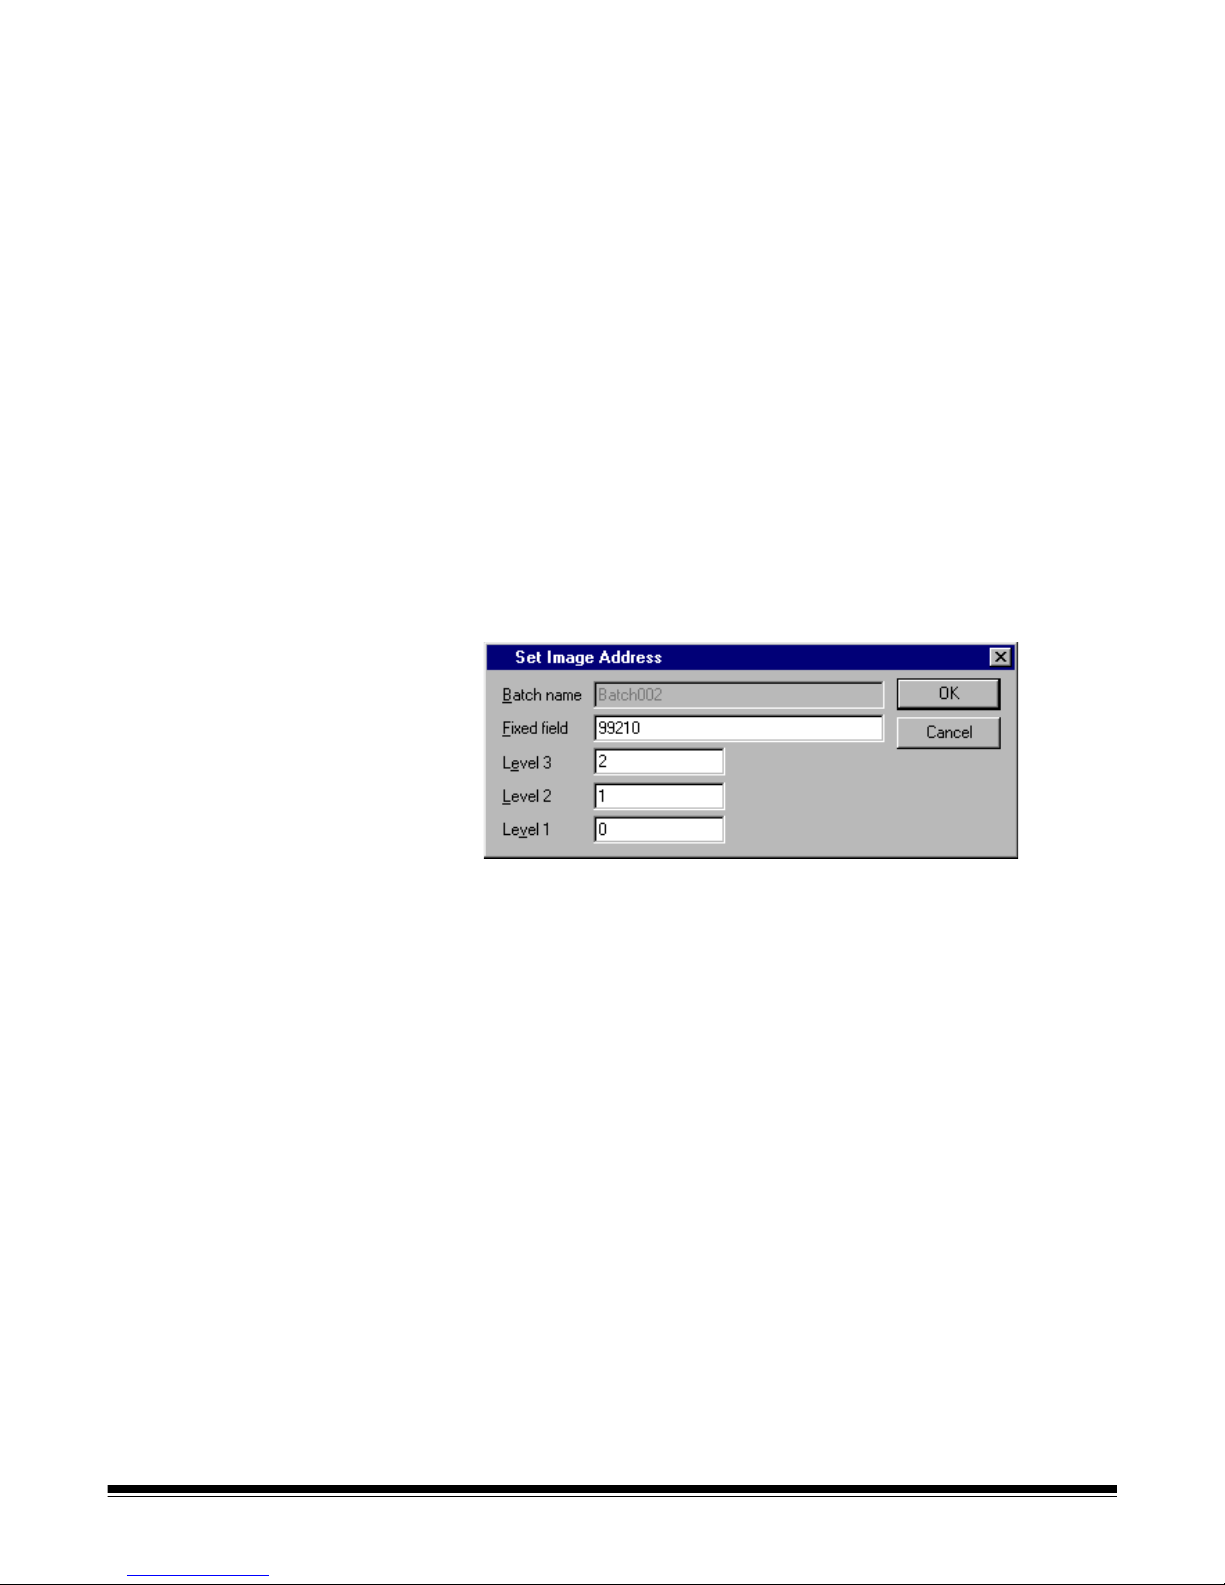
• For high volume and i800 Series Scanners, the Set Image Address
dialog box appears.
Enter the starting image address for the batch. It will be downloaded to
the attached high volume scanner and will appear in the scanner’s LCD
display. Only those image address fields (i.e., Fixed field, Level 3, Level
2, and Level 1) that are applicable to the scanner mo de being used ca n
be modified. By default, Capture Software suggests a starting image
address based upon the Application Setup.
6. Start scanning into the new batch.
A-63054 February 2004 2-5
Page 22
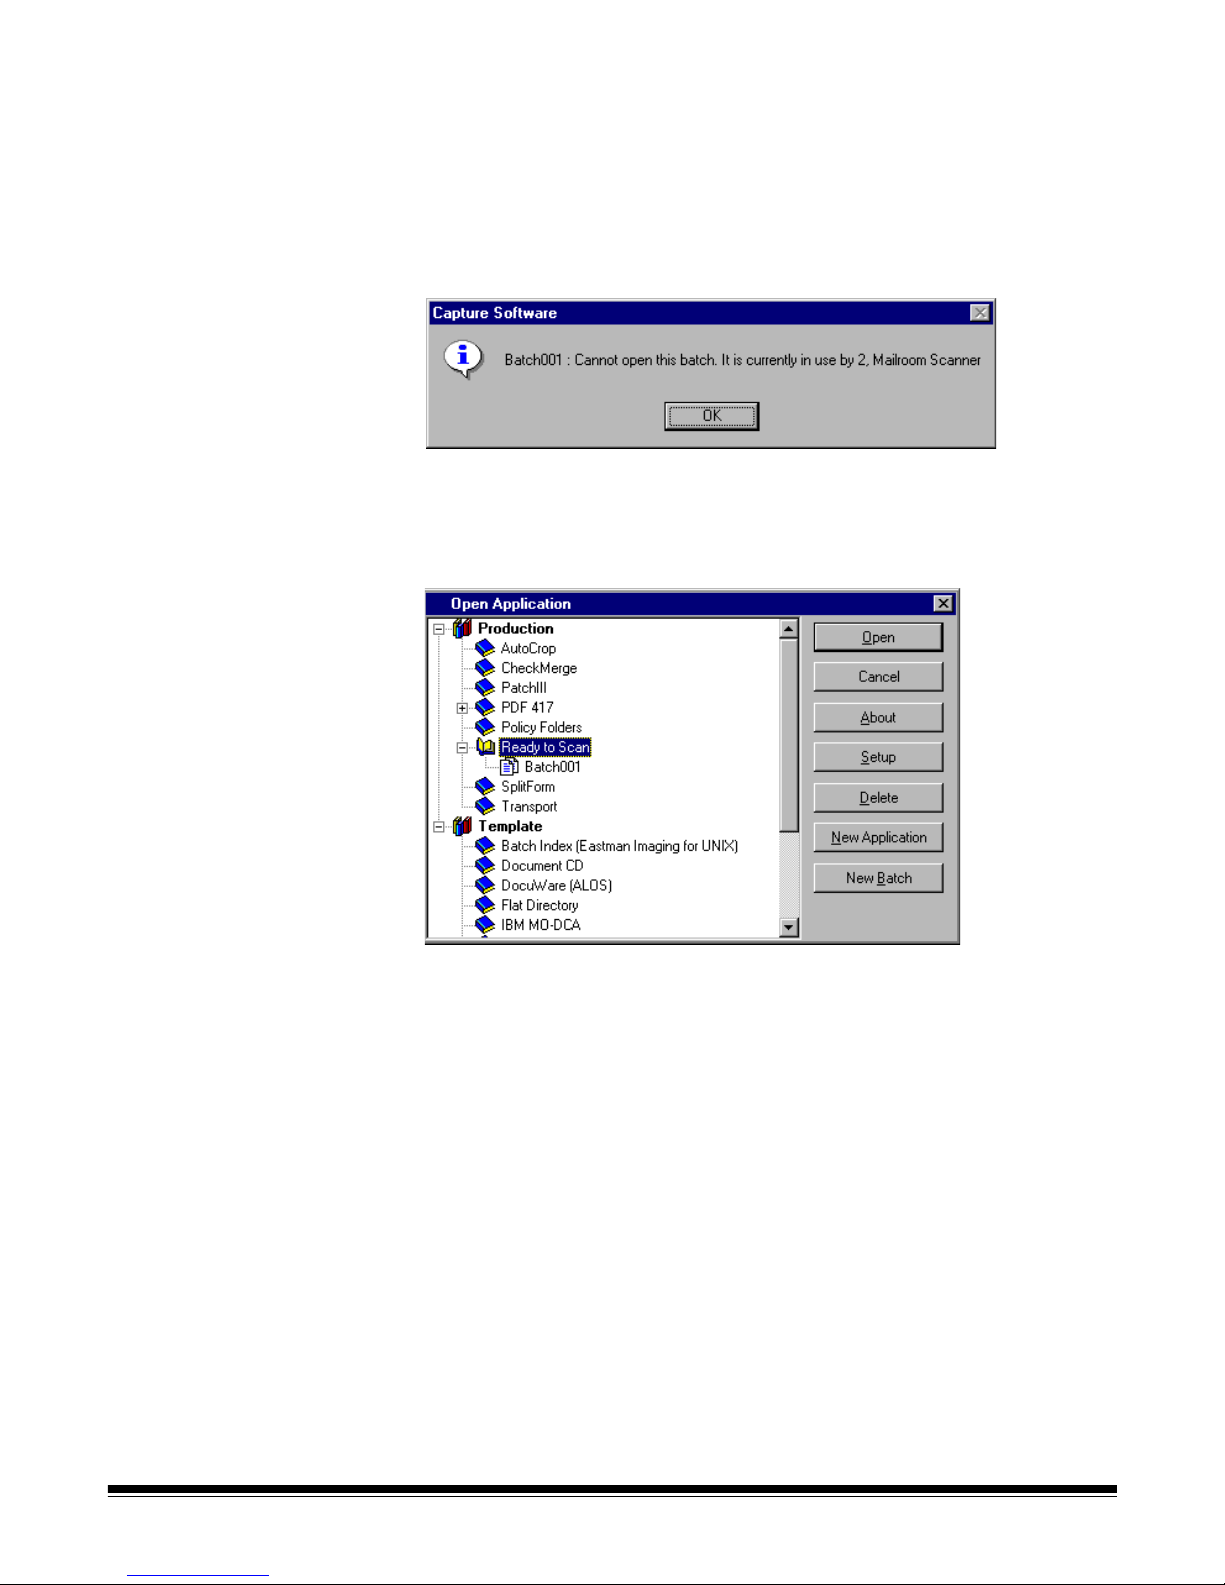
Opening a batch • To open an existing batch, double-click on the batch you want to open
or highlight it and click Open.
The main window appears and shows the existing batch.
If you are scanning in a multiple scanner environm ent, an d the ba tc h ha s
already been opened by another workstation, Capture Software will not allow
you to open the batch. Instead, a message similar to the one shown below
will appear.
Changing to another
application
• From the main window, select File>Open Application.
The Open Application dialog box appears.
From this dialog box you can open another application.
2-6 A-63054 February 2004
Page 23

Starting and stopping
the scanner in
Capture Software
To start the scanner in Capture Software:
Stop Start
• Click on the green Start button (on the Scanner bar in the Capture Software
main window) or press F7.
- For the i50/i60/i80 Scanners, you first need to place the documents to be
scanned face down in the feeder. The scanner automatically detects the
presence of documents in the feeder and the scanner transport/feeder
starts to run.
Y ou may also place a do cument on the flatbed. If no docu ments ar e in the
feeder and flatbed scanning has been enabled, the scanner will scan the
flatbed. When you scan single sheet documents with the flatbed, place
the documents in the upper left corner of the flatbed (this position is
labeled “0,0” on the flatbed).
- For the i200 Series Scanners, the scanner transport/feeder starts to run.
Y ou may also place a do cument on the flatbed. If no docu ments ar e in the
feeder and flatbed scanning has been enabled, the scanner will scan the
flatbed. When you scan single sheet documents with the flatbed, place
the documents face down with the corner aligned with the arrow.
- For the Scanner 1500 and Scanner 2500, you first need to place the
documents to be scanned in the feeder. The scanner automatically
detects the presence of documents in the feeder and the scanner
transport/feeder starts to run.
For the Scanner 1500, you may also place a document on the flatbed.
If no documents are in the feeder and flatbed scanning has been
enabled, the scanner will scan the flatbed. When you scan single
sheet documents with the flatbed, place the documents in the upper
left corner of the flatbed.
NOTE:Page Setup is configured for auto-cropping and/or deskewing
documents, place the document in the middle of the flatbed platen
and align the top edge with the top edge of the glass.
- For the Scanner 3500, Scanner 3510, Scanner 3520, Color Scanner
3590C, and Color Scanner 4500, the scanner transport/feeder starts
to run.
- For the Scanner 5500, Scanner 7520, and Scanner 9520, the Start button
enables the scanner. You must press the green butt on on th e sca nn e r’s
operator panel to start the scanner transport/feeder.
A-63054 February 2004 2-7
Page 24

- For the i800 Series Scanners, the Auto-start transport option in the
Scanner Setup dialog determines what the Start button does.
When Auto-St art transport is enabled, the scanner transport and feeder
will automatically run and start scanning.
When Auto-Start transport is disabled, the Start button enables only the
scanner. You must press the green button on the sca nner control p anel to
start the scanner transport/feeder.
It may take a few seconds to start the scanner the first time because
Capture Software is downloading parameters. Successive starts are faster.
To stop the scanner in Capture Software:
• Click the red Stop button on the Scanner bar of the Capture Software main
window or press F6.
NOTE: The i50 Scanner, i60 Scanner, or i80 Scanner will stop when all
documents in the feeder have been scanned.
Exiting Capture Software • To exit Capture Software, select File>Exit.
The Capture Software application closes.
Restarting if a
transport time-out
occurs
The scanner stops automatically when you do not scan documents for a
period of time (based upon the time-out period that is set in the Scanner
Setup dialog box).
To restart the feeder and transport, click the green Start button on the
Scanner bar and continue feeding documents. You do not need to restart
Capture Software.
2-8 A-63054 February 2004
Page 25

Recovering from
a paper jam
Under certain conditions, a paper jam can occur. Follow these steps to clear
the scanner and restart Capture Software.
1. Clear any paper from the scanner by following the guidelines described in
the User’s Guide for the scanner you are using.
2. Make sure that the top and/or bottom of the scanner are completely closed,
if you had to open them to clear the jam.
3. Wait until the scanner is ready (e.g., on the Scanner 3500, the yellow light
is off and the green Ready light has stopped flashing).
NOTE: Check the screen to verify the last complete image you received from
the scanner before the paper jam. Restart scanning from that point.
4. Click the green Start button on the Scanner bar in the main window.
NOTE: For the i200 Series Scanners, the red indicator light remains on until
the scanner is restarted. If the jam was properly cleared, the re d
indicator light will go out and the green indicator light will illuminate.
Calibration Calibration optimizes the optical system of your scanner in order to achieve the
best overall quality of scanned images. Frequent calibration is not needed or
recommended. However , if you do need to calibrate the scanner (for exam ple,
poor image quality), follow the steps below.
1. Clean the imaging guides properly (e.g., see the scanner’s User’s Guide
for procedures).
2. Obtain a proper calibration target.
Use a clean, blank sheet of paper with a matte surface (not glossy). Make
sure that the target is wider than the document s to be scanned. It is best to
use the square calibration target available from Kodak.
NOTE: For the i800 Series Scanners only: You must use the special
black-and-white calibration target provided with the scanner.
3. Select Scanner>Calibration in the Capture Software main window.
NOTES: For the i50, i60, and i80 Scanners and the Scanner 1500 and
Scanner 2500, scanner calibration is not necessary and therefore is
not available through Capture Software.
For the Scanner 5500, Scanner 7520, and Scanner 9520, calibration
is available only through the scanner operator panel and is required
every time the scanner is powered up.
For the Color Scanner 3590C and Color Scanner 4500, select
Scanner>Color Calibration for color image quality issues.
A prompt appears.
4. Place the calibration target in the scanner ADF.
5. Click OK.
A-63054 February 2004 2-9
Page 26
3A Working in Capture Software
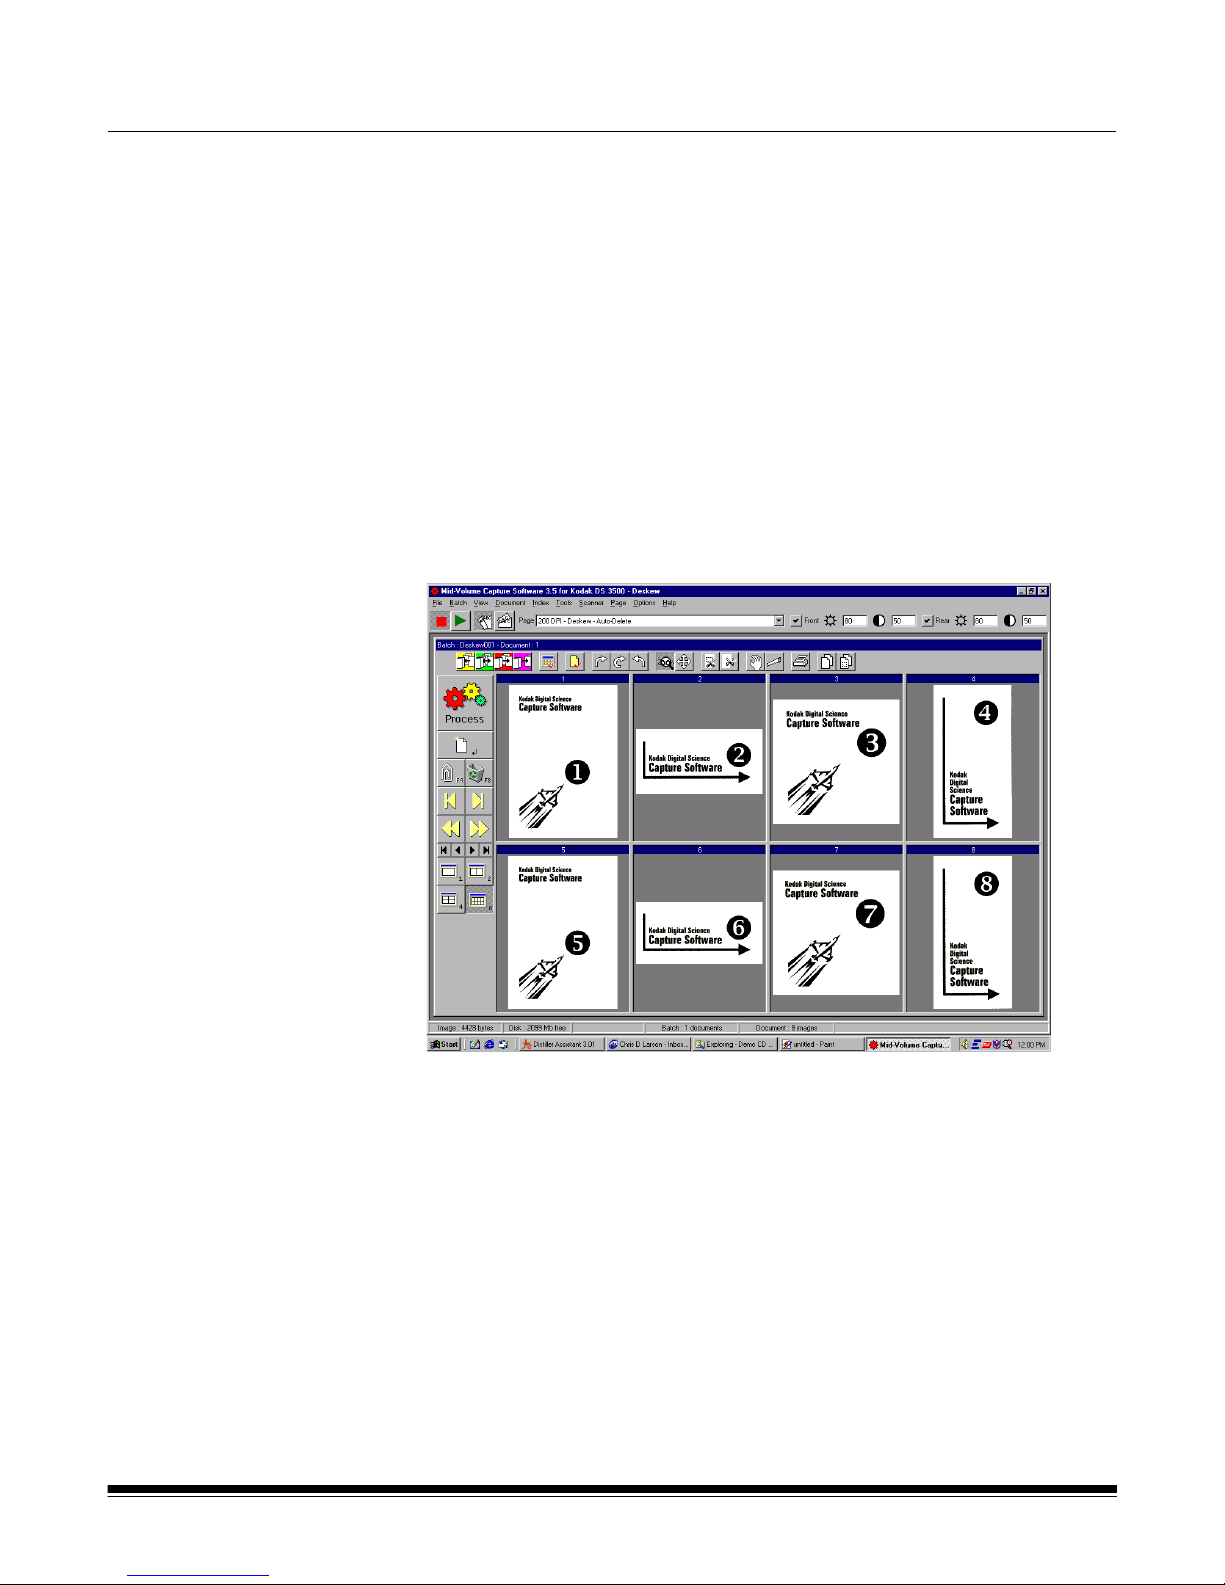
The main
Capture Software
window
This chapter describes how to access and use th e vari ou s fu nc tion s of
Capture Software through the tools and menus of the main window.
The main window contains the following elements :
• Program title bar
• Menu bar
• Scanner bar
• Document title bar
•Tool bar
•Image display
• Button bar
• Status bar
Program title bar The Program title bar provide s the ver sio n nu m be r of Capt ur e Software that
A-63054 February 2004 3A-1
you are running and the name of the selected sc a nner. The application name
is also included on the Program title bar.
Page 27

Menu bar The Menu bar provides the following menu options:
The following summarizes the functions associated with each Capture
Software menu:
File—allows you to open, close, or delete an existing Production or Template
application. In addition, you can create and set up a new application.
Batch—allows you to open an existing batch or create a new batch; and
process current or all available batches.
View—allows you to display 1, 2, 4, or 8 images, fit images to the display
windows regardless of its original size and allows you to enlarge or reduce the
images by a fixed percentage.
Document—provides many options of navigating thro ugh th e disp la ye d
images of a document and the documents within a batch. You can also create
and delete documents and attach new images to an existing document.
Index—allows you to edit batch, document, and page index fields.
Tools—provides a variety of methods which allows you to manipulate
displayed images.
Scanner—allows you to set up a scanner and to start, stop and calibrate
the scanner.
Page—allows you to set up specific page properties, duplex scanning mode
(classic or calendar), and image setup options.
Options—provides access to hiding or displaying the Tool bar, Status bar,
Button bar, and Scanner bar.
Help—provides version number information about the current installation of
Capture Software.
The following sections provide information on each of these menu options. In
many cases, you can use a keyboard, Tool bar, Scanner bar, or Button bar
shortcut instead of selecting an option from the menu.
Button bar, Scanner bar, and Tool bar summaries are described later in this
chapter. Proce dures on h ow to use a menu option ar e cove red in the following
menu descriptions.
3A-2 A-63054 February 2004
Page 28

File menu The File menu allows you to open, close, import, export, or delete an existing
Production or Template application. In addition, you can create and set up a
new application.
New Application—accesses the Create New Application dialog box which
allows you to create a new application based upon an existing application.
Open Application—allows you to open an existing application. Keyboard
shortcut: F3
Close Application—closes the current application and open batch.
Import/Export Application—allows you to export (or save) application
settings from one Capture Software installation and import (or load) those
settings to another Capture Software insta llation. These functions currently
are not supported.
Application Setup—accesses the Application Setup dialog box. More
information about setting up applications can be found in Chapter 4,
Application Setup.
Delete Application—when selected, deletes the current application. You
cannot delete an application that contains batches.
Properties—automatically closes the current application and accesses the
Capture Software Program Properties. More informa tio n ab out Prog ra m
Properties can be found in Chapter 11, System Administration —
Program Properties.
Exit—closes Capture Software. Keyboard shortcut: Alt+F4
A-63054 February 2004 3A-3
Page 29
Open Application dialog box The Open Application dialog box allows you to:
• Open an existing application.
• Close the Open Application dialog box.
• Access information (i.e., a Readme text file) for selected applications.
• Set up a new application—see Chapter 4, Application Setup, for
more information.
• Delete an existing application.
• Create a new batch—see the section entitled “The Batch menu” later in this
chapter for more information.
Opening an application
1. Select File>Open Application.
The Open Application dialog box appears.
2. Select the application you want to open.
The batches associated with the application will be displayed.
3. Click Open to show the batch you selected in the main Capture
Software window.
3A-4 A-63054 February 2004
Page 30

Closing an application
•Select File>Close Application from the main Capture Software window.
Deleting an application
1. Select the application you want to delete.
The batches associated with the application will be displayed.
NOTE: An application cannot be deleted unless all batches are processed
or deleted.
2. Click Delete.
Accessing online application information
1. Select the application you want information about.
2. Click About.
If available, information about the application will appear in a text window.
A-63054 February 2004 3A-5
Page 31

Batch menu The Batch menu allows you to open, create, set up and delete batches. You
can also process a current batch or all available batches.
New—allows you to create a new batch.
Open—shows a list of available batches for a selected application. Opening a
batch from the list automatically closes the current batch.
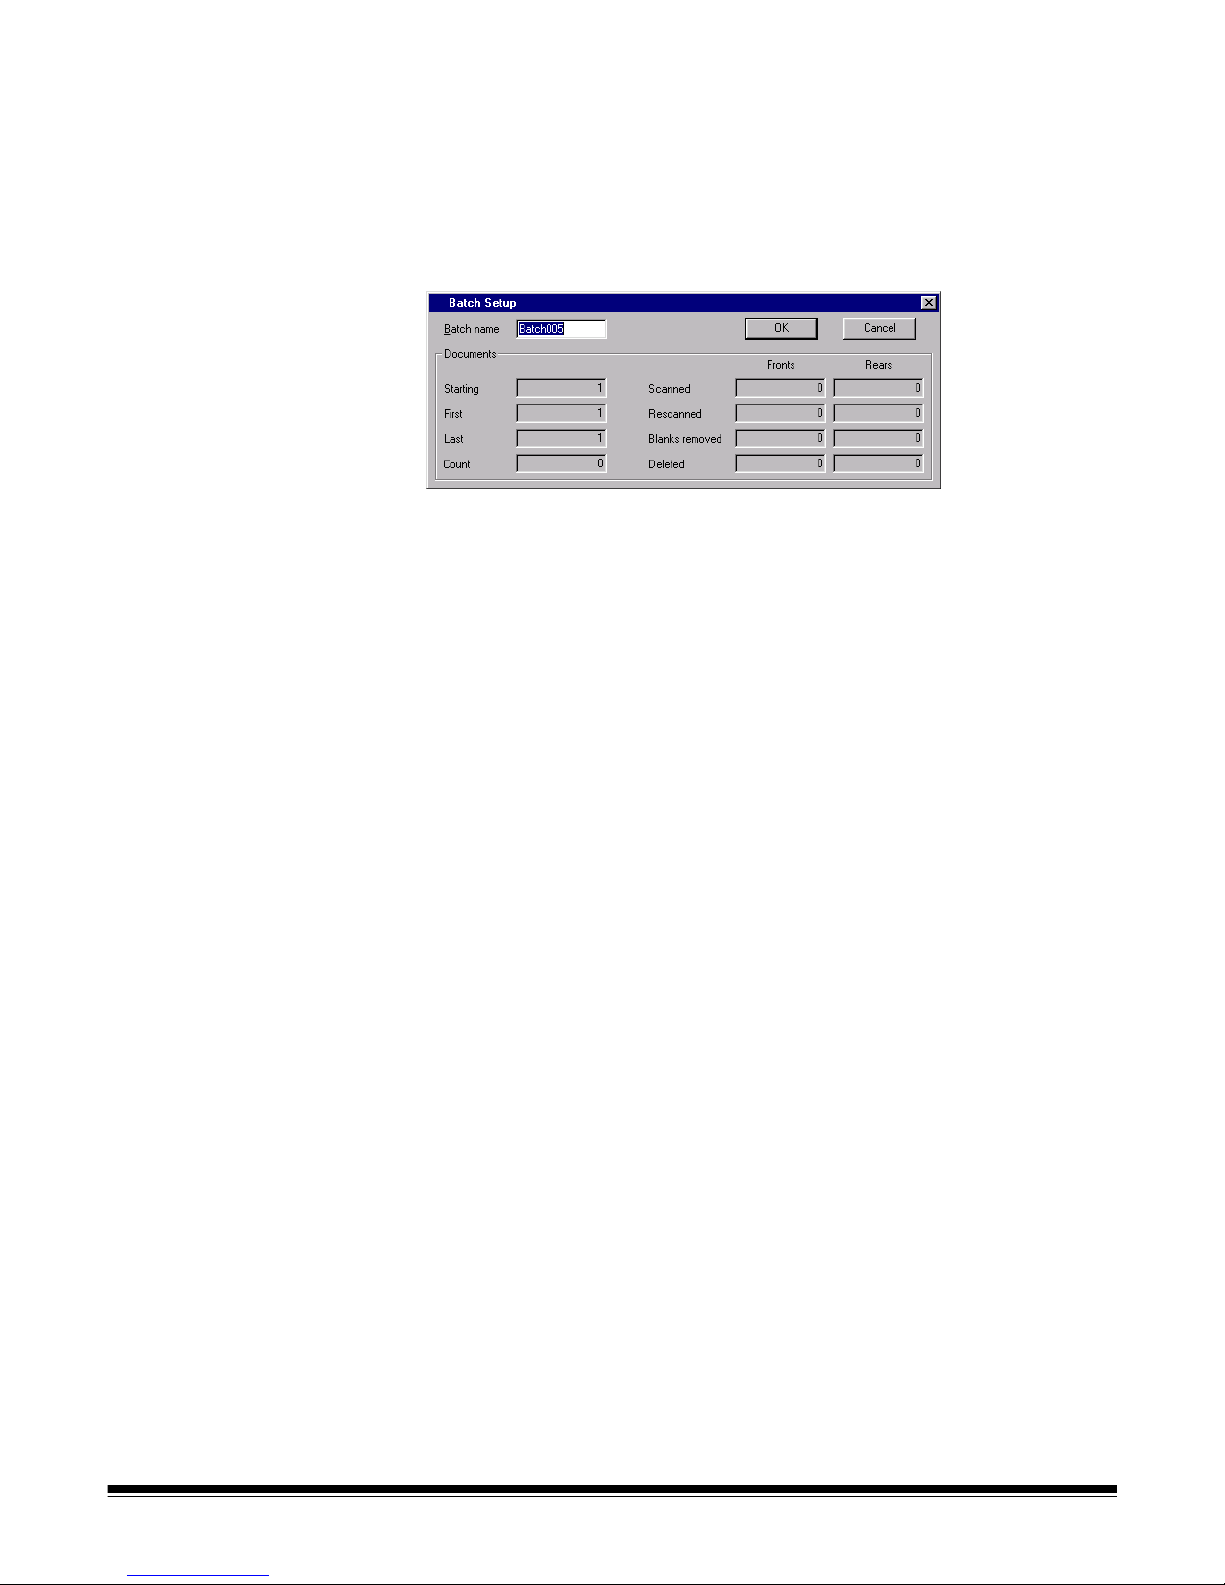
Setup—allows you to change the name of a batch. When selected, the Batch
Setup dialog box will appear, which allows you to enter a new Batch name.
After you have entered a new batch name, click OK.
Remove Blank Images—allows you to remove blank rear or front sides
produced by the scanner.
Process—processes the current batch according to the selected Batch Output
Format. Keyboard shortcut: P
Process All—shows all available batches for the current application; you can
select one or more batches to process unattended.
Clear—erases all images in a batch, but keeps the batch subdirectory
structure intact.
Delete—erases both the images and batch subdirectory structure of the
selected batch.
3A-6 A-63054 February 2004
Page 32

Creating a new batch When you create a new batch, Capture Software will not disable the scanner.
From the Open Application window:
1. Select an application where you want the new batch to reside.
2. Click New Batch.
From the main Capture Software window:
3. Select Batch>New.
The Create New Batch dialog box appears.
4. Enter a new batch name in the Batch name field.
By default, Capture Software suggests a new batch name based upon the
last batch name created for the application (e.g., If the last batch name is
Batch002, then the new batch name default will be Batch003).
5. Enter the starting document number.
By default, Capture Software suggests a starting document number based
upon the Application Setup.
6. Click OK.
The main window appears with the batch name you assigned.
A-63054 February 2004 3A-7
Page 33

Depending on your User Profile settings and the Application Setup,
other dialog boxes may appear before the main Capture Software
window appears.
• For the Scanner 1500 or Scanner 2500 and Scanner 3520DP or Color
Scanner 4500DP (when document printing is enabled), and the i800
Series Scanners, the Set Counter dialog box appears.
Enter a starting counter number.
- For the Scanner 1500 or Scanner 2500, the number is download ed to
the scanner and will appear on the scanner’s LCD display.
- For the Scanner 3520DP or Color Scanner 4500DP, the number is
downloaded and printed on the first scanned page when document
printing is enabled.
- For the i800 Series Scanners, the number is downloaded and
assigned (and optionally printed) to the first scanned page.
By default, Capture Software suggests a starting counter based upon
the Application Setup.
• For high volume and i800 Series Scanners, the Set Image Address
dialog box appears.
Enter the starting image address for the batch. It will be downloaded to
the attached high volume scanner and will appear in the scanner’s LCD
display. Only those image address fields (i.e., Fixed field, Level 3, Level
2, and Level 1) that are applicable to the scanner mo de being used ca n
be modified. By default, Capture Software suggests a starting image
address based upon the Application Setup.
7. Start scanning into the new batch.
3A-8 A-63054 February 2004
Page 34
Opening a batch To open an existing batch, select Batch>Open. The Open Application dialog
box appears. The batch that was previously opened is highl ighted. You can
now open any existing batch in any production application.
Setting up a batch From the main window:
1. Select Batch>Setup.
The Batch Setup dialog box appears.
2. If desired, enter a new name for the current batch.
3. Click OK.
The new batch name is reflected in the list of batches for the
selected application.
The main Capture Software window appears. You can continue scanning.
A-63054 February 2004 3A-9
Page 35

Removing blank images This option allows you to remove the blank rear or front sides produced by the
scanner. If you use this option, you will be asked to verify the batch delete of
the blank images.
From the main window:
1. Select Batch>Remove Blank Images.
The Remove Blank Images Setup dialog box appears.
2. Enter the document in the batch where you want verification to begin. The
default is 1.
3. Define the byte size threshold of the images to be verified.
NOTE: A good setting for typical business documents is 5000 bytes in
200 dpi bitonal.
4. If you want to remove only the blank rear sides of the images in a batch,
click the Check only rear sides check box.
5. If you do not want all images pre-selected for deletion, uncheck the
Pre-select all check box to disable this option.
6. Define the number of columns and rows you want to display.
On a 1024 x 768 SVGA screen, a matrix of 14 x 7 allows you to check
98 images per screen for images containing valid data.
7. Click OK to accept the values you entered.
3A-10 A-63054 February 2004
Page 36
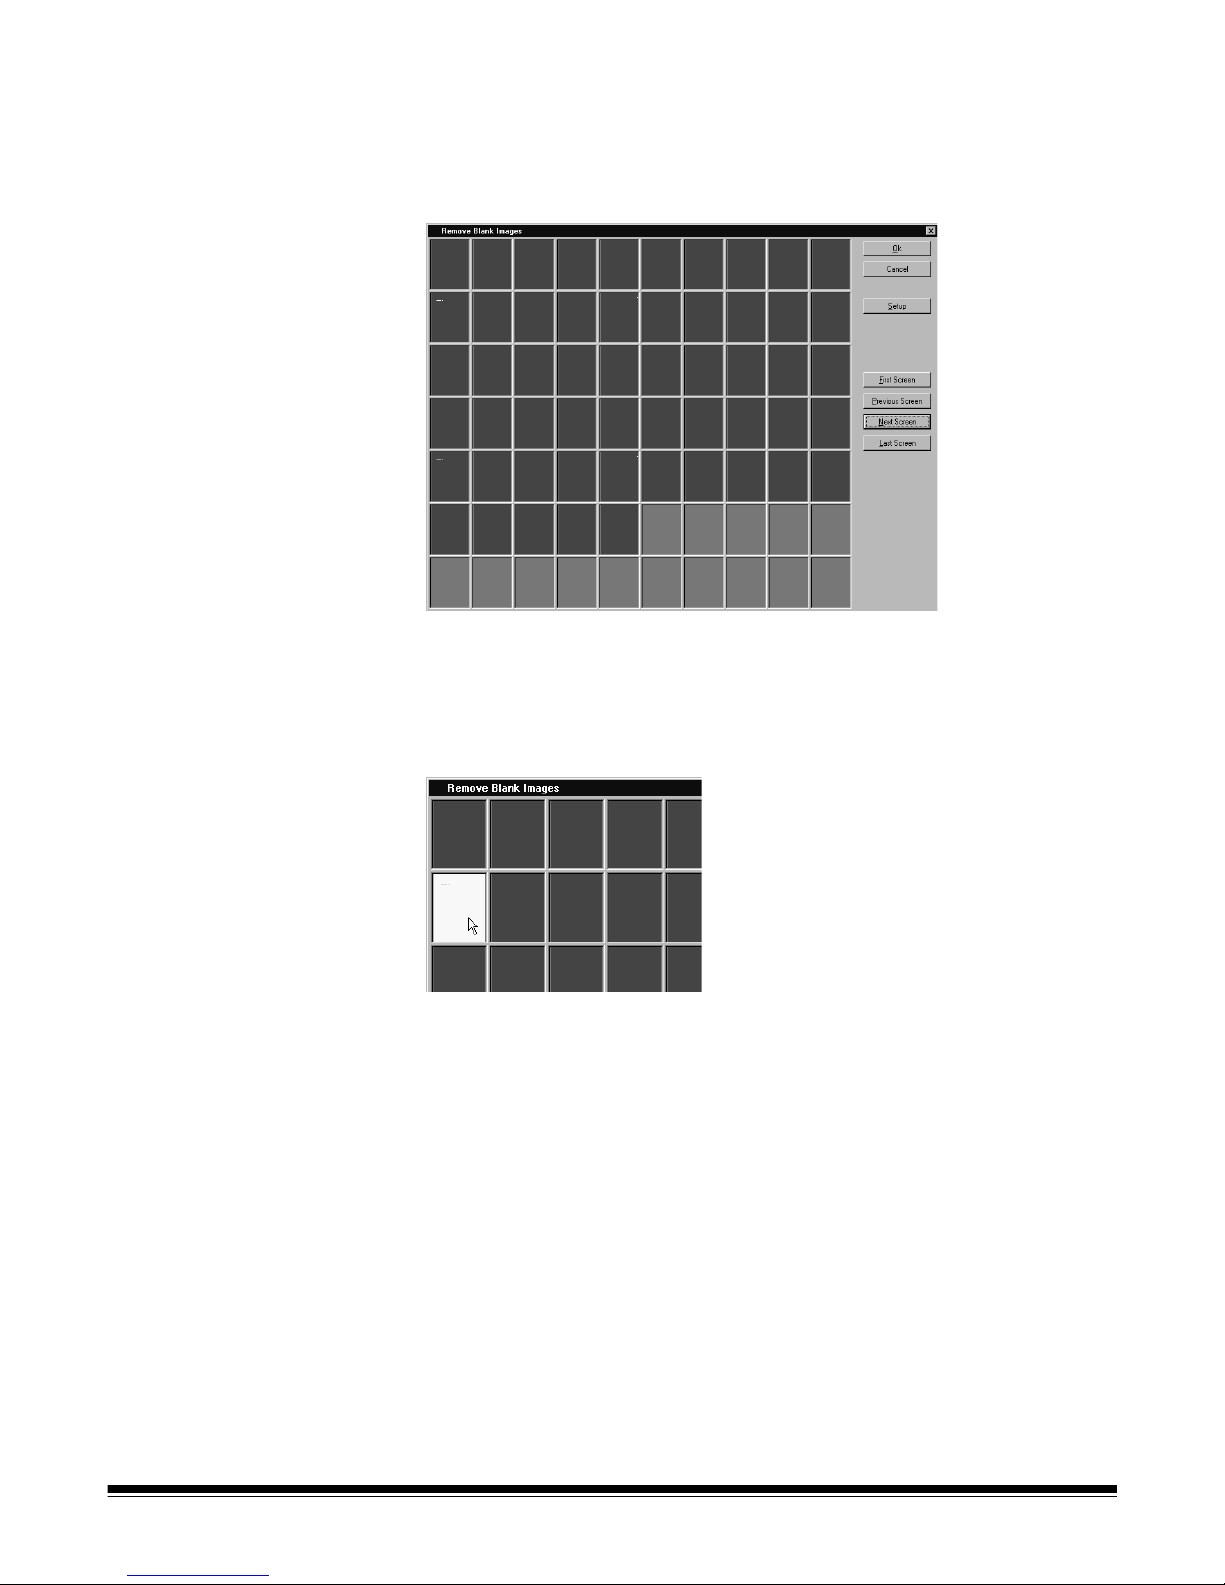
After a batch has been processed, Capture Software displays all rear images
below the specified number of bytes (e.g., 5000 bytes). These images are
displayed in a red highlight color (unless you disabled the Pre-select all
option). All colored images (which appear black here, but red on your screen)
are considered blank and ready for mass deletion.
To delete the blank images:
1. By default, all images are selected for deletion. Select any images you do
not want to delete by clicking them individually.
The color changes to white.
NOTE: The First Screen, Previous Screen, Next Screen, and Last Screen
buttons help you navigate through all the blank imag e s in the batc h.
2. Click OK.
The message Remove all selected images? appears.
3. Select Yes to confirm the deletion of images.
Capture Software removes the images and repagin ates the documents.
The available batch and hard disk capacity are also updated.
A-63054 February 2004 3A-11
Page 37
Changing the Remove Blank Images setup
You can change the Remove Blank Images setup by selecting Setup on the
Remove Blank Images dialog box. The Remove Blank Image Setup dialog box
appears and you can change the parameters as required.
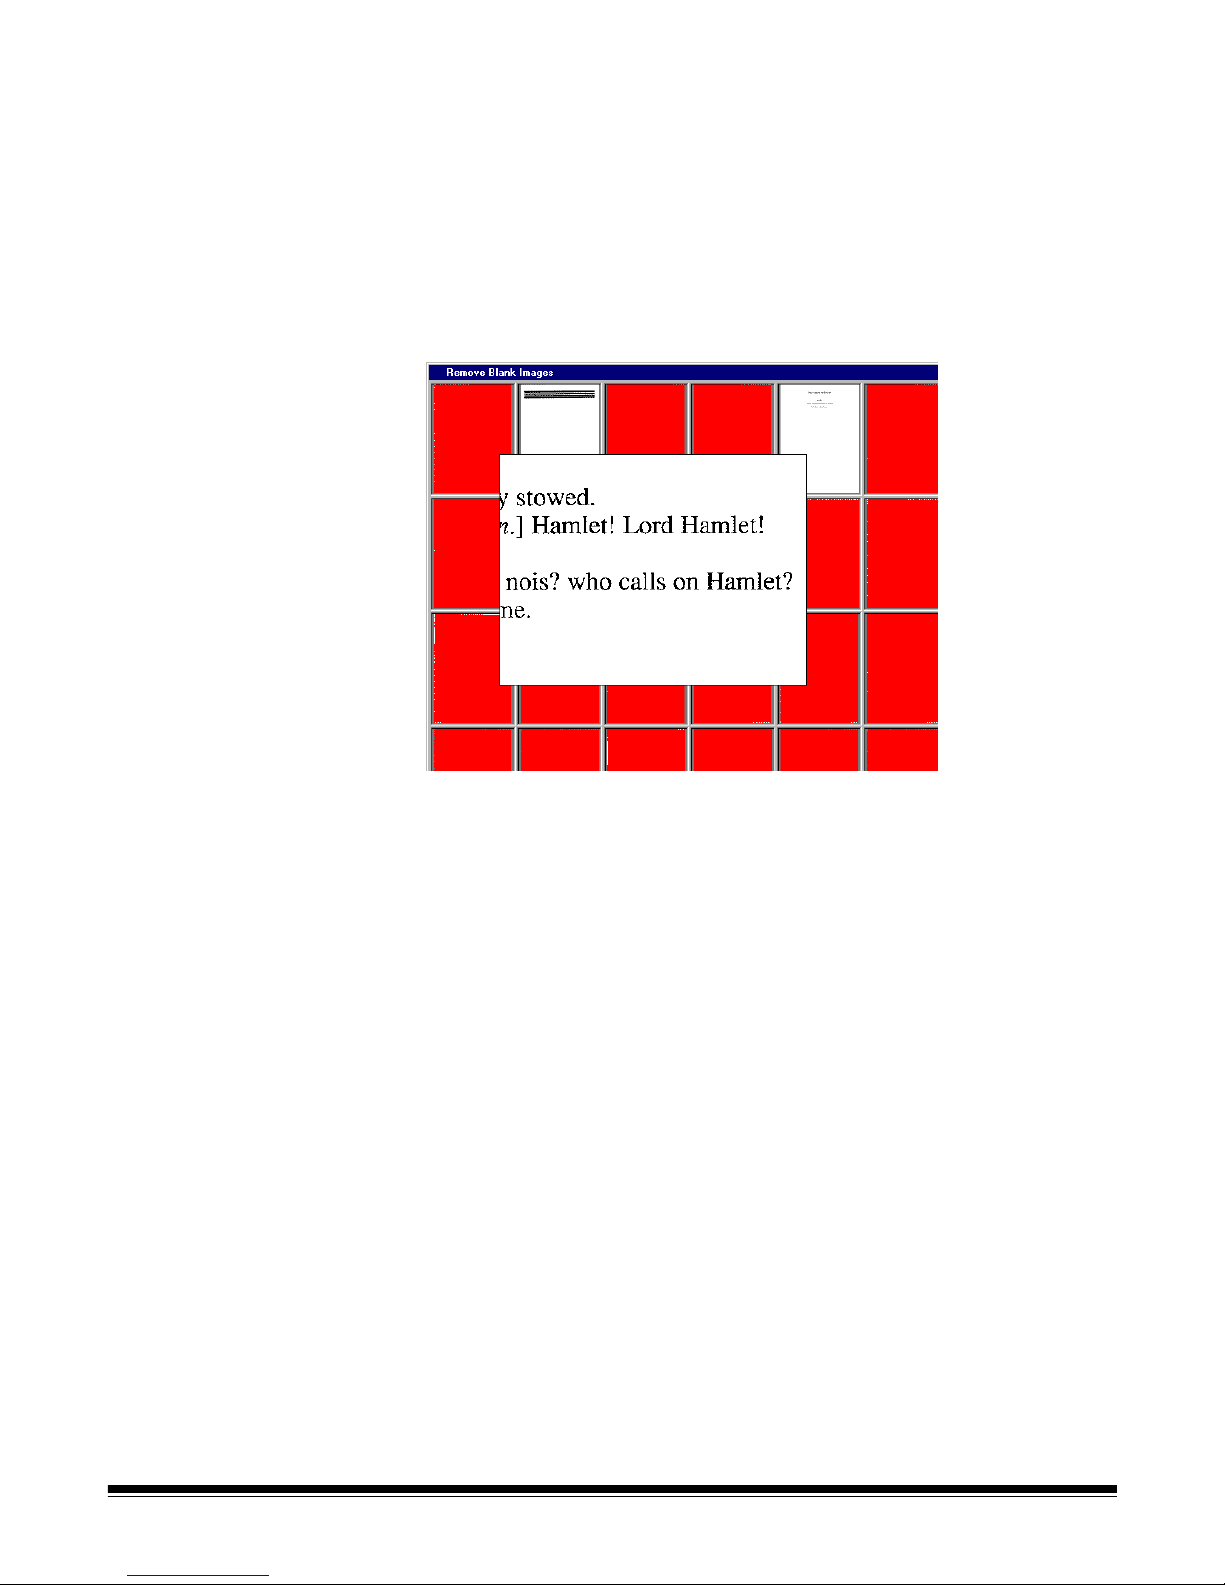
Displaying a detailed view of an image
You can display a more detailed view of an image by right-clicking on the
thumbnail of the image. The image will be magnified to 100%. By moving the
magnifying glass over the thumbnail, you can verify whether or not the image
should be deleted.
Processing batches You can process one batch at a time or process all available batches. When
you process a batch, the batch is processed according to the selected Batch
Output Format in Application Setup (Output tab). This typically results in the
batch being copied to an output subdirectory path.
Processing the current batch
•Select Batch>Process.
A progress meter will be displayed while the batch is processing.
3A-12 A-63054 February 2004
Page 38
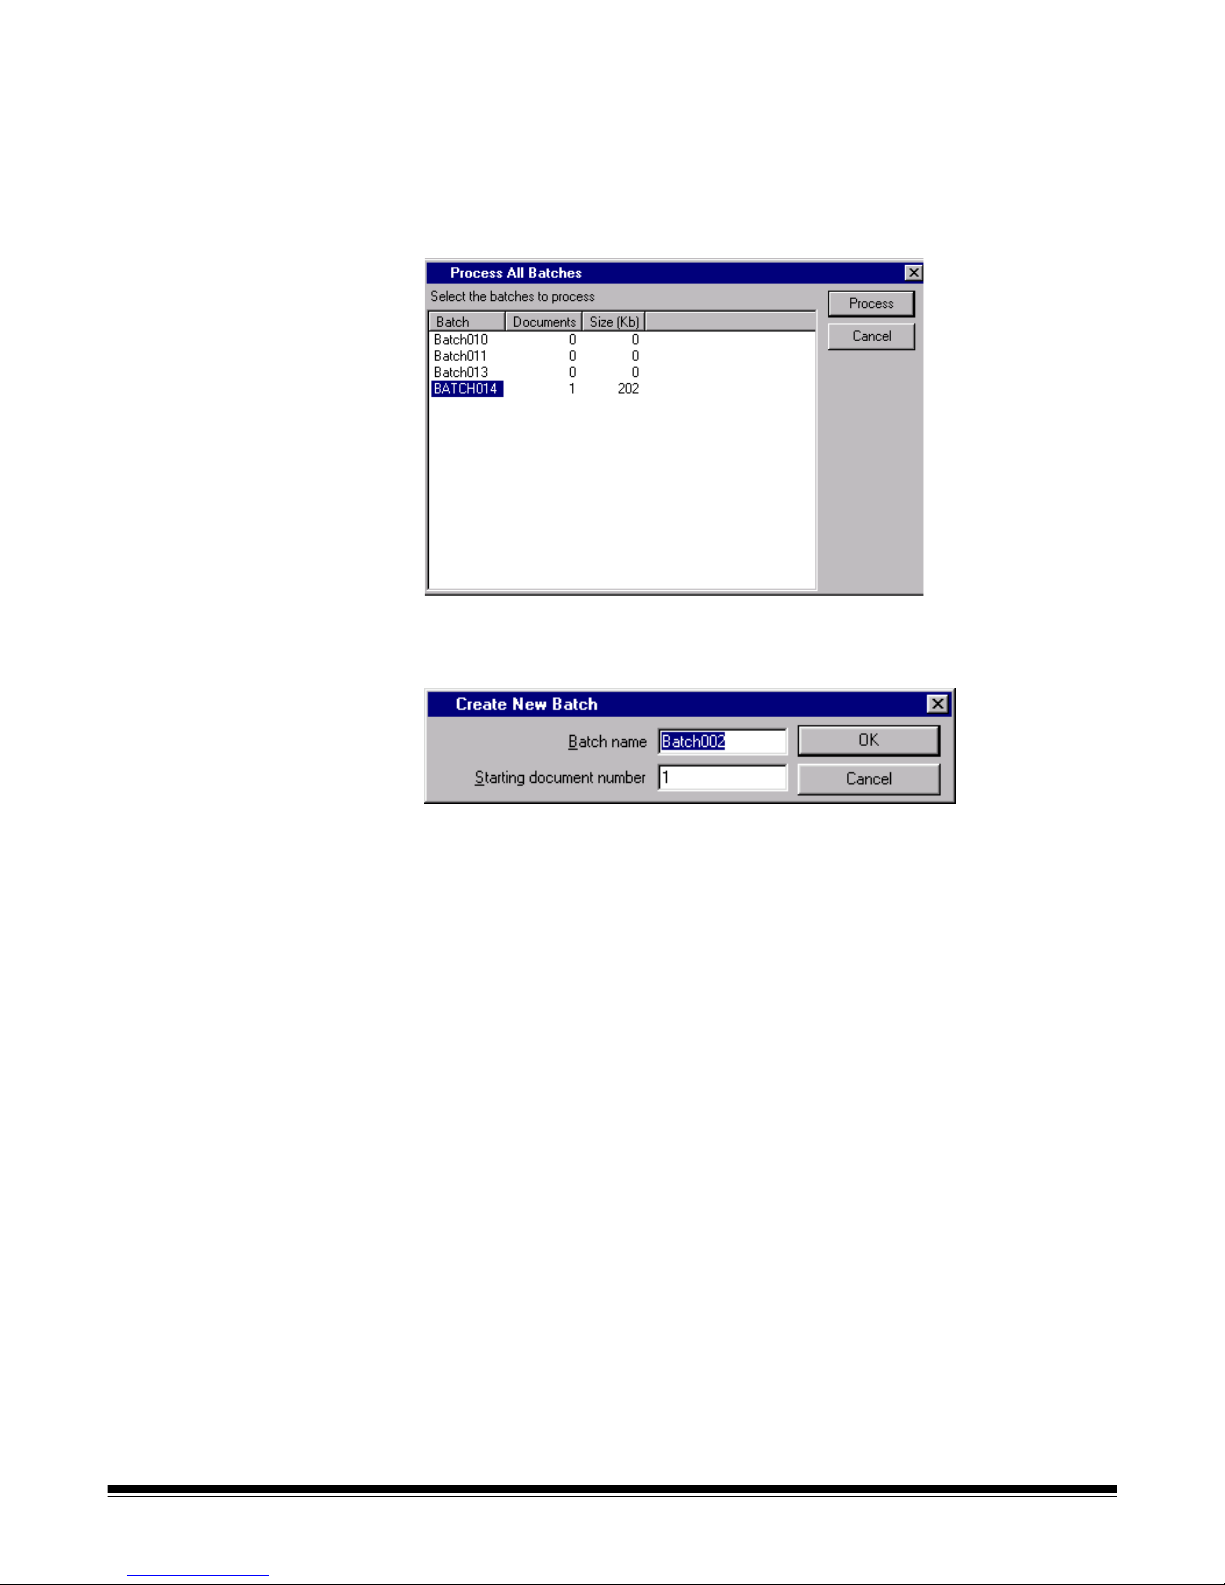
Processing all available batches
1. Select Batch>Process All.
The Process All Batches dialog box appears. This dialog box allows you to
select one or more batches to be processed.
2. Click Process.
Each selected batch is processed in the order displayed.
3. After processing, the Create New Batch dialog box appears.
By default, the name of the new batch is incremented by one. It is
suggested that you increment the previous batch name by one.
4. Click OK to continue scanning into the new batch.
Clearing and deleting batches The Clear and Delete options are available from the Batch menu. When you
clear a batch, Capture Software deletes all images but keeps the batch
subdirectory name and all subdirectories that have already been created.
When you delete a batch, Capture Software deletes the entire batch
subdirectory structure and removes the batch name from the list of batches
in the selected application.
A-63054 February 2004 3A-13
Page 39

View menu The View menu provides options which allow you to alter the way you view
images in the Image Display area.
1 Image—allows you to display one image in the Image Display area.
Keyboard shortcut: 1
2 Images—allows you to display two images in the Image Display area.
Keyboard shortcut: 2
4 Images—allows you to display four images in the Image Display area.
Keyboard shortcut: 4
8 Images—allows you to display eight images in the Image Display area.
Keyboard shortcut: 8
Scale to Gray—toggles the scale to gra y mo de on and off. Selecting Scale
to Gray will increase the quality of the bitonal images displayed on lower
resolution monitors. This option has no effect on the image files
Fit Images to Window—fits each image to the Image Display window
regardless of its original size. Keyboard shortcut: F
Zoom In—enlarges an image by a fixed percentage according to the Zoom
Step setting. Keyboard shortcut: +
Zoom Out—reduces an image by a fixed percentage according to the Zoom
Step setting. Keyboard shortcut: Zoom Step—accesses the Zoom S t ep dialog box which allows you to select a
percentage to scale. Options range from 15 to 40% in increments of 5%.
3A-14 A-63054 February 2004
Page 40

Changing zoom settings To change the settings in the Zoom Step dialog box, proceed as follows.
1. Select View>Zoom Step.
The Zoom Step dialog box appears.
2. Click on the setting you desire.
3. Click OK.
The zoom setting will be reduced or enlarged based upon the percentage
you selected.
A-63054 February 2004 3A-15
Page 41

Document menu Following is a summary of what options are provided from the
Document menu.
New—allows you to start a new document with a document number equal to
the last document number + 1. Keyboard shortcut: Enter
In Capture Software for 3000/4000 Series Scanners and Cap tu re So ftware for
i800 Series Scanners, selecting this option also enables the scanner an d starts
the scanner transport/feeder.
Attach—appends the next scanned page to the current document. Keyboard
shortcut: F4
Delete—deletes the current document. Keyboard shortcut: F8
Delete Range—accesses the Delete Documents dialog box which allows you
to delete a range of documents in the batch.
CDVue—this option is only available when you use the IBS/ Document CD
Native Scan structure. When this option is available, you can search and view
documents in the current batch with the CDVue application. This is useful for
testing the Document Index data that has been generated for the batch.
Keyboard shortcut: V
First—select this option to go to the first document in a batch. Keyboard
shortcut: Ctrl+Home
Last—select this option to go to the last document in a batch. Keyboard
shortcut: Ctrl+End
Previous—moves to the previous document number containing images.
Keyboard shortcut: Ctrl+Page Up
Next—moves to the next document number containing images. Keyboard
shortcut: Ctrl+Page Down
3A-16 A-63054 February 2004
Page 42

Go to Document—accesses the Go to Document dialog box which allows you
to enter the number of the document that you want to display. You can also go
to document numbers that do not contain any images. Keyboard shortcut: D
First Image—allows you to go to the first image of a document. Keyboard
shortcut: Home
Last Image—allows you to go to the last image of a document. Keyboard
shortcut: End
Previous Screen—allows you to go to the previous screen. Keyboard
shortcut: Page Up
Next Screen—allows you to go to the next screen. Keyboard shortcut:
Page Down
Go to Image—accesses the Go to Image dialog box which allows you to enter
the number of the image you want to display first in the Image Display area.
Keyboard shortcut: I
Scroll Images to Top—allows you to scroll all of the images in the Image
Display area to the top of the images. Keyboard shortcut: Ctrl+Up Arrow
Scroll Images to Left—allows you to scroll all of the images in the Image
Display area to the left of the images. Keyboard shortcut: Ctrl+Left Arrow
Scroll Images to Bottom—allows you to scroll all of the images in the
Image Display area to the bottom of the images. Ke yboard shortcut:
Ctrl+Down Arrow
Scroll Images to Right—allows you to scroll all of the images in the Image
Display area to the right of the images. Keyboard shortcut: Ctrl+Right Arrow
Deleting a range of pages 1. Select Document>Delete Range.
The Delete Documents dialog box appears.
2. Enter the beginning number of the document you want to delete in the
Delete all documents from field.
3. Enter the ending number of the group of documents you want to delete in
the up to field.
4. Click OK when finished.
A-63054 February 2004 3A-17
Page 43

Moving to a specific
document or image
The Go to Document and Go to Images options are available when you want
to move directly to a specific document or image.
To go to a specific document:
1. Select Document>Go to Document.
The Go to Document dialog box appears.
2. Enter the document number you want to go to.
3. Click OK.
To go to a specific image:
1. Select Document>Go to Image.
The Go to Image dialog box appears.
2. Enter the image number you want to go to.
3. Click OK.
3A-18 A-63054 February 2004
Page 44

Index menu The Index menu provides access to the index fields at batch, document, and
page levels. Following is a summary of each option.
Edit Batch Fields—when selected, the Batch Index Fields dialog
box appears.
Edit Document Fields—when selected, the Document Index Fields dialog
box appears.
Edit Page Fields—when selected, the Page Index Fields dialog box appears.
This function is not yet available, as page level index fields are not available.
To enter or change a batch or document index field:
1. Choose Edit Batch Fields or Edit Document Fields, depending upon
which fields you would like to edit.
The appropriate dialog box appears, containing an entry and value, if one
exists, for each index field define d during Application setup. In addition, the
first page of the batch (for batch index fields) or document (for document
index fields) is displayed next to the index field entries.
A-63054 February 2004 3A-19
2. Change any information in the fields as requir ed .
As you tab from field to field, the audit rules for the fiel d are displayed (e.g.,
A(4) to enter up to four alphabetic characters).
3. Click OK to finish editing the current document/batch index fields.
The Image Display area of the Capture Software main window appears.
NOTE: Select Cancel to ignore any changes that were made. The Image
Display area of the Capture Software main window appears.
Page 45

For document index fields, two additional options are available:
•Select Next Doc to edit the index fields for the next document in a batch.
This option is useful for manual data entry indexing after scanning has
been completed.
•Select Next Invalid to go to the next document (or next field in the current
document) that has an invalid field value. This option is useful for index
correction after scanning has been completed.
NOTE: The last button used (Next Doc or Next Invalid) remains active,
allowing you to perform post-scanning indexing functions quickl y using
the Enter key without using the mouse.
Image Display options When editing index fields, several image display options are available. Image
display options are accessible from the Image Display Tool bar and an Image
Display context-sensitive menu.
Image Display Tool bar
From left to right:
•The rotation buttons rota te the dis playe d ima g e 90
o
, 180o, or 270o
clockwise. These buttons are useful to orient the image in the direction of
the index data (e.g., bar code data) that needs to be enter ed/corrected.
IMPORTANT: When an image is rotated and the index field changes are
saved (i.e., not canceled), any rotation of the image is
also saved.
•The Zoom image with magnifying glass tool is the same as the tool on the
Capture Software main window.
•The Zoom image on rectangle tool allows you to draw a rectangle around
a portion of the image that you want zoomed for display when editing index
fields. This zoom setting is saved per index field. As a result, you can define
a zoom zone for each index field and the image display auto matically zooms
to the appropriate part of the image when that field is edited.
•The Scroll image tool is the same as the tool on the Capture So ftware main
window. The results of scrolling are saved per index field.
•The Front and Rear radio buttons control which side of a duplex page is
displayed when editing index fields. The front/rear setting is sa ved per inde x
field. As a result, when tabbing between index fields, the image display can
automatically switch from front to rear and back again.
3A-20 A-63054 February 2004
Page 46

Image Display context-sensitive menu
These menu options function the same as they do on the Capture Software
main window image context-sensitive menu. Any adjustments to imag e display
by zooming in/out or fit image to window are saved per index field.
NOTES: All adjustments to image display from the tool bar or the context-
sensitive menu are automatically saved, per Capture Software
application, when leaving the Batch/Document Index Fields dialog
box. As a result, the next time fields are edited, the image display
settings used previously remain in effect.
The Batch and Document Index Fields dialog boxes can be resized
and moved to a different position on the screen. When leaving the
dialog box, the size and on-screen positions are automatically saved.
As a result, the next time index fields are edited, the location and size
of the dialog box used previously remain in effect.
Index correction during scanning
When index fields are defined with the Check Field During Scanning option
enabled, each index field value is audited against the input mask and minimum
length requirements for the field. If an index field audit fails, scanning will be
interrupted and you will be prompted to correct the index data before scanning
can be resumed.
If the Stop Scanner on Error option is enabled for the application, the
scanner must be manually restarted (green button on the Scanner bar) to
resume scanning. Otherwise, scanning will automatically resume when the
index field is corrected.
A-63054 February 2004 3A-21
Page 47

Tools menu Following is a brief summary of each option on the Tools menu. The Tool bar
also provides most of these options. See the section entitled “Tool bar” in this
chapter for an explanation of the Tool bar buttons.
Re-Append Images—this option is available only when the Insert Image tool
is used. Use this option after Insert is completed to reattach the ending images
of a document with the inserted images.
Insert Image—allows you to insert additional pages into a scanned document.
Keyboard shortcut: Insert
Rescan Image—allows you to rescan a selected image. Keyboard shortcut: R
Delete Image—allows you to delete one or more images selected inside a
document. For example, blank images can be deleted from a double-sided
document; Capture Software will renumber all remaining images after the
selected images are deleted. Keyboard shortcut: Delete
Delete End of Document—allows you to delete the selected image and all
subsequent images of a document. Images are removed from your hard
disk. You cannot undo this function.
Confirm Image—allows you to confirm unchangeable actions (no undo).
Actions you cannot undo, and therefore must confirm, are: deleting and
cropping images, blanking parts of one or more images, and copying parts of
an image to the Windows clipboard. Keyboard shortcut: Space
Flag Image—allows you to indicate that something special needs to be done
with a particular image. This function is not yet available.
3A-22 A-63054 February 2004
Page 48

Rotate 90°—allows you to rotate an image 90 degrees to the right. Keyboard
shortcut: Shift+Right Arrow
Rotate 180°—allows you to rotate an image 180 degrees. Keyboard shortcut:
Shift+Up or Down Arrow
Rotate 270°—allows you to rotate an image 270 degrees to the right (or 90
degrees to the left). Keyboard shortcut: Shift+Left Arrow
Zoom—allows you to enlarge a portion of an imag e. When you select Zoom, a
magnifying glass will be displayed. You can enlarge any area where you place
the magnifying glass. You can also select other magnification ratios (100, 150,
200, or 250%) by right-clicking on the image and selecting Magnification
Ratio from the context-sensitive menu. The Magnify tool does not slide
between images. Keyboard shortcut: Z
Scroll—use the Scroll option to scroll in any direction within an image that is
partially hidden. This is useful when a single image is too large to be displayed
fully on the screen. Keyboard shortcut: S
Blank—use the Blank tool to select an area of an image that you want to
remove from the image. Keyboard shortcut: Ctrl+X
Crop—allows you to draw a rectangle around a portion of an image retaining
only the part of the image you want.
Move—allows you to move a page (both front and rear images) from one
location to another location within the document. To move an image, right- click
on the image and select Move image on the context-sensitive menu to ch ange
the move tool setting. Keyboard shortcut: M
Split—allows you to split a document into two documents.
Print—allows you to print a document or specific images within a document.
Only black-and-white images can be printed at this time. Keyboard shortcut:
Ctrl+P
Copy—allows you to copy an image (in its highest resolution) to the Windows
clipboard. Keyboard shortcut: Ctrl+C
Copy Area—allows you to copy a specific area of an image to the
Windows clipboard.
A-63054 February 2004 3A-23
Page 49

Scanner menu The Scanner menu provides the following functions:
Setup—accesses the Setup dialog box specific to the scanner you selected.
From this dialog box you can set the SCSI parameters and other specific
parameters for the selected scanner.
Stop—clears and stops the transport and disables the scanner. Keyboard
shortcut: F6
Start—enables the scanner and starts the transport. Keyboard shortcut: F7
Image Calibration—allows you to calibrate the scanner. You may need to
calibrate the scanner if you are experiencing problems with image quality.
NOTE: This function is only available in Capture Software for the Scanner
3500, Scanner 3510, Scanner 3520, Color Scanner 3590C, Color
Scanner 4500, and all i800 Series Scanners.
Color Calibration—allows you to calibrate the Color Scanner 3590C or Color
Scanner 4500 for color image quality.
NOTE: This function is only available in Capture Software for the Color
Scanner 3590C or Color Scanner 4500.
Multi-feed Thickness Calibration— allows you to calibrate the scanner for
multi-feed document detection based on the thickness of a scanned sheet of
paper. When prompted, feed a sample sheet into the scanner. When Multifeed Thickness Detection is actuated after calibration, the scanner warns you
with an audible alarm whenever a scanned sheet of paper is detected to be
thicker (commonly caused by a multi-feed) than the sheet used for calib ra tion.
See Chapter 9, Page Setup, for information about actuating Multi-feed
Thickness Detection.
NOTE: This function is only available in Capture Software for the Scanner
3500, Scanner 3510, Scanner 3520, Color Scanner 3590C, or Color
Scanner 4500.
Set Counter—accesses the Set Counter dialog box which allows you to
change the sequential counter value assigned (and optionally printed) to the
next page scanned. On the Scanner 1500 and Scanner 2500, the counter
value that is entered will appear on the LCD display.
NOTE: This function is only available in Capture Software for the Scanner
1500, Scanner 2500, Scanner 3520DP, Color Scanner 4500DP, and all
i800 Series Scanners.
3A-24 A-63054 February 2004
Page 50

Additional menu options
for high volume scanners
For high volume scanners, such as Scanner 5500, Scanner 7520,
Scanner 9520, or the i800 Series Scanners, two additional menu options
can be selected.
Set Mode—accesses the Set Mode dialog box which allows you to change the
scanning mode on the high volume scanner. If the mode selected is a linked
mode to the current mode (as defined by the scanner), then the image address
will not change. However, if the mode selected is not linked to the current
scanner, then the image address will change to the last address used for
the mode.
NOTES: It is recommended that you always change the mode within Capture
Software, as opposed to changing the mode at the scanner keypad
(i.e., using the F01 function). If you change the mode at the scanner
keypad, you may not be able to restart the scanner in Capture
Software due to a mismatch in the expected Image Address format
between the scanner and Capture Software.,
Set Mode is not available for the i800 Series Scanners which only
support one operative mode configurable in Application Setup.
Set Image Address—accesses the Set Image Address dialog box which
allows you to change the image address that is displayed on the high volume
scanner (and optionally printed). Only those image address fields (e.g., Fixed
field, Level 2) that are applicable to the scanner mode being used can be
modified. By default, Capture Software suggests an image address based
upon the Application Setup that resynchronizes the current Capture Software
document number with the scanner image address.
A-63054 February 2004 3A-25
Page 51
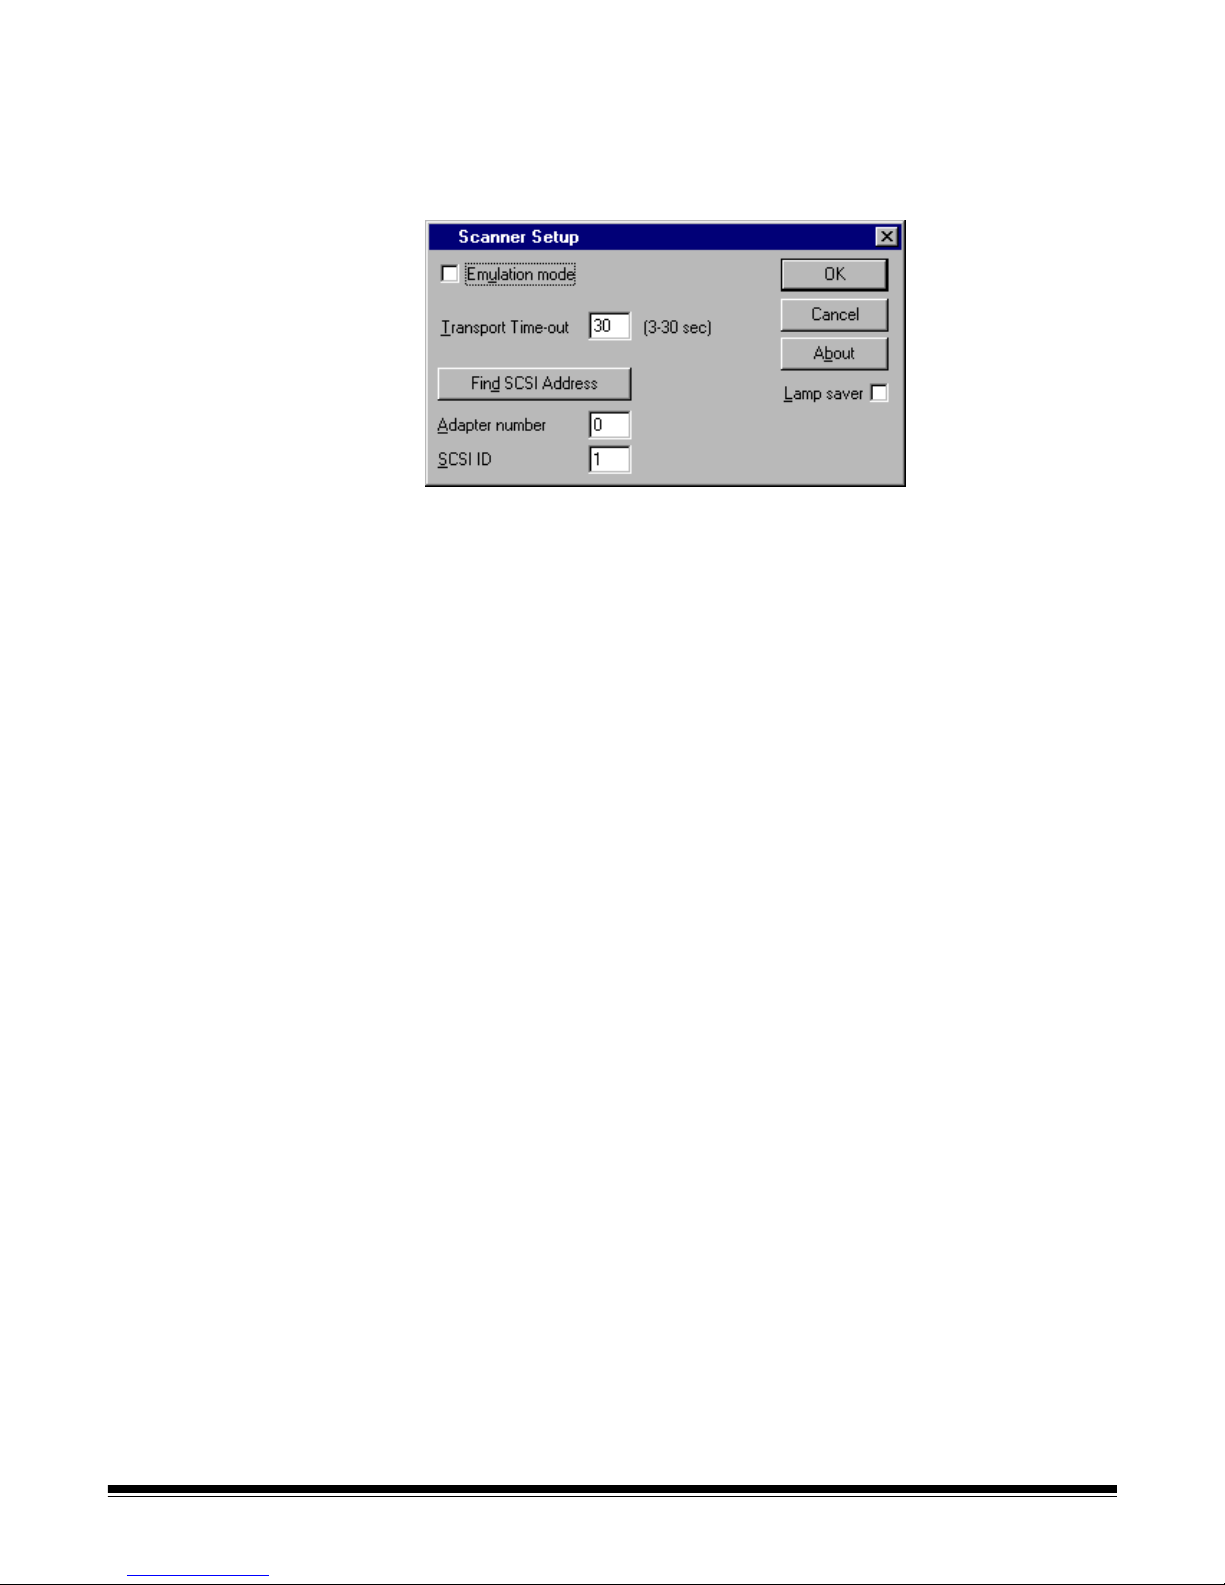
Setting up the scanner You can set up or change the parameters of the scanner you will be using by
accessing the Setup dialog box.
1. Select Scanner>Setup.
The Scanner Setup dialog box appears.
2. Enter a Transport Time-out value, if desired.
Valid values for the time-out period depend upon the attached scanner.
For the Scanner 3500, Scanner 3510, Scanner 3520, Color Scanner
3590C, and Color Scanner 4500, valid values are 3 to 30 seconds.
The Transport Time-out is the number of seconds that the scanner
transport remains enabled when not actively scanning. When a time-out
occurs, the scanner transport stops and is disabled.
3. Enable or disable the Lamp saver setting.
A check in the box indicates that Lamp saver is enabled; no check
indicates that it is disabled. In order for a change in the setting to take
effect, you must scan at least one page. When Lamp saver is enabled,
the lamps in the scanner automatically shut off after 10 minutes of scanner
inactivity. When this feature is disabled, the lamps in the scanner remain
on until the scanner is powered off.
NOTE: Transport Timeout and Lamp saver are only available in Capture
Software for the Scanner 3500, Scanner 3510, Scanner 3520, Color
Scanner 3590C, and Color Scanner 4500.
3A-26 A-63054 February 2004
Page 52

Upon startup, Capture Software automatically locates the scanner and fills
in the adapter number and SCSI ID of the scanne r. If the scanner was not
ready or powered up when Capture Software was started, press the Find
SCSI Address button to locate the scanner and fill in the fields if the
scanner is available. To key in the adapter number or SCSI ID manually,
the following applies:
• If the scanning PC contains more than one SCSI adapter, enter the
appropriate adapter number in the Adapter number field, otherwise, leave
the adapter number to its default value of 0.
• Enter the SCSI ID number of the attached scanner, usually a number from
1 to 7.
For the Scanner 1500 and Scanner 2500, the SCSI ID number is visible in
the LCD display on the front of the scanner. Press the down arrow on the
display panel until the SCSI ID appears in the LCD display.
For the Scanner 3500, Scanner 3510, Scanner 3520, Color Sca nner 3590C,
and Color Scanner 4500, the SCSI ID number is visible in the small box on
the back panel of the scanner.
The Emulation mode check box is used to enable/disable running
Capture Software in emulation mode without an attached scanner . For
more information on the Emulation mode check box, refer to Appendix A,
Installation.
NOTE: If the SCSI Address or Emulation mode settings are changed, you may
need to exit and restart Capture Sof t ware in or der to scan su ccessfully.
4. Press the About button to display information about the attached scanner.
A-63054 February 2004 3A-27
Page 53
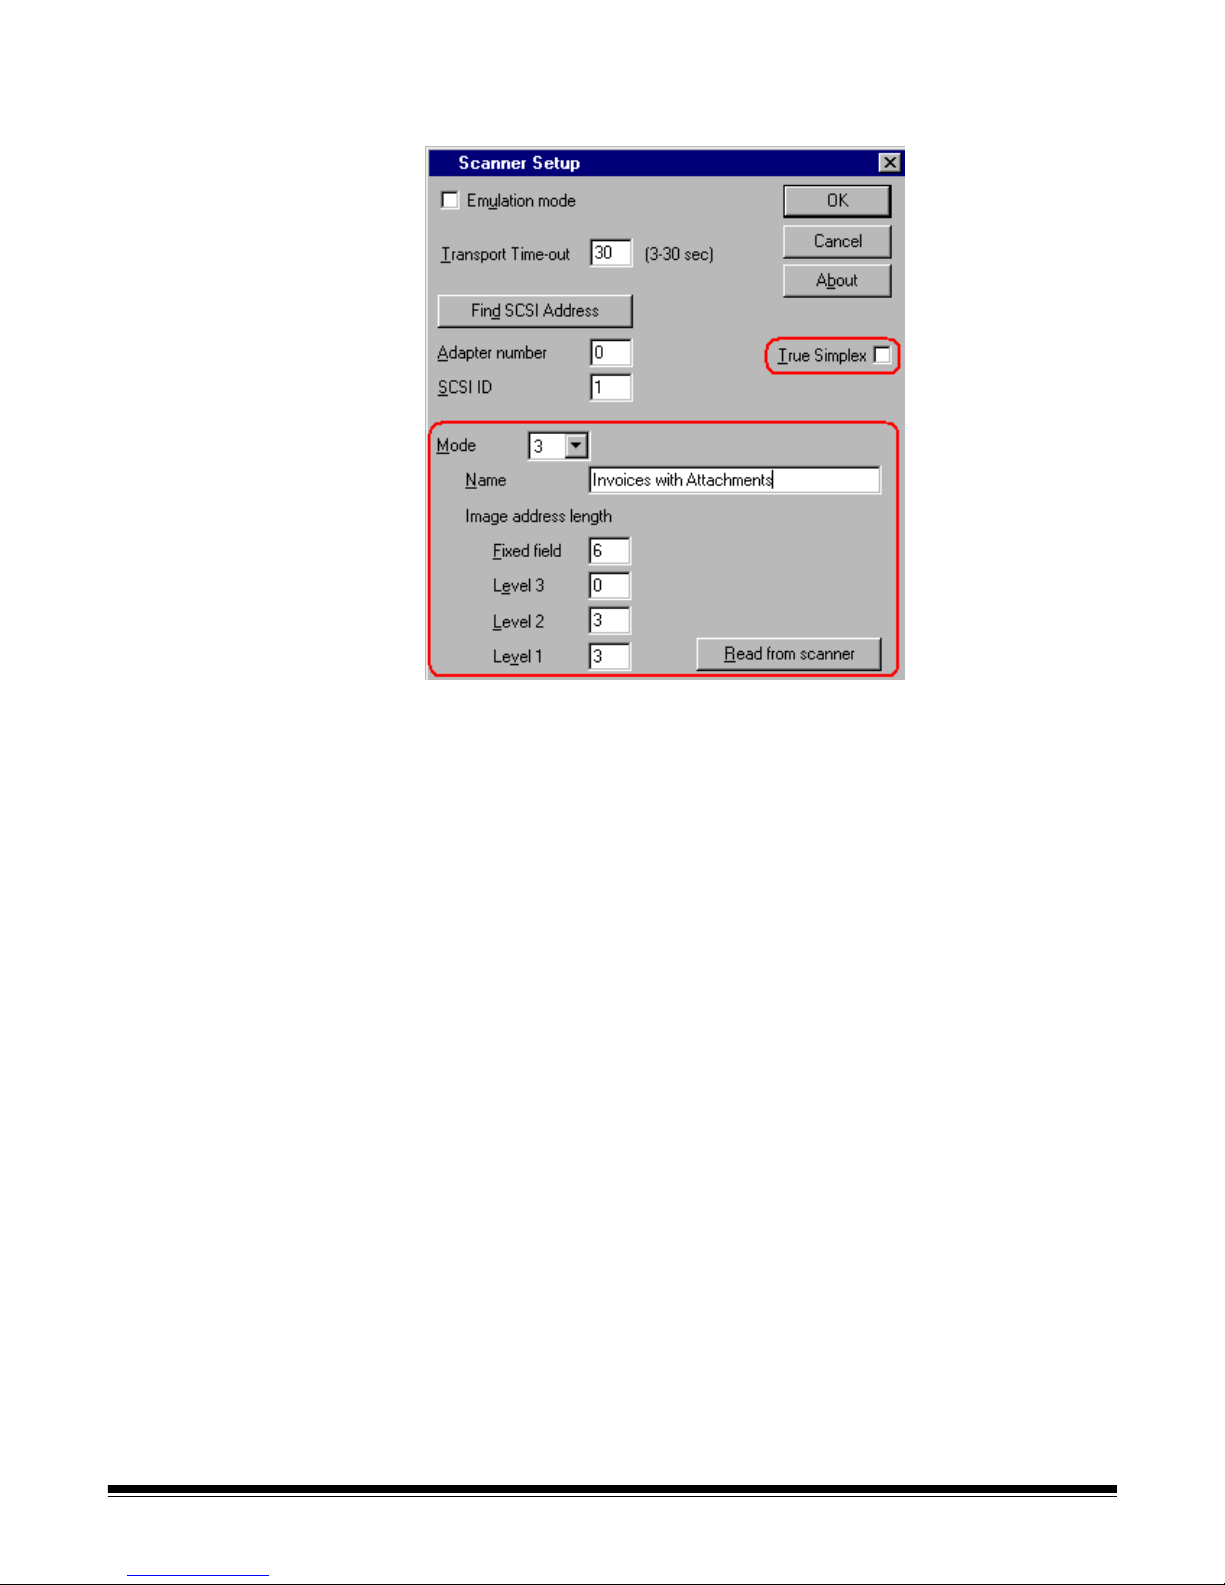
Additional settings for
high volume scanners
For the Scanner 5500, Scanner 7520, and Scanner 9520, the Scanner Setup
dialog box has the additional settings shown below.
True Simplex—allows you to operate a duplex Kodak high volume scanner
more efficiently when scanning single-sided documents in simplex mode. By
default, this setting is disabled. You should use it only when scanning small
documents (e.g., postcard-size documents) in simplex mode.
Kodak high volume scanners have 18 scanning modes that can be set up for
different scanning applications (imprinting, image address format, level rules,
document separator, hardware bar code/patch code reading, etc.).
In Capture Software, you must define the image address format (i.e., lengths
of the image address fields) for each mode to be used for scanning. The image
address format as defined in Capture Software must be identical to the format
as defined in the scanner.
3A-28 A-63054 February 2004
Page 54

Mode Setup The default image address format for each mode in Capture Software matche s
the factory setting of the mode defined in the scanner. As a result, you should
only need to make changes in Capture Software if mode changes were made
in your scanner through the KODAK Scanner Mode Setup Software.
To make changes to your mode setting in Capture Software, do the following:
1. Select a Mode from the drop-down list of 18 mode numbers.
2. Enter an optional mode Name that will be displayed in Capture Software
whenever you are selecting a mode to be downloaded to the scanner.
3. Enter the Image address length for each of the image address fields.
The lengths of the image address fields must mat ch th e ima g e addr ess
format as defined in the scanner. To assist you in determining what the
lengths should be, click on the Read from scanner button. This will adjust,
if necessary, the image address lengths to match the lengths as defined in
the scanner.
NOTES: The total of all of the image address lengths must not exceed
12 characters.
A length of “0” means that the image address field is not used or it is
not applicable for the selected mode.
Read from scanner is operational only for the Scanner 5500 and
Scanner 7500/7520.
A-63054 February 2004 3A-29
Page 55

Additional settings for
the Scanner 1500 and
Scanner 2500
For the Scanner 1500 and Scanner 2500, the Scanner Setup dialog box has
the additional settings shown below.
The Scanner 1500 and Scanner 2500 paper feed rollers and separator rollers
must be cleaned and replaced periodically.
Clean roller status—allows you to clear the Clean Roller warning when it
occurs on the scanner. Clean the rollers, then press the Reset button to clear
the warning.
Replace roller status—allows you to clear the Replace Roller warning when it
occurs on the scanner. Replace the rollers, then press the Reset button to
clear the warning.
See the multimedia User’s Guide for the Scanner 1500 or the Scanner 2500
for information about cleaning and replacing the rollers.
3A-30 A-63054 February 2004
Page 56
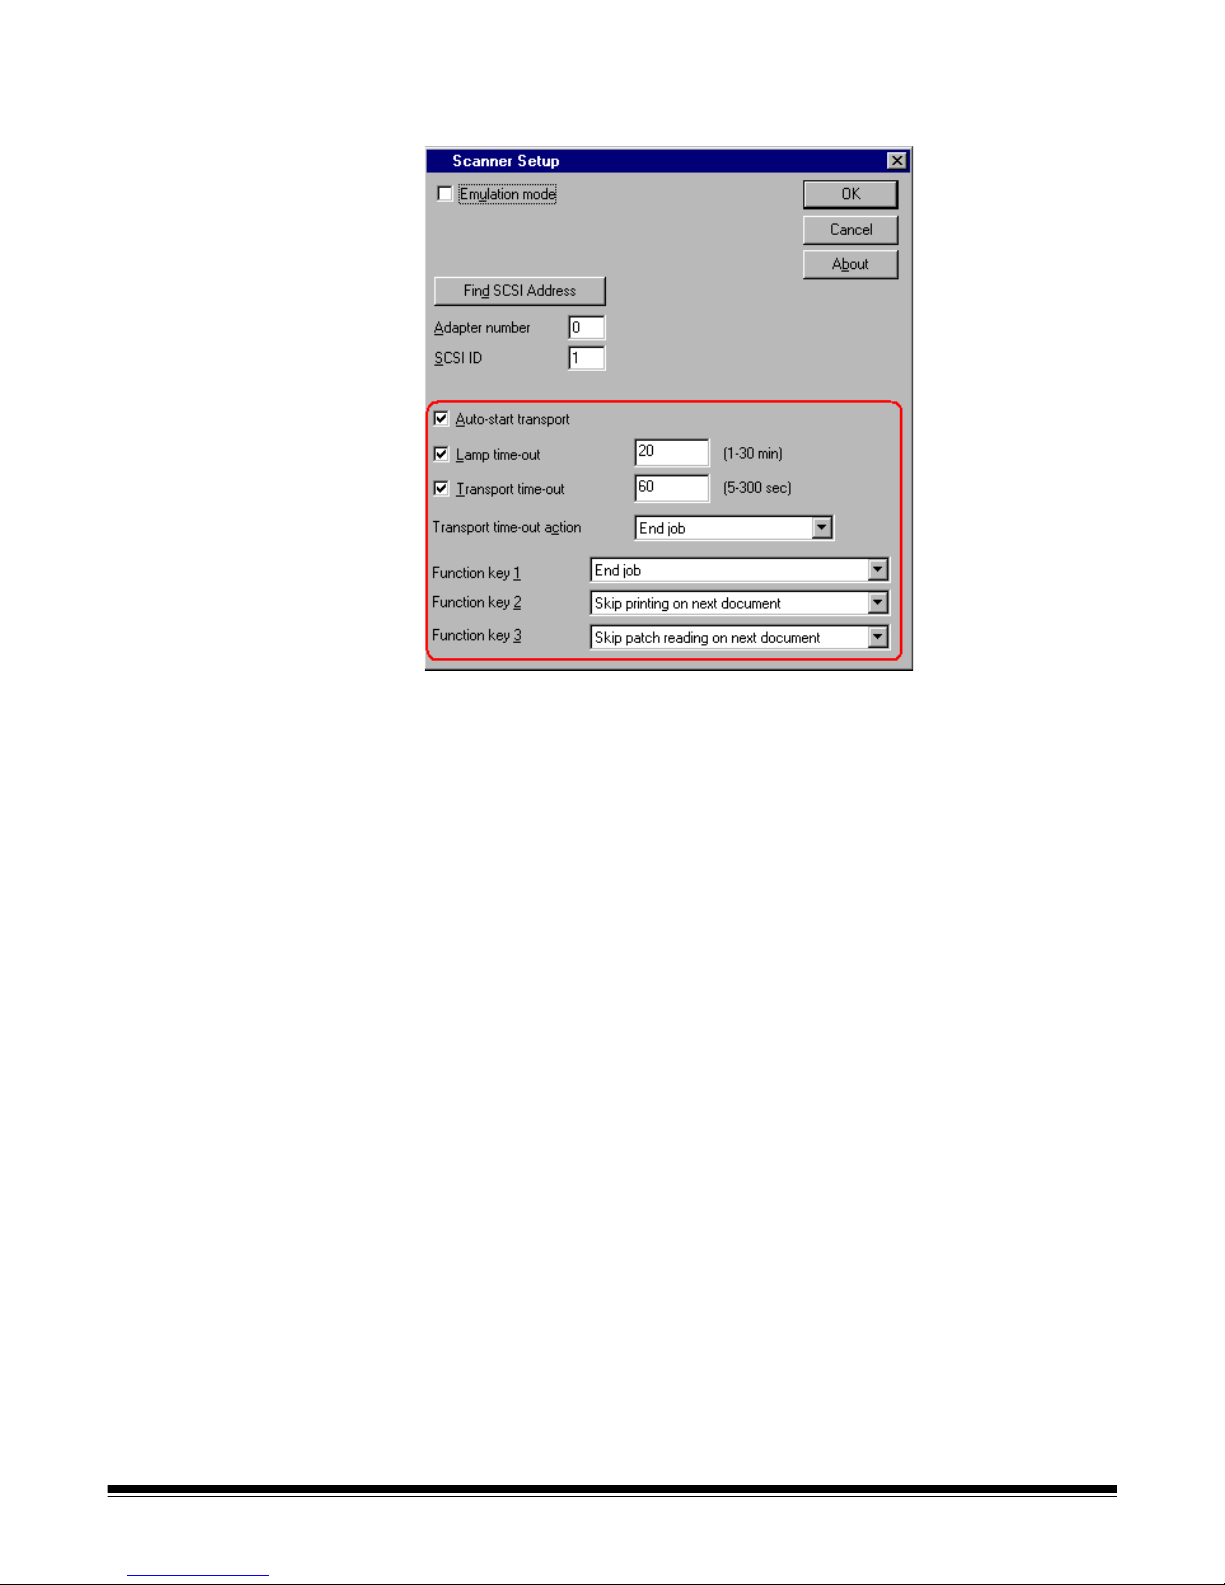
Specific settings for the
i800 Series Scanners
For the i800 Series Scanners, the Scanner Setup dialog box has the specific
settings shown below.
Auto-start transport—allows you to start the scanner transport and feeder
automatically when the Start Scanner button is pressed in the main window of
Capture Software. By default, this setting is enabled. When disabled, the
scanner transport will not automatically start. As a result, you must press the
green button on the scanner operator cont rol panel to initiate scanner feeding.
The following settings will only take effect when at least one page is scanned.
Lamp time-out—when enabled, the lamps in the scanner will automatically
shut off after a specified number of minutes of scanner inactivity. Valid values
are 1 to 30 minutes. When this feature is disabled, the lamps in the scanner
remain on until the scanner is powered off.
Transport time-out—when enabled, the scanner transport and feeder will
automatically stop after a specified number of seconds of no scanning.
Valid values are 5 to 300 seconds. When this feature is disabled, the
scanner transport and feeder remain on until the scanner is disabled in
Capture Software.
A-63054 February 2004 3A-31
Page 57

Transport time-out action—select an option to determine what takes place
when the transport times out.
•Select End job to stop the transport and feeder and disable the scanner.
Scanning must be reinitiated from Capture Software.
•Select Stop feeder and transport to sto p the transport and feeder, and
leave the scanner enabled. Scanning can be reinitiated by pressing the
green button on the scanner operator control pan el.
Function keys 1-3—the i800 Series Scanners ha ve three programma ble keys
that are accessible from the operator control panel. These keys are available
for use by the operator when the scanner is enabled. The operator control
panel displays the numbers 1 through 3 corresponding to the buttons on the
control panel that represent the function keys.
Each of the programmable keys can be assigned to the following functions:
•Select None for no scanner functionality. This is the default setting.
•Select End Job to stop the feeder and transport and disable the scanner.
Scanning is stopped in Capture Software.
•Select Terminate Batch to terminate the active batch when scanner
batching is enabled. See the i800 Series Scanner options in Chapter 4,
Application Setup.
•Select Skip multi-feed detection on next document to turn off multifeed
detection for the next page scanned.
•Select Skip printing on next document to turn off printing for the next
page scanned.
•Select Skip patch reading on next document to turn off patch code
reading for the next page scanned.
3A-32 A-63054 February 2004
Page 58

Page menu The following Page menu options are available. Mo st of these options can also
be selected by using the Scanner bar.
Setup List—accesses a drop-down list of all Page Setup names that have
been defined. Allows you to select a page setup to use for the application.
Once selected from the Setup List, Capture Software automatically downloads
the page properties and start s the scanner. Keyboard shortcut: F2
Setup—displays the Page Setup dialog box which enables you to set up the
properties of the pages to be scanned. For more information about Page
Setup, refer to Chapter 9, Setting up Page Properties. Keyboard shortcut: F5
Front—select this option to enable/disable simplex, front only scanni ng .
Keyboard shortcut: F9
Rear—select this option to enable/disable simplex, rear only scanning.
Keyboard shortcut: F10
Duplex—select this option to scan double-sided pages with a duplex scanne r.
Keyboard shortcut: F11
Classic—duplex mode typically associated with multi-page documents; such
as, reports, postcards, articles. See the section entitled “About Duplex modes”
for more information. Keyboard shortcut: F12
Calendar—duplex mode typically associated with documents such as
presentation handouts, statistical and financial reports, project planning
reports. See the section entitled “About Duplex modes” for more information.
Keyboard shortcut: F12
A-63054 February 2004 3A-33
Page 59

Specific settings for the
i820 Scanner and
i840 Scanner
For the i820 Scanner and i840 Scanner, which can scan in both color and
black and white simultaneously, the Page menu has the specific settings
shown below.
Bi-tonal—both front and rear bitonal are enabled. Select this option to enable
bitonal-only scanning. Keyboard shortcut: F9
Color—both front and rear color are enabled. Select this option to enable
color-only scanning. Keyboard shortcut: F10
Dual Stream—select this option to enable dual-stream scanning (both front
and rear color and bitonal). Keyboard shortcut: F11
3A-34 A-63054 February 2004
Page 60

About Duplex modes The way a document is printed influences the orientation of the images
produced by the scanner. There are two different ways of printing
duplex documents.
Classic duplex format is typically associated with multi-page reports.
Reports, postcards, articles, etc. are all printed according to the classic
duplex format.
Calendar duplex format is more unusual. It is used for presentation
handouts, statistical and financial reports, project planning reports, etc.
The following illustrates typical duplex classic and calendar formats:
Classic duplex format Calendar duplex format
The Duplex buttons (on the Tool bar)
To use these buttons, look at your original and compare it with the picture on
the duplex buttons. Click on the button that corresponds with your original.
The duplex mode only influences the way the front image will be rotated in
relation with the rear image. It does not set the overall rotation of the document
(0°, 90°, 180°, or 270°). Rotation can be set up in the Page Setup dialog box.
The first button handles classic duplex formats:
• A 0° rotated front corresponds with a 0° rotated rear.
• A 180° rotated front corresponds with a 180° rot ated rear.
• A 90° rotated front corresponds with a 270° rotated rear.
• A 270° rotated front corresponds with a 90° rotated rear.
The second button handles all calendar duplex formats:
• A 0° rotated front corresponds with a 180° rotated rear.
• A 180° rotated front corresponds with a 0° rotated rear.
• A 90° rotated front corresponds with a 90° rotated rear.
• A 270° rotated front corresponds with a 270° rot ated rear.
If you have images in the current document and you to gg le th e du ple x mo d e
buttons, the message Do you want to apply the selected duplex mode to the
already scanned images in the current document? appears.
If you select Yes, Capture Software will rotate the images in the current
document according to the selected duplex mode.
A-63054 February 2004 3A-35
NOTE: When color scanning with the Color Scanner 3590C,
Color Scanner 4500, i820 Scanner, or i840 Scanner,
only classic duplex mode is supported.
Page 61

Selecting a page setup Capture Software comes with several pre-defined page setups The list of pre-
defined page setups will vary depen ding upon which Capture Sof tware product
and Kodak scanner are being used. To access the Page Setup list from the
main Capture Software window, select Page>Setup List.
To select a page setup from the drop-down list either use the mouse, arrow
keys or enter the first letters of the page setup name. Capture Software
automatically scrolls down the Page Setup List until a unique page setup
is found.
3A-36 A-63054 February 2004
Page 62

Options menu The Options menu allows you to customize the Capture Software screen
layout and display or hide the Scanner bar, Tool bar, Button bar, or Status bar.
For more information about each of these bars, see the appropriate section
within this chapter.
Extended Scanner bar—in addition to the Default Scanner bar, the Extended
Scanner bar displays threshold and contrast settings. See the section entitled
“Scanner bar” later in this chapter. Keyboard shortcut: Ctrl+E
Default Scanner bar—the Default Scanner bar displays the Start and Stop
buttons, the Duplex buttons, the Page name information and the front and rear
scan options. Keyboard shortcut: Ctrl+D
Tool bar—the T ool bar provides shortcuts to commonly used image
manipulation commands in Capture Software. Clicking on one of these buttons
is equivalent to selecting the corresponding command from the menu bar. The
Tool bar is described in more detail in the section entitled “Tool bar” later in this
chapter. Keyboard shortcut: Ctrl+T
Button bar—the Button bar provides shortcuts to commonly used image
display and navigation commands in Capture Software. Clicking on one of
these buttons is equivalent to selecting the corresponding command from the
menu bar. The Button bar is described in more detail in the section entitled
“Button bar” later in this chapter. Keyboard shortcut: Ctrl+B
Status bar —the Status bar indicates the size of the last-scanned image or the
image you clicked on last. The Status bar is described in more detail in the
section entitled “Status bar” later in this chapter. Keyboard shortcut: Ctrl+S
A-63054 February 2004 3A-37
Page 63

Help menu The Help menu provides access to the About box.
The About box lists all Capture Software program libraries with their
corresponding version number and description. The Ca pture Software
program version number is also displayed in the About box.
3A-38 A-63054 February 2004
Page 64

Scanner bar The Scanner bar provides tools for controlling th e scanner from with in Capture
Software. If the Scanner bar is not visible, open the Options menu and click on
the Scanner bar option. The Scanner bar displayed below is for a duplex
scanner scanning both sides of the page.
Default Scanner bar The Default Scanner bar provides the following options.
Button Description
Stop—clears and stops the transport/feeder and
disables the scanner.
Start—enables the scanner and starts the transport/
feeder.
Classic—duplex scanning format typically associated
with multi-page reports. Reports, postc ards, articles,
etc., are all printed according to the classic
duplex format.
Calendar—duplex scanning format typically used for
presentation handouts, statistical and financial reports,
project planning reports, etc.
NOTE: Calendar duplex mode is not supported when
color scanning with the Color Scanner 3590C,
Color Scanner 4500, i820 Scanner, or i840 Scanner.
Page—displays the current/ active page setup. Use the
drop-down list button to select a different page setup.
Front—select this option to enable/disable simplex,
front only scanning.
Rear—select this option to enable/disable simplex,
rear only scanning.
Specific options for
the i820 Scanner and
i840 Scanner
For the i820 Scanner and i840 Scanner, which can scan in both color and
black and white simultaneously, the Default Scanner bar has the specific
settings shown below.
Button Description
Bi-tonal—select the Front and Rear buttons to ena ble/
disable front and/or rear bitonal scanning.
Color—select the Front and Rear buttons to enable/
disable front and/or rear color scanning.
A-63054 February 2004 3A-39
Page 65
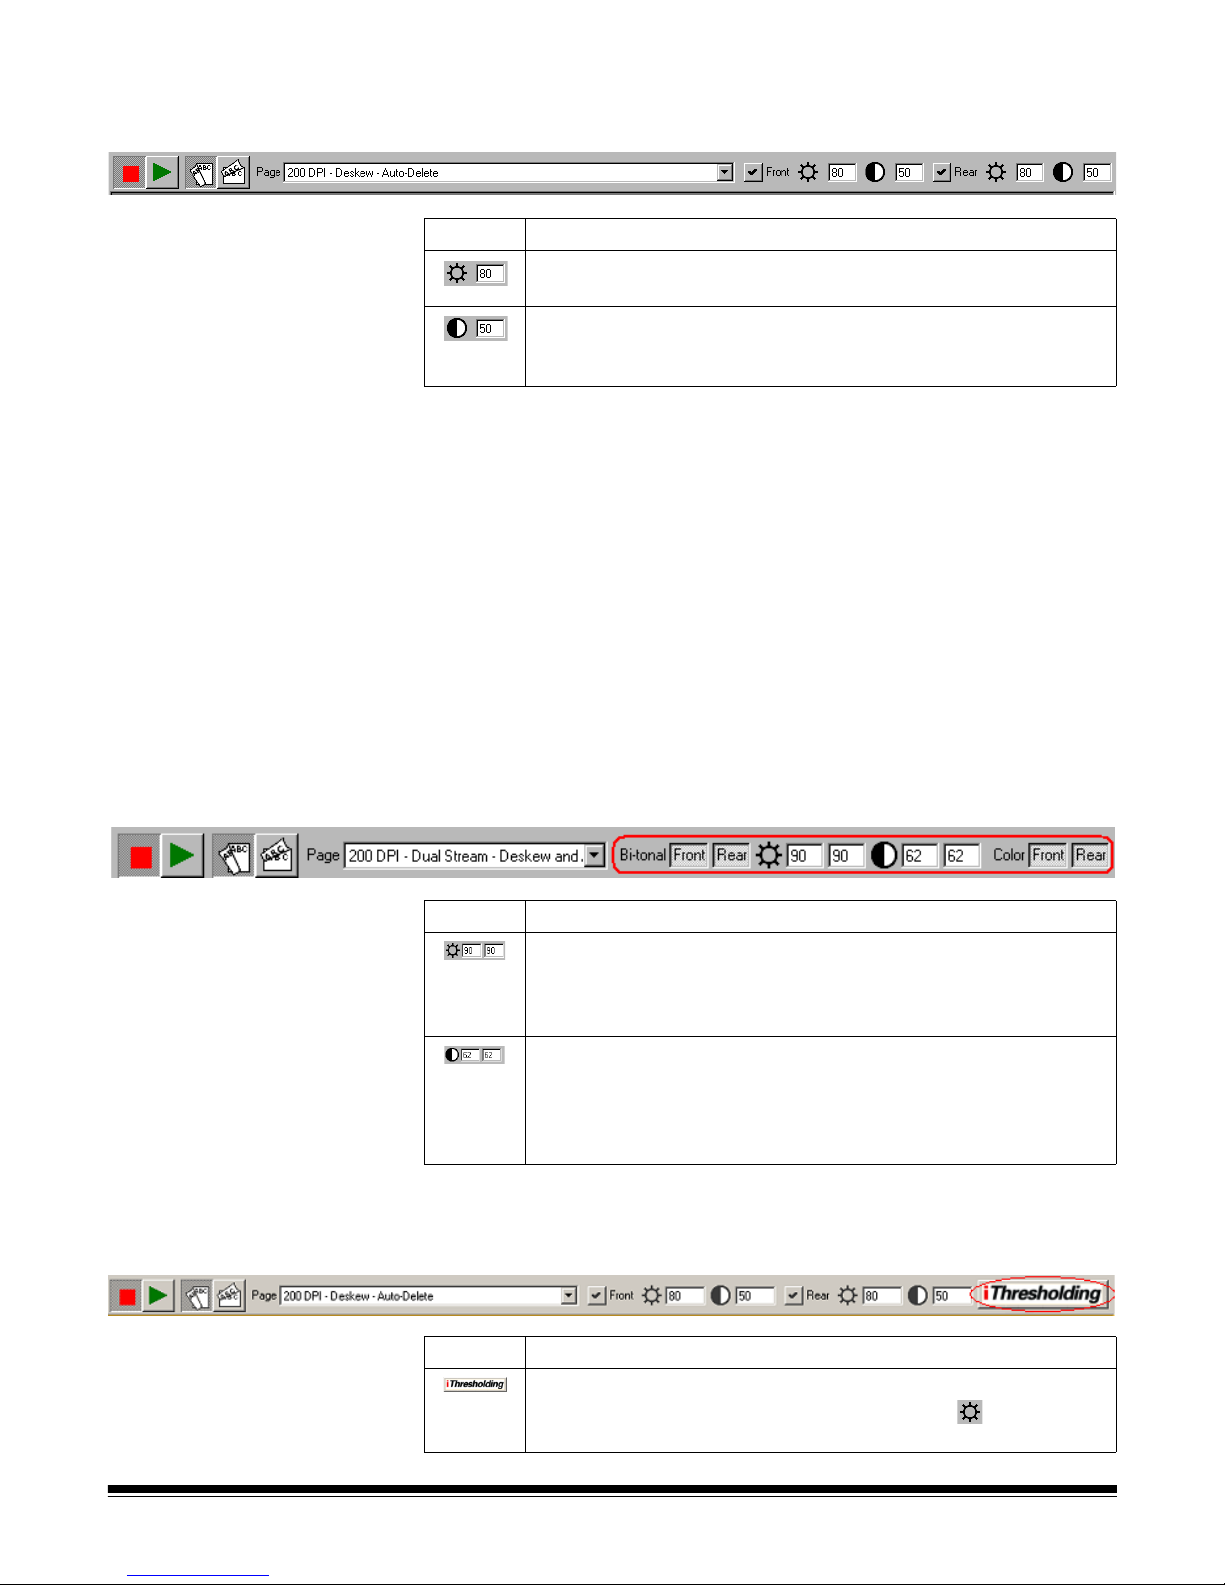
Extended Scanner bar The Extended Scanner bar has all of the options listed previously plus the
following options:
Button Description
Threshold—controls the lightness and darkness of the
background in an image. Valid values are 0 to 255.
Contrast—contrast enhances the edges contained in a
document. The higher the contrast level, the more the image
edges will be enhanced. Valid values are 0 to 100.
NOTES: Changing the duplex scanning format, front and rear selection, and
threshold/contrast settings from the Scanner bar are temporary
settings for the current scanning session and do not affect the
currently selected page setup.
Threshold and Contrast are only applicable when scanning in black
and white. Therefore, they are not available when scanning in color
with the Color Scanner 4500. However, when MultiStream™ support
(i.e., where each color image is converted to a corresponding
bitonal image) is enabled in the currently selected page setup,
Threshold and Contrast remain enabled. When color images are
binarized, the Threshold and Contrast settings are used as part of
the binarization process.
Specific options for
the i820 Scanner
and i840 Scanner
Specific options for scanners
with the iThresholding feature
For the i820 Scanner and i840 Scanner, which can scan in both color and
black and white simultaneously, the Extended Scanner bar has the specific
settings shown below. .
Button Description
Threshold—controls the lightness and darkness of the
background in a bitonal image. Valid values are 0 to 255. Enter a
front side threshold value in the text box on the left. Enter a rear
side threshold value in the text box on the right.
Contrast—contrast enhances the edges contained in a
document. The higher the contrast level, the more the image
edges will be enhanced. Valid values are 0 to 100. Enter a front
side contrast value in the text box on the left. Enter a rear side
contrast value in the text box on the right.
For the Scanner 3520 and i800 Series Scanners with the iThresholding
feature, the Extended Scanner bar has the specific settings shown below. .
3A-40 A-63054 February 2004
Button Description
iThresholding—activates the iThresholding feature.
When iThresholding is enabled, the Threshold ( ) entry box
is disabled.
Page 66

Scanner bar
context-sensitive menu
If you position the mouse cursor on the Scanner bar and click the right mouse
button, the context-sensitive menu will appear. The following menu options
are available.
Page Setup—accesses the Page Setup dialog box where you can set up page
properties for an application.
Default Bar/Extended Bar—allows you to toggle between the Extended
Scanner bar and the Default Scanner bar.
Large Buttons/Small Buttons—allows you to toggle between displaying
large and small buttons on the Scanner bar.
Image Calibration—allows you to calibrate the scanner.
NOTE: This option is available only in Capture Software for all mid-volume
3000/4000 Series Scanners and i800 Series Scanners.
Color Calibration—allows you to calibrate the Color Scanner 3590C or
Color Scanner 4500 for color image quality.
NOTE: This function is only available in Capture Software for the
Color Scanner 3590C and Color Scanner 4500.
Multi-feed Thickness Calibration— allows you to calibrate the scanner for
multi-feed detection.
NOTE: This function is only available in Capture Software for the Scanner
3510, Scanner 3520, Color Scanner 3590C, and Color Scanner 45 00.
Set Counter—this option appears when the scanner has a do cument printer.
• For the Scanner 1500 or Scanner 2500: allows you to change the counter
value to be printed and/or displayed on the scanner’s LCD display.
• For the Scanner 3520DP and Color Scanner 4500DP: a llows you to change
the counter value to be printed on the next scanned page when document
printing is enabled.
• For the i800 Series Scanners: allows you to change the counter value
assigned (and optionally printed) to the next scanned page.
Set Mode—allows you to change the scanning mode on the high volume
scanner. Th is option is avail able only for Ca ptur e So ftware for the 5000, 7000,
and 9000 Series Scanners.
Set Image Address—allows you to change the image address that is
displayed on the high volume scanner (and optionally imprinted). By default,
Capture Software suggests an image address based upon the Application
Setup that resynchronizes the current Capture Software document number
with the scanner image address. This option is available only for all Kodak high
volume scanners (5000, 7000, 9000, and i800 Series Scanners).
A-63054 February 2004 3A-41
Page 67

Tool bar If the Tool bar is not displayed, it can be displayed by choosing Options>Tool
bar. The following table describes the function of each button on the Tool bar.
Procedures on how to use these functions are also included in this section.
Most of these options can also be accessed from the Tools menu.
The following list provides all of the Tool bar options and a brief summary of
their functions.
Button Description
Re-Append images—allows you to re-append the remaining
images of a document after an Insert operation.
Insert image—allows you to insert additional images into a
scanned document.
Rescan—allows you to rescan images in a document.
Delete image—click this button if you want to delete one or
more images.
Delete end of document—click this button to delete the selected
image and all subsequent images of a document. This action
cannot be undone.
Confirmation—allows you to confirm an unchangeable action (no
undo). Confirmation is required for the Delete, Blank, Crop, and
Copy Area tools.
Flag image—use this tool to indicate something special has to be
done with an image after batch processing. Not yet available.
Rotate 90°—rotates the selected image 90 degrees to the right.
Rotate 180°—rot ates the selected image 180 degrees.
Rotate 270°—rot ates the selected image 270 degrees to the right
(i.e., 90 degrees to the left).
Zoom—allows you to enlarge a portion of an image. When you
select Zoom, a magnifying glass will be displayed. The Zoom tool
does not slide between images.
Scroll—allows you to scroll in any direction within an imag e th at is
partially hidden. This is useful when a single image is too large to
be displayed fully on the screen.
3A-42 A-63054 February 2004
Page 68
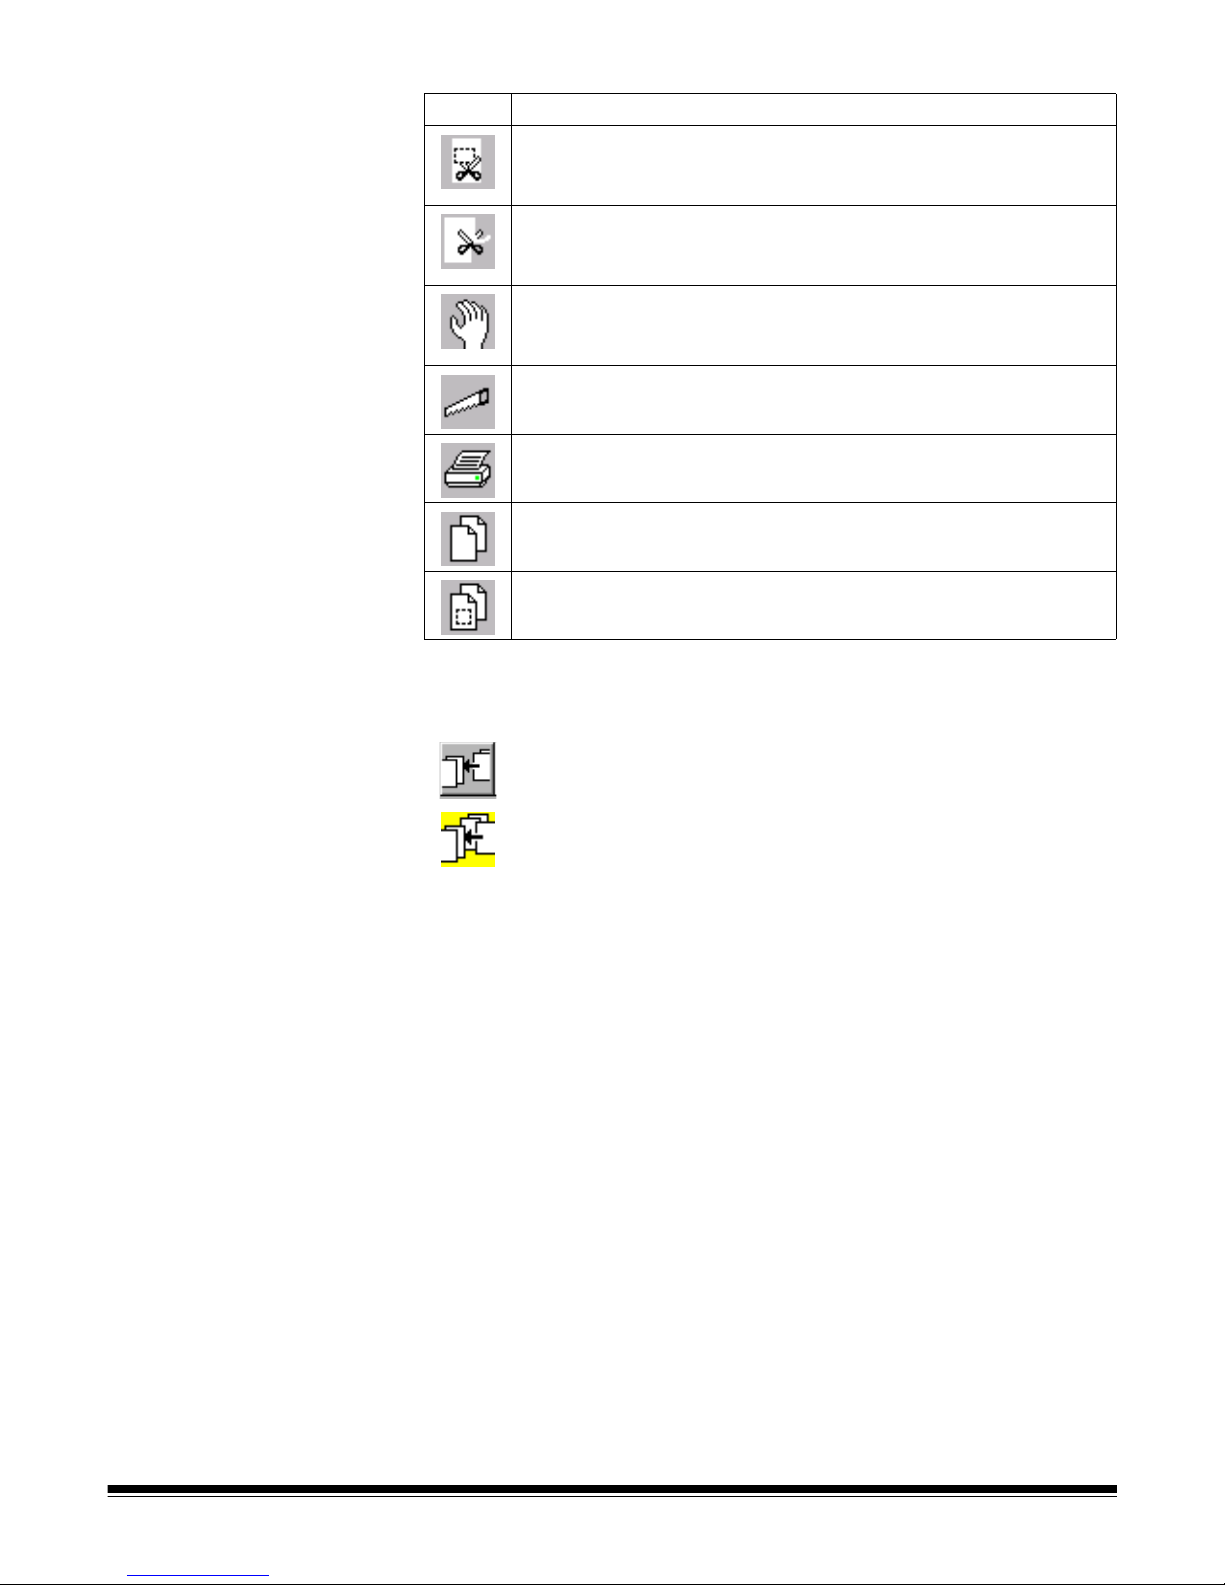
Button Description
Blank—you can blank out a specific part of an image by using
the Blank tool. This is useful to clean up images or remove
confidential information.
Crop—allows you to draw a rectangle around a specific ar ea of an
image and discard any information outside the rectangle. Use this
tool to keep only the significant part of an image.
Move—use the Move tool to move a page or a consecutive range
of pages to another location. You can also set the Move tool to
move an image or a consecutive range of image s.
Split—allows you to split a document into two documents.
Print—allows you to print a complete documen t, or specific images
within a document.
Copy image—allows you to copy a complete image to the
Windows clipboard.
Copy area—allows you to copy an area of an image to the
Windows clipboard.
Using the Tool bar Following are procedures for using the Tool bar options.
Re-Append images
Insert image
You can insert additional images into a scanned document with the Insert
image tool.
To use the Insert image tool:
1. Select the Insert image tool (or press Insert).
2. Click on the page (front image of the page) where you want to
insert images.
The images will be inserted before this page. The selected page and all
following images are placed in a temporary buffer. The Re-Append
images tool appears at the left side of the Tool bar.
When you click on the rear of a page that also contains a front, the
message Inserting images between a front and a rear of a page is not
allowed appears.
3. Scan the images you want to insert.
A-63054 February 2004 3A-43
4. When you have finished scanning, recall the images in the temporary
buffer by clicking on the Re-Append images tool or the Confirmation tool.
Page 69

Rescan
To rescan images in a document:
1. Select the Rescan tool (or press R).
2. Click on the images to be rescanned. To select multiple images, use the
CTRL-click and SHIFT-click Windows techniques.
If only the front or rear scanner is enabled, scanned images will replace all
selected images until no selected images are available. Subsequent
scanned images will be appended to the document. When a front image
replaces a rear image, the new scanned image will also be marked as a
rear and vice versa.
When you use the scanner in duplex mode re-scan is done on a page-perpage basis. Capture Software analyzes each selected page and replaces
fronts by fronts and rears by rears. When the selection does not include
certain rears or fronts, Capture Software discards the corresponding
scanned images. Once all selected images are replaced, subsequent
scanned pages will be appended to the document.
Rescanning binarized color pages
When using the Rescan tool on color pages that have been binarized
(i.e., converted to black and white for MultiStream™ processing), the following
guidelines must be followed to ensure a successful rescan operation. These
guidelines are important because when a scanne d color pa ge is binar ized, the
page can contain up to four images (front bitonal, rear bitonal, front color, and
rear color).
• If only color images need to be rescanned, select a page setup that has
binarization disabled (e.g., the Color 150 DPI – Deskew – Keep All Images
page setup that is provided with Capture Software).
• If only binarized images need to be rescanned, (e.g., to adjust the Contrast
or Threshold), select a page setup where only the bitonal images are kept
(e.g., the Color 150 DPI – Deskew – Binary Only for Rescan page setup that
is provided with Capture Software).
• If both color and bitonal images need to be rescanned, highlight both a
bitonal and a color image for rescan. Select a p age setup where binarization
has been enabled (e.g., the Color 150 DPI – Deskew – Dual Stream page
setup that is provided with Capture Software).
• When rescanning binarized color pages on the Color Scanner 3590C,
highlight all three images of the page and select a page setup where
binarization had been enabled (e.g., Color 150 DPI – Deskew –
Dual Stream).
3A-44 A-63054 February 2004
Page 70

Rescanning when using dual stream with an i800 Series Scanner
When scanning dual stream (both front and rear color a nd bitonal) with an i820
Scanner or i840 scanner , the following guid elines must be followed to ensure a
successful rescan operation:
• After highlighting the images of the pa ge that you want rescanne d, go to the
Scanner bar and use the Front/Rear butt on s to en a ble only thos e im ag es
that are highlighted for rescan.
For example, if only the Front bitonal and Front color images need to be
rescanned, then the Scanner bar would look like the example below when
the scanner is restarted.
Similarly, if only the Front and Rear bitonal images need to be rescanned,
then the Scanner bar would look like the example below when the scanner
is restarted.
IMPORTANT: Not following these color rescanning guidelines may result
in additional images being appended to the end of the
current document.
A-63054 February 2004 3A-45
Page 71

Delete image
You can delete one or more images selected inside a document using the
Delete image tool. For example, use this tool for the deletion of blank images
from a double-sided document. Capture Software renumbers all remaining
images after the selected images are deleted.
1. Click on the Delete image tool (or press Delete).
2. Click on the images you want to delete. To select multiple images, use the
CTRL-click and SHIFT-click Windows techniques.
3. Click the Confirmation tool (or press the space bar) to confirm deletion of
the selected pages.
IMPORTANT: Once confirmed, the selected pages are removed from your
system’s hard disk. You cannot undo this action.
Delete end of document
1. Click on the Delete end of document tool.
The message Using this tool may lose a lot of images. Continue
anyway? appears.
2. Click Yes to continue.
3. Click on any image to delete that image, and all subsequent images.
IMPORTANT: The images are removed from your system’s hard disk. You
cannot undo this action.
Confirmation
Use the Confirmation tool (or press the space bar) to confirm the following
unchangeable actions (no undo):
• deleting images
• cropping images
• blanking parts of one or more images
• copying parts of an image to the Windows clipboard
The Confirmation tool also
• appends images from the insert buffer
• deselects all the images selected for rescan
3A-46 A-63054 February 2004
Page 72

Flag image
You can indicate that something special has to be done with certain images by
using the Flag image tool. For example, flagged images can be used to
indicate that an image has to be processed by an OCR system for data
extraction. This function is not yet available.
1. Select the Flag image tool.
2. Click on the image you want to flag.
Flagged images will be colored yellow. If you want to flag multiple images
on the screen, use the CTRL-click and SHIFT-click Windows techniques.
Rotate
The Rotate tools rotate images 90° right, 180°, or 90° left (270° r ight). This tool
physically rotates the image file, so that when viewed later in any application, it
has the same orientation as displayed in Capture Software.
1. Select the desired Rotate tool.
2. Click on the image you want to rotate. If you want to rotate all images on
the screen or undo the action, select the appropriate function from the
Image menu (right-clicking on the image accesses the context-sensitive
Image menu).
NOTE: When rotating color images, the default operation is a pixel-precise
color image rotation. If continuously repeated on the same color
image, pixel-precise rotation may result in some loss of color image
quality. To avoid any image quality loss when rotating a color image,
select Enable Fast Color Processing from the Image menu (rightclicking on the image accesses the context-sensitive Image menu).
Fast image rotation may, however, result in the addition of a small
amount of black border along some image edges. To re-establish pixelprecise rotation, select Enable Pixel Precision from the Image menu.
A-63054 February 2004 3A-47
Page 73
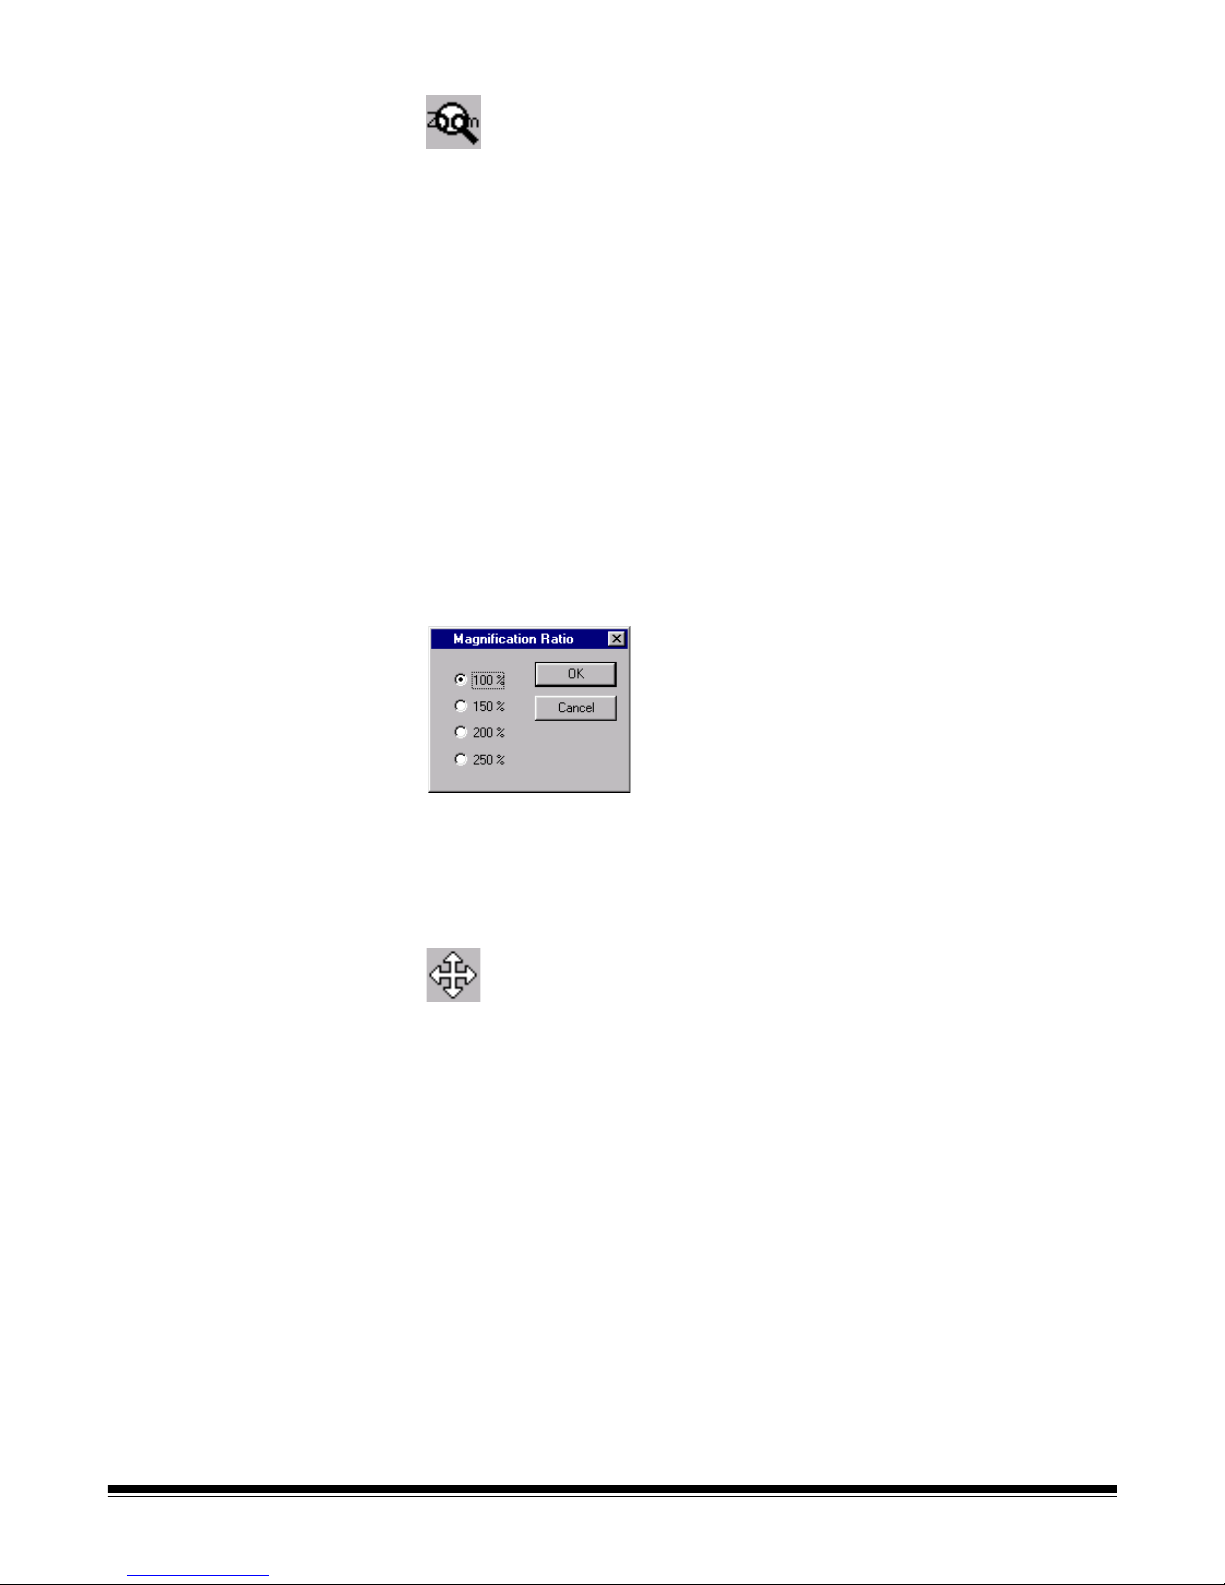
Zoom (with magnifying glass)
1. Select the Zoom tool and click and hold the left mouse button anywhere on
an image.
The zone where you clicked is magnified.
2. You can select other magnification ratios (100%, 150%, 200%, or 250%)
through the Image menu (right-clicking on the im age accesses th e contextsensitive Image menu).
If you want to magnify a different displayed image, click and hold the left
mouse button anywhere on that image. The Zoom tool does not slide
between images.
Changing the magnification ratio using the Image menu
1. Right-click on the image.
The context-sensitive Image menu appears.
2. Select Magnification ratio.
The Magnification Ratio dialog box appears.
3. Click on the setting you desire.
4. Click OK.
The magnification ratio changes to the percentage you selected.
Scroll
Use the Scroll tool to scroll in any direction within an image that is partially
hidden. This is useful when a single image is too large to be displayed fully on
the screen.
The arrow keys perform the same function as the Scroll tool. You can use the
Control key with an arrow key to move the display immediately to the upper,
lower, right, or left portion of an image.
If you are working in a multi-image display mode (2, 4, or 8 imag es ), yo u can
latch every image to scroll to the same relative position. To do this, select the
Scroll Images to Same Position option from the Image menu (right-clicking
on the image accesses the context-sensitive Image menu).
3A-48 A-63054 February 2004
Page 74

Blank
With the Blank tool you can blank out a specific part of an image. Use this
tool to clean up images or to remove confidential information (i.e., to protect
aname).
To blank part of an image:
1. Select the Blank tool.
2. Point to the upper left corner of the area you want to blank out.
3. Click and drag the mouse diagonally over the area you want to blank out.
NOTE: If you want to blank out the same area on all images on the screen,
draw the rectangle on any of the images and duplicate the
rectangle by selecting Apply Blank Rectangle to Screen from the
Image menu (right-clicking on the image will display the contextsensitive Image menu).
4. Click on the Confirmation tool to confirm your actions.
Data within the rectangle is blanked out. You cannot undo this action.
You can also draw different rectangles on different images.
Crop
With the Crop tool, you can crop an image to a drawn rectangle. Use this tool
to keep only the significant part of an image (i.e., newspape r articles).
1. Select the Crop tool.
The mouse pointer now resembles scissors with an arrow.
2. Point to the upper left corner of the area you want to keep.
3. Click and drag the mouse diagonally over the area you want to keep.
4. Release the mouse button and a rectangle is displayed. If it is not
acceptable, you can redraw the rectangle (only one rectangle per image)
by repeating the above actions.
5. Click on the Confirmation tool. The image(s) are cropped to the area
within the rectangle(s). You cannot undo this action.
NOTES: If you want to crop the same area on all images on the screen,
use the appropriate option from the Image menu (r ight-clicking on
the image accesses the context-sensitive Image menu).
When cropping color images, the default operation is a pixelprecise image crop. If continuously repeated on the same image,
some loss of color image quality may occur. To avoid any image
quality loss when cropping a color image, select Enable Fast
Color Processing from the Image menu (right-clicking on the
image accesses the context-sensitive Image menu). Fast image
crop, however, is not as accurate as pixel-precise image crop.
To re-establish pixel-precise cropping, select Enable Pixel
Precision from the Image menu.
A-63054 February 2004 3A-49
Page 75

Move
Use the Move tool to move a page or a consecutive range of pages to
another location.
• Select the Move tool, then click on one of the images of the page (front or
rear) and drag and drop the page to its new location.
If you drop a page on top of another page, it is inserted before that page. It
does not matter whether you drop the page on top of the front or rear image of
the page, it will always be inserted before the first image of the page.
When you drop the rear image of a page on the front ima ge of the same page,
front and rears are swapped. When you drop the front image of a page on top
of the image following the same page, fronts and rears are also swapped.
To place a page after the last image on your screen, position the hand-pointer
clearly after the last image (see below).
You can move a page to any location within a document (e.g., from position 1
to position 100). Capture Software renumber s all images after you move a
page to a new location.
To change the Move tool so it will move individual images, as opposed to
pages, select the Move tool and right-click on an image. Select Move image
on the context-sensitive menu to change the move tool setting.
NOTE: When using the Move tool on pages with more than two images
(i.e., pages that have been split into four or six images or color
pages that have been binarized [i.e., converted to black and white for
MultiStream™ proce ssing]), using only Move image is recommended.
Move page is designed to move corresponding pairs of images.
Using Move page on split, bin arized, or dual stream pages may
cause unpredictable results.
3A-50 A-63054 February 2004
Page 76

Following are some ways to move a page from one location to another within
a document.
1. Select one of the images of the page (front or rear) you want to move with
the Move tool and hold the left mouse button.
2. Drag the page beyond the upper or lower borders of the screen to move it
to its new destination.
Capture Software paginates through the document automatically, as long
as you keep the tool beyond the outer borders.
3. Drop the page on top of the page in front of which you want to insert it.
OR
1. Select the page you want to move with the Move tool.
2. Press the Home, End, Page Up, or Page Down key to navigate to the
location to move the page.
3. Drop the page on top of the page in front of which you want to insert it.
OR
1. Select the page you want to move with the Move tool.
2. Press 0 on the numeric keypad followed by the number to which you want
to move the page (e.g., 0100 to navigate to image position 100). When you
press 0, the text Goto image: 0 is displaye d in the bottom lef t corner of the
screen. This text is updated as you type the image number.
3. Press Enter to move to the new location or press ESC to cancel the
Go to function.
4. Drop the page on top of the page in front of which you want to insert it.
Split
The Split tool allows you to split a document into two documents.
If you do not separate documents with patch codes, bar codes, or after
X pages, you will start a new document by using the New Document button.
If you forget to do this, the next document is appended to the current
document. To correct this, cut off the part belonging to the next document
with the Split tool to create a new document.
1. Select the Split tool and click on the first image in the new document.
That image and all subseq uent images ar e cut from the screen and moved
to a new document. The new document is appended to the end of the
current batch. Capture Software shows the new document with the
cut images.
2. When you click on the rear of a page that also contains a front, the
message Splitting a document in the middle of a front and a rear of a
page is not allowed appears.
A-63054 February 2004 3A-51
If you want to undo this action, select the Undo option from the Image menu
and the cut images are returned in their original document (right-clicking on the
image accesses the context-sensitive Image menu).
Page 77

Print
You can print a complete document or specific images within a document with
the Print tool.
1. Click on the Print tool.
2. Click on the image you want to print.
A standard Windows Print dialog box is displayed. For example:
3. Select the image page or pa ges that yo u want to print. By d efau lt, Cap ture
Software selects the image page that was selected with the Print tool.
4. Select any of the other options/properties on the Print dialog box.
5. Click OK to start printing.
NOTE: Color images may not be printed. Only black-and-white imag es can be
printed at this time.
Copy image
To copy a complete image to the Windows clipboard:
• Click on the Copy image tool and select one of the images in
your document.
Copy area
To copy an area of an image to the Windows clipboard:
1. Click on the Copy area tool.
2. Draw a selection rectangle around the area you want to copy from
an image.
3. Click on the Confirmation tool or press the space bar.
3A-52 A-63054 February 2004
The selected rectangular area of the image is copied to the
Windows clipboard.
Page 78

Tool bar contextsensitive menu
If you position the mouse cursor on the Tool bar and click the right-mouse
button, the context-sensitive menu appears. The following menu option
is available:
Large Buttons/Small Buttons—allows you to toggle between displaying
large and small buttons on the To ol ba r.
Document title bar The Document title bar shows the current document number and batch name.
If you right-click the mouse button, you can access the Properties option.
Properties will display a full path name of the current document, number of
images and number of pages in the document.
Image display area The Image display area is the area where your images are displayed. How
they are displayed is dependent upon what you have set up from the View
menu. You can view 1, 2, 4, or 8 images at a time. The example below shows
a 4-image display.
A-63054 February 2004 3A-53
NOTES: Every page scanned in Capture Software is displayed on-the-fly
during scanning.
When scanned color pages from a Color Scanner 3590C or Color
Scanner 4500 are binarized (i.e., converted to black and white for
MultiStream™ processing), the bitonal images of the scanned page
are displayed first, followed by the color images.
When dual-stream scanning (simultaneous color and black-and-white
scanning), as with an i820 Scanner or i840 Scanner, the image
display order is determined by the currently selected page setup.
For more information, refer to Chapter 9, Setting Up Page Properties.
Page 79

Image title bar The Image title bar contains the current image number. The format of the
image number (0 or 1 based) is defined in the Application Setup> ImagesNative Scan Structure.
When you right-click on the Image Title bar, the context-sensitive menu with
the option Properties appears.
Properties provides access to the following information for each image:
• Front or rear
• Page ID within the batch
• Location on disk
• Compression
• Resolution
• Image size in bytes, pixels by pixels, 1/100 inch x 1/100 inch, or in mm x mm
• Degrees of skew correction (when performed by the scanner or by Capture
Software) applied to the image
• Skew Correction status (Scanner 3520 and i800 Series Scanners only)
NOTE: Skew correction is not repo rt ed at this time for color images that have
been deskewed by Capture Software.
• Print string when printing is enabled for the Scanner 3520 DP, Color
Scanner 4500DP, or an i800 Series Scanner
• Image Address (i800 Series Scanners only)
• Sequential Counter (i800 Series Scanners only)
• Patch code type detected by the scanner (i800 Series Scanners only)
• List of detected bar code or OCR text values (by launching the bar code/
OCR engine when Properties is called). Only bar codes or OCR text
zones defined through Bar Code/OCR Setup app ear. Hardware bar
codes that are read by a Kodak high volume scanner are not displayed
in Image Properties.
NOTE: Bar code detection and OCR are not available for Capture
Software Lite for Scanner 1500/2500.
3A-54 A-63054 February 2004
Page 80
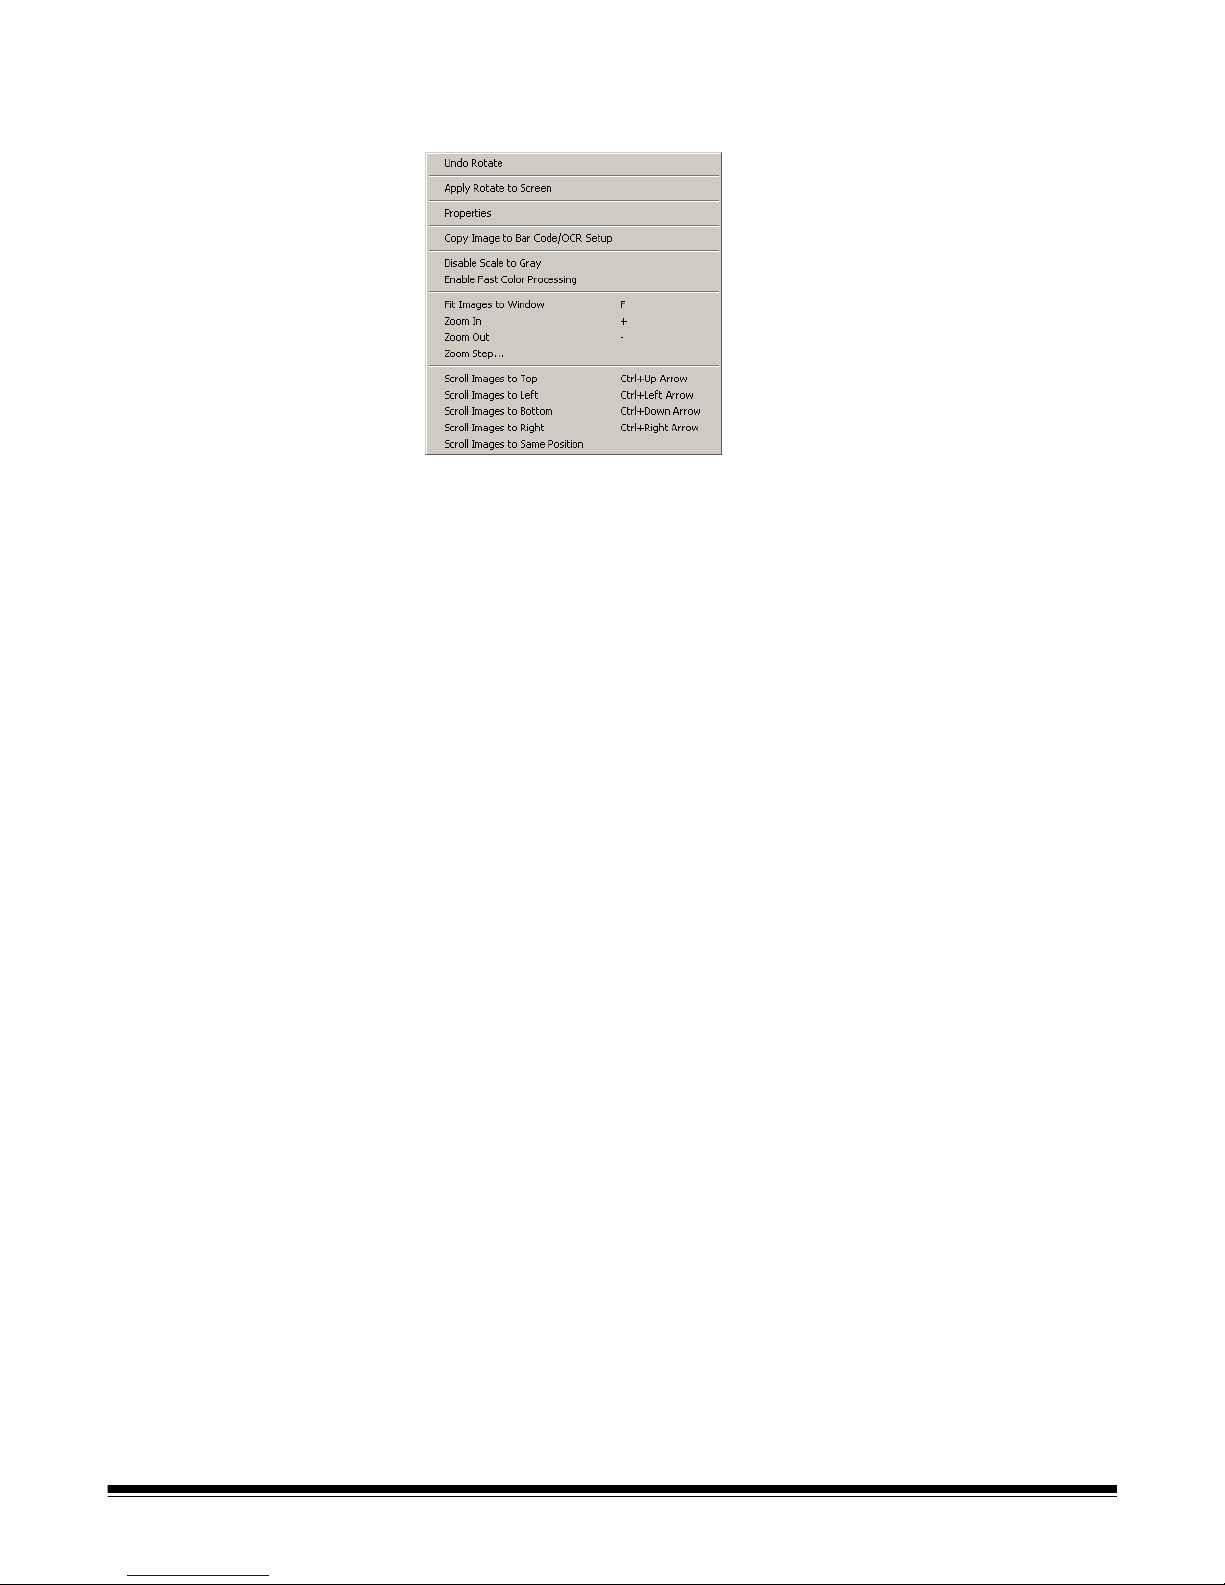
Image
context-sensitive
menu
When you right-click on an image, a context-sensitive menu is displayed with
the following options:
Undo [function]—this reverts one level of the last rotation, split tool action,
and selection for insert, re-scan, delete, or flag. The m enu o ption indi cates the
undo action it will perform (e.g., Undo Rotate, Undo Split, etc.).
Apply [function] to Screen—these menu options apply the selected tool on
all the images on the screen at one time. This works with Rescan, Flag,
Rotate, Blank, and Crop.
Properties—see the previous section, “Image title bar,” for an explanation of
this function.
Copy Image to Bar Code/OCR Setup—makes the image available to
Bar Code/OCR Setup for defining bar code field and OCR text zones.
Refer t o Chapter 6, Bar Code/OCR Setup, for more information.
NOTE: Bar code detection is not available for Capture Software Lite for
Scanner 1500/2500.
Enable/Disable Scale to Gray—toggles scale to gray on or off.
Enable Fast Color Processing / Enable Pixel Precision—toggles the im age
rotation and image cropping setting for color images. This setting only affects
the behavior of the Rotate and Crop tools for color images. Fo r deta ils, see the
section entitled “Tool bar.” The default is Enable Pixel Precision.
Fit Images to Window—this function is the same as described in
“The View menu.” Keyboard shortcut: F
A-63054 February 2004 3A-55
Page 81

Zoom in—this function is the same as described in “The View menu.”
Zoom out—this function is the same as described in “The View menu.”
Zoom Step—this function is the same as described in “The View menu.”
Scroll Images to Top—selecting this function will scroll all the images in the
Image Display area to the top.
Scroll Images to Bottom—selecting this function will scroll all the images in
the Image Display area to the bottom.
Scroll Images to Left—selecting this function will scroll all the images in the
Image Display area to the left.
Scroll Images to Right—selecting this function will scroll all the images in the
Image Display area to the right.
Scroll Images to Same Position—selecting this function will scroll all the
images in the Image Display area to the same position as the image that was
right-clicked.
Status bar The Status bar indicates the size of the last scanned image or the image you
clicked on last and the total Free Disk Space and Free Batch S p ace (based on
the Maximum MB setting defined in the Storage setup). It also indicates the
total number of images in the document and the number of documents in
the batch.
3A-56 A-63054 February 2004
Page 82
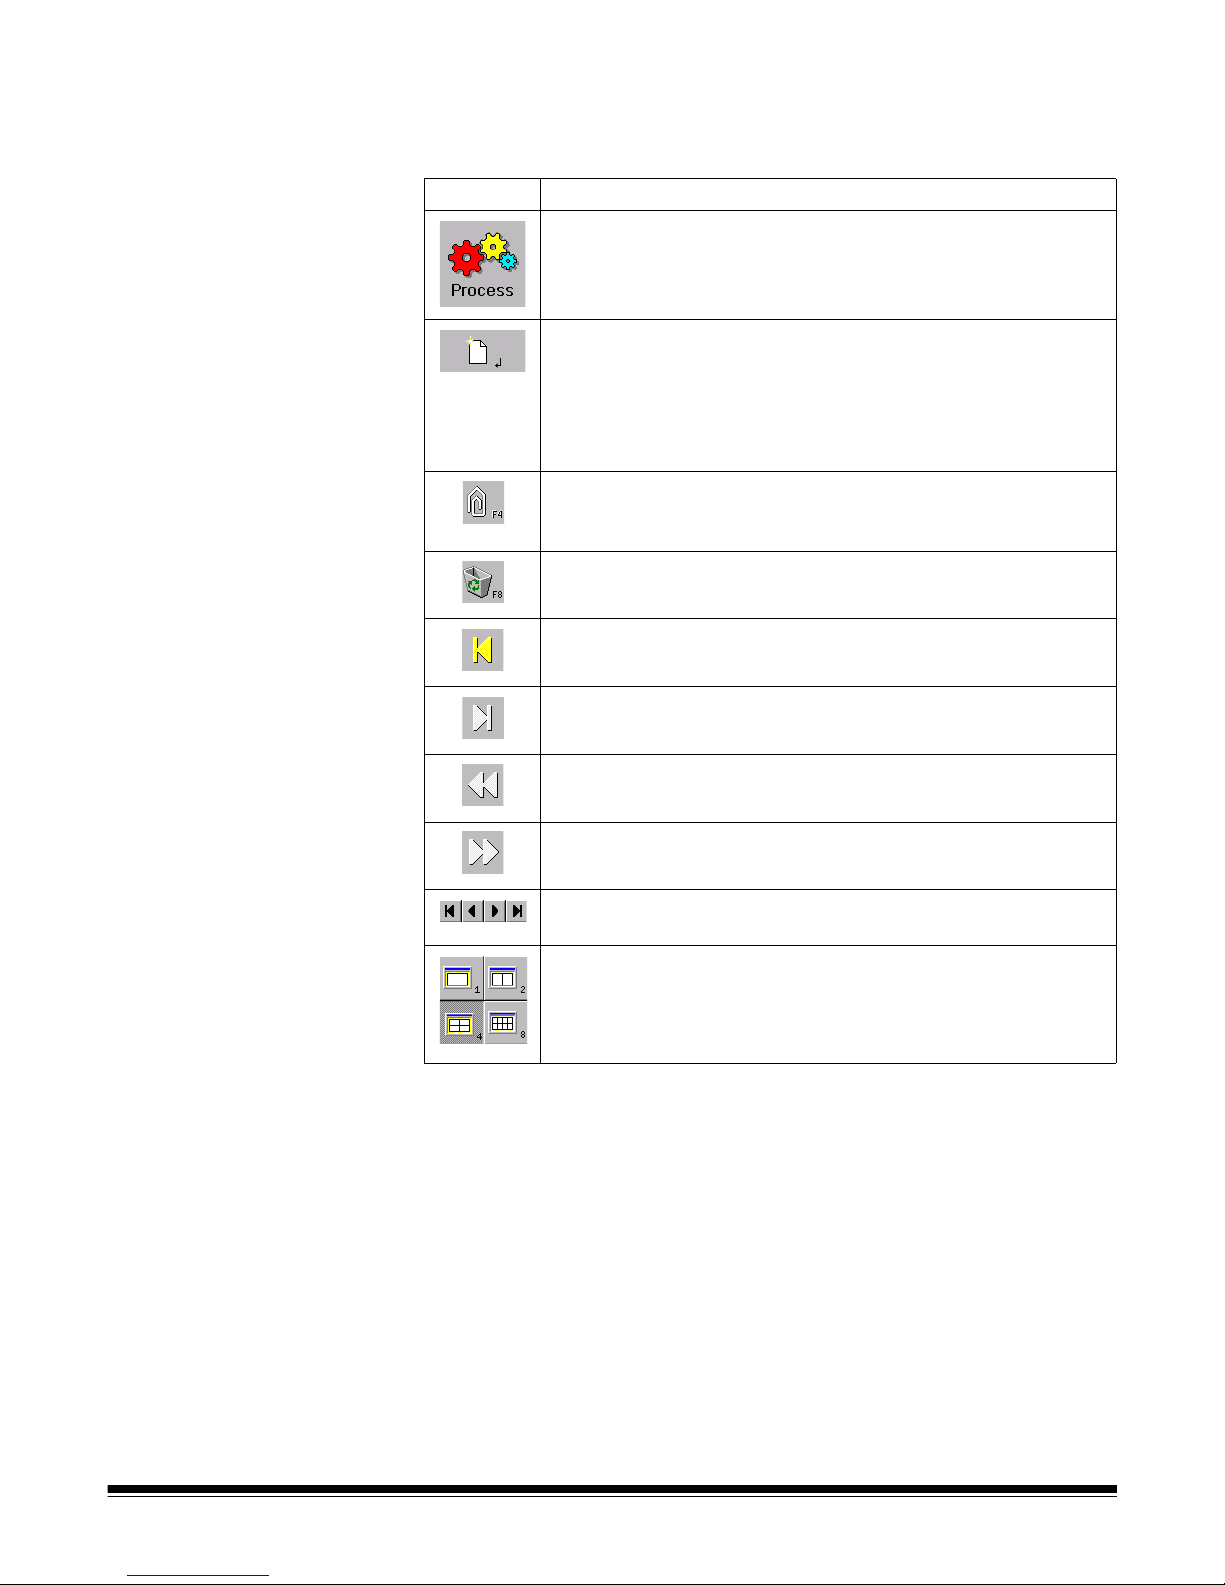
Button bar When selected, the Button bar appears on the left side of the screen. If the
Button bar does not appear , enable Button bar from the Options menu. The
following table describes the function of each button.
Button Description
Process—when selected, processes the current batch.
New Document—when selected, Capture Software starts a
new document with a document number equal to the last
document number +1. In Capture Software for 3000/4000
Series Scanners and i800 Series Scanners, selecting this
button also enables the scanner and starts the scanner
transport/feeder.
Attachment—appends the next scanned page to the current
document. This button only creates one attachment and has to
be clicked again for each additional attachment.
Delete Document—deletes the current document. A
confirmation box will be displayed when you click on this button.
First Document—click this button to go directly to the first
document in a batch.
Button bar contextsensitive menu
Last Document—click this button to go directly to the last
document in a batch.
Previous Document—moves to the previous document
number containing images.
Next Document—moves to the next document number
containing images.
Image Navigation—allows you to move respectively to the
first, previous, next, and last image of a document.
Display Mode—allows you to display 1, 2, 4, or 8 images
simultaneously.
If you position the mouse cursor on the Button bar and click the right-mouse
button, a context-sensitive menu is displayed which allows you to display
either large or small buttons.
A-63054 February 2004 3A-57
Page 83
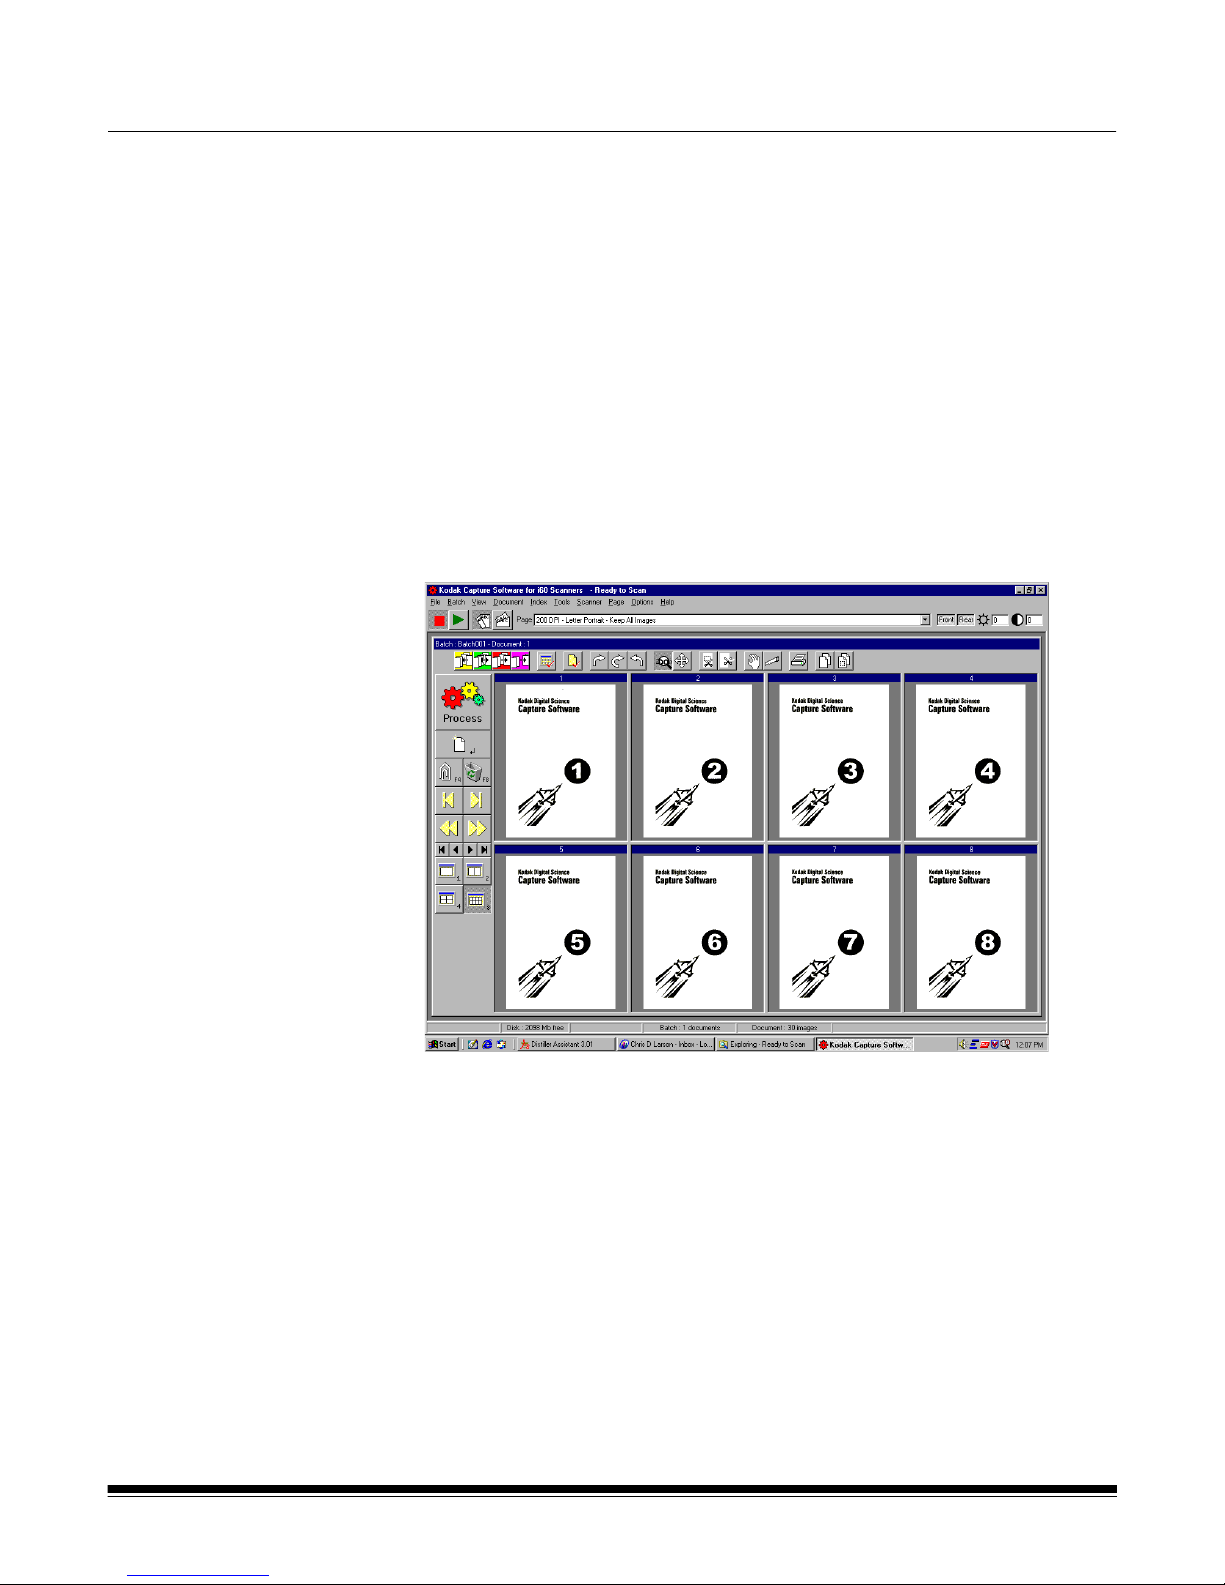
3B Working in Capture Software for i50/i60/i80 Scanners
The main
Capture Software
window
This chapter describes how to access and use th e vari ou s fu nc tion s of
Capture Software through the tools and menus of the main window.
The main window contains the following elements :
• Program title bar
• Menu bar
• Scanner bar
• Document title bar
•Tool bar
•Image display
• Button bar
• Status bar
Program title bar The Program title bar provide s the ver sio n nu m be r of Capt ur e Software that
A-63054 February 2004 3B-1
you are running and the name of the selected sc a nner. The application name
is also included on the Program title bar.
Page 84

Menu bar The Menu bar provides the following menu options:
The following summarizes the functions associated with each Capture
Software menu:
File—allows you to open, close, or delete an existing Production or Template
application. In addition, you can create and set up a new application.
Batch—allows you to open an existing batch or create a new batch; and
process current or all available batches.
View—allows you to display 1, 2, 4, or 8 images, fit images to the display
windows regardless of its original size and allows you to enlarge or reduce the
images by a fixed percentage.
Document—provides many options of navigating thro ugh th e disp la ye d
images of a document and the documents within a batch. You can also create
and delete documents and attach new images to an existing document.
Index—allows you to edit batch and document index fields.
NOTE: Only one index field can be defined for Capture Software Lite for
i50/i60/i80 Scanners.
Tools—provides a variety of methods which allows you to manipulate
displayed images.
Scanner—allows you to set up a scanner and to start and stop the scanner.
Page—allows you to set up specific page properties, duplex scanning mode
(classic or calendar), and image setup options.
Options—provides access to hiding or displaying the Tool bar, Status bar,
Button bar, and Scanner bar.
Help—provides version number information about the current installation of
Capture Software.
The following sections provide information on each of these menu options. In
many cases, you can use a keyboard, Tool bar, Scanner bar, or Button bar
shortcut instead of selecting an option from the menu.
Button bar, Scanner bar, and Tool bar summaries are described later in this
chapter. Proce dures on h ow to use a menu option ar e cove red in the following
menu descriptions.
3B-2 A-63054 February 2004
Page 85
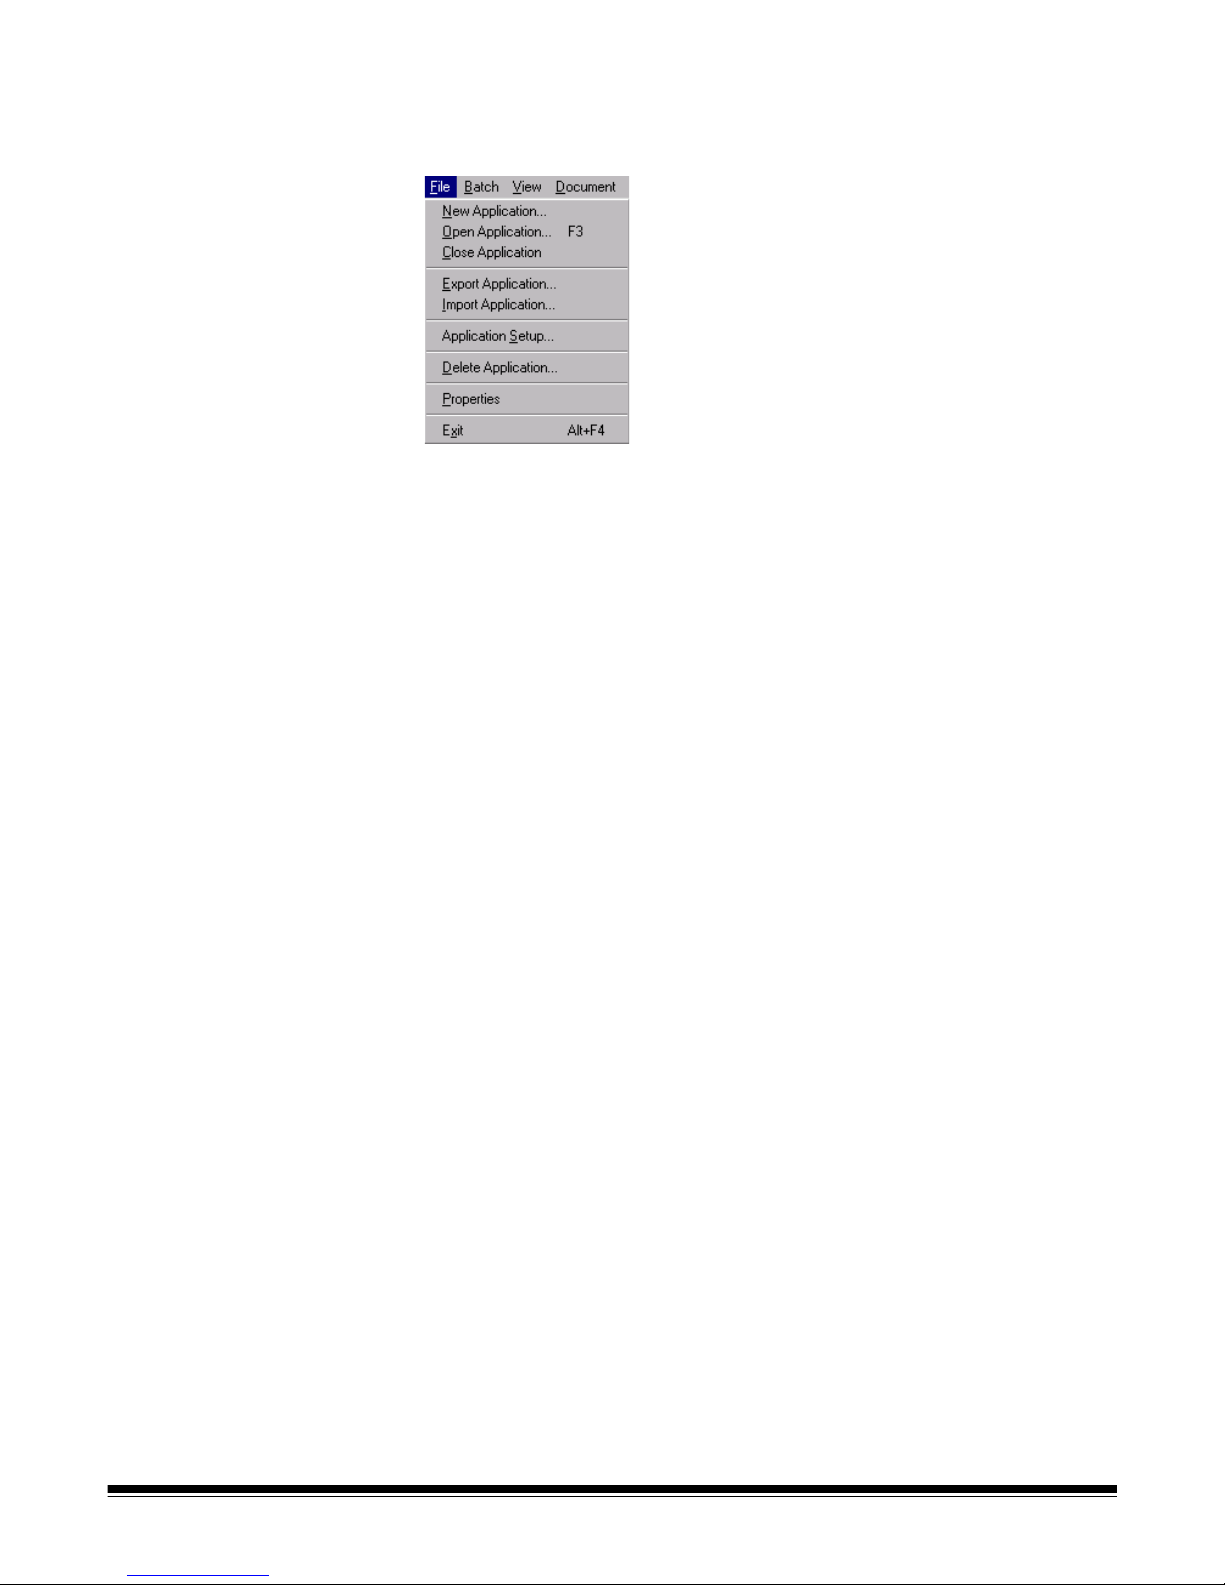
File menu The File menu allows you to open, close, import, export, or delete an existing
Production or Template application. In addition, you can create and set up a
new application.
New Application—accesses the Create New Application dialog box which
allows you to create a new application based upon an existing application.
Open Application—allows you to open an existing application.
Keyboard shortcut: F3
Close Application—closes the current application and open batch.
Import/Export Application—allows you to export (or save) application
settings from one Capture Software installation and import (or load) those
settings to another Capture Software insta llation. These functions currently
are not supported.
Application Setup—accesses the Application Setup dialog box. More
information about setting up applications can be found in Chapter 4,
Application Setup.
Delete Application—when selected, deletes the current application. You
cannot delete an application that contains batches.
Properties—automatically closes the current application and accesses the
Capture Software Program Properties. More informa tio n ab out Prog ra m
Properties can be found in Chapter 11, System Administration —
Program Properties.
Exit—closes Capture Software. Keyboard shortcut: Alt+F4
A-63054 February 2004 3B-3
Page 86

Open Application dialog box The Open Application dialog box allows you to:
• Open an existing application.
• Close the Open Application dialog box.
• Access information (i.e., a Readme text file) for selected applications.
• Set up a new application—see Chapter 4, Application Setup, for
more information.
• Delete an existing application.
• Create a new batch—see the section entitled “The Batch menu” later in this
chapter for more information.
Opening an application
1. Select File>Open Application.
The Open Application dialog box appears.
2. Select the application you want to open.
The batches associated with the application will be displayed.
3. Click Open to show the batch you selected in the main Capture
Software window.
3B-4 A-63054 February 2004
Page 87

Closing an application
•Select File>Close Application from the main Capture Software window.
Deleting an application
1. Select the application you want to delete.
The batches associated with the application will be displayed.
NOTE: An application cannot be deleted unless all batches are processed
or deleted.
2. Click Delete.
Accessing online application information
1. Select the application you want information about.
2. Click About.
If available, information about the application will appear in a text window.
A-63054 February 2004 3B-5
Page 88
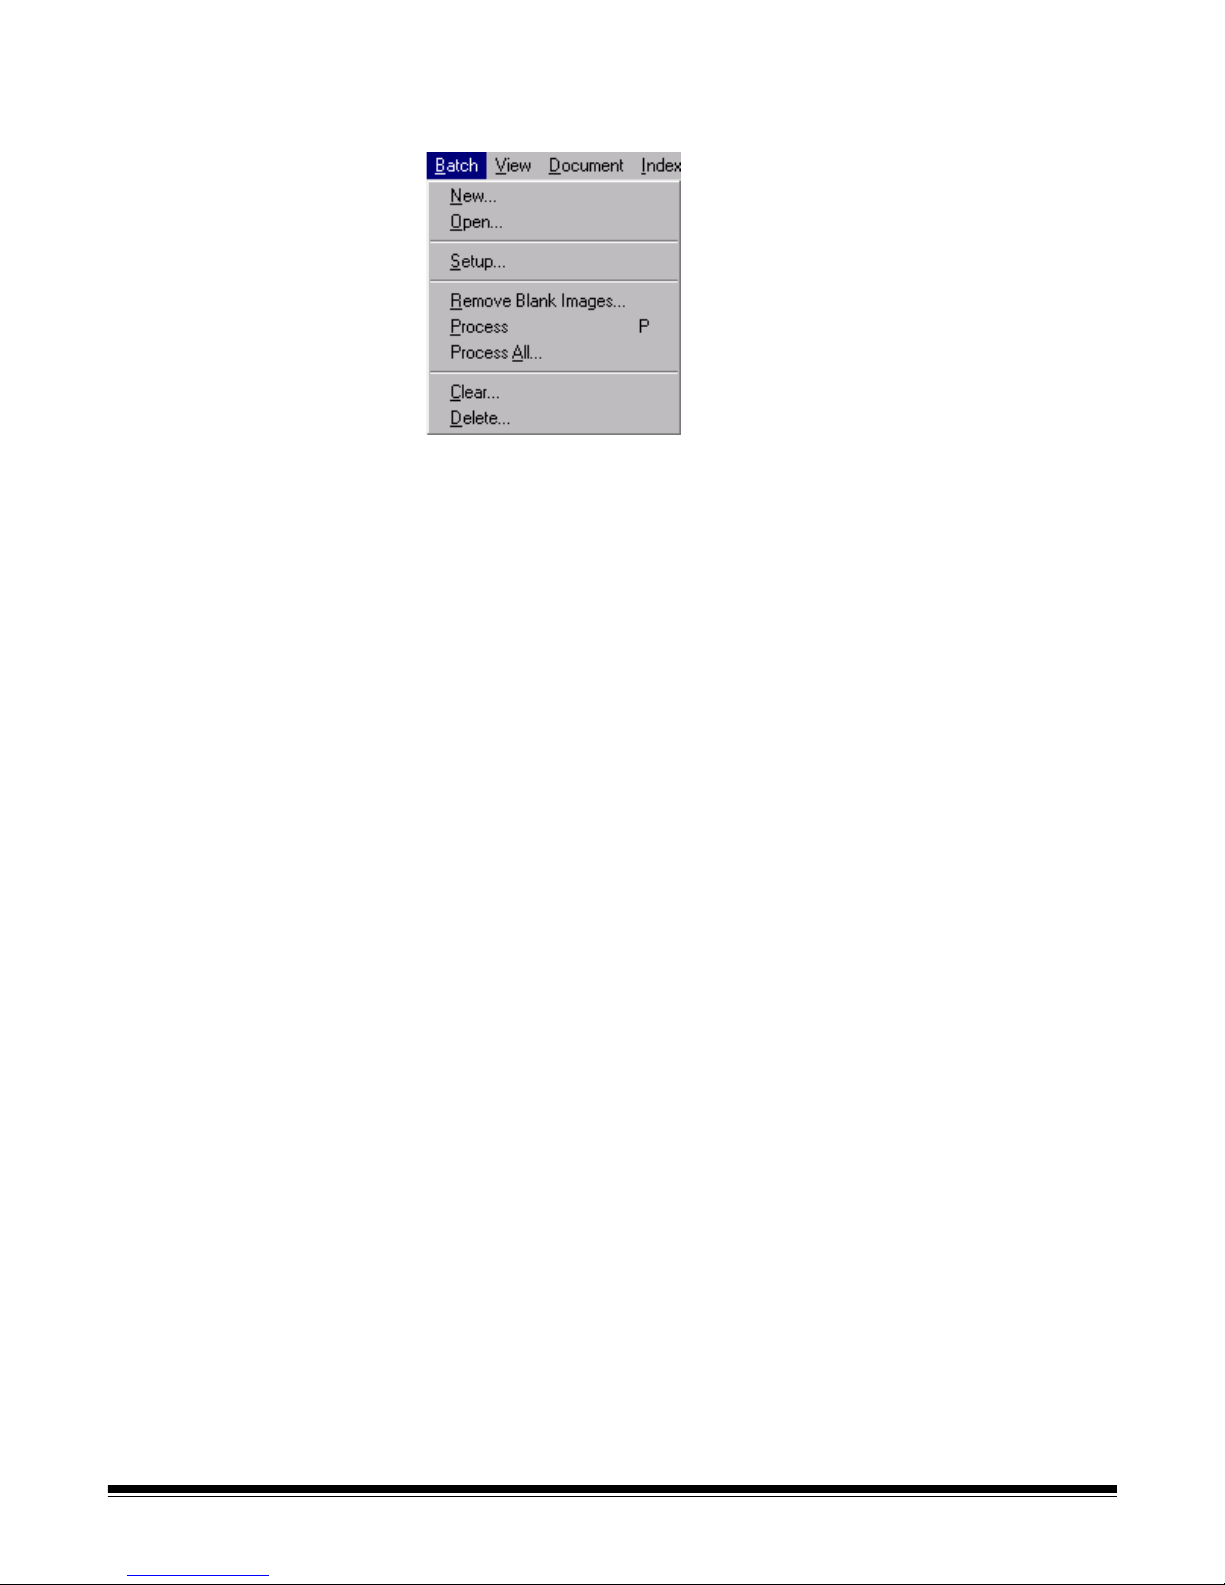
Batch menu The Batch menu allows you to open, create, set up and delete batches. You
can also process a current batch or all available batches.
New—allows you to create a new batch.
Open—shows a list of available batches for a selected application. Opening a
batch from the list automatically closes the current batch.
Setup—allows you to change the name of a batch. When selected, the Batch
Setup dialog box will appear, which allows you to enter a new Batch name.
After you have entered a new batch name, click OK.
Remove Blank Images—allows you to remove blank rear or front sides
produced by the scanner.
Process—processes the current batch according to the selected Batch Output
Format. Keyboard shortcut: P
Process All—shows all available batches for the current application; you can
select one or more batches to process unattended.
Clear—erases all images in a batch, but keeps the batch subdirectory
structure intact.
Delete—erases both the images and batch subdirectory structure of the
selected batch.
3B-6 A-63054 February 2004
Page 89
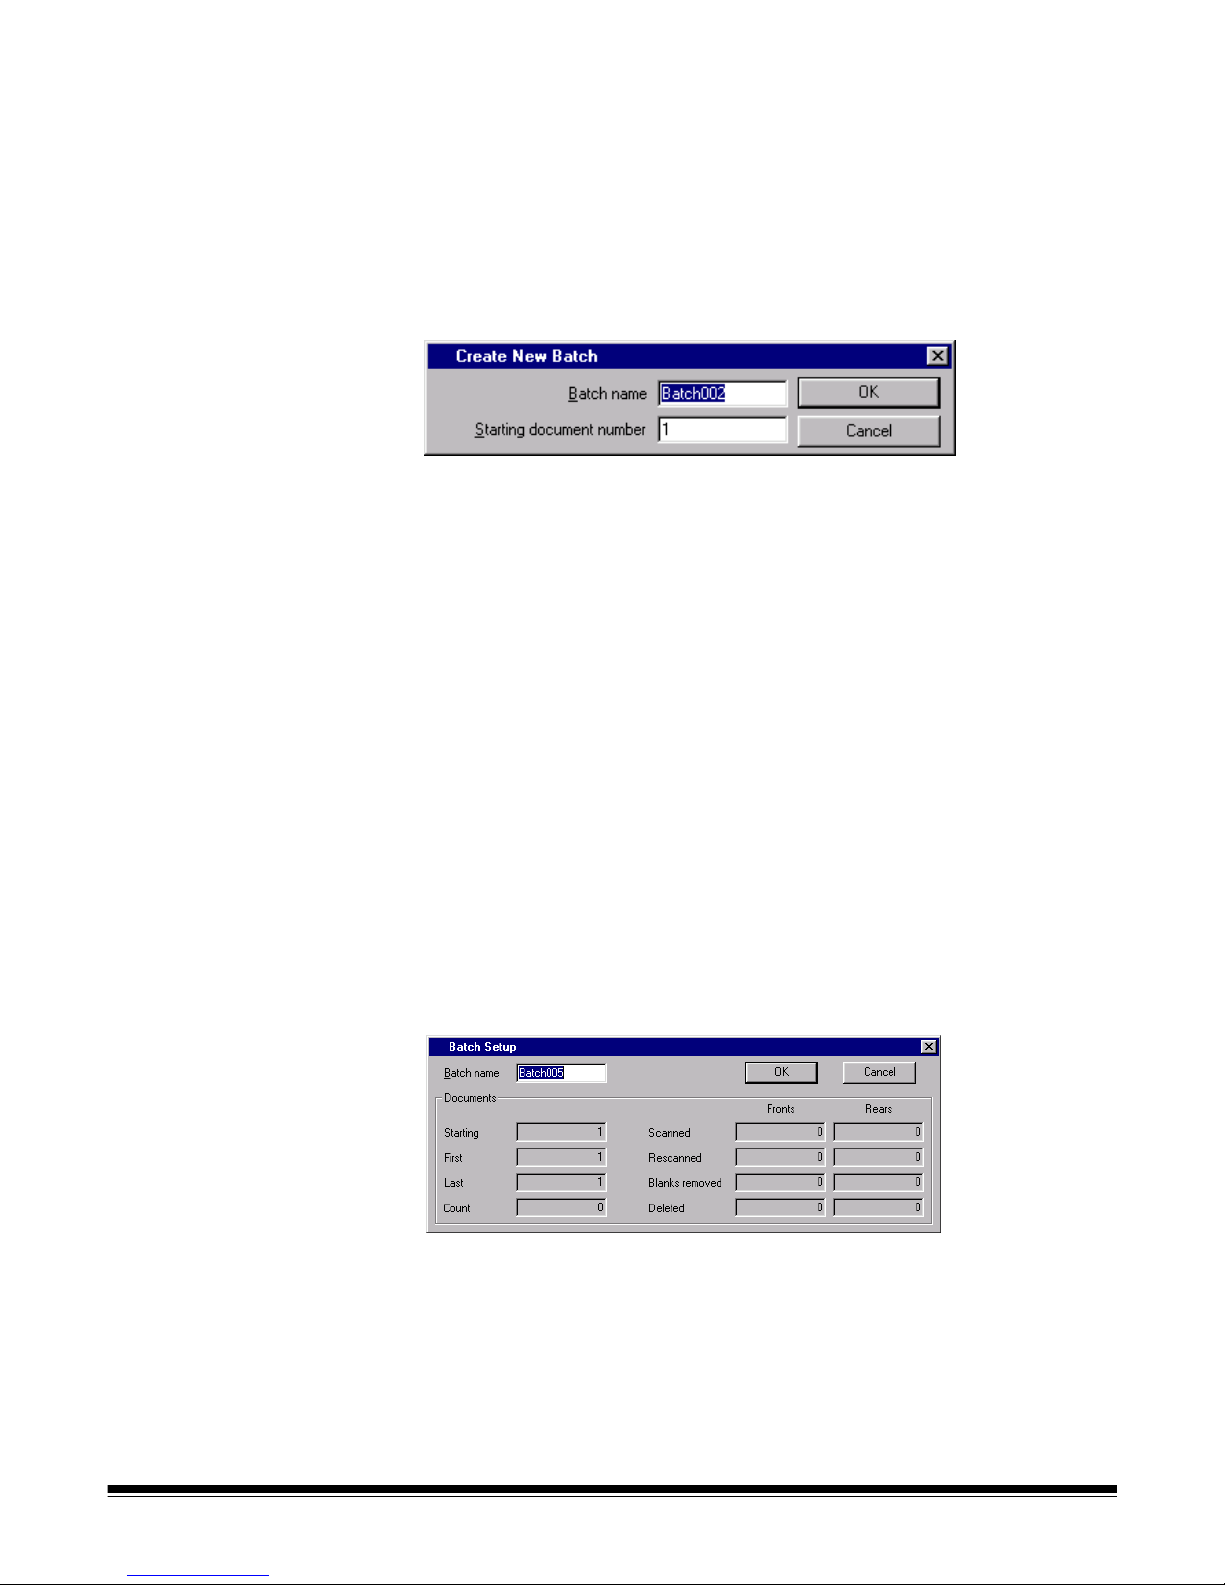
Creating a new batch When you create a new batch, Capture Software will not disable the scanner.
From the Open Application window:
1. Select an application where you want the new batch to reside.
2. Click New Batch.
From the main Capture Software window:
3. Select Batch>New.
The Create New Batch dialog box appears.
4. Enter a new batch name in the Batch name field.
By default, Capture Software suggests a new batch name based upon the
last batch name created for the application (e.g., If the last batch name is
Batch002, then the new batch name default will be Batch003).
5. Enter the starting document number.
By default, Capture Software suggests a starting document number based
upon the Application Setup.
6. Click OK.
The main window appears with the batch name you assigned.
7. Start scanning into the new batch.
Opening a batch To open an existing batch, select Batch>Open. The Open Application dialog
box appears. The batch that was previously opened is highl ighted. You can
now open any existing batch in any production application.
Setting up a batch From the main window:
1. Select Batch>Setup.
The Batch Setup dialog box appears.
2. If desired, enter a new name for the current batch.
A-63054 February 2004 3B-7
3. Click OK.
The new batch name is reflected in the list of batches for the
selected application.
The main Capture Software window appears. You can continue scanning.
Page 90

Removing blank images This option allows you to remove the blank rear or front sides produced by the
scanner. If you use this option, you will be asked to verify the batch delete of
the blank images.
From the main window:
1. Select Batch>Remove Blank Images.
The Remove Blank Images Setup dialog box appears.
2. Enter the document in the batch where you want verification to begin. The
default is 1.
3. Define the byte size threshold of the images to be verified.
NOTE: A good setting for typical business documents is 5000 bytes in
200 dpi bitonal.
4. If you want to remove only the blank rear sides of the images in a batch,
click the Check only rear sides check box.
5. If you do not want all images pre-selected for deletion, uncheck the
Pre-select all check box to disable this option.
6. Define the number of columns and rows you want to display.
On a 1024 x 768 SVGA screen, a matrix of 14 x 7 allows you to check
98 images per screen for images containing valid data.
7. Click OK to accept the values you entered.
3B-8 A-63054 February 2004
Page 91

After a batch has been processed, Capture Software displays all rear images
below the specified number of bytes (e.g., 5000 bytes). These images are
displayed in a red highlight color (unless you disabled the Pre-select all
option). All colored images (which appear black here, but red on your screen)
are considered blank and ready for mass deletion.
To delete the blank images:
1. By default, all images are selected for deletion. Select any images you do
not want to delete by clicking them individually.
The color changes to white.
NOTE: The First Screen, Previous Screen, Next Screen, and Last Screen
buttons help you navigate through all the blank imag e s in the batc h.
2. Click OK.
The message Remove all selected images? appears.
3. Select Yes to confirm the deletion of images.
Capture Software removes the images and repagin ates the documents.
The available batch and hard disk capacity are also updated.
A-63054 February 2004 3B-9
Page 92

Changing the Remove Blank Images setup
You can change the Remove Blank Images setup by selecting Setup on the
Remove Blank Images dialog box. The Remove Blank Image Setup dialog box
appears and you can change the parameters as required.
Displaying a detailed view of an image
You can display a more detailed view of an image by right-clicking on the
thumbnail of the image. The image will be magnified to 100%. By moving the
magnifying glass over the thumbnail, you can verify whether or not the image
should be deleted.
Processing batches You can process one batch at a time or process all available batches. When
you process a batch, the batch is processed according to the selected Batch
Output Format in Application Setup (Output tab). This typically results in the
batch being copied to an output subdirectory path.
Processing the current batch
•Select Batch>Process.
A progress meter will be displayed while the batch is processing.
3B-10 A-63054 February 2004
Page 93

Processing all available batches
1. Select Batch>Process All.
The Process All Batches dialog box appears. This dialog box allows you to
select one or more batches to be processed.
2. Click Process.
Each selected batch is processed in the order displayed.
3. After processing, the Create New Batch dialog box appears.
By default, the name of the new batch is incremented by one. It is
suggested that you increment the previous batch name by one.
4. Click OK to continue scanning into the new batch.
Clearing and deleting batches The Clear and Delete options are available from the Batch menu. When you
clear a batch, Capture Software deletes all images but keeps the batch
subdirectory name and all subdirectories that have already been created.
When you delete a batch, Capture Software deletes the entire batch
subdirectory structure and removes the batch name from the list of
batches in the selected application.
A-63054 February 2004 3B-11
Page 94

View menu The View menu provides options which allow you to alter the way you view
images in the Image Display area.
1 Image—allows you to display one image in the Image Display area.
Keyboard shortcut: 1
2 Images—allows you to display two images in the Image Display area.
Keyboard shortcut: 2
4 Images—allows you to display four images in the Image Display area.
Keyboard shortcut: 4
8 Images—allows you to display eight images in the Image Display area.
Keyboard shortcut: 8
Scale to Gray—toggles the scale to gra y mo de on and off. Selecting Scale
to Gray will increase the quality of the bitonal images displayed on lower
resolution monitors. This option has no effect on the image files.
Fit Images to Window—fits each image to the Image Display window
regardless of its original size. Keyboard shortcut: F
Zoom In—enlarges an image by a fixed percentage according to the Zoom
Step setting. Keyboard shortcut: +
Zoom Out—reduces an image by a fixed percentage according to the Zoom
Step setting. Keyboard shortcut: Zoom Step—accesses the Zoom S t ep dialog box which allows you to select a
percentage to scale. Options range from 15 to 40% in increments of 5%.
3B-12 A-63054 February 2004
Page 95

Changing zoom settings To change the settings in the Zoom Step dialog box, proceed as follows.
1. Select View>Zoom Step.
The Zoom Step dialog box appears.
2. Click on the setting you desire.
3. Click OK.
The zoom setting will be reduced or enlarged based upon the percentage
you selected.
A-63054 February 2004 3B-13
Page 96
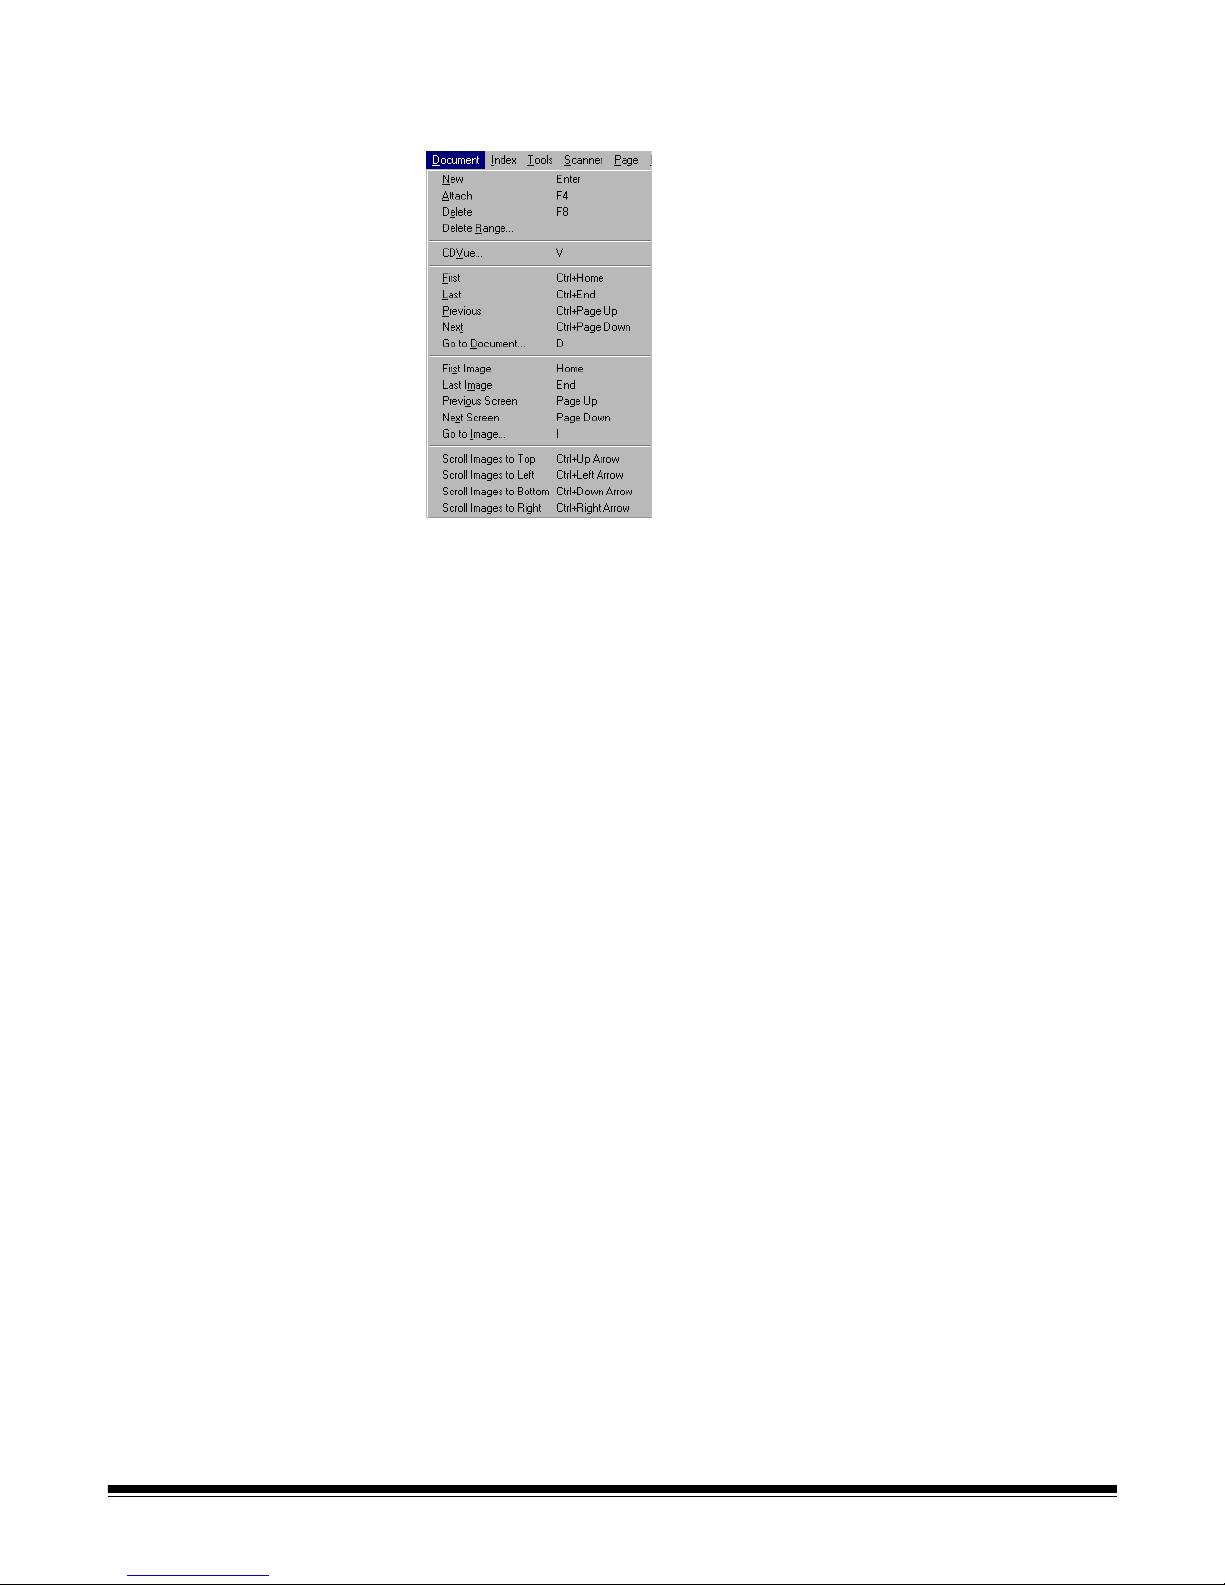
Document menu Following is a summary of what options are provided from the
Document menu.
New—allows you to start a new document with a document number equal to
the last document number +1. Keyboard shortcut: Enter
Selecting this option also enables the scanner and starts the scanner
transport/feeder or flatbed.
Attach—appends the next scanned page to the current document. Keyboard
shortcut: F4
Delete—deletes the current document. Keyboard shortcut: F8
Delete Range—accesses the Delete Documents dialog box which allows you
to delete a range of documents in the batch.
CDVue—this option is only available when you use the IBS/ Document CD
Native Scan structure. When this option is available, you can search and view
documents in the current batch with the CDVue application. This is useful for
testing the Document Index data that has been generated for the batch.
Keyboard shortcut: V
First—select this option to go to the first document in a batch. Keyboard
shortcut: Ctrl+Home
Last—select this option to go to the last document in a batch. Keyboard
shortcut: Ctrl+End
Previous—moves to the previous document number containing images.
Keyboard shortcut: Ctrl+Page Up
Next—moves to the next document number containing images. Keyboard
shortcut: Ctrl+Page Down
3B-14 A-63054 February 2004
Page 97
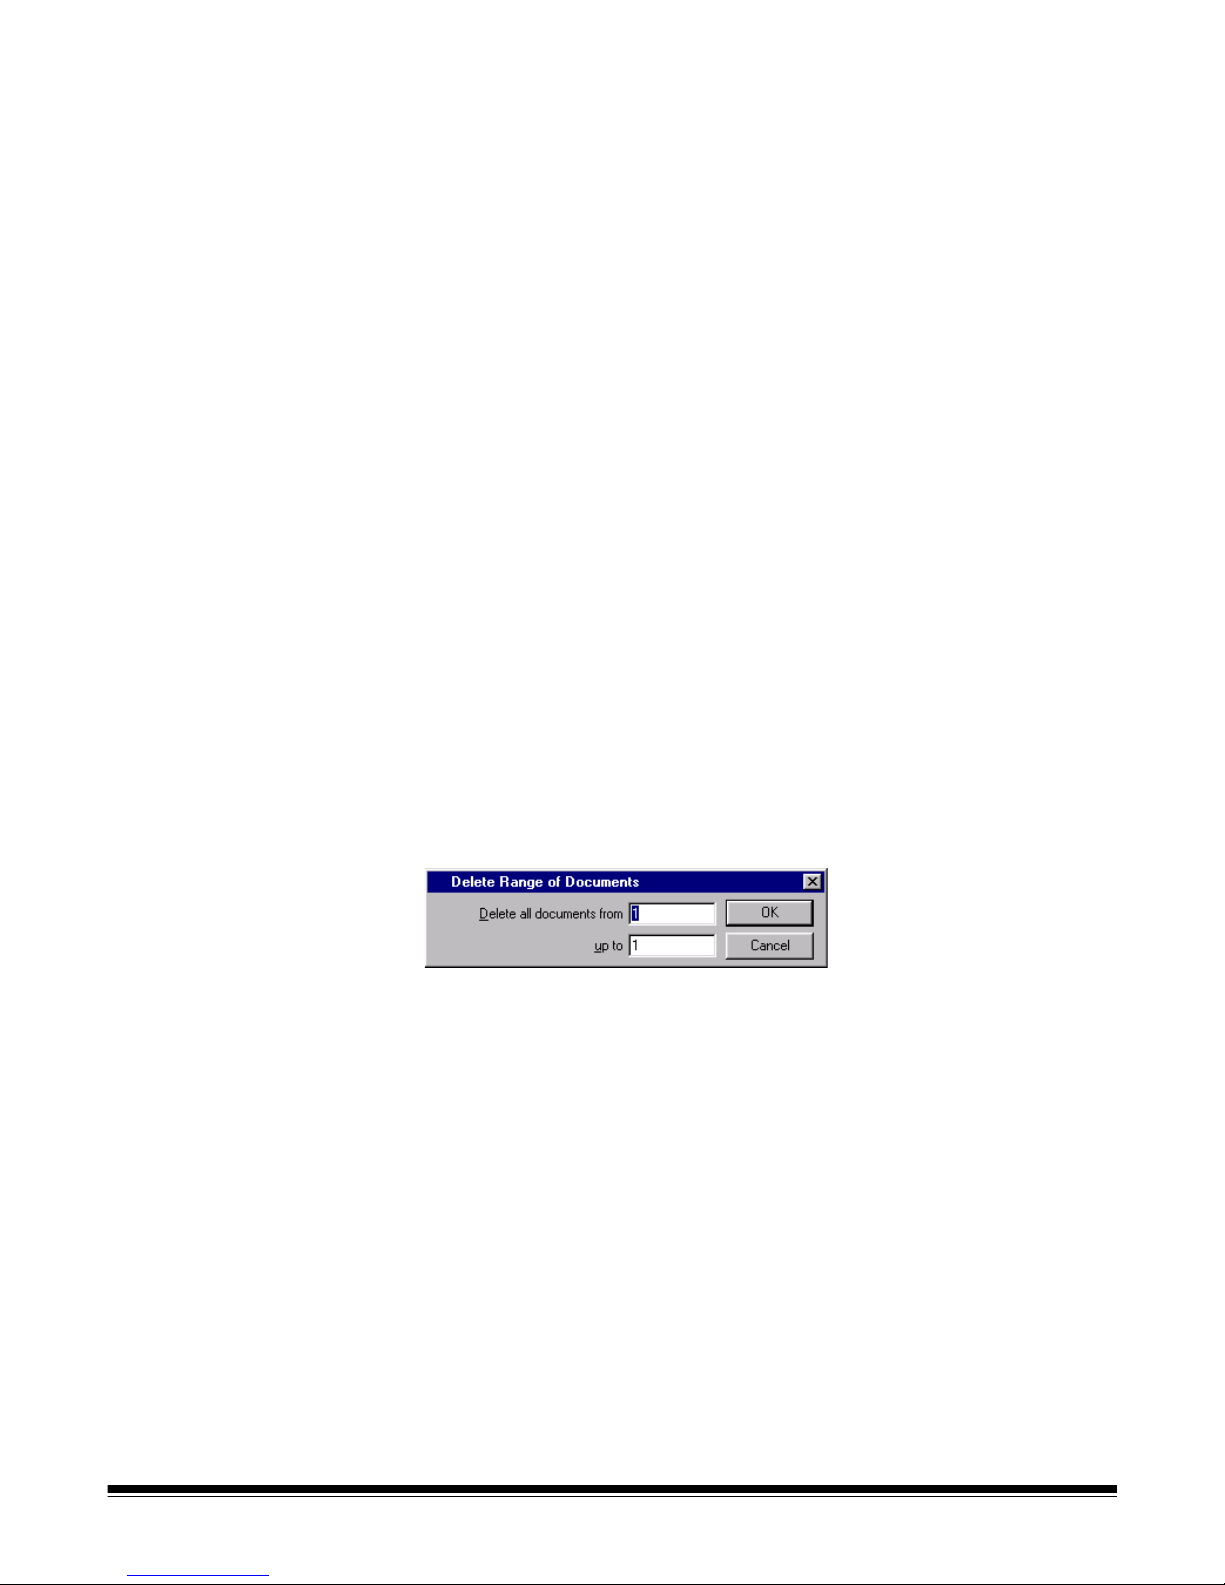
Go to Document—accesses the Go to Document dialog box which allows you
to enter the number of the document that you want to display. You can also go
to document numbers that do not contain any images. Keyboard shortcut: D
First Image—allows you to go to the first image of a document. Keyboard
shortcut: Home
Last Image—allows you to go to the last image of a document. Keyboard
shortcut: End
Previous Screen—allows you to go to the previous screen. Keyboard
shortcut: Page Up
Next Screen—allows you to go to the next screen. Keyboard shortcut:
Page Down
Go to Image—accesses the Go to Image dialog box which allows you to enter
the number of the image you want to display first in the Image Display area.
Keyboard shortcut: I
Scroll Images to Top—allows you to scroll all of the images in the Image
Display area to the top of the images. Keyboard shortcut: Ctrl+Up Arrow
Scroll Images to Left—allows you to scroll all of the images in the Image
Display area to the left of the images. Keyboard shortcut: Ctrl+Left Arrow
Scroll Images to Bottom—allows you to scroll all of the images in the
Image Display area to the bottom of the images. Ke yboard shortcut:
Ctrl+Down Arrow
Scroll Images to Right—allows you to scroll all of the images in the Image
Display area to the right of the images. Keyboard shortcut: Ctrl+Right Arrow
Deleting a range of pages 1. Select Document>Delete Range.
The Delete Documents dialog box appears.
2. Enter the beginning number of the document you want to delete in the
Delete all documents from field.
3. Enter the ending number of the group of documents you want to delete in
the up to field.
4. Click OK when finished.
A-63054 February 2004 3B-15
Page 98
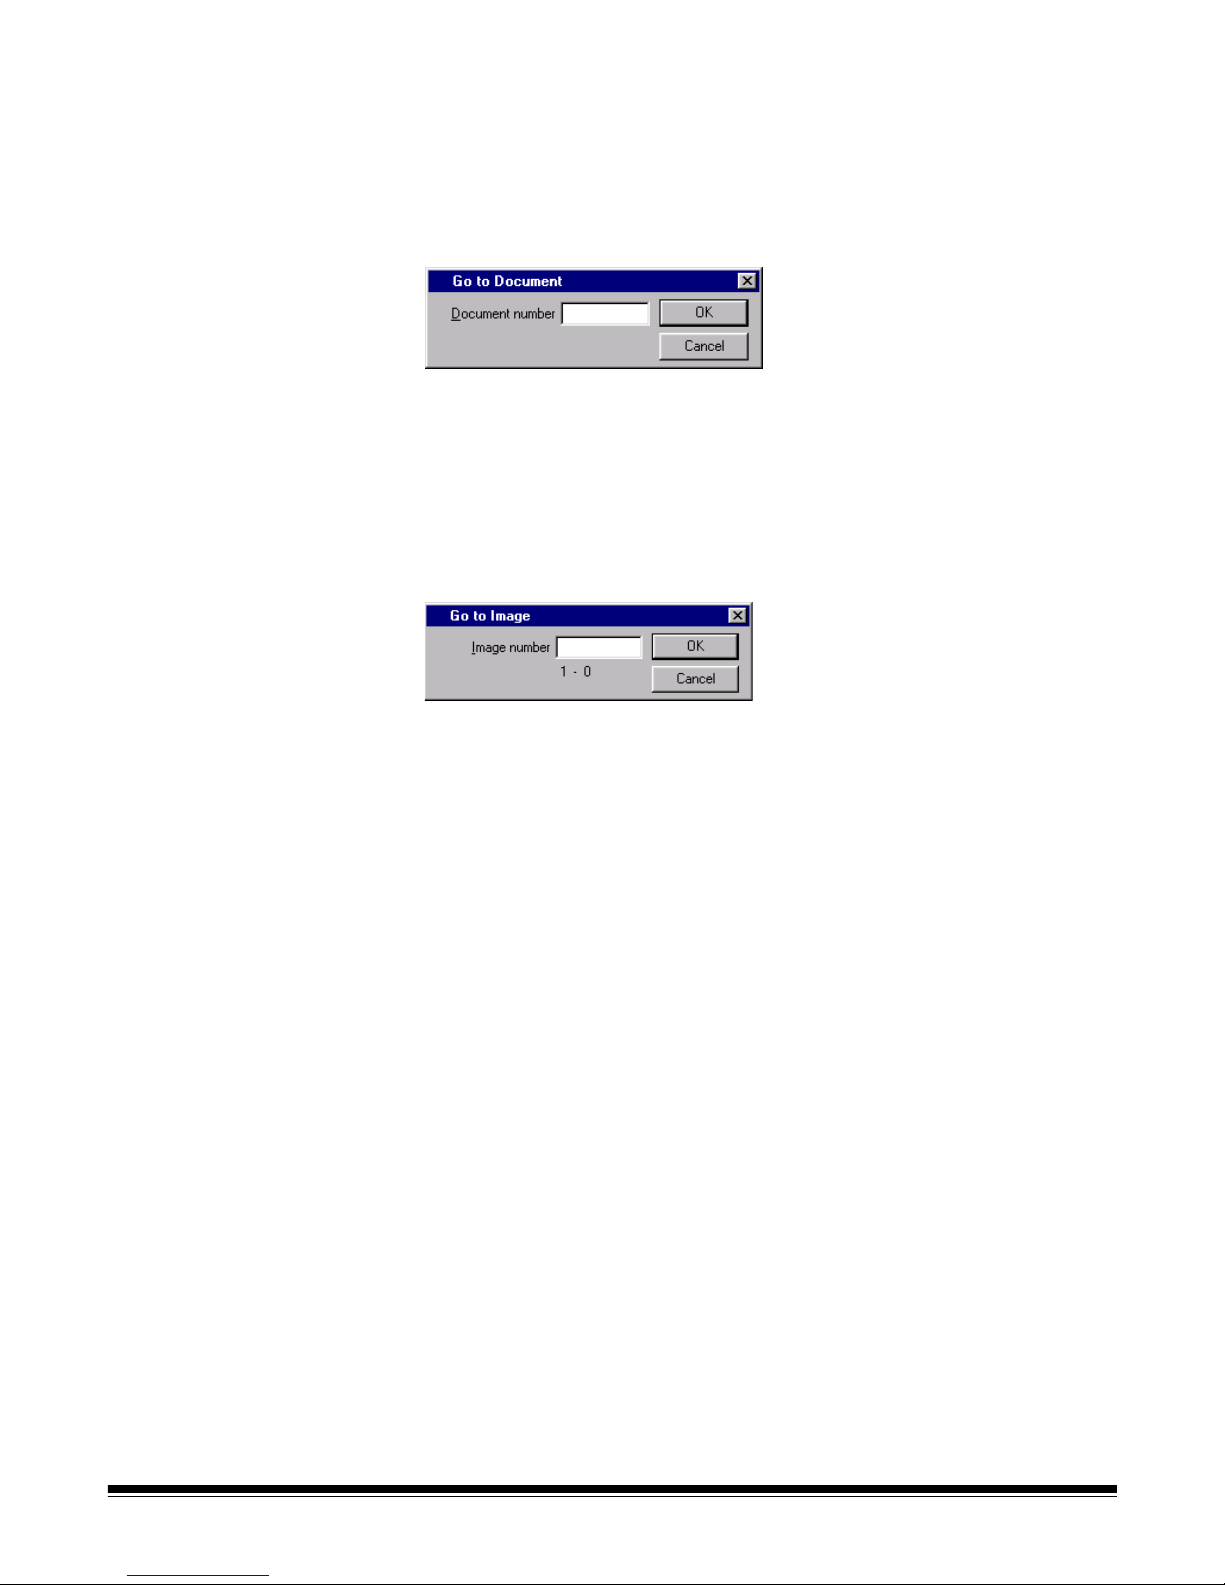
Moving to a specific
document or image
The Go to Document and Go to Images options are available when you want
to move directly to a specific document or image.
To go to a specific document:
1. Select Document>Go to Document.
The Go to Document dialog box appears.
2. Enter the document number you want to go to.
3. Click OK.
To go to a specific image:
1. Select Document>Go to Image.
The Go to Image dialog box appears.
2. Enter the image number you want to go to.
3. Click OK.
3B-16 A-63054 February 2004
Page 99
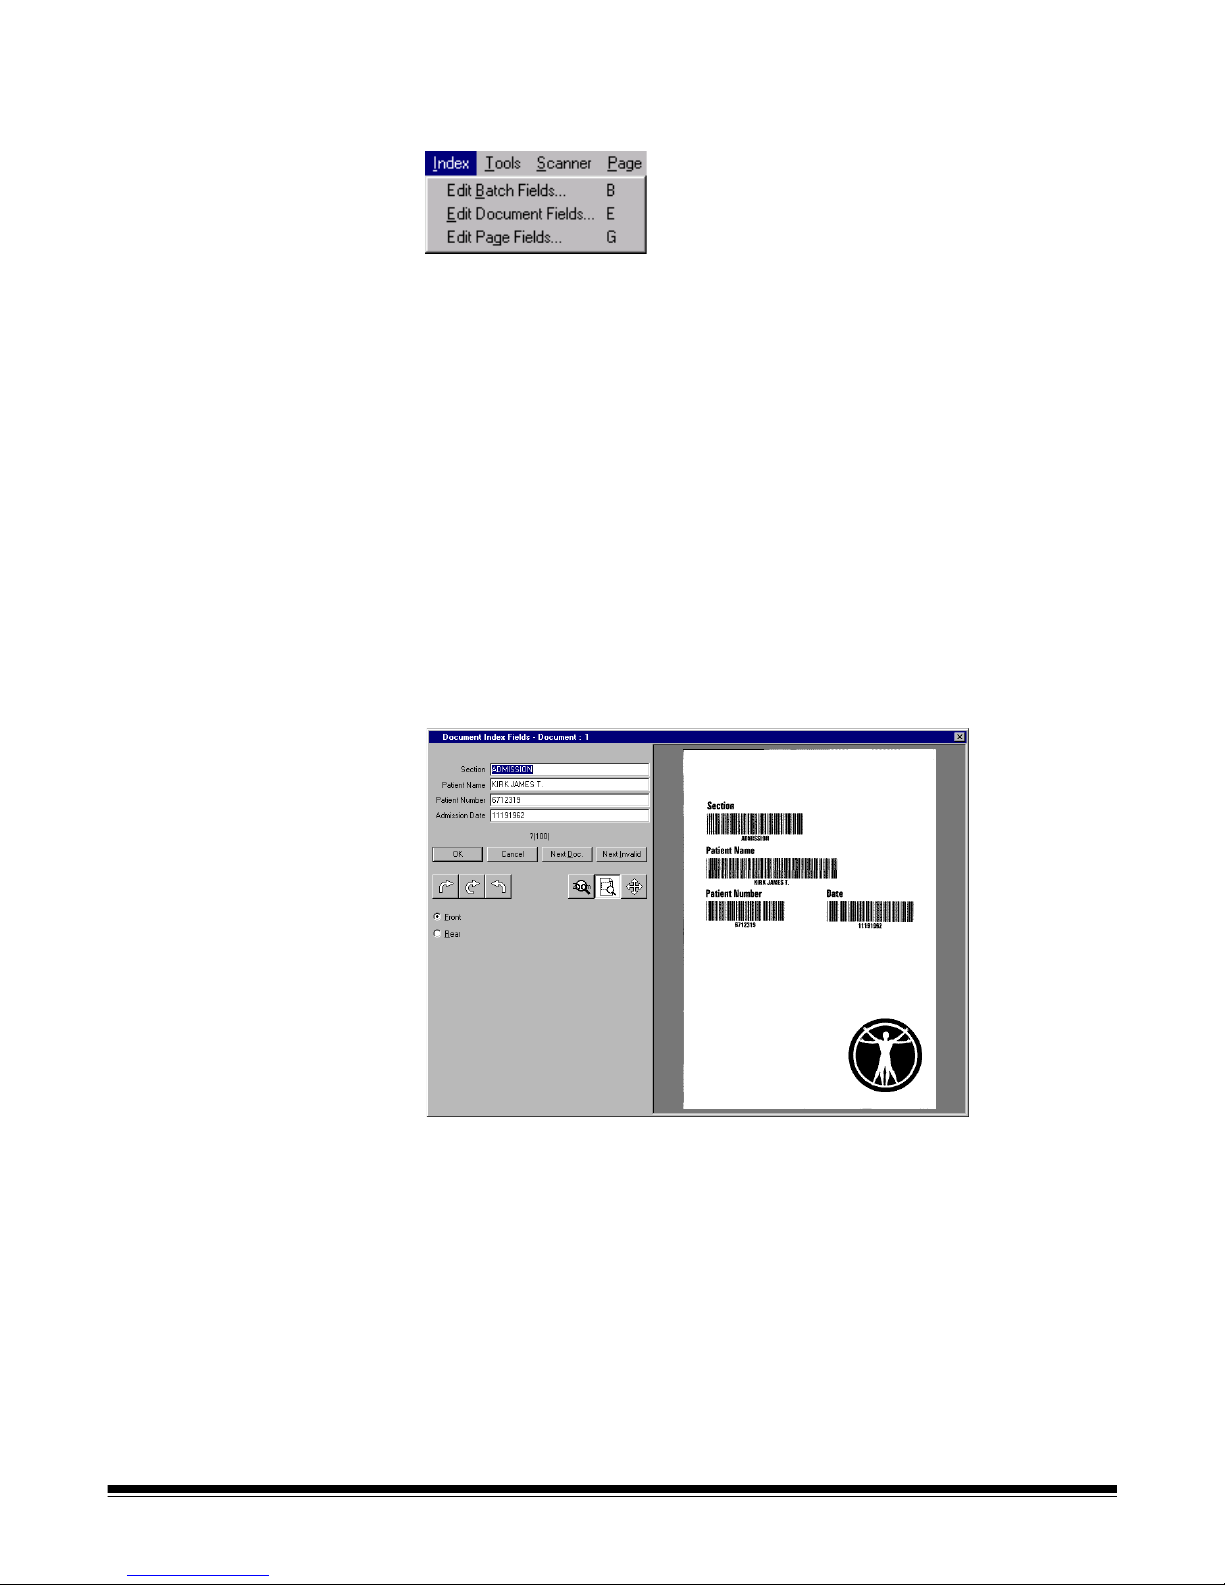
Index menu The Index menu provides access to the index fields at batch, document, and
page levels. Following is a summary of each option.
Edit Batch Fields—when selected, the Batch Index Fields dialog
box appears.
Edit Document Fields—when selected, the Document Index Fields dialog
box appears.
Edit Page Fields—when selected, the Page Index Fields dialog box appears.
This function is not yet available, as page level index fields are not available.
NOTE: Only one index field can be defined for Capture Software Lite for
i50/i60/i80 Scanners.
To enter or change a batch or document index field:
1. Choose Edit Batch Fields or Edit Document Fields, depending upon
which fields you would like to edit.
The appropriate dialog box appears, containing an entry and value, if one
exists, for each index field define d during Application setup. In addition, the
first page of the batch (for batch index fields) or document (for document
index fields) is displayed next to the index field entries.
A-63054 February 2004 3B-17
2. Change any information in the fields as requir ed .
As you tab from field to field, the audit rules for the fiel d are displayed (e.g.,
A(4) to enter up to four alphabetic characters).
3. Click OK to finish editing the current document/batch index fields.
The Image Display area of the Capture Software main window appears.
NOTE: Select Cancel to ignore any changes that were made. The Image
Display area of the Capture Software main window appears.
Page 100

For document index fields, two additional options are available:
•Select Next Doc to edit the index fields for the next document in a batch.
This option is useful for manual data entry indexing after scanning has
been completed.
•Select Next Invalid to go to the next document (or next field in the current
document) that has an invalid field value. This option is useful for index
correction after scanning has been completed.
NOTE: The last button used (Next Doc or Next Invalid) remains active,
allowing you to perform post-scanning indexing functions quickl y using
the Enter key without using the mouse.
Image Display options When editing index fields, several image display options are available. Image
display options are accessible from the Image Display Tool bar and an Image
Display context-sensitive menu.
Image Display Tool bar
From left to right:
•The rotation buttons rota te the dis playe d ima g e 90
o
, 180o, or 270o
clockwise. These buttons are useful to orient the image in the direction of
the index data (e.g., bar code data) that needs to be enter ed/corrected.
IMPORTANT: When an image is rotated and the index field changes are
saved (i.e., not canceled), any rotation of the image is
also saved.
•The Zoom image with magnifying glass tool is the same as the tool on the
Capture Software main window.
•The Zoom image on rectangle tool allows you to draw a rectangle around
a portion of the image that you want zoomed for display when editing index
fields. This zoom setting is saved per index field. As a result, you can define
a zoom zone for each index field and the image display auto matically zooms
to the appropriate part of the image when that field is edited.
•The Scroll image tool is the same as the tool on the Capture So ftware main
window. The results of scrolling are saved per index field.
•The Front and Rear radio buttons control which side of a duplex page is
displayed when editing index fields. The front/rear setting is sa ved per inde x
field. As a result, when tabbing between index fields, the image display can
automatically switch from front to rear and back again.
3B-18 A-63054 February 2004
 Loading...