

Page 1
A-61661 / January 2010 Part No. 6J7159
Installation Instructions for the Kodak Enhanced Printer
Accessory for use with Kodak i4000 Series Scanners
Following are instructions for installing the Kodak Enhanced Printer Accessory for the i4000 Series
Scanners. See the User’s Guide for procedures on how to use this accessory.
The Kodak Enhanced Printer Accessory includes:
1 Upper imaging guide
1 Upper flippable background accessory
1 Enhanced Printer carrier
1 Enhanced Printer Black Ink Cartridge
4 Ink blotters
NOTE: Additional ink colors and replacement ink
cartridges can be purchased online at:
scannerstore.Kodak.com.
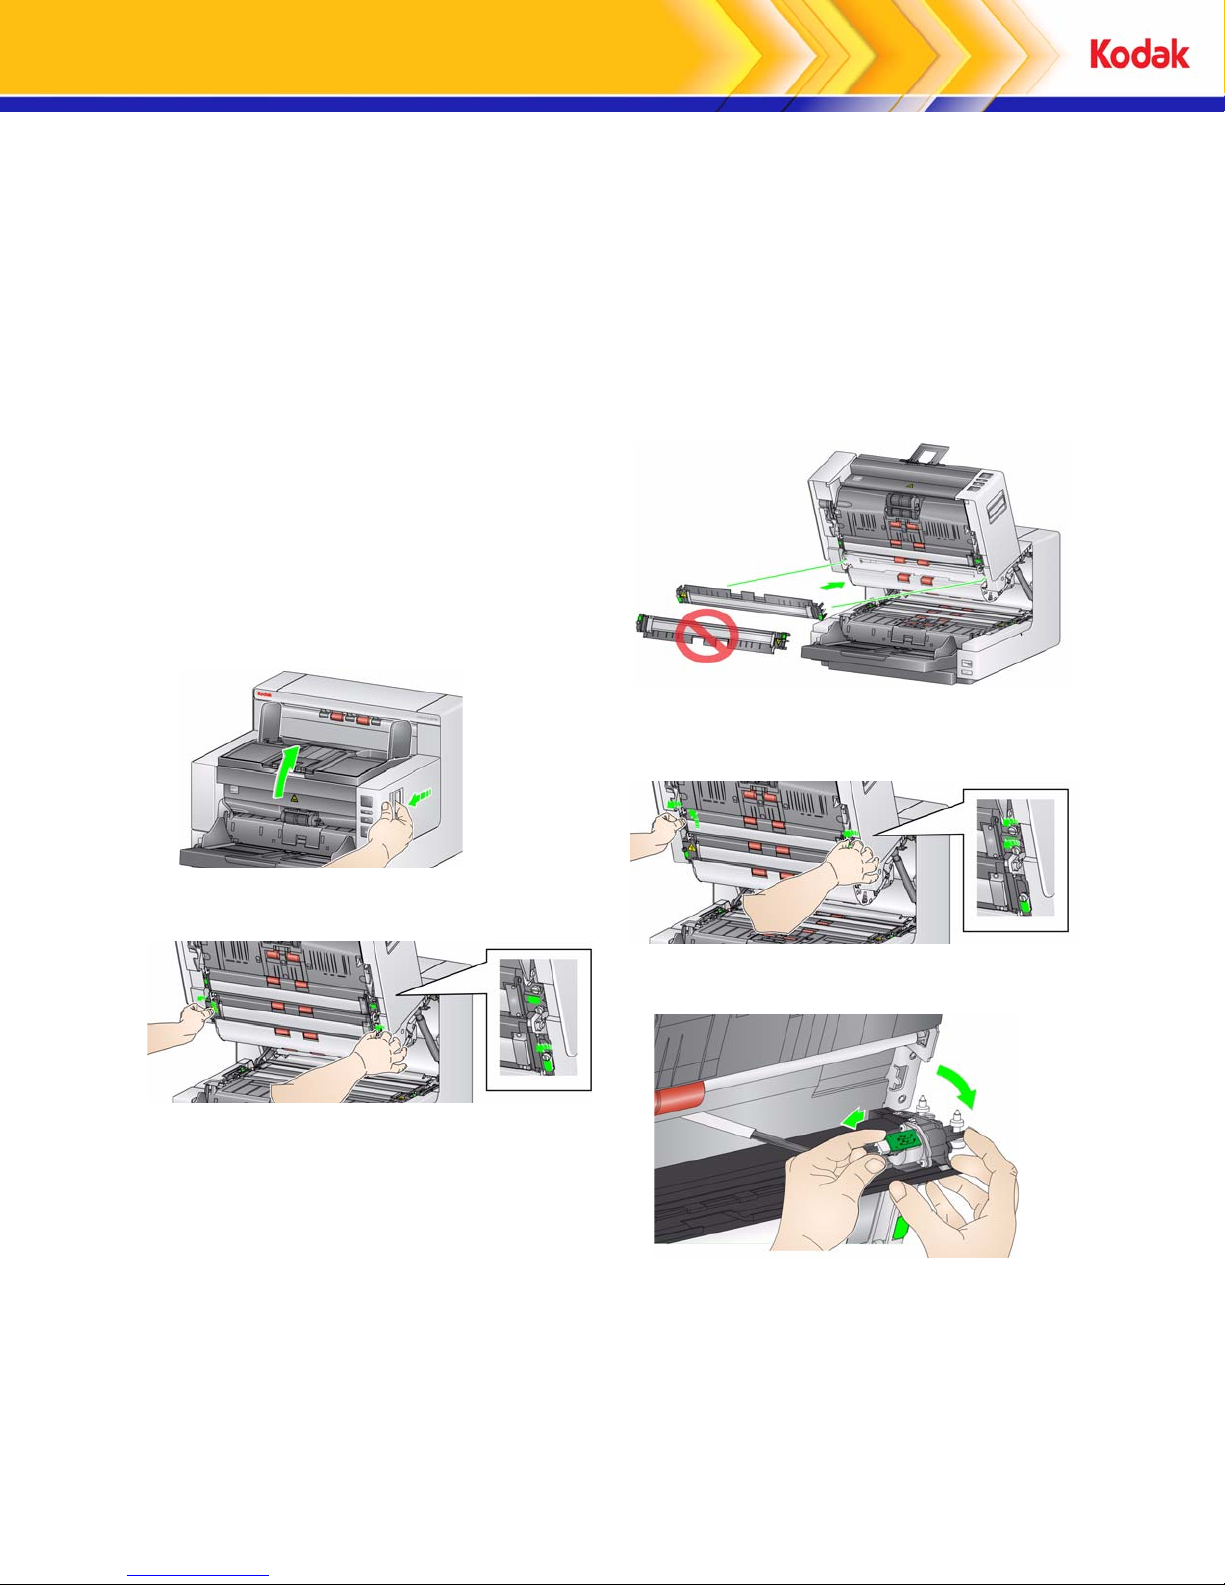
Before you begin be sure the scanner is turned off.
1. Open the scanner cover.
NOTE: Be sure to install the upper imaging guide
in the correct orientation.
4. Loosen the upper flippable background accessory. Use a screwdriver to loosen all four
screws.
2. Loosen the screws on each end of the upper
imaging guide and remove it from its position
3. Install the Enhanced Printer imaging guide and
tighten the screws to secure the imaging guide.
Do not over-tighten.
5. Unplug the connector to release and remove
the flippable background.
6. Install the flippable background by connecting
the cable and aligning and tightening the
screws in place. Do not over-tighten.
7. Install the ink blotters. See the User’s Guide,
Chapter 4, Document Printing, for instructions
for installing and replacing ink blotter strips.
Page 2
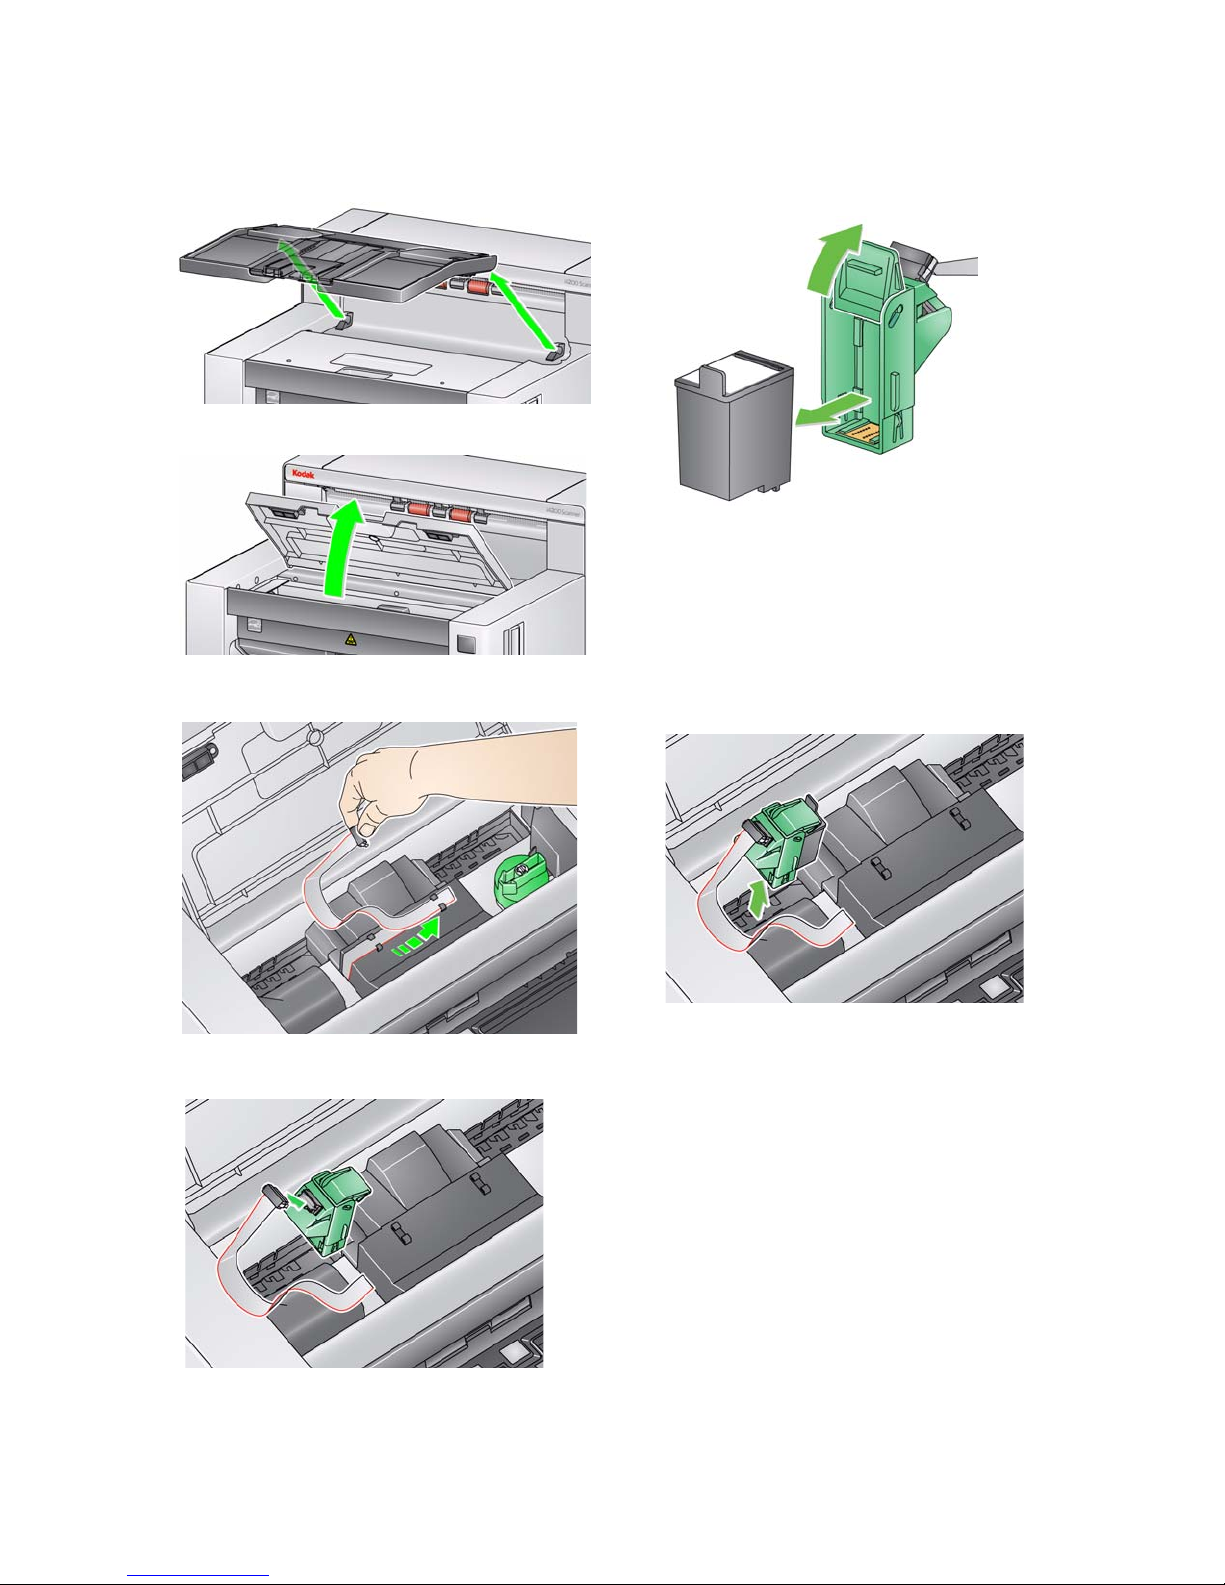
8. Close the scanner cover and remove the output tray.
9. Open the printer access cover.
10. Release the printer ribbon cable from the holding clips.
13. Lift the green tab on the pr inter carrier and slide
the new ink cartridge in the printer carrier and
close the tab.
NOTE: Ink cartridge disposal: consult the
Hewlett-Packard website for recycling
printing supplies or disposing of the ink
cartridges according to local regulation s.
14. Slide the printer carrier into the desired print
position. See the User’s Guide, Chapter 4,
Document Printing, for information on changing the print positions.
11. Push the connector on the printer cable firmly
into the printer carrier.
12. Open the ink cartridge package and remove
the tab from the new ink cartridge.
15. Close the printer access cover and reinstall the
output tray.
Eastman Kodak Company
343 State Street
Rochester, NY 14650 U.S.A.
© Kodak, 2010. All rights reserved.
TM: Kodak
 Loading...