

5KCM1204

TABLE OF CONTENTS
COFFEE MAKER SAFETY .....................................................................................6
Important safeguards .....................................................................................6
Electrical requirements ...................................................................................9
Electrical equipment waste disposal ..............................................................9
PARTS AND FEATURES .......................................................................................10
Parts and accessories ....................................................................................10
Display and control panel features ...............................................................11
OPERATING THE COFFEE MAKER ...................................................................12
Installing the water lter ...............................................................................12
Setting the clock ...........................................................................................14
Setting brew strength ...................................................................................14
Filling the Coffee Maker with water for brewing .........................................15
Pause and pour feature ................................................................................15
Filling the lter basket ..................................................................................16
Coffee dosage guide ....................................................................................17
Programming the auto feature .....................................................................18
Using the previously programmed auto time ...............................................19
Brewing coffee ..............................................................................................20
CARE AND CLEANING .......................................................................................21
Cleaning the Coffee Maker ..........................................................................21
TROUBLESHOOTING ..........................................................................................23
WARRANTY AND SERVICE ................................................................................24
ENGLISH
| 5
COFFEE MAKER SAFETY
IMPORTANT SAFEGUARDS
When using electrical appliances, basic safety
precautions should always be followed, including
the following:
1. Read all instructions. Misuse of appliance may result
in personal injury.
2. The heating element surface is subject to residual
heat after use. Do not touch hot surfaces. Use handles
or knobs.
3. To protect against re, electric shock and personal
injury do not immerse cord, plugs, or appliance in
water or other liquids.
6 | COFFEE MAKER SAFETY

COFFEE MAKER SAFETY
4. This appliance can be used by children aged from 8
years and above, and persons with reduced physical,
sensory, or mental capabilities or lack of experience
and knowledge if they have been given supervision or
instruction concerning use of the appliance in a safe
way and understand the hazards involved. Children
shall not play with the appliance. Cleaning and user
maintenance shall not be made by children unless they
are older than 8 years and are supervised.
5. Keep the appliance and its cord out of reach of
children under 8 years of age.
6. Unplug the Coffee Maker from outlet when not in use
and before cleaning. Allow to cool before putting on or
taking off parts and before cleaning the appliance.
7. Do not operate any appliance with a damaged cord
or plug or after the appliance malfunctions or has
been damaged in any manner. Return appliance to the
nearest Authorised Service Facility for examination,
repair, or adjustment.
8. The use of accessory attachments not recommended
by the appliance manufacturer may cause injuries.
9. Do not use outdoors.
10. Do not let cord hang over edge of table or counter, or
touch hot surfaces.
11. Do not place on or near a hot gas or electric burner, or
in a heated oven.
12. Do not use appliance for other than intended use.
Misuse of the appliance may result in personal injury.
ENGLISH
COFFEE MAKER SAFETY | 7

COFFEE MAKER SAFETY
13. Do not use appliance without lid properly placed
on carafe.
14. The carafe is designed for use with this appliance.
It must never be used on a range top or in a
microwave oven.
15. Do not set a hot carafe on a wet or cold surface.
16. Do not use a cracked carafe or a carafe having a loose
or weakened handle.
17. Do not clean carafe with abrasive cleaners, steel wool
pads, or other abrasive material.
18. Scalding may occur if the brew basket is opened
during the brew cycles.
SAVE THESE INSTRUCTIONS
THIS PRODUCT IS DESIGNED FOR HOUSEHOLD USE ONLY.
8 | COFFEE MAKER SAFETY
COFFEE MAKER SAFETY
ELECTRICAL REQUIREMENTS
Volts: 220-240 VAC
Hertz: 50-60 Hz
Wattage: 1100 Watts
NOTE: This Coffee Maker has a grounded
plug. To reduce the risk of electrical
shock, this plug will fit in an outlet only
one way. If the plug does not fit in the
outlet, contact a qualified electrician.
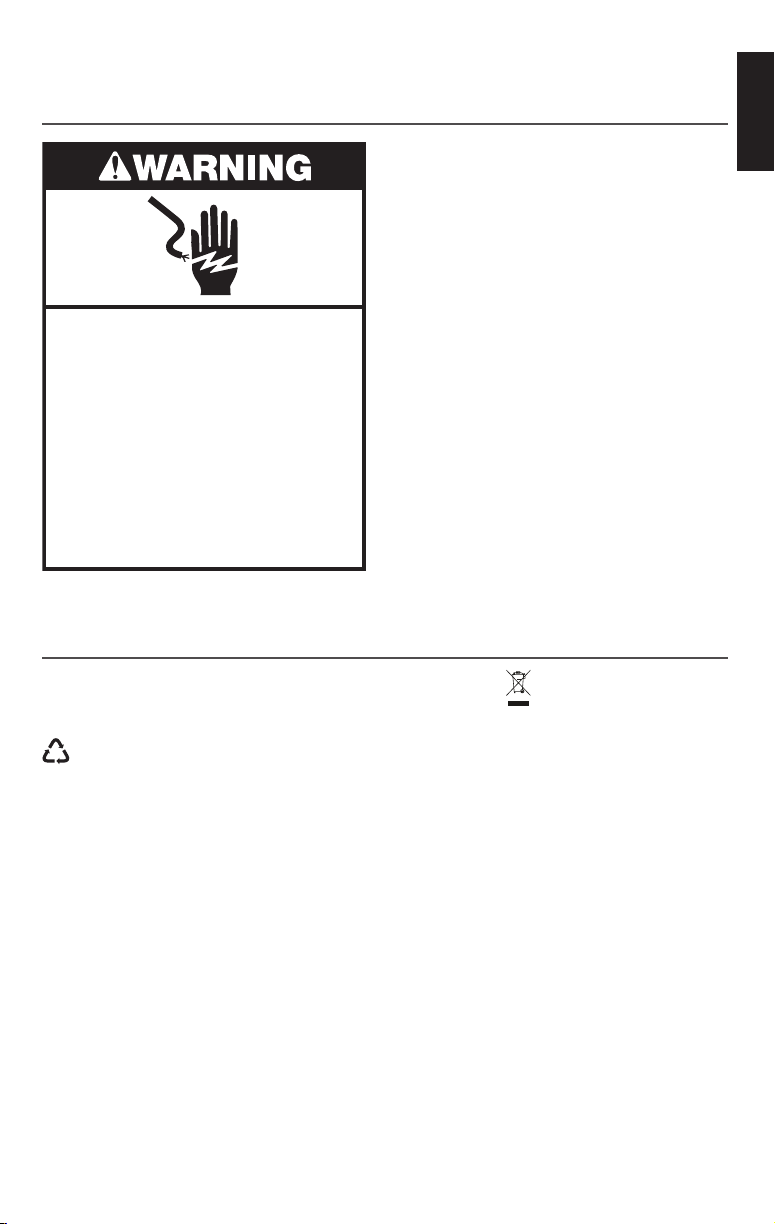
Electrical Shock Hazard
Plug into an earthed outlet.
Do not remove earth prong.
Do not use an adapter.
Do not use an extension cord.
Failure to follow these
instructions can result in
death, fire, or electrical shock.
ELECTRICAL EQUIPMENT WASTE DISPOSAL
Do not modify the plug in any way.
Do not use an extension cord. If the
power supply cord is too short, have
a qualified electrician or service personnel
install an outlet near the appliance.
ENGLISH
Disposal of packing material
The packing material is 100% recyclable
and is marked with the recycle symbol
. The various parts of the packing
must therefore be disposed of
responsibly and in full compliance
with local authority regulations
governing waste disposal.
Scrapping the product
- This appliance is marked in compliance
with European Directive 2012/19/EU,
Waste Electrical and Electronic
Equipment (WEEE).
- By ensuring this product is disposed
of correctly, you will help prevent
potential negative consequences for
the environment and human health,
which could otherwise be caused by
inappropriate waste handling of this
product.
- The symbol
on the product or
on the accompanying documentation
indicates that it should not be treated
as domestic waste but must be taken
to an appropriate collection Centre
for the recycling of electrical and
electronic equipment.
For more detailed information about
treatment, recovery and recycling of
this product, please contact your
local city ofce, your household waste
disposal service or the shop where you
purchased the product.
COFFEE MAKER SAFETY | 9

PARTS AND FEATURES
PARTS AND ACCESSORIES
Gold Tone permanent lter
Filter basket
Brew basket
Water tank window
Carafe lid
Glass carafe
Water tank lid
Programmable display
Water tank
Brew head
Filter assembly
Charcoal lter
10 | PARTS AND FEATURES
Warming plate
Cord storage in base
(not shown)

PARTS AND FEATURES
DISPLAY AND CONTROL PANEL FEATURES
Programmable display
Clock
ENGLISH
Brewing status icon
Auto indicator
Regular strength indicator
Small batch indicator
Control panel
Warming status icon
Bold strength indicator
Clean indicator
PARTS AND FEATURES | 11

OPERATING THE COFFEE MAKER
INSTALLING THE WATER FILTER
Before rst use
Wash the Gold Tone permanent lter, lter
basket, and carafe in hot, soapy water; then
rinse with clean water and dry. Do not use
abrasive cleansers or scouring pads.
NOTE: These parts can also be washed
in the top rack of the dishwasher.
Installing the charcoal lter:
Using the lter is optional but strongly
recommended. The Coffee Maker will
operate normally without the lter, but it
reduces contaminants that can impair
coffee avour.
The lter is for use only with municipally
treated tap water or well water that is
regularly tested for contaminants; it is not
intended to remove contaminants in water
that is not suitable for drinking.
IMPORTANT: Every time you install a new
water filter, run the Coffee Maker through
a complete brew cycle without coffee.
Use a full carafe of clean, cool water.
Place the charcoal filter in a
container filled with fresh, cool
water. The charcoal filter should
remain submerged in the water
1
for 10 minutes. Rinse the charcoal
filter under running water for
5 seconds after soaking.
Put the charcoal filter into the filter
2
assembly. Snap to close.
12 | OPERATING THE COFFEE MAKER
Lift the water tank lid using
3
the tab at the front of the lid.

OPERATING THE COFFEE MAKER
Electrical Shock Hazard
Place the filter assembly in the well
at the bottom of the water reservoir.
4
Push the filter assembly slightly to
make sure it fits snugly.
Plug into an earthed outlet.
Do not remove earth prong.
Do not use an adapter.
Do not use an extension cord.
Failure to follow these
instructions can result in
death, fire, or electrical shock.
ENGLISH
Cord is stored in base. If needed,
gently pull cord outwards until
fully extended or just long enough
5
to reach the outlet. Plug into a
grounded outlet.
OPERATING THE COFFEE MAKER | 13

OPERATING THE COFFEE MAKER
SETTING THE CLOCK
NOTE: When the Coffee Maker is first plugged in or when power is restored after
an interruption, the display will initially show 12:00.
To set the minutes: Press MINUTE.
The Hour setting will switch to a
To set the hour: Press HOUR.
The Hour setting will begin to blink.
The hour digits will change with
1
each press; or press and hold
to scroll rapidly.
SETTING BREW STRENGTH
solid display and the Minute setting
will begin to blink. The Minute digits
will change with each press, or press
2
and hold to scroll rapidly.
To save the current displayed time
and exit clock set up: Wait for
10 seconds or press any button
, , , , ).
(
To switch between Regular ( ) and
Bold (
1
NOTE: Regular is the default setting.
14 | OPERATING THE COFFEE MAKER
) brew strengths: Press
to toggle between Regular and Bold
until you reach the strength desired.

OPERATING THE COFFEE MAKER
FILLING THE COFFEE MAKER WITH WATER FOR BREWING
TIP: Brew two pots of fresh, cool water and discard before brewing the first
pot of coffee.
ENGLISH
Lift the water tank lid and fill
with enough fresh, cool water to
make the desired amount of coffee.
1
Use the cup indicators on the water
tank window to view water input.
Close the water tank lid.
NOTE: When using the Small Batch brew cycle, make sure to fill the tank with
only the amount of water needed to brew your desired number of cups. If you
put in 12 cups of water, the Coffee Maker will brew all 12 cups.
Place the carafe in the Coffee Maker.
Make sure the bottom of the carafe
is fully seated; otherwise, the Pause
2
and pour feature may not engage,
causing water and coffee to overflow
the filter basket.
PAUSE AND POUR FEATURE
The Pause and pour feature enables you to remove the carafe from the Coffee Maker and
pour a cup of coffee before brewing is nished. When the carafe is removed,
a special valve stops the ow of coffee from the lter basket. However, brewing
does not stop. If the carafe is not placed back in the Coffee Maker within 25 seconds,
water and coffee grounds will overow the lter basket.
OPERATING THE COFFEE MAKER | 15

OPERATING THE COFFEE MAKER
AM PM
Auto
Bold
Regular
Small Batch
Clean
FILLING THE FILTER BASKET
NOTE: Do not operate the Coffee Maker without the filter basket in place.
NOTE: If you do not wish to use the
Gold Tone permanent filter, you may
use a 12-cup, flat bottom paper coffee
filter instead; do not use both together.
When using a paper coffee filter,
place the filter inside the filter basket,
pressing the filter into the sides of the
filter basket. Pre-wetting the paper
filter is not required. The paper coffee
filter needs to be placed in the filter
basket before adding ground coffee.
Open the brew basket. Make sure
the filter basket and filter are placed
1
inside of the basket door before
adding coffee.
If using the Gold Tone permanent
filter, you may remove the filter from
the filter basket to add ground coffee,
if desired.
Use the “Coffee dosage guide”
to add the appropriate amount of
ground coffee to the filter basket.
2
Shake the filter basket slightly to
even out the bed of coffee, then
close the brew basket.
16 | OPERATING THE COFFEE MAKER

OPERATING THE COFFEE MAKER
COFFEE DOSAGE GUIDE
For best results, use a kitchen scale and the chart below when
lling the lter basket with coffee grounds. As a baseline, use
medium ground coffee (see picture to the left). Alter grind and/or
dosage to taste.
CUPS* WATER GRAMS COFFEE GRAMS
2
3
4
5
6
7
8
9
10
11
12
306 10
459 14
612 19
764 24
917 29
1070 33
1223 38
1376 43
1529 48
1682 52
1835 57
ENGLISH
*Use the measurements on the side of your carafe.
OPERATING THE COFFEE MAKER | 17

OPERATING THE COFFEE MAKER
PROGRAMMING THE AUTO FEATURE
To set the time the Coffee Maker
should begin brewing: Press the
To program the Coffee Maker to
brew coffee at a preset time: Press
the AUTO button (
The Auto indicator light will flash
1
and the time display will change
to the currently set Auto time
(0:00 is the default time.)
) one time.
HOUR button. The hour digits will
change with each press; or press and
hold to scroll rapidly.
2
Next, press the MINUTE button. The
Hour setting will stay solid, and the
Minute setting will begin to blink.
The minute digits will change with
each press; or press and hold
to scroll rapidly.
To save the current displayed
time and exit Auto: Wait for
10 seconds, or press any button
, , , , ).
(
3
The Auto indicator will remain lit and
the time display will go back to the
current time.
18 | OPERATING THE COFFEE MAKER
To cancel the Auto time after
programming is complete:
4
Press the AUTO button (
again; or press
.
)

OPERATING THE COFFEE MAKER
USING THE PREVIOUSLY PROGRAMMED AUTO TIME
These steps can be followed to save the Auto time after following the steps in the
“Programming the Auto feature” section.
To save the current displayed time
Press the AUTO button ( ).
The Auto indicator will flash and the
1
time display will show the previously
set Auto time.
and exit Auto: Wait for 10 seconds,
or press any button (
, , , ). The Auto
2
indicator will remain lit and the time
display will go back to the current
time.
,
ENGLISH
OPERATING THE COFFEE MAKER | 19

OPERATING THE COFFEE MAKER
BREWING COFFEE
TIP: Brew two pots of fresh, cool water and discard before brewing the first
pot of coffee.
Press the Brew button ( ) to begin
brewing coffee. The Coffee Maker
will beep 1 time, and the Brew icon
will light up when the Brew cycle
is started.
1
To brew 1-4 cups of coffee instead
of an entire pot, press the Small
Batch button (
pressing the Brew button (
Small Batch indicator will light up.
NOTE: Opening the brew basket while coffee is brewing will interrupt the brew
process and impair flavour.
) before
). The
The Coffee Maker will beep
three times when the Brew cycle
is complete, then will automatically
initiate the 30-minute warm mode.
2
The Brewing icon will turn off and
the Warming icon will light up.
After the warm mode completes,
one long beep will sound.
NOTE: Repeat steps 1 and 2 to brew
additional carafes of coffee. Allow the
Coffee Maker to cool for 5 minutes
before starting the next brew cycle.
To cancel the Brew cycle or warm
mode: Press the Brew button (
3
once. The Brew cycle or warm mode
will be cancelled.
IMPORTANT: The outside of the carafe may be warm to the touch
after brewing. Use discretion when placing the carafe on uncovered
surfaces immediately after brewing.
20 | OPERATING THE COFFEE MAKER
)

CARE AND CLEANING
CLEANING THE COFFEE MAKER
Calcium deposits (scale) from water will build up in the Coffee Maker over time and
impair brewing efciency and coffee quality. If you notice that it takes longer than
usual to brew or that the Coffee Maker is making unusual noises, then it is time
to descale. The Clean indicator will ash when the Coffee Maker has completed
100 brew cycles. Descaling should be done as soon as possible to preserve the
performance and life of your Coffee Maker.
NOTE: The Coffee Maker can be
descaled using a vinegar and water
solution or by using a packaged
descaling agent. Always mix the
descaling solution using cool water.
When using vinegar, fill the carafe
with a solution consisting of 1/2 vinegar
and 1/2 water.
When using a descaling agent, follow
the directions on the package for
the recommended ratios of descaling
agent and water to use.
The Coffee Maker should be run
through a complete Clean cycle using
a full tank of the descaling solution.
Before descaling, always remove
the water filter (see the “Installing
the water filter” section) and make
1
sure the filter basket contains no
coffee or coffee filters.
ENGLISH
CARE AND CLEANING | 21

Auto
Bold
Regular
Small Batch
Clean
CARE AND CLEANING
When the Clean indicator
begins to flash on the display,
run a clean cycle: Press the Clean
button (
will stop flashing. Then press the
Brew button to begin
2
the Clean cycle.
When the Clean cycle is complete
(approximately 15 minutes), 3 beeps
will sound, and the Clean indicator
will turn off.
). The Clean indicator
Run at least two water-only cycles
3
after the Clean cycle is complete.
x 2
Reinstall or replace the water filter.
Replace the filter every 3 months
4
under normal use. Replace it more
Reinstall the coffee filter.
5
often under heavy use.
IMPORTANT: The Clean cycle can be completed at regular intervals, if desired,
without the Clean indicator needing to light up. Follow these directions to
clean the Coffee Maker whenever desired.
22 | CARE AND CLEANING

TROUBLESHOOTING
Electrical Shock Hazard
Plug into an earthed outlet.
Do not remove earth prong.
Do not use an adapter.
Do not use an extension cord.
Failure to follow these
instructions can result in
death, fire, or electrical shock.
If your Coffee Maker should fail to
operate as expected, please check
the following:
1. If the display is not illuminated:
• Check to see whether the Coffee
Maker is plugged into a grounded
outlet. If it is, check the fuse or circuit
breaker on the electrical circuit the
Coffee Maker is connected to and
make sure the circuit is closed.
2. If only a portion of the water added to
the Coffee Maker actually brews:
• The Coffee Maker requires immediate
descaling. Please refer to the “Care
and cleaning” section.
3. If you hear three rapid tones:
• There is no water in the water tank.
The Coffee Maker will not brew. Fill
the water tank with fresh, cool water
and continue with the brewing
cycle as described in the
“Brewing coffee” section.
4. If “Er1” flashes on the display and you
hear one tone:
• A button may be jammed. Unplug
the Coffee Maker and press each
button several times. Plug the Coffee
Maker into a grounded outlet. If “Er1”
appears again on the display, repeat
this procedure.
5. If coffee overflows the filter basket:
• The brew basket is not completely
closed. Close the brew basket and
ensure it clicks rmly into place.
• Too much coffee was placed into the
lter basket.
6. If water exits from the back of the
Coffee Maker:
• Too much water was poured in to the
water tank.
If the problem is not due to one of
the above items, see the “Warranty
and service” section.
Do not return the Coffee Maker to the
retailer as they do not provide service.
ENGLISH
TROUBLESHOOTING | 23

WARRANTY AND SERVICE
KITCHENAID COFFEE MAKER WARRANTY
Length of Warranty: KitchenAid Will Pay For: KitchenAid Will Not Pay For:
Europe, Middle East
and Africa:
5KCM1204
Two years full
warranty from
date of purchase.
KITCHENAID DOES NOT ASSUME ANY RESPONSIBILITY FOR
INDIRECT DAMAGES.
CUSTOMER SERVICE
In U.K. and Ireland:
For any questions, or to find the nearest Authorised KitchenAid Service Centre,
please find our contact details below.
NOTE: All service should be handled locally by an Authorised KitchenAid
Service Centre.
Contact number for U.K. and Northern Ireland:
Tollfree number 0800 988 1266 (calls from mobile phones are charged standard
network rate) or call 0194 260 5504
The replacement parts
and repair labour
costs to correct
defects in materials or
workmanship. Service
must be provided by an
Authorised KitchenAid
Service Centre.
A. Repairs when Coffee Maker
is used for operations other
than normal household
beverage preparation.
B. Damage resulting from
accident, alterations,
misuse, abuse, or installation/
operation not in accordance
with local electrical codes.
Contact number for Ireland:
Tollfree number +44 (0) 20 8616 5148
E-mail contact for U.K. and Ireland:
Go to www.kitchenaid.co.uk, and click on the link “Contact Us” at the bottom
of the page.
Address for U.K. and Ireland:
KitchenAid Europa, Inc.
PO BOX 19
B-2018 ANTWERP 11
BELGIUM
General hotline number:
In other countries:
For all product related questions and after sales matters, please contact your dealer
to obtain the name of the nearest Authorised KitchenAid Service/Customer Centre.
For more information, visit our website at:
www.KitchenAid.co.uk
www.KitchenAid.eu
Specications subject to change without notice.
24 | WARRANTY AND SERVICE
©2017 All rights reserved.

W10842644B
Specications subject to change without notice.
©2017 All rights reserved.
03/17
 Loading...