

Page 1

CAR MULTIMEDIA SYSTEM
QUICK REFERENCE GUIDE
l
Page 2

LOOKING FOR MORE INFORMATION?
This Quick Reference Guide does not replace your System
Owner's Manual.
If you require additional information or are unsure of a specific
issue, refer to the System User's Manual for additional information.
iPod®
iPod® is a registered trademark of Apple Inc.
Bluetooth® Wireless Technology
The
Bluetooth
trademarks owned by
use of such marks by Kia is under license.
Bluetooth
A
Bluetooth
®
Wireless Technology word mark and logos are registered
Bluetooth
®
Wireless Technology enabled cell phone is required to use
®
Wireless Technology.
®
Wireless Technology SIG, Inc. and any
HD Radio™ Technology
HD Radio Technology manufactured under license from iBiquity Digital
Corporation. U.S. and Foreign Patents.
HD Radio™ and the HD, HD Radio, and “Arc” logos are proprietary trademarks of iBiquity Digital Corp.
All Map Database cannot be copied without permission.
Warning: This is protected by U.S. copyright laws. All rights not expressly granted are
reserved.
You may not otherwise reproduce, modify, and distribute the content without M&Soft, Inc's
prior written consent.
Please ensure that this information is accurately stated and approved for use in this context.
Page 3

•
SiriusXM service requires a subscription, sold separately, after 3-month trial
included with vehicle purchase. If you decide to continue your SiriusXM ser-
at the end of your trial subscription, the plan you choose will automatically
vice
renew and bill at then-current rates until you call Sirius XM at 1-866-635-2349 to
cancel. See our Customer Agreement for complete terms at www.siriusxm.com.
Programming subject to change. Sirius satellite service is available only to those
at least 18 and older in the 48 contiguous USA, D.C., and PR (with coverage
limitations). Traffic information not available in all markets. See siriusxm.com/traf
for details. Sirius, XM and all related marks and logos are trademarks of Sirius
fic
XM Radio Inc.
WARNING
• Driving while distracted can result in a loss of vehicle control that may lead to an
accident, severe personal injury, and death. The driver’s primary responsibility is in
the safe and legal operation of a vehicle, and use of any handheld devices, other
equipment, or vehicle systems which take the driver’s eyes, attention and focus
away from the safe operation of a vehicle or which are not permissible by law
should never be used during operation of the vehicle.”
•
UVO eServices is compatible with many popular smartphone devices. Please
see MyUVO.com for phone compatibility.
•
App Store and Google Play are service marks of Apple Inc. and Google Inc.
respectively. No charge for the UVO eServices App. App runs on your smart-
cellular data service. Normal data rates will apply.
phone
•
HD Radio and the HD Radio logo are proprietary trademarks of iBiquity Digital
Corporation.
•
24-hour Roadside Assistance is a service plan provided by Kia Motors America,
Inc. Certain limitations apply. Coverage details are available in the Kia Warranty
and Consumer Information Manual. For access to Enhanced Roadside
Assistance, a connected mobile phone via Bluetooth within the cellular service
coverage area is required.
•
Vehicle Diagnostics do not take the place of regularly scheduled maintenance.
Feature checks powertrain, chassis, and airbag systems only. For factory-recom-
maintenance schedule, see the Maintenance Feature of UVO eServices
mended
or the Owner’s Manual.
•
911 Connect activates after an airbag deployment. Feature requires a connected
mobile phone via Bluetooth. Dependant on cellular service coverage.
•
The REAR-CAMERA display is not a substitute for proper and safe backing-up
procedures. The REAR-CAMERA display may not display every object behind
the vehicle. Always drive safely and use caution when backing up.
-
Page 4

Table of Contents
Controls and Functions ....................................................................................... 2
Sound Settings ....................................................................................................5
Display Settings .................................................................................................. 7
FM/AM Mode ...................................................................................................... 8
HD RadioTM Mode ........................................................................................... 11
SIRIUS Mode ....................................................................................................13
CD Mode ........................................................................................................... 16
MP3 CD Mode .................................................................................................. 18
USB Mode .........................................................................................................21
iPod Mode ......................................................................................................... 25
AUX Mode .........................................................................................................27
Bluetooth® Audio .............................................................................................. 28
My Music Mode .................................................................................................29
Navigation ......................................................................................................... 32
Bluetooth® Wireless Technology .....................................................................47
Voice Recognition ............................................................................................. 59
Page 5
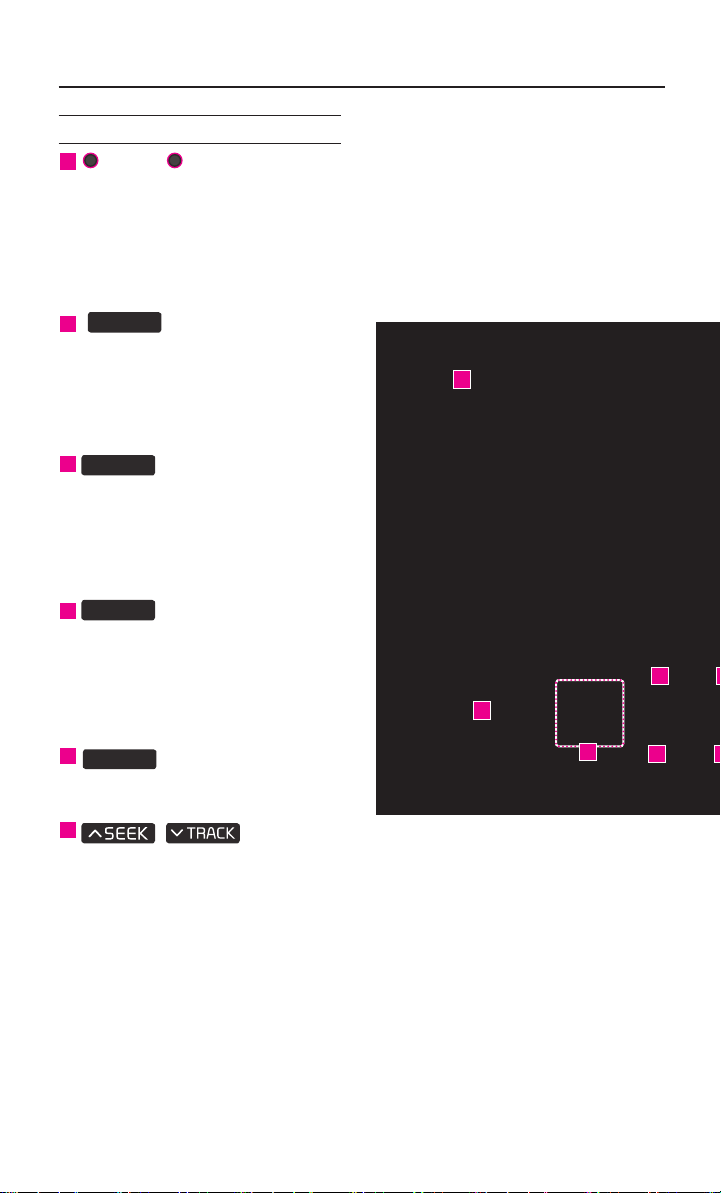
Controls and Functions
Control Panel
1
POWER
•
When power is off, press to turn power on.
•
When power is on, press and hold (over 1.2 seconds) to turn power off.
•
When power is on, press shortly (under 1.2 seconds) to turn Audio off.
•
Turn left/right to control volume.
FM/AM
2
•
Selects FM/AM mode.
•
Each time the key is pressed, the mode is
changed in order of FM1 → FM2 →
AM → FM1.
3
Converts to SIRIUS mode
Each time the key is pressed, the mode is
changed in order of SIRIUS1 → SIRIUS2
SIRIUS3 → SIRIUS1.
MEDIA
4
•
Displays CD, MP3, USB, iPod, AUX,
Bluetooth
•
If the media is not connected or a disc is not
inserted, corresponding modes will be disabled.
VOL
SAT
®
Audio Streaming, My Music modes.
→
7
1
2 3
5
PHONE
6
Takes user to phone screen.
6
,
Pressed shortly. (under 0.8 seconds)
•
In FM/AM mode, plays previous/next frequency.
•
In SIRIUS mode, plays the previous/next channel.
•
In CD/MP3/USB/iPod/My Music modes, changes
the track, file or chapter.
Pressed and held. (over 0.8 seconds)
•
In FM/AM mode, continuously changes the frequency until
plays the current frequency.
•
In SIRIUS mode, continuously changes the channel until the key is released
and plays the current channel.
•
In CD/MP3/USB/iPod/My Music modes, rewinds or fast-forwards the track or file.
2
the key is released and
98
Page 6
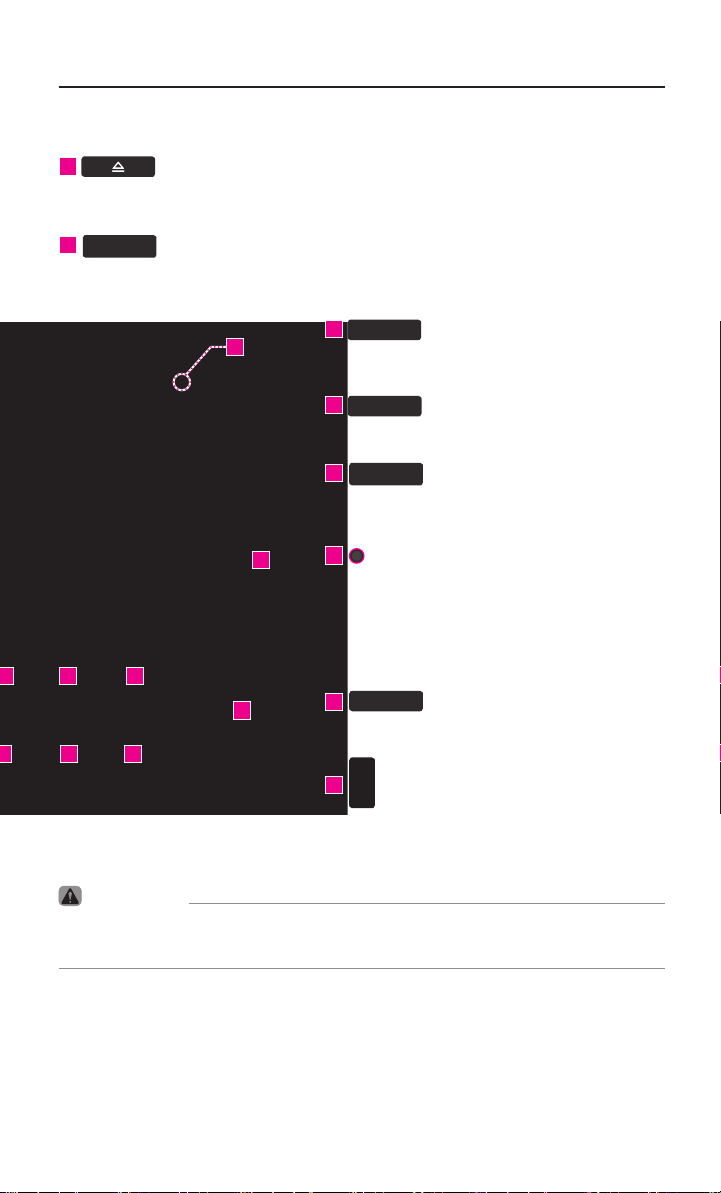
7
Press to insert or eject disc.
MAP
8
VOICE
Displays the map for the current position.
13
14
43 5
12
9 10
11
Controls and Functions
9
DEST
Displays the Destination setup menu.
10
ROUTE
Displays Route menu screen.
INFO
11
Displays the Setup mode.
12
•
In FM/AM mode, changes the frequency.
•
In SIRIUS mode, changes the channel.
•
In CD, MP3, USB, iPod, My Music modes,
changes the track, file or chapter.
13
Resetting the system.
14
SETUP
TUNE
RESET
SD Card insert slot.
CAUTION
•
Always give your full attention to driving. Do not operate your system in such a
way that you may be distracted from driving your vehicle.
3
Page 7
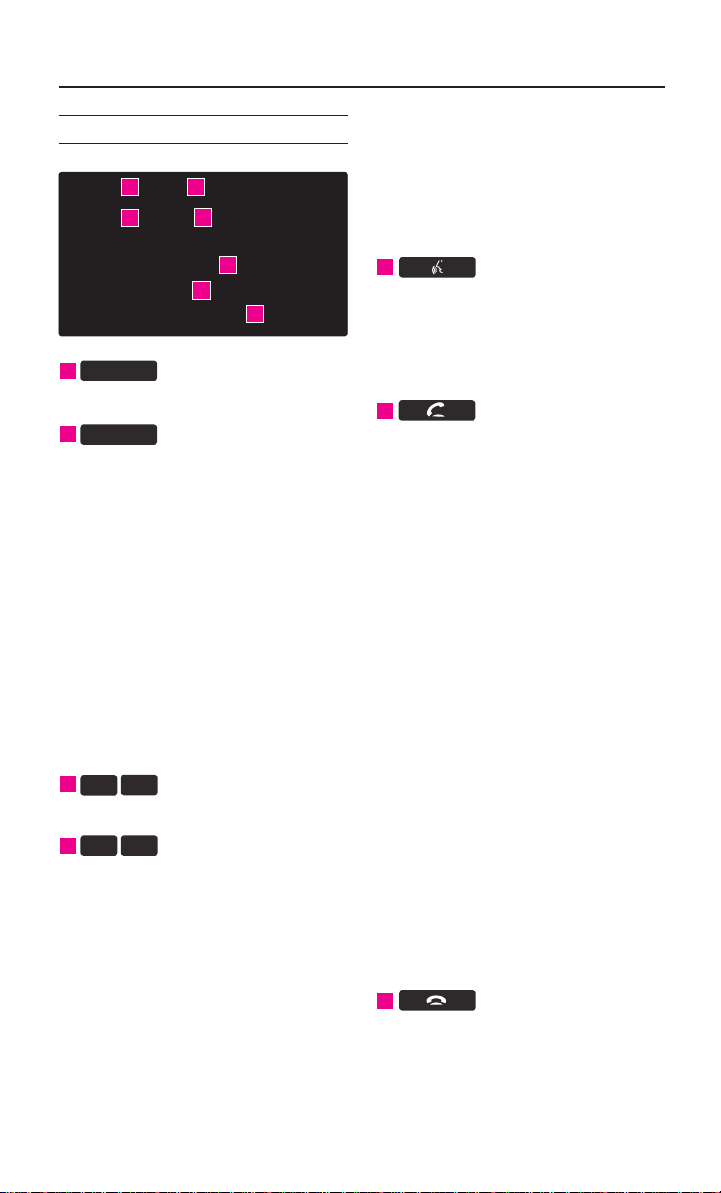
Controls and Functions
Steering wheel
1 2
3
MUTE
1
Mutes the sound.
2
MODE
•
Each time this key is pressed, the mode
is changed in order of FM1→ FM2 → AM
→
SIRIUS1 → SIRIUS2 → SIRIUS3 →
USB or iPod → AUX → Bluetooth
→
My Music.
•
If the media is not connected or a disc
is not inserted, corresponding modes
will be disabled.
•
Press and hold the key (over 0.8 seconds) to turn the Audio system on/off.
•
When power is off, press the key to turn
power back on.
3
VOL+
VOL-
Controls the volume.
Λ V
4
Pressed shortly. (under 0.8 seconds)
•
In FM/AM mode, searches broadcast frequencies saved to Presets.
•
In SIRIUS modes, searches broadcast channels saved to Presets.
•
In CD/MP3/USB/iPod/My Music modes,
changes the track, file or chapter.
Pressed and held. (over 0.8 seconds)
•
In FM/AM mode, automatically
searches broadcast frequencies
4
5
6
7
®
Audio
and channels.
•
In SIRIUS modes, automatically
searches broadcast channels.
•
In CD/MP3/USB/iPod/My Music modes:
rewinds or fast forwards the track of file.
5
When pressed shortly. (under 0.8 seconds)
•
Activates voice recognition.
When pressed and held. (over 0.8 seconds)
•
Ends voice recognition.
6
Pressed shortly. (under 0.8 seconds)
•
When pressed in the phone screen,
displays call history screen.
•
When pressed in the dial screen,
makes a call.
•
When pressed in the incoming call
screen, answers the call.
•
When pressed during call waiting,
switches to waiting call (Call Waiting)
Pressed and held. (over 0.8 seconds)
•
When pressed in the Bluetooth®
Handsfree phone mode, redials the
last call.
•
When pressed during a Bluetooth®
Handsfree call, switches call back to
mobile phone (Private).
•
When pressed while calling on the
mobile phone, switches call back to
®
Bluetooth
when Bluetooth
Handsfree (Operates only
®
Handsfree is con-
nected).
7
•
When pressed during a call, ends the
phone call.
•
When pressed in the incoming call
screen, rejects the call.
4
Page 8
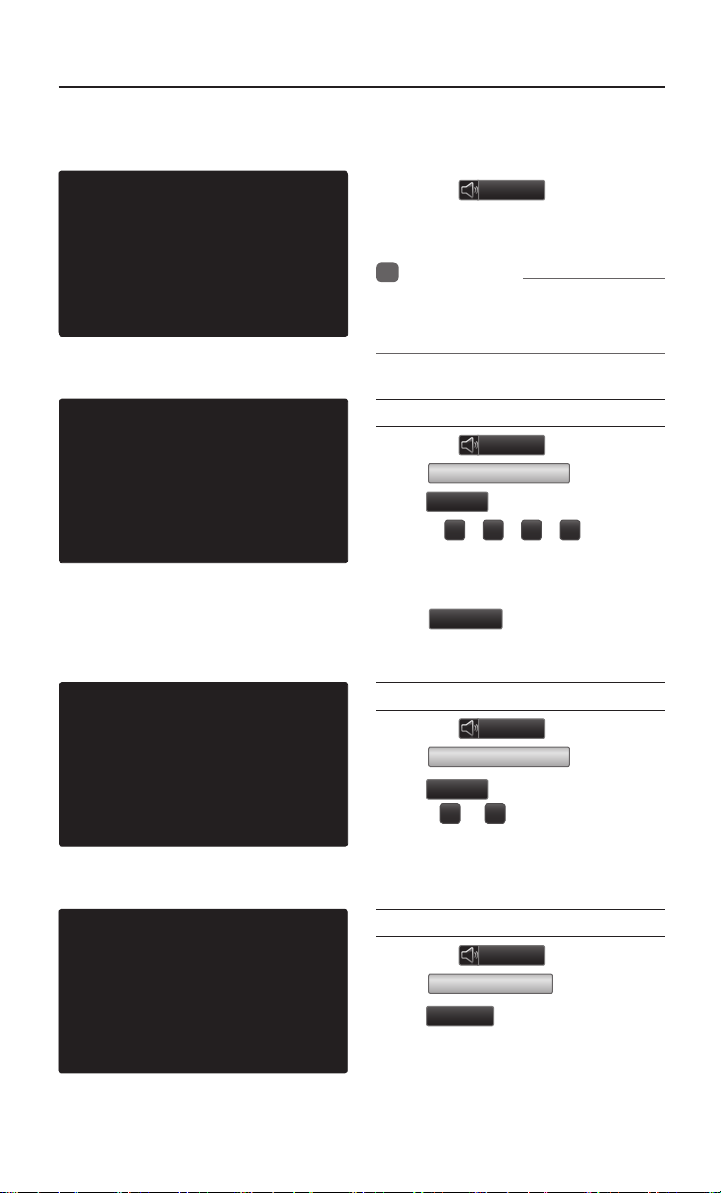
Sound Settings
Sound Settings
Press the
Sound
button to
display the sound setting screen.
Information
i
•
UVO eServices is an optional feature
available in select vehicles on select trims.
Setting Balance/Fader
Press the
Press
press
Use the ▲ , ▼ , ◀ , ▶ buttons to
move the cursor on the control screen
to the desired position.
Press
the center position.
Sound
button ▶
Fader/Balance
Done
.
CENTER
to restore sound to
▶ Set and
Setting Bass/Mid/Treble
Press the
Press
press
Use the ◀ or
Bass/Mid/Treble settings.
Sound
button ▶
Bass/Mid/Treble
Done
.
buttons to adjust the
▶
▶ Set and
Setting Volume Ratio
Press the
Press
press
These options are used to set the volume ratio by selecting from Navigation
Priority/ Audio Priority/Same Ratio.
Sound
Volume Ratio
Done
.
button ▶
▶ Set and
5
Page 9
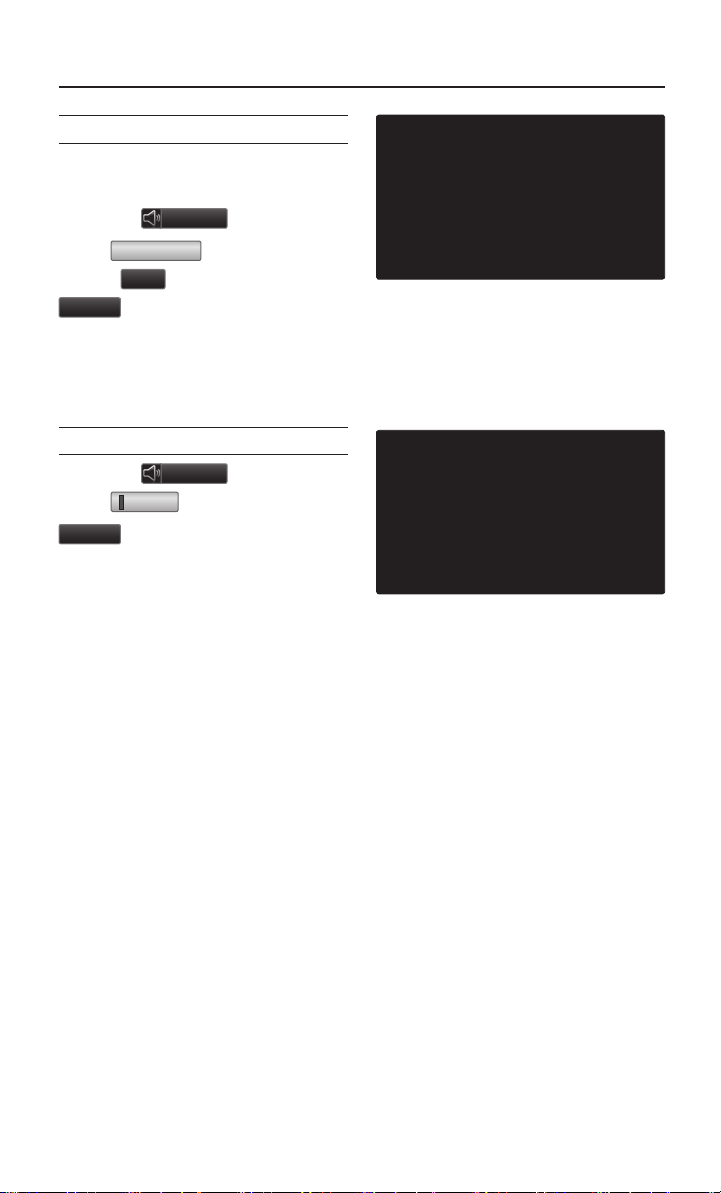
Sound Settings
Advanced
Speed Dependent Volume Control
Press the
Press
feature
Done
The volume level is controlled automatically according to the vehicle
speed.
Setting Beep
Press the
Press
Done
Each press of this button turns the
BEEP tone on/off.
Sound
Advanced
▶ Set and press
On
.
Sound
▶ Set and press
Beep
.
button ▶
▶ Turn the
button ▶
6
Page 10
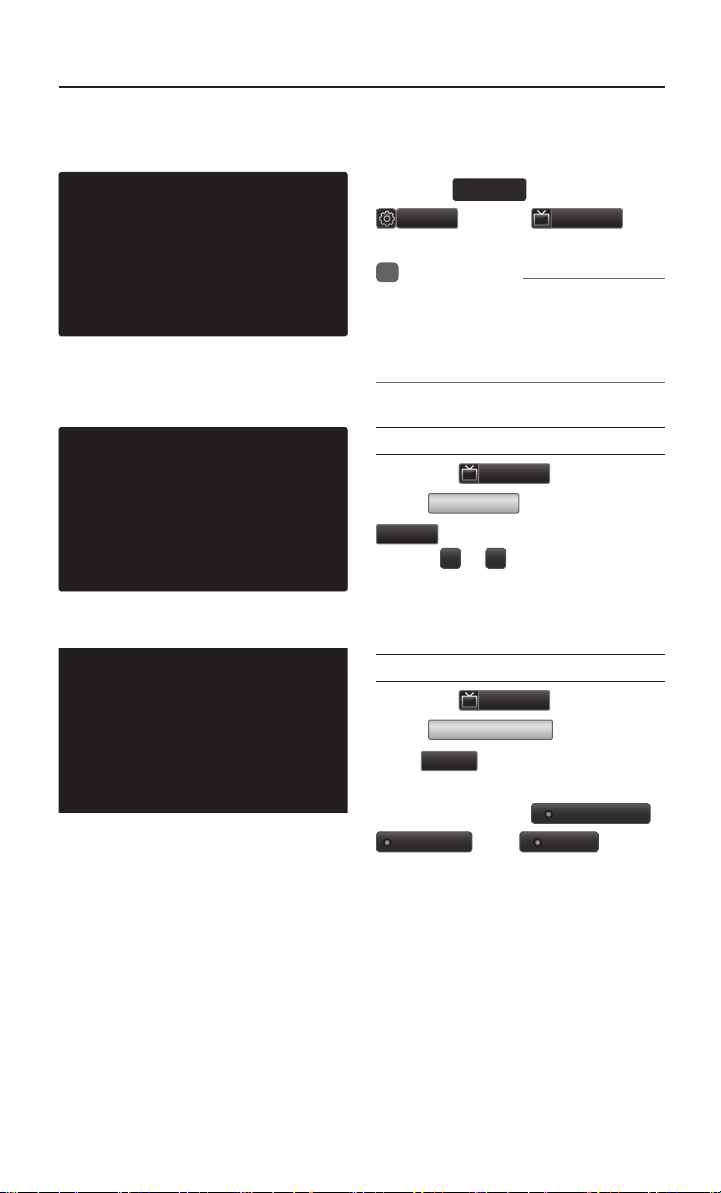
Display Settings
Display Settings
INFO
Press the
i
•
Adjusting Brightness
Press the
Press
Done
Use the ◀ or ▶ buttons to adjust the
display brightness.
SETUP
▶ Press
Setup
Information
UVO eServices is an optional feature
available in select vehicles on select
trims.
Brightness
.
key ▶ Press
Display
Display
button ▶
▶ Set and press
.
Setting Display Mode
Press the
Press
press
Press the button for the desired display mode from
Daylight
Display
Display Mode
.
Done
, and
button ▶
▶ Set and
Automatic
modes.
Light
,
7
Page 11

FM/AM Mode
Starting Mode
Press the
FM/AM
key to change
the mode in order of FM1 → FM2
→ AM.
When the power is OFF, pressing the
FM/AM
play a radio broadcast
key will turn the power on and
Using Seek
Press the
,
automatically search for frequencies.
•
Shortly press the key (under 0.8 seconds) :
Plays previous/next frequency
•
Press and hold the key (over 0.8 seconds) :
Changes the frequency while pressed
and receives
release.
the next frequency upon
key to
Using TUNE
Turn the
select the frequency.
•
•
TUNE knob left/right to
FM1/FM2 : Increases/decreases by
200kHz
AM : Increases/decreases by 10kHz
Selecting Presets
From the 6 presets, select the frequency you want to listen to.
8
Page 12

FM/AM Mode
Saving Radio Frequency
Saving Manually
After selecting frequency ▶ Press
and hold (over 0.8 seconds) the
preset button.
•
A 'beep' will sound and the frequency will be saved to the selected
preset button.
Saving Automatically
Press the
save receivable frequencies to Preset
buttons.
A total of 18 frequencies with six preset frequencies each for FM1/FM2/
AM modes can be saved.
Auto Store
to automatically
Scanning Radio
Frequency
Press the
all radio frequencies.
Starting from the current frequency,
frequencies with superior reception
are scanned for 5 seconds and the
previous frequency is restored.
Scan
button to scan
9
Page 13
ON
ON
Off
FM/AM Mode
Using the Menu Buttons
Press the
Menu
button to use the
Preset Scan menu.
Preset Scan
Press the
Preset Scan
•
Frequencies saved to the 6 preset
Menu
button ▶ Press
.
buttons are each played for 5 seconds and the previous frequency is
restored.
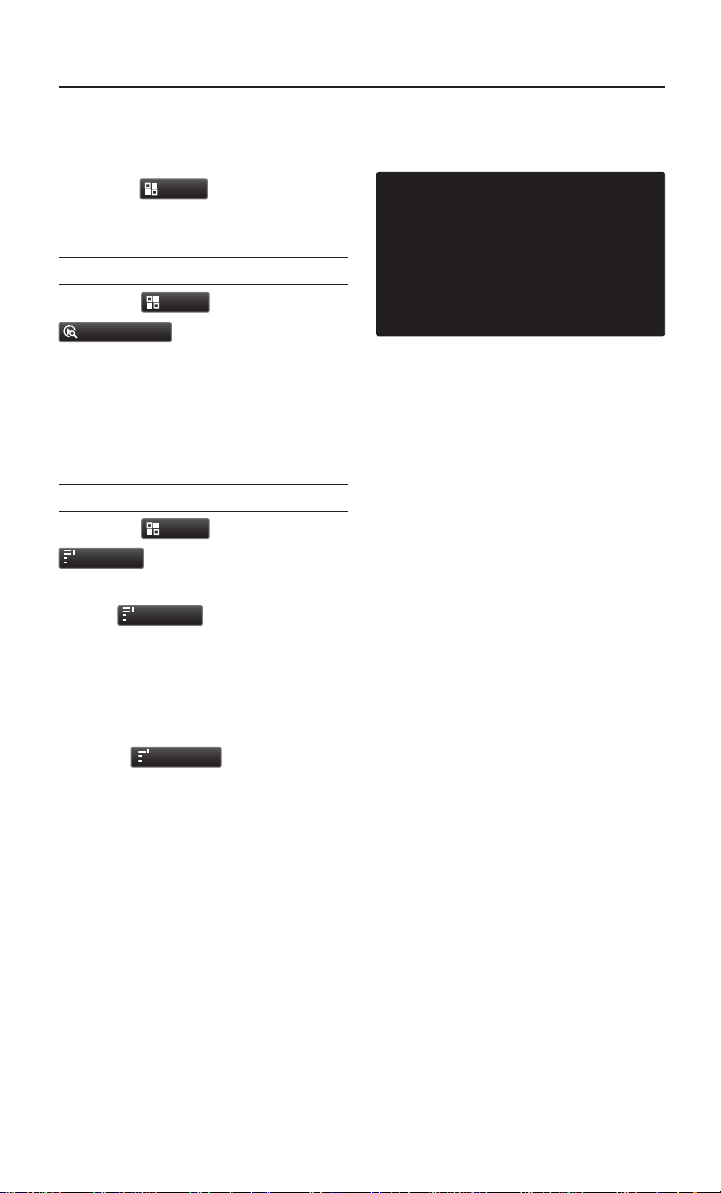
Text On/Text Off
Text On
.
Press the
The Text feature is turned on/off.
•
If the
(Text off state), information will not
be displayed even if there is infor
mation being transmitted from the
broadcast station.
•
If the
played (Text on state), then broadcast information will be displayed.
Information may not be displayed if
th
mitted from the broadcast station.
Text On
e
re is no information being trans-
Menu
button ▶ Press
button is displayed
Text Off
button is dis-
-
10
Page 14

HD RadioTM Mode
Starting Mode
Press the
FM/AM
key to turn on
Radio mode.
If an HD RadioTM broadcast is received,
the radio mode will switch from analog
broadcast to HD Radio
TM
broadcast.
Operating HD RadioTM
Mode
Selecting a Frequency
As HD RadioTM reception is included
within FM/AM mode, the methods of
moving between channels, saving presets, searching, or methods of searching frequencies are identical. However,
while the HD Radio
display will become active when within
regions where an HD Radio
can be received.
TM
related icon
TM
signal
Using TUNE
Turn the TUNE knob left/right to
select the frequency.
Selecting through Preset
From the 6 presets, select the HD RadioTM
broadcast you want to listen to.
11
Page 15

HD RadioTM Mode
Song-Tagging
The song tagging feature provides
a way to capture broadcasted song
information from the radio for future
purchase in iTunes
Upon connection of an Apple audio
playback device , the "tagged songs"
will be transferred to your iTunes
account in your Tagged songs folder.
HD RadioTM Digital
Broadcast On/Off
®
.
®
.
Press the
the
HD Radio
HD RadioTM Broadcasts can be turned
On and Off for HD RadioTM FM and
AM mode.
INFO
SETUP
key ▶ Press the
Setup
▶ Press
key ▶ Press
On
/
Off
.
12
Page 16

SIRIUS Mode
Starting Mode
Press the
the mode in order of SIRIUS1 →
SIRIUS2 → SIRIUS3.
When the power is OFF, pressing the
key will turn the power on
SAT
and play an SIRIUS Radio broadcast.
key to change
SAT
Using SEEK
Press the
on the control panel for under 0.8
seconds.
The previous or next channel will be
selected.
,
key
Using TUNE
Turn the TUNE knob to display
the previous or next channel
information.
After a brief moment, the selected
channel will be played.
Selecting Presets
From the 6 presets, select the channel you want to listen to.
13
Page 17

SIRIUS Mode
Selecting through Channel/
Category List
Press the
the desired category and channel.
Once selected, the previous screen will
be restored and the selected channel
will begin playing.
Saving SIRIUS
Channels
Saving Manually
After selecting channel ▶ Press
and hold (over 0.8 seconds) the
preset button.
•
A confirmation ‘beep’ will be heard
and the channel will be saved to the
selected preset button.
button ▶ Select
List
14
Page 18
SIRIUS Mode
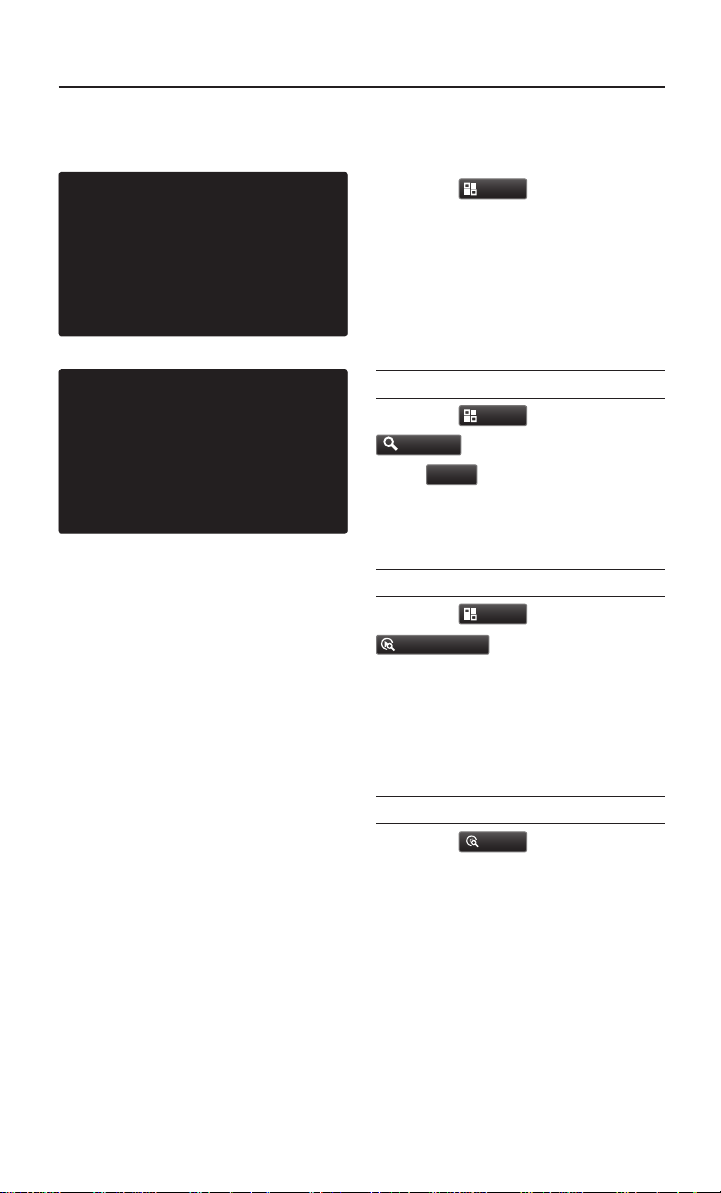
Using the Menu Buttons
Press the
the Search, Preset Scan, and Scan
menus.
Search
Press the
Search
press
Enter the number of the channel you
want to receive.
Preset Scan
Press the
Preset Scan
Channels saved to the 6 preset buttons are each played for 10 seconds
and then the previous channel is
restored.
Menu
button to use
Menu
button ▶ Press
▶ Enter numbers and
Done
.
Menu
button ▶ Press
.
Scan
Press the
all channels.
Starting from the current channel,
channels with superior reception are
scanned for 10 seconds and the previous channel is restored once scanning is complete.
Scan
button to scan
15
Page 19
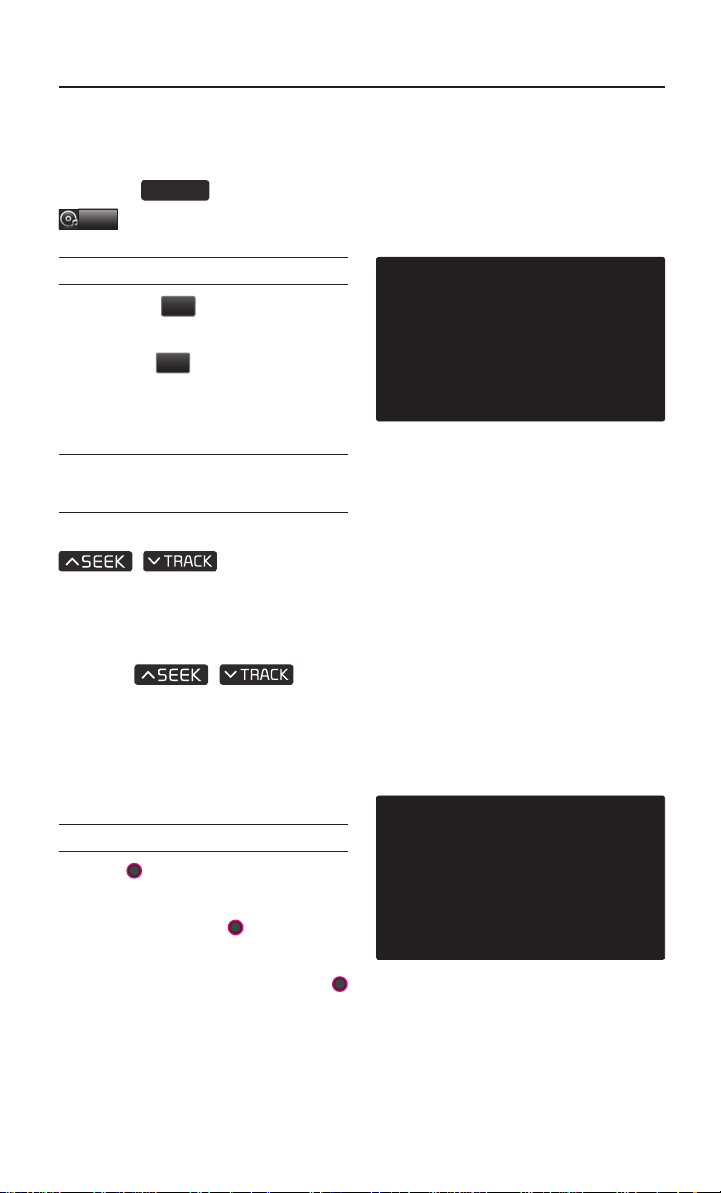
CD Mode
Starting Mode
.
MEDIA
key ▶ Press
Press the
CD
Playing a CD
•
Press the
track.
•
Press the ll button to pause the
track.
▶
button to play the
Fast-forwarding or Rewinding
CD Tracks
While playing ▶ Press and hold the
key. (over 0.8
,
seconds)
This will rewind or fast-forward the
track.
While the
being pressed, the track will rewind or
fast-forward at 20x speed.
Once released, the track will begin
playing at normal speed.
key is
,
Searching CD Tracks
Turn the
tracks ▶ Once the desired track name
is displayed, press the
When searching tracks, the track number
is displayed in orange. Pressing the
TUNE
track.
16
TUNE knob ▶ Search
knob
will play the corresponding
TUNE
knob.
Page 20
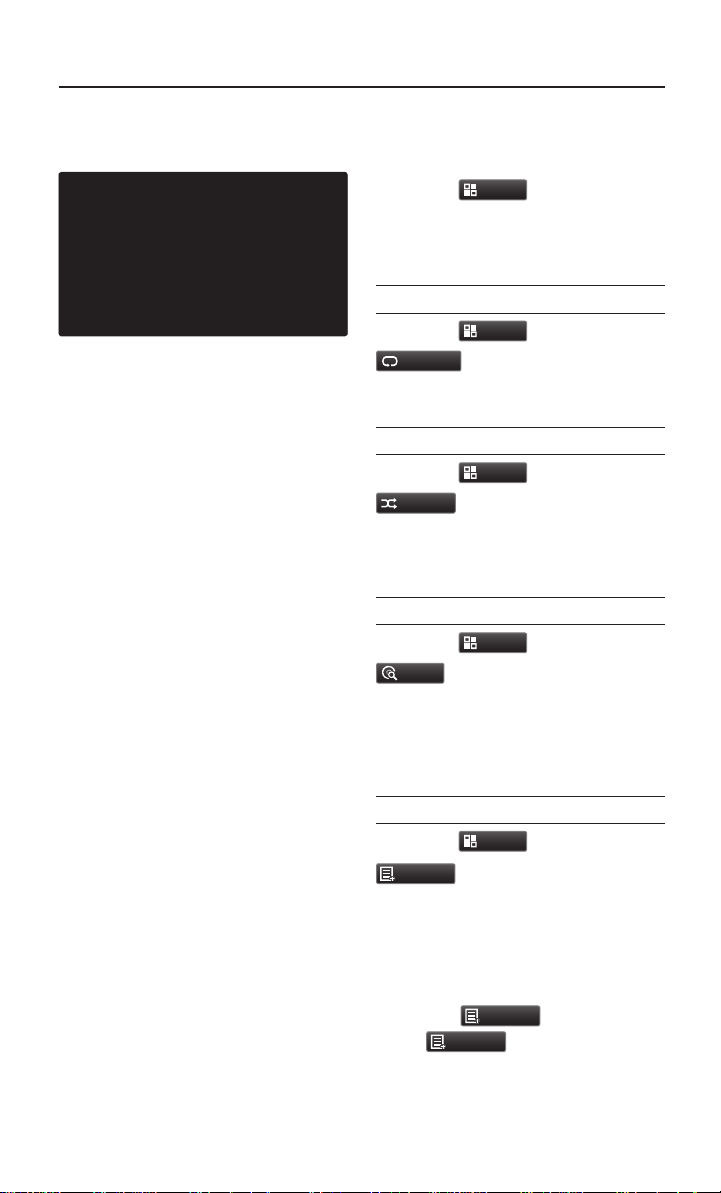
CD Mode
Using the Menu Buttons
.
.
.
Menu
button to set the
Menu
button ▶Press
Menu
button ▶Press
Menu
button ▶ Press
Press the
repeat, shuffle, scan and Info On/
Info Off menus.
Repeat
Press the
Repeat
The current track is repeated.
Shuffle
Press the
Shuffle
Tracks within the disc are played in
random order.
Scan
Press the
Scan
The beginning (approx. 10 seconds) of all tracks within the CD are
scanned.
Info On/Info Off
Press the
Info On
The amount of information displayed
on the screen can be selected. When
the title, artist, and album info are displayed, the button will automatically
change to
Press
ous information display setting.
Menu
.
Info Off
Info Off
button ▶ Press
.
to restore the previ-
17
Page 21
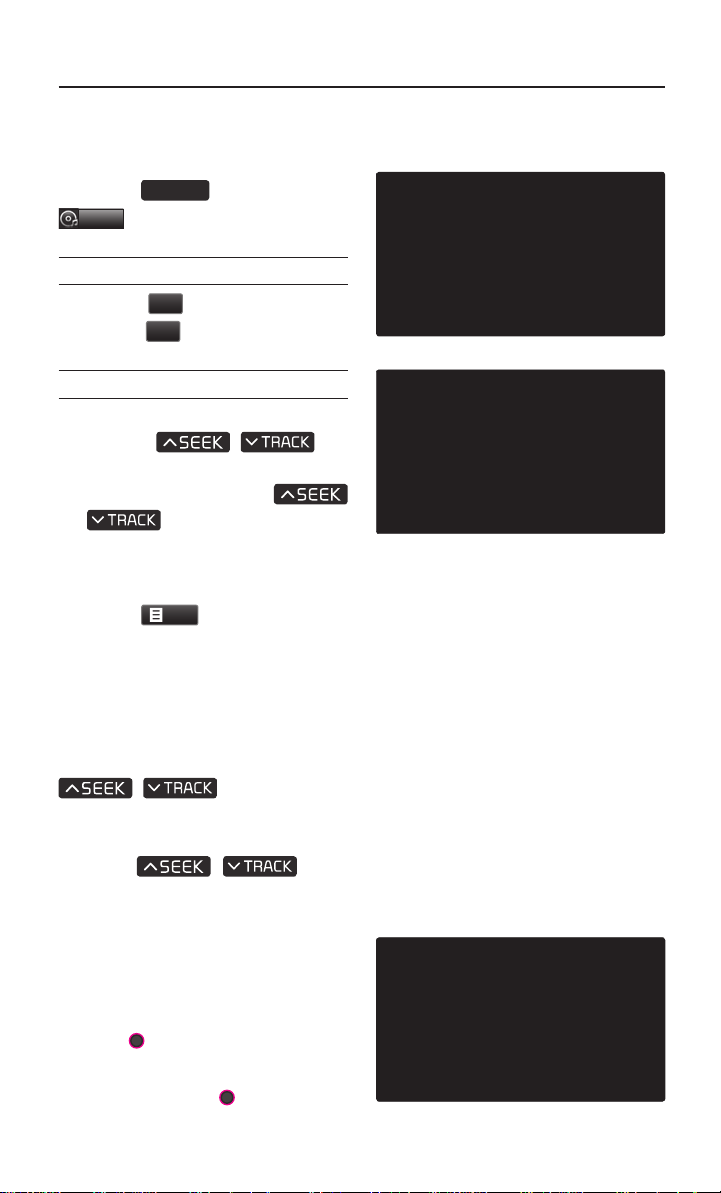
MP3 CD Mode
Starting Mode
Press the
MP3
.
MEDIA
key ▶ Press
Playing MP3
•
Press the
•
Press the
▶
button to play the file.
ll
button to pause the file.
Selecting MP3 files
Selecting from the Mode Screen
•
Press the , key
to select the previous or next file.
•
Pressing and holding the
, key will rewind or fastforward the current file.
Using Menus within List Screen
Press the
the file from the list.
button ▶ Select
List
Fast-forwarding or Rewinding MP3
Files
While playing ▶ Press and hold the
key (over 0.8
,
seconds).
This will rewind or fast-forward the file.
While the
being pressed, the file will rewind or
fast-forward at 20x speed.
Once released, the file will begin playing at normal speed.
key is
,
Searching MP3 Files
Turn the
files ▶ Once the desired file na me is
displayed, press the
18
knob ▶ Search
TUNE
TUNE
knob.
Page 22
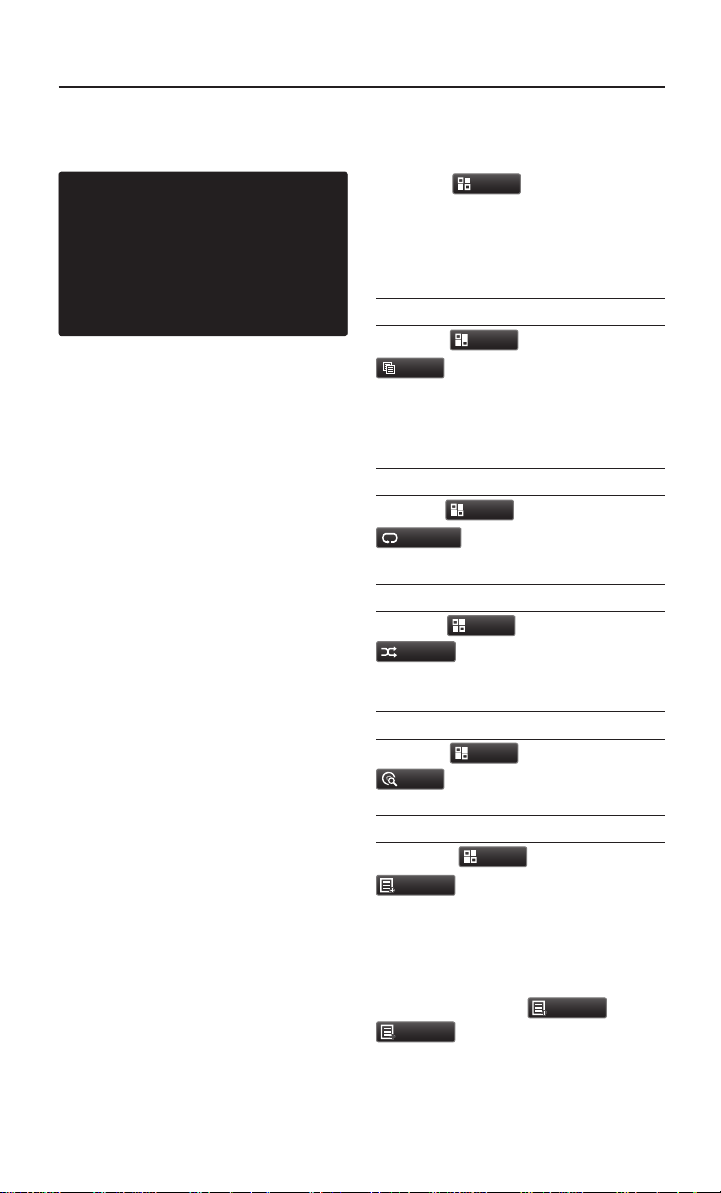
MP3 CD Mode
Using the Menu Buttons
Press the
copy, repeat, shuffle, scan, and Info
On/Off options.
Menu
button to set the
Copy
Copy
.
Press the
The currently playing file is copied and
saved in My Music.
Menu
button ▶ Press
Repeat
Press the
Repeat
Menu
.
button ▶ Press
Shuffle
Press the
Shuffle
Menu
.
button ▶ Press
Scan
.
Menu
button ▶ Press
Press the
Scan
Info On/Info Off
Press the
Info On
The amount of information displayed
on the screen can be changed.
When the title, artist, and album info
are displayed, the button will auto
matically change to
Info Off
formation display setting.
Menu
button ▶ Press
.
Info Off
to restore the previous in-
. Press
19
-
Page 23
MP3 CD Mode
Using Menus within
the List Screen
Moving between Lists
Press the
the
▲
If five (5) or more files or folders exist
in the same folder, the list will be displayed across two or more pages.
Press the
quickly find the desired page.
Moving between Folders
Press the
from the folder list.
Pressing the button will move to the
folder one level above the current folder.
Pressing the
move to the root folder.
button ▶ Press
List
,
▼
buttons.
, ▼ cursor buttons to
▲
button ▶ Select folder
Home
button folder will
Returning to Current Location
While searching files within other
folders, press the
button to return to the currently
playing file screen.
20
Now Playing
Page 24
USB Mode
Starting USB Music
Mode
Press the
USB Music
MEDIA
connected, then the
key ▶ Press
. If the USB is not
USB Music
button will be disabled.
Playing USB Music
•
Press the ▶ button to play the
USB Music.
•
Press the ll button to pause
USB Music.
Searching USB Music Files
While Playing ▶ Press the < , >
buttons or the
,
key to play the previous/next file.
•
Pressing and holding the
key (over 0.8 seconds)
,
will rewind or fast-forward the current file.
•
While the
key is being pressed, the track
will rewind or fast-forward at high
speeds. Once the key is released,
the USB Music will begin playing at
normal speed.
,
21
Page 25
USB Mode
Using the Menu Buttons
Press the
button to set the
Menu
Copy, Repeat, Shuffle, Scan, Info
On (Info Off) menus.
Copy
Press the
.
Copy
The currently playing file is copied and
saved in My Music.
button ▶ Press
Menu
Repeat
Press the
Repeat
.
button ▶ Press
Menu
Shuffle
Press the
Shuffle
.
button ▶ Press
Menu
Scan
Press the
.
Scan
button ▶ Press
Menu
Info On/Info Off
Info Off
Info Off
.
Press the
Info On
When the title, artist, and album info
are displayed, the button is changed
to
Press
ous information display setting.
22
Menu
button ▶ Press
.
to restore the previ-
Page 26

USB Mode
Starting USB Image Mode
Press the
MEDIA
USB Image
key ▶ Press
.
Searching USB Image Files
While playing ▶Press the < ,
>
buttons to view the previous/
next image.
Using the Menu Buttons
Press the
Slideshow, Rotate Image, Adjust
Image Size, Save Image and Info
menus.
Menu
button to set the
23
Page 27
USB Mode
Slideshow Interval
Press the
Slideshow
Image Slideshow intervals can be set
5sec
,
at
intervals.
Rotating Image
Press the
Rotate Image
Each time the
pressed, the image is rotated from 0˚
→
90˚ → 180˚ → 270˚ degrees.
Adjusting Image Size
Press the
Press the
or reduce the image size. The scale can
be changed to x1/4, x1/2, x1, x2, x4.
Adjust Image Size
-
button ▶ Press
Menu
.
20sec
10sec
,
Menu
button ▶ Press
▶ Press
Rotate
Menu
button ▶ Press
▶ Press
, +
buttons to enlarge
30sec
or
,
Done
.
button is
Done
.
Saving Image
Press the
Save Image
Menu
button ▶ Press
.
Viewing Info
Press the
Info
This menu is used to check image
information, such as the image resolution and file type.
24
.
Menu
button ▶ Press
Page 28
iPod Mode
Starting Mode
Press the
iPod
If an iPod is not connected, then the
iPod
MEDIA
.
button will be disabled.
key ▶ Press
Playing iPod
•
Press the
iPod.
•
Press the ll
iPod.
Searching iPod
Press the
the initial iPod list screen.
When searching an iPod, it is possible to search by Playlists, Artists,
Albums, Songs, Genres, Composers,
Audiobooks, and Podcasts.
▶
button to play the
button to pause the
List
button to display
25
Page 29
iPod Mode
Selecting iPod File
<
TUNE
,
knob.
While playing ▶ Press the
>
buttons or the
,
key to play the previous/
next file.
Pressing and holding the
key (over 0.8 seconds)
,
will rewind or fast-forward the current
song.
Searching iPod Files
Turn the
files. Once the desired file name is
displayed, press the
When searching files, the file number is
displayed in orange. Pressing the
TUNE
file.
knob to search
TUNE
knob will play the corresponding
Using the Menu Buttons
Press the
Menu
button to set the
Repeat, Shuffle, and Info On (Info Off)
menus.
Repeat
Press the
Repeat
Menu
.
button ▶ Press
Shuffle
.
Menu
button ▶ Press
Press the
Shuffle
26
Info On/Info Off
Press the
Info On
The screen display can be set differently
depending on user selection. When
the title, artist, and album info are displayed, the button
Info Off
play setting.
Menu
button ▶ Press
.
Info Off
to restore the previous dis-
. Press
Page 30
AUX Mode
Starting Mode
Press the
AUX
.
MEDIA
key ▶ Press
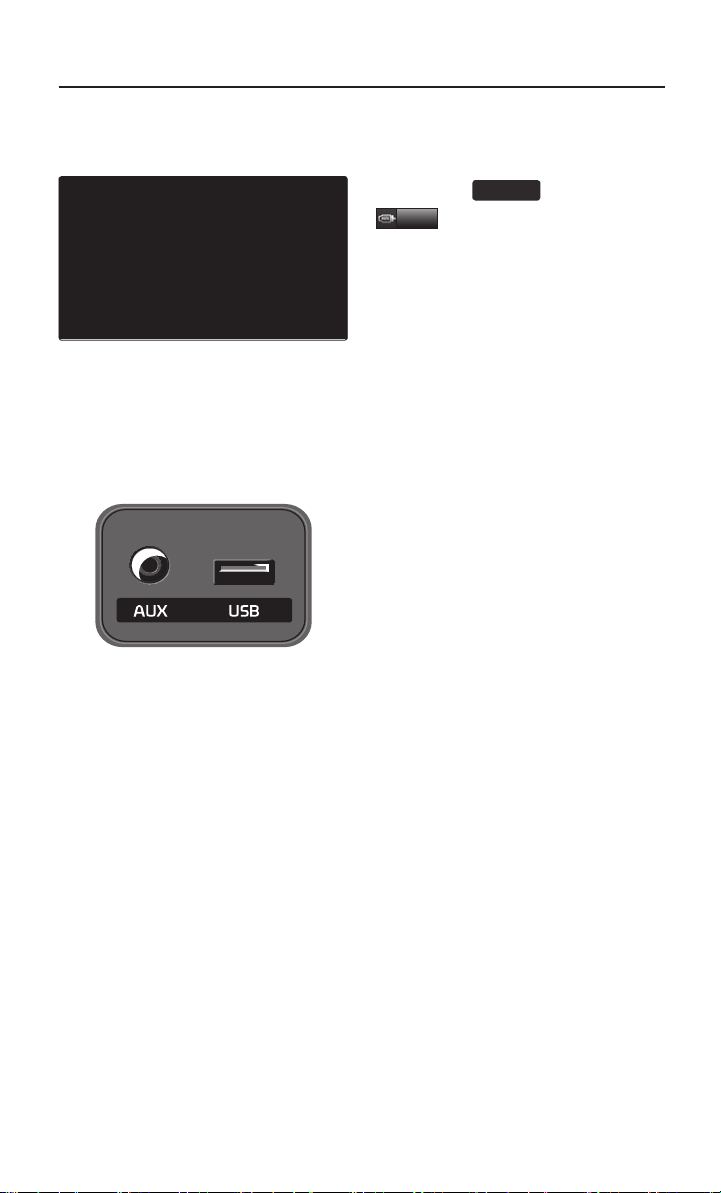
External Device
External AUDIO players can be played
through a dedicated cable. The posi-
tion of the AUX jack is at the top of the
gear shifter located between the driver
and passenger seats.
27
Page 31
Bluetooth® Audio
Starting Mode
Press the
Bluetooth Audio
MEDIA
key ▶ Press
.
Playing Bluetooth® Audio
•
Press the
saved within the Bluetooth
•
Press the
file.
▶
button to play files
ll
button to pause the
®
phone.
Selecting Bluetooth® Audio Files
While playing
,
previous/next file.
▶ Press the
key ▶ Selects the
Setting Connection
Press the
Connections
to add a new Bluetooth
connect/disconnect, delete, delete
all, or view the Help section.
button
®
phone,
28
Page 32
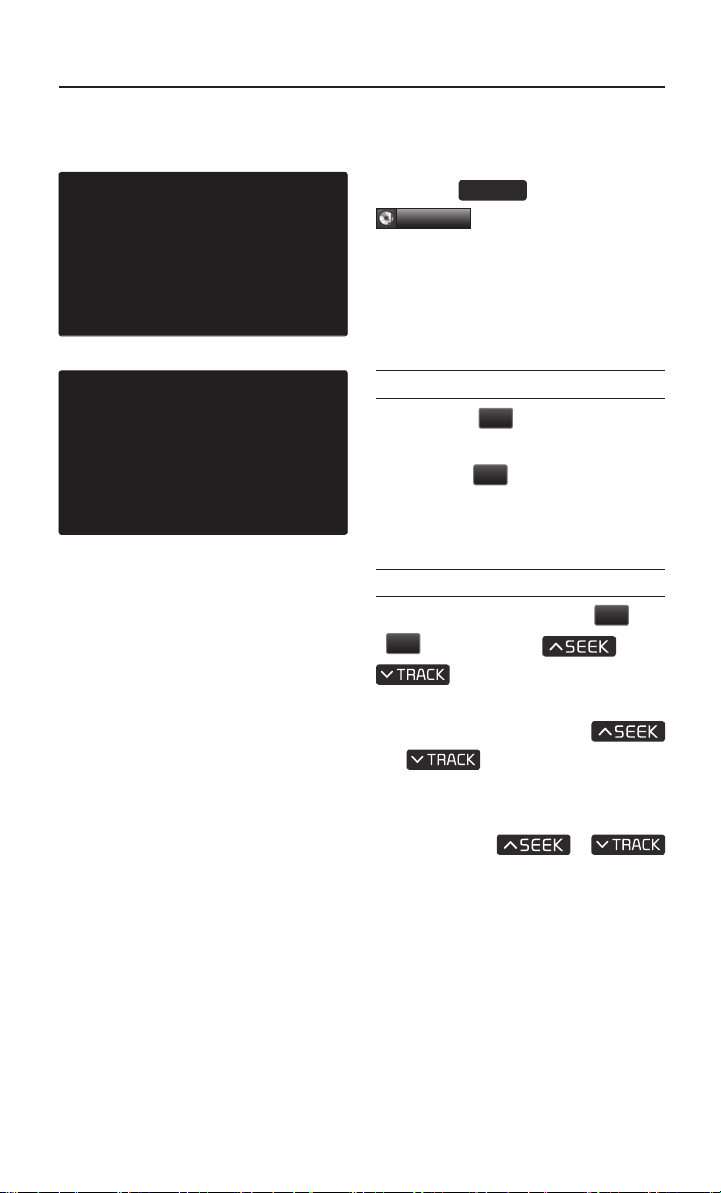
My Music Mode
Starting Mode
Press the
My Music
MEDIA
.
key ▶ Press
Playing My Music
•
Press the
file.
•
Press the
file.
▶
button to play the
ll
button to pause the
Selecting My Music
<
While playing ▶ Press the
>
buttons or the
,
key to play the previous/
next file.
•
Pressing and holding the
,
will rewind or fast-forward the current file.
•
While the
key is being pressed, the track
will rewind or fast-forward at high
speeds. Once the key is released,
the Music will begin playing at normal speed.
key (over 0.8 seconds)
,
,
29
Page 33
My Music Mode
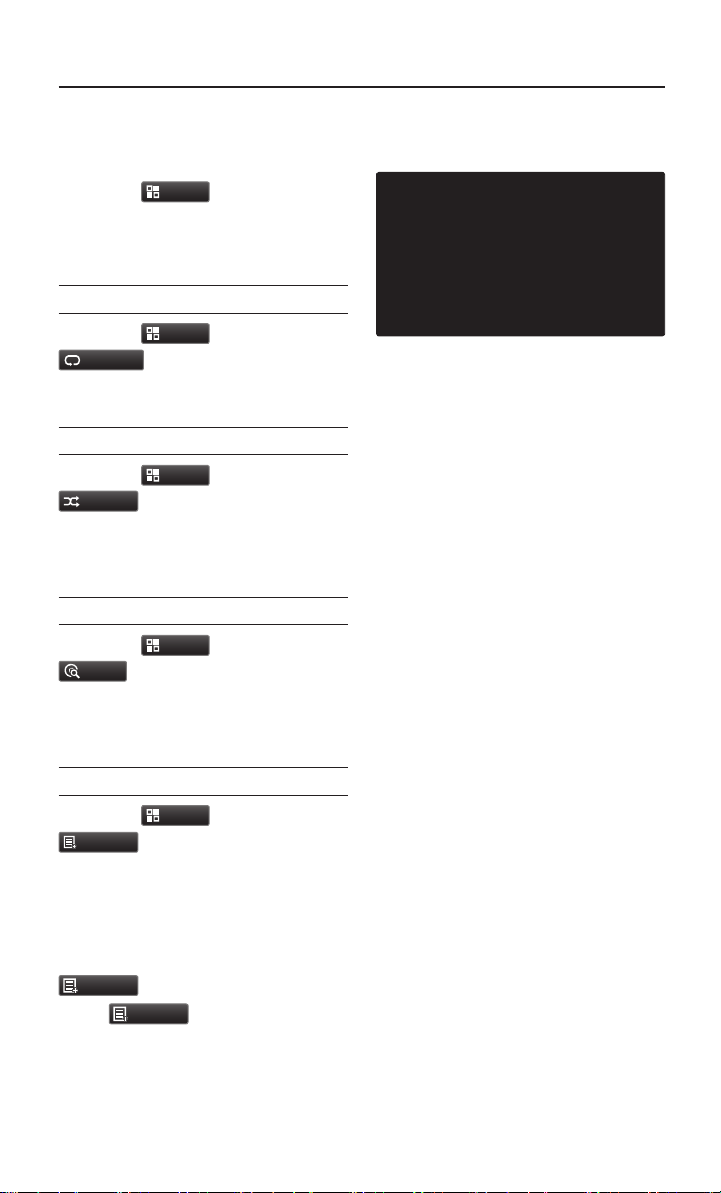
Using the Menu Buttons
Press the
button to set the
Menu
Repeat, Shuffle, Scan, Info On (Info
Off) menus.
Repeat
Repeat
.
Press the
The currently playing file is repeated.
button ▶ Press
Menu
Shuffle
Shuffle
.
Press the
When turned on, files are played in
random order.
button ▶ Press
Menu
Scan
Scan
.
Press the
The beginning (approx 10 seconds) of
all files are scanned.
button ▶ Press
Menu
Info On/Info Off
Info Off
.
.
Info Off
Press the
Info On
The screen display can be set differently depending on user selection.
When the title, artist, and album info
are displayed, the button is changed to
Press
ous information display setting.
30
button ▶ Press
Menu
to restore the previ-
Page 34
My Music Mode
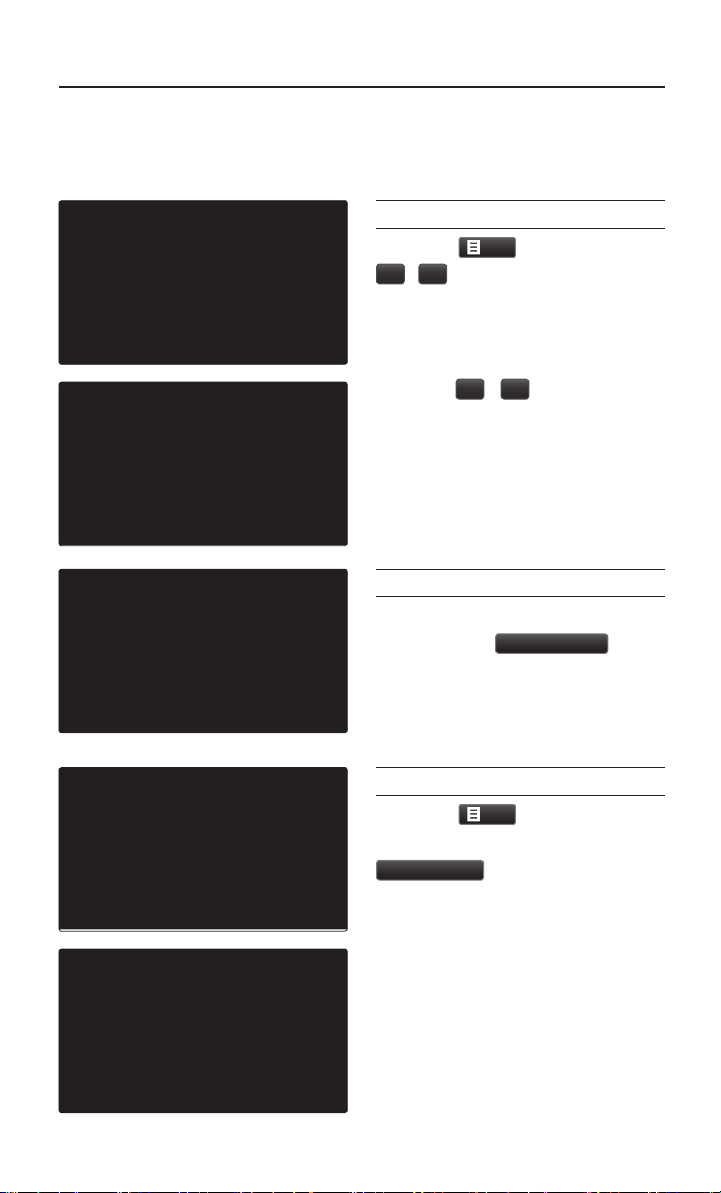
Using Menus within
the List Screen
Moving between Lists
List
, ▼
▲
Now Playing
button ▶ Press
cursor buttons to
button
, ▼
.
Press the
▲
If six (6) or more files or folders exist
in the same folder, the list will be displayed across two or more pages.
Press the
quickly find the desired page.
Retuning to Current Location
While searching files within other folders, press the
to return to the currently playing file
screen.
Deleting Files
Press the
Select the files to delete ▶ Press
Delete Items
List
.
button ▶
31
Page 35
Navigation
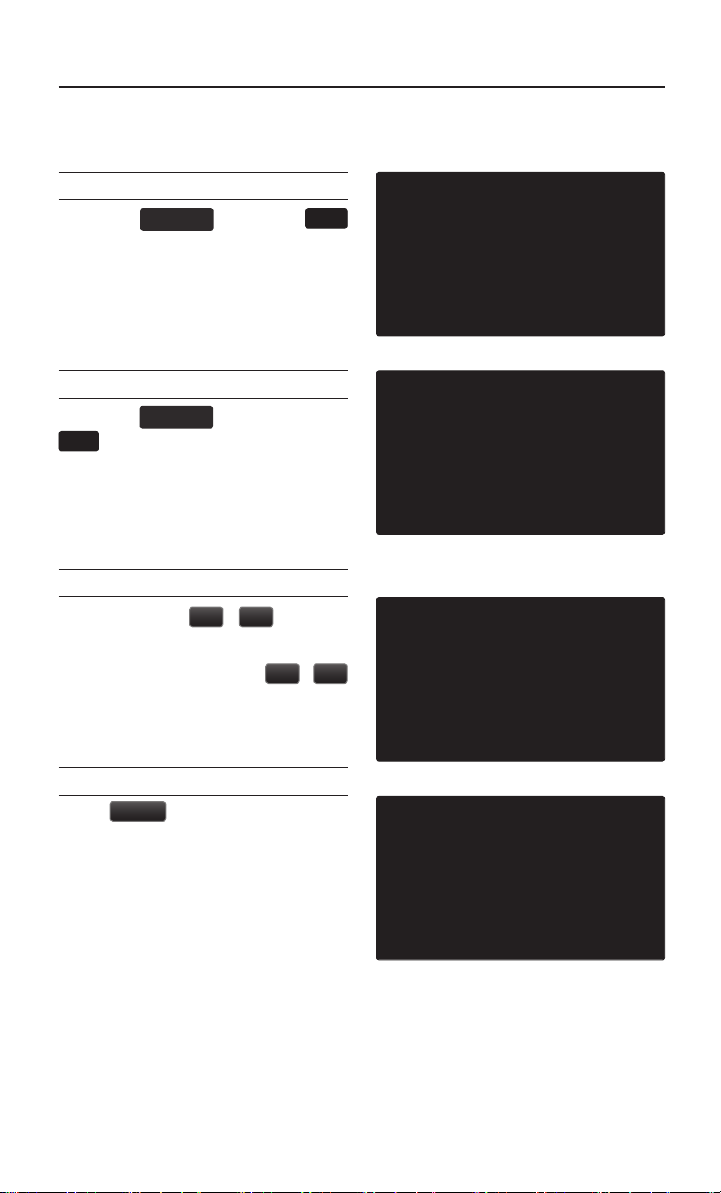
Starting Navigation
Current Position
Press the
button displayed at the upper right
side in some map conditions to dis-
play the map of the current position
and the neighboring area.
Map Display Settings
Press the
.
Each press of this button changes the
direction between Heading-up and
North-up.
Changing Map Scale
Press the Scale
display a popup showing all scales. To
adjust the scale, press the
button or push the desired scale on
the scale pop-up window.
MAP
key or the
VOICE
MAP
key▶ Press the
VOICE
+
/
button to
-
+
/
-
Map Menu
Menu
Press
The Set as Destination, Add Waypoint,
Add to Address Book, Navi Vol. features
can be used.
Some buttons are disabled in states
when they cannot be used.
32
button.
Page 36
Navigation
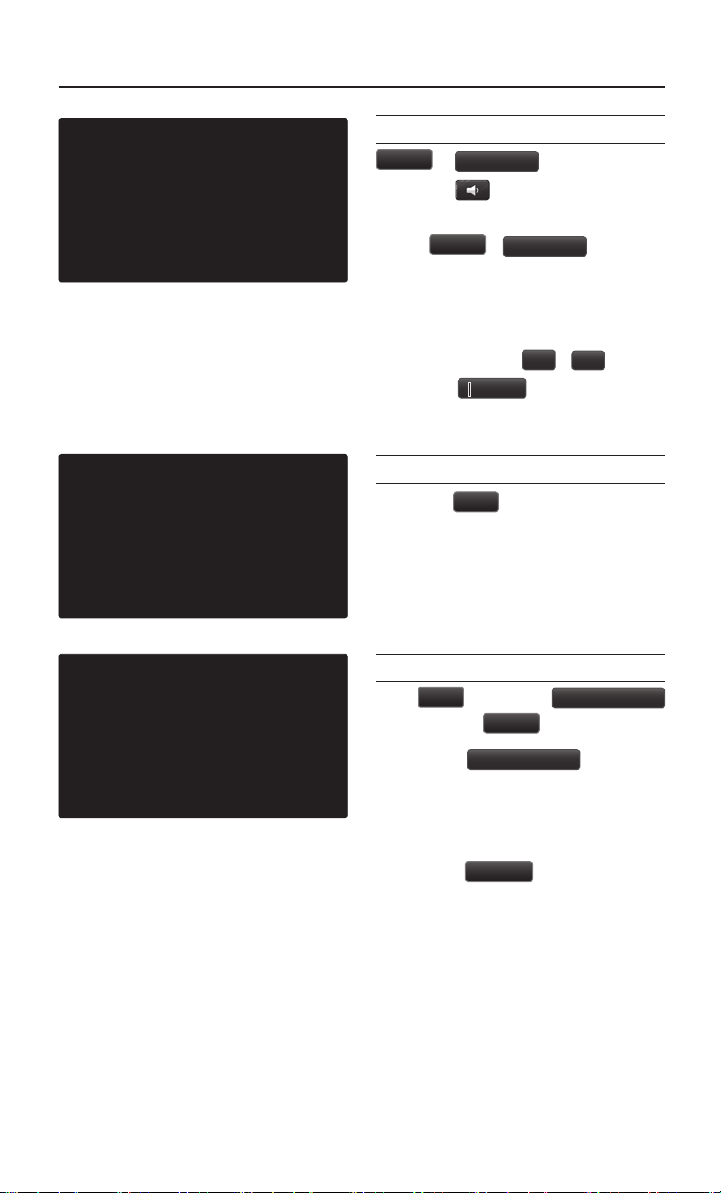
Adjusting Navigation Volume
Menu
▶
Navi Vol.
Press the button to turn the navi
guidance volume on/off.
Press
display a popup used to adjust volume
and adjust the navi guidance volume
to the desired loudness.
0~45 through the
Press the
the sound.
Menu
Mute
POI Display
Press the
When POI menus are displayed,
pressing one of the 6 POI icon buttons
will display the corresponding POI
icons.
POI
▶ Adjust volume.
▶
Navi Vol.
/
+
button to turn off
button
.
button to
button.
-
Editing POI Icons
POI
Press
▶ Press the
button ▶ Press
Press the
select the desired facility from the vari-
ous facility types.
Up to six fa
Press the
the displayed POI icons. Initially, Gas
Station, Parking, Fast Food, Hospital,
Auto Service, and Bank are set as
default.
Edit POI Icon
vorite facilities can be set.
Default
Edit POI Icon
Done
.
button to reset
button to
33
Page 37
Navigation
Searching POIs
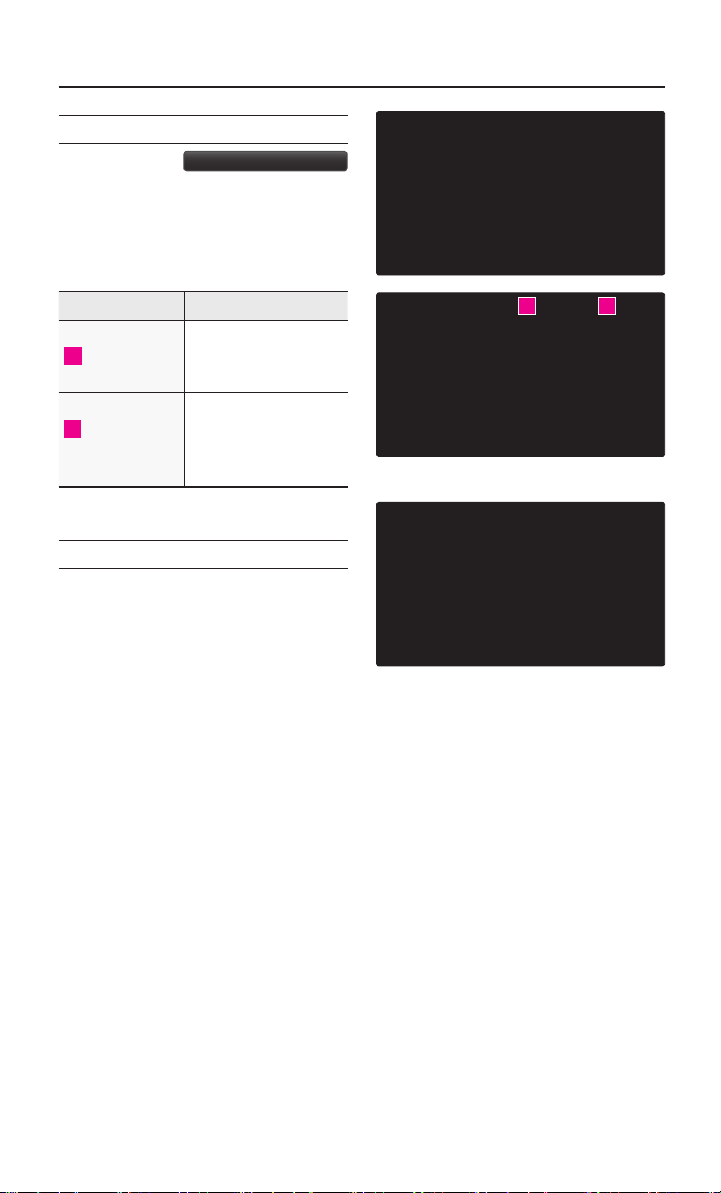
Press the
button.
This feature is used to search nearby
POIs.
Search by local POI
Name Description
Use the Select Area
1
Select Area
2
Near Current
Position
feature to change the
area.
Within the ‘Search by
POI menu, searches
facilities based on the
current vehicle positio
Adding a My Place
Feature used to save the current
position or scroll position.
1 2
34
Page 38
Navigation
Destination Search
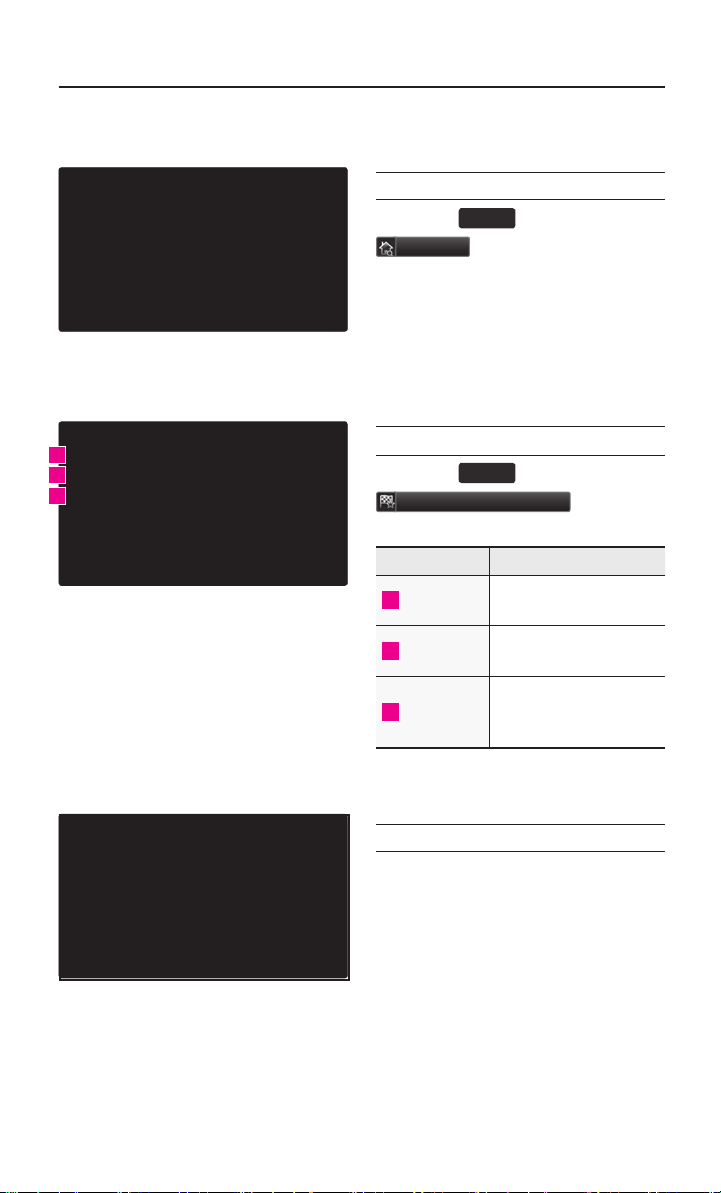
Address
Press the
Address
Feature used to search destinations
through addresses, including House
No., Street name, City name, etc.
key ▶ Press
DEST
.
1
2
3
Previous Destinations
Press the
Previous Destination
Name Description
1
By Date
2
By Name
3
Delete Items
key ▶ Press
DEST
Sorts POIs and locations
by added date
Sorts POIs and locations
by name
From various entries,
items can be selected
and deleted all at once
.
Point of Interest (POI) Search
This feature is used to search
facilities using POI categories. It is
possible to search through previous
search history.
35
Page 39
Navigation
Gas Station
Press the
Gas station
This search feature is used to search
destinations by street intersections
throughout the map.
Enter the name of the Street, City and
State corresponding to the desired
destination. Once search is complete,
press the
the desired location from the list.
Search
Restaurants
Press the
Restaurants
This search feature is used to search
destinations by street intersections
throughout the map.
Enter the name of the Street, City and
State corresponding to the desired
destination. Once search is complete,
press the
the desired location from the list.
Search
key ▶ Press
DEST
.
button to select
key ▶ Press
DEST
.
button to select
36
Page 40
Navigation
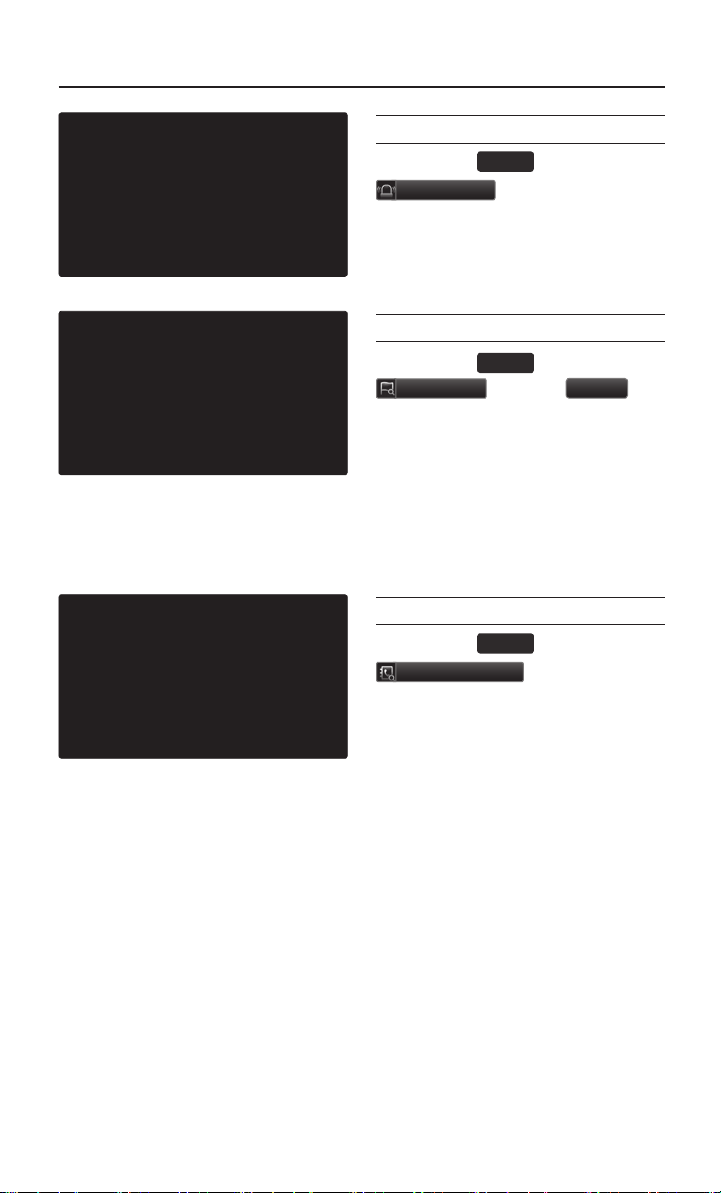
Emergency
Press the
Emergency
This search feature is used to search
for police stations, hospitals, and deal-
erships in emergency situations.
My Places
Press the
My Places
This search feature is used to search
destinations by selecting previously
saved My Places to set as destinations.
My Places can be placed in groups, and
group names can be edited within Setup.
Phone Number
Press the
Phone Number
This search feature is used to search the
locations of POIs by entering the phone
number of the desired POI destination.
•
Area codes must be entered to complete
the search.
key ▶ Press
DEST
.
key ▶ Press
DEST
▶ Press
key ▶ Press
DEST
.
Group
.
37
Page 41

Navigation
Intersection Search
Press the
Intersection Search
This search feature is used to search
destinations by street intersections
throughout the map.
Enter the name of the Street, City and
State corresponding to the desired
destination. Once search is complete,
press the
the desired location from the list.
Search
Exit/Entrance
Press the
Exit/Entrance
This search feature is used to search
destinations by entering the Exits and
Entrances of corresponding express-
ways.
Enter the
responding to the desired destination.
On
Search
location from the list.
name of the Freeway cor-
ce search is complete, press the
button to select the desired
key ▶ Press
DEST
.
button to select
key ▶ Press
DEST
.
38
Page 42

(Alternative Route)
(Route Overview)
Navigation
Setting a Destination
Press the
for the Destination ▶ Press
Set as Destination
•
To conduct a destination search
through the desired search method,
select the desired destination from
the list. (For more information on
destination search methods, refer to
the ‘Destination Search’ section.)
•
After verifying the location of the
searched destination, press the
Set as Destination
late the route. The Route Overview
native Route screen will be
or Alter
the displayed.
•
Within the Route Overview
or Alternative Route screen, press
the
Start Guidance
route guidance.
MAP
VOICE
key ▶ Search
DEST
.
button to calcu-
key or the
button to start
One Touch Scroll Setting
The destination can be set to the cur-
rent map display.
•
While in the map screen, touching
a position on the map will move the
map to the center of the selected
position and display the scroll mark.
•
Press the
selected position as a waypoint or des-
tination.
Menu
button to set the
39
Page 43

Navigation
Route Calculation
•
Once you have set a destination, cal-
culate the route. The route overview
and route option menus will be dis-
played.
•
After checking the Route Overview,
press the
Start Guidance
for over 3 mph or for approximately 5
seconds to start guidance.
Demo
After a route has been calculated,
press the
simulated driving of the calculated
route.
•
Within the Route Overview screen,
press the
•
During Demo, press the
key to end the demo and display
the current map position. If you
start driving while viewing the route
demo, demo will end and route
guidance will start.
MAP
VOICE
button or just drive
button to begin
Demo
button.
Demo
key or the
MAP
VOICE
Add Waypoint
After searching for waypoints, press
the
Add Waypoint
the waypoint to the current route.
40
button to add
Page 44

Navigation
Route Recalculation
Once a route has been set, the
Recalculate
top of the menus.
Pressing the
will display a pop-up that allows you to
change route options. Once the settings
are changed, the route is recalculated
by reflecting the changes.
Cancel Route
In the Map menu screen, press the
Cancel Route
button is displayed at the
Recalculate
button.
button
41
Page 45

Navigation
Route Guidance
Preliminary guidance, highway mode,
turn list guidance, and other guidance
screens are displayed according to
the current road condition.
Within the guidance map screen, if
the current position is on route, then
intersection guidance will be provided
once you are nearby an intersection.
Also, the intersection zoom screen is
displayed when nearby an intersec-
tion.
Preliminary Guidance Mode
At the top right side of the screen, the
next/ after next turn info, remaining
distance, direction, and other informa-
tion are displayed.
Intersection Zoom Mode
This mode provides detailed guidance
nearby intersections before the next
turn.
This mode is displayed starting from
0.5mi before the intersection.
42
Page 46
1 2 3
Navigation
Highway Mode
Upon entering a highway during route
guidance, the highway mode will auto-
matically be displayed. This mode is
display
ed when driving on a highway
and mainly displays highway related
POIs.
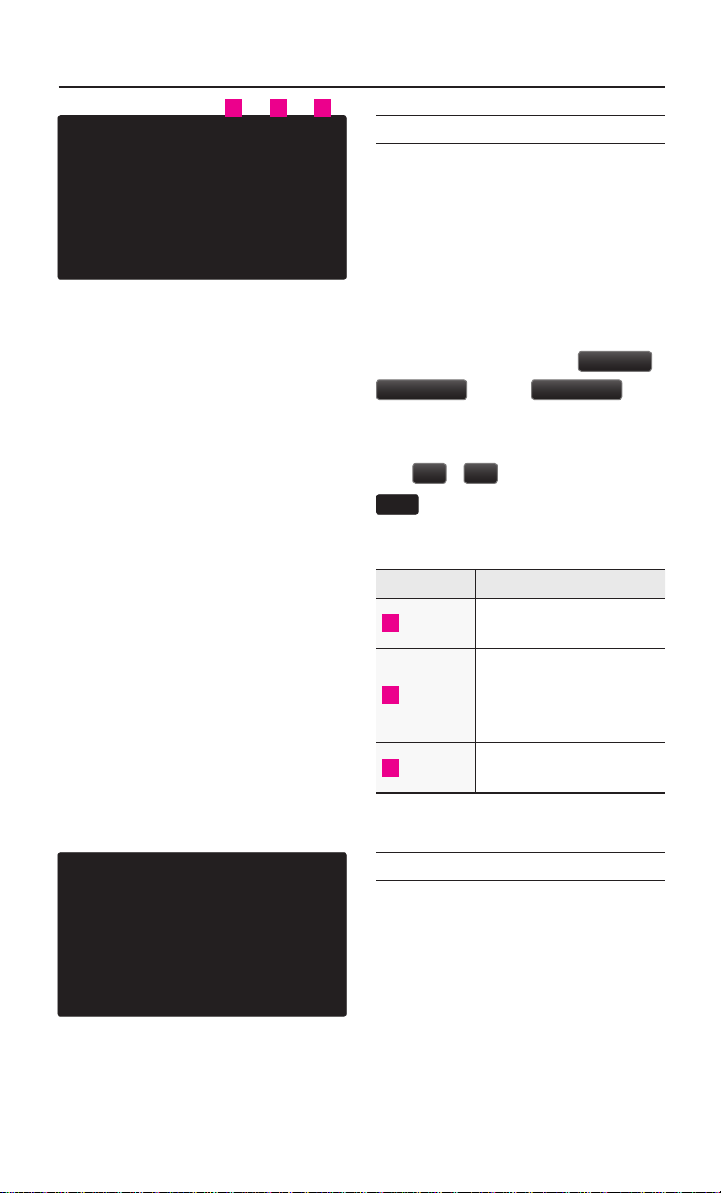
You can check information for various POIs by using the
Summary
, and
Rest Area
tons.
When scrolling
the
▼
button will select the POI clos-
through POIs by using
, ▲ buttons, pressing the
est to the current position.
Name Description
1
View All
2
Summary
3
Rest Area
Guidance for all POIs on
the highway
Shows list of turn points
and other directional route
guidance while driving
within highway
Guidance for only the rest
areas on the highway
View All
,
but-
Turn List Mode
Turn List Mode shows turn information
on the current route.
43
Page 47
Navigation
Route Menu
Press the
ROUTE
key to use, edit,
or optimize various route options.
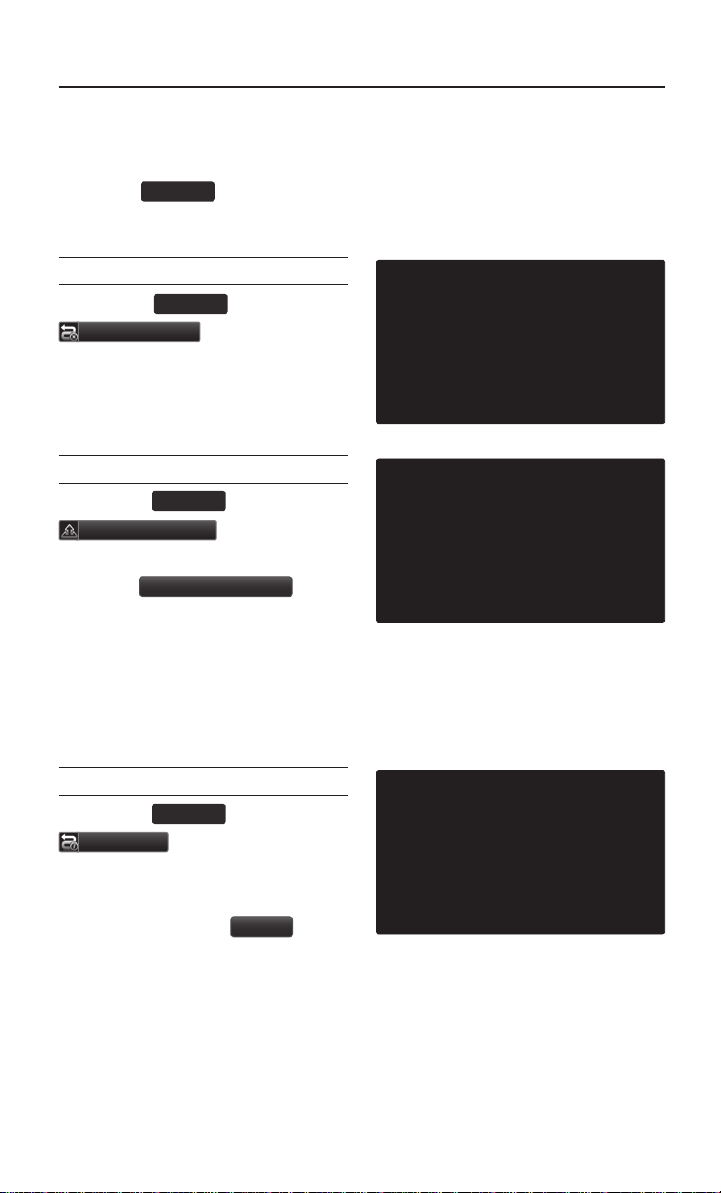
Cancel Route
Press the
Cancel Route
ROUTE
key ▶ Press
.
Route Overview
Press the
Route Overview
Within the Route Overview screen,
press the
to display other potential routes to the
set destination.
From the alternative route options,
select the desired route.
ROUTE
Alternative Route
key ▶ Press
.
button
Route Info
Press the
Route Info
The turn points and distance informa-
tion
by key roads within the set route
are played.
next to each road name to display the
map position for the corresponding
location.
44
ROUTE
Press the
.
key ▶ Press
button
MAP
Page 48
Navigation
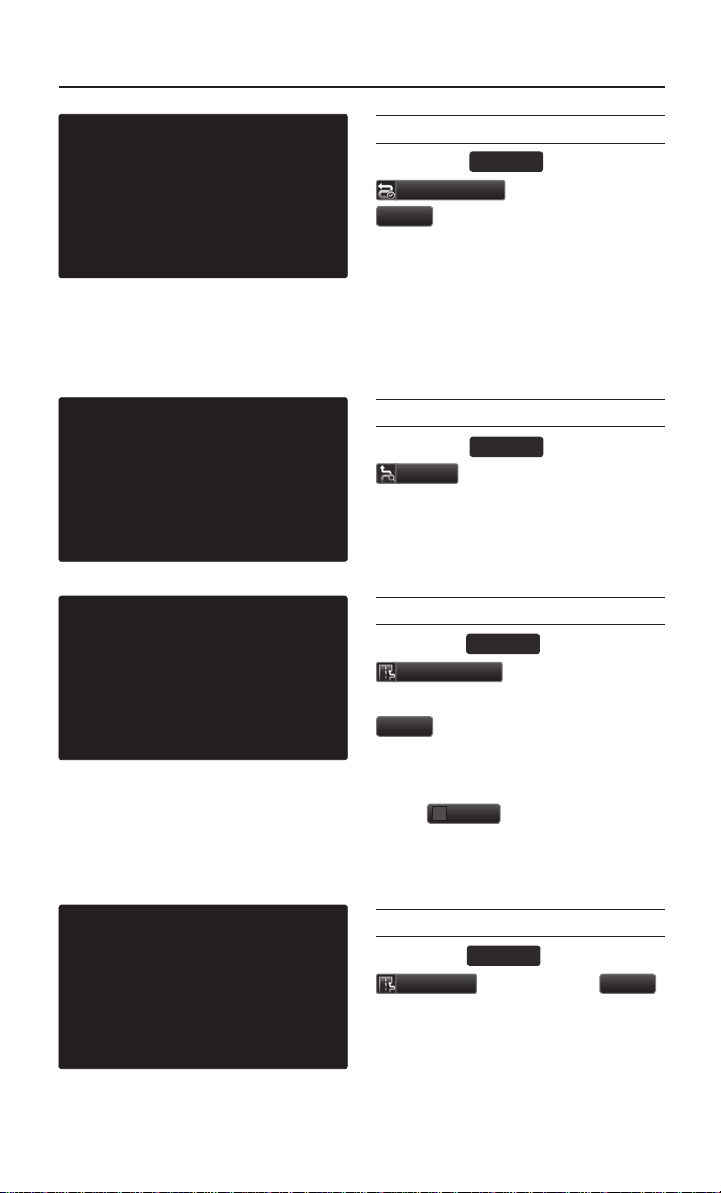
Route Option
Press the
Route Option
Done
Route Options refer to conditions used to
calculate the route to the destination. The
route is automatically recalculated if the
route options and detailed route settings
are changed.
ROUTE
.
Detour
Press the
Detour
The Detour menu is used to redefine
the route by setting a detour to a cer-
tain distance from the current position.
.
ROUTE
Avoid Streets
Press the
Avoid Streets
streets you want to avoid and press
Done
This feature is used to select specific
streets to avoid within the current route.
Select
streets in the route overview that are
desired to be avoided.
.
Avoid
ROUTE
key ▶ Press
▶ Set and press
key ▶ Press
key ▶ Press
▶ Select the
to avoid the particular
Edit Route
Press the
Edit Route
The Edit Route menu displays the
start point, waypoints, and the desti-
nation in list format and is used to edit
corresponding positions or the order
of destinations within the route.
ROUTE
▶ Set and press
key ▶ Press
Done
45
.
Page 49

Navigation
Avoid Area
Press the
Avoid Area
Done
This feature is used by creating a rect-
angle over the area to avoid.
An area set as an avoid area is
excluded from the calculated route. If
a route had been calculated prior to
creating an avoid area, the route will
automatically be recalculated.
The screen will prompt to select the
first corner of the square of the avoid
area, followed by the second corner.
ROUTE
.
key ▶Press
▶ Set and press
46
Page 50

Bluetooth
®
Wireless Technology
Using Bluetooth® Handsfree
Pairing from the Bluetooth® Device
Press the key on the steering
wheel or press the
Yes
.
PHONE
In the Search from Device screen
▶ Search for the car name and
pair the device ▶ Enter the
Passkey ▶ Bluetooth
connected.
•
When searching from the
Bluetooth® device, the car name is
Kia Motors and the default passkey is ‘0000’, then press Ok
•
To learn more about searching from
Bluetooth® devices and pairing,
refer to the user's manual for your
Bluetooth
•
The Bluetooth® Audio screen is displayed once audio streaming is available.
®
device.
▶ Press
®
becomes
47
Page 51

Bluetooth
®
Wireless Technology
NOTICE
•
This process may take a few minutes. Radio may play during the
wait.
•
Some phones (i.e., iPhone, Android
and Blackberry phones) may offer
an option to allow acceptance of
all future Bluetooth
requests by default.
•
Phonebook transfer will occur automatically at initial pairing. Wait until
complete before placing a call.
•
Visit http://www.kia.com for additional information on pairing your
Bluetooth
and to view a phone compatibility
list
®
enabled mobile phone,
.
®
connection
48
Page 52
1 2
Bluetooth
®
Wireless Technology
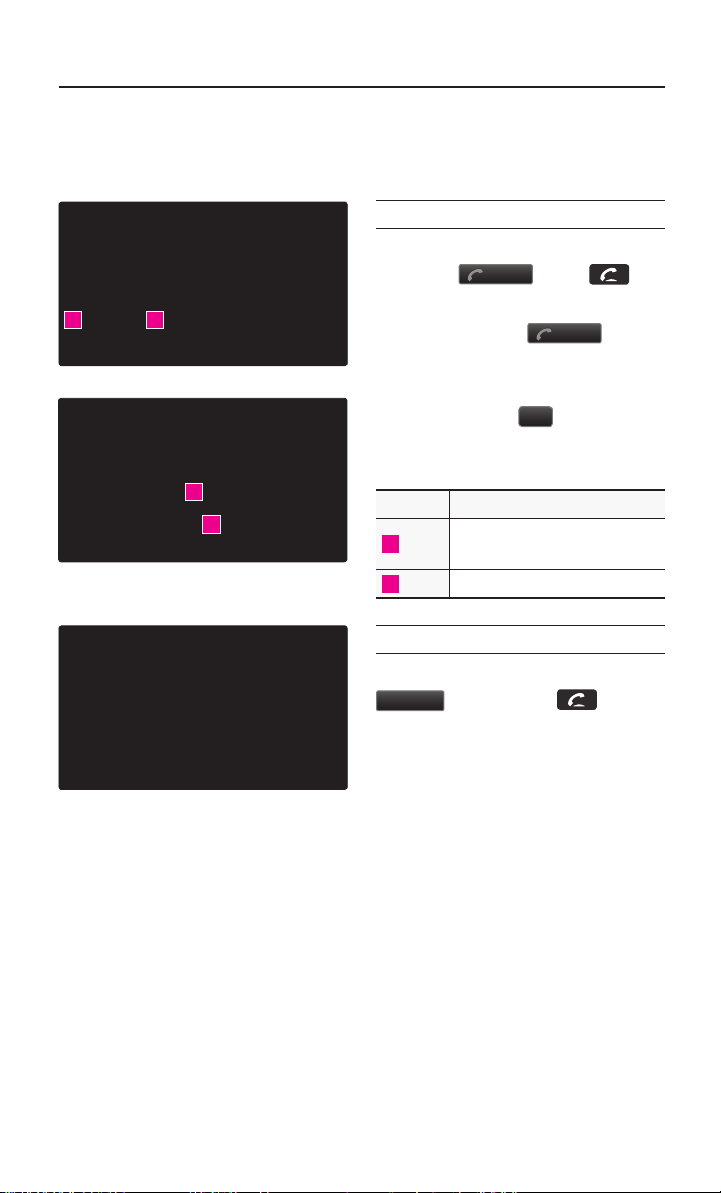
Making/Answering
Calls
Calling by Dialing a Number
Enter number on the dial pad ▶
Send
Press the
on the steering wheel.
If you press the
without entering a number, the Call
History screen is displayed. Press and
hold the dial pad
onds) to enter a "+".
or the
Send
(over 0.8 sec-
0 +
button
key
1
2
Name Description
1
2
Calls the entered phone
Send
number
End Deletes all entered numbers
Answering a Call
Incoming call notice ▶ Press the
Accept
the steering wheel.
button or the key on
49
Page 53
Bluetooth
®
Wireless Technology
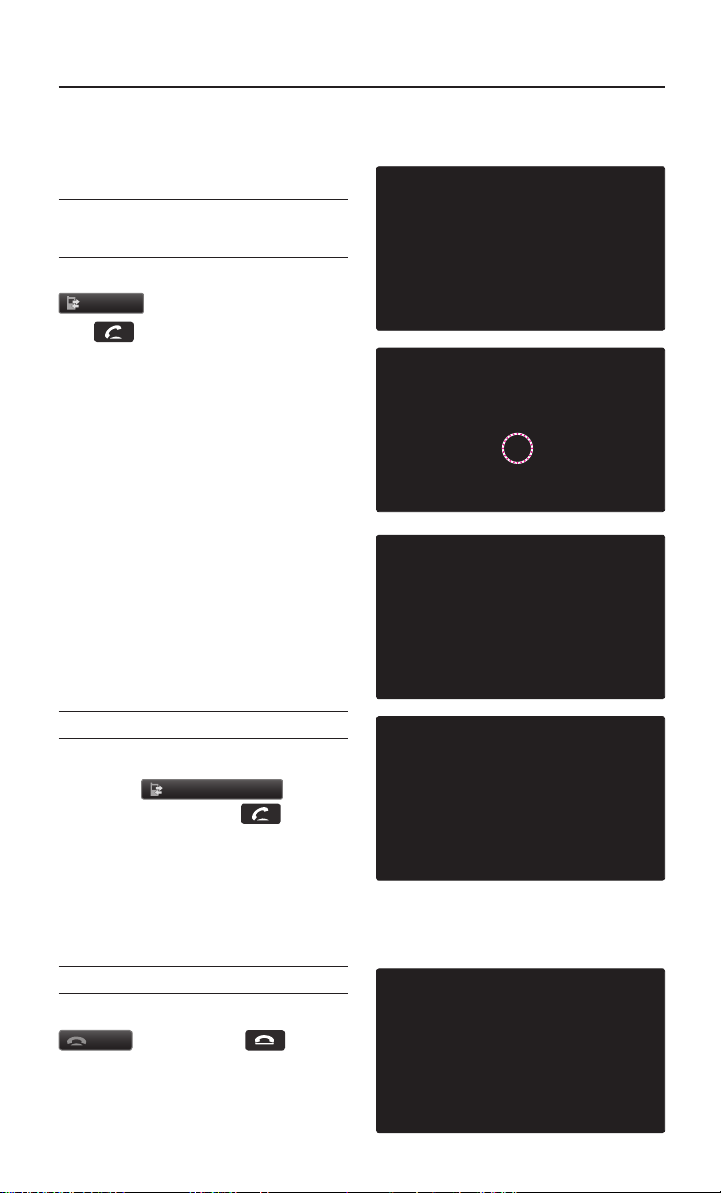
Operating Menus
during a Call
Switching Call to Bluetooth®
Phone
During handsfree call ▶ Press the
Private
the
on the steering wheel.
The call will be switched from the
handsfree to the Bluetooth® mobile
phone.
button or press and hold
key (over 0.8 seconds)
Switching Call to the Handsfree
During call on mobile phone ▶
Press the
or press and hold the
(over 0.8 seconds) on the steering
wheel.
The call will be switched from the
Bluetooth® mobile phone to the handsfree.
Use Handsfree
button
key
Ending a Call
While on a call ▶Press the
button or the key on
End
the steering wheel.
The Bluetooth® handsfree call will
end.
50
Page 54
Bluetooth
®
Wireless Technology
Contacts
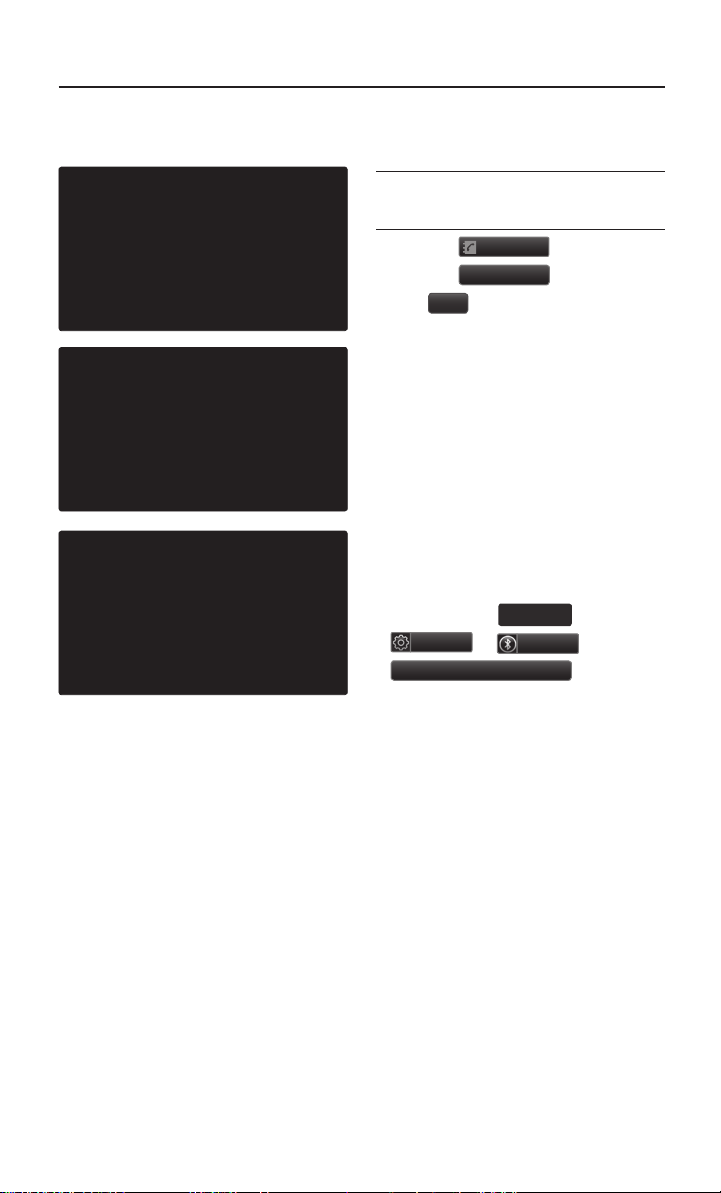
Downloading Mobile Phone
Contacts
Download
Yes
press the
Setup
Contacts
button ▶
button ▶
.
multimedia sys-
INFO
SETUP
▶
Phone
key
▶
.
▶
Press the
Press the
Press
Contacts Sync (Phonebook Download)
The Contacts Sync feature allows you to
choose whether your phone contact list
will transfer to your vehicle contacts each
time your phone is connected or only at
the initial phone pairing. To enable or disable Contacts Syncing:
1.
Depending on the equipped
options of your
tem,
Contact Sync Settings
2. On the display screen, press Phone,
Settings, Advanced Setup and
Contacts Sync, then press On or
Off to change the setting.
•
If Contact Sync is set to ON, contacts stored your phone will download each time your phone is
connected. There may be a delay
before the system is available to place a
call.
•
If Contact Sync is set to OFF,
your phone contacts will download only at the initial pairing. This
allows you to make calls without waiting
for your phone contact list to download.
51
Page 55

Bluetooth
®
Wireless Technology
Favorites
Calling Favorites
In Phone screen ▶ Press
★ Favorites
Favorite ▶ Call is connected.
▶ Select the desired
Selecting/Deleting Favorites
In Favorites screen ▶ Press
Delete Items
want to delete and press
Press
▶ Select items you
.
Yes
Delete
▶
52
Page 56

Bluetooth
®
Wireless Technology
Searching Contacts
Search by Name
Press the
▶ Enter name and press
Search by Name
button
Search
Searching by Number
Press the
button ▶ Enter number and press
Search
Search by Number
.
.
Information
i
•
When searching a number, it is possible to search by entering just a part
of the entire number.
(ex : if you enter “1544”, all numbers
that include “1544” will be searched.)
53
Page 57

Bluetooth
®
Wireless Technology
Setting Bluetooth®
Connection
Connecting a Device
Press the
Phone screen.
The Phone screen is displayed once
Bluetooth® Handsfree is connected,
and the Bluetooth
displayed once audio streaming is
available.
Connect
button on the
®
Audio screen is
54
Page 58

Bluetooth
®
Wireless Technology
Disconnecting a Device
Select the device you wish to
disconnect ▶ Press
▶ Press
Yes
.
Disconnect
55
Page 59

Bluetooth
®
Wireless Technology
Setting Auto Connection
Press the
▶ Select the desired phone ▶ Set
and press
The Bluetooth® device will automatically be connected according to the
option set when the car ignition is
turned on. When the user selected
phone cannot be connected, the system automatically attempts to connect
the most
When the most recently connected
phone cannot be connected, the system attempts to connect all paired
phones. If you do not want to connect
automatically, turn off Bluetooth within
your mobile phone.
Auto Connection
Done
.
recently connected phone.
button
56
Page 60

Bluetooth
®
Wireless Technology
Device Information
INFO
Press the
•
▶ Press
Setup
Device Information
This feature allows you to check
device information.
SETUP
key ▶ Press
Phone
.
Adjusting the Ring/Call Volume
While on a call ▶ Use the VOL
knob on the head unit or the
,
VOL -
VOL +
steering wheel to adjust the ring/
call volume.
keys on the
▶
57
Page 61

Bluetooth
®
Wireless Technology
Setting Mic Volume
While on a call ▶ Press the
Outgoing Vol.
Volume ▶ Press
If you press the
the outgoing volume is muted and
blocked to the other party.
▶ Set Outgoing
OK
.
Mute
button,
Restore Factory Settings
INFO
Press the
Press
SETUP
▶ Press
Setup
Restore Factory Settings
key ▶ Press
Phone
▶
.
58
Page 62
Voice Recognition and
Phone Contact Tips
The Kia Voice Recognition System may
have difficulty understanding some accents
or uncommon names When using Voice
Recognition to place a call, speak in a
moderate tone, with clear pronunciation.
To maximize the use of Voice Recognition,
con sider these guidelines when st
contacts:
•
Do not store single-name entries (e.g.,
“Bob”, “Mom”, etc.). Instead, always use
full names (including first and last names)
for these contacts
•
Do not use special characters (e.g., ‘@’,
‘-’, ‘*’, ‘&’, etc.)
•
Do not use abbreviations (i.e., use
“Lieutenant” instead of “Lt.”) or acronyms
(i.e., use “County Finance Department”
instead of “C. F. D.”; Be sure to say the
name exactly as it is entered in the contacts list.
oring
Voice Recognition
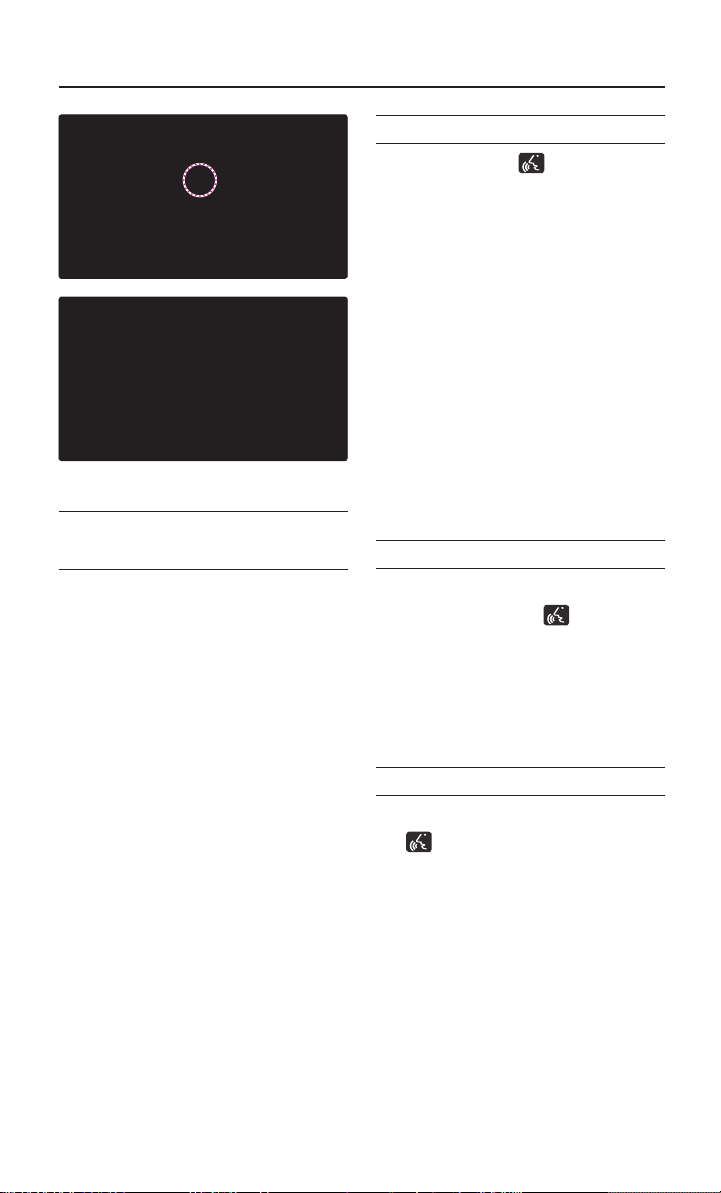
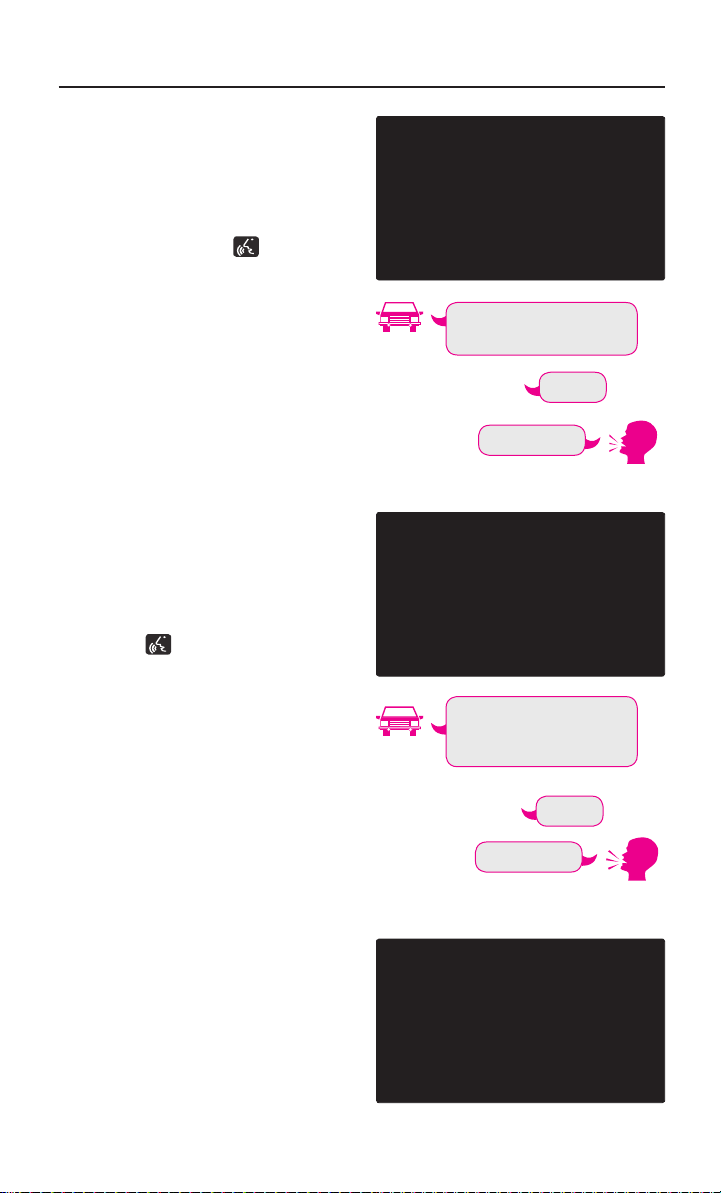
Starting Voice Recognition
Shortly press the key on the
steering wheel (under 0.8 seconds)
▶ Say a command.
Once voice recognition starts, the voice
command entry window and the six representative commands are displayed.
•
If voice recognition is in [Normal
Mode], then the system will say
“Please say a command after the
beep,” followed by a beep tone.
•
If voice recognition is in [Expert
Mode], then you will only hear a
beep a “Beep~”.
Skipping Prompt Messages
While prompt message is being stated
▶ Briefly press the
steering wheel. (under0.8 second)
The prompt message is immediately
ended and the beep tone will sound.
After the “beep”, say the voice command.
Re-starting Voice Recognition
While system waits ▶ Briefly press
the
key on the
(under 0.8 seconds)
The command wait state will end and
the beep tone will sound. After the
“beep”, say the voice command.
key on the
59
Page 63
Voice Recognition
Destination
Please say a command
after the beep
BEEP
Destination
Please say a command
after the beep
Go Home
BEEP
Ending Voice
Recognition
While Voice Recognition is operating
▶ Press and hold the
steering wheel. (over 0.8 seconds)
While using voice recognition, pressing a steering wheel remote control or
a different key will end voice recognition.
Illustration on Using
key on the
Voice
Recognition
(Setting Home as the
Destination)
Press the key. (under 0.8 seconds) The system awaits for your
command and display a list of accessible commands on the screen.
60
Page 64
Voice Recognition
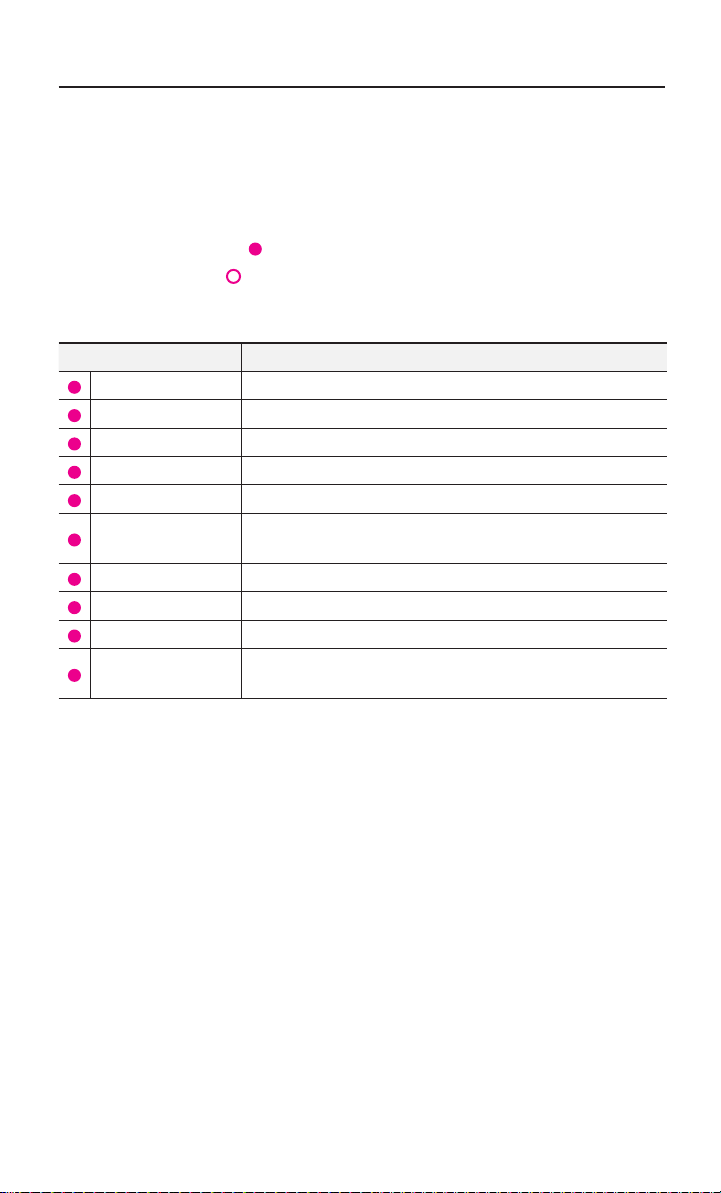
Voice Command List
Voice commands within this system are categorized into “Common Commands”
and “Mode Commands.”
•
Common Commands ( ) : commands that can be used in all situations.
•
Mode Commands ( ) : commands that can be used in specific multimedia/
navigation/Bluetooth® mode states.
Command Operation
Help Displays the main Help screen
Destination Help Displays the Destination related command list
Map Help Displays the Map related command list
Radio Help Displays the FM/AM radio related command list
SIRIUS Help Displays the SIRIUS radio related command list
Disc Help
iPod Help Displays the iPod related command list
USB Help Displays the USB related command list
Phone Help Displays the Phone related comand list
UVO eServices
Help(Optional)
Displays the DISC mode related command list for the disc
inserted in the CD Player
Display the UVO eServices releated command list
61
Page 65
Voice Recognition
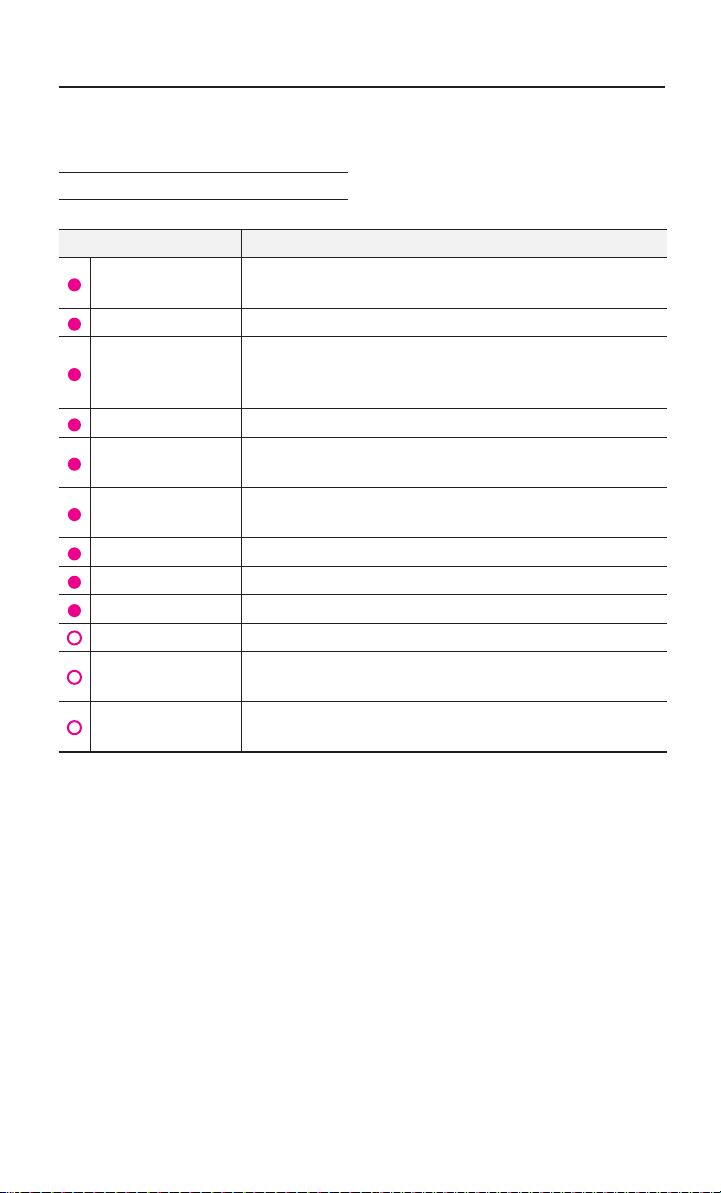
Audio System Command List
FM/AM Radio
Command Operation
Radio
AM Plays the most recent frequency for the corresponding band
FM
FM1/FM2 Plays the most recent frequency for the corresponding band
AM <530~1710>
FM <87.5~107.9>
AM Preset <1~6> Plays the desired AM band preset frequency
FM1 Preset <1~6> Plays the desired FM1 band preset frequency
FM2 Preset <1~6> Plays the desired FM2 band preset frequency
Preset <1~6> Plays the desired preset frequency for the current band
Scan On
Preset Scan
Plays the most recent frequency for the most recently operated
band
Plays the most recent frequency for the corresponding band.
In the case of FM, The most recent frequency within the most
recently played FM1 or FM2 band is played
Plays the desired AM band frequency (e.g. AM “Five-Hundred
Thirty”)
Plays the desired FM band frequency (e.g. FM “Eighty-Seven
point Five”)
Scans receivable frequencies from the current broadcast and
plays for 10 seconds each
Plays through all presets for 10 seconds each, beginning with
the current preset
62
Page 66
Voice Recognition
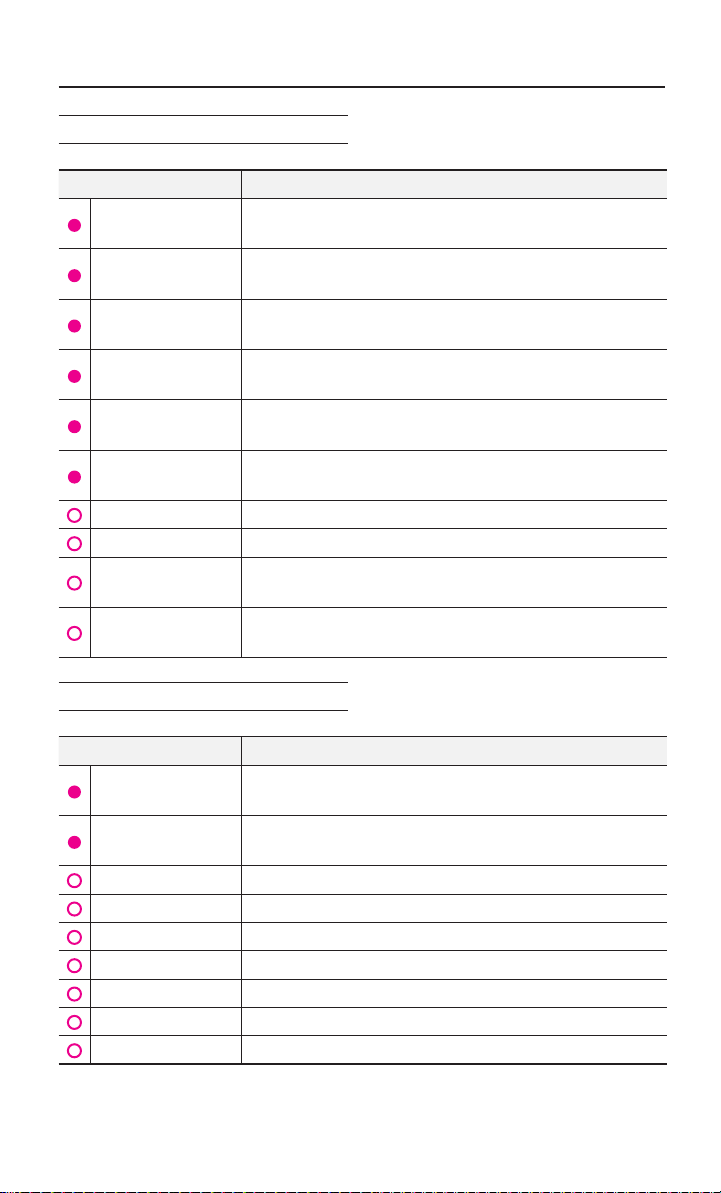
SIRIUS Radio
Command Operation
SIRIUS
SIRIUS1/ SIRIUS2/
SIRIUS3
SIRIUS Channel
<0~255>
SIRIUS1 Preset
<1~6>
SIRIUS2 Preset
<1~6>
SIRIUS3 Preset
<1~6>
Channel <0~255> Plays the desired channel of the current band
Preset <1~6> Plays the desired preset channel of the current band
Scan
Preset Scan
Plays the last channel within the last band from SIRIUS1, SIRIUS2,
and SIRIUS3
Plays the most recent channel for the corresponding band
Plays the desired SIRIUS band channel (e.g. SIRIUS channel
“Eleven”)
Plays the desired preset channel for SIRIUS1 band
Plays the desired preset channel for SIRIUS2 band
Plays the desired preset channel for SIRIUS3 band
Scans receivable channels from the current broadcast and plays
for
10
seconds each
Plays through all presets for 10 seconds each, beginning with
the current preset
CD(Audio Type)
Command Operation
CD
CD Track <1~99>
Play Plays the currently paused song
Pause Pauses the current song
Repeat Repeats the current track
Repeat Off Cancels repeat play to play tracks in sequential order
Shufe Randomly plays the tracks within the CD
Shufe Off Cancels random Play to play tracks in sequential order
Track <1~99> Plays the desired track number
If the DISC inserted in the CD Player is either a CD or MP3
DISC, then the CD or MP3 will be played
If the DISC inserted in the CD Player is a CD, then CD Mode
will start and plays the desired track
63
Page 67
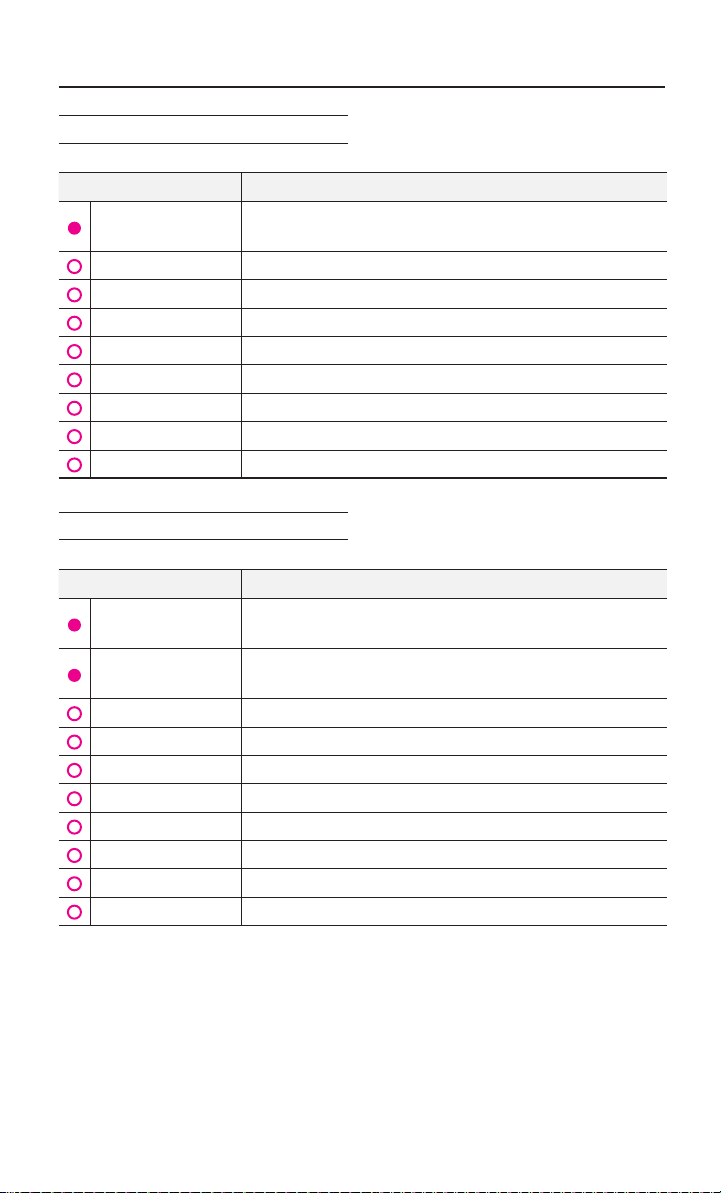
Voice Recognition
CD(MP3 Type)
Command Operation
CD
Play Plays the currently paused song
Pause Pauses the current song
Next Folder Plays the rst le in the next folder
Previous Folder Plays the rst le in the previous folder
Repeat Repeats the current le
Repeat Off Cancels repeat play to play les in sequential order
Shufe Plays all les within the CD in random order
Shufe Off Cancels random play to play les in sequential order
USB Music
Command Operation
USB
USB Music
Play Plays the currently paused song
Previous File Plays the previous track
Next Folder Plays the rst le in the next folder
Previous Folder Plays the rst le in the previous folder
Repeat Repeats the current le
Repeat Off Cancels repeat play to play les in sequential order
Shufe Plays all les within the USB in random order
Shufe Off Cancels random play to play les in sequential order
If the DISC inserted in the CD Player is either a CD or MP3
DISC, then the CD or MP3 will be played
If the USB has been connected to the device, play the MP3 or
image les on the USB
If the USB has been connected to the device, plays the MP3
les within the USB
64
Page 68
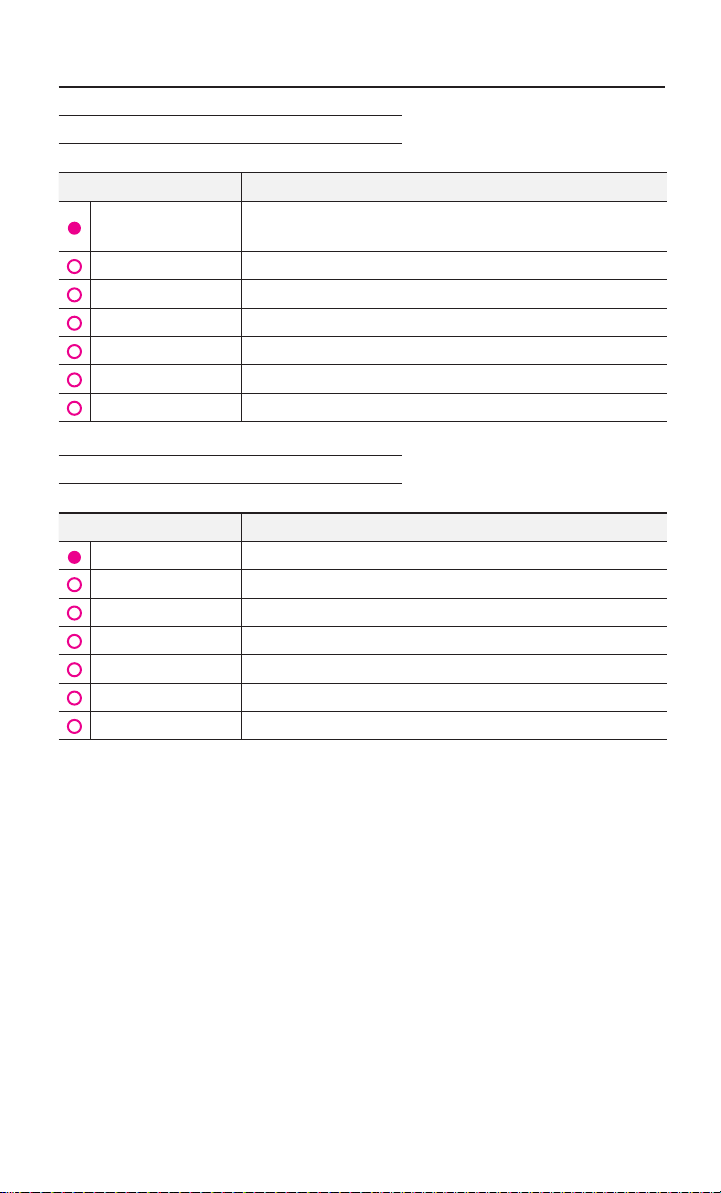
Voice Recognition
iPod
Command Operation
iPod
Play Plays the currently paused song
Pause Pauses the current song
Repeat Repeats the current le
Repeat Off Cancels repeat play to play les in sequential order
Shufe Plays all les within the current category in random order
Shufe Off Cancels random play to play les in sequential order
My Music
Command Operation
My Music Plays the songs within the My Music
Play Plays the currently paused song
Pause Pauses the current song
Repeat Repeats the current le
Repeat Off Cancels repeat play to play les in sequential order
Shufe Plays all les within the current category in random order
Shufe Off Cancels random play to play les in sequential order
Plays the songs within the iPod if the iPod has been connected
to the device
65
Page 69
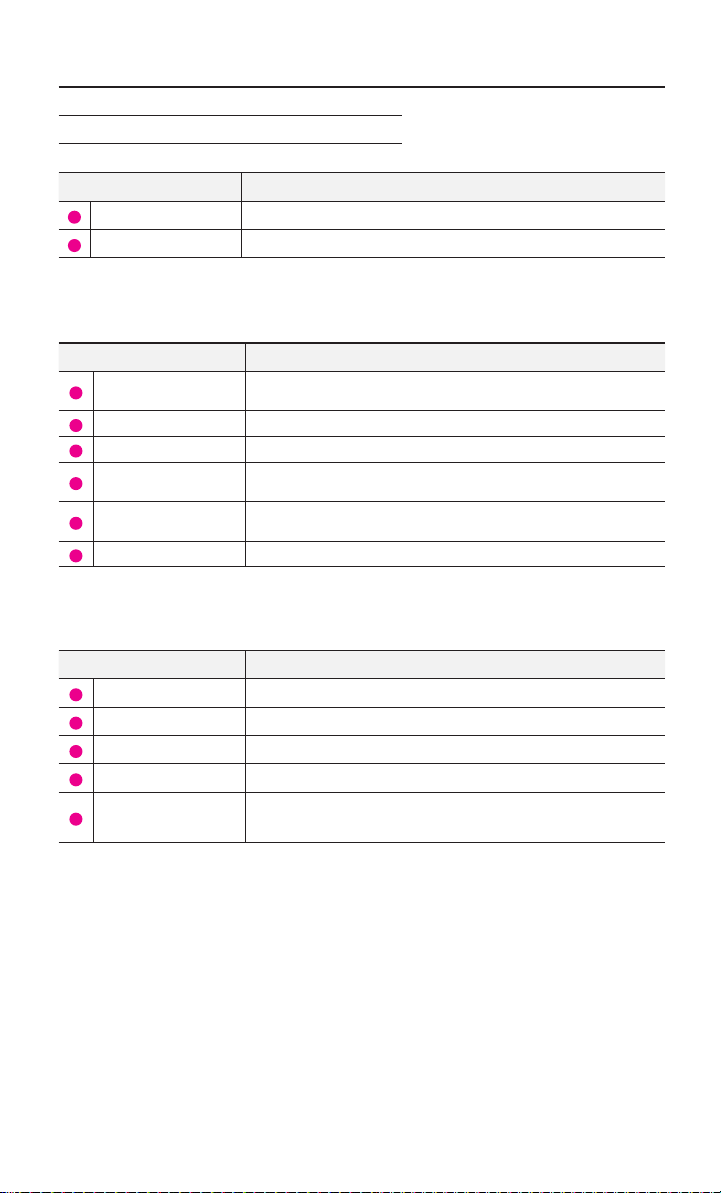
Voice Recognition
Others
Command Operation
Bluetooth Audio Plays Bluetooth® Audio
Auxiliary Plays the connected auxiliary device
Phone Command List
Name Description
Call
Call <Name> Call <Name> saved in Contacts (e.g. Call “John Smith”)
Dial Number Makes the call to the number
Dial <Number>
Call History
Redial Connects the most recently called number
UVO eServices Command List(Optional)
Displays list of saved contacts. Say the name to connect the call
to the corresponding contact.
Call can be made by dialing the spoken numbers (e.g. Dial “111
555 1234”)
The user can select a number from the outgoing, incoming, and
missed calls
Name Description
UVO eServices
Roadside Assist Connect with a Roadside Assist agent.
eService Guide
Vehicle Diagnostics Informs you if a diagnostic issue is found in your vehicle
My POIs
66
Display the UVO eServices releated command list
Provides guidance on how to use UVO eServices
Show Points of Interest list which downloaded from
Google Maps
TM
and MyUVO.com
Page 70
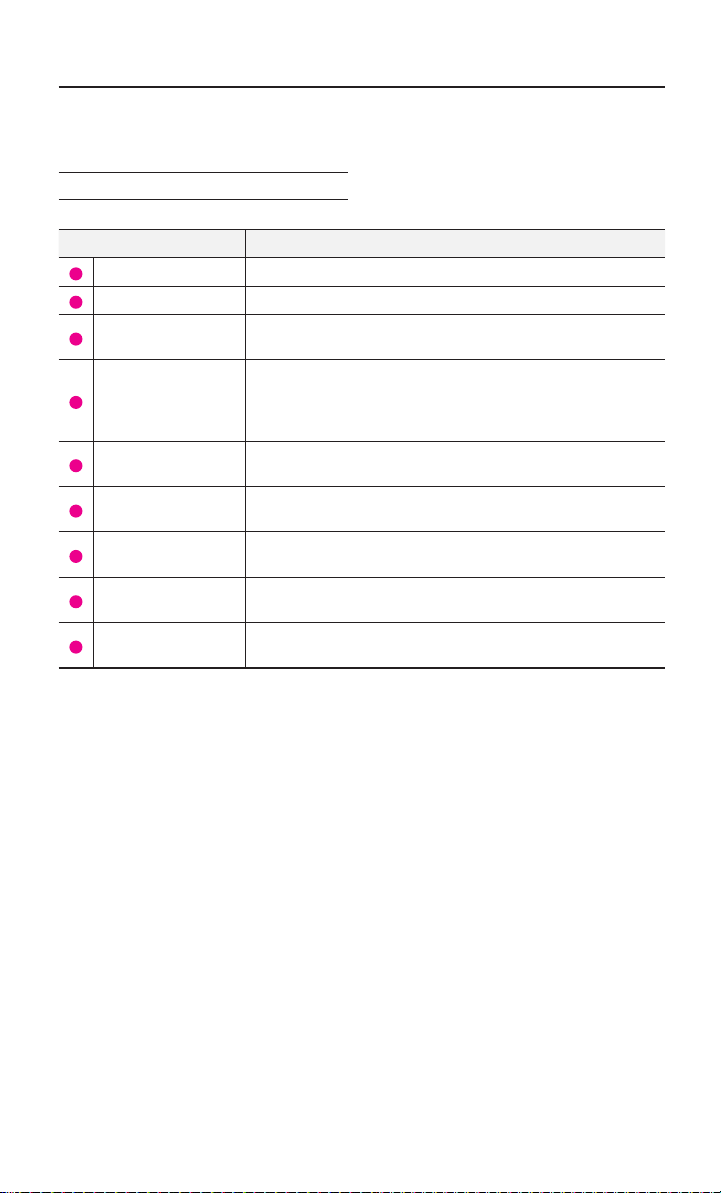
Voice Recognition
Navigation Command List
Destination
Name Description
Find Address Sets the destination through address search for route guidance
Previous Destinations Sets the previous destination as the current destination
Find Nearest POI
Find the Nearest
<POI Category>
Find Emergency
Policestation
Find Emergency
Hospital
Find an Emergency
Dealership
Go Home
Go to Ofce
Sets a POI near the current position as the destination for route
guidance through the POI category search
Sets a POI near the current position as the destination by directly
inputting the POI name for route guidance (e.g. Find the Nearest
“Restaurants”), For more information on <POI Category>, refer to
Page 3-30.
Searches for a police station near the current position and sets it
as the destination for route guidance
Searches for a hospital near the current position and sets it as the
destination for route guidance
Searches for a dealership near the current position and sets it as
the destination for route guidance
Sets the previously registered home address as the destination for
route guidance
Sets the previously registered ofce address as the destination for
route guidance
67
Page 71
Voice Recognition
Map
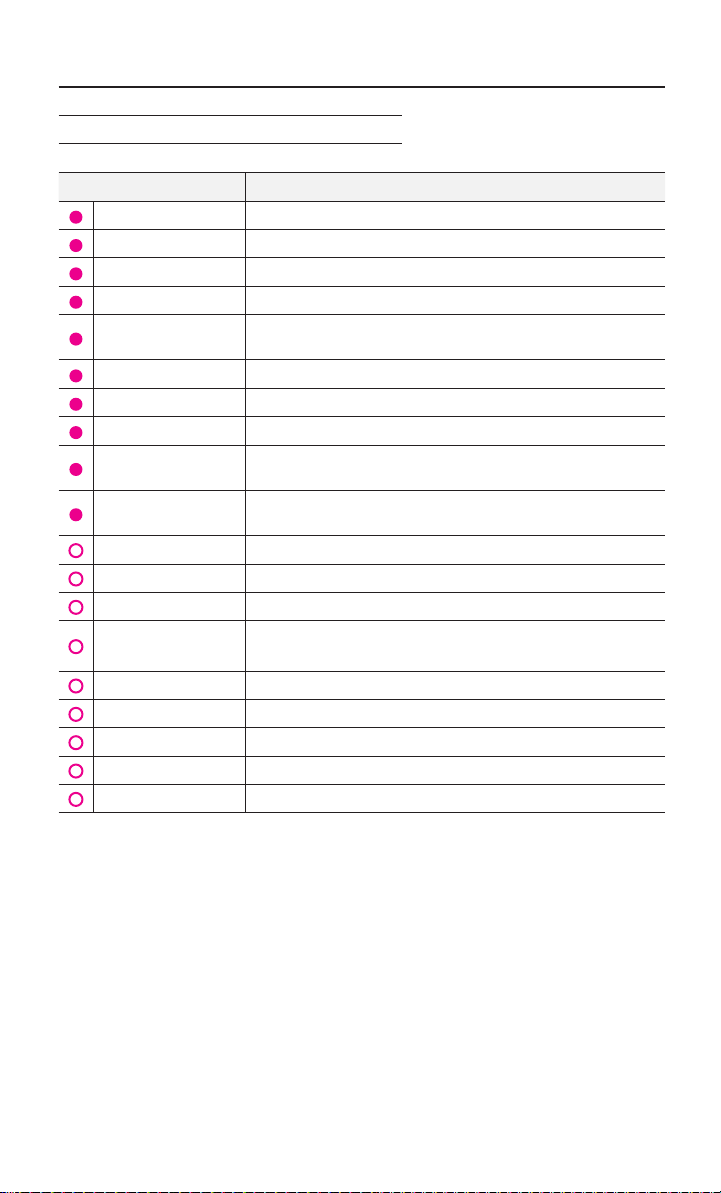
Name Description
Voice Guidance On Turns the Voice Guidance On
Voice Guidance Off Turns the Voice Guidance Off
Voice Guidance Lauder Increases the Voice Guidance volume by 1 level
Voice Guidance Softer Decreases the Voice Guidance volume by 1 level
Repeat Voice Guid-
ance
Cancel Route
Distance to Destination Reports the remaining distance until destination by voice
Time to Destination Reports the remaining time until destination by voice
Replan Faster Time
Route
Replan Shorter
Distance Route
Zoom In / Zoom Out Decreases/Increases the map zoom by one level
Zoom Maximum Displays the map screen in the maximum zoom level
Zoom Minimum Displays the map screen in the minimum zoom level
View Route
Auto Zoom On Turns the Auto Zoom feature on
Auto Zoom Off Turns the Auto Zoom feature off
Auto Mode
Daylight Mode Converts the map display into daylight mode
Night Mode Converts the map display into night mode
Repeats the route guidance
Deletes the designated destination and terminates the route guidance
Recalculates the route with faster time route
Recalculates the route with shorter distance route
If the destination has been set, displays the entire route on the screen
until the destination
Automatically converts the map display between daylight and night mode
68
Page 72
POI Category List
Voice Recognition
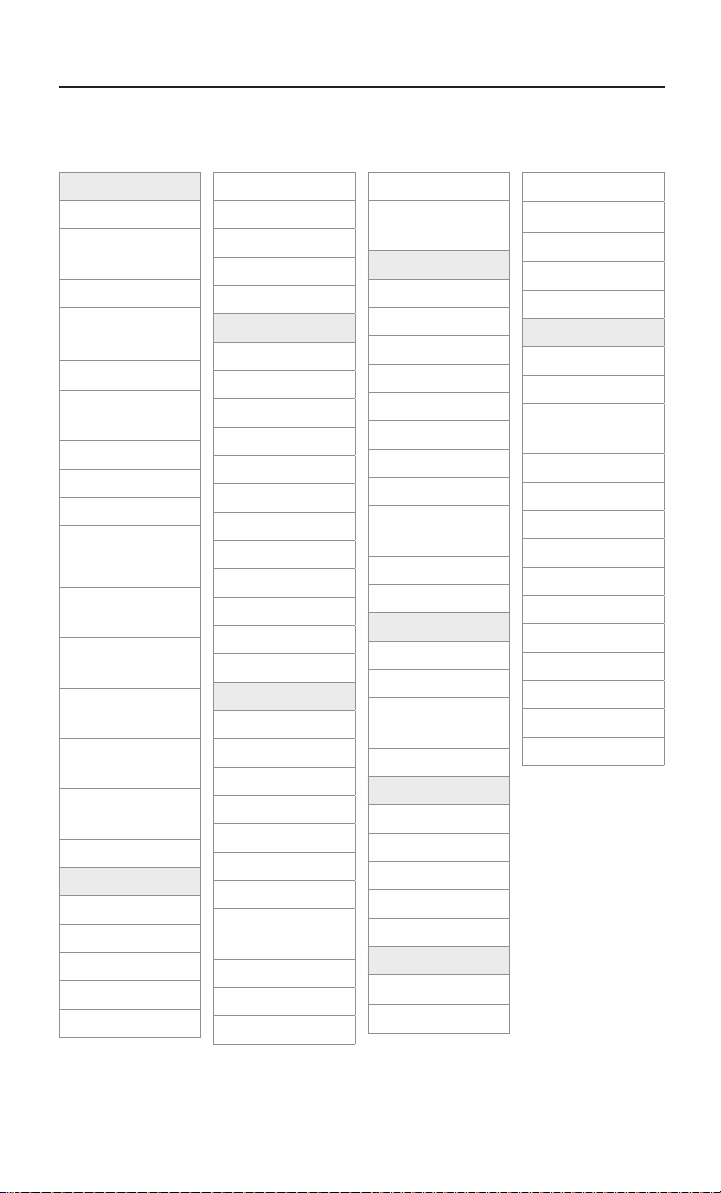
Restaurants
African Restaurants
American Restau-
rants
Asian Restaurants
Chinese Restau-
rants
Coffee Shop
Continent
rants
Fast Food
French Restaurants
Italian Restaurants
Japanese Restaurants
Korean Restaurants
Latin American
Restaurants
Mexican Restaurants
Seafood Restaurants
Vegetarian Restaurants
Other Restaurants
Automotive
Auto Parts
Auto Service
Kia Dealership
Car Wash
Gas Station
al Restau-
Hyundai Dealership
Motorcycle Dealership
Parking
Rest Area
Road Assistance
Travel
Airport
Bus Station
Campground
City Center
Ferry Terminal
Hotel
Local Transit
Rental Car Agency
Tourist Attraction
Tourist Information
Train Station
Travel Agent
Shopping
Bookstore
Clothing Shop
Convenience Store
Department Store
Electronics Store
Gift Shop
Grocery Store
Home Specialty
Store
Music Store
Pharmacy
Shoe Store
Shopping Center
Sporting Goods
Store
Recreation
Amusement Park
Cinema
Golf Course
Museum
Recreation Area
Ski Resort
Sports Activities
Sports Complex
Video & Game
Rental
Winery
Other Recreation
Financial Services
ATM
Bank
Check Cashing
Service
Money Transfer
Community
Business Facility
City Hall
Civic Center
Convention Center
Court House
Fire Department
Government Ofces
Library
Police Station
Post Ofce
School
Utilities
Waste & Sanitary
Services
Attorney
Cleaning & Laundry
Communication
Services
Dentist
Funeral Home
Hair & Beauty
Hospital
Medical Service
Mover Services
Photography
Physician
Social Service
Tailor & Alteration
Tax Service
69
Page 73

MEMO
70
Page 74

MEMO
71
Page 75

MEMO
72
Page 76

A7ENE06
 Loading...