


Page 1
Quick Manual
Page 2
Quick manual SD1 Plus
11
INDEX
ENGLISH
ITALIANO
DEUTSCH
FRANÇAIS
ESPAÑOL
PORTUGUÊS
TABLES
PAGE
3
7
11
15
19
23
27
Page 3

Page 4
Quick manual SD1 Plus
3
The NEW SD1 PLUS Arranger Workstation!
Congratulations on your purchase of the new SD1 PLUS. We know this workstation will bring you years of listening and performance pleasure.
To quickly assist you in utilizing most of the new features, we have put together this manual. It is to be used in conjunction with the main manual
also supplied with this unit. Enjoy!!
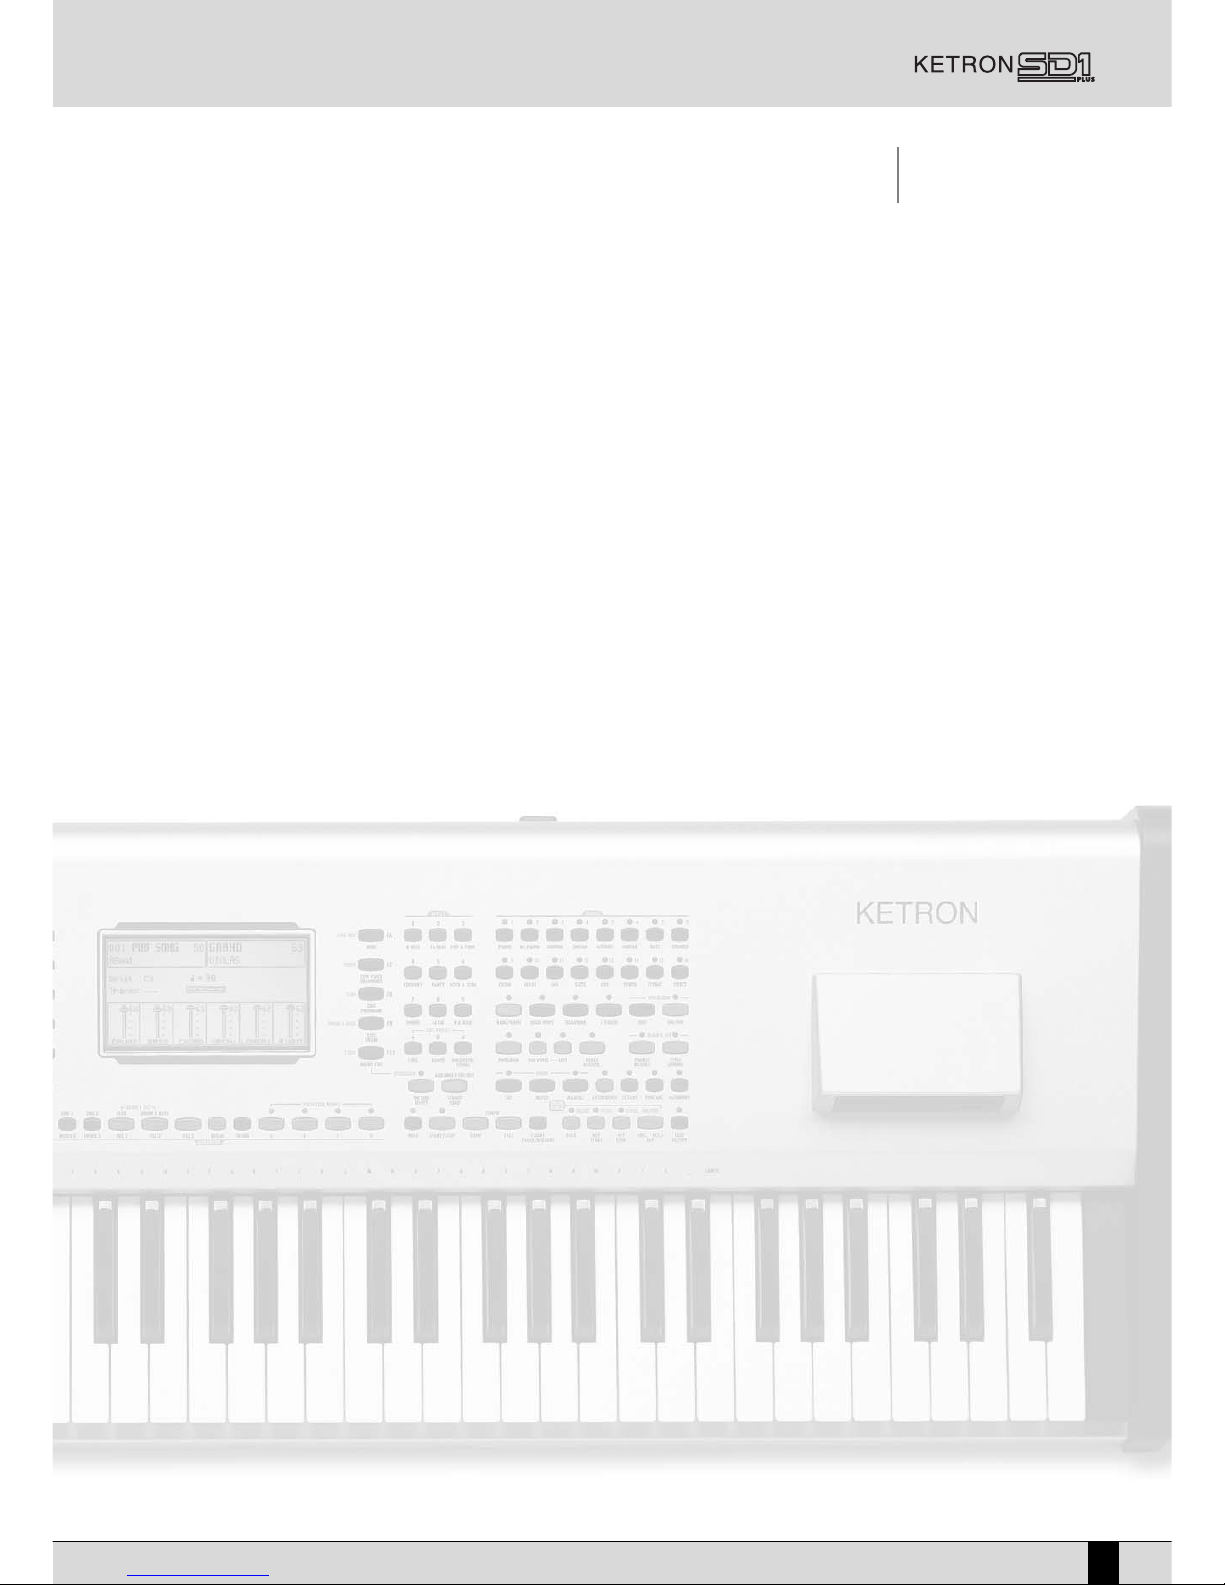
Layout
The new layout of the SD1 PLUS was carefully designed to ensure that you have the easiest and quickest access to most of the former (from the
world acclaimed SD1) and current features of this workstation. The new color code ensures quick access to main features (accompaniment,
recording, playback etc). The new labels clearly list the new functions (as emphasized with OS 4.0 remarks to follow).
New sounds
The Ketron SD1 PLUS comes with some of the world’s most authentic and realistic new sounds. New orchestral voices are included for the Guitars
(*), Bass, E.Pianos (very clean and precise), Strings (full and spacey), Pads, Brass (more authentic) & Organ groups, while some ROM voices have
been readjusted entirely to produce a cleaner Hi Fi response. The Drum sets of Drum1 and Drum2 have aggressively been restyled with new,
natural Percussion sounds and more Live Drum loops (especially for Dance and Hip Hop styles). A rich Stereo Grand Piano sound (along with
other great Sax, Pads and Guitar sounds) resides within the massive 6GB HD and can be loaded and used within the SD1 PLUS.
NNBB::
The new Stereo Grand piano has already been programmed into the first PROGRAM location and once this sound is loaded from the HD, it
can be played instantly!
(*) Hawaian and Pedal Steel guitars voices are set to play 3 notes max. with Steel Mode. (Assignment easily changeable in new Preset Editing
feature shown below).
LLOOAADDIINNGG TTHHEE NNEEWW BBOONNUUSS SSOOUUNNDDSS::
The new OS 4.0 (already installed) includes all the modifications made to the Preset voices
to yield a better Hi-Fi response in all sound categories. Extra bonus sounds (and other preexisting sounds within the HD of the SD1 PLUS) can be loaded as described on page 33 of the
Owner’s Manual (
SSoouunndd LLooaadd
).
IINNSSTTAANNTTLLYY HHAAVVEE AACCCCEESSSS TTOO NNEEWW SSOOUUNNDDSS::
You may want to have these sounds ready to use in RAM each time you turn on your SD1
PLUS (since these sounds are lost once the keyboard is powered off). To do this, you will
have to initially create a Block of sounds that will incorporate the sounds you would like loaded once the keyboard is turned on. This is a one time process that informs the SD1 PLUS
on what sound files to load once the keyboard is turned on. To proceed, see page 34 of the
Owner’s Manual (
AAuuttoommaatteedd LLooaaddiinngg
). You may proceed to create multiple sound Blocks featuring your best sounds within the Sound Folder of the HD. Once the Block(s) is (are) created, you will now have to proceed as described on page 34 of the Owners Manual (
LLooaadd aa
SSoouunndd BBlloocckk oonn SSwwiittcchhiinngg tthhee SSDD11 PPLLUUSS OOnn
). The newly created file (
!!!!iinniittoo11..ppwwrr
) is a file that
informs the SD1 PLUS of the Sound files you want loaded whenever the keyboard is turned
on. In this way, whenever the keyboard is turned on, the selected BLOCK of sounds will automatically be loaded. These RAM sounds can also be used within the presets creating new
high quality voices (or used within the Program voices as well) rendering you with a limitless array of voice patches and creations!
English
Page 5
New music!
MMUUSSIICC -- SSOONNGGSS::
We have also incorporated about 166 Midi files for your listening and performing pleasure. These include some of the
world’s famous hits as performed and were programmed by experienced programmers from around the world in
order to maintain authenticity. Most of these songs also utilize some of the new audio loops incorporated within the
SD1 Plus. These songs are included within the SD1 PLUS’ HD Folder 91 – Midi files. To listen to these songs, Press the
SSOONNGG PPLLAAYY
button on the SD1 PLUS from the default screen. Next, press
DDIIRR ((FF55))
to access the entire contents within
the Midi file folder. You can now use the styles buttons to enter the numeric value of the song you would like to listen
to and press the red START button to start the song.
MMUUSSIICC –– DDAATTAABBAASSEE::
A new music database has been created within the SD1 PLUS. This allows the musician to instantly set up the keyboard
in preparation to perform a particular song. About 200 songs settings are included within the SD1 PLUS as Song
Registrations. These files are located within the HD Folder 91 – Midi files.
SSEETT UUPP::
To set up the keyboard to perform a particular song listed within this large database, please proceed as follows:
•
Press the
DDIISSKK
button and make sure you are within the HD of the SD1 PLUS
•
Press
SSiinnggllee RReeggiissttrr
button to display all the Single Registers within Folder 93 - the Registration folder. (With the
Master Folder activated, you can also make this selection from the default disk menu using F3).
•
Use the
––VVaalluuee++
buttons to highlight the Song file you want the keyboard to set up to and
SSEELLEECCTT
with F10.
•
Now
LLOOAADD
this file using F2 and the SD1 PLUS will automatically set up to play the selected song. It should be noted
that you can create your own song settings and add to this database (see page 95 of the Owner’s manual –
CCaalllliinngg
nngg uupp aanndd SSaavviinngg aa SSiinnggllee RReeggiissttrraattiioonn
).
New ‘Jam’ STYLES
The best of the best! We have rearranged the FLASH styles within the SD1 PLUS to include 131 new Flash styles. By carefully balancing these new
styles with the initial ROM styles and utilizing the new sounds, the SD1 PLUS is capable of keeping an audience on their dancing feet while you
perform with great satisfaction.
When you access any of these styles (by pressing the style group e.g. Latin), they are denoted with Capital letters, while the re-voiced and perfected ROM styles are denoted with small letters as you access the following pages. No matter how we try to express these on paper, there’s
nothing more than trying some of them yourself and seeing what you think.
BBOONNUUSS SSTTYYLLEESS::
34 Bonus styles reside within the HD Folder 95 – Styles. Most of these styles utilize the new audio loops created for the SD1
PLUS, especially styles such as Dance and Pop Down.
To utilize these styles, (with the Master Folder LED on),
•
Press the Single RAM style button to access the styles on the HD.
•
Utilize the Styles groups buttons (8beat, 16beat…) to locate the style you want to load. They will be displayed on the
screen. The format by which these styles are displayed can be changed depending on the mode selected (see
PPaatttteerrnn VViieeww
below).
•
Use the associated F-button to select the style you want to use.
Try out the new, cool R&B, Dance and Pop rhythms (with authentic intros and endings) plus the new Soft Dancing, Latin and Traditional dancing
(listen carefully to the smooth build up as you progress from Arranger A to D), and you will understand why again, Ketron is out to produce the
best.
New functions for better performances
•
DDRRUUMM RREEMMIIXX
- To liven up or simply modify a song, changing the rhythm structure of the drums or the percussion instruments can make a
huge difference, bringing more 'life' to the song. The SD1 PLUS enables the realisation of similar results, granting the capability of replacing the percussion tracks of a Midi file/song with those from the onboard styles (including the live drum loops), enabling the muting of
single percussion groups of the rhythm track. While the Midi file is being played, it is also possible to switch between the on board styles
and the original drum tracks of the Midi file, activate the Fill-ins and use the four Arrangers in real time!
This feature is activated and used while in 'Song Play' mode with the following buttons:
OONN//OOFFFF ((TTaapp))::
Drum Remix On/Off - ‘Drum Remix’ displays on the Song Play screen when turned on.
SSTTYYLLEE//SSOONNGG ((LLoocckk))::
Style/Song selection - Determine if the numeric styles buttons (0-9) should be used to select either a Style to
be associated with a song or a Song from the current disk folder. The corresponding selection type will be displayed on the screen
SD1 Plus Quick manual
4
English
Page 6

Quick manual SD1 Plus
5
under the bar counter.
SSOONNGG ((KKeeyy SSttaarrtt))::
Turns on the drum tracks of the Midi file – Original Drum tracks from the Midi file will be heard when the song is
playing.
SSTTYYLLEE ((KKeeyy SSttoopp))::
Turns on the drum tracks of the selected SD1 PLUS style - Styles from the SD1 PLUS will be heard when the song
is playing). You can now choose to maintain this setting permanently (i.e. whenever you next call up this Midi file, it should utilize
the drum tracks of the Ketron SD1 PLUS rather than the original drum tracks of the Midi files).
To memorize the new Song Set up with Remix:
1 ) Press the GM (F1) button while the Midi file is running.
2 ) Press the Start/Stop button to stop the Midi file.
3) While within a GM part, press SAVE/ENTER, then F 10 to confirm the Saving operation.
You may choose to either overwrite the existing Midi file or rename this new file.
For every Midi file it is possible to also choose the starting and ending Bar for the Remix function.
To select the initial Bar press F2 and search the number with Value +/-.
To select the final Bar press again F2 and search the number with Value+/-. The SD1 PLUS will start to play the Remix style only within the
initial and final bar as assigned above when you press START. You can press ‘Song’ to go back to the drum tracks of the Midi file.
Patterns on Disk can be also used with the Drum Remix feature (and saved using the Save Song Set up) but ONLY if they have been loaded
into the Pattern location in RAM.
•
BBAASSSSIISSTT
- The Bassist function automatically allows the Manual Bass to be played to the left of the Split point of the keyboard section while
the right side can be used to play chords or solo parts. Every time you take off your hand from the right keyboard section, the chord last
played on the right section remains in memory (if the Hold push button is activated) whereas the Bass can be played freely without affecting the chord. This is a cool feature used to reduce the redundancy that can be associated with a style and allows the musician to freely
produce natural, human bass lines in real life. This function is automatically set ‘On’ when Pianist/Bassist and Manual (under Bass) are both
activated.
•
IINNCCRREEAASSEEDD PPOOLLYYPPHHOONNYY
- The number of notes that can be played at any given time has been increased. More notes can now be played on
the SD1 PLUS without experiencing note-drop out.
•
PPAATTTTEERRNN VVIIEEWW::
Visualization and access to Disk Patterns now works similar to that of the Internal Styles. To access disk styles, just press
the
SSiinnggllee RRaamm
Styles button and select the Style family/group; then proceed with the associated function (F1- F10) button to select the
style. A diamond shape after the style denotes that this style has already been loaded. The new GROUP function (accessed by pressing the
BBlloocckk LLiisstt
button and pressing F8 repeatedly) can be used to select the following Pattern view modes:
•
MMooddee 11::
Numeric 1; Styles are displayed numerically.
•
MMooddee 22::
Orderly; Styles are displayed in the order in which they were loaded into HD.
•
MMooddee 33::
Alphabetic; Styles are displayed alphabetically.
•
OOffff::
Numeric 2; Styles are accessed numerically as was the case with previous OS (see pg 56 & 57 of Owner’s manual).
NNBB::
If there are no patterns within the current disk folder, no Patterns will be displayed.
•
RROOMM && FFLLAASSHH SSTTYYLLEESS
- Internal ROM (denoted with small letters) and FLASH (denoted with Capital letters), styles are now easily distingui-
shable.
•
FFLLAASSHH SSTTYYLLEESS BBAACCKKUUPP FFOOLLDDEERR
- It is possible to save onto Disk the current configuration for the Flash Styles. Press Save/Enter, then Styles
(F2) and Global Flash to Disk (F7). The next screen will ask for a name to give to this new Backup Folder. Press F10-Save to confirm once
named.
This operation automatically creates a new folder containing all the current Flash Styles.
This very useful feature allows you to save/load from Disk a new, fully personalized Flash Style’s block, thus rendering you with
various blocks of customized Flash styles.
•
AARRRRAANNGGEERR OONN//OOFFFF
- A dedicated Arranger On/Off function has been added to the SD1 PLUS. It is now possible to have the current voice(s)
played over the entire keyboard (i.e. ignoring the SPLIT point) while playing Styles or Midi files. This is obtained by simply pressing the
AArrrraannggee OOnn//OOffff
button while playing to turn the arranger OFF (a new split-point value of ‘C-2’ will be displayed). Pressing this button once
more reinitiates the split point and turns the arranger ON.
•
MMIIDDII FFIILLEE PPLLAAYYEERR::
•
XD Remap – This feature XD-Remap [F8] located under the Transposer Menu, (while in Song Play mode) allows for complete
compatibility of Midi files created for the XD-series when played back on the SD1 PLUS.
•
VVOOCCAALLIIZZEERR::
•
It is possible to turn on/off the vocalizer with the Demo&Hit buttons.
•
The Hold function (in harmony mode) is now retained within the vocal set after the settings have been saved.
•
FFoooottsswwiittcchh
– Functions added to the Footswitch table: Lead On/Off, Pianist, Bassist, Drum Off All, Drum&Bass, Accordion On/Off. (Page 99 of
the Owner’s manual –
FF55 FFoooottsswwiittcchh
lists the other functions that can be controlled by the Footswitch – www.ketron.it includes others that
have been included with successive OS updates).
English
Page 7

•
PPOOWWEERR OONN SSEETT UUPP
- Functions added to the Power On Set up: Autoclose (for Preset Voices), Intelligent Transposer, Text Mode, Accordion Bass
on Stop, Pattern Group, Transposer Delayed mode. (Page 58 of the Owner’s manual contains the other futures –
PPoowweerr OOnn SSeett UUpp
).
•
AACCCCOORRDDIIOONN::
•
The new function B
as
s Off Stop has been added. When the Accordion Mode is activated the new feature, BS ACCORD [accessed
from Utility, Accordion (F6) and using F8 to toggle between Off on Stop and Normal] is automatically set to ‘Off on Stop’. This
ensures that the Bass and Chords do not sound after the arranger has been stopped. Into Accordion Mode, on F6, Bass Octave
function is shared Sustain.
•
New Dynamic User Curves have been added, Left Expression controlled via Midi 2 (for Midi Accordion equipped with bellow’s
Expression).
•
11 TTOOUUCCHH TTOO SSTTYYLLEE
– There is the possibility to assign the 1 Touch voice to a Style. For each style therefore, you can assign your best 10 voices that you believe best suit the style in question for quicker operation. This function is located within the Arranger Mode - Pg. 2 under
the Retrigger&Mode screen. Using the -Value + buttons, after the Style Setting Etn/Orc4, it is possible to assign any of the 1- 8 One Touch
settings to the style in question. This way, whenever you call up that style, the associated One Touch settings will automatically be associated with the style when you press the One Touch button (with the Style Setting LED on). Your favourite voices for a particular style will
always be available – quicker access to voices and less time searching for the right voice!
•
TTEEXXTT MMOODDEE::
When displaying text, 40 characters can now be viewed within each line without re-formatting. Under UTILITY, TEXT (F7), 2
modes can now be selected:
•
MMooddee 11::
Standard form centralized within screen – 27 characters per line will be displayed.
•
MMooddee 22::
New, smaller font utilizing full screen – 40 characters per line will be displayed.
•
DDRRYY OONN SSTTOOPP
- This feature has also been added under OnLineEffect (Micro [F6]) for easier, quicker access and operation.
•
RRAAMM FFUULLLL
- For faster operation, (when the Ram Memory gets full during sound loading), the message ‘Memory Full’ is displayed together
with the new function Clear&Load (F10) and Exit. Pressing (F10) allows the sounds that currently reside in RAM to be cleared and the current selected sounds automatically loaded, while Exit (F5) aborts the loading operation and retains the current sounds in RAM.
•
PPrreesseett EEddiittiinngg
: An Editing possibility for Preset Voices exists within the SD1 Plus. When a Preset voice is selected, by pressing simultaneously
the Edit Preset buttons * and #, the Program window corresponding to the same Preset is opened.
2 new functions have been provided for Saving the voice: To Preset [F8] (overwrites the existing RAM Preset with the same name and new
edits), and To Disk [F7] (Saves all Presets to Disk with an extension .pre).
•
SSttyyllee CCoonnvveerrtt
- Under the Disk menu - Utility - Disk Control, the Style Convert feature exists. This allows the SD1 PLUS to automatically con-
vert all the Styles from the X and XD series that reside within HD into Master Styles Folder to the SD1 PLUS format.
•
CChhoorrdd SSoolloo
- The capability to instantly mute all of the accompaniment chord tracks while a selected one remains active is available. Within
the Arrange View window, if one of the 5 automatic Chords (F6 – F10) is selected and highlighted, it is possible to mute all the other unselected chords, drum and bass leaving the highlighted chord active by simultaneously pressing both Chord/Solo Volume buttons. To exit from
the function and re-activate the other chords, just press one of the 2 master Chord Volumes again or a Fill In.
•
22nndd VVooiiccee ttoo DDiisskk
- It is possible to save the 2nd Voices settings to Disk with the extension .2ND. After pressing Save/Enter, press F6 – 2nd
Voice, then F8 – Disk Save and finally F10 - Save to confirm. Any new 2nd voice setting overwrites the previous 2ndvoice file.
•
LLooaaddiinngg DDiisskk SSttyylleess ffrroomm SSoonngg PPllaayy
- When in Song Play mode, by simultaneously pressing the two Edit Preset buttons * and #, it is possi-
ble to view and select a Style from the current HD folder that will be used next. The Style selected will automatically be loaded.
•
NNeeww DDyynnaammiicc CCuurrvveess
- New Dynamic curves have been added to clearly distinguish the difference between Soft1, Soft2, Normal, Hard1, Hard2
… etc. (UTILITY, Page1/3, Vel. Curve [F10]).
PPSS::
All references to the full OS4.0a information (already loaded in this unit) can be obtained from our website at www.ketron.it - under the
Software category.
SD1 Plus Quick manual
6
English
Page 8

Quick manual SD1 Plus
7
SD1 Plus
Congratulazioni per aver scelto il nuovo SD1 PLUS. Siamo certi che questa workstation Vi garantirà anni di piacevole ascolto e di divertimento
musicale. Il presente manuale breve è stato redatto per permetterVi di usare subito la maggior parte delle nuove funzioni e caratteristiche.
Dovrà essere usato assieme al manuale principale che Vi è stato fornito con lo strumento. Buon divertimento !
Pannello
Il nuovo pannello dell'SD1 PLUS è stato studiato accuratamente per garantire un accesso facile e veloce alla maggior parte delle funzioni preesistenti. I nuovi tasti colorati evidenziano i comandi principali e le nuove scritte invece elencano con chiarezza le nuove funzioni.
Nuovi suoni
Il Ketron SD1 PLUS si presenta con alcuni nuovi suonidi grande realismo.
Sono state incluse nuove voci orchestrali per le Chitarre (*), il Basso, gli E.Pianos (molto puliti e precisi), nonché gli Archi ( pieni ed avvolgenti),
i Pads, gli Ottoni ( più autentici) e gli Organi.
Anche la batteria ( Drum1 e Drum2 ) é state perfezionata con l'aggiunta di nuovi suoni Percussivi ( Casse, Snares etc. ) ed un maggior numero
di Live Drum loop (in particolare per gli stili Dance e Hip Hop). Su Hard Disk sono disponibili un nuovo di Grand Piano Stereo ed altri suoni di
Sax, Pads,Basso e Chitarra.
NNBB::
Il nuovo Stereo Grand piano è già stato inserito nella programmazione del PROGRAM n.1, per cui appena questo suono viene caricato da disco
fisso potrà essere usato immediatamente per le esecuzioni musicali!
(*) Le voci delle chitarre Hawaian e Pedal Steel sono state programmate in maniera tale che vengano suonate al massimo 3 note in modalità
Steel. (Le assegnazioni possono essere facilmente modificate usando la nuova funzione di Preset Editing descritta in seguito).
CCAARRIICCAARREE II NNUUOOVVII SSUUOONNII IINN RRAAMM ::
È possibile caricare individualmente in Ram i suoni presenti sul disco fisso dell'SD1 PLUS
seguendo la procedura descritta a pagina 33 del manuale d'uso (
SSoouunndd LLooaadd
).
CCAARRIICCAAMMEENNTTOO AAUUTTOOMMAATTIICCOO DDEEII SSUUOONNII AALLLL''AACCCCEENNSSIIOONNEE::
Se si desidera avere i nuovi suoni pronti all'uso non appena si accende l'SD1 PLUS occorre
creare un SOUND BLOCK comprendente tutti i suoni che si vogliono caricare. Si tratta di
un'operazione che basta eseguire una sola volta, e che indica appunto all'SD1 PLUS quali
sono i files da caricare al momento in cui viene accesa la tastiera. Per la procedura da seguire, si veda la pagina n° 34 del Manuale d'uso (
CCaarriiccaammeennttoo aauuttoommaattiiccoo
). Nel Sound Folder
del disco fisso è possibile creare più Sound Blocks contenenti i suoni preferiti. Dopo aver
creato il Block, è sufficiente procedere come descritto a pagina 34 del Manuale d'uso.
(
CCaarriiccaarree uunn SSoouunndd BBlloocckk aall mmoommeennttoo ddeellll''aacccceennssiioonnee ddeellll''SSDD11 PPLLUUSS
). Il nuovo file così crea-
to (
!!!!iinniittoo11..ppwwrr
) è un file che informa l'SD1 PLUS sui files audio da caricare. Non appena la
tastiera verrà accesa, il Sound BLOCK selezionato verrà caricato automaticamente. I suoni
in RAM potranno essere utilizzati anche all'interno di Preset o Program per creare nuove
voci di alto livello qualitativo.
Nuova libreria
SSOONNGGSS::
Abbiamo incluso nel Folder 91 dell'H.D 166 Midifiles comprendenti vari generi musicali e brani musicali famosi. Molte
di queste songs comprende anche alcuni dei nuovi audio loop presenti nell'SD1 Plus. Per ascoltarle le Songs, premere il pulsante SONG PLAY dalla videata di default dell'SD1 PLUS. Premere poi DIR (F5) per avere accesso a tutto il contenuto del Folder con i Midifiles. Ora con i pulsanti Styles è possibile digitare il valore numerico della Song che si desidera ascoltare e premere poi il pulsante START rosso per far partire la song.
SSOONNGG RREEGGIISSTTRRAATTIIOONNSS::
Nel Folder 93 - Registrations sono state inserite circa 200 Song Registration appositamente programmate per una
certa Song. Ciò permette al musicista di avere in pochi istanti la tastiera pronta all'esecuzione di quella song.
Italiano
Page 9

SSEETT UUPP::
Per preparare la tastiera a suonare una song particolare che si trova all'interno del database, procedere come segue:
•
Premere il pulsante
DDIISSKK
ed assicurarsi che ci si trova sul disco fisso dell'SD1 PLUS
•
Premere il pulsante
SSiinnggllee RReeggiissttrr
per visualizzare tutti i Single Registers che si trovano all'interno del Folder 93
- Registrations folder. (Se il Master Folder è stato attivato, questa selezione potrà essere eseguita anche dal disk
menu di default premendo F3)..
•
Usare i pulsanti –
VVaalluuee
+ per evidenziare il Song file per il quale la tastiera deve essere predisposta e premere
F10 –
SSEELLEECCTT
.
•
Premere ora F2 per
CCAARRIICCAARREE
questo file e l'SD1 PLUS inizierà automaticamente a suonare la song selezionata.
Si rammenta che è possibile creare Song settings individuali ed aggiungerli poi al database (vedi pagina 95
del Manuale d'uso – Richiamare e salvare una Single Registration).
•
Se si conosce il
nnuummeerroo
della Registration questo può essere digitato anche direttamente con la pulsantiera 0 - 9.
Nuovi STILI
Un altro punto saliente consiste nel fatto che i FLASH styles all'interno dell'SD1 PLUS sono stati rivisti e sono stati inclusi 131 nuovi Flash styles.
Combinando sapientemente questi stili nuovi con quelli originali residenti in ROM ed usando i nuovi suoni, sarà possibile trarre il massimo divertimento suonando l'SD1 PLUS.
I nuovi stili in Flash verranno indicati con lettere MAIUSCOLE, mentre gli stili in ROM verranno visualizzati con lettere MINUSCOLE.
PPAATTTTEERRNNSS ::
Su H.D. , all'interno del Folder 95 – Styles risiedono 34 nuovi Patterns . La maggior parte di essi utilizza i nuovi loop audio
creati per l'SD1 PLUS, in particolar modo gli styles come Dance e Pop Down.
Per usare questi styles, procedere come segue (con il LED del Master Folder acceso):
•
Premere il pulsante Single RAM Style per poter accedere agli styles sul disco fisso.
•
Usare i pulsanti dei gruppi di stili (8beat, 16beat…) per visualizzare il gruppo nel quale si trova lo stile che si
desidera caricare. Il formato della visualizzazione può essere modificato in base alla modalità selezionata
(vedi
PPaatttteerrnn VViieeww
più avanti).
•
∑ Usare il relativo pulsante funzione per selezionare lo style che si desidera usare.
Provate i nuovi ritmi Dance, Pop&Funk e Pop (con intros ed endings originali), Folk ,Swing e Latin. ( Da notare su Waltz, Polka, Mazurka e Oberwaltz
una nuova risoluzione armonica che porta sull'Arrange A ).
Nuove funzioni
•
DDRRUUMM RREEMMIIXX
- Quando si desidera ravvivare o comunque modificare una song, cambiare la struttura ritmica degli strumenti di percussione o della batteria può fare una differenza enorme, appunto vivacizzando la song. L'SD1 PLUS permette di ottenere risultati di questo genere offrendo la possibilità di sostituire le tracce della percussione di singoli Midifiles o di songs con quelle degli stili residenti nella memoria dello strumento (live drum loops compresi) e di escludere temporaneamente singoli gruppi di percussione dalla traccia del ritmo.
Mentre il Midifile sta suonando, sarà possibile anche passare dagli styles della tastiera alle tracce di batteria originali del Midifile e viceversa, attivare i Fill-ins ed usare i quattro Arrangers in tempo reale!
Questa funzione può essere azionata ed usata in modalità 'Song Play' usando i seguenti pulsanti:
OONN//OOFFFF ((TTaapp))::
Drum Remix On/Off - Sulla videata del Song Play viene indicato se il ‘Drum Remix’ è attivato o meno.
SSTTYYLLEE//SSOONNGG ((LLoocckk))::
Selezione di Style/Song - Per scegliere se si desidera usare i pulsanti numerici degli styles (0-9) per selezionare uno Style da associare ad una song, oppure per selezionare una Song dal folder attualmente aperto sul disco. Il tipo di selezione attivato verrà visualizzato sullo schermo, sotto al contatore delle battute.
SSOONNGG ((KKeeyy SSttaarrtt))::
Aziona le tracce di batteria del Midifile – Con la song verranno riprodotte le tracce Drum originali del Midifile.
SSTTYYLLEE ((KKeeyy SSttoopp))::
Aziona le tracce di batteria dello stile SD1 PLUS selezionato, che verranno usate durante la riproduzione della
song. Questa selezione può essere memorizzata in maniera permanente (cioè quando questo Midifile verrà richiamato la prossima
volta, userà le tracce di batteria del Ketron SD1 PLUS invece delle tracce di batteria originali dei Midifiles)
Per memorizzare il nuovo Song Set up con Remix:
1 ) Premere il pulsante GM (F1) mentre il Midifile viene riprodotto.
2 ) Premere il pulsante Start/Stop per interrompere il Midifile.
3) All'interno di una parte GM, premere SAVE/ENTER, poi F10 per confermare l'operazione di salvataggio.
Si può scegliere o di sovrascrivere il Midifile esistente o di rinominare questo nuovo file.
Per ogni Midifile è possibile anche scegliere la battuta di inizio e fine della funzione di Remix.
Per selezionare la battuta iniziale, premere F2 e cercare il numero usando Value +/-.
Per selezionare la battuta finale, premere nuovamente F2 e cercare il numero con Value+/-. Premendo START, l'SD1 PLUS inizierà a suonare
lo stile nella versione Remix soltanto dalla battuta iniziale fino a quella finale assegnata come descritto sopra. Premendo ‘Song’ verranno
nuovamente attivate le tracce di batteria del Midifile.
SD1 Plus Quick manual
8
Italiano
Page 10

Quick manual SD1 Plus
9
La funzione Drum Remix permette anche di usare i Pattern presenti sul disco (salvati con Save Song Set up) ma SOLTANTO se sono stati
caricati nello spazio previsto nella RAM per i Pattern.
•
BBAASSSSIISSTT
- La funzione Bassist permette di suonare il basso manuale sulla parte a sinistra del punto di split sulla tastiera, mentre la parte
destra potrà essere usata per suonare accordi o degli assolo. Ogni volta che il musicista solleva la mando dalla parte destra della tastiera,
l'ultimo accordo suonato nella parte destra rimarrà in memoria (a condizione che il pulsante Hold sia stato attivato) mentre il Basso potrà
essere suonato manualmente senza influenzare l'accordo. Si tratta di una funzione molto utile per ridurre la ripetitività connessa con l
'Arranger. Il Bassist risulta automaticamente su ‘On’ quando sono attivati sia il tasto Pianist / Bassist che il tasto Manual Bass.
•
PPIIÙÙ PPOOLLIIFFOONNIIAA
- È stata ottimizzata l'assegnazione dinamica della polifonìa sulle varie sezioni. contemporaneamente.
•
PPAATTTTEERRNN VVIIEEWW::
La visualizzazione e l'accesso ai Disk Patterns avvengono ora in maniera similare agli Internal Styles. Per ottenere accesso
ai disk styles, basta premere il pulsante
SSiinnggllee RRaamm
Styles e selezionare il gruppo o la famiglia di Styles; usare poi il relativo pulsante funzione (F1- F10) per selezionare lo stile specifico. Appare il simbolo "….." dopo lo stile già caricato. La nuova funzione GROUP (attivabile premendo il pulsante
BBlloocckk LLiisstt
e poi ripetutamente il pulsante F8) potrà essere usata per selezionare le seguenti modalità di visualizzazione
dei Patterns:
•
MMooddaalliittàà 11::
Modalità numerica 1; gli stili verranno visualizzati in ordine numerico.
•
MMooddaalliittàà 22::
Per ordine di caricamento; gli Styles verranno visualizzati secondo l'ordine in cui sono stati caricati nel disco fisso.
•
MMooddaalliittàà 33::
Per ordine alfabetico; gli Styles vengono visualizzati in ordine alfabetico.
•
OOffff::
Modalità numerica 2; gli Styles possono essere richiamati in maniera numerica così come previsto con il software precedente (vedi
pagine 56 & 57 del Manuale d'uso).
NNBB::
Se nel folder del disco attualmente selezionato non sono presenti dei patterns, non verrà visualizzato nessun pattern.
•
FFOOLLDDEERR DDII BBAACCKKUUPP PPEERR FFLLAASSHH SSTTYYLLEESS
- La configurazione attuale dei Flash Styles può essere salvata su disco. Premere Save/Enter, poi
Styles (F2) e Global Flash to Disk (F7). Sulla videata successiva Le verrà chiesto il nome da assegnare a questo nuovo Folder di backup.
Premere F10-Save per confermare il nome inserito.
Questa operazione crea automaticamente un nuovo folder che conterrà tutti i Flash Styles correnti.
Si tratta di una funzione estremamente utile per salvare/caricare dal disco un nuovo Block di Flash Styles completamente
personalizzati, mettendoLe a disposizione una serie di blocchi diversi di Flash Styles personalizzati.
•
AARRRRAANNGGEERR OONN//OOFFFF
- All'SD1 PLUS è stata aggiunta un'apposita funzione di Arranger On/Off. È ora possibile avere il Suono disponibile su
tutta la tastiera (cioè senza tener conto del punto di SPLIT) mentre si stanno suonando gli Styles o i Midifiles. Per ottenere ciò è sufficiente premere il pulsante
AArrrraannggee OOnn//OOffff
mentre si sta suonando, disattivando così l'arranger (verrà visualizzato un nuovo valore per lo split
point, e cioè il ‘C-2’). Premendo nuovamente questo pulsante, il punto di split verrà riattivato e l'Arranger torna su ON.
•
MMIIDDII FFIILLEE PPLLAAYYEERR::
•
XD Remap – La funzione XD-Remap [F8] si trova sotto il Menu Transposer (in modalità Song Play) e garantisce la compatibilità
completa dei Midifiles creati per la serie XD, che potranno quindi essere utilizzati senza alcun problema sull'SD1 PLUS.
•
VVOOCCAALLIIZZEERR::
•
Il vocalizer potrà essere attivato / disattivato agendo sui pulsanti Demo&Hit.
•
La funzione Hold (in modalità harmony) resterà inclusa nel vocal set, dopo il salvataggio delle impostazioni.
•
FFOOOOTTSSWWIITTCCHH
– Nuove funzioni sono state aggiunte per gli interruttori a pedali: Lead On/Off, Pianist, Bassist, Drum Off All, Drum&Bass,
Accordion On/Off. (A pagina 99 del Manuale d'uso –
FF55 FFoooottsswwiittcchh
si trova un elenco delle altre funzioni che possono essere controllate con
il pedale – nel sito www.ketron.it si trovano ulteriori funzioni aggiunte con i successivi aggiornamenti di Software)..
•
PPOOWWEERR OONN SSEETT UUPP
- Le seguenti funzioni sono state aggiunte al Power On Set up: Autoclose (per Preset Voices), Intelligent Transposer, Text
Mode, Accordion Bass on Stop, Pattern Group, Transposer Delayed mode (a pagina 58 del Manuale d'uso sono elencate le altre funzioni –
Power On Set Up).
•
AACCCCOORRDDIIOONN::
•
È stata aggiunta la nuova funzione Bass Off Stop. Quando è attivata la modalità Accordion, la nuova funzione BS ACCORD [accessibile da Utility, Accordion (F6) e premendo F8 per passare da Off on Stop a Normale e viceversa] è automaticamente impostata come ‘Off on Stop’. In questo modo si fa sì che il Basso e gli Accordi non continuino a suonare dopo che l'Arranger è stato
stoppato. In modalità Accordion, sul pulsante funzione F6, le funzioni Bass Octave e Sustain sono condivise.
•
Sono state aggiunte nuove Curve di User Dynamic e la Left Expression viene controllata via Midi 2 ( con fisarmoniche Midi corredate di controllo dell'espressione tramite mantice).
•
11 TTOOUUCCHH TTOO SSTTYYLLEE
– Esiste la possibilità di assegnare la 1 Touch voice ad uno Style. È quindi possibile assegnare ad ogni style le 10 voci che
meglio si addicono allo style in questione, per una maggiore rapidità durante le esecuzioni. Questa funzione si trova nell'Arranger Mode Pg. 2 sotto la schermata Retrigger&Mode. Usando i pulsanti Value +/–, dopo lo Style Setting Etn/Orc4 si potrà assegnare una qualsiasi delle
impostazioni One Touch da 1 a 8 allo style in questione. In questo modo, in qualsiasi momento si richiami questo stile, le impostazioni One
Touch che vi sono state associate verranno automaticamente richiamate non appena si aziona il pulsante One Touch ( il LED dello Style
Setting deve stare acceso
Italiano
Page 11

•
TTEEXXTT MMOODDEE::
Durante la visualizzazione di testi, ora potranno essere riprodotti 40 caratteri su ogni riga senza dover riformattare. Sotto UTI-
LITY, TEXT (F7), vi sono 2 modalità a disposizione:
•
MMooddaalliittàà 11::
Formato standard visualizzato al centro dello schermo – 27 caratteri per riga.
•
MMooddaalliittàà 22::
Verranno usati caratteri diversi, più piccoli, sullo schermo intero – 40 caratteri per riga.
•
DDRRYY OONN SSTTOOPP
- Questa funzione è stata inserita anche sotto OnLineEffect (Micro [F6]) per rendere più facile e più veloce l'accesso.
•
RRAAMM FFUULLLL
-
Quando la memoria Ram si riempie durante il Sound Load, verrà visualizzato il messaggio ‘Memory Full’ assieme alla nuova fun-
zione Cle
ar&Load (F10) ed Exit. Premendo (F10) si cancellano i suoni che risiedono attualmente nella RAM ed i suoni selezionati al momento
vengono caricati automaticamente. Con Exit (F5) si annulla l'operazione e si mantengono nella RAM i suoni che vi risiedono attualmente.
•
PPrreesseett EEddiittiinngg
: L'SD1 Plus prevede la possibilità di modificare le Preset Voices. Dopo aver selezionato una Preset voice, premendo contemporaneamente i pulsanti Edit Preset * e #, si apre la finestra del Program relativo al Preset in questione.
Sono state previste 2 nuove funzioni per salvare la voce: To Preset [F8] (viene sovrascritto l'attuale RAM Preset con lo stesso nome e le
modifiche effettuate), e T
o Disk [F7] (Verranno salvati su Disk tutti i Presets con estensione .pre).
•
SSttyyllee CCoonnvveerrtt
- Nel menu Disk - Utility - Disk Control, esiste la funzione Style Convert. Questa funzione permette all'SD1 PLUS di convertire
automaticamente in formato SD1 PLUS tutti gli Styles delle serie X ed XD residenti sul disco fisso nel Master Styles Folder.
•
CChhoorrdd SSoolloo
- Questa funzione permette di escludere all'istante tutte le tracce degli Accordi di accompagnamento, ad eccezione di una. Nella
finestra Arrange View, dopo aver selezionato ed evidenziato uno dei 5 Chord (F6 – F10), tutti i Chords, Drum e Bass che non siano stati evidenziati possono essere esclusi premendo contemporaneamente ambedue i pulsanti Chord/Solo Volume. Per uscire da questa funzione e
riattivare gli altri Chord, è sufficiente premere una seconda volta uno dei 2 pulsanti master Chord Volumes oppure un Fill In.
•
22nndd VVooiiccee ttoo DDiisskk
- È possibile salvare le impostazioni della 2nd Voice su disco, con estensione .2ND. Dopo aver premuto Save/Enter, premere F6 – 2nd Voice, poi F8 – Disk Save ed infine F10 - Save per confermare. Se le impostazioni della 2nd Voice vengono salvate una seconda volta, verrà sovrascritto il precedente file 2nd Voice.
•
CCaarriiccaarree SSttyylleess ddaa DDiissccoo iinn SSoonngg PPllaayy
- In modalità Song Play è sufficiente premere contemporaneamente i due pulsanti * e # ( Edit Preset
) per visualizzare e selezionare il prossimo Style da usare dall'attuale folder del disco fisso. Lo Style selezionato verrà caricato automaticamente.
•
NNuuoovvee CCuurrvvee ddii DDiinnaammiiccaa
- Sono state aggiunte nuove curve di Dinamica per rendere più evidente la differenza tra Soft1, Soft2, Normal,
Hard1, Hard2 … ecc. (UTILITY, Page1/3, Vel. Curve [F10]).
PPSS::
Per informazioni più dettagliate sull'OS4.0a (già caricato su SD1 Plus ) si rinvia al nostro sito web www
.ketron.it - sezione Software.
SD1 Plus Quick manual
10
Italiano
Page 12

Quick manual SD1 Plus
11
Die neue Arranger Workstation SD1 PLUS!
Mit dem neuen SD1 PLUS haben Sie eine sehr gute Wahl getroffen – herzlichen Glückwunsch! Wir sind sicher, dass Ihnen diese Workstation Jahre
langen Hörgenuss und Freude am Musikmachen garantiert. Die vorliegende Kurzanleitung ist verfasst worden, um Ihnen zu gestatten, sofort die
meisten der neuen Funktionen und Leistungsmerkmale zu nutzen. Sie ist jedoch nur in Zusammenhang mit dem Benutzerhandbuch, das Ihnen
mit dem Instrument mit geliefert wurde, zu verwenden. Viel Vergnügen!
Layout
Das neue Layout des SD1 PLUS wurde entwickelt, um Ihnen einen einfachen und schnellen Zugriff auf die bereits vorher existierenden (das SD1
hat weltweit einen riesigen Erfolg erzielt) und neuen Funktionen dieser Workstation sicherzustellen. Die neue Farbkodierung sorgt dafür, dass
die wichtigsten Optionen (Begleitung, Aufnahme, Wiedergabe usw.) geradezu „griffbereit“ sind. Die neuen Beschriftungen hingegen listen die
neuen Funktionen ganz klar auf (siehe auch nachfolgende Anmerkungen zur OS 4.0).
Neue sounds
Das Ketron SD1 PLUS hat einige neue Klänge zu bieten, die einzigartig authentisch und realistisch sind. Es sind neue Orchestersounds für Gitarren
(*), Bass, E-Pianos (sehr sauber und präzise) sowie für Streicher (voll und einbindend), Pads, Bläser (noch echter klingend) und Orgel hinzugekommen, während einige im ROM-Speicher verfügbare Stimmen neu aufgelegt wurden, um einen noch besseren HiFi-Sound zu erzielen. Auch
die Schlagzeugelemente für Drum1 und Drum2 wurden durch die Integration von neuen natürlichen Klängen und mehr Live Drum Loops (insbesondere für die Dance- und Hip Hop-Styles) eingehend überarbeitet. Die leistungsstarke 6 GB-Festplatte umfasst ein Stereo Grand Piano von
äußerst vielfältiger Klangfülle (zusammen mit anderen, überaus reizvollen Sax-, Pads- und Gitarrenklängen): allesamt Sounds, die am SD1 PLUS
geladen und verwendet werden können.
NNBB::
Das neue Stereo Grand Piano wurde bereits bei der Ausarbeitung des ersten PROGRAMS berücksichtigt, d.h. dass dieser Klang, sobald er von
der Festplatte geladen wird, unmittelbar zum Spielen zur Verfügung steht!
(*) Die Stimmen der Hawaian- und Pedal Steel-Gitarren sind so programmiert, dass höchstens 3 Noten im Steel-Modus gespielt werden. (Die
Zuordnungen können ganz einfach mit der neuen, nachstehend beschriebenen Pr
eset Editing-Funktion geändert werden).
DDIIEE NNEEUUEENN KKLLÄÄNNGGEE LLAADDEENN::
die neue OS 4.0 (bereits installiert) beinhaltet sämtliche Änderungen, die an den Preset
Sounds vorgenommen wurden, um eine bessere HiFi-Klangwirkung in allen SoundKategorien zu gewährleisten . Es ist möglich, weitere zusätzliche Klänge (und andere vorab
auf der Festplatte des SD1 PLUS vorhandene Klänge) zu laden, indem Sie die auf Seite 33 des
Benutzerhandbuchs (
SSoouunndd LLooaadd
) erläuterte Vorgangsweise befolgen.
FFÜÜRR EEIINNEENN UUNNMMIITTTTEELLBBAARREENN ZZUUGGRRIIFFFF AAUUFF DDIIEE NNEEUUEENN KKLLÄÄNNGGEE::
wenn Sie möchten, dass die neuen Klänge beim Einschalten des SD1 PLUS immer sofort zur
Verfügung stehen, ist es erforderlich, einen Sound Block zu kreieren, in dem alle gewünschten Klänge mit aufzunehmen sind (andernfalls entziehen sich diese Klänge dem unmittelbaren Zugriff bei Ausschalten des Keyboards). Es handelt sich um eine Aktion, die nur einmal auszuführen ist, damit das SD1 PLUS „lernt“, welche Dateien beim Einschalten des
Keyboards zu laden sind. Bzgl. der Vorgangsweise lesen Sie auf Seite 34 im
Benutzerhandbuch (
DDeenn LLaaddeevvoorrggaanngg aauuttoommaattiissiieerreenn
) nach. Im Sound Folder der Festplatte
können mehrere Sound Blocks mit Ihren Favourite-Klängen erstellt werden. Nachdem der
(die) Block(s) angelegt wurde(n), ist wie auf Seite 34 des Benutzerhandbuchs (
EEiinneenn SSoouunndd
BBlloocckk bbeeiimm EEiinnsscchhaalltteenn ddeess SSDD11 PPLLUUSS aauuttoommaattiisscchh llaaddeenn
) beschrieben vorzugehen. Die auf
diese Weise neu erstellte Datei (
!!!!iinniittoo11..ppwwrr
) ist die Datei, die das Keyboard dahingehend
anweist, welche Audiodateien im Rahmen des gewählten Sound BLOCKS beim Einschalten
des Geräts automatisch zu laden sind. Die besagten RAM-Klänge können auch innerhalb der
Presets (oder Program Voices) verwendet werden, um neue, hoch qualitative Stimmen zu
generieren. Damit haben Sie eine schier unendliche Auswahl an Klangelementen und neuen
Kreationen zu Verfügung!
Deutsch
Page 13

Neue musik!
MMUUSSIICC -- SSOONNGGSS::
wir haben etwa 166 Midi-Dateien inkludiert, die Sie einfach abspielen oder verwenden können, um beim Musikmachen
noch mehr Spaß zu haben. Diese Dateien enthalten einige der weltweit berühmtesten Stücke und sind von Fachleuten
aus der ganzen Welt programmiert worden, um ihren authentischen Charakter zu garantieren. Der meiste Teil dieser
Songs, die im Folder 91 – Midifiles auf der Festplatte zu finden sind, beinhaltet bereits einige der neuen, im SD1 Plus
implementierten Audio-Loops. Zur Wiedergabe ist der Push-Button
SSOONNGG PPLLAAYY
von der Default-Menüseite des SD1
PLUS aus zu betätigen. Anschließend
DDIIRR (FF55
) drücken, um sich auf den gesamten Inhalt des Ordners mit den MidiDateien Zugriff zu verschaffen. Mit den Styles-Knöpfen ist es nun möglich, die Nummer des Songs, den Sie hören
möchten, einzugeben. Auf den roten START-Knopf drücken, um mit der Wiedergabe zu beginnen.
MMUUSSIICC –– DDAATTAABBAASSEE::
das SD1 PLUS verfügt über eine neue Datenbank, die es dem Musiker ermöglicht, das Keyboard in nur wenigen
Sekunden auf die Ausführung eines bestimmten Songs vorzubereiten. Etwa 200 Song-Einstellungen sind in Form von
Song Registrations im Folder 91 – Midifiles auf Festplatte zu finden.
SSEETT UUPP::
um das Keyboard darauf vorzubereiten, einen bestimmten Song aus dieser breit gefächerten Datenbank zu spielen,
ist wie folgt vorzugehen:
•
Den Knopf
DDIISSKK
drücken und sich vergewissern, dass damit die Festplatte des SD1 Plus angesteuert wird.
•
Den Knopf
SSiinnggllee RReeggiissttrr
drücken, um sämtliche Single Registrations, die im Folder 93 - Registrations Folder
vorhanden sind, angezeigt werden (wenn die Master Folder-Funktion aktiviert wurde, kann diese Wahl auch vom
Default-Disk-Menü aus erfolgen, indem F3 betätigt wird).
•
Mit den
VVaalluuee
+ -Knöpfen die Song-Datei markieren, auf die das Keyboard vorzubereiten ist, und F10 –
SSEELLEECCTT
drücken.
•
Nun über F2 die Datei
LLAADDEENN
, und das SD1 PLUS beginnt automatisch den ausgewählten Song zu spielen. Es wird
daran erinnert, dass es möglich ist, individuelle Song Settings zu erstellen, die dann der Datenbank
hinzuzufügen sind (siehe Seite 95 des Benutzerhandbuchs –
EEiinnee SSiinnggllee RReeggiissttrraattiioonn aabbrruuffeenn uunndd ssiicchheerrnn
).
Neue ‘Jam’-STYLES
Eine weitere signifikante Neuheit besteht darin, dass die internen FLASH Styles überarbeitet und 131 neue Flash Styles integriert wurden. Durch
die gekonnte Kombination dieser neuen Stile mit den ROM residenten Stilen und den Einsatz der neuen Sounds können Sie sich beim Spielen
des SD1 PLUS vergnügen wie noch nie und gleichzeitig das Publikum begeistern!
Bei der Anzeige der neuen Stile (nach Anwahl der jeweiligen Styles-Gruppe, Latin zum Beispiel) werden diese durch Großbuchstaben gekennzeichnet, während die überarbeiteten und perfektionierten ROM-Styles in Kleinbuchstaben auf den folgenden Seiten angezeigt werden. Diesen
neuen Aspekt hier ausführlich zu beschreiben, wäre jedoch sinnlos: Sie müssen die Sache ausprobieren und werden verstehen, worum es geht!
NNEEUUEE SSTTYYLLEESS::
auf der Festplatte sind im Folder 95 – Styles 34 Styles gespeichert. Die meisten davon verwenden die neuen, für das SD1
PLUS entwickelten Audio-Loops, insbesondere die Styles wie Dance und Pop Down.
Um mit diesen Styles zu arbeiten, ist wie folgt vorzugehen (bei aktivierter Master Folder-Funktion):
•
Den Single RAM Style-Knopf drücken, um sich auf die Styles auf Festplatte Zugriff zu verschaffen.
•
Die Knöpfe der Styles-Gruppen (8beat, 16beat…) verwenden, um die Gruppe anzuzeigen, in der sich der Stil
befindet, der geladen werden soll. Das Format der Anzeige kann anhand der Anzeigemoduswahl geändert werden
(siehe hierzu in weiterer Folge:
PPaatttteerrnn VViieeww
)..
•
Über den entsprechenden Funktionsdruckknopf den gewünschten Style anwählen.
Probieren Sie die neuen Rhythmen R&B, Dance und Pop (mit originellen Intros und Endings) sowie den neuen Soft Dancing, Latin und Traditional
Dancing (beachtenswert ist der absolut sanfte Übergang von Arranger A auf D) und Sie werden sofort bemerken, warum Ketron auch diesmal
gleichbedeutend mit Fortschritt ist.
Neue funktionen für bessere musikalische Leistungen
•
DDRRUUMM RREEMMIIXX
- Soll ein Song dynamischer oder sonst irgendwie geändert werden, ist es grundlegend, die rhythmische Struktur der
Perkussionsinstrumente bzw. des Schlagzeugs zu ändern, um eben dem Song mehr Power zu verleihen. Das SD1 PLUS gestattet in diesem
Sinne, die Perkussionsspuren der einzelnen Midifiles oder Songs mit denen der speicherresidenten Stile des Instruments zu ersetzen (Live
Drum Loops inklusive) und zeitweilig die einzelnen Perkussionsgruppen von der Rhythmusspur wegzuschalten. Während die Midi-Datei
abgespielt wird, ist es auch möglich, von den Styles der Tastatur auf die Original-Schlagzeugspuren der Midi-Datei überzugehen und
umgekehrt, Fill-ins zu aktivieren und die vier Arranger in Echtzeit zu benutzen!
SD1 Plus Quick manual
12
Deutsch
Page 14

Quick manual SD1 Plus
13
Diese Funktion kann im 'Song Play'-Modus zugeschaltet und verwendet werden, indem die folgenden Knöpfe betätigt werden:
OONN//OOFFFF ((TTaapp))::
Drum Remix On/Off – auf der Menüseite von Song Play wird angezeigt, ob die Funktion ‘Drum Remix’ aktiviert ist oder nicht.
SSTTYYLLEE//SSOONNGG ((LLoocckk))::
Auswahl von Style/Song – mit dieser Option wird festgelegt, die Zifferntasten der Styles (0-9) zur Anwahl eines
mit einem Song zu koppelnden Styles oder zur Anwahl eines Songs aus dem laufend geöffneten Festplatten-Ordner zu verwenden.
Der aktivierte Wahlmodus wird am Display unter dem Taktzähler angezeigt.
SSOONNGG ((KKeeyy SSttaarrtt))::
schaltet die Schlagzeugspuren der Midi-Datei zu – mit dem Song werden die Original-Drum-Spuren des Midifiles
wiedergegeben.
SSTTYYLLEE ((KKeeyy SSttoopp))::
aktiviert die Schlagzeugspuren des gewählten SD1 PLUS-Styles, die während der Wiedergabe des Songs verwendet werden. Diese Wahl kann permanent gespeichert werden (d.h. wenn dieselbe Midi-Datei das nächste Mal aufgerufen wird,
verwendet sie die Schlagzeugspuren des Ketron SD1 PLUS anstatt der Original-Schlagzeugspuren der Midi-Datei).
Um ein neues Song Set Up mit Remix zu sichern:
1 ) drücken Sie den Knopf GM (F1), während die Midi-Datei abgespielt wird.
2 ) drücken Sie den Start/Stop-Knopf, um die Midi-Datei anzuhalten.
3) Innerhalb eines GM-Parts drücken Sie SAVE/ENTER, dann F10 um den Speichervorgang zu bestätigen.
Sie können entweder die vorhandene Midi-Datei überschreiben oder die neue Datei mit einem anderen Namen versehen.
Für jede Midi-Datei ist es auch möglich, den Anfangs- und Endtakt von Remix festzulegen.
Um den Anfangstakt zu wählen, ist F2 zu drücken und die entsprechende Taktzahl mit den Value +/- -Knöpfen zu markieren.
Um den Endtakt zu wählen, ist erneut F2 zu drücken und die entsprechende Taktzahl mit den Value +/- -Knöpfen zu markieren. Bei Betätigen
des START-Knopfs beginnt das SD1 PLUS den Stil in der Remix-Version erst ab dem ausgewählten Anfangstakt und bis zu dem wie oben
beschrieben zugewiesenen Endtakt zu spielen. Über den Push-Button ‘Song’ werden erneut die Schlagzeugspuren der Midi-Datei aktiviert.
Die Funktion Drum Remix gestattet auch, die auf Disk vorhandenen Patterns (d.h. die mit Save Song Set Up gespeicherten Patterns) zu
verwenden, allerdings NUR unter der Voraussetzung, dass sie in den für die Patterns vorgesehenen RAM-Bereich geladen wurden.
•
BBAASSSSIISSTT
- Die Funktion Bassist gestattet, den manuellen Bass auf der linken Seite vom Splitpunkt der Tastatur zu spielen, während die rechte Seite dazu verwendet werden kann, Akkorde oder Soli zu spielen. Jedes Mal, wenn der Musiker die Hand von der rechten Seite der
Ta statur abhebt, wird der zuletzt rechts gespielte Akkord gespeichert (sofern der Hold-Knopf aktiviert wurde). Der Bass kann hierbei frei
gespielt werden, ohne den Akkord zu beeinflussen. Es handelt sich um eine äußerst nützliche Funktion, um die Überfülle mancher Stile zu
reduzieren und nach Empfinden des Musikers natürliche, lebendige und realistische Begleitlinien zu kreieren. Diese Funktion ist automatisch zugeschaltet, sowohl wenn Pianist/Bassist als auch Manual (unter Bass) aktiviert sind.
•
MMEEHHRR PPOOLLYYPPHHOONNIIEE
- Es wurde die Zahl der gleichzeitig zu spielenden Noten erhöht. In anderen Worten heißt dies, dass am SD1 PLUS nun
mehr Noten gespielt werden können, ohne dass einige hiervon verloren gehen.
•
PPAATTTTEERRNN VVIIEEWW::
die Anzeige der Disk Patterns und der Zugriff auf dieselben erfolgen ähnlich wie bei den Internal Styles. Um auf die Disk
Styles zuzugreifen, ist der
SSiinnggllee RRaamm
Styles-Knopf zu drücken und die gewünschte Styles-Gruppe zu wählen; anschließend drücken Sie den
entsprechenden Funktionsdruckknopf (F1- F10), um den einzelnen Stil anzuwählen. Nach dem bereits geladenen Stil wird das Symbol "….."
angezeigt. Die neue Funktion GROUP (über den
BBlloocckk LLiisstt
-Knopf und wiederholte Betätigung des Funktionsdruckknopfs F8 zu aktivieren)
dient dazu, unter den folgenden Anzeigemodi der Patterns zu wählen:
•
MMoodduuss 11::
numerischer Anzeigemodus 1; die Styles werden in zahlenmäßiger Reihenfolge angezeigt.
•
MMoodduuss 22::
Anzeige nach dem Ladezeitpunkt; die Styles werden in der Reihenfolge angezeigt, in der sie auf die Festplatte geladen wurden.
•
MMoodduuss 33::
Anzeige nach dem Alphabet; die Styles werden in alphabetischer Reihenfolge angezeigt.
•
OOffff::
numerischer Anzeigemodus 2; die Styles können anhand ihrer Nummern wie von der vorhergehenden Software vorgesehen
aufgerufen werden (siehe Seiten 56 und 57 des Benutzerhandbuchs).
NNBB::
wenn im laufend angewählten Festplatten-Ordner keine Patterns vorhanden sind, wird kein Pattern angezeigt.
•
RROOMM && FFLLAASSHH SSTTYYLLEESS
- Die ROM residenten Styles (die in Kleinbuchstaben anzeigt werden) und die FLASH Styles (die in Großbuchstaben
angezeigt werden) sind leicht zu unterscheiden.
•
BBAACCKKUUPP--FFOOLLDDEERR FFÜÜRR FFLLAASSHH SSTTYYLLEESS
- Die jeweils aktuelle Konfiguration der Flash Styles kann auf Disk gesichert werden. Save/Enter, Styles
(F2) und Global Flash to Disk (F7) drücken. Auf der folgenden Menüseite müssen Sie dem neuen Backup-Folder einen Namen zuweisen. Über
F10-Save ist der Name zu bestätigen.
Mit dieser Aktion wird automatisch ein neuer Ordner erstellt, der sämtliche laufenden Flash Styles enthält.
Diese Funktion dient dazu, einen neuen Block individuell gestalteter Flash Styles zu speichern bzw. von Festplatte zu laden. Auf diese
Weise können Sie über eine Reihe unterschiedlicher Blocks aus individuell gestalteten Flash Styles disponieren.
•
AARRRRAANNGGEERR OONN//OOFFFF
- Das SD1 PLUS wurde um die Funktion Arranger On/Off bereichert. Es ist nun möglich, über die laufende(n) Stimme(n)
auf der gesamten Tastatur (d.h. ohne den SPLIT-Punkt zu berücksichtigen) zu verfügen, während Styles oder Midifiles gespielt werden.
Hierfür ist einfach der
AArrrraannggee OOnn//OOffff
-Knopf während der Ausführung zu drücken. Der Arranger wird ausgeschaltet, und als Split-Punkt wird
‘C-2’angezeigt. Durch erneutes Betätigen desselben Knopfs wird der Split-Punkt wieder aktiviert und der Arranger wieder zugeschaltet
•
MMIIDDII FFIILLEE PPLLAAYYEERR::
•
XD Remap – Die Funktion XD-Remap [F8] findet sich (im Song Play-Modus) unter dem Transposer-Menü und gewährleistet
die perfekte Kompatibilität der für die XD-Serie geschaffenen Midifiles, die hiermit problemlos am SD1 PLUS einzusetzen sind.
•
VVOOCCAALLIIZZEERR::
•
Der Vocalizer kann mit den Knöpfen Demo&Hit aktiviert und deaktiviert werden.
Deutsch
Page 15

•
Die Funktion Hold (im Harmony-Modus) bleibt im Vocal Set nach Sichern der Einstellungen erhalten.
•
FFoooottsswwiittcchh
– neue Funktionen sind auch für die Pedalschaltungen hinzugekommen: Lead On/Off, Pianist, Bassist, Drum Off All, Drum&Bass,
Accordion On/Off (auf Seite 99 des Benutzerhandbuchs –
FF55 FFoooottsswwiittcchh
finden Sie eine Liste weiterer Funktionen, die mit dem Pedal
gesteuert werden können).
•
PPOOWWEERR OONN SSEETT UUPP
- Die folgenden Funktionen sind dem Power On Set Up hinzugefügt worden: Autoclose (für Preset Voices), Intelligent
Transposer, Text Mode, Accordion Bass on Stop, Pattern Group, Transposer Delayed Mode (auf Seite 58 des Benutzerhandbuchs sind weitere Funktionen aufgelistet –
PPoowweerr OOnn SSeett UUpp
).
•
AACCCCOORRDDIIOONN::
•
Hinzugekommen ist die Funktion B
ass Off Stop
. Wenn der Accordion-Modus aktiviert ist, ist die neue Funktion BS ACCORD[aufrufbar über Utility, Accordion (F6) und F8, um von ‘Off on Stop’ auf ‘Normal’ und umgekehrt zu schalten] automatisch auf ‘Off on
Stop’ gesetzt. Auf diese Weise ist dafür gesorgt, dass der Bass und die Akkorde nicht weiter klingen, nachdem der Arranger
gestoppt wurde. Wird im Accordion-Modus F6 betätigt, gelangen Sie zur doppelten Funktion von Bass Octave und Sustain.
•
Es sind neue User Dynamic-Kurven hinzugekommen; die Left Expression wird über Midi 2 kontrolliert (bei Midi-Akkordeons mit
Expression-Steuerung über Balg).
•
11 TTOOUUCCHH TTOO SSTTYYLLEE
– Es besteht die Möglichkeit, die 1 Touch Voices einem Style zuzuordnen, d. h. mit jedem Style können die 10 Stimmen, die
am besten zu dem betreffenden Style passen, verknüpft werden, um diese während Live-Darbietungen schneller zur Verfügung zu haben.
Die Funktion ist im Arranger Mode - Seite 2 unter der Retrigger&Mode-Menüseite zu finden. Mit den Value +/–-Knöpfen können Sie nach dem
Style Setting Etn/Orc4 jede der One Touch-Einstellungen von 1 bis 8 dem jeweiligen Style zuweisen. Jedes Mal, wenn dann der Style aufgerufen wird, werden auch automatisch die damit verknüpften One Touch-Einstellungen aufgerufen, sobald der One Touch-Knopf (bei leuchtender Style Setting-LED) betätigt wird. Die von Ihnen für einen bestimmten Style bevorzugten Stimmen stehen auf diese Weise immer zur
Verfügung – schnellerer Zugriff auf die Stimmen und weniger Suchzeit für die jeweils am besten geeignete Stimme!
•
TTEEXXTT MMOODDEE::
bei der Textreproduktion können nun 40 Zeichen pro Zeile, ohne neu formatieren zu müssen, angezeigt werden. Unter UTILITY,
TEXT (F7) gibt es 2 Anzeigemodi zur Auswahl:
•
MMoodduuss 11::
Standardformat, das in der Mitte des Displays angezeigt wird – 27 Zeilen pro Zeile.
•
MMoodduuss 22::
Es werden hierbei andere kleinere Zeichen verwendet, die auf dem gesamten Display angezeigt werden – 40 Zeichen pro Zeile.
•
DDRRYY OONN SSTTOOPP
- Auch diese Funktion wurde unter OnLineEffect (Micro [F6]) integriert, um sowohl den Zugriff als auch die Verwendung ein-
facher und schneller werden zu lassen.
•
RRAAMM FFUULLLL
- Um die erforderlichen Aktionen zu beschleunigen (wenn sich die RAM-Speicherkapazität während des Sound Loads erschöpft),
wird die Meldung ‘Memory Full’ zusammen mit der neuen Funktion Cle
ar&Load (F10) und Exit angezeigt. Durch Betätigen von F10 werden die
Klänge, die sich im RAM-Speicher befinden, gelöscht und die laufend angewählten Klänge werden automatisch geladen, während über Exit
(F5) die Aktion abgebrochen wird und die im RAM-Speicher residenten Klänge beibehalten werden.
•
PPrreesseett EEddiittiinngg
: Das SD1 Plus sieht die Möglichkeit vor, die Preset Voices zu ändern. Nach Anwahl der zu ändernden Preset Voice sind gleichzeitig die Knöpfe Edit Preset * und # zu betätigen, so dass das Fenster des zum jeweiligen Preset gehörigen Programs geöffnet wird.
Es sind 2 neue Funktionen zur Sicherung der Stimme integriert worden: T
o Preset [F8] (es wird das laufende RAM-Preset mit demselben
Namen und den durchgeführten Änderungen überschrieben) und T
o Disk [F7] (es werden auf Disk sämtliche Presets mit Dateizusatz .pre
gespeichert)
•
SSttyyllee CCoonnvveerrtt
- Im Menü Disk - Utility - Disk Control gibt es die Funktion Style Convert. Diese gestattet es dem SD1 PLUS, automatisch säm-
tliche Styles der Serien X und XD, die auf Festplatte im Master Styles Folder resident sind, in SD1 PLUS-Format zu konvertieren.
•
CChhoorrdd SSoolloo
- Diese Funktion gestattet es, in Echtzeit sämtliche Chord-Begleitspuren bis auf eine auszuschließen. Nachdem in dem Fenster
Arrange View eine der 5 Chords (F6 - F10) ausgewählt und markiert wurde, können alle nicht markierten Chord-, Drum- und Bass-Spuren
weggeschaltet werden, indem Sie gleichzeitig die Knöpfe Chord/Solo Volume drücken. Um diese Funktion abzubrechen und die anderen
Chords wieder zuzuschalten, ist einer der beiden Chord Volumes Master-Knöpfe ein zweites Mal zu betätigen oder ein Fill In zu aktivieren.
•
22nndd VVooiiccee ttoo DDiisskk
- Es ist möglich, die Einstellungen der 2nd Voice auf Disk mit Dateizusatz .2ND zu sichern. Save/Enter, F6 – 2nd Voice, F8
– Disk Save und schließlich F10 - Save zur Bestätigung drücken. Werden die Einstellungen der 2nd Voice zum zweiten Mal gesichert, wird die
vorhergehende 2nd Voice-Datei automatisch überschrieben.
•
DDiisskk SSttyylleess iimm SSoonngg PPllaayy--MMoodduuss llaaddeenn
-
Im Song Play-Modus sind gleichzeitig die beiden Knöpfe Edit Preset * und # zu drücken, um den als näch-
sten zu verwendenden Style aus dem laufenden Festplatten-Ordner anzuzeigen und anzuwählen. Der gewählte Style wird automatisch geladen.
•
NNeeuuee DDyynnaammiicc--KKuurrvveenn
- Es sind neue Dynamic-Kurven integriert worden, um den Unterschied zwischen Soft1, Soft2, Normal, Hard1, Hard2 …
usw. stärker herauszustellen (UTILITY, Page1/3, Vel. Curve [F10]).
PPSS::
zwecks weiterer Informationen über die OS 4.0a (die bereits installiert ist) verweisen wir auf unsere Website www.ketron.it – Bereich
Software.
SD1 Plus Quick manual
14
Deutsch
Page 16

Quick manual SD1 Plus
15
La nouvelle Arranger Workstation SD1 PLUS!
Tous nos compliments pour avoir choisi le nouveau SD1 PLUS. Nous sommes sûrs que cette station de travail sera un vrai régal pour vos tympans et qu’elle vous permettra de réaliser de la musique pendant des années. Ce bref manuel a été rédigé pour faire en sorte que vous puissiez utiliser tout de suite la plupart des nouvelles fonctions et caractéristiques. Il faudra l’utiliser avec le mode d’emploi principal que l’on Vous
a fourni avec l’instrument. Bon amusement !
Agencement
Le nouvel agencement du SD1 PLUS a été soigneusement étudié dans le but de Vous garantir un accès facile et rapide à la plupart des fonctions
préexistantes ( du SD1 qui a obtenu un très grand succès dans le monde entier) et aux nouvelles fonctions de cette station de travail. Le nouveau code chromatique permet un accès très rapide aux caractéristiques principales (accompagnement, enregistrement, écoute, etc.). Les nouvelles inscriptions, par contre, listent très clairement les nouvelles fonctions (voir aussi ci-dessous les notes relatives au système OS 4.0).
Nouveaux sons
Le Ketron SD1 PLUS présente quelques nouveaux sons qui sont ce qu’il y a de plus authentique et de plus réaliste au niveau mondial. On a inclus
de nouvelles sonorités orchestrales pour les Guitares (*), la Basse, les Pianos E. (très pures et précises), et également pour les groupes de
Cordes (pleines et enveloppantes), Pads, Cuivres (plus authentiques) et Orgue, tandis que quelques-unes des sonorités disponibles sur ROM ont
été complètement revues afin d’obtenir un effet de haute fidélité plus pur. Les éléments de batterie pour Drum1 et Drum2, aussi, ont été revus
de manière très incisive en introduisant de nouveaux sons de percussion naturels et un plus grand nombre de boucles Live Drum (en particulier pour les styles Dance et Hip Hop). Le disque dur puissant de 6 Giga-octets comprend un Stereo Grand Piano à la sonorité extrêmement riche
(avec d’autres sons de Sax, Pads et des sons de Guitare extrêmement séduisants: on peut charger et utiliser tous ces sons sur le SD1 PLUS.
NNBB
: Le nouveau Stereo Grand piano a déjà été introduit dans la programmation du premier PROGRAM, on pourra donc utiliser ce son immédia-
tement pour les performances musicales!
(*) Les sonorités des guitares Hawaian et Pedal Steel ont été programmées de manière à ce que l’on joue au maximum 3 notes en mode Steel.
(On pourra modifier facilement les assignations en utilisant la nouvelle fonction de Preset Editing décrite par la suite).
CCHHAARRGGEERR LLEESS NNOOUUVVEEAAUUXX SSOONNSS::
Le nouveau système OS 4.0 (déjà installé) comprend toutes les modifications effectuées sur
les Preset Sounds afin d’obtenir une meilleur réponse de haute fidélité dans toutes les catégories sonores. Il est possible de charger d’autres sons additionnels ( et d’autres sons
préexistants sur le disque dur du SD1 PLUS) en suivant la procédure décrite à la page 33 du
mode d’emploi (
SSoouunndd LLooaadd
).
PPOOUURR UUNN AACCCCEESS IIMMMMEEDDIIAATT AAUUXX NNOOUUVVEEAAUUXX SSOONNSS::
Si l’on désire avoir les nouveaux sons prêts à l’usage dès que l’on allume le SD1 PLUS (ces
sons ne seront plus présents une fois que l’on éteint le clavier), il faut, tout d’abord, créer
un Sound Block qui comprendra tous les sons que l’on veut charger chaque fois que l’on
allume le clavier. Il s’agit d’une opération qu’il faudra exécuter une seule fois, et qui indique donc au SD1 PLUS quels sont les fichiers à charger lors de la mise sous tension du clavier. Pour la procédure à suivre, voir la page n° 34 du Mode d’emploi (
CChhaarrggeemmeenntt aauuttoo--
mmaattiiqquuee
). Dans le Sound Folder du disque dur on peut créer plusieurs Sound Blocks contenant les sons préférés. Après avoir créé le ou les Block, il suffit de suivre la procédure
décrite à la page 34 du Mode d’emploi. (
CChhaarrggeerr uunn SSoouunndd BBlloocckk lloorrss ddee llaa mmiissee ssoouuss tteenn--
ssiioonn dduu SSDD11 PPLLUUSS
). Le nouveau fichier ainsi créé (
!!!!iinniittoo11..ppwwrr
) est un fichier qui informe le
SD1 PLUS sur les fichiers audio que l’on désire charger chaque fois que l’on allume le clavier.
De cette manière, dès que l’on allumera le clavier, le Sound BLOCK sélectionné sera chargé
automatiquement. On pourra utiliser les sons susdits de la Mémoire Vive également dans
les Preset pour créer de nouvelles sonorités ayant un très haut niveau qualitatif (ou bien
dans les Program voices), en mettant ainsi à Votre disposition un gamme infinie d’éléments
sonores et de nouvelles créations!
Français
Page 17

De la nouvelle musique!
MMUUSSIICC -- SSOONNGGSS::
Nous avons inclus environ 166 fichiers Midi que Vous pourrez simplement écouter ou utiliser pour vous amuser encore plus en jouant de la musique. Ces fichiers comprennent certains morceaux de musique parmi les plus célèbres au
niveau mondial et ils ont été programmés par des experts du monde entier afin de garantir leur authenticité. La plupart de ces songs comprennent déjà certaines des nouvelles boucles audio présentent dans le SD1 Plus, et elles se
trouvent dans le Folder 91 – Fichiers Midi sur le disque dur du SD1 PLUS. Pour les écouter, appuyer sur le bouton SONG
PLAY à partir de la page-écran par défaut du SD1 PLUS. Puis appuyer sur
DDIIRR
(F5) pour accéder à tout le contenu du
Folder avec les fichiers Midi. Maintenant à l’aide des boutons Styles on peut taper la valeur numérique de la Song que
l’on désire écouter et appuyer ensuite sur le bouton START rouge pour lancer la song.
MMUUSSIICC –– DDAATTAABBAASSEE::
Dans le SD1 PLUS on a créé une nouvelle base de données. Cela permet au musicien d’avoir le clavier prêt pour l’exécution d’une song spécifique en un instant. Dans le SD1 PLUS on trouve environ 200 réglages spécifiques par song
sous la forme de Song Registrations. Ces fichiers se trouvent dans le Folder 91 – fichiers Midi sur le disque dur.
SSEETT UUPP::
Pour préparer le clavier à jouer une song particulière se trouvant dans cette vaste base de données, procéder de la
manière suivante:
•
Appuyer sur le bouton
DDIISSKK
et s’assurer que l’on se trouve sur le disque dur du SD1 PLUS.
•
Appuyer sur le bouton
SSiinnggllee RReeggiissttrr
pour afficher tous les Single Registers se trouvant dans le Folder 93 Registrations folder. (Si le Master Folder a été activé, on pourra exécuter cette sélection également à partir du
menu disk par défaut en appuyant sur F3).
•
Utiliser les boutons –
VVaalluuee
+ pour mettre en surbrillance le fichier Song pour lequel le clavier doit être
prédisposé et appuyer sur F10 –
SSEELLEECCTT
.
•
Maintenant appuyer sur F2 pour
CCHHAARRGGEERR
ce fichier et le SD1 PLUS commencera automatiquement à jouer la song
sélectionnée. On rappelle qu’il est possible de créer des réglages Song individuels et des les ajouter ensuite à la
base de données (voir page 95 du Mode d’emploi –
RRaappppeelleerr eett ssaauuvveeggaarrddeerr uunnee SSiinnggllee RReeggiissttrraattiioonn
).
NOUVEAUX STYLES ‘Jam’
Un autre point important consiste dans le fait que les FLASH styles dans le SD1 PLUS ont été revus et on a inclus 131 nouveaux Flash styles. En
combinant de la juste manière ces nouveaux styles avec ceux originaux se trouvant dans ROM et en utilisant les nouveaux sons, on pourra tirer
le plus grand amusement du SD1 PLUS lors des performances en réussissant en même temps à susciter l’admiration du public!
Si l’on affiche les nouveaux styles (en sélectionnant le groupe de styles relatif, par exemple Latin), ceux-ci seront indiqués avec des lettres majuscules, tandis que les styles de ROM, revus et perfectionnés, seront affichés avec des lettres minuscules dans les pages suivantes. Il est de toute
manière inutile de décrire ce nouvel aspect : essayez-en quelques-uns et vous comprendrez. !
NNOOUUVVEEAAUUXX SSTTYYLLEESS::
Sur le disque dur, dans le Folder 95 – Styles il y a 34 styles. La plupart d’entre eux utilisent les nouvelles boucles audio
créées pour le SD1 PLUS, de manière particulière les styles tels que Dance et Pop Down.
Pour utiliser ces styles, procéder de la manière suivante (avec la DEL du Master Folder allumée):
•
Appuyer sur le bouton Single RAM Style pour pouvoir accéder aux styles sur le disque dur.
•
Utiliser les boutons des groupes de styles (8beat, 16beat…) pour afficher le groupe dans lequel se trouve le style que l’on désire
charger. On peut modifier le format de la visualisation sur la base du mode sélectionné (voir
PPaatttteerrnn VViieeww
par la suite).
•
Use the associated F-button to select the style you want to use.
Essayez les nouveaux rythmes R&B, Dance et Pop (avec des intros et des fins originales) et le nouveau Soft Dancing, Latin et Traditional Dancing
(il faut remarquer le passage très graduel de Arranger A à D), et vous comprendrez tout de suite pourquoi cette fois aussi Ketron est synonyme d’avant-garde.
DE NOUVELLES FONCTIONS pour de meilleures
performances musicales.
•
DDRRUUMM RREEMMIIXX
- Lorsqu'on désire raviver ou bien modifier une song, la possibilité de changer la structure rythmique des instruments de percussion ou de la batterie peut constituer une énorme différence, justement en rendant plus vivace la song. Le SD1 PLUS permet d'obtenir
des résultats de ce genre en offrant la possibilité de remplacer les pistes de la percussion de chaque fichier Midi ou de chaque song avec
celles des styles se trouvant dans la mémoire de l'instrument (y compris les boucles des live drum) et d' exclure temporairement chaque
SD1 Plus Quick manual
16
Français
Page 18

Quick manual SD1 Plus
17
groupe de percussion de la piste du rythme.
Pendant que le fichier Midi est en train de jouer, il sera également possible de passer des styles
du clavier aux pistes de batteries originales du fichier Midi et vice-versa, d'activer les Fill-ins et d'utiliser les quatre Arrangers en temps réel!
On peut activer et utiliser cette fonction en mode 'Song Play' en utilisant les boutons suivants:
OONN//OOFFFF ((TTaapp))::
Drum Remix On/Off - Sur la page-écran du Song Play on indique si le ‘Drum Remix’ est activé ou non.
SSTTYYLLEE//SSOONNGG ((LLoocckk))::
Sélection de Style/Song – Pour choisir si l’on désire utiliser les boutons numériques des styles (0-9) pour sélectionner un Style à associer à une song, ou bien pour sélectionner une Song à partir du répertoire actuellement ouvert sur le
disque. Le type de sélection activé sera affiché à l’écran, sous le compteur des mesures.
SSOONNGG ((KKeeyy SSttaarrtt))::
Elle actionne les pistes de batterie du fichier Midi – Avec la song on reproduira les pistes Drum originales du
fichier Midi.
SSTTYYLLEE ((KKeeyy SSttoopp))::
Elle actionne les pistes de batterie du style SD1 PLUS sélectionné, que l’on utilisera au cours de la reproduction
de la song. On peut mémoriser cette sélection de manière permanente ( cela veut dire que la prochaine fois que l’on rappellera ce
fichier Midi, il utilisera les pistes de batterie du Ketron SD1 PLUS au lieu des pistes de batterie originales des fichiers Midi).
Pour mémoriser le nouveau Song Set up avec Remix:
1 ) Appuyer sur le bouton GM (F1) pendant la reproduction du fichier Midi
2 ) Appuyer sur le bouton Start/Stop pour interrompre le fichier Midi.
3) A l’intérieur d’une partie GM, appuyer sur SAVE/ENTER, puis sur F10 pour confirmer l’opération de sauvegarde.
On peut choisir ou d’écraser par écriture le fichier Midi existant ou bien de renommer ce nouveau fichier.
Pour chaque fichier Midi on peut choisir également la mesure de début et de fin de la fonction de Remix.
Pour sélectionner la mesure initiale, appuyer sur F2 et chercher le numéro en utilisant Value +/-. Pour sélectionner la mesure finale, appuyer
de nouveau sur F2 et chercher le numéro avec Value+/-. Si l’on appuie sur START, le SD1 PLUS commencera à jouer le style dans la version Remix
uniquement à partir de la mesure initiale jusqu’à la mesure finale assignée comme décrit ci-dessus. Si l’on appuie sur ‘Song’ on activera de
nouveau les pistes de batterie du fichier Midi.
LLaa ffoonnccttiioonn DDrruumm RReemmiixx ppeerrmmeett ééggaalleemmeenntt dd’’uuttiilliisseerr lleess PPaatttteerrnn pprréésseennttss ssuurr llee ddiissqquuee ((ssaauuvvee--
ggaarrddééss aavveecc SSaavvee SSoonngg SSeett uupp)) mmaaiiss UUNNIIQQUUEEMMEENNTT ss’’iillss oonntt ééttéé cchhaarrggééss ddaannss ll’’eessppaaccee pprréévvuu ddaannss llaa MMéémmooiirree vviivvee ppoouurr lleess PPaatttt