

Kenwood KS 100 G Instructions For Use - Installation Advice
1
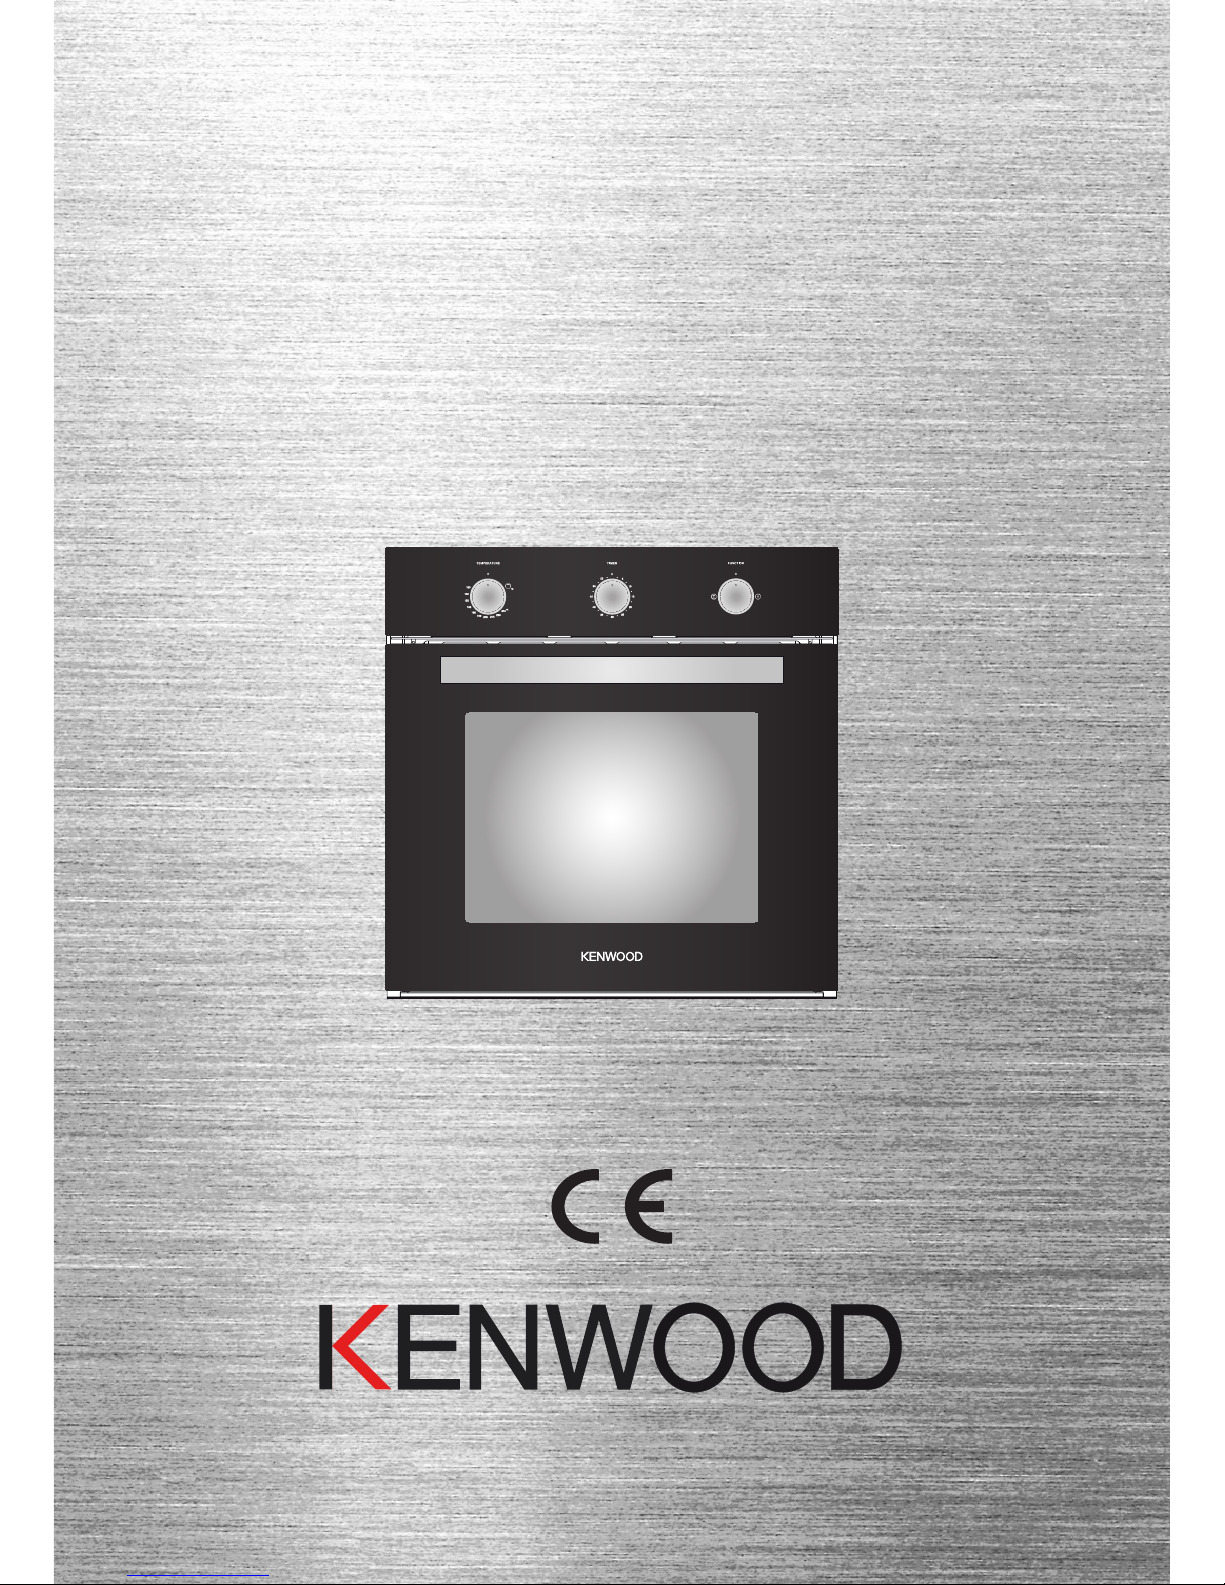
BUILT-IN
GAS OVEN
model KS 100 G
Instructions for use - Installation advice
Before operating this oven,
please read these instructions carefully

2
CONTENTS Page Number
Introduction ..........................................................................................
Important Safeguards & Recommendations .........................................
Control Panel ........................................................................................
How to use the Fan Oven.....................................................................
Minute Counter .....................................................................................
Cleaning & Maintenance ......................................................................
Advice for the Installer ..........................................................................
Installation ............................................................................................
Gas Section ..........................................................................................
Electrical installation .............................................................................
Guarantee ............................................................................................
3 - 4
5
6
7 - 14
15
16 - 22
23
24 - 27
28 - 35
36 - 37
38

3
Declaration of CE Conformity
This oven has been designed to be used only for cooking.
Any other use (such as heating a room) is improper and dangerous.
This oven has been designed, constructed, and marketed in compliance with:
− safety requirements of EU Directive “Gas” 2009/142/EC;
− safety requirements of EU Directive “Low voltage” 2006/95/EC;
− safety requirements of EU Directive “EMC” 2004/108/EC;
− requirements of EU Directive 93/68/EEC.
GB
Dear Customer,
Thank you for having purchased and given your preference to
our product. The safety precautions and recommendations within
this booklet are for your own safety and that of others. They will also
provide a means by which to make full use of the features offered
by your appliance.
Please preserve this booklet carefully. It may be useful in future,
either to yourself or to others in the event that doubts should arise
relating to its operation.
This appliance must be used only for the task it has explicitly been designed for, that is for cooking foodstuffs. Any
other form of usage is to be considered as inappropriate and
therefore dangerous.
The manufacturer declines all responsibility in the event
of damage caused by improper, incorrect or illogical use of the
appliance.

4
Before Using for the First Time
• Read the instructions carefully before installing and using the appliance.
• After unpacking the appliance, check that it is not damaged. In case of doubt, do not
use the appliance and contact your supplier or a qualied engineer.
• Remove all the packing materials (i.e. plastic bags, polystyrene foam, etc.) and do not
leave it around within easy reach of children, as these may cause serious injuries. The
packaging materials are recyclable (symbol ).
• The installation and all the gas/electrical connections shall be made by a qualied
engineer in compliance with local regulations in force and following the manufacturer’s
instructions.
• Do not attempt to modify the technical characteristics of the appliance, as it may be
come dangerous to use.
Using the Oven for the First Time
You are advised to carry out the following operations:
• Assemble the interior of the oven as described under the heading “Cleaning and main-
tenance”.
• Switch the empty oven ON at maximum temperature for about two hours to eliminate
traces of grease and smell from the components.
• Let the oven cool down, switch off the electrical supply, then clean the inside of the
oven with a cloth soaked in water and neutral detergent and dry thoroughly.
Important Precautions and Recommendations for Use of Electrical Appliances
Use of any electrical appliance implies the necessity to follow a series of fundamental rules.
In particular:
• never touch the appliance with wet hands or feet;
• do not operate the appliance barefooted;
• do not allow children or disabled people to use the appliance without your supervision.
The manufacturer cannot be held responsible for any damages caused by improper, incorrect or unreasonable use of the appliance.

5
Important Safeguards & Recommendations
• If you should decide not to use this appliance any longer (or decide to substitute an
older model), before disposing of it, it is recommended that it is made inoperative in an
appropriate manner in accordance to health and environmental protection regulations,
ensuring in particular that all potentially hazardous parts be made harmless, especially
in relation to children who could play with unused appliances.
• Some appliances are supplied with a protective lm on steel and aluminium parts.
This lm must be removed before using the appliance.
• Do not carry out any cleaning or maintenance without rst disconnecting the appliance
from the electrical supply.
• During and after use of the oven, certain parts will become very hot. Do not touch hot
parts.
• After use always ensure that the control knobs are in the “O” (OFF) position.
• Keep children away from the oven during use.
• Household appliances are not intended to be played with by children.
• Children, or persons with a disability which limits their ability to use the appliance,
hould have a responsible person to instruct them in its use. The instructor should be
satised that they can use the appliance without danger to themselves or their surroundings.
• WARNING. When correctly installed, your product meets all safety requirements laid
down for this type of product category. However special care should be taken around
the rear or the underneath of the appliance as these areas are not designed or intended to be touched and may contain sharp or rough edges, that may cause injury.
• Fire Risk! Do not store inammable materials inside the oven.
• Always use oven gloves when removing the shelves and food trays from the oven
whilst hot.
• Clean the oven regularly and do not allow fat or oils to build up in the oven base or
trays. Remove spillages as soon as they occur.
• Do not line the oven walls with aluminium foil. Do not place baking trays or the drip tray
on the base of the oven chamber.
• Always stand back from the oven when opening the oven door to allow steam and hot
air to escape before removing the food.
• Do not hang towels, dishcloths or other items on the oven or its handle – as this could
be a re hazard.
• Make sure that electrical cords connecting other appliances in the proximity cannot
become entrapped in the oven door.
• Safe food handling: leave food in the oven for as short a time as possible before and
after cooking. This is to avoid contamination by organisms which may cause food poisoning. Take particular care during warmer weather.
• Important: This appliance has been designed for domestic use only.
6
Fig. 1.1
1 2 3
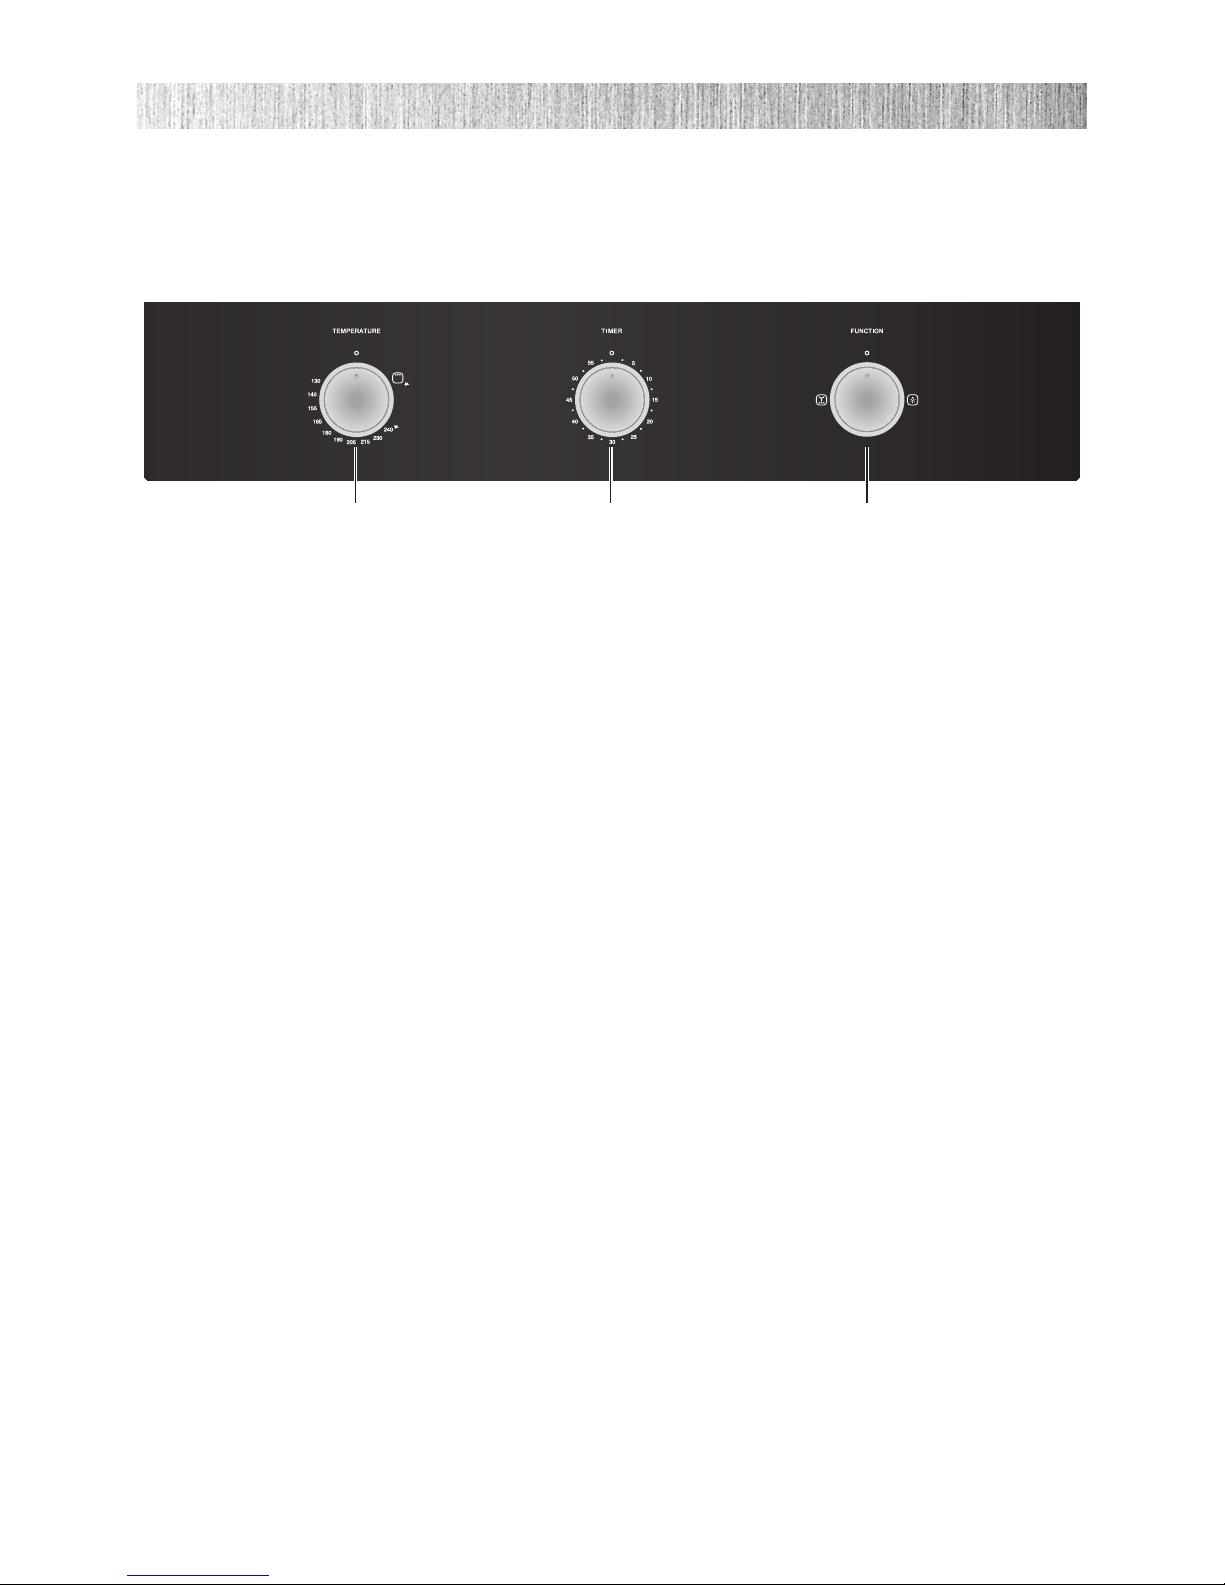
Controls Description
1. Gas oven/gas grill control knob
2. 60’ timer control knob
3. Oven light / fan motor control knob
Notes:
− The electric ignition is incorporated in the thermostat control knob.
− The appliance has a safety valve system tted, the ow of gas will be stopped if and
when the ame should accidentally go out.
CAUTION:
If the burner is accidentally extinguished, turn the gas off at the control knob and wait
at least 1 minute before attempting to relight.
CAUTION:
Gas appliances produce heat and humidity in the environment in which they are
installed.
Ensure that the cooking area is well ventilated by opening the natural ventilation
grilles or by installing an extractor hood connected to an outlet duct.
CAUTION:
If the appliance is used for a prolonged time it may be necessary to provide further
ventilation by opening a window or by increasing the suction power of the extractor
hood (if tted).
1 - CONTROL PANEL

7
2 -
HOW TO USE THE FAN OVEN
Technical Features
The oven is furnished completely clean.
It is advisable however, upon rst use, to turn the oven on to the maximum temperature to
eliminate possible traces of grease from the oven burner.
The same operation shall be done with the gas grill.
This oven is tted with:
− One gas oven burner (2,70 kW), located at the bottom, providing self-ignition and
safety device.
− One gas grill burner (2,10 kW), placed on the top, providing self-ignition and safety
device.
− A fan motor, positioned on the back panel of the oven cavity, which can be used:
• in combination with the oven gas burner;
• alone, without heating.
IMPORTANT NOTE - It is not possible to use the fan motor in combination with
the gas grill: a safety device switches off the fan motor when the gas oven/grill
control knob is turned on grill position.
Operating Principles
Heating and cooking in the gas oven are obtained in the following ways:
a. by Normal Convection
The heat is produced by the oven gas burner.
b. by Forced Convection
The heat produced by the oven burner is distributed throughout the oven by the fan.
c. by Radiation
The heat is radiated by the gas grill.
d. by Ventilation
The food is defrosted by using the fan only without oven burner (this is not a cooking
function).
Cooling Fan Motor
This appliance incorporates a safety cooling fan motor to achieve optimum efciency of the
controls, ensure lower surface temperatures are maintained and cool the internal components.
The cooling fan motor turns on automatically when igniting the oven or grill burner.
It may run on (for various minutes) even after the oven or grill burner has been turned off.
The duration of this time is dependent on previous cooking temperature and duration.
ATTENTION:
The oven door becomes very hot during operation and very hot steam goes out from
the area below the control panel. Keep children away.
The door is hot, use the handle.
During use the appliance becomes hot.
Care should be taken to avoid touching the heating elements inside the oven.

8
IMPORTANT NOTES:
− Do not use the appliance in case of power failure or if the cooling fan motor is
damaged. The appliance may overheat and get damaged due to the non-operation of the cooling fan motor.
− In case of failure of the cooling fan motor during the operation of the gas oven or
grill, the oven or grill burner is turned off automatically after about 20 minutes.
In that case do not use the appliance and contact the after-sales service.
− When the cooling fan motor is operating correctly there is an air ow in the top
area of the appliance (g. 2.1).
Oven Burner
The gas ow to the burner is regulated by a thermostat which allow to maintain the oven
temperature constant.
The control of the temperature is assured by a thermostatic probe positioned inside the oven.
The probe must be always kept in its housing, in a clean condition, as an incorrect position
or encrustment may cause an alteration in the control of the temperature.
Moreover, the thermostat is tted with a safety valve which automatically shuts off the gas
supply when the ame goes out.
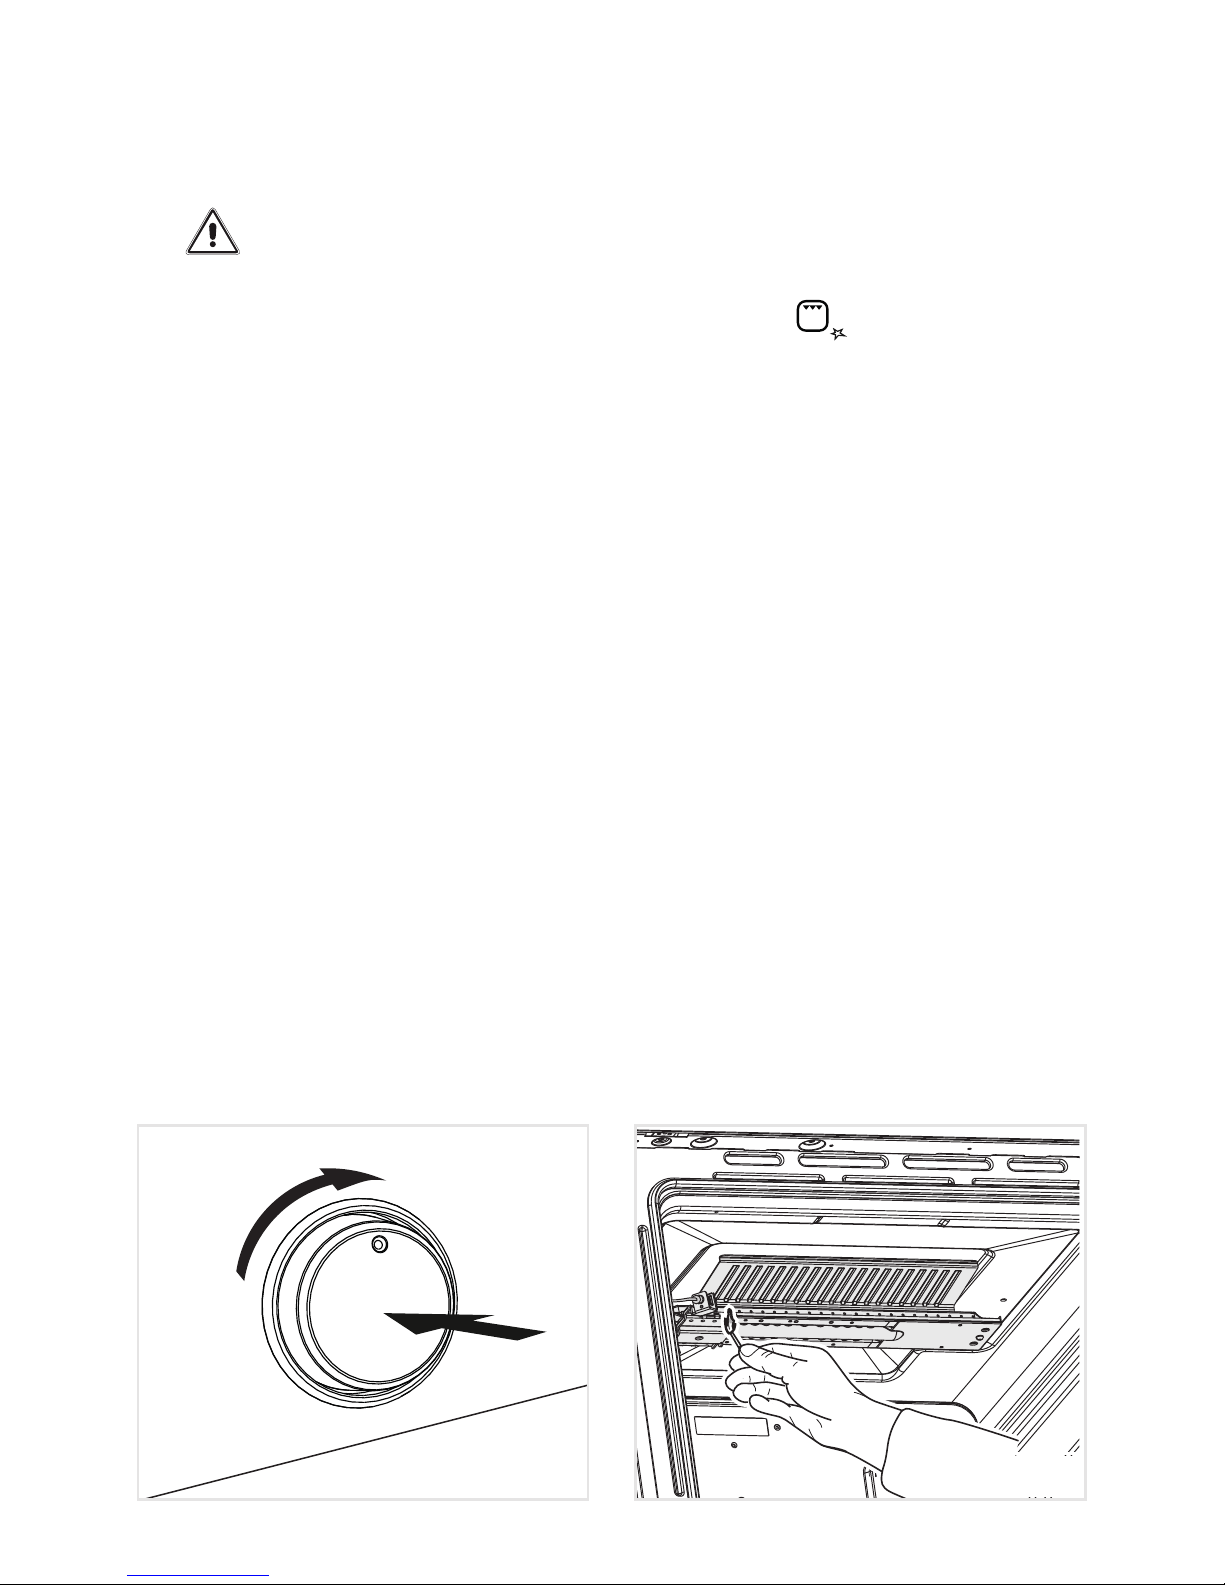
Thermostat
The numbers printed on the control panel (g.
2.2) indicate the increasing oven temperature
value.
To regulate the temperature, set the knob to
the chosen number. The symbol close to
the maximum position indicates that the electric ignition is incorporated into the knob (activated by the knob itself).
Fig. 2.2
Fig. 2.1

9
Lighting of Oven Burner
IMPORTANT: The oven door must be open during this operation.
To ignite the oven burner:
1 Fully open the oven door.
If this operation is not performed you should not proceed to light the oven.
2. Press the thermostat knob throughly to start up the electric ignition and, keeping the
knob under pressure turn it anti-clockwise (g. 2.3) to the maximum position
240
(g. 2.2).
Never continue this operation for more than 15 seconds. If the burner has still
not ignited, wait for about 1 minute prior to repeating the ignition.
In case of mains failure, to light the oven manually, approach a ame to the hole “A” of
the oor (g. 2.4), then press and turn the thermostat knob (g. 2.3).
3. Wait about ten seconds after lighting the burner to release the knob (priming time of
the thermocouple).
4. Check that the burner has lit; if not, turn the knob clockwise back to “
O” (OFF) and
repeat the procedure from step 1.
5. Close the oven door slowly and adjust the thermostat knob on the desired setting.
If the ame extinguishes for any reason, the safety valve will automatically shut off the gas
supply to the burner.
To re-light the burner, rst turn the oven control knob to OFF position “
O”, wait for at least
1 minute and then repeat the lighting procedure.
For the correct use of the gas oven see the chapters “COOKING WITH GAS OVEN” and
“COOKING WITH FAN ASSISTED GAS OVEN”.
During and after use of the oven, certain parts will become very hot.
Keep children away.
ATTENTION: In case of manual lighting, never turn the thermostat before approa-
ching a ame to the hole “A” of the oor.
A
Fig. 2.4
Fig. 2.3
10
Lighting of Gas Grill Burner
IMPORTANT: The oven door must be open during this operation.
To light the burner, you need to:
1 Fully open the oven door.
If this operation is not performed you should not proceed to light the oven.
2 Press the thermostat knob throughly to start up the electric ignition and, keeping the
knob under pressure turn it clockwise (g. 2.5) to position
(g. 2.2).
Never continue this operation for more than 15 seconds. If the burner has still
not ignited, wait for about 1 minute prior to repeating the ignition.
In case of mains failure, to light the grill manually, put a ame to the right and left side
of the burner (g. 2.6), then press and turn the thermostat knob (g. 2.5).
3. Wait about ten seconds after the burner lighting before releasing the knob (priming
time of the thermocouple).
4. Check that the burner has lit; if not, turn the knob anti-clockwise back to “
O” (OFF) and
repeat the procedure from step 1.
5. The oven door must always be kept half-open when the grill is in operation.
For correct use see chapter “TRADITIONAL GRILLING”.
If the ame extinguishes for any reason, the safety valve will automatically shut off the gas
supply to the burner.
To re-light the burner, rst turn the grill control knob to OFF position “
O”, wait for at least
1 minute and then repeat the lighting procedure.
IMPORTANT NOTE: It is not possible to use the fan motor in combination with the
gas grill; a safety device switches off the fan motor when the gas oven/grill control
knob is turned on grill position.
During and after use of the grill, certain parts will become very hot.
Keep children away.
ATTENTION: In case of manual lighting, never turn the thermostat before approa-
ching a ame to the burner.
Fig. 2.6
Fig. 2.5
11
Cooking With Gas Oven
Before introducing the food, preheat the oven to the desired temperature.
For a correct preheating operation, it is advisable to remove the tray from the oven and
introduce it together with the food, when the oven has reached the desired temperature.
Check the cooking time and turn off the oven 5 minutes before the theoretical time to recuperate the stored heat.
Fan Motor
The fan motor is designed to distribute throughout the oven the heat generated by the
oven gas burner.
The fan motor can also be used without the
oven gas burner (without heating) to defrost
frozen foods.
The fan is controlled by a knob (g. 2.7).
− To operate the fan motor turn the knob
indicated in g. 2.7 to position
.
− To switch it off turn the knob to the off po-
sition “
O”.
IMPORTANT: When using the fan motor toge-
ther with the oven gas burner, switch on the
fan only after the ignition of the gas burner.
Cooking With Fan Assisted Gas Oven
(Oven Burner and Fan Motor - g. 2.8)
After the ignition of the gas burner, close the
oven door and switch on the fan motor.
Before introducing the food, preheat the oven
to the desired temperature.
For a correct preheating operation, it is advisable to remove the tray from the oven and
introduce it together with the food, when the
oven has reached the desired temperature.
Check the cooking time and turn off the oven
5 minutes before the theoretical time to recuperate the stored heat.
Defrosting Frozen Foods
(Fan Motor Only - g. 2.9)
Switch on the fan motor only.
The oven thermostat control knob shall be in
the “
O” (off) position.
The defrosting is done by simple ventilation
without heat.
Fig. 2.8
Fig. 2.9
Fig. 2.7
12
Oven Light
The oven provides an interior lamp to allow the visual inspection during the cooking.
To light the oven lamp turn the knob indicated in g. 2.7 to position
.
Traditional Grilling
Warning: The grill burner must be used with the door ajar only.
Leave to warm up for approximately 5 minutes with the door ajar.
Place the food inside positioning the rack as near as possible to the grill.
Insert the drip pan under the rack to collect the cooking juices.
The operation of the grill should not exceed 30 minutes.
Attention: The oven door becomes very hot during operation.
Keep children away.
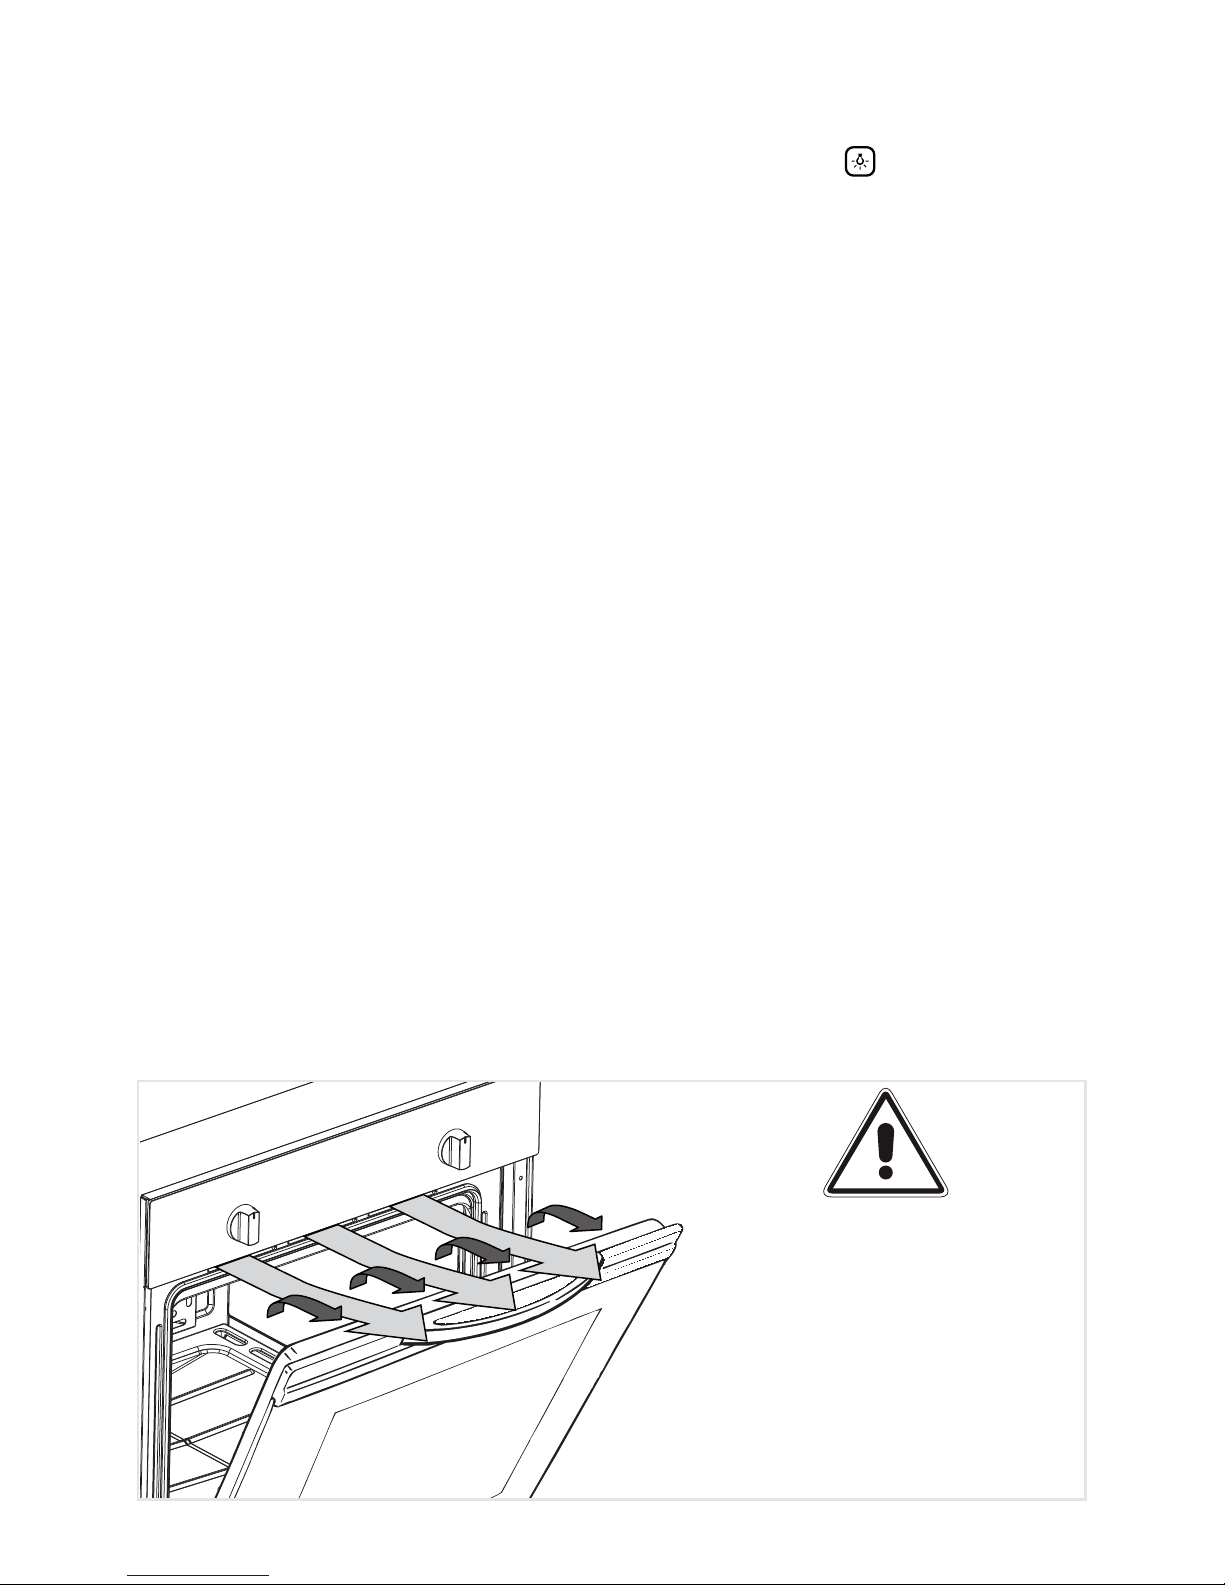
Fig. 2.10
WARNING !!
The grill burner must be used with
the door ajar only.
The cooling fan air ow (below
the control panel) allows a correct
discharging of the hot air coming
from the inside of the cavity.
Do not use the grill burner if the
cooling fan is not operating (e.g.
mains failure, cooling fan broken).
 Loading...