

KENWOOD KMD-44 User Manual

KMD-44
MD-RECEIVER
INSTRUCTION MANUAL
© B64-1755-00 (KW)
Take the time to read through this instruction manual.
Familiarity with installation and operation procedures will help you obtain the
best performance from your new MD-receiver.
For your records
Record the serial number, found on the back of the unit, in the spa ces designated on
the wa rranty card, and in the space provided below. Refer to the model and serial
numbers whenever you ca ll upon your KE NWOOD dealer for information or service on
the product.
Model KMD-44 Serial number

— 2 —
English
Contents
Warning.................................................................3
Safety precautions............ ....................... .............4
Genera l features
Powe r ... .......... ........... .......... ........... .......... ........... .......... .......... ......6
Volume................ .......... ........... .......... .......... ........... .......... ........... .6
Attenuator .......................................... ........... .......... ........... .......... .6
Switching Modes. ........ ....... ........ ........ ....... ........ ....... ........ ........ ....6
Loudness ........ ........ ........ ....... ........ ........ ....... ........ ........ ....... ........ .7
Audio Control Set ting. ........ ....... ........ ........ ....... ........ ........ ....... ......7
Speaker Set ting............. ........ ....... ........ ........ ....... ........ ........ ....... ...8
Theft Deterrent Faceplate.. ....... ........ ........ ....... ........ ........ ....... ......8
Tuner fea tures
Tuning. ........... .......... .......... ........... .......... ........... .......... .......... .....10
Station Preset Me mory.. ........ ........ ....... ........ ........ ....... ........ ....... 10
Auto Memory Entry ........................ ....... ........ ........ ....... ........ ......1 0
Station Name Preset (SNPS)................... ........ ....... ........ ........ ....11
Switching Display f or Tuner.................. ........ ........ ....... ........ .......1 1
MD/Exter nal disc control features
Playing MDs............... ....... ........ ........ ....... ........ ........ ....... ........ ....12
Playing Other Disc mode............... ....... ........ ........ ....... ........ .......1 3
Switching Display f or D iscs ...................... ........ ........ ....... ........ ...13
Fast Forwarding and Reversing Disc Play....... ....... ........ ........ ....14
Track Search ..................................... ....... ........ ........ ....... ........ ....14
Disc Search .... ....... ........ ........ ....... ........ ........ ....... ........ ........ ....... .14
Track / Disc Repeat...................... ........ ....... ........ ........ ....... ........ .14
Track Scan........................ ........ ........ ....... ........ ........ ....... ........ .....1 5
Disc Scan................... ........ ....... ........ ........ ....... ........ ........ ....... ....15
Random Play......... ........ ....... ........ ........ ....... ........ ........ ....... ........ .15
Magazine Random Play............ ........ ....... ........ ........ ....... ........ .....16
Text / Title Scroll ................................... ....... ........ ........ ....... ........ 16
Presett ing Disc Nam es ................................. ....... ........ ....... ........ 16
Menu set tings
Menu System ........................ ....... ........ ........ ....... ........ ........ ....... 18
Touch Sensor Tone....... ........ ........ ....... ........ ........ ....... ........ ........ 19
Manual Time A djus tment....................... ........ ....... ........ ........ ......1 9
Calendar Adjust ment ..... ........ ....... ........ ........ ....... ........ ....... ........ 19
Calendar Mode...... ........ ........ ....... ........ ........ ....... ........ ........ ....... .19
Memo Mod e ........................................... ....... ........ ........ ....... ......2 0
Contrast Adjus tment .......................................... ....... ........ ........ ..20
Switching Graphic Display..... ........ ....... ........ ........ ....... ........ .......2 1
Clean Recept ion Syst em Circuit (CRSC).....................................2 1
Text Scroll... ....... ........ ........ ....... ........ ........ ....... ........ ........ ....... ....21
Installation
Accessories........................ ....... ........ ........ ....... ........ ........ ....... ....22
Installation Procedure ............ ........ ....... ........ ........ ....... ........ .......2 2
Connecting Wires t o Term i nals ........................ ........ ....... ........ ...23
Installation........... ....... ........ ....... ........ ........ ....... ........ ........ ....... ....24
Troubleshootin g Guide ............. ..................... .....27
Specifi cations .. . ............. ....................... ..............31
— 3 —
2Warning
Use of con trols or adjustments or
perfo rmance of proced ures other th an th ose
specif ied h erein may result in hazardous
radiat io n exp osur e.
In com pliance with Federal Regulations,
following are reproductions of labels on, or
inside t he prod uct relating t o laser product
safety.
Location : Bottom Panel
FCC WARNING
This equipmen t may generate or use radio
frequ ency ener gy. Changes or m o difications
to this equipment may cause harm ful
interference unles s the m odifications are
expressly approved in the inst ruc tion manual.
The user could lose the authorit y to operate
this e quipment if an unauthorized change or
modi fication is m ade.
2CAUTION
KENWOOD CORPORATION
2967-3, ISHIKAWA-CHO,
HACHIOJI-SHI
TOKYO, JAPAN
KENWOOD CORP. CERTIFIES THIS EQUIPMENT
CONFORMS TO DHHS REGULATIONS N0.21 CFR
1040. 10, CHAPTER 1, SUBCHAPTER J.
This equipmen t has been tested and found
to comply wit h the lim its fo r a Class B digital
device, pursuant to Part 1 5 of the FCC Rules.
These limits are designed to pro vide
reasonable protect io n against harm ful
interference in a residential installation. This
equipm en t may cause harmf ul in terferen ce
to radio communi cation s, if it is not inst alled
and used in accordance w ith the instruct ions.
However, t he re is no g uarantee that
interference will not occur in a particular
installation. If this equi pment d oes cause
harmf ul in terferen ce to radio or tele vision
recept ion, which c an be determined by
turnin g the equipment off and on, the user is
encouraged to try to co rrect th e interfe renc e
by one or more of the foll owing measures:
• Reorient or reloc ate the receiving anten na.
• Increase the sep aration between the
equipm en t and receiver.
• Connect t he equ ipment into an outlet on a
circuit differe nt from that to which t he
receiver is conn ected.
• Consult t he dealer or an experience d
radio/TV tec hnici an fo r help .
This Class B digital apparatus com pl ies with
Canadian ICES-003.
NOTE
NOTE
US and foreign patents Iicensed from Do lby
Laboratories Licensing Corporation .

— 4 —
English
Safety precautions
To prevent injury or fire, take the
following precautions:
• Insert the unit all th e way in unt i l it is ful ly
locked in place. Ot h erwise i t may fall out of
place w he n jolted.
• When extending t h e ign ition, batt ery , or
ground wires, make sure to us e aut omotive grade w ire s or other wires wit h a 0.75mm
2
(AWG18) or more t o pre vent wire
deter iorati on and damage t o the wire
coating.
• To prevent a short cir cuit, never put or leave
any met allic objects (such as coins or metal
tools) inside the unit .
• If the unit starts to emit s moke or st range
smell s, turn of f the p ower imm ediat ely and
consult yo ur Kenwood dealer.
• Make sure not to get y our fingers caught
between the faceplate and t he unit.
• Be careful not to dr op the unit o r sub ject it to
stron g sho ck.
The unit may break or crack because it
contains glass parts.
• Do not touch t he liq uid c rystal fluid if the
LCD is damaged or broken due to shock. The
liquid crystal fluid m ay be dangerous to your
health or even fatal.
If the liquid crystal fluid f ro m the L CD
contact s y our b ody or clo thing, wash it off
with soap immediate ly.
2WARNING
To prevent damage to the machine,
take the following precautions:
• Make sure to groun d the unit to a negative
12V DC power supp ly.
• Do not open the top or b ottom covers of the
unit.
• Do not install the unit in a spot expos ed to
direct sun light or excessive heat or hu midity.
Also avoid places with too muc h du st or the
possibilit y of water splashing.
• Do not set the removed f aceplate or the
faceplate case in areas exposed to direc t
sunlight , e xces sive heat, or hu midity. Also
avoid places w ith too much dust or the
possibilit y of water splashing.
• To prevent deterioration, do n ot touch the
terminals of the unit or faceplate with you r
finger s.
• Do not subj ect the faceplate to e xces sive
shock, as it is a piece of precision
equipm en t.
• When replacing a fuse , on ly us e a new one
with the prescribed r ating . Usin g a f use with
the wron g rat ing may cause your unit to
malfu nction.
• To prevent a short cir cuit when replacing a
fuse, first dis conn ect the wir ing h arness.
• Do not place any object be tween the
faceplate and th e un it.
• Do not use your own scr ews. U se on ly the
screws provided. If you use t h e wrong
screws, you could dam age t he u nit.
2CAUTION
IIMPORTANT INFORMATION
About the disc changer to be
connected:
To connect a disc changer having t he "O-N"
switch to th is un it, set the "O-N" switch to
"N".
To connect a disc changer having no "O-N"
switch to th is un it, the c onve rter cord CADS100 and/or sw itching adapter KCA-S210A
are required as options.
If a m odel with no "O-N" sw itch is
connect ed , some unavailable function s and
information t h at cannot be displayed are
generated, suc h as t he D NPS, DNPP,
Magazine random play, and CD Text display.
Note that none of the KDC-C100, KDC-C302,
C205, C705, and non-Kenwood CD changers
can be connect ed.
You can damage both your unit and
the CD changer if you connect them
incorrectly.
2CAUTION
— 5 —
• Wipe away dirt or d ust from th e cart ridg e
surface wit h a dry clot h before use. Usin g an
oil-soiled cartridge in part icular m ay result in
the d isc no t loading or being unable to ejec t
it. (At time of cleaning, be careful no t to
open t he s hutter.)
• Do not leave t he MD in the unit for a
prolonged perio d. The ejected MD should be
placed in an MD case f or storage.
• Do not leave t he MD in a place exposed to
direct sun light (such as on a dashboard) or in
other places t h at attain high temperatures.
The M D c artrid ge will b ecome m iss hapen
and w ill no long er b e usable.
• MDs designed for use wit h dat a cannot be
used. Please use MDs designed for mus ic.
• Do not use lens cleaners. Doin g so will lead
to bre akdown.
Lens Fogging
In cold climates, t here may be a period after
you tu rn o n you r veh icle's heate r when the
lens t hat g uides the laser beam used in yo ur
MD player fogs up . If this happens, you
cannot play min i dis cs. Take out d iscs and
the fogging will disappear. If it does not
return to norm al aft er s ever al hours, contact
your Kenwood dealer.
About the play time of MD long play
performance time display
If the MD perf or mance tim e goes ove r 100
minu tes only t he l ast 2 digits of per formance
time are shown.
• If you e xper ience pro blems during
installation, con sult your Kenwood dealer.
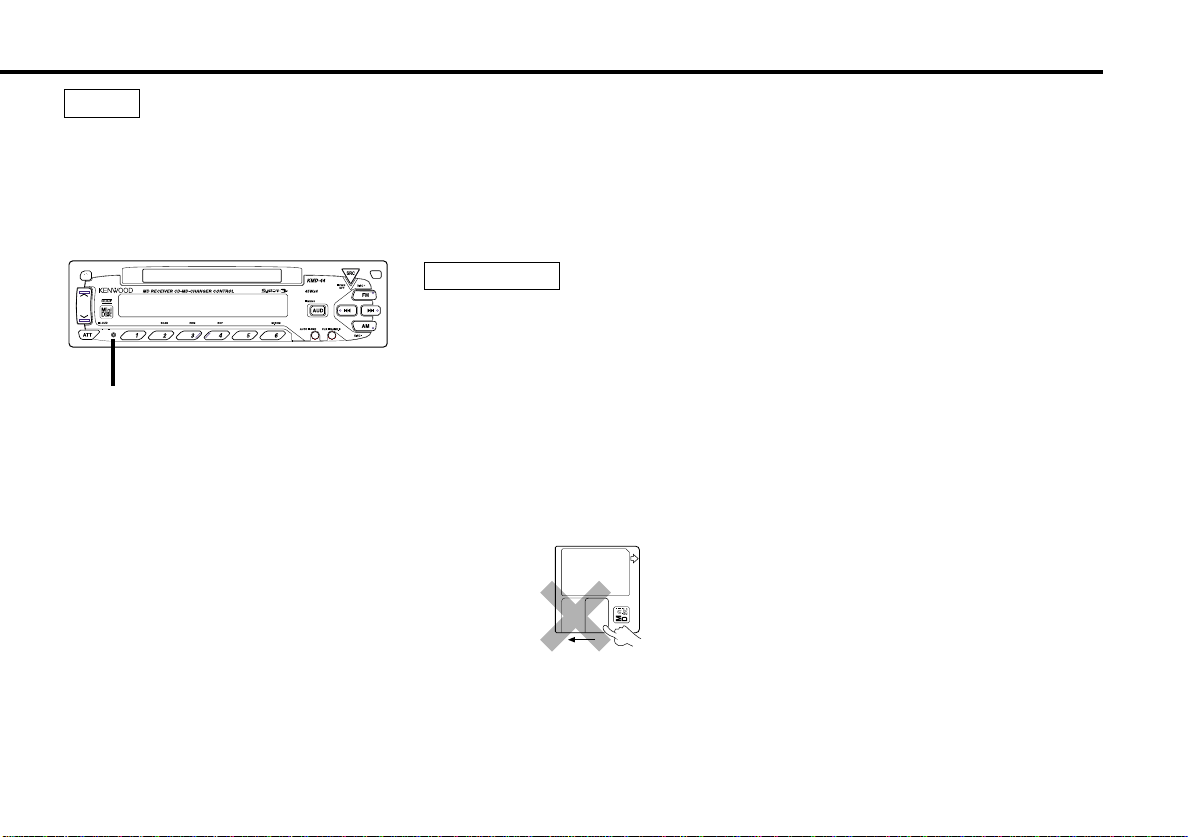
• If the unit does not seem to be working
right, try pressing the reset bu tton first. If
that d oes n ot solve t he prob lem, consult
your Kenwood dealer.
• Characters in the LCD may becom e difficult
to read in temperat ures belo w 41 ˚F (5 ˚C).
• The illustrations of the d isplay and the p anel
appearing in this m anual are examples used
to exp lain m ore clearly how the cont rols are
used. Therefor e, what appears on the disp lay
in the illus trations m ay dif fer fro m what
appears on the display on t he actual
equipm en t, and some of the ill ustrations on
the d isplay m ay represen t some thing
impo ssible in act ual operation .
• The funct ion s that can be used and the
information t h at can be disp layed will differ
depending on the ext e rnal disc players being
connect ed .
NOTE
Reset button
Cleaning the Faceplate Terminals
If the ter minals on the uni t or faceplate get
dirty, wipe them with a dry, soft cloth.
Cleaning the Unit
If the faceplate of this unit is st ained, wipe it
with a dry soft cloth such as a silicon cloth.
If the faceplate is s tained badly, wip e the
stain of f with a clot h moisten ed with neut ral
cleaner, then wipe neu tral detergent off.
Applying spray cleaner direct l y to the unit
may aff ect its mechanical part s. Wiping t he
faceplate wit h a hard cloth o r usin g a volatile
liquid such as t hinne r or alcohol may scrat ch
the su rface or erases characte rs.
Handling Mini discs
• The M D sh utter is d esig ned s o that it cannot
be opened. If forc ed op en, the cartridge will
be damaged and use of the MD will no
longer be poss ible. If the sh utter has been
opened due to som e c ause, be carefu l not to
touch the recording po rtion with a f ing er.
Doing so will cause t he sou nd to skip.
• Do not use an MD t hat h as a peeling label.
Use of an MD t hat has a loose or peeling
label may cause problem s, su ch as t he label
comin g off in side the player and the resultant
inability t o ejec t the MD.
2CAUTION
Switching M odes:
Each t ime you press the SRC (source) butt on, the m ode
Sw itc h ing M od es
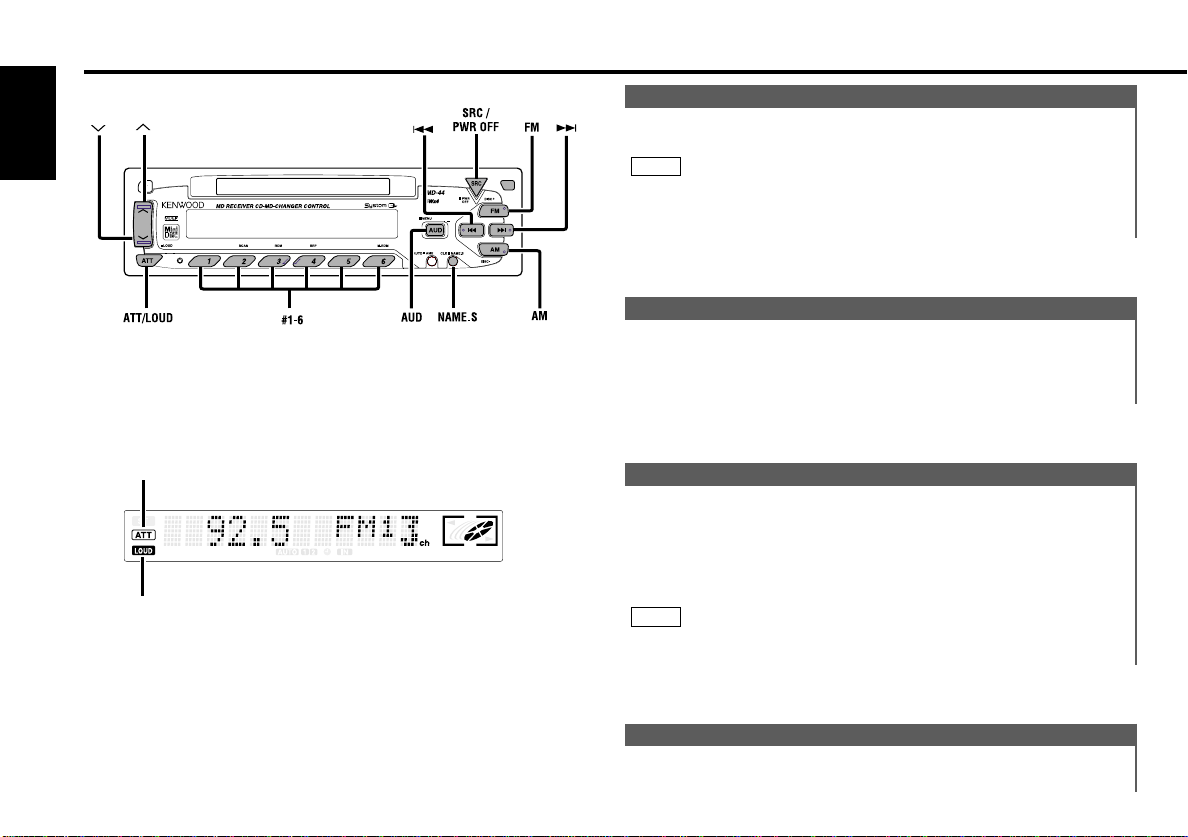
Thi s f unct ion al lows y o u to tur n down t h e vol um e qui ckly.
Turning Attenuator On/ Off:
Press the ATT butt on to swit ch t he att en uator o n and of f .
When t he at t enu ator is o n, t he ATT indicator blinks.
When t he at t enu ator is o f f , the volum e ret urn s t o the original
level.
Turning the vol um e u p, or turning it all t he way down deactivat es
the at t enuat or f un ct ion .
NOTE
Attenuator
Increasing Volume:
Press the u but t on t o turn up t he v olum e .
Decreasing Volume:
Press the d but t on t o turn down t he v olum e .
Volume
Turning on the power:
Press the SRC (source) butt o n.
Turn the power on bef o re carrying out the f ollowing procedu res.
Turning off the power:
Press the PWR OFF butt on f or at least one se cond.
NOTE
Power
General features
— 6 —
English
ATT indicator
LOUD indicator
Ad j ust v ario us par amet er s of so und q uali ty.
Press the AUD but ton to ent e r t he cont ro l m od e.
Selecting mode
Press either the FM or AM b ut t o n.
Each t ime the but ton is pressed , t he adjustment m od e will
change.
Please refer to t he following f or the cont ents of t he
adjustm ent mod es.
Source tone memory
Each source (CD, M D, FM, AM and disc changer) has its own
memory in which to sto re t he bass, m iddle, and treb le t on e
settings.
The sett ings m ade f or a particular source are recalled
autom atically whenever y ou use that source ( f or exam ple, FM
mode uses the t one settin gs m ade f or FM, AM f or AM, et c.).
Adjust each mode
Press the 4/¢ but ton.
Please refer to t he following f or the adjusting v alues.
Press the AUD but ton to end the cont rol mode.
4
3
NOTE
2
1
Audio Contro l Setting
Thi s f unct ion amp l ifi es low an d h igh ton es wh en the v olu me i s
tu r ned d ow n .
The LOU D i ndi cator lig h ts up wh en th e l oud ness fu n ctio n is
on .
Turning Loudness On/Off:
Press the LOU D but ton f or at le ast one second t o switch th e
loudness on and of f .
Loudness
sw i t ches as follo ws:
Selecting standby mode:
Press the SRC button rep eatedly and switc h t o "ALL OFF" .
When "ALL OFF" is displayed, the standby mode is activat ed.
The standby m ode t u rns all f unct io ns off while l eaving t he
power to t he u nit on . Use this m ode whe n you want t o h ave
the d isplay illum inate d but don't want t o list en t o anyt hing.
• The m ode swit che s t o the next mode f rom any mod e which
cannot be used .
• The ext ern al disc cont rol mode will dif fer depending on t h e unit
that is conne ct ed.
• To enable th e selection of Exte rnal disc cont ro l m od e 2/AUX
mode , you sh ould co nnect opti onal switch ing adapter KCAS210A (which allows you to select both External disc cont r ol
mode 2 and AUX mode ) or CD changer (KDC-CPS87, KDCCX87, KDC-CPS85, KDC-CX85, KDC-CPS82 or KDC-CX82) or
sw i t ching adapter CA-C1AX (whi ch allows you t o se lect A UX
mode only).
During t he AU X mod e, "AUX" (or AUX-name disp lay) will show
in the display. W hen t he CA-C1AX is being used, the AUX
M o de will rep lace the External Disc Cont rol Mode .
Presetting AUX-name (Except the CA-C1AX)
In the AUX m ode, pr ess t h e NAME.S butt on f or at least tw o
seconds. "NAM E SET" is display and AUX-name mod e is entered.
Input t he ch aracters, ref err ing t o t he s ect ion on "Presett ing Disc
Names (DNPS)" (page 16).
NOTE
NOTE
▼
Tuner mode
▼
MD mod e
▼
External disc control mode 1
▼
External disc control mode 2/A UX mode
▼
Standby mode
— 7 —
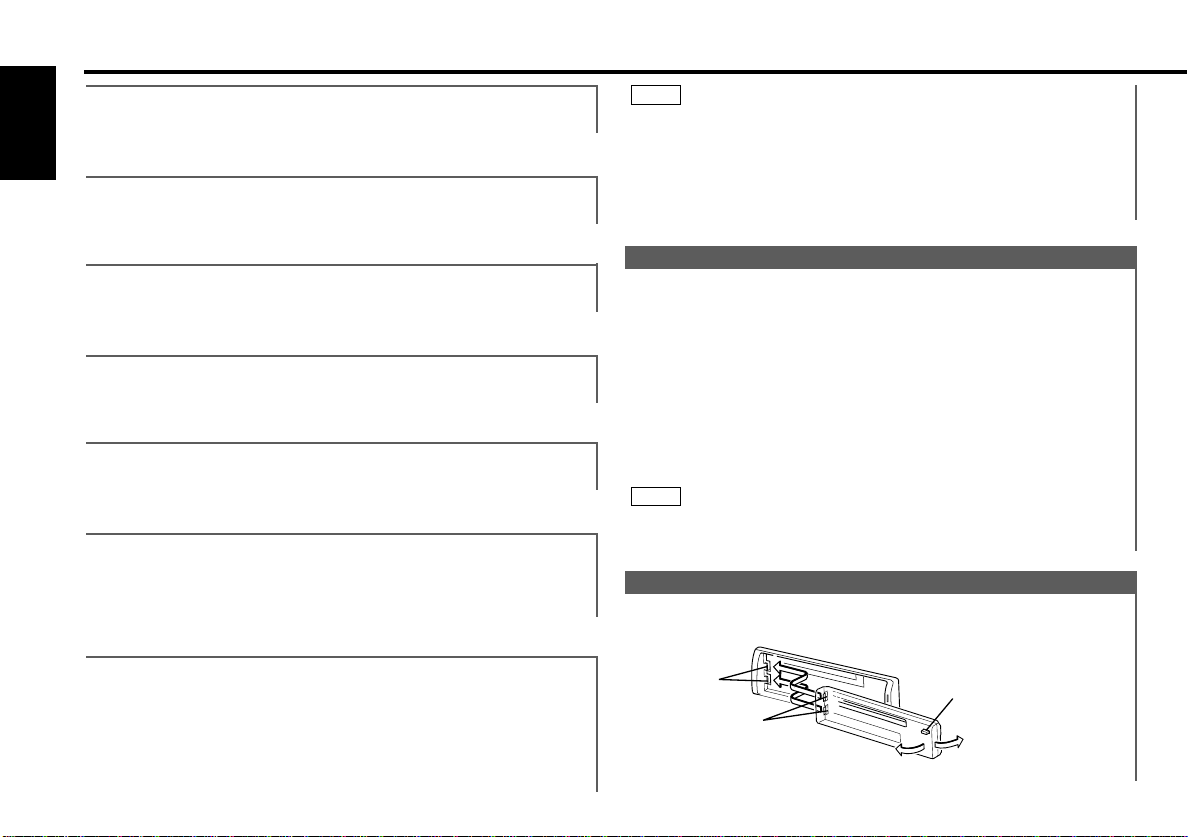
The f acep late o f th e u nit can be d etached an d taken wi th y o u,
hel p ing to d et er th eft.
Grooves
Release button
Projections
Theft D eterrent Faceplate
Thi s f unct ion al lows y o u to adju st the set tin g that is recal led
w i th t he Syst em Q, acco r din g to typ es o f speaker s.
Press the SRC button rep eatedly t o se lect the st andby m ode.
"ALL OFF" is displayed when t he s t andby m ode is selec t ed.
Press the AUD but ton to ent e r t he s peaker set t in g m o de.
Press either the 4 or ¢ but t on t o se lect the t ype of
speaker. The sett ing switches as follows.
Off ("SP OFF") / For the OEM spe aker ("SP OEM") / For 6/6x9
in. speaker ("SP 6/6x9inch") / For 5/4 in. speaker ("SP 5/4inch")
Press the AUD but ton to end the speaker set t ing mode.
Speaker setting f unction allow s f or tuning of bass, m idd le and
treble
NOTE
4
3
2
1
Speaker Setting
The System Q f unction changes t he values of the fo llowing
sound quality p aramete rs:
Bass centre frequency, bass level, bass quality f actor , bass
exten d, m id dle cen t re frequency, middle level, middle quality
factor , t rebl e centre fr equency , and tr eble lev el.
Their sett ing values are diff e rent d ependin g on the set t ing of the
speaker sett in g m o de.
NOTE
"SYS-Q" : < System Q > Recalling the kenwood preset sound
setting
Press the prese t button s (#1-6).
Settin gs:#1;Flat (‘SYS-Q Flat” ), #2;Rock (‘SYS-Q Rock” ),
#3;Top 40 (‘SYS-Q Top40”), #4;Pops (‘SYS-Q Pops” ),
#5;Jazz (‘SYS-Q Jazz”), #6;Easy (‘SYS-Q Easy” )
"V OFFSET" : Set the sound level of the each source selected by
adjusting the level difference between t he basic
sound level and the required level.
Settin g values: - 8 – ±0
"Fader" : Adjust the fader level.
Settin g values: Rear 15 – Front 1 5
"Balance" : Adjust the balance level.
Settin g values: Lef t 15 – Right 15
"Mid" : Adjust the middle level.
Settin g values: - 8 – + 8
"Bass" : Adjust t he bass level.
Settin g values: - 8 – + 8
General features
— 8 —
English
"Treble" : Adjust the treble level.
Settin g values: - 8 – + 8

Tuner features
Removing the Faceplate:
Press the release but ton.
The faceplate is unlocked , allowing you t o d et ach it .
• The faceplate is a precision piece of equipm en t and can be
damaged by shocks or jo lt s. For t hat re ason, keep t he f aceplate
in its special st orage case w h ile detached.
• Do not expose t he faceplate or it s st orage case t o direct
sunlight or ex cessive heat or humidity. Also avoid places wit h
too much dust o r t he possibil it y of water splashing.
Reattaching the Faceplate:
Align t he pro ject ion s on the unit wit h the grooves o n t he
faceplate.
Push the f aceplate in u nt il it clicks.
The faceplate is locked in place, allow ing you to use t he un it .
2
1
NOTE
— 9 —
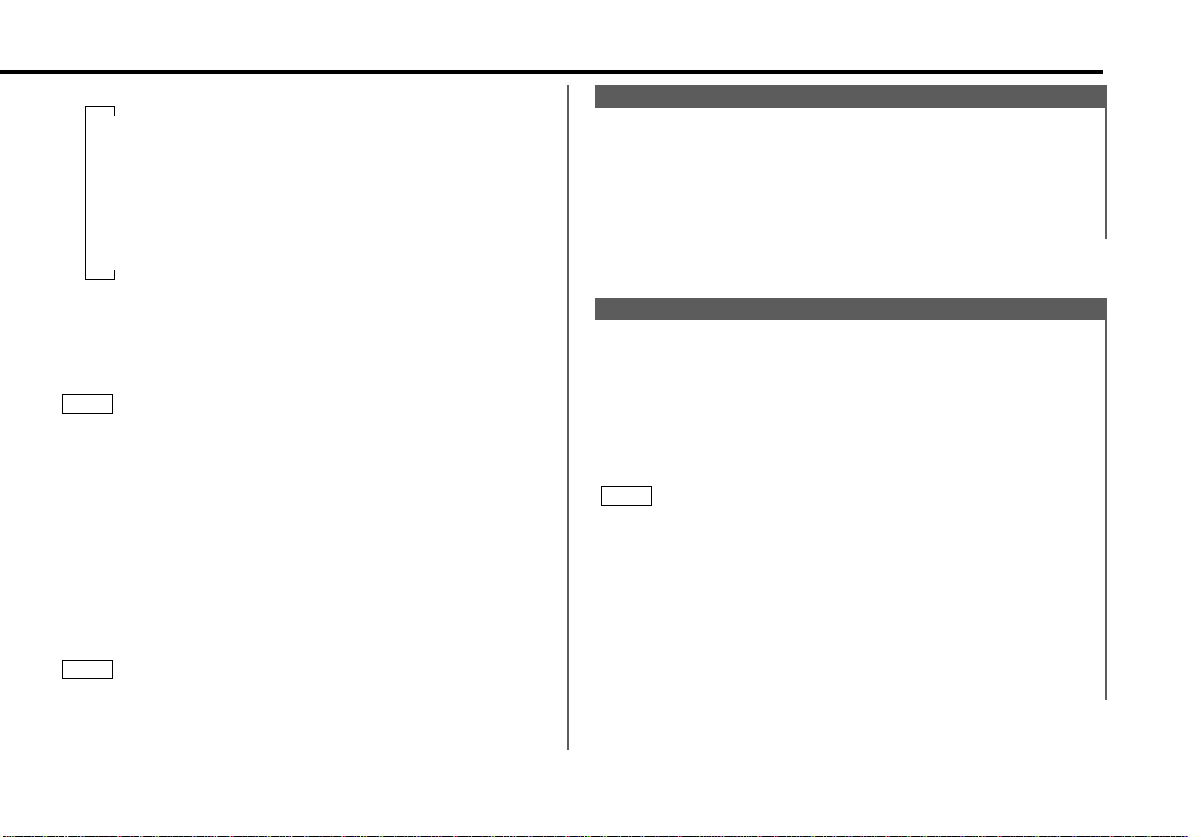
AUTO 1/2 indicat or
ST indicat or
Frequency
Preset station number
Band displ ay
£ indicator
You can auto mat i cally stor e all t he recei vabl e f requ encies i n
th e b and cu rren t ly b eing list ened t o , and t hen r ecall t h em wi t h
th e t ouch of a b u tto n lat er. Thi s f unct ion is especi al ly u seful
w h en yo u are t ravel l ing and d o no t know wh at st at ion s are
avai l able. U p to six f requ en cies can b e stor ed thi s way .
Select t he band f or aut o memo ry entry.
Press the AME but t on for at least tw o second s t o s t art aut o
memory ent ry.
The numbers o f t h e prese t st at ion button s are shown in orde r.
When all the st atio ns in a cert ain band are stored in the preset
memory, t he aut o m e m ory ent ry st ops . The tu ner t h en plays
the last st at ion rece ived.
Recalling a Preset Station:
2
1
Auto M emo r y Entry
Sto r e the f requ en cy of a stati on. Yo u can th en recal l th at
stat i on wi t h a sing le to uch o f a but ton .
Select t he band/ st ati on t hat you want t o have st ore d.
Press the button (#1-6) that you want to use f or the st ation, for
at least t wo seco nds.
The butt on n um be r blinks once in t he d isplay to indicate t hat
the d ata has been store d.
Recalling a Preset Station:
Press the prese t station but t o n (#1-6) for the de sired s t ation.
The number of the recalled st atio n is disp layed.
You can store six st atio ns in each of the FM 1, FM2, FM 3, and
AM bands.
NOTE
2
1
Statio n Preset Memory
received.
You can choo se fro m t h ree tu nin g mo des: aut o seek, pr eset
stat i on seek, an d m an ual. Th e " AUTO 1" i ndi cator l igh ts up
w h en aut o seek tu n ing is select ed, and t he "A U TO 2" ind icato r
li g hts wh en p reset st atio n seek tu n ing is select ed.
Selecting Tuning Mode:
Press the AUTO but ton.
Each t ime you press the AUTO but t on, the m ode switches as
follows.
Tuning:
Press the SRC (source) butt o n repeat edly to select t h e t une r
mode . "TUNER" is displayed when the t uner mode has been
select ed.
Press either the FM or AM b ut t o n t o s elect t he band.
Each t ime you press the FM button, t he b and switch es
between t he FM1, FM 2 and FM 3 (w h ich are used f or groups
of pre set stations).
Press the AM button t o se lect the AM band.
• Auto Seek Tuning
Press the ¢ but t o n t o s eek hig her f r equenc ies.
Press the 4 butt on t o seek lo wer f req uencies .
• Preset st ation seek tuning
Press the ¢ but t o n t o move t o the next pres et station (i.e.,
the o ne wit h the next hig hest num b er), and the 4 button to
move t o the last preset stat ion (i.e., t he on e wit h the next
lowest n um be r).
• M anual Tuning
Press the ¢ but t o n t o i ncrease t he f r equenc y by one st ep .
Press the 4 but t o n t o d ecrease t he frequency by o ne st e p.
The ST indicator lights up when st e reo bro adcasts are being
NOTE
3
2
1
▼
Auto 1 (Auto Seek Tuning)
▼
Auto 2 (Preset Stat io n Seek Tuning)
▼
Manual (Manual Tuning)
Tuning
Tuner features
— 10 —
English
 Loading...