

Kenwood KMC5XX series, KMM7XX series Instructions Manual
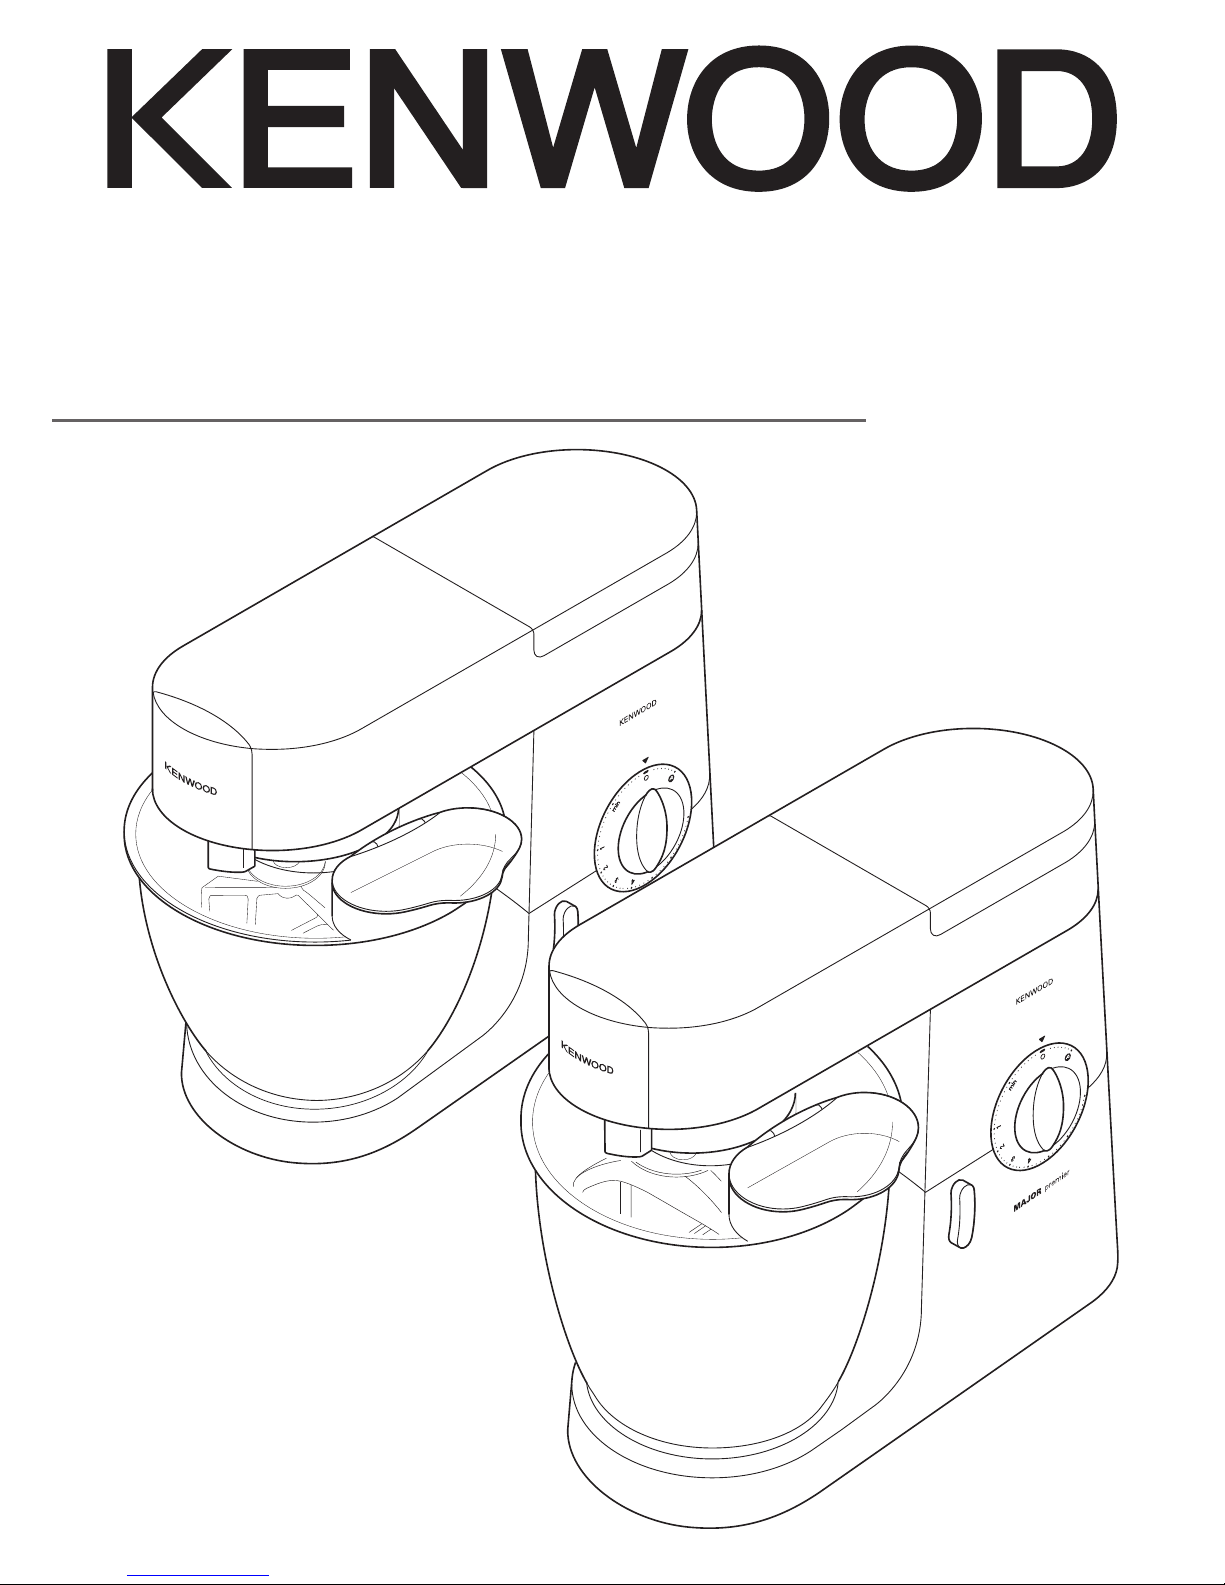
Chef and Major
KMC5XX - KMM7XX series
TYPE KMC5, TYPE KMM7
instructions

page 4 instructions
C
ongratulations on buying a Kenwood. With such a wide range of attachments available, it’s
more than just a mixer. It’s a state-of-the-art kitchen machine. We hope you’ll enjoy it.
Robust. Reliable. Versatile. Kenwood.
EEnngglliissh
h
´d°w
¢FKOLU‹ 11 ÅH∫W
≤NMµJr ´Kv ®d«¡ §NU“ ØOMuËœ. ˱l ¢u≠d ¢AJOKW Ë«ßFW ØNcÁ ±s «∞LK∫IU‹, ≠Nu ∞Of ±πdœ îö©W. °q «≤t §NU“ ±D∂a
¨
U¥W ≠w «∞dË´W Ë«ô¢IUÊ.«≤MU ≤Q±q ¢L∑FJr °t.
±∑Os, ±u£u‚, ±∑Fbœ «ôß∑FLUô‹, ØOMuËœ.

4
safety
G
Read these instructions carefully and retain for future reference.
G
Remove all packaging and any labels.
G
Switch off and unplug before fitting or removing
tools/attachments, after use and before cleaning.
G
Keep your fingers away from moving parts and fitted
attachments.
G
Never leave the machine on unattended.
G
Never use a damaged machine. Get it checked or repaired: see
‘service and customer care’.
G
Never operate the mixer with the head in the raised position.
G
Never let the cord hang down where a child could grab it.
G
Never let the power unit, cord or plug get wet.
G
Never use an unauthorised attachment or more than one
attachment at once.
G
Never exceed the maximum capacities.
G
When using an attachment, read the safety instructions that come
with it.
G
Take care when lifting this appliance as it is heavy. Ensure the head
is locked and that the bowl, tools, outlet covers and cord are
secure before lifting.
G
Appliances can be used by persons with reduced physical,
sensory or mental capabilities or lack of experience and
knowledge if they have been given supervision or instruction
concerning use of the appliance in a safe way and if they
understand the hazards involved.
G
Misuse of your appliance can result in injury.
G
This appliance shall not be used by children. Keep the appliance
and its cord out of reach of children.
G
Children should be supervised to ensure that they do not play
with the appliance.
G
Only use the appliance for its intended domestic use. Kenwood
will not accept any liability if the appliance is subject to improper
use, or failure to comply with these instructions.
before plugging in
important - UK onlyGMake sure your electricity supply is the same as the one shown on the underside of your machine.
G
The wires in the cord are coloured as follows:
Blue = Neutral, Brown = Live.
G
The appliance must be protected by a 13A approved (BS1362) fuse.
G
For non-rewireable plugs the fuse cover MUST be refitted when replacing the fuse. If the fuse cover
is lost then the plug must not be used until a replacement can be obtained. The correct fuse cover
is identified by colour and a replacement may be obtained from your Kenwood Authorised Repairer
(see Service).
G
If a non-rewireable plug is cut off it must be DESTROYED IMMEDIATELY. An electric shock hazard
may arise if an unwanted non-rewireable plug is inadvertently inserted into a 13A socket outlet.
G
This appliance conforms to EC directive 2004/108/EC on Electromagnetic Compatibility and EC
regulation no. 1935/2004 of 27/10/2004 on materials intended for contact with food.
know your Kenwood kitchen machine
before using for the first time
1 Remove all packaging
2 W
ash the parts: see ‘care and cleaning’.
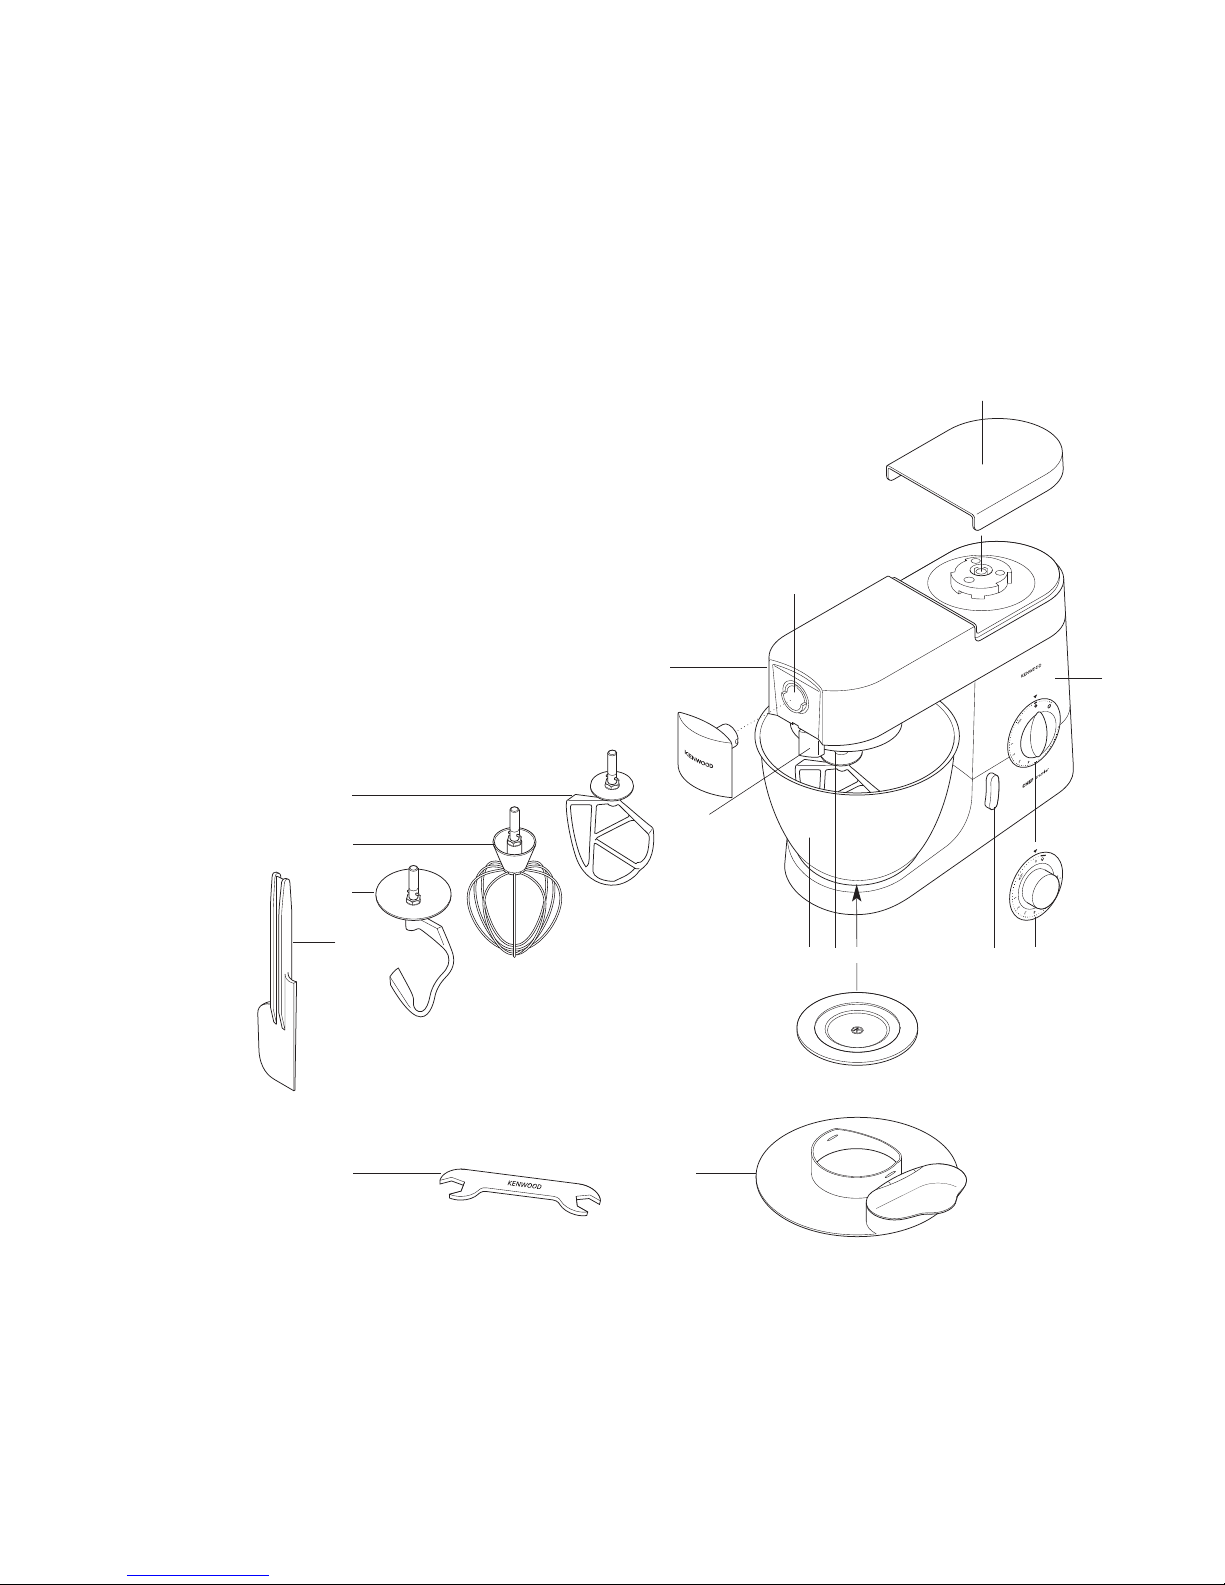
know your Kenwood kitchen machine
(To buy an attachment not included in your pack, see service and customer care.)
a
ttachment outlets
h
igh-speed outlet
slow-speed outlet
tool socket
the mixer mixer head
o
utlet catch
b
owl
bowl seating pad
head-lift lever
on/off and speed switch
p
ower unit
K-beater
whisk
dough hook
spatula
spanner
splashguard
know your Kenwood kitchen machine
5
the mixing tools and some of their uses
K-beaterGFor making cakes, biscuits, pastry, icing, fillings, éclairs and mashed
p
otato.
whisk
G
For eggs, cream, batters, fatless sponges, meringues, cheesecakes,
mousses, soufflés. Don’t use the whisk for heavy mixtures (eg creaming
fat and sugar) - you could damage it.
dough hook
G
For yeast mixtures.
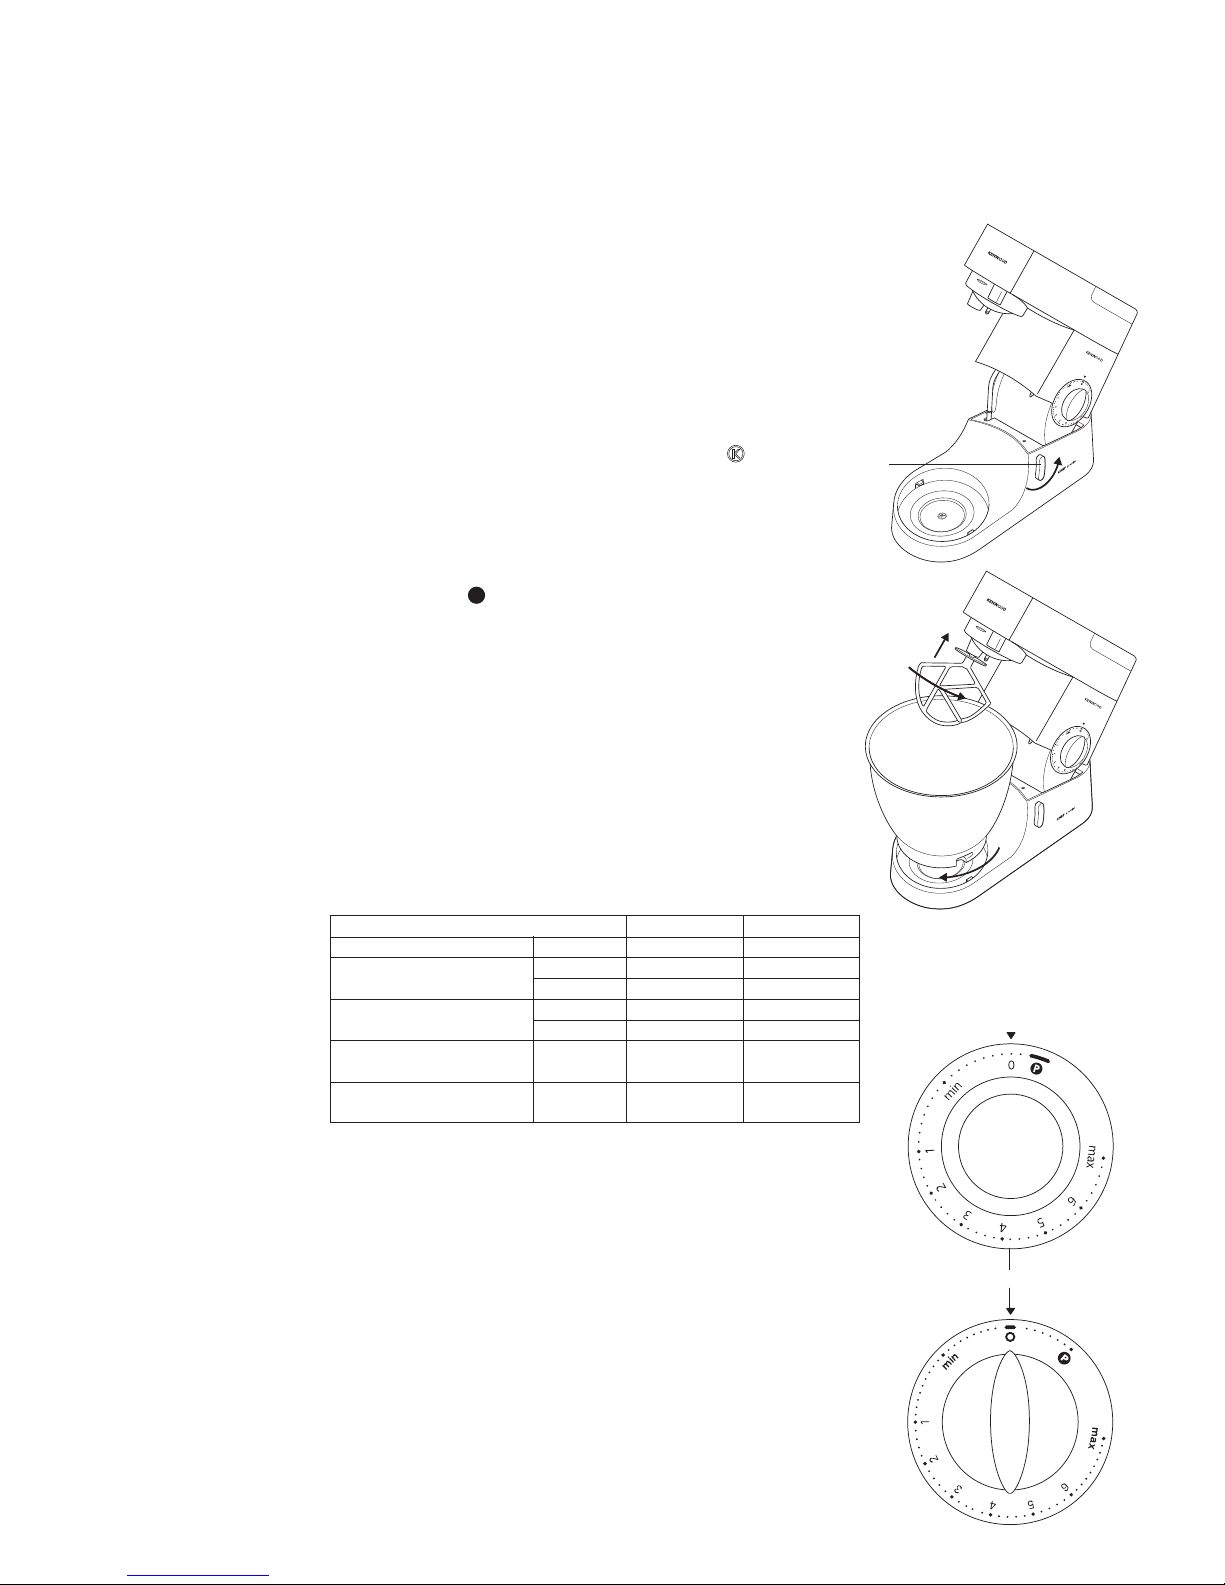
to use your mixer
1 Turn the head-lift lever anti-clockwise and raise the mixer head till it locks.
E
nsure the bowl seating pad is correctly fitted with the symbol
u
ppermost.
to insert a tool
2 Push up till it stops then turn.
3 Fit the bowl onto the base - press down and turn clockwise
4 Lift the mixer head slightly then turn the head-lift lever anti-clockwise and lower
t
he mixer head till it locks.
5 Switch on by turning the speed switch to the desired setting.
G
Switch to pulse for short bursts.
6 Switch off and unplug after use.
to remove a tool 7 Turn and remove.
hints
G
Switch off and scrape the bowl with the spatula frequently.
G
Eggs at room temperature are best for whisking.
G
Before whisking egg whites, make sure there’s no grease or egg yolk
on the whisk or bowl.
G
Use cold ingredients for pastry unless your recipe says otherwise.
points for bread making
importantGNever exceed the maximum capacities below - you’ll overload the
machine.
G
If you hear the machine labouring, switch off, remove half the dough
and do each half separately.
G
The ingredients mix best if you put the liquid in first.
* Egg sizes used = medium sized (Weight 53-63g)
speed switch
K-beater
G
creaming fat and sugar start on min, gradually increasing to ‘max’.
G
beating eggs into creamed mixtures 4 - ‘max’.
G
folding in flour, fruit etc Min - 1
G
all in one cakes start on min speed, gradually increase to max.
G
rubbing fat into flour min - 2.
whisk
G
Gradually increase to ‘max’.
dough hook
G
Start on ‘min’, gradually increasing to 1.
important
Ensure that no bowl tool is fitted
or stored in the bowl when using
other outlets.
P
6
the mixer
Maximum capacities CHEF MAJOR
Shortcrust pastry Flour weight 680g/1lb 8oz 910g/2lb
Bread dough (stiff yeasted) Flour weight 1.36Kg/3lb 1.5Kg/3lb 5oz
Total weight 2.18Kg/4lb 13oz 2.4Kg/5lb 5oz
Soft yeasted dough (enriched Flour weight 1.3Kg/2lb 14oz 2.6Kg/5lb 12oz
with butter and eggs) Total weight 2.5Kg/5lb 8oz 5Kg/11lb
Fruit cake mix (creaming fat Total weight 2.72Kg/6lb 4.55Kg/10lb
and sugar method) (9 egg mix) (15 egg mix)
Egg whites Number 12 16
Weight (455g) (605g)
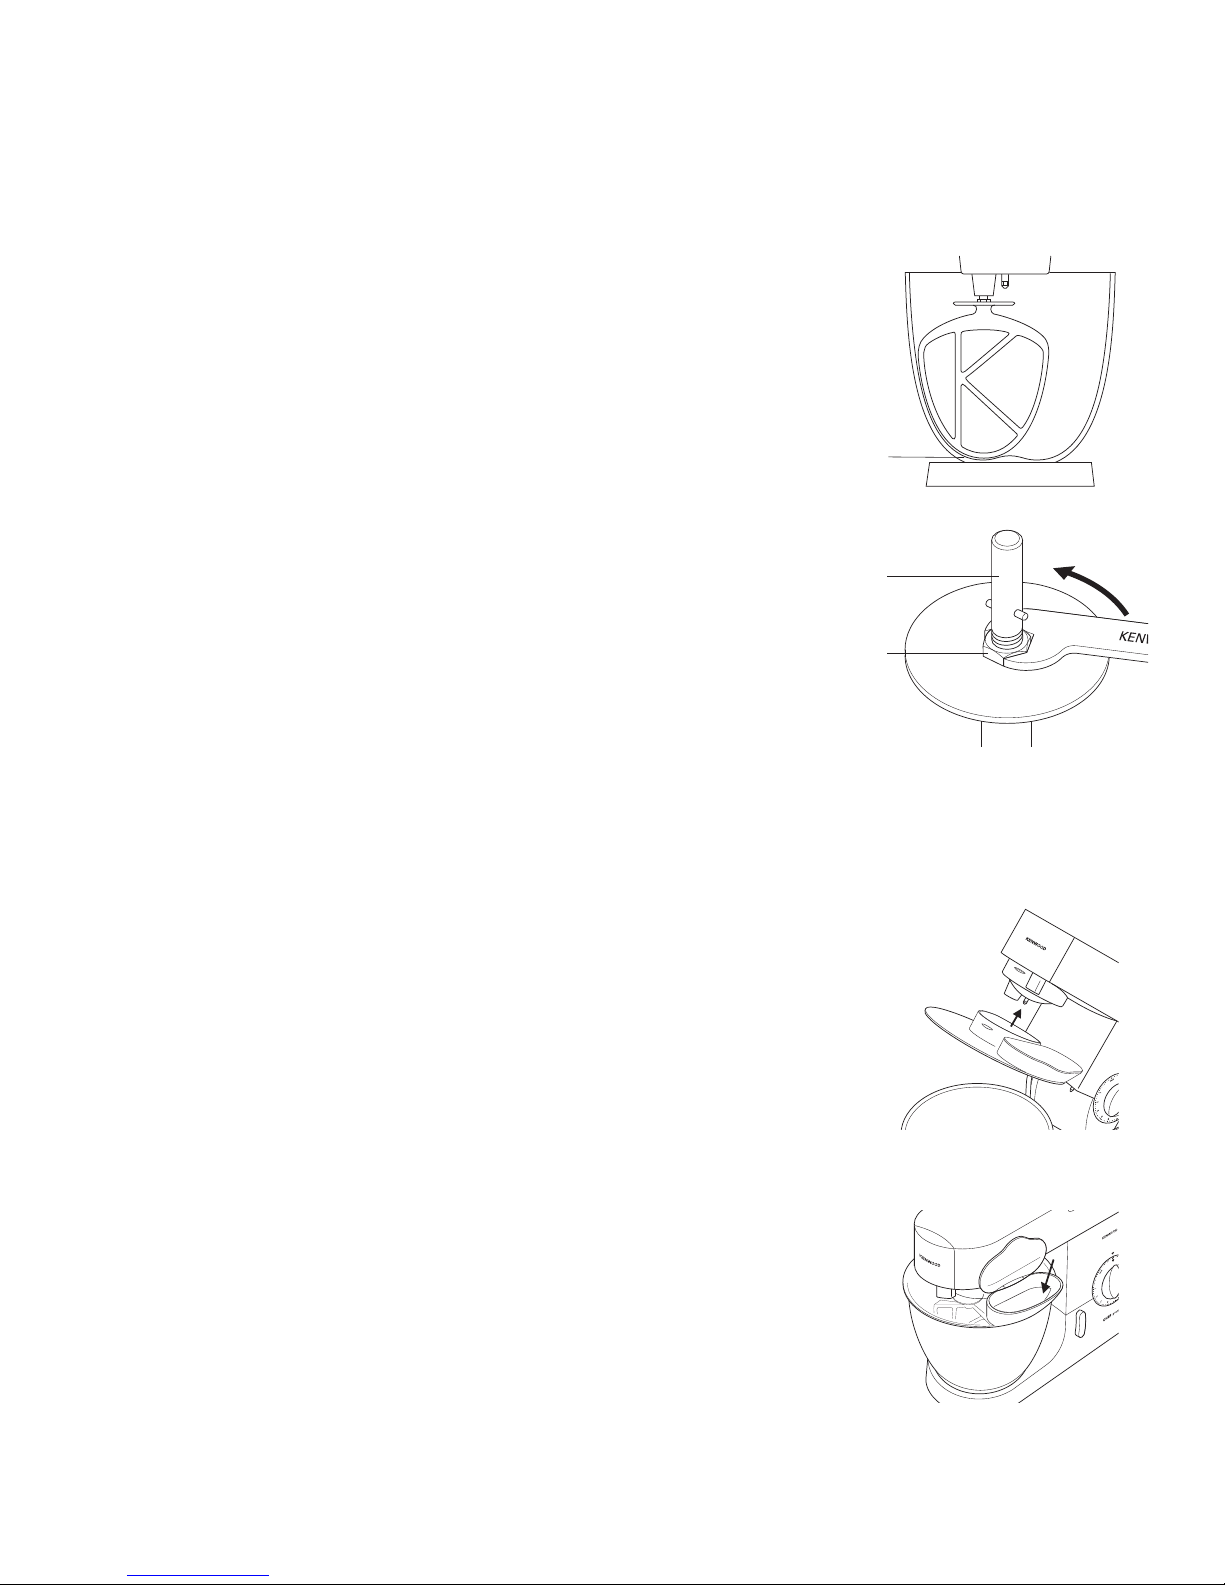
problem
G
The whisk or K-beater knocks against the bottom of the bowl or isn’t
r
eaching the ingredients in the bottom of the bowl.
solution
G
Adjust the height using the spanner provided. Here’s how:
1 Unplug the appliance.
2 Raise the mixer head and insert the whisk or beater.
3 L
ower the mixer head. If the clearance needs to be adjusted, raise the
mixer head and remove the tool. Ideally the whisk and K-beater should be
almost touching the bottom of the bowl
.
4 Using the spanner provided loosen the nut sufficiently to allow
a
djustment of the shaft
.
To lower the tool closer to the bottom of the
b
owl, turn the shaft anti-clockwise. To raise the tool away from the bottom
of the bowl turn the shaft clockwise.
5 Re-tighten the nut.
6 Fit the tool to the mixer and lower the mixer head. (Check its position see
p
oints above).
7 Repeat the above steps as necessary until the tool is set correctly. Once
this is acheived tighten the nut securely.
dough hook - this tool is set at the factory and should require no
adjustment.
problem
G
The mixer stops during operation.
solution
G
Your mixer is fitted with an overload protection device and will stop if
overloaded to protect the machine. If this happens, switch off and
unplug the mixer. Remove some of the ingredients to reduce the load,
and allow the mixer to stand for a few minutes. Plug in and reselect the
speed. If the mixer does not restart immediately allow to stand for
additional time.
to fit and use your splashguard
1 Raise the mixer head until it locks.
2 Fit the bowl onto the base.
3 Push the splashguard onto the underside of the mixer head until fully
located. The hinged section should be positioned as shown.
4 Insert required tool.
5 Lower the mixer head.
G
During mixing, ingredients can be added directly to the bowl via the
hinged section of the splashguard
.
G
You do not need to remove the splashguard to change tools.
6 Remove the splashguard by raising the mixer head and sliding it down.
troubleshooting
7
 Loading...