

Page 1

.¿'i Press [Select].
The setedion menu wHI appear
Press cXD or CZ> to highlight the
desired selecdon/ then press [Select].
To turn on me greeting message furKUon, select 'Enable' To
turn II off. seteci 'Oisable' To personalize the greeting
message, select 'Edit Message*.
When *Enat^* or 'Disable' is selected. 'Greeting Message
has been Enabled* or 'Greeting Message has been Oisabted'
will appear.
When 'Edit Massage’ ts selected, the current message will
appear.
Edit the message.
no eharaotefs are on the display. *OK* will not «>peer >
)i$ablG
Edit Message
^ After editing the message^ press [OK].
'New Greeting Message Stored* will appear
Answering the Phone by Pressing Any Key
You can answer a can by pressing any Key except and [Busy]
Press cZZ!Z> or from "Change Phone
Settings*' (page 54) until "Any Key
Answer" appears with the current
setting.
To him Any Key Answer on or off, press
[Enable] or [Disoble].
'Any Key Answer has been Enabled* or 'Any Kay Answer
has been OisabtecT will appear
jjOtP
it keypad ioeK is enabled, you can only answer s call toy pressing ^ or [Accept]
I Any Key Answer
I Disabled
Т»
?
3
5P
3
61
Page 2

Selecting a Menu Language
You can seieci a tanguago manually from the menu It you select *Automat)c’. the language will
depend on the SIM card
Press cXD or C3P from "Change Phone
Settings" (page 54) until "Menu
Language" appeors with the current
setting.
2 Press [Change].
Menu Language
Automatic
Cnnnqe
2 Press CL5 or CX5 to display the desired
languoge.
^ When the desired language is
disployed/ press [Select].
'XXXX Selected Manually” at 'XXXX Selected AutomaUcaD/ *tll appear (XXXX represema
a lar>guBge name).
Performmg the iollowing toy sequences Irom Idle mode wiaeo alow ycu to change langi^gss
English: i^«000a# German. ^»OOOt#
French: -^#0002» ilaHan: >#0003«
Greeic VffOOOA# Turkish: »0005«
Spanish. -«»OOOe« Dutch: >«0007«
Portuguese: >«0006« Traditional Chinesa: >«00t 0«
Sinifrirfied Chinesa: >e0011
* Some languages may not be available on your phone.
T..MI
Automaiic
Language Select
62
Page 3

!ltp|lling the Character Mode
Character Mode aUows you to setect the type o( characters you can enter II you select ‘‘AutomalK*.
the characters depend on the selected language It you select 'Exterxied'. you can enter all the
characters this phone otters (page $S>
Press cX5 or CIP from "Change Phone
Settings" (роде 54) until "Character
Mode" appears with the current setting.
Press [Change].
*Character Mode has been set to Extended* or *Charecter
Mode has been set to Automatic* will appear.
Sdning the Time and Date
The time arvj date are displayed on the Idle screen
T, Press or CX3 from "Change Phone
•• Settings" (page 54) until "Time & Date"
appears with the current settings.
2 Press [Change].
'Set Time* will appear
Ш ТшшШ
Character Mode
Automatic
T.»ell
Time & Date
12:34
12 Mar 99
^ Enter the time.
hÓtrMEllPhiuflt be between 00 and and the minute
value between 00 end 59.
^ Press [ОК].
'Set (3aie* will appear.
63
3
о
Page 4

^ Enter the day, month, and yeor.
“’^The day must be between 1 and 31 (d^^endlng on the month ^
and year), the month must be between 1 and 12. and the
year must be between 99 and 14.
^ Press [OK].
*7Vne and Dam have been set to nnm XXXX'wM appear (nn.tin
represents the time, end XXXX represents the date)
Changing the Call Waiting Settings
Call Waiting informs you of an incomvng call white you are alrewty engaged in a cafl
'ft
• This leature is dep^dent on your aubachpoon as well as your network operator
\ *Thfc
• This teatura may r>pt wort» when you are outtMe your networh'a service area
Press cXD or C3I5 from '^Change
Phone Settings" (page 54) until
"Chonge Call Waiting Settings"
appears.
Change
Call Waiting
Settings
2 Press [Select].
The (uTKitjon selection menu will appear.
»Check Status
You can check the currerrt setting of the Call Waiting feature
Press CZ3 or CE? to highlight "Check
Status", then press [Select].
‘Caa Wailing has been Enabled* or *Call Wailing has been
Otsablod* wtll appear
64
r.«sai
inable
Disable
Page 5
Enable/ Disable
Turn CaH Waiting off if you do not want to be disturbed by another
can whSe talking on the phone.
Turn Call Waiting on if you want to be Informed of another caH while
talking on the phone.
Check Status
Disable
To him Call Wolfing on, press or
d? to highlight "Enable". To turn Coll
Waiting off, highlight "Disable".
Press [Select].
*Call WaJtktg has been Enabled' or *CaH Waiting has been
Disabled* wHI appear.
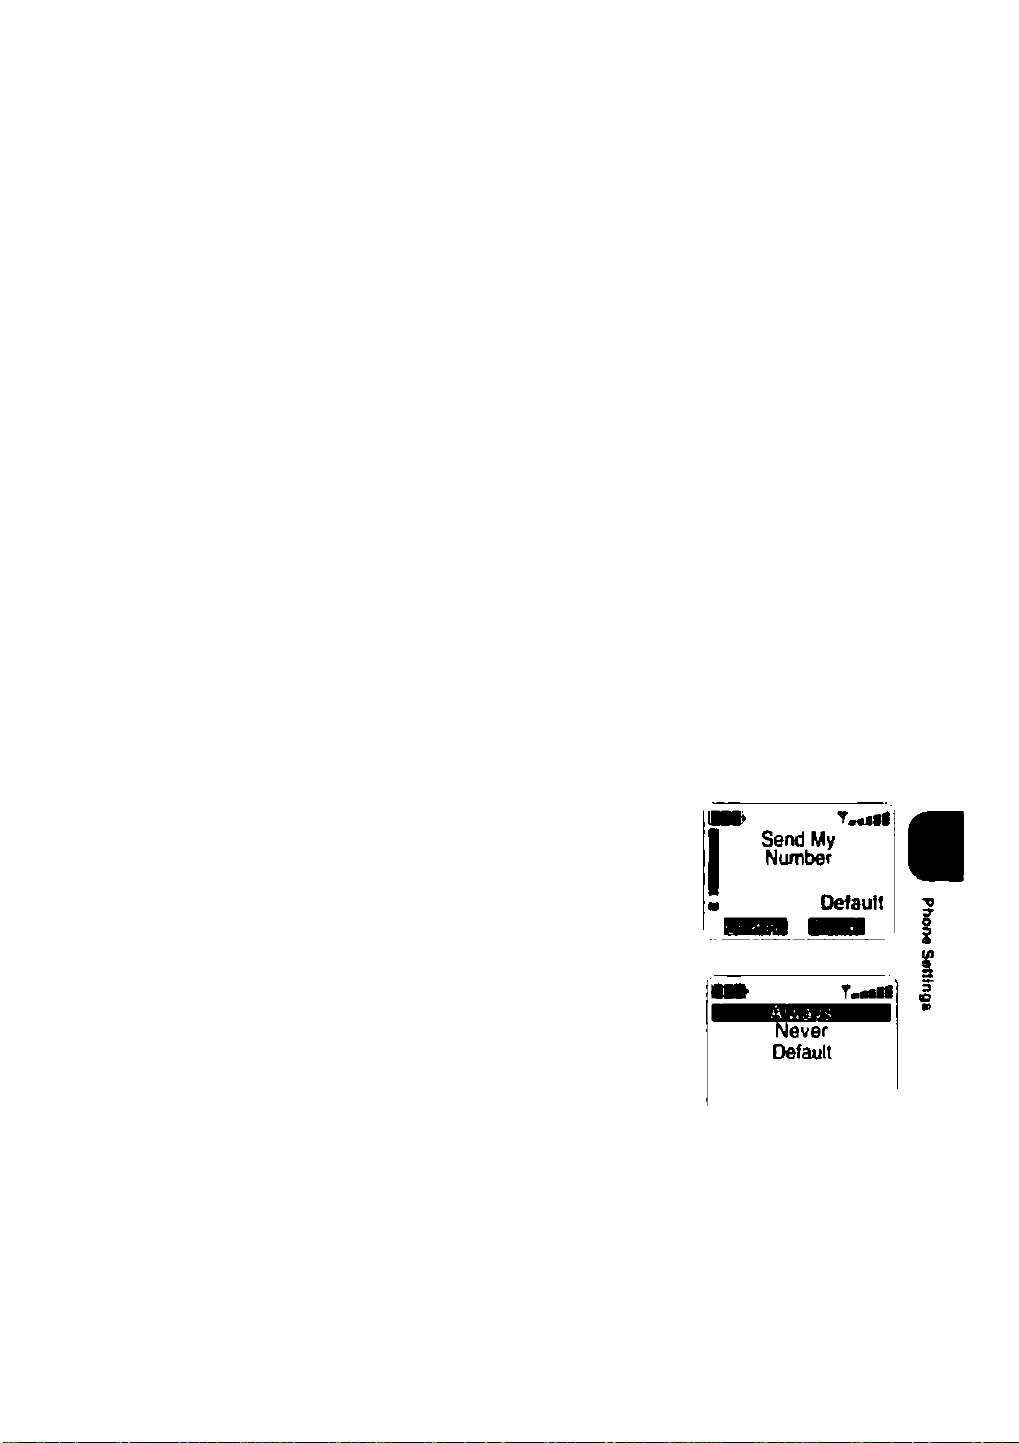
Restricting the Disclosing of Your Phone Number
feature is dependent on ymr subscription as wall as your network operator
T.«ell
If you do not want to reveal your phorw number to the called party, you can use this feature to prevent
the dlscfosing of your number with the caB.
Press cX5 or C3? from "Change Phone
Settings" (page 54) until "Send My
Number" appears wtdi the current
setting.
Press [Change].
The selection menu wiD appear
ШШ
65
Page 6

If you want to reveal your number,
press or to highlight "Always",
If you do not want to reveal your
number, highlight "Never". To use the
network default setting, highlight
"Default".
The default setting is network dependent.
Press (Select).
‘Send My Number Always*. 'Send My Number Never*, or
‘Send My Number DefautT will a^^ar.
iOMnging Your Answering Machine Number
The onswenng service provided by the rtetwork works Nke a home anawenrvg machine; it allows catters
to leave a message when you cannot or do r>o( want to answer a caN
Your answering service phone number Is stored on the SIM card It the network changes the number,
you can change the number in the phor>e merrKxy.
• Thts feature ts dependent on your eubechpoon as well as your network operator
Not III SIM cards ara pravtded with me answoring service phone number stored.
I «No
Press C£:> or C5Z3 from "Change Phone
Settings" (роде 54) until "Answering
Machine Number" appears with the
current number.
^ Press (Select).
‘Enter Number* will appear
Edit the number then press (OK).
‘New CaU Answenng Mactune Number Stored* wiU appear.
J
Ш T..III
Answenng
Machine Number
0123456789
Enter Number
1234567890
НЯВД
66
Page 7

Setting Cell Information
This function aUows you to monilof text messages which are broadcastod by the network,
function «(topendeni on your tubocnpOon as well as your network operator
J Press cX> or C3? from "Change Phone
'— Settings" (page 54) until "Cell Info"
Cell Info
T.«f|f
appears with the current setting.
2 To turn Cell Info on or off, press [Enable]
Disabled
or [Disable].
*Cetl Info has been En^ed* or "Cetl Irrto has been Disabled'
wiU appear.
Selecting a Compatible Network
When you switch the phone on, N normally selects your home network However, if your home network
is not avaliabie (while using the phone overseas, for example), your phor>e wiH find a compabbte
network that you are решнПеО to roam in. The SIM card contalna a bat of networks that the phone can
conrtect to. You can configure your phone to select a rtatwork automatlcalfy (networks In the Ust wtth
an acceptable stgnaf strength) or manuafty You can also add and remove rietworks from the provided
Ifsl
Press or <3^ from "Chonge Phone
Settings" (page 54) until "Network
Selection" oppeors with the current
setting.
Network
Selection
Manual
^ Press [Change].
The network selection menu will et4>ear
Press CX) or dP to highlight
"Automatic", "Manual", or "Edit Ust”.
>AutomaHc/Manual/Edit List
• Automatic allows you to eutomaticalty search for a network
• Manual allows you to select a retwork manually.
• You can new trie network list, remove a network from the list, or add a
network to the lei. When adding a network to the list, you must enter
the mobile country code (MCC) and the mobile network code (MNC)
These codes are used by the network for identification
T^ll
fanuai
Edit Ust
67
Page 8

the Current Phone Settings
You can vtaw Iha current phone MritinQs
Press or dP from '’Change Phone
Settings" (page 54) until "Show
Settings" appears.
Show Settings
Press [Select].
The list of current phorw settings wtfl appear
To view the following pages, press
(Next) or dP. To view the previous
page, press
Reset the Phone Settings to Default
does not affeci any network features
Press or <3^ from "Change Phone
Settings" (page 54) until "Reset Phone
Settings to Factory Default" oppeors.
m T.rtM
RtngVol 5
RirigStl Type 1
Esr^tKXi Oft
TMesAlerl Ouiei
fii» T^rti
Reset
(
Phone Settings
to Factory
• Default
2 Press [Select].
&6
*Enter Handsel Code* w<R appear
win appear after you enrar 4 «gfts
Enter the handset code, then press [OK].
II Cali Restrictions have been activated, you also must enter
your PINS code.
Turn the hondphone power off and then
on again to implement the reset.
Page 9

Security Features
Security features protect your phor>e from unauthorized use and misuse, and limits the type of calls
that can be made trom your pt^e according to your needs
This phone provides the following security features:
• Locking the keypad SO that keys cannot be pressed accidantalty.
• Locking your handphone so that K cannot be used unless the PIN is entered at power>up.
• Locking the SIM to the handphone so that rt canrK>l be used unless the Handsel Code Is entered
when a r>ew SIM Is Instaned
• Barring outgoirtg and incoming voice calls, data calls. arKf fax calls.
• RsstncUng outgoing calls except from the Fixed Number Dialing Met.
• Resiricimg outgoing calls except from the Phonebook
• Restncting outgoing calls except from the Speed Otailmg list
Locking the Handphone
Your phone has a single 4*digit secunty code called the Handset code. The SIM card has two
security codes called PIN and PIN2. The phone can be configured to request input of PIN andfor the
Handset code when the phone Is switched on. The Handset code is onty requested the first time a
new SIM is installed
'Cancelling a Blocked Code
II you enter an incorrect PIN 3 tirrMs in succession. *PIN blocked“ wiH appear. To cancel the block:
1 Enter the PUK at the "Enter PUK"
prompt/ then press [OK].
wW ofow •fl«'you »hlafr a digit
“Enter New PIN* win appear
2 Enter a new PIN, then press [OK].
-----------------------------
PIN can be between 4 and e (HgitB
“Re-enter New PIN* will appear.
— ~ ~
^ Enter the PIN again/ then press [OK].
*OK* wü appear after you erder 4 digits
“PIN Changed’ will ar^jear.
M you enter an mcorrect PUK more than 10 times. “PUK
blocked Contact Service Provider* will appear. The SIM card
is now blocked- Please contact your service provider.
----------
—s
69
Page 10

I Locking/ Unlocking the Keypad
Wh«n keypad lock Is 'Enabled*. A will appear and rw keys can bo used.
t wtien you press a key. However, you can make cans to emervency numban
iirdybuct^aflswefcatobypresej^ During a cal. <M keypad and phone opendenermiUy.
To and tie cal, press When the caR is ended, the keypad wiil lock again.
To lock the keypad:
. Press [Menu].
2 ■ Press or until "Change Security
Settings" appears.
Press [Select].
'Keypad Lock Disabled'' will appear
Keypad Lock
I
Press [Enable] to lock the keypad.
'Keypad locked Press Up key and then press * Key to
unlock* will appear.
To unlock the keypad:
Press then C*2> ♦
The keypad will automatically unlock when you oonnect It to a mini car kt (ECK15) or desktop
charger (EOCM) When you remove the phone from the car kit or desktop charger, the keypad will
automalicalty lock again
Disabled
'Keypad Lock/UnkcKk Shortcut
1
2
Press CD), then
'Keypad locked. Press Up key and then press > key to unlock* and A will appear
Repeat step 1 to unlock the keypad.
'Keypad Unlocked* will appear and A disappears.
ITuming the PIN Check On/Off
H this feature is 'Enabled*, you must enter your PIN each time you switch the phone on
Press [Menu].
^ Press or C35 until "Change Security
Settings" appears.
70
Page 11

Press [Select] then press or
until "PIN Entry During Power Up"
appears with ^e current setting.
A Press [Disable] or [Enable] to change
^ the status.
‘Enter PIN* will appear
Enter PIN.
■D T*a«rt
PIN Entry
During Power Up
Disabled
OK* wUt appear after you enter 4 dtgtts
Press [OK].
‘PIN Entry has been disabled* or ‘PIN Entry has been
enabled* will appear.
J
‘Changing the Security Codes
Follow the instructions below to change PIN. PIN2, artd/or the Handsel coda
Press [Menu].
2
3
Press CZ!> or until "Change Security
Settings" appears.
Press [Select], then press CS or
until "Change Secunty Codes" appears.
4a To change PIN;
Press [Select].
‘Change PIN* appears only if ‘PIN Entry During Power Up*
is enabled.
4b To change PIN2 or the Handset code;
Press [Select], then press or <ZT>
until "Change PIN2" or "Change
Handset Code" appears.
5
Press [Select]*
‘Enter PIN*. ‘Enter PIN2*. or ‘Enter Handset Code* will of^joar
If
6
Enter PIN, PIN2, or the Handset code.
^ Press[OK].
‘Enter New PIN*. ‘Enter New PIN2*. or ‘Enter Now Handset
Code* wilt appear.
appear oflw you enter 4 digits
J
Enter New PIN
r.«tsi
71
Page 12

Q Enter a new PIN, PIN2, or Handset
^ code.
*0K* wi appMr aft*r you enter 4 digits
3
Press [OK].
*Re*errter New PIN*. 'Re-enter New PIN2*. ck 'Re-enter New
Handset Code* wilt appear.
Re*enter New PIN
Enter PIN, PIN2, or the Handset code
ogoin.
we appear attar you enter 4 ogttB
/1 Press [OK].
'PIN Changed*. *PIN2 Changed*, or 'Handsel Code
Changed* wlH apfMar.
3
I Locking the SIM to the Handphone
When ’Lock SIM to Ph<K>e* is enabled, you must enter the HarKlset code each time a new SIM is
installed (including the onginal SIM).
Press [Menu].
2^^ Press or C3> until "Change Security
Settings" oppeors.
2 Press [Select], then press or dP
until "Lock SIM to Pnone" oppeors with
the current stotus.
Press [Enable] or [Disoble] to change
the status.
'Enter Handset Code* will appear
Enter the Handset code.
wM appear aner you enter 4 dkjibi
V.
__ __
^ Press [OK].
*SIM lock to phone has been disablecr or 'SIM lock to photw
72
has been ertabled* will appear
T.^1
Lock SIM to '
Phone
Disabled'
Page 13

Call Barring
• Ttwse features aro dependent on your »upscnpuon and your network operator.
* TNm« features may not work you are outBKta your neiwoiK's service orea
I Bar Outgoing Voice Calls, Incoming Voice Calls,
Data Calls, and Fax Calls
You can set the bemng function for outgoing end incoming voice calls, data calls. ar>d fax calls
according lo your needs.
The table below summerlzea the lurxnions available.
Cad Type
Outgoing Votce Caite
Incoming Voice CoBs
Ail Voice Cafls
Data Calls
Р«С.1Й 1 All F« Cans
Press [Menu].
1
Options
• Gel Status
• Allow All Outgoing Voice Calls
e Bar Intamaitontf Outgoing Voice Except Home
• Bar International Outgoing Voice Caffe
• Bar All Outgoing Voice Calls
• Gel Status
• Afiow All Incoming Voice Calls
« Bar Inoomktg Voice Ca8s When Roaming
a Bor All incomino Voice Can»
• Allow AH Voice Calls
• Get Status
• Allow An Data Calls
• Bar All Outgoing Data Calls
• Bar All Incoming Data CaMs
• Get Stams
• Bar All Outgoing Fax Calls
1 • Bar All Incoming Fax Caite
2
3
Press cX) or dP until "Change
Security Settings" appears.
Press [Select], then press CX> or
until "Restrict Calls" appears. Restrict Calls
73
Page 14

^ Press [Select].
*Catl Barring* win appear
Press JSelect]/ then press or CXP
until tne desired coll barring function
oppears.
• To criange outgoing voice calls. BeiecTBar Outgoing Voice
Cate*
• To change incon^ voice cans. se)eci*BaMncoming voice
Cate*
• To aBow all voice calls, select ‘Allow AH Voice Cate*
« To change data cate, select *Bar Data Cans*.
• To change lax calls, select ‘Bar Fax Calls'.
To check the currently selected barring function, see
'Checking the current status' (below).
To chartge the selected barring function, see 'Setting the
bamng luncUon* (belowk.
Checking the current status:
1 Select the desired coll barring function.
For example, select 'Bar Outgoing Voice Calls*
Call BefTing
Bar Outgoing
Voice Calls
2 Press (Select).
‘Get Status* vriR appear.
3 Press [Select].
The current setting of the barring resirichons will appear.
Setting the barring function:
1 Select the desired call barring function.
For example, select 'Bar Outgoing Voice CaBs*
2 Press [Select], then press сХЭ or
until the desired option appears.
For example, if you want to allow all outgoing voice cate,
select 'Allow All Outgoing Voice Cans*
3 Press [Select].
'Enter Bamng Password’ wiR appear
74
Get Status
T-sif
All outgoing
voice cans are
allowed
Ш
Allow Ail
Outgoing Voice
Celts
Page 15

4 Enter the barring possword.
wilt appear atter you enter 4 dK>iti.
5 Press [OK].
'Please wait' wtti appear tt the correct password is entered,
the new setting is confirmed.
»Changing the Barring Password
Use the followtr>g procedure to change the barrir^g password.
Press [Menu].
4
All outgomg
voice calls are
allowed
2
3
Press or until "Change Security
Settings" appears.
Press [Select], then press clZ) or C3P
until "Restrict Colls" appears.
Press [Select].
4
"Call Barring" will appear.
5
^ Press [Select].
^ *OK'Mllappearatoryouenlar4dlgrti.
X, Enter the barring password, then press
Press [Select], then press cr'T'ia or d
until "Change Borring Password"
appears.
it the password ts not bfocKed. ‘Enter Darnng Password*
win appear
(OK).
wil appee after you enter 4 Oglts
Change Bamng
Password
Enter Barring
Password
wm
Enter New
Barring Password
if
I
<?
'Enter New Bamng Password* will appear
75
Page 16

Q Enter a new 4*digit barring password/
^ then press [ОК].
--------------------------------------------
wtH appeal attor you enter 4 digna.
‘Re*Enier New Barring Password* will appear.
0
Re-Enter New
Barring Password
Q. Enter the barring password again/ then
^ press [OK].
wiB appeal oJtor you enter 4 digits
*Ptease WaK’ will appear. II the new bamr^ password is
accepted, 'Bamng Password Changed* will appear H you
entered the barring password incorrectty. ‘Incorrect Barring
Password* will appear.
Fixed Number Dialling (FDN)
^^^TTwrwnbefol entries teliw Bleed tfcimberDio№f>glteidapenâtoMh»ciyad(yot the SlMcant^
^Adding, Editing, and Erasing an Entry
You can add a new entry to the Fixed Number Oiantrig list or edit and erase existing entries.
You can use wild cards (*?*) when entenng or ediiing FON numbers. Wild cards allow you to dial
several different phone numbers lhal contain most of the same numbers For example, you can
enter an area code (*1 2 3 4*] and the first few digits of the phone number (*S в 7*), then enter wild
cards lor the remaining digits <*? 7 7*). Doing this, you would be able to call any number beginning
with •! 2 3 4 5 6 7*. The numbers would range from *1 2 3 4 5 6 7 OQO* to‘1 234567 9 9Э*.
•TbinnnawildcardrT*), pmsandhoU<^forapprtmimalatyl second
When this fMlure is enabled, you corwiot modify the list. To add a new entry or modify the lict,
you must first disabie this feature.
1
2
3
4
Press [Menu].
Press or C5P until "Change
Security Settings" appears.
Press [Select]/ then press C2Z> or
until "Restrict Calls" appears.
Press [Select]/ then press or
until "Only outgoing calls from Fixed
Number Dialling list" appears.
HR T«««if
■ Only outgoing
calls from
Rxod Number
Dialling list
I
76
Page 17

Press (Select].
*Flxad Number DtaOmg* will appear with the current status
6
press [Disable]. If fixed number
dialling is disabled, press [Options].
If fixed number dialling is enabled/
‘Enter PIN2* will appear.
Enter PIN2.
miff.'
Perform the required (unction:
• To add a new entry to the Fixed Number Dialling list, see ‘Adding a New Entry* (below)
• To edit or erase entries in the Rxed Number Dialling list, see ‘Editing and Erasing an Entry'
(page 7B).
• To erase all entries m the Fixed Number Dialling Rsi. see ‘Erasing All Entries* (page 79)
wID appear ate« you enter digits
8
Press [OK].
11 fixed ruimber diaiUr^ was enabled In st^ 6. ‘Fixed Number
Dialling List* vnll appear. If fixed min^r dialling was disabled
in slap 6. Tixad Number Dia№ng‘ appears wdh the current
status. Press (Options] to enter the 'Fixed Number Dialling
List* display.
Adding a New Entry
2 Select "Fixed Number Dialling List".
See steps 1 to 8 of ‘Adding, Editing, and Erasing an Entry*
(page 76).
2 Press [Select].
The Fixed Number Diallirxg list will appear
Press CLD or c3? to highlight an empty
location.
empty location is not availabto. you can odit or erase on
ouetiog number in the let
4a Manually entering a number:
I Press [Select].
’Add Now Entry* will appear
KENWOOD
+44
1234567890?
77
Page 18

2 Press [Select].
'Enter Name ' «viti appear
3 Enter a name of the new entry, then
press [OK].
'Enter Number' wUI appear.
4 Enter the phone number/ then press
[OK].
wNi appear after you enter a dtQtt
'Entry Saved* will appear.
Using the Phonebook:4b
1 Press [Select], then press or -:3- ’
until "Add New Entry From Phonebook"
appears.
2 Press [Select].
'Find Name' will appear. II you want to use 'Character
Search', press cX:>or until 'Character Search' appears
{See ’Dialling a Phone Number by Finding a Name’ or
'Dialling a Phone Numter by Character Search* on pages
17 and 18).
Enter Name:
Editing and Erasing an Entry:
J _ Select "Fixed Number Dialling List".
See steps 1 to 8 of 'Adding. Editing, and Erasing an Entry*
(page 76).
2 Press [Select].
The Fixed Number Dialling list will appear
j Press or C35 to highlight the
desired entry.
^ Press [Select].
The rwne you selected wUl appear with the phone
number
78
KENWOOD
•1-44
1234567890?
T.«all
KENWOOD
1234567890
Page 19

Press (Options].
The selection menu will appear.
A Press or to highlight
^ "Edit" or "Erase".
7« EdH:
t Press [Select].
The name and phone number will reappear
2 Edit the name and number.
3 Press [Save] to save the new data.
‘'Entry Saved* will appear.
7^ Erase:
1 Press (Select).
The name and phone number wUI reappear.
2 Press (Erase).
*Entry Erased* will appear
Erasing All Entries:
^ Select "Fixed Number Dialling List".
See steps 1 to 8 of *Addmp. Editing, and Erasing an Entry*
(page 76)
Press or until "Erase all the
2
entries in the Fixed dial list" appears.
Press (OK) to erase all the entries.
3
'Fixed Number Dialling fiei has been erased* will appear
iTuming Fixed Number Dialling On
Select "Fixed Number Dialling List".
So« steps t to 8 o! 'Adding. Editing, and Erasing an Entry*
(page 76)
2
Press cX5 or until "Fixed Number
Dialling Disabled" appears.
Press (Enable).
*Only outgoing calls trom fixed number dialling list are
allowed' will appear
t
!?
e
79
Page 20

Outgoing Call Restrictions
You can sat outgoing calls to be macie only to numbers In ttw Phonebook or in the Speed Dialling
list. The numbers in these lists cannot be modified unless you first temove this restriction
Press [Menu).
^ Press CZ2> or until "Change Security
Settings" appeors.
2 Press (Select], then press c2> or <3?
until "Restrict Calls” appears.
A Press (Select).
5a
To change the current status of the outgoing
calls from the Phonebook restriction:
I Press ^ or cr? until "Only outgoing
calls from Phonebook" appears wtm
the current status.
2 Press (Enable) or (Disoble) to change
the status.
'Enter PIN2' wiH appear
3 Enter PIN2, then press [OK].
appuar abar you antef 4 <Sgll&.
‘Only outgoing caffs from phonebook are allowed* or
‘Reetnction removed* will appear
5b To change the current status of the outgoing
calls from Speed Dial list restriction:
1 Press or <27 until "Only outgoing
colls from Speed Dial list" appears with
the current status.
2 Press (Enable) or (Disable) to chonge
the status.
‘Enter P1N2' will appear.
wm T^tn\
Only outgoing I
■
canslronri
Phonebook
I Disabled:
R T*am
Only outgolrig
calls from
Speed Dial list
Disabled
80
3 Enter PIN2, then press (OK),
wtl appear after you errtar 4 digKs
‘Only outgoing calls from Speed Dial Us! are allowed* or
‘Restriction removed* will appear
Page 21

Troubleshooting
II №0 phone IS not working properly, check the following list of problems and solutlorxs. It you are still
unable to resolve the problem, contact your dealer or service provider.
Problem
Cannot make or racetve cala. • Make sure the phone is turned on.
• Make sure the battery IS charged
• Make sure №e Si|^ StrengSi con ie vtsa^ie on the dtaplay.
• Make sure cans rtave not been resmctad by security features such as
Cal Barring and Fixed Nwnber Dialing
• Idake sure your ca№ have not been redirecled
• Make sure the proper SIM card «ineerted correctly.
The battery icon does not turn cn ehen the
btftery is bang recharged.
Theaudo courxtft weak • Make sure the vdune IS not set 100 kMt
The phone does not nng.
The LCD is not dev. • MMteauretheoonlraataMBngisnottoolow.
The keypad doesn’t hmdm • Make sure the keypad is nd locked.
• Make sure the travel AC charger is properly connected 10 the phone
and AC otSiai.
• Make sure iha baiteiy end charger contacts are dean.
• sura the sHeni or vtualOfset№gs are not selected
• Move the phorw away from axtemal nose sources
• Make aure you have not dwened inooming cMs
• flifiM the hind^tone by removing and rein Ming the battery pick
it possibie. IWsi turn oft the herKtehone power
Solution
81
tr
7
Page 22

Care and Maintenance
Your hendphorte is a product of supenor design вгк1 craftsmanship and should be treated with ca/e.
The toilowlng suggestions wtH help you (uHill the warranty obligatioAS and enjoy this product tor
many years.
• Keep the phone and Its accessories out o( the reach of small children
• The phorte № not water resistant: keep tt dry И the phone gets wet. wipe It off Immediately.
• Do not use or store the phone in dusty or dirty areas; parts can be damaged.
• Do not use or store the phone in heft environments: high temperatures can shorten the life of etectronic
parts, damage the battery, and warp or matt certain plastics
• Do not use or store the phone in cold environments, iow temperatures can shorten the trie Ы electronic
parts, and damage the battery.
• Do not use ttte phone in cool envirormrents when the phone gets hot; condensahon may occur and
Internal electronics can be damaged.
» Do not open the phorte; you may damage it.
Do not drop or shake the phone; rough harvfling can damage Internal circuitry.
• Do not use hersn chemicats. cleaning solvents, or strong detergents to cieen the phone.
• Use only accesaones recommer>ded by KENWOOD Using other accessones may damage the
phor>e
82
Page 23

Main Menu
Menu
Appendix A: Menu Directory
Gen Anew enng
Machine
Chenge Phone
Saltings
Show Recent CeH
IntormBtkm ”
OtveriCaHeTo
Another Numbet
Adfust Ringer Volume or Style
Adluel Handset Tones
Cal Conngctlon Indicator
Ac^uM Contrast
Ch«>ge BaoMght Duratton
Change Greeting Me»oge
Any Key Answer
Menu Larrguage
Character Motto
Time & Dale
Change Cafl Waitlr>g Settings
Send My Number
Answenrtg MachtrM Nuthber
Cel Into
Network Setociton
Snow Settings
Reset Phone SetUngs K» Factory Default
Last *n‘Dialled Cans
Last *n* Answered Calls
Lost *n* Unanswered Calls
CalTimeis
Set Charge Unrt
On«rt Voioe Calls When UrvvaitAile
Dtven Al Voice Cats
Detailed Divans
Diaabla All Diverts
Phonebook
Accesa Text
Metiegeg
Change Secunty
Settings
Phonabook
Incoming Messages
Outgoing Messages
CeU Broedcast Messages
Message Settings
Keypad Lock
PIN Entry During Power Up
Criange Security Codas
Lock StM To Phono
Restrict Calls
Find Name
Oiaracter Search
New Entry
Speed Dial
Own Number
Phoriebook Entries
83
Page 24

Appendix B: Character Sets
When the charecter sat is set to *AulOfnelic*. the characters assigned to any Key are appropnalo to the
current language. You may saiect an 'Extended* character set to use any of the GSM characters,
irrespective of the current language.
ingasri OerrwAn
Upcw 1 liMHB
• ■pace
A 1 C 7 A 0 C } AABCC
i
9 ocra A • t 9 0 C P t
4 0 H 1 4
9 J К L 9
• uno* •n n « A и N 0 6 1
/
P О R S 7
TUVA
$
W X V 7 ■ vr X V 7 A
•
0
■ h f 4
tits J к L S
p q r • r
t ti V A r U Ù V A
m
• A (pTM* *nd Р014И4И) or curAOr г1дП1 (pr««a erwt hoMI
K*V
t
Ut«MH
3 A В C 7
9 DAP) A A 1 9 A
4
0 H t 4 g N 14 1
A J К 1 f
A M N 0 A M n A A A N 8 0 A
7 FORA?
a
T U V e
W X V 7 A • • V < •
A
0 О •- a
H
■ A (pros* »nd rwiMMi or cur«or righi (pfMA and ПОМ)
tiANan GroAh Turtdih
Untar UPPOI икни
a b c 3 4 A ft 1* 3 A 8 C C 9
1 к t A
P A • ■ r
1 U ? A A T V ♦ A
о и 1 4
P 0 Й 8ft 7
M (pws and ratMMit or eunor Ion (ртом and гюкП
ttMoa 17-1
A C X 9 DC p a data
H e 1 4
к A U 9
П P X r
X 4> Ы A
К (ргАА» and rotaMo) oi curoor Ml (рпмр and noMf)
uppar 1 UM«r ияам uoiMf
A A Ь s 7
« • t 3
g h i 4 0 H 4 g n t 4
IMA
Ht n 0 A A U N О e
p q t • В f P О R 1 r P q r A T
Ш € f t $ w X V X a « I у 4 A
0 «> « % C S V
* ' M A • •
Ч r s «
PiwKh
A e c c :
0 A e F } A A A r 9
J X L fi
7 u Ù v a
umr
• a /
• A P c 1 1
1*15
«П n p A
1 u A A V ■
a A c ( X
0 e и 1 l4
J К L ■
M N О 0 A
p n s 1 r
T U l> V A
t X e
0 A tl 1 1 4
1 4 < S
m Л 0 A A
p ♦ 4 A 7
1 U A « A
V • A
J
LCMrar
84
Page 25

K»y
A e C 2
> D E { r 7
0 M 1 4
•
J K L S 1 k 1 ft
• M N M O A m N A u 8
7
^ 0 R ft 7
r U V «
•
• WAVE« a » r t 8
0
1 *"
SpanMt Dutch
ilfom 1 LoBW
• « « < 2 A B C 2 ■ ft ft fi c g 7
4 • « ' 3
g h 1 4 a H 14 g n 1 1 4
D 0 1 • 7 P 0 n 9 T
« u t ■ T U V ■
*0»cm IT.'.
uwa> [ IMMT UBP« I LOW*
D E 7 3 a • • a 1 3
J K l s 1 k » 5
U N 0 6 m 1 A « A 9
vr X V2 9
0 * • *>I C ft V
H (p«ww mivi or curaor M< (ptwm ana hoM)
a Ipr««« and tataaas) or curaor right rpraa* and tiold)
A BC ¿ ft ft ft ft C ( j
0 e F 3 8 • « 1 )
G H 1 ft
J X L 9
» 4 • • 7
1 H 8 tt V ft T U V ■
w ■ y t t
M N ft 0 ft
P 0 R ft 7
W X V 2 •
PottuguMft
y A 1 4
1 k 1 ft
m n ft a ft
S q 1 « 7
1 u ft « ft
• > V 4 9
Kfty
1
2
9
4
9
ft
7
ft
9
UPPW
oOoce 17.«
4<>.«/«ZyUOtll
A A A C ■ C C
r X
ft e £ p ftPftft • ft ft t ft a 1
ft H t 4 8 A 1 1 4
4 ft 1. A ft 1 ft t A ft
M N A 0 0 0 ftmflAftAoaft
F Q R 8 II S 7
r U U V ft
W X V Z ft
0
m
•
EUftncM
. .*•1)1
F q • «17
1 U U (1 V ft
O • • '
curftor loft (praaa ar«t hoW)
curaor right (praaa and hold)
a « f » 9
I. C $ «
K (praaa and reiesee) or
a tprafta and raieaeo) or
laa»
1 1
85
Page 26

Appendix C: Optional Accessories
Desktop Charger (EDC14)
LUhtum ton battofy charger Thts charger can be used to charge the banery when attached to the
handphone as well as a spare EEB18 Li-ion battery.
Cigar Lighter Cable (ECC11)
Lithium Ion battery vehtcie charger. This charger wtH fully charge the EEB16 U-lon battery on the
handphone in approximately 3 hours
Mini Car Kit (ECK15)
Handphone holder and ECCtI Ogsr Lighter Cable combination kit.
Data Cable (E1C12)
Data cable for connecting the handphorw to a personal computer Connect this cable directly to the
serial port of a PC without using the PCMCIA card.
Desktop Stand (EDS12)
Use this stand with the AC adaptor
Soft Case (ELC11)
Case for protecting your phone.
Hands Free Kit (EHF11)
Simple hartds-free operahon kit which allows you to make and rocaivo calls without having to hold
the phone.
External Antenna Cable (EEX11)
Conversion cable for connecting the phone la an external antenna
Travel AC Adaptor <EEC11)
Lightweight adaptor that can be used with a mams AC rangmg between 100 V AC and 250 V AC-
88
Page 27

Appendix D: Quick Reference
To
Turn (he phone on/oH Press and hold the Power key for арргохкпаШу 2 seconds.
MeKe a call • Full number dialling
M^e a caD • Abbrevtated rmmbef diaBing 1. Enter the location number.
Make i can • Spood dtaflmg
Make a call • OWUng by Name Search
EndacaN Prasad.
Redel the lest nun«w «led Press twice.
Dispiev (he recent diaBed numbers M Press
Answer icbU The tneormng Call LED Bashaa
Reject a call
Lock/ unlock the keypad f. Pressed.
Actual the spoaker volume dunng a call
Clear the display Press and hoM CEP for approximately t second.
Vibration eotting shortcut
Enter the Quided Tour f. Press
1. Enter the phorte number
2. Preset.
2. РгвееС£л)
ДРгеааОЬ-
1. Press an assigned key (1 to 9).
2. Ртиа&.
f. Press [Phonebook]
Z Press сГ7*аог ^^until ‘Find Narrte* appears
3. Press [Select]
4. Either emer the first character of me torget name or pmss
^^or^^to search the names In the Phonebook.
5. Highlight the target name, then press [Select],
e. Press [Opttona]
7. Highlight *01вГ.
A Press [Salecfl.
PraeaGb
The tnooming Call LED flashes
Prasad or [Bueyl
Z Press
PressOIXo cncisase the volume.
PreesCT^Io decrease the volume.
f. Press
2. Press <7^.
Z Press
Do this
87
 Loading...