

Page 1

Multi-CD control High power CD/MP3/WMA player
with FM/AM tuner
Syntoniseur FM/AM et lecteur de CD/MP3/WMA, “Puisance
élevée”, avec contrôleur pour lecteur de CD á chargeur
Operation Manual
DEH-P840MP
Mode d’emploi
English
Français
Page 2
Before You Start
Dear Customer 5
About this unit 6
About this manual 6
After-sales service for Pioneer products 6
Precautions 6
Features 7
• CD playback 7
• MP3 file playback 7
• WMA file playback 7
About WMA 7
About the XM READY mark 7
What’s what 8
• Front panel (close) 8
• Front panel (open) 9
Steering remote control 10
Remote control and care 11
• Installing the lithium battery 11
• Replacing the lithium battery 11
Display indication 12
• LCD display 12
• OEL display 12
Resetting the microprocessor 12
Protecting your unit from theft 13
• Removing the front panel 13
• Attaching the front panel 13
About the demo mode 14
• Reverse mode 14
• Feature DEMO 14
• Motion DEMO 14
Power ON/OFF
Turning the unit on 15
Selecting a source 15
Turning the unit off 15
Tuner
Listening to the radio 16
Introduction of advanced tuner
operation 17
Storing and recalling broadcast
frequencies 17
Tuning in strong signals 18
Storing the strongest broadcast
frequencies 18
Built-in CD Player
Playing a CD 19
Introduction of advanced built-in CD player
operation 20
Repeating play 20
Playing tracks in a random order 21
Scanning tracks of a CD 21
Pausing CD playback 21
Using disc title functions 22
• Entering disc titles 22
• Displaying disc titles 23
Using CD TEXT functions 23
• Displaying titles on CD TEXT discs 23
• Scrolling titles in the display 23
MP3/WMA Player
Playing a MP3/WMA 24
Introduction of advanced built-CD player
(MP3/WMA) operation 25
Repeating play 26
Playing tracks in a random order 26
Scanning folders and tracks 27
Pausing MP3/WMA playback 27
Displaying titles on MP3/WMA 27
Scrolling titles in the display 28
Thank you for buying this Pioneer product.
Please read through these operating instructions so you will know how to operate your model properly. After you have finished reading the instructions, put them
away in a safe place for future reference.
Contents
En
2
00
Section
Page 3
Multi-CD Player
Playing a CD 29
50-disc multi-CD player 29
Introduction of advanced multi-CD player
operation 30
Repeating play 30
Playing tracks in a random order 31
Scanning CDs and tracks 31
Pausing CD playback 31
Using ITS playlists 32
• Creating a playlist with ITS
programming 32
• Playback from your ITS playlist 32
• Erasing a track from your ITS
playlist 33
• Erasing a CD from your ITS playlist 33
Using disc title functions 33
• Entering disc titles 33
• Displaying disc titles 34
• Selecting discs from the disc
title list 35
Using CD TEXT functions 35
• Displaying titles on CD TEXT discs 35
• Scrolling titles in the display 35
Using compression and bass emphasis 36
Audio Adjustments
Introduction of audio adjustments 37
Setting the sound focus equalizer 38
Using balance adjustment 38
Using the equalizer 38
• Recalling equalizer curves 39
• Adjusting equalizer curves 39
• Fine adjusting equalizer curve 40
Adjusting bass 40
Adjusting treble 40
Adjusting loudness 41
Using subwoofer output 41
• Adjusting subwoofer settings 41
Using no fading output 42
• Adjusting non fading output level 42
Using the high pass filter 42
Adjusting source levels 43
Using automatic sound levelizer 43
Initial Settings
Adjusting initial settings 44
Setting the time 44
Setting the warning tone 45
Switching the flap auto open 45
Switching the auxiliary setting 45
Switching the dimmer setting 45
Selecting the brightness 46
Setting the rear output and
subwoofer controller 46
Switching the telephone muting/
attenuation 47
Switching the motion screen 47
Contents
En
3
English
Español
Deutsch
Français
Italiano
Nederlands
00
Section
Page 4

Other Functions
Setting the time display on or off 48
Using different entertainment displays 48
Using the AUX source 48
• Selecting AUX as the source 48
• Setting the AUX title 48
Using the telephone muting/attenuation 49
Introduction of DAB operation 50
• Operation 50
• Changing the label 50
• Operating announcements with the
function menu 51
• Available PTY Function 51
• Searching the PTY 51
• Using dynamic label 51
• Displaying dynamic label 51
• Storing and recalling
dynamic label 52
Introduction of XM operation 52
• Operation 53
• Switching the display 53
• Switching the channel select mode 53
• Display the ID code 53
Additional Information
CD player and care 54
CD-R/CD-RW discs 54
Understanding built-in CD player error
messages 55
About folders and MP3 files 55
MP3 files 56
About folders and WMA files 57
WMA files 57
Terms 58
Specifications 60
Contents
En
4
00
Section
Page 5

En
5
English
Español
Deutsch
Français
Italiano
Nederlands
01
Section
Selecting fine audio equipment such as the unit you’ve just purchased is only the start of your
musical enjoyment. Now it’s time to consider how you can maximize the fun and excitement your
equipment offers. This manufacturer and the Electronic Industries Association’s Consumer
Electronics Group want you to get the most out of your equipment by playing it at a safe level. One
that lets the sound come through loud and clear without annoying blaring or distortion—and, most
importantly, without affecting your sensitive hearing.
Sound can be deceiving. Over time your hearing “comfort level” adapts to higher volumes of
sound. So what sounds “normal” can actually be loud and harmful to your hearing. Guard against
this by setting your equipment at a safe level BEFORE your hearing adapts.
To establish a safe level:
• Start your volume control at a low setting.
• Slowly increase the sound until you can hear it comfortably and clearly, and without distortion.
Once you have established a comfortable sound level:
• Set the dial and leave it there.
Taking a minute to do this now will help to prevent hearing damage or loss in the future. After
all, we want you listening for a lifetime.
We Want You Listening For A Lifetime
Used wisely, your new sound equipment will provide a lifetime of fun and enjoyment. Since hearing damage from loud noise is often undetectable until it is too late, this manufacturer and the
Electronic Industries Association’s Consumer Electronics Group recommend you avoid prolonged
exposure to excessive noise. This list of sound levels is included for your protection.
Decibel
Level Example
30 Quiet library, soft whispers
40 Living room, refrigerator, bedroom away from traffic
50 Light traffic, normal conversation, quiet office
60 Air conditioner at 20 feet, sewing machine
70 Vacuum cleaner, hair dryer, noisy restaurant
80 Average city traffic, garbage disposals, alarm clock at two feet.
THE FOLLOWING NOISES CAN BE DANGEROUS UNDER CONSTANT EXPOSURE
90 Subway, motorcycle, truck traffic, lawn mower
100 Garbage truck, chain saw, pneumatic drill
120 Rock band concert in front of speakers, thunderclap
140 Gunshot blast, jet plane
180 Rocket launching pad
Information courtesy of the Deafness Research Foundation.
Page 6
Before You Start
About this unit
The tuner frequencies on this unit are allocated
for use in North America. Use in other areas
may result in improper reception.
Important
The serial number is located on the top of this
unit. For your own security and convenience, be
sure to record this number on the enclosed
warranty card.
About this manual
This unit features a number of sophisticated
functions ensuring superior reception and operation. All the functions have been designed for
the easiest possible use, but many are not selfexplanatory. This operation manual will help you
benefit fully from this product’s potential and to
maximize your listening enjoyment.
We recommend that you familiarize yourself
with the functions and their operation by reading through the manual before you begin using
this unit. It is especially important that you read
and observe precautions on this page and in
other sections.
This manual explains head unit operation. You
can perform the same operations with the steering remote control.
After-sales service for Pioneer
products
Please contact the dealer or distributor from
where you purchased this unit for after-sales
service (including warranty conditions) or any
other information. In case the necessary information is not available, please contact the companies listed below:
Please do not ship your unit to the companies at
the addresses listed below for repair without
advance contact.
For warranty information please see the Limited
Warranty sheet included with this unit.
Precautions
• Keep this manual handy as a reference for
operating procedures and precautions.
• Always keep the volume low enough so you
can hear sounds outside of the car.
• Protect this product from moisture.
• If the battery is disconnected or discharged,
the preset memory will be erased and must be
reprogrammed.
CAUTION: USE OF CONTROL OR
ADJUSTMENT OR PERFORMANCE OF PROCEDURES OTHER THAN
THOSE SPECIFIED HEREIN
MAY RESULT IN
HAZARDOUS RADIATION
EXPOSURE.
CAUTION: THE USE OF OPTICAL
INSTRUMENTS WITH
THIS PRODUCT WILL
INCREASE EYE HAZARD.
U.S.A.
Pioneer Electronics (USA) Inc.
CUSTOMER SUPPORT DIVISION
P.O. Box 1760
Long Beach, CA 90801-1760
800-421-1404
CANADA
Pioneer Electronics of Canada, Inc.
CUSTOMER SATISFACTION DEPARTMENT
300 Allstate Parkway
Markham, Ontario L3R OP2
(905) 479-4411
1-877-283-5901
En
6
01
Section
Page 7
Before You Start
En
7
Features
CD playback
Music CD/CD-R/CD-RW playback is possible.
MP3 file playback
This product allows playback of MP3 files on
CD-ROM, CD-R and CD-RW discs. Disc recordings compatible with level 1 and level 2 of
ISO9660 and with the Romeo and Joliet file
system can be played back.
WMA file playback
This product allows playback of WMA files on
CD-ROM, CD-R and CD-RW discs. Disc recordings compatible with level 1 and level 2 of
ISO9660 and with the Romeo and Joliet file
system can be played back.
About WMA
The Windows Media logo printed on the box
indicates that this product can playback the
WMA data.
WMA is short for Windows Media Audio and
refers to an audio compression technology that
is developed by Microsoft Corporation. WMA
data can be encoded by using Windows Media
Player version 7, 7.1 or Windows Media Player
for Windows XP.
Microsoft, Windows Media, and the Windows
logo are trademarks, or registered trademarks
of Microsoft Corporation in the United States
and/or other countries.
Notes
• Some applications used to encode WMA files
may not operate correctly.
• With some applications used to encode WMA
files, album names and other text information
may not be correctly displayed.
About the XM READY mark
The XM READY mark printed on the front panel
indicates that the Pioneer XM tuner (sold separately) can be controlled by this unit. Please
inquire to your dealer or nearest authorized
Pioneer service station regarding the XM tuner
that can be connected to this unit. For XM tuner
operation, please refer to the XM tuner owner’s
manual.
Notes
• XM Satellite Radio is developing a new band
of radio in the U.S.A.
The system will use direct satellite-to-receiver
broadcasting technology to provide listeners
in their cars and at home with crystal-clear
sound seamlessly from coast to coast. XM will
create and package up to 100 channels of
digital-quality music, news, sports, talk and
children’s programming.
English
Español
Deutsch
Français
Italiano
Nederlands
01
Section
Page 8
01
Section
Before You Start
En
8
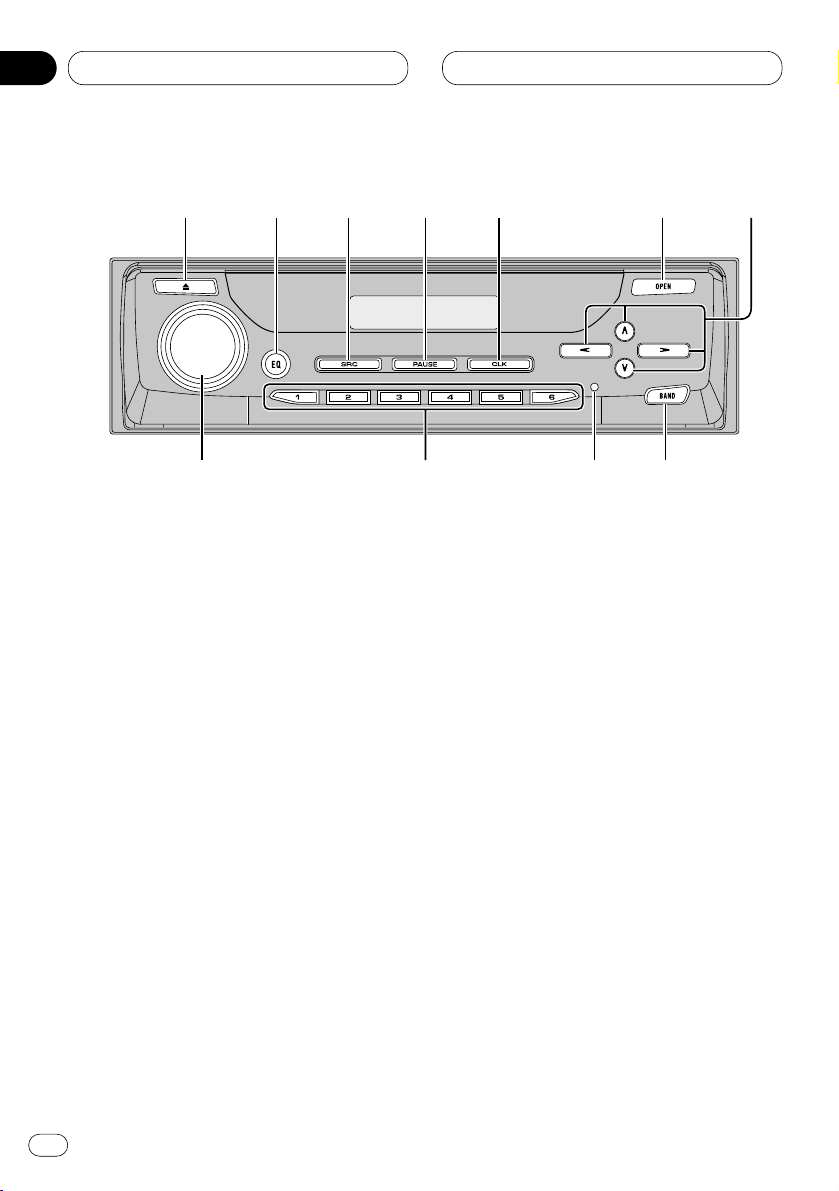
What’s what
Front panel (close)
1 EJECT button
Press to eject a CD from your built-in CD
player.
2 EQ button
Press to select various equalizer curves.
Press and hold for about two seconds to
select a natural sound with presence.
3 SOURCE button
This unit is switched on by selecting a
source. Press to cycle through all of the
available sources.
4 PAUSE button
Press once to pause play.
Press and hold for about two seconds to
display dynamic label when using a DAB
tuner.
5
CLOCK button
Press to switch clock display on or off.
6
OPEN button
Press to open the front panel. When you
want to operate buttons inside the front
panel, press OPEN to open the front panel.
7 5/∞/2/3 buttons
Press to do manual seek tuning, fast forward, reverse and track search controls. Also
used for controlling functions.
8 BAND button
Press to select among three FM and one AM
band and cancel the control mode of functions.
9 RESET button
You can reset this product. For more details,
see Resetting the microprocessor on page 12.
0 1–6 (PRESET TUNING) buttons
Press for preset tuning and disc number
search when using a multi-CD player.
-
VOLUME
Rotate to increase or decrease the volume.
1
23
45
6
7
890-
Page 9
01
Section
Before You Start
En
9
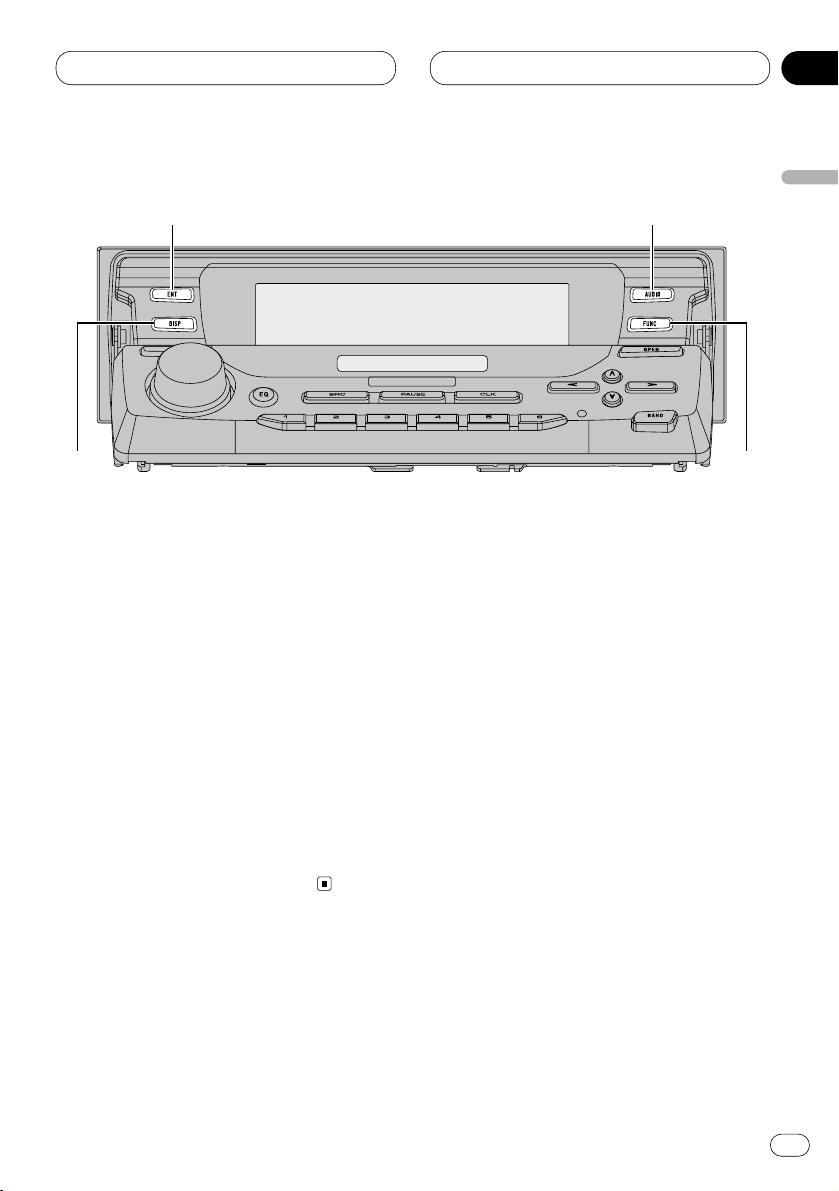
Front panel (open)
• These buttons listed below can be operated
only when the front panel opened.
= ENTERTAINMENT
button
Press to change to the entertainment display.
~
AUDIO button
Press to select various sound quality controls.
! FUNCTION button
Press to select functions.
@ DISPLAY button
Press to select different displays.
English
Español
Deutsch
Français
Italiano
Nederlands
=
~
!
@
Page 10
01
Section
En
10
Before You Start
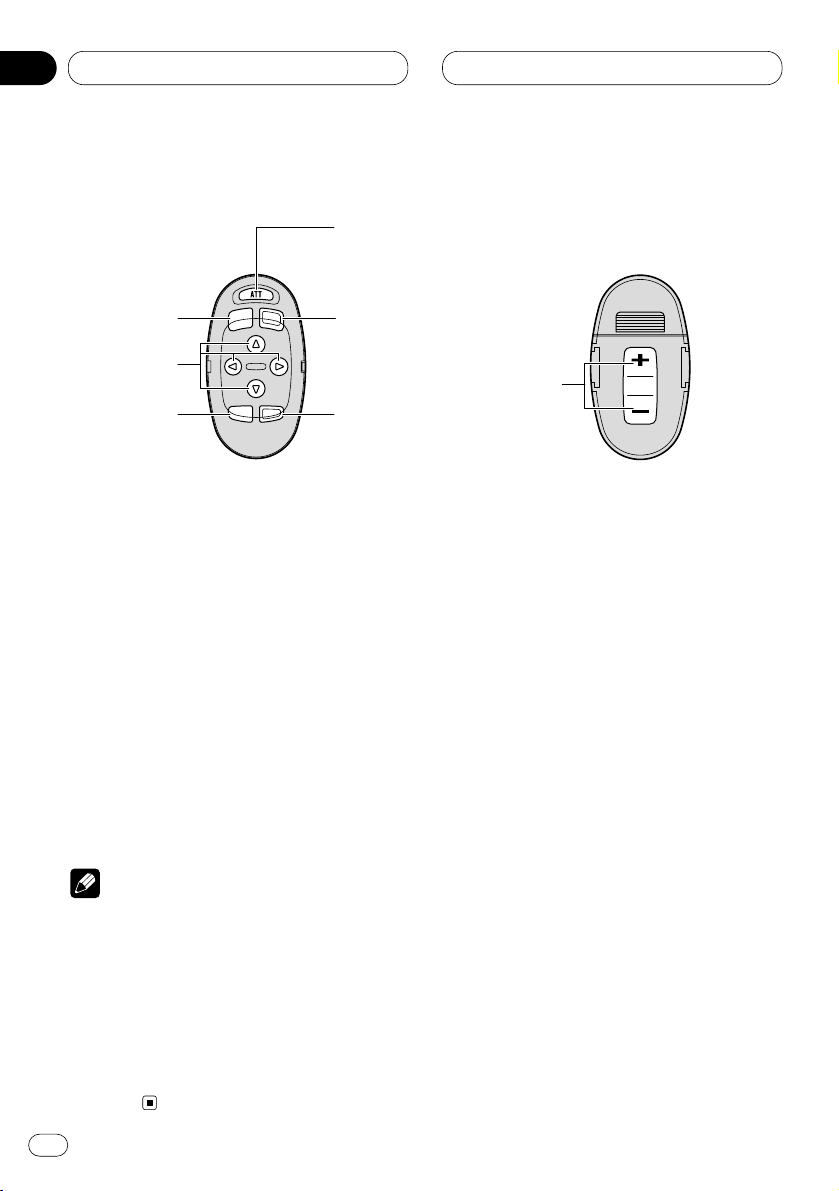
Steering remote control
A steering remote control that enables remote
operation of the head unit is supplied. See the
explanation of the head unit about the operation
of each button with the exception of ATT , which
is explained below.
# ATT button
Press to quickly lower the volume level, by
about 90%. Press once more to return to the
original volume level.
$ VOLUME button
Press to increase or decrease the volume.
Notes
• If you press FUNCTION or AUDIO on the steering remote control while front panel of the
head unit has been closed, the front panel
automatically opens.
• If you press FUNCTION on the remote control
while pressing BAND on it, the remote control
will not function properly. To cancel this setting, press AUDIO on the remote control while
pressing BAND on it to return to the previous
setting.
#
3
!
7
8
$
~
Page 11

01
Section
Before You Start
En
11
English
Español
Deutsch
Français
Italiano
Nederlands
Remote control and care
Installing the lithium battery
• Remove the cover on the back of the steering
remote control and insert the battery with the
(+) and (–) poles pointing in the proper direction.
Replacing the lithium battery
• Remove the lithium battery.
Precautions
• Replace the battery with a CR2032 lithium
battery.
• Replace the battery in the unit using a non
metallic tapered instrument.
WARNING
• Keep the lithium battery out of the reach of
children. Should the battery be swallowed,
immediately consult a doctor.
CAUTION
• Do not recharge, disassemble, heat or dispose of the battery in a fire.
• Use a CR2032 (3 V) lithium battery only. Never
use other types of battery with this unit.
• Do not handle the battery with metallic tools.
• Do not store the lithium battery with metallic
materials.
• When disposing of used batteries, please
comply with governmental regulations or
environmental public institution’s rules that
apply in your country/area.
• Always check carefully that you are loading
the battery with its (+) and (–) poles facing in
the proper directions.
Page 12

Before You Start
En
12
01
Section
Display indication
This unit is equipped two types of display indications such as LCD display and OEL display.
LCD display contains basic information about
the each source and other settings which is
visible whenever the front panel is opened or
closed.
OEL display contains detailed information about
the each source and other settings which is
visible only when the front panel is opened.
This manual mainly explains using OEL display.
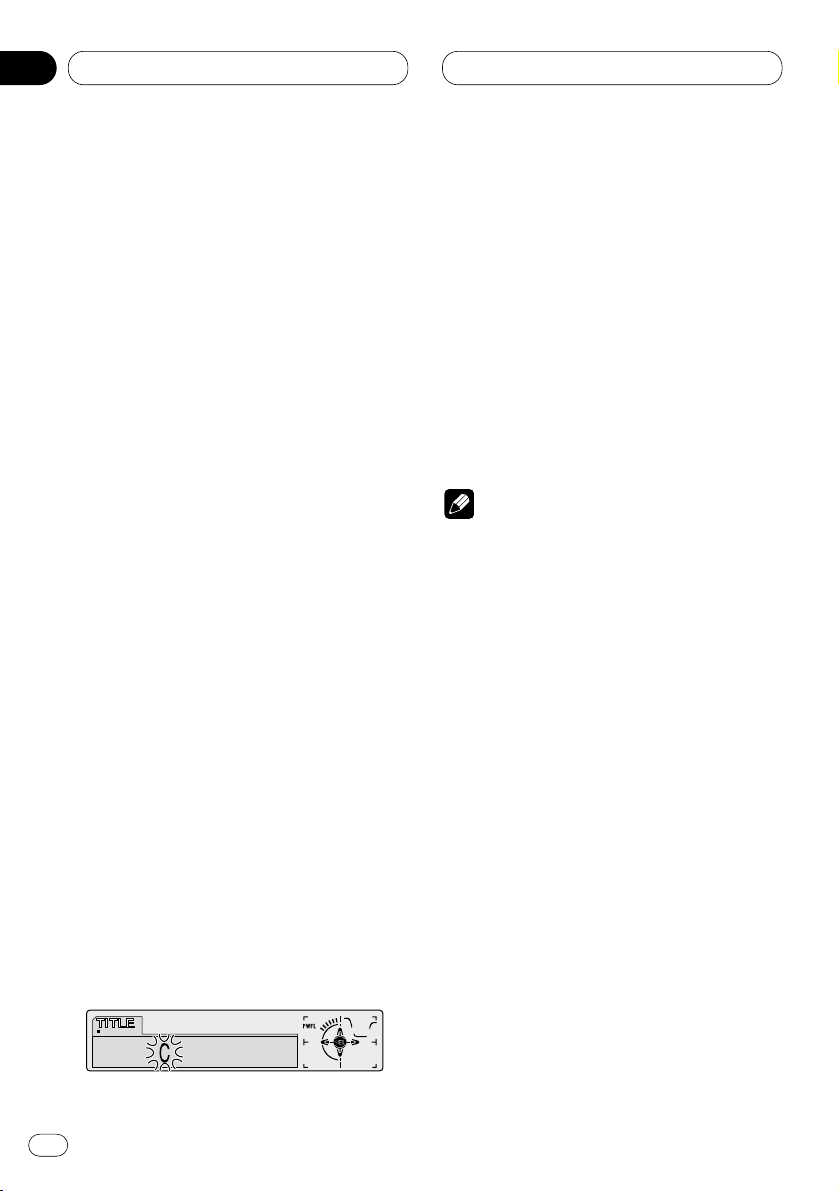
LCD display (e.g. Built in CD player)
OEL display (e.g. Built in CD player)
Resetting the microprocessor
The microprocessor must be reset under the
following conditions:
• Prior to using this unit for the first time after
installation
• If the unit fails to operate properly
• When strange or incorrect messages appear
on the display
Press RESET
on the head unit with a pen tip or
other pointed instrument.
RESET button
Play time
Track number that currently playing
Source which curently playing
Track number that currently playing
Page 13
Before You Start
En
13
English
Español
Deutsch
Français
Italiano
Nederlands
01
Section
Protecting your unit from theft
The front panel can be detached from the head
unit and stored in the protective case provided
to discourage theft.
• If the front panel is not detached from the
head unit within five seconds of turning off
the ignition, a warning tone will sound.
• You can turn off the warning tone. See
Switching the warning tone on page 45.
Important
• Never use force or grip the display and the
buttons tightly when removing or attaching.
• Avoid subjecting the front panel to excessive
shocks.
• Keep the front panel out of direct sunlight and
high temperatures.
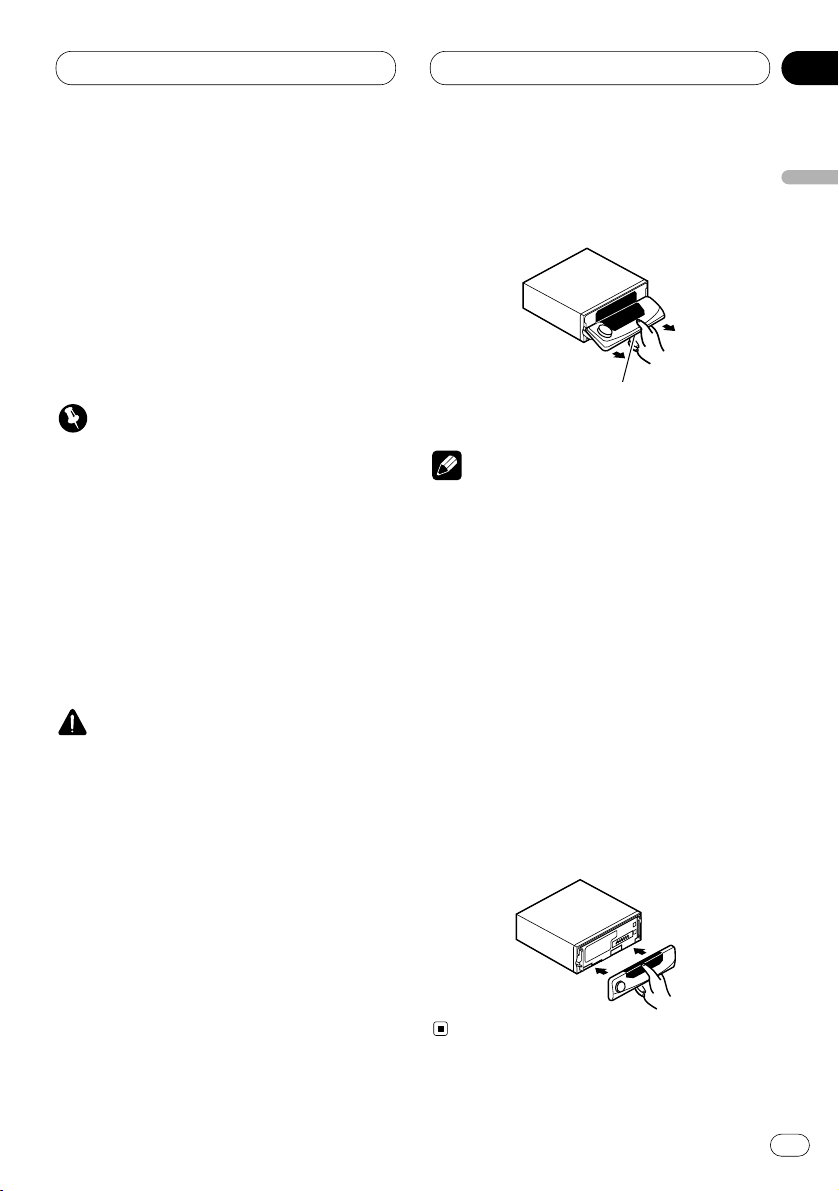
Removing the front panel
1 Press OPEN to open the front panel.
CAUTION
• A few seconds after turning the ignition
switch to ON/OFF, the front panel automatically moves. When this happens, your fingers
may become jammed in the panel, so keep
your hands away from it.
• You can cancel the automatic move of the
front panel. See Switching the flap auto open
on page 45.
2 Slide and remove the front panel toward
you.
Take care not to grip it tightly or drop it.
Notes
• When removing the front panel, be sure to
hold the corrugated release button on the rear
of the front panel while pulling.
• When removing the front panel while ACC is
on, be sure not to press any buttons other
than the release button. Otherwise, those
functions will be carried out.
3 Put the front panel into the protective case
provided for safe keeping.
Attaching the front panel
1 Make sure the inner cover is closed.
2 Replace the front panel by clipping it into
place.
Release button
Page 14
Before You Start
About the demo mode
This product features three demonstration
modes: Reverse mode, Feature DEMO and
Motion DEMO.
Reverse mode
If you do not perform an operation within about
30 seconds, screen indications start to reverse,
and then continue reversing every 10 seconds.
Pressing 5 numbered button when power to this
product is switched off while the ignition switch
is set to ACC or ON cancels the Reverse mode.
Pressing 5 numbered button again to start the
Reverse mode.
Feature DEMO
Pressing 4 numbered button when power to this
product is switched off while the ignition switch
is set to ACC or ON starts the Feature DEMO.
Motion DEMO
Pressing 6 numbered button when power to this
product is switched off while the ignition switch
is set to ACC or ON starts the Motion DEMO. If
the Motion DEMO is set to ON, front panel
opens/closes automatically in each about 30
minutes.
Notes
• Remember that if the Feature DEMO or Motion
DEMO continues operating when the car
engine is switched off, it may drain battery
power.
• The red lead (ACC) of this product should be
connected to a terminal coupled with ignition
switch on/off operations. If this is not done,
the vehicle battery may be drained.
• Feature DEMO and Motion DEMO are set to
OFF initially. If you turn off the ignition switch
or power to this product is switched off,
Feature DEMO and Motion DEMO return to off
automatically.
En
14
01
Section
Page 15

Power ON/OFF
En
15
Turning the unit on
Press SOURCE to turn the unit on.
When you select a source the unit is turned on.
Selecting a source
You can select a source you want to listen to. To
switch to the built-in CD player, load a disc in
this unit (refer to page 19).
Press
SOURCE to select a source.
Press
SOURCE repeatedly to switch between
the following sources:
Built-in CD player—TV—Tuner—DAB (Digital
Audio Broadcasting)—XM Tuner—Multi-CD
player—External unit 1—External unit 2 —AUX
Notes
• In the following cases, the sound source will
not change:
— When a product corresponding to each
source is not connected to this unit.
— When no disc is set in this unit.
— When no magazine is set in the multi-CD
player.
— When the AUX (auxiliary input) is set to off
(refer to page 45).
• External unit refers to a Pioneer product (such
as one available in the future) that, although
incompatible as a source, enables control of
basic functions by this unit. Two external units
can be controlled by this unit. When two external units are connected, the allocation of
them to external unit 1 or external unit 2 is
automatically set by this unit.
• When this unit’s blue/white lead is connected
to the car’s auto-antenna relay control terminal, the car’s antenna extends when this
unit’s source is switched on. To retract the
antenna, switch the source off.
Turning the unit off
Press
SOURCE and hold for at least one sec-
ond to turn the unit off.
English
Español
Deutsch
Français
Italiano
Nederlands
02
Section
Page 16

Tuner
Listening to the radio
These are the basic steps necessary to operate
the radio. More advanced tuner operation is
explained starting on page 17.
1 BAND indicator
Shows which band the radio is tuned to, AM
or FM.
2 STEREO (ST) indicator
Shows that the frequency selected is being
broadcast in stereo.
3 FREQUENCY indicator
Shows to which frequency the tuner is
tuned.
4 PRESET NUMBER indicator
Shows what preset has been selected.
1 Press SOURCE to select the tuner.
Press SOURCE until you see Tuner displayed.
2 Use VOLUME to adjust the sound level.
Rotate to increase or decrease the volume.
3 Press BAND to select a band.
Press BAND until the desired band is displayed,
FM1, FM2, FM3 for FM or AM.
4 To perform manual tuning, press
2 or 3
with quick presses.
The frequencies move up or down step by step.
5 To perform seek tuning, press and hold 2
or 3 for about one second and release.
The tuner will scan the frequencies until a
broadcast strong enough for good reception is
found.
• You can cancel seek tuning by pressing either
2 or 3 with a quick press.
• If you press and hold 2 or 3 you can skip
broadcasting stations. Seek tuning starts as
soon as you release the buttons.
Note
• When the frequency selected is being broadcast in stereo the STEREO (ST) indicator will
light.
1
2
3
4
En
16
03
Section
Page 17

Tuner
En
17
Introduction of advanced tuner
operation
1 FUNCTION display
Shows the function status.
1 Press OPEN to open the front panel.
2 Press
FUNCTION to display the function
names.
Press
FUNCTION repeatedly to switch between
the following functions:
BSM (best stations memory)—LOCAL (local
seek tuning)
• To return to the frequency display, press
BAND.
Note
• If you do not operate the function within about
30 seconds, the display is automatically
returned to the frequency display.
Storing and recalling broadcast
frequencies
If you press any of the PRESET TUNING buttons
you can easily store up to six broadcast frequencies for later recall with the touch of a button.
When you find a frequency that you want to
store in memory press a PRESET TUNING button and hold until the preset number stops
flashing.
The number you have pressed will flash in the
PRESET NUMBER indicator and then remain lit.
The selected radio station frequency has been
stored in memory.
The next time you press the same PRESET TUN-
ING button the radio station frequency is
recalled from memory.
Notes
• Up to 18 FM stations, 6 for each of the three
FM bands, and 6 AM stations can be stored in
memory.
• You can also use 5 and ∞ to recall radio station frequencies assigned to PRESET TUNING
buttons.
1
English
Español
Deutsch
Français
Italiano
Nederlands
03
Section
Page 18

03
Section
En
18
Tuner
Tuning in strong signals
Local seek tuning lets you tune in only those
radio stations with sufficiently strong signals for
good reception.
1 Press
OPEN to open the front panel.
2 Press FUNCTION to select LOCAL.
Press
FUNCTION until LOCAL appears in the
display.
3 Press 5 to turn local seek tuning on.
Local seek sensitivity (e.g., Local 2) appears in
the display.
4 Press 2 or 3 to set the sensitivity.
There are four levels of sensitivity for FM and
two levels for AM:
FM: Local 1—Local 2—Local 3—Local 4
AM: Local 1—Local 2
The Local 4 setting allows reception of only the
strongest stations, while lower settings let you
receive progressively weaker stations.
5 When you want to return to normal seek
tuning, press ∞ to turn local seek tuning off.
Local :OFF appears in the display.
Storing the strongest broadcast
frequencies
BSM (best stations memory) lets you automatically store the six strongest broadcast frequencies under PRESET TUNING buttons 1–6 and
once stored there you can tune in to those frequencies with the touch of a button.
1 Press OPEN to open the front panel.
2 Press FUNCTION to select BSM.
Press FUNCTION until BSM appears in the dis-
play.
3 Press 5 to turn
BSM on.
BSM begins to flash. While BSM is flashing the
six strongest broadcast frequencies will be
stored under PRESET TUNING buttons in order
of their signal strength. When finished, BSM
stops flashing.
• To cancel the storage process, press ∞.
Note
• Storing broadcast frequencies with BSM may
replace broadcast frequencies you have saved
using PRESET TUNING.
Page 19
04
Section
Built-in CD Player
En
19
English
Español
Deutsch
Français
Italiano
Nederlands
Playing a CD
These are the basic steps necessary to play a
CD with your built-in CD player. More advanced
CD operation is explained starting on page 20.
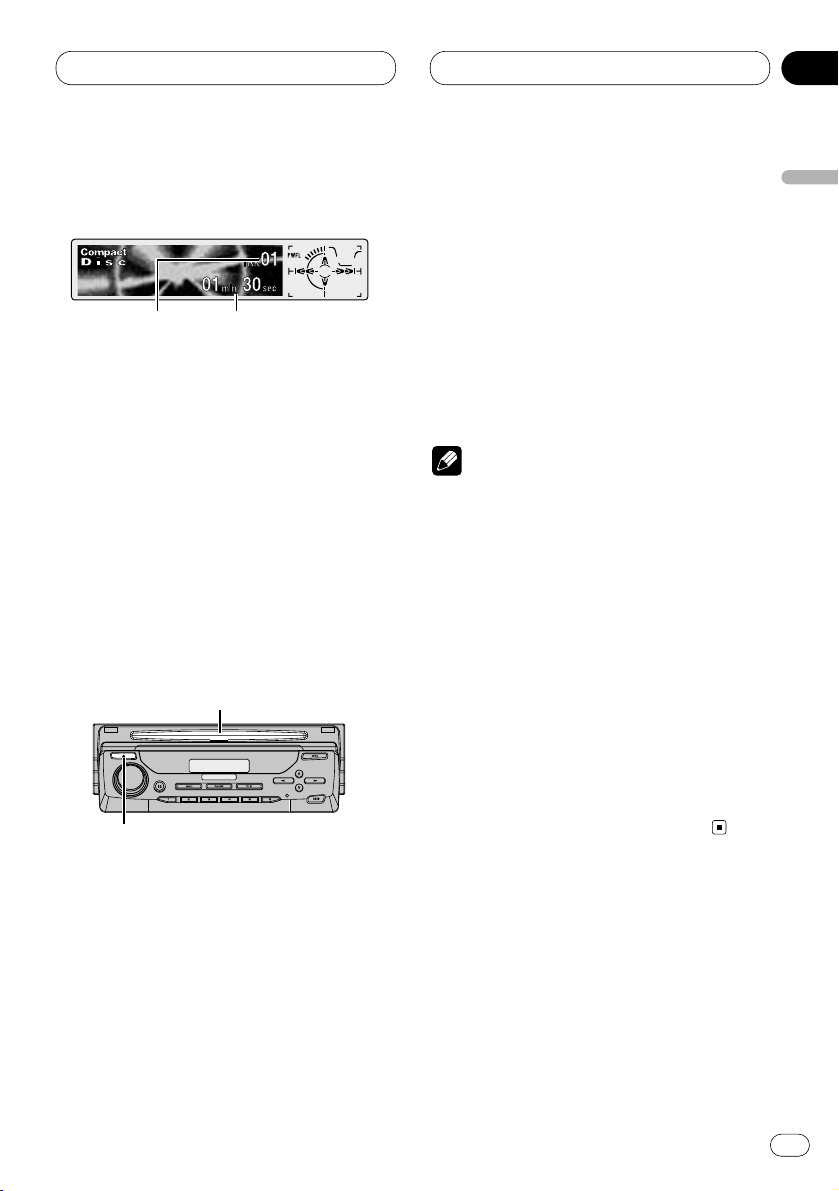
1 TRACK NUMBER indicator
Shows the track currently playing.
2 PLAY TIME indicator
Shows the elapsed playing time of the current track.
1 Press EJECT.
CD loading slot appears.
2 Insert a CD into the CD loading slot.
Playback will automatically start.
CD loading slot
EJECT button
• You can eject a CD by pressing EJECT.
• If the front panel is in the EJECT position
(shown above), buttons other than EJECT,
VOLUME, OPEN, and ATT (on the remote con-
trol) do not operate.
3 After a CD has been inserted, press
SOURCE to select the built-in CD player.
Press SOURCE until you see Compact Disc displayed.
4 Use VOLUME to adjust the sound level.
Rotate to increase or decrease the volume.
5 To perform fast forward or reverse, press
and hold 2 or 3.
6 To skip back or forward to another track,
press 2 or 3.
Pressing 3 skips to the start of the next track.
Pressing 2 once skips to the start of the current
track. Pressing again will skip to the previous
track.
Notes
• The built-in CD player plays one, standard,
12-cm or 8-cm (single) CD at a time. Do not
use an adapter when playing 8-cm CDs.
• Do not insert anything other than a CD into
the CD loading slot.
• If you cannot insert a disc completely or if
after you insert a disc the disc does not play,
check that the label side of the disc is up.
Press EJECT to eject the disc, and check the
disc for damage before inserting the disc
again.
• 5and∞ can be operated when MP3 or WMA
is playing.
• If the built-in CD player does not operate properly, an error message such as ERROR-11 may
be displayed. Refer to Understanding built-in
CD player error messages on page 55.
21
Page 20
Built-in CD Player
Introduction of advanced built-in
CD player operation
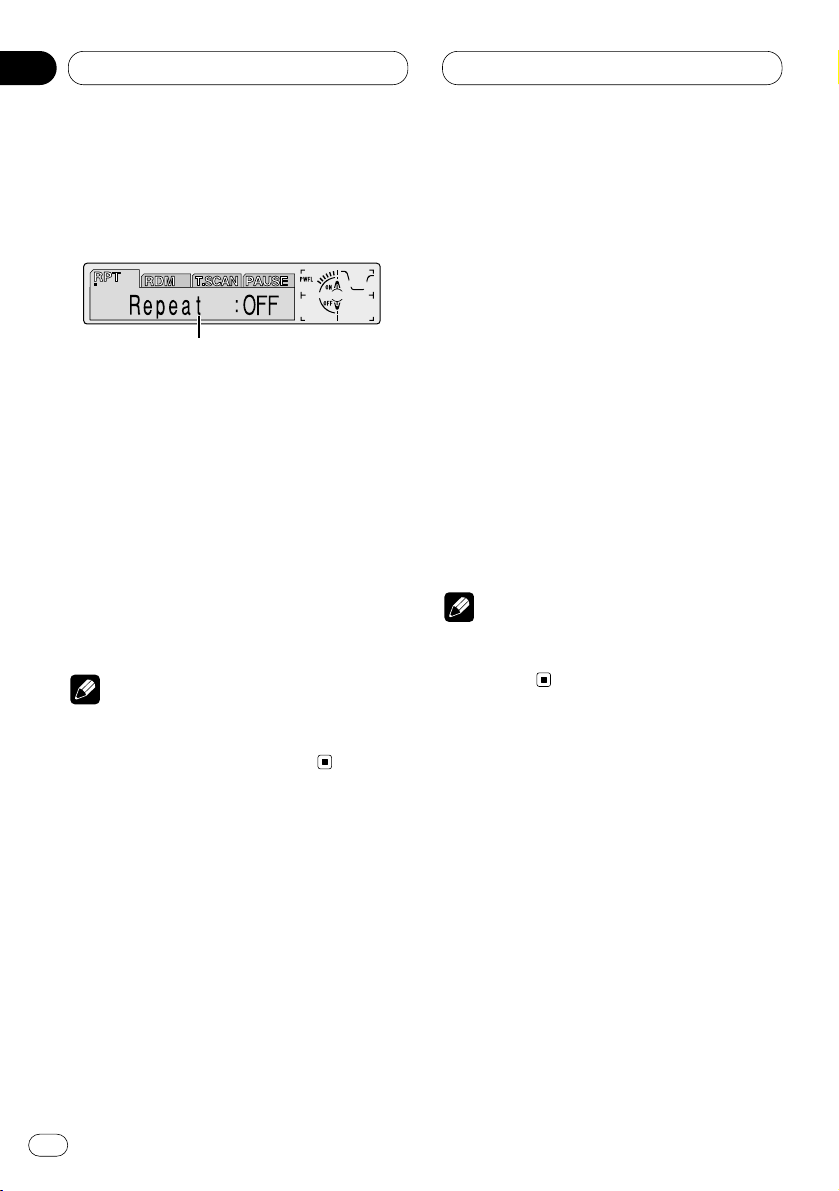
1 FUNCTION display
Shows the function status.
1 Press OPEN to open the front panel.
2 Press
FUNCTION to display the function
names.
Press
FUNCTION repeatedly to switch between
the following functions:
RPT (repeat play)—RDM (random play)—
T.SCAN (scan play)—PAUSE (pause)
• To return to the playback display, press BAND.
Note
• If you do not operate the function within about
30 seconds, the display is automatically
returned to the playback display.
Repeating play
Repeat play lets you hear the same track over
again.
1 Press
OPEN to open the front panel.
2 Press FUNCTION to select RPT.
Press
FUNCTION until RPT appears in the dis-
play.
3 Press 5 to turn repeat play on.
Repeat :ON appears in the display. The track
presently playing will play and then repeat.
4 Press ∞ to turn repeat play off.
Repeat :OFF appears in the display. The track
presently playing will continue to play and then
play the next track.
Note
• If you perform track search or fast
forward/reverse, repeat play is automatically
cancelled.
1
En
20
04
Section
Page 21
Built-in CD Player
En
21
Playing tracks in a random order
Random play lets you play back tracks on the
CD in a random order.
1 Press
OPEN to open the front panel.
2 Press FUNCTION to select RDM.
Press
FUNCTION until RDM appears in the dis-
play.
3 Press 5 to turn random play on.
Random :ON appears in the display. Tracks will
play in a random order.
4 Press ∞ to turn random play off.
Random :OFF appears in the display. Tracks will
continue to play in order.
Scanning tracks of a CD
Scan play lets you hear the first 10 seconds of
each track on the CD.
1 Press OPEN to open the front panel.
2 Press FUNCTION to select T. S C A N .
Press FUNCTION until T.SCAN appears in the
display.
3 Press 5 to turn scan play on.
Track Scan:ON appears in the display. The first
10 seconds of each track is played.
4 When you find the desired track press ∞ to
turn scan play off.
Track Scan:OFF appears in the display. The track
will continue to play.
• If the display has automatically returned to
the playback display, select T.SCAN again by
pressing FUNCTION.
Note
• After scanning of a CD is finished, normal
playback of the tracks will begin again.
Pausing CD playback
Pause lets you temporarily stop playback of the
CD.
1 Press OPEN to open the front panel.
2 Press FUNCTION
to select PAUSE.
Press
FUNCTION until PAUSE appears in the
display.
3 Press 5 to turn pause on.
Pause :ON appears in the display. Play of the
current track pauses.
4 Press ∞ to turn pause off.
Pause :OFF appears in the display. Play will
resume at the same point that you turned pause
on.
• Pressing PAUSE also turns pause on or off.
English
Español
Deutsch
Français
Italiano
Nederlands
04
Section
Page 22
Built-in CD Player
Using disc title functions
You can input CD titles and display the title. The
next time you insert a CD for which you have
entered a title, the title of that CD will be displayed.
Entering disc titles
Disc title input lets you input CD titles up to 10
letters long and up to 48 disc titles into the builtin CD player.
1 Play a CD that you want to enter the title.
2 Press OPEN to open the front panel.
3 Press FUNCTION and hold until TITLE
appears in the display.
• When playing a CD TEXT disc, you cannot
switch to TITLE. The disc title will have already
been recorded on a CD TEXT disc.
4 Press 1 numbered button to select the
desired character type.
Press 1 numbered button repeatedly to switch
between the following character type:
Alphabet (upper case), Numbers and Symbols—
Alphabet (lower case)
• You can select to input Numbers and Symbols
by pressing 2 numbered button.
5 Press 5 or ∞ to select a letter of the alphabet.
Each press of 5 will display a letter of the alphabet in A B C ... X Y Z, numbers and symbols in 1 2
3 ... @ # < order. Each press of ∞ will display a
letter in the reverse order, such as Z Y X ... C B A
order.
6 Press 3 to move the cursor to the next
character position.
When the letter you want is displayed, press 3
to move the cursor to the next position and then
select the next letter. Press 2 to move backwards in the display.
7 Move the cursor to the last position by
pressing 3 after entering the title.
When you press 3 one more time, the entered
title is stored in memory.
8 Press
BAND to return to the playback dis-
play.
Notes
• Titles remain in memory, even after the disc
has been removed from built-in CD player, and
are recalled when the disc is reinserted.
• After data for 48 discs has been stored in
memory, data for a new disc will overwrite the
oldest one.
• If you connect a multi-CD player, you can
input disc titles for up to 100 discs.
• When a multi-CD player that does not support
disc title function is connected, you cannot
enter disc titles in this unit.
En
22
04
Section
Page 23
Built-in CD Player
En
23
Displaying disc titles
You can display the title of any disc that has had
a disc title entered.
1 Press OPEN to open the front panel.
2 Press DISPLAY
.
Press
DISPLAY repeatedly to switch between
the following settings:
PLAYBACK MODE A (play time)—Disc Title (disc
title)—PLAYBACK MODE B (play time and DAB
information)
When you select Disc Title, the title of the currently playing disc is shown in the display.
• If no title has been entered for the currently
playing disc, NO Title is displayed.
• You can only switch to PLAYBACK MODE B
when a DAB Tuner (GEX-P700DAB) is
connected.
Using CD TEXT functions
Some discs have certain information encoded
on the disc during manufacture. These discs
may contain such information as the CD title,
track title, artist’s name and playback time and
are called CD TEXT discs. Only these specially
encoded CD TEXT discs support the functions
listed below.
Displaying titles on CD TEXT discs
1 Press OPEN to open the front panel.
2 Press DISPLAY when playing a CD TEXT
disc.
Press DISPLAY repeatedly to switch between
the following settings:
PLAYBACK MODE A (play time)—Disc Title (disc
title)—DiscArtist Name (disc artist name)—
Track Title (track title)—TrackArtist Name (track
artist name)—PLAYBACK MODE B (play time
and DAB information)
• If specific information has not been recorded
on a CD TEXT disc, NO XXXX will be displayed
(e.g., NO T-Artist Name).
• You can only switch to PLAYBACK MODE B
when a DAB Tuner (GEX-P700DAB) is
connected.
Scrolling titles in the display
This unit can display the first 16 letters only of
Disc Title, DiscArtist Name, Track Title and
TrackArtist Name. When the recorded informa-
tion is longer than 16 letters, you can scroll the
text to the left so that the rest of the title can be
seen.
1 Press OPEN to open the front panel.
2 Press DISPLAY and hold until the title
begins to scroll to the left.
The rest of the title will appear in the display.
English
Español
Deutsch
Français
Italiano
Nederlands
04
Section
Page 24

MP3/WMA Player
Playing a MP3/WMA
These are the basic steps necessary to play a
MP3/WMA with your built-in CD player. More
advanced MP3/WMA operation is explained
starting on page 25.
1 MP3 (WMA) indicator
Shows when the MP3 (WMA) file is playing.
2 FOLDER NUMBER indicator
Shows the folder number currently playing.
3 PLAY TIME
indicator
Shows the elapsed playing time of the current track.
4
TRACK NUMBER indicator
Shows the track (file) currently playing.
1 Press EJECT.
CD loading slot appears.
2 Insert a CD-ROM into the CD loading slot.
Playback will automatically start.
CD loading slot
EJECT button
• You can eject a CD-ROM by pressing EJECT.
• If the front panel is in the EJECT position
(shown above), buttons other than EJECT,
VOLUME, OPEN, and ATT (on the remote con-
trol) do not operate.
3 After a CD-ROM has been inserted, press
SOURCE to select the built-in CD player.
Press SOURCE until you see Compact Disc displayed.
4 Use VOLUME to adjust the sound level.
Rotate to increase or decrease the volume.
5 Press 5 or ∞ to select a folder.
• You can not select a folder that does not have
an MP3/WMA file recorded in it.
• Press ∞ for 2 seconds or longer to return to
folder 01 (ROOT). However, if folder 01 (ROOT)
contains no files, playback commences with
folder 02.
6 To perform fast forward or reverse, press
and hold 2 or 3.
• This is fast forward and reverse operation only
for the file being played. This operation is canceled when the previous or next file is reached.
7 To skip back or forward to another track,
press 2 or 3.
Pressing 3 skips to the start of the next track.
Pressing 2 once skips to the start of the current
track. Pressing again will skip to the previous
track.
Notes
• When playing discs with MP3 and/or WMA
files and audio data (CD-DA) such as CDEXTRA and MIXED-MODE CD, both types can
be played only by switching mode between
MP3/WMA and CD-DA with BAND.
• If you have switched between playback of
MP3/WMA files and audio data (CD-DA),
playback starts at the first track on the disc.
• The built-in CD player can play back an MP3
or WMA file recorded on CD-ROM. (Please
refer to pages 56 and 57 that can be played
back.)
• Do not insert anything other than a CD into
the CD loading slot.
12 3 4
En
24
05
Section
Page 25
MP3/WMA Player
En
25
• There is sometimes a delay between starting
up playback and the sound being issued. This
is particularly the case when playing back
multi-session and many folders. When being
read in, Format Read is displayed.
• If you cannot insert a disc completely or if
after you insert a disc the disc does not play,
check that the label side of the disc is up.
Press EJECT to eject the disc, and check the
disc for damage before inserting the disc
again.
• Playback is carried out in order of file number.
Folders are skipped if they contain no files. (If
folder 01 (ROOT) contains no files, playback
commences with folder 02.)
• When playing back files recorded as VBR
(Variable Bit Rate) files, the play time will not
be correctly displayed if fast-forward or
reverse operations are used.
• If inserted disc contains no files that can be
played back, No Audio is displayed.
• There is no sound on fast-forward or reverse.
• If the built-in CD player does not operate properly, an error message such as ERROR-11 may
be displayed. Refer to Understanding built-in
CD player error messages on page 55.
Introduction of advanced built-in
CD player (MP3/WMA) operation
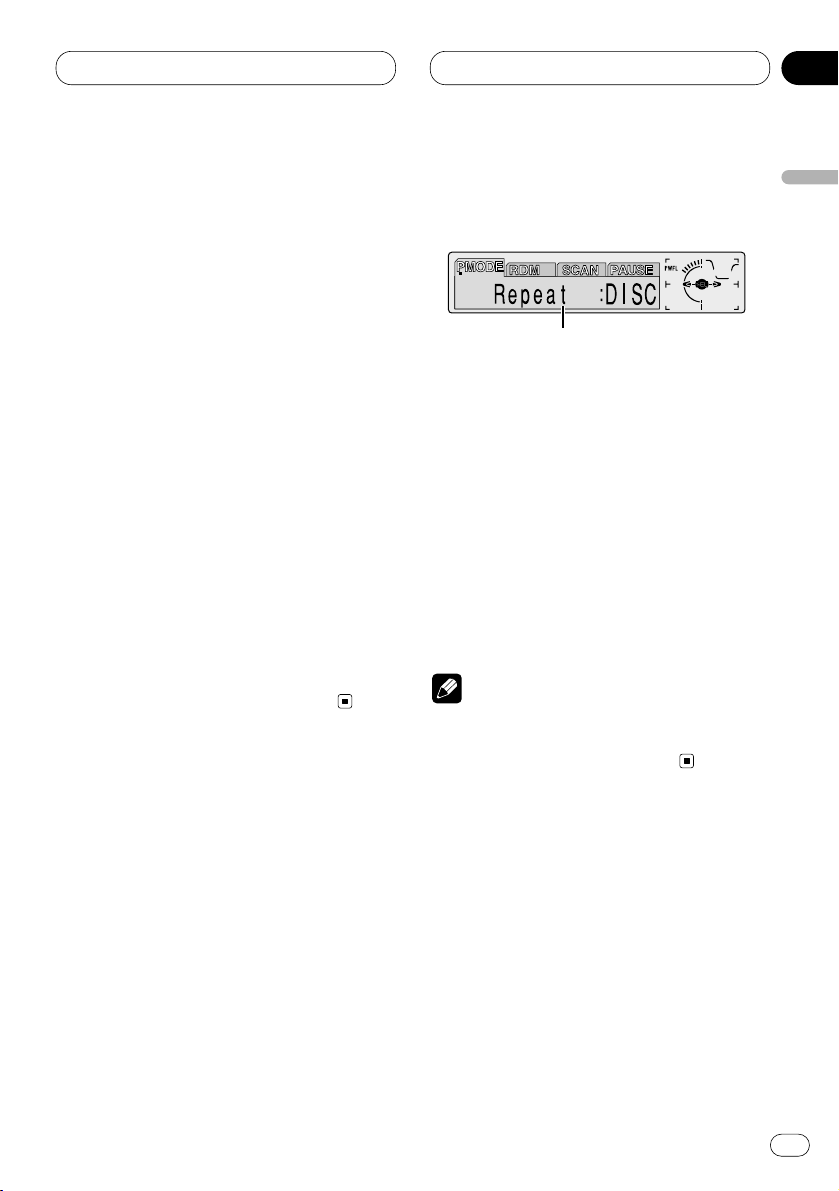
1 FUNCTION display
Shows the function status.
1 Press OPEN to open the front panel.
2 Press FUNCTION to display the function
names.
Press FUNCTION repeatedly to switch between
the following functions:
PMODE (repeat play)—RDM (random play)—
SCAN (scan play)—PAUSE (pause)
• To return to the playback display, press BAND.
Note
• If you do not operate the function within about
30 seconds, the display is automatically
returned to the playback display.
1
English
Español
Deutsch
Français
Italiano
Nederlands
05
Section
Page 26

MP3/WMA Player
Repeating play
For MP3/WMA playback, there are three repeat
play ranges: FOLDER (folder repeat), TRK (onetrack repeat), and DISC (repeat all tracks).
1 Press
OPEN to open the front panel.
2 Press FUNCTION to select PMODE.
Press
FUNCTION until PMODE appears in the
display.
3 Press 2 or 3 to select the repeat range.
Press 2 or 3 until the desired repeat range
appears in the display.
• FOLDER – the folder being played back is
repeated.
• TRK – the track being played back is
repeated.
• DISC – the entire folder is repeated.
Notes
• If you select other folder during repeat play,
the repeat play range changes to DISC (all
repeat).
• If you perform track search or fast
forward/reverse during TRK (one-track
repeat), the repeat play range changes to
FOLDER (folder repeat).
• When FOLDER is selected, it is not possible to
play back a sub-folder of that folder.
Playing tracks in a random order
Random play lets you play back tracks in a random order within the repeat range,F.RANDOM
(folder repeat) and RANDOM (all repeat).
1 Select the repeat range.
Refer to Repeating play on this page.
2 Press
OPEN to open the front panel.
3 Press FUNCTION to select RDM.
Press
FUNCTION until RDM appears in the
display.
4 Press 5 to turn random play on.
Random :ON appears in the display. Tracks will
play in a random order within the previously
selected F.RANDOM (folder player repeat) or
RANDOM (disc repeat) ranges.
5 Press ∞ to turn random play off.
Random :OFF appears in the display. Tracks will
continue to play in order.
Note
• When the playback range is set to disc repeat,
tracks of all folders will be played back in a
random order.
En
26
05
Section
Page 27
MP3/WMA Player
En
27
Scanning folders and tracks
While you are using T.SCAN (folder repeat), the
beginning of each track in the selected folder
plays for about 10 seconds. When you are using
F.SCAN (all repeat), the beginning of the first
track of each folder is played for about 10 seconds.
1 Select the repeat range.
Refer to Repeating play on page 26.
2 Press
OPEN to open the front panel.
3 Press
FUNCTION
to select SCAN.
Press
FUNCTION until SCAN appears in the
display.
4 Press 5 to turn scan play on.
Scan :ON appears in the display. The first 10
seconds of each track of the present folder (or
the first track of each folder) is played.
5 When you find the desired track (or folder)
press ∞ to turn scan play off.
Scan :OFF appears in the display. The track (or
folder) will continue to play.
• If the display has automatically returned to
the playback display, select SCAN again by
pressing FUNCTION.
Notes
• Scan playback is cancelled if it returns to the
track (or folder) where it started.
• During track repeat, if scan repeat is set to on,
the playback range changes to folder repeat,
and track scan is started.
Pausing MP3/WMA playback
Pause lets you temporarily stop playback of the
MP3/WMA.
1 Press
OPEN to open the front panel.
2 Press FUNCTION to select PAUSE.
Press
FUNCTION until PAUSE appears in the
display.
3 Press 5 to turn pause on.
Pause :ON appears in the display. Play of the
current track pauses.
4 Press ∞ to turn pause off.
Pause :OFF appears in the display. Play will
resume at the same point that you turned pause
on.
• Pressing PAUSE also turns pause on or off.
Displaying titles on MP3/WMA
1 Press OPEN to open the front panel.
2 Press DISPLAY when playing a MP3/WMA
disc.
Press DISPLAY repeatedly to switch between
the following settings:
PLAYBACK MODE A (play time)—Folder Name
(folder name)—File Name (file name)—Track
Title (track title)—Artist Name (artist name)—
Album Title (album title)—BIT RATE (bit rate)—
PLAYBACK MODE B (play time and DAB infor-
mation)
• When playing back files recorded as VBR
(Variable Bit Rate) files, the BIT RATE value is
not displayed even after switching to BIT RATE.
• If specific information has not been recorded
on a MP3/WMA disc, NO XXXX will be displayed
(e.g., NO Artist Name).
English
Español
Deutsch
Français
Italiano
Nederlands
05
Section
Page 28

MP3/WMA Player
• With some applications used to encode WMA
files, album names and other text information
may not be correctly displayed.
• You can only switch to PLAYBACK MODE B
when a DAB Tuner (GEX-P700DAB) is
connected.
Scrolling titles in the display
This unit can display the first 16 letters only of
Folder Name, File Name, Track Title, Artist Name
and Album Title. When the recorded information is longer than 16 letters, you can scroll the
text to the left so that the rest of the title can be
seen.
1 Press OPEN to open the front panel.
2 Press
DISPLAY
and hold until the title
begins to scroll to the left.
The rest of the title will appear in the display.
En
28
05
Section
Page 29

Multi-CD Player
En
29
Playing a CD
You can use this unit to control a multi-CD player,
which is sold separately.
These are the basic steps necessary to play a
CD with your multi-CD player. More advanced
CD operation is explained starting on page 30.
1 DISC NUMBER indicator
Shows the disc currently playing.
2 PLAY TIME indicator
Shows the elapsed playing time of the current track.
3 TRACK NUMBER indicator
Shows the track currently playing.
1 Press SOURCE to select the multi-CD
player.
Press SOURCE until you see Multi-CD displayed.
2 Use VOLUME to adjust the sound level.
Rotate to increase or decrease the volume.
3 Select a disc you want to listen to with the
1 to 6 buttons.
For discs located at 1 to 6, press the corresponding number button.
If you want to select a disc located at 7 to 12,
press and hold the corresponding numbers
such as 1 for disc 7, until the disc number
appears in the display.
• You can also sequentially select a disc by
pressing 5/∞.
4 To perform fast forward or reverse, press
and hold
2 or 3.
5 To skip back or forward to another track,
press 2 or 3.
Pressing 3 skips to the start of the next track.
Pressing 2 once skips to the start of the current
track. Pressing again will skip to the previous
track.
Notes
• When the multi-CD player performs the
preparatory operations, Ready is displayed.
• If the multi-CD player does not operate properly, an error message such as ERROR-11 may
be displayed. Refer to the multi-CD player
owner’s manual.
• If there are no discs in the multi-CD player
magazine, NO DISC is displayed.
50-disc multi-CD player
Only those functions described in this manual
are supported for 50-disc multi-CD players.
123
English
Español
Deutsch
Français
Italiano
Nederlands
06
Section
Page 30
Multi-CD Player
Introduction of advanced multiCD player operation
1 FUNCTION display
Shows the function status.
1 Press OPEN to open the front panel.
2 Press
FUNCTION to display the function
names.
Press
FUNCTION repeatedly to switch between
the following functions:
PMODE (repeat play)—T.LIST (disc title list)—
RDM (random play)—SCAN (scan play)—ITS-P
(ITS play)—PAUSE (pause)—COMP (compres-
sion and DBE)
• To return to the playback display, press BAND.
Note
• If you do not operate the function within about
30 seconds, the display is automatically
returned to the playback display.
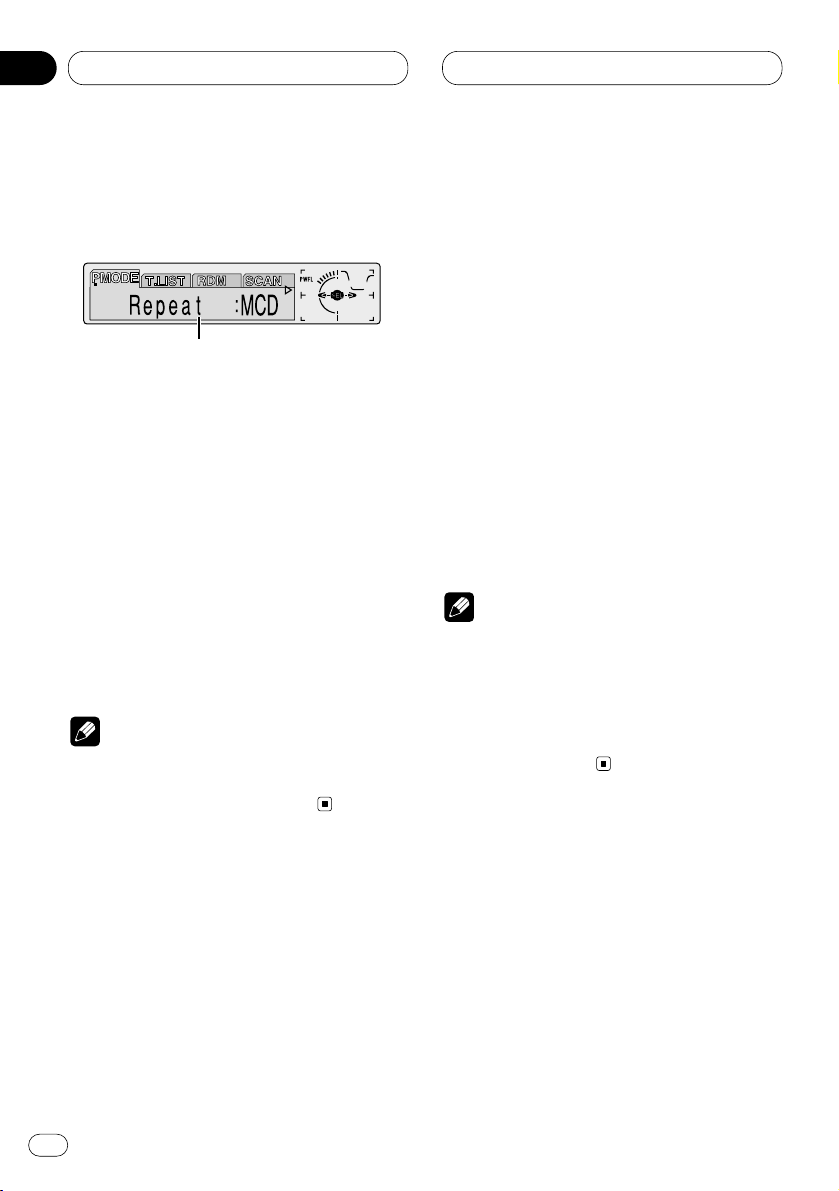
Repeating play
There are three repeat play ranges for the multiCD player: MCD (multi-CD player repeat), TRK
(one-track repeat), and DISC (disc repeat).
1 Press
OPEN to open the front panel.
2 Press FUNCTION to select PMODE.
Press
FUNCTION until PMODE appears in the
display.
3 Press 2 or 3 to select the repeat range.
Press 2 or 3 until the desired repeat range
appears in the display.
• MCD — Repeat all discs in the multi-CD
player
• TRK — Repeat just the current track
• DISC — Repeat the current disc
Notes
• If you select other discs during repeat play,
the repeat play range changes to MCD (multiCD player repeat).
• If you perform track search or fast
forward/reverse during TRK (one-track
repeat), the repeat play range changes to
DISC (disc repeat).
1
En
30
06
Section
Page 31
Multi-CD Player
En
31
Playing tracks in a random order
Random play lets you play back tracks in a random order within the repeat range, RANDOM
(multi-CD player repeat) and D.RANDOM (disc
repeat).
1 Select the repeat range.
Refer to Repeating play on page 30.
2 Press
OPEN to open the front panel.
3 Press FUNCTION to select RDM.
Press
FUNCTION until RDM appears in the dis-
play.
4 Press 5 to turn random play on.
Random :ON appears in the display. Tracks will
play in a random order within the previously
selected RANDOM (multi-CD player repeat) or
D.RANDOM (disc repeat) ranges.
5 Press ∞ to turn random play off.
Random :OFF appears in the display. Tracks will
continue to play in order.
Scanning CDs and tracks
While you are using T.SCAN (disc repeat), the
beginning of each track on the selected disc
plays for about 10 seconds. When you are using
D.SCAN (multi-CD player repeat), the beginning
of the first track of each disc is played for about
10 seconds.
1 Select the repeat range.
Refer to Repeating play on page 30.
2 Press OPEN to open the front panel.
3 Press
FUNCTION to select SCAN.
Press FUNCTION until SCAN appears in the
display.
4 Press 5 to turn scan play on.
Scan :ON appears in the display. The first 10
seconds of each track of the present disc (or the
first track of each disc) is played.
5 When you find the desired track (or disc)
press ∞ to turn scan play off.
Scan :OFF appears in the display. The track (or
disc) will continue to play.
• If the display has automatically returned to
the playback display, select SCAN again by
pressing FUNCTION.
Note
• After track or disc scanning is finished, normal playback of the tracks will begin again.
Pausing CD playback
Pause lets you temporarily stop playback of the
CD.
1 Press
OPEN to open the front panel.
2 Press
FUNCTION to select PAUSE.
Press FUNCTION until PAUSE appears in the
display.
3 Press 5 to turn pause on.
Pause :ON appears in the display. Play of the
current track pauses.
4 Press ∞ to turn pause off.
Pause :OFF appears in the display. Play will
resume at the same point that you turned pause
on.
• Pressing PAUSE also turns pause on or off.
English
Español
Deutsch
Français
Italiano
Nederlands
06
Section
Page 32

Multi-CD Player
Using ITS playlists
ITS (instant track selection) lets you make a
playlist of favorite tracks from those in the multiCD player magazine. After you have added your
favorite tracks to the playlist you can turn on ITS
play and play just those selections.
Creating a playlist with ITS programming
You can use ITS to enter and playback up to 99
tracks per disc, up to 100 discs (with the disc
title). (With multi-CD players sold before the
CDX-P1250 and CDX-P650, up to 24 tracks can
be stored in the playlist.)
1 Play a CD that you want to program.
Press 5 or ∞ to select a CD.
2 Press
OPEN to open the front panel.
3 Press FUNCTION and hold until TITLE
appears in the display, then press
FUNCTION
to select ITS.
After TITLE is displayed, press FUNCTION
repeatedly, the following functions appear in the
display:
TITLE (disc title input)—ITS (ITS programming)
4 Select a desired track by pressing 2 or 3.
5 Press 5 to store the currently playing track
in the playlist.
ITS Input is displayed briefly and the currently
playing selection is added to your playlist. The
display then shows ITS again.
6 Press
BAND to return to the playback dis-
play.
Note
• After data for 100 discs has been stored in
memory, data for a new disc will overwrite the
oldest one.
Playback from your ITS playlist
ITS play lets you listen to the tracks that you
have entered into your ITS playlist. When you
turn on ITS play, tracks from your ITS playlist in
the multi-CD player will begin to play.
1 Select the repeat range.
Refer to Repeating play on page 30.
2 Press OPEN to open the front panel.
3 Press FUNCTION to select ITS-P.
Press FUNCTION until ITS-P appears in the
display.
4 Press 5 to turn ITS play on.
ITS Play :ON appears in the display. Playback
begins of those tracks from your playlist within
the previously selected MCD (multi-CD player
repeat) or DISC (disc repeat) ranges.
• If no tracks in the current range are
programmed for ITS play then ITS Empty is
displayed.
5 Press ∞ to turn
ITS play off.
ITS Play :OFF appears in the display. Playback
will continue in normal order from the currently
playing track and CD.
En
32
06
Section
Page 33

06
Section
Multi-CD Player
En
33
English
Español
Deutsch
Français
Italiano
Nederlands
Erasing a track from your ITS playlist
When you want to delete a track from your ITS
playlist, you can if ITS play is on.
If ITS play is already on, skip to step 3. If ITS play
is not already on, press FUNCTION.
1 Play a CD you want to delete a track from
your ITS playlist, and turn ITS play on.
Refer to Playback from your ITS playlist on page
32.
2 Press OPEN to open the front panel.
3 Press FUNCTION and hold until
TITLE
appears in the display, then press FUNCTION
to select ITS.
After TITLE is displayed, press FUNCTION until
ITS appears in the display.
4 Select a desired track by pressing 2 or 3.
5 Press ∞ to erase a track from your ITS
playlist.
The currently playing selection is erased from
your ITS playlist and playback of the next track
from your ITS playlist begins.
• If there are no tracks from your playlist in the
current range, ITS Empty is displayed and normal play resumes.
6 Press BAND to return to the playback display.
Erasing a CD from your ITS playlist
When you want to delete all tracks of a CD from
your ITS playlist, you can if ITS play is off.
1 Play a CD that you want to delete.
Press 5 or ∞ to select a CD.
2 Press OPEN to open the front panel.
3 Press FUNCTION and hold until TITLE
appears in the display, then press FUNCTION
to select ITS.
After TITLE is displayed, press FUNCTION until
ITS appears in the display.
4 Press ∞ to erase all tracks on the currently
playing CD from your ITS playlist.
All tracks on the currently playing CD are erased
from your playlist and ITS Clear is displayed.
5 Press BAND to return to the playback display.
Using disc title functions
You can input CD titles and display the title.
Then you can easily search for and select a
desired disc for play.
Entering disc titles
Disc title input lets you input CD titles up to 10
letters long and up to 100 disc titles (with ITS
playlist) into the multi-CD player.
1 Play a CD that you want to enter the title.
Press 5 or ∞ to select a CD.
2 Press OPEN to open the front panel.
Page 34

06
Section
Multi-CD Player
3 Press FUNCTION and hold until TITLE
appears in the display.
After TITLE is displayed, press FUNCTION
repeatedly, the following functions appear in the
display:
TITLE (disc title input)—ITS (ITS programming)
• When playing a CD TEXT disc on a CD TEXT
compatible multi-CD player, you cannot switch
to TITLE. The disc title will have already been
recorded on a CD TEXT disc.
4 Press 1 numbered button to select the
desired character type.
Press 1 numbered button repeatedly to switch
between the following character type:
Alphabet (Upper case), Numbers and Symbols—
Alphabet (Lower case)
• You can select to input Numbers and Symbols
by pressing 2 numbered button.
5 Press 5 or ∞ to select a letter of the alphabet.
Each press of 5 will display a letter of the alphabet in A B C ... X Y Z, numbers and symbols in 1 2
3 ... @ # < order. Each press of ∞ will display a
letter in the reverse order, such as Z Y X ... C B A
order.
6 Press 3 to move the cursor to the next
character position.
When the letter you want is displayed, press 3
to move the cursor to the next position and then
select the next letter. Press 2 to move backwards in the display.
7 Move the cursor to the last position by
pressing 3 after entering the title.
When you press 3 one more time, the entered
title is stored in memory.
8 Press BAND to return to the playback display.
Notes
• Titles remain in memory, even after the disc
has been removed from the magazine, and
are recalled when the disc is reinserted.
• After data for 100 discs has been stored in
memory, data for a new disc will overwrite the
oldest one.
Displaying disc titles
You can display the title of any disc that has had
a disc title entered.
1 Press OPEN to open the front panel.
2 Press DISPLAY.
Press DISPLAY repeatedly to switch between
the following settings:
PLAYBACK MODE A (play time)—Disc Title (disc
title)—PLAYBACK MODE B (play time and DAB
information)
When you select Disc Title, the title of the currently playing disc is shown in the display.
• If no title has been entered for the currently
playing disc, NO Title is displayed.
• You can only switch to PLAYBACK MODE B
when a DAB Tuner (GEX-P700DAB) is
connected.
En
34
Page 35

Multi-CD Player
En
35
Selecting discs from the disc title list
Disc title list lets you see the list of disc titles
that have been entered into the multi-CD player
and select one of them to playback.
1 Press OPEN to open the front panel.
2 Press FUNCTION to select
T.LIST.
Press
FUNCTION until T.LIST appears in the
display.
3 Press 2 or 3 to scroll through the list of
titles that have been entered.
• If no title has been entered for a disc, NO D-
TITLE will be displayed.
4 Press 5 to play your favorite CD title.
That selection will begin to play.
Using CD TEXT functions
You can use these functions only with a CD TEXT
compatible multi-CD player.
Some discs have certain information encoded
on the disc during manufacture. These discs
may contain such information as the CD title,
track title, artist’s name and playback time and
are called CD TEXT discs. Only these specially
encoded CD TEXT discs support the functions
listed below.
Displaying titles on CD TEXT discs
1 Press OPEN to open the front panel.
2 Press DISPLAY when playing a CD TEXT
disc from the multi-CD player.
Press DISPLAY repeatedly to switch between
the following settings:
PLAYBACK MODE A (play time)—Disc Title (disc
title)—DiscArtist Name (disc artist name)—
Track Title (track title)—TrackArtist Name (track
artist name)—PLAYBACK MODE B (play time
and DAB information)
• If specific information has not been recorded
on a CD TEXT disc, NO XXXX will be displayed
(e.g., NO T-Artist Name).
• You can only switch to PLAYBACK MODE B
when a DAB Tuner (GEX-P700DAB) is
connected.
Scrolling titles in the display
This unit can display the first 16 letters only of
Disc Title, DiscArtist Name, Track Title and
TrackArtist Name. When the recorded informa-
tion is longer than 16 letters, you can scroll the
text to the left so that the rest of the title can be
seen.
1 Press OPEN to open the front panel.
2 Press DISPLAY and hold until the title
begins to scroll to the left.
The rest of the title will appear in the display.
English
Español
Deutsch
Français
Italiano
Nederlands
06
Section
Page 36

Multi-CD Player
Using compression and bass
emphasis
You can use these functions only with a multi-CD
player that supports them.
Using COMP (compression) and DBE (dynamic
bass emphasis) functions let you adjust the
sound playback quality of the multi-CD player.
Each of the functions have a two-step adjustment. The COMP function balances the output
of louder and softer sounds at higher volumes.
DBE boosts bass levels to give playback a fuller
sound. Listen to each of the effects as you select
through them and use the one that best
enhances the playback of the track or CD that
you are listening to.
1 Press
OPEN to open the front panel.
2 Press FUNCTION to select COMP.
Press
FUNCTION until COMP appears in the
display.
• If the multi-CD player does not support
COMP/DBE, No Comp. is displayed when you
attempt to select it.
3 Press 5 or ∞ to select your favorite setting.
Press 5 or ∞ repeatedly to switch between the
following settings:
Comp. OFF—Comp. 1—Comp. 2—Comp. OFF—
DBE 1—DBE 2
En
36
06
Section
Page 37

Audio Adjustments
En
37
Introduction of audio
adjustments
1 AUDIO display
Shows the audio adjustments status.
2 PRESET EQ indicator
Shows which equalizer preset is presently
selected.
3 ASL indicator
Shows the level of ASL.
1 Press
OPEN to open the front panel.
2 Press AUDIO to display the audio function
names.
Press AUDIO repeatedly to switch between the
following audio functions:
Fad (balance adjustment)—EQ (equalizer curve
adjustment)—Bass (bass)—Treble (treble)—
Loud (loudness)—Sub-W1 (subwoofer1)/Non Fad
(non fading output on/off)—Sub-W2
(subwoofer2)/Non Fad (non fading output setting)—HPF (high pass filter)—SLA (source level
adjustment)—ASL (automatic sound levelizer)
• When the subwoofer controller setting is only
S.W Control:EXT, you cannot switch Sub-W1.
(Refer to page 46.)
• You can select Sub-W2 only when Subwoofer
output is switched on in Sub-W1.
• When the subwoofer controller setting is only
S.W Control:EXT, you can switch the non fading
output on/off mode. (Refer to page 46.)
• You can select the non fading output setting
mode only when non fading output is switched
on in the non fading output on/off mode.
• When selecting the FM tuner as the source,
you cannot switch to SLA.
• To return to the playback display, press BAND.
Note
• If you do not operate the audio function within
about 30 seconds, the display is automatically
returned to the source display.
123
English
Español
Deutsch
Français
Italiano
Nederlands
07
Section
Page 38

07
Section
En
38
Audio Adjustments
Setting the sound focus
equalizer
Clarifying the sound image of vocals and instruments allows the simple staging of a natural,
pleasant sound environment.
Even greater listening enjoyment will be
obtained if seating positions are chosen carefully.
• FRT1 boosts the treble on the front output and
the bass on the rear output.
FRT2 boosts the treble and the bass on the front
output and the bass on the rear output. (The
bass boost is the same for both front and rear.)
For both FRT1 and FRT2 the H setting provides a
more pronounced effect than the L setting.
1 Press
EQ and hold until SFEQ OFF
appears
in the display.
2 Press
EQ to select the desired SFEQ mode.
FRT1-H (front1-high) —FRT1-L (front1-low) —
FRT2-H (front2-high) —FRT2-L (front2-low) —
CUSTOM (custom) —SFEQ OFF (off)
3 Press 2 or 3 to select the desired position.
LEFT (left) —CENTER (center) —RIGHT (right)
Notes
• If you adjust the bass or treble, CUSTOM
memorizes an SFEQ mode in which the bass
and treble are adjusted for personal preference.
• If you switch the SFEQ mode, the H.P.F. func-
tion is automatically switched off. By switching the H.P.F. function on after selecting the
SFEQ mode, you can combine H.P.F. function
with SFEQ function.
Using balance adjustment
You can select a fader/balance setting that provides an ideal listening environment in all occupied seats.
1 Press
OPEN to open the front panel.
2 Press AUDIO to select Fad.
Press
AUDIO until Fad appears in the display.
• If the balance setting has been previously
adjusted, Bal will be displayed.
3 Press 5 or ∞ to adjust front/rear speaker
balance.
Each press of 5 or ∞ moves the front/rear
speaker balance towards the front or the rear.
• Fad F 15 – Fad R 15 is displayed as the
front/rear speaker balance moves from front to
rear.
• Fad F/R 0 is the proper setting when only two
speakers are used.
• When the rear output setting is Rear SP:S.W,
you cannot adjust front/rear speaker balance.
Refer to Setting the rear output and subwoofer
controller on page 46.
4 Press 2 or 3 to adjust left/right speaker
balance.
When you press 2 or 3, Bal L/R 0 is displayed.
Each press of 2 or 3 moves the left/right
speaker balance towards the left or the right.
• Bal L 9 – Bal R 9 is displayed as the left/right
speaker balance moves from left to right.
Using the equalizer
The graphic equalizer lets you adjust the equalization to match car interior acoustic characteristics as desired.
Page 39
07
Section
Audio Adjustments
En
39
English
Español
Deutsch
Français
Italiano
Nederlands
Recalling equalizer curves
There are seven stored equalizer curves which
you can easily recall at any time. Here is a list of
the equalizer curves:
Display Equalizer curve
SUPER BASS (S.BASS) Super bass
POWERFUL (PWFL) Powerful
NATURAL (NTRL) Natural
VOCAL (VOCAL) Vocal
CUSTOM1, 2 (CSTM1 (2)) Custom1, 2
FL AT ( FLAT ) Flat
• CUSTOM1 and CUSTOM2 are adjusted equalizer curves.
• A separate CUSTOM1 curve can be created
for each source. (The Built-in CD player and
Multi-CD player are set to the same Equalizer
Curve Adjustment setting automatically.)
• If you make adjustments when a curve other
than CUSTOM2 is selected, the equalizer curve
settings are memorized in CUSTOM1.
•A CUSTOM2 curve can be created common to
all sources.
• If you make adjustments when the CUSTOM2
curve is selected, the CUSTOM2 curve is
updated.
• When FLAT is selected no supplement or
correction is made to the sound. This is useful
to check the effect of the equalizer curves by
switching alternatively between FLAT and a set
equalizer curve.
Press EQ to select the equalizer.
Press EQ repeatedly to switch between the following equalizer.
SUPER BASS—POWERFUL—NATURAL—
VOCAL—CUSTOM1—CUSTOM2—FLAT
Adjusting equalizer curves
You can adjust the currently selected equalizer
curve setting as desired. Adjusted equalizer
curve settings are memorized in CUSTOM1 or
CUSTOM2.
1 Press OPEN to open the front panel.
2 Press AUDIO
to select the equalizer mode .
Press
AUDIO until EQ-Low/EQ-Mid/EQ-High
appears in the display.
3 Select the band you want to adjust with
2/3.
EQ-Low (low)—EQ-Mid (mid)—EQ-High (high)
4 Press 5 or ∞ to adjust the equalizer curve.
Each press of 5 or ∞ increases or decreases
the equalizer curve respectively.
• +6 – –6 is displayed as the equalizer curve is
increased or decreased.
Note
• If you make adjustments when a curve other
than CUSTOM2 is selected, CUSTOM1 curve
is updated.
Page 40

Audio Adjustments
Fine adjusting equalizer curve
You can adjust the center frequency and the Q
factor (curve characteristics) of each currently
selected curve band (EQ-Low/EQ-Mid/EQ-High).
1 Press
OPEN to open the front panel.
2 Press AUDIO and hold until frequency and
the Q factor (e.g., F 80 Q 1W) appears in the
display.
3 Press AUDIO to select the desired band for
adjustment.
low—mid—high
4 Press 2 or 3 to select the frequency.
Press 2 or 3 until the desired frequency
appears in the display.
low : 40—80—100—160 (Hz)
mid : 200—500—1 k—2 k (Hz)
high : 3.15 k—8 k—10 k—12.5 k (Hz)
5 Press 5/∞ to select the desired Q factor.
Press 5 or ∞ until the desired Q factor appears
in the display.
2 N—1 N—1 W—2 W
Note
• If you make adjustments when a curve other
than CUSTOM2 is selected, CUSTOM1 curve
is updated.
Adjusting bass
You can adjust the cut-off frequency and the
bass level.
• In FRT1 mode, bass adjustment affects only
the rear output: front output cannot be
adjusted.
1 Press
OPEN to open the front panel.
2 Press AUDIO to select Bass.
Press
AUDIO until Bass appears in the display.
3 Press 2 or 3 to select the frequency.
Press 2 or 3 until the desired frequency
appears in the display.
40—63—100—160 (Hz)
4 Press 5 or ∞ to adjust the bass level.
Each press of 5 or ∞ increases or decreases
the bass level. +6 – –6 is displayed as the level is
increased or decreased.
Adjusting treble
You can adjust the cut-off frequency and the
Treble level.
• In FRT1 and FRT2 modes, treble adjustment
affects only the front output: rear output cannot
be adjusted.
1 Press OPEN to open the front panel.
2 Press AUDIO to select Treble.
Press AUDIO until Treble appears in the display.
3 Press 2 or 3 to select the frequency.
Press 2 or 3 until the desired frequency
appears in the display.
2.5k—4k—6.3k—10k (Hz)
4 Press 5 or ∞ to adjust the treble level.
En
40
07
Section
Level (dB)
Center frequency
Frequency (Hz)
Q=2N
Q=2W
Page 41

Audio Adjustments
En
41
Each press of 5 or ∞ increases or decreases
the treble level. +6 – –6 is displayed as the level
is increased or decreased.
Adjusting loudness
Loudness compensates for deficiencies in the
low- and high-sound ranges at low volume.
1 Press OPEN to open the front panel.
2 Press AUDIO to select Loud.
Press AUDIO until Loud appears in the display.
3 Press 5 to turn loudness on.
Loudness level (e.g., Loud Mid) appears in the
display.
4 Press 2 or 3 to select the level.
Press 2 or 3 until the desired level appears in
the display.
Low (low)—Mid (mid)—High (high)
5 Press ∞ to turn loudness off.
Loud OFF appears in the display.
Using subwoofer output
This unit is equipped with a subwoofer output
which can be switched on or off.
1 Press
OPEN to open the front panel.
2 Press AUDIO to select Sub-W1.
When the subwoofer controller setting is
S.W
Control:EXT, you can select Sub-W1. Press
AUDIO until Sub-W1 appears in the display.
3 Press 5 to turn subwoofer output on.
Sub-W1 Normal appears in the display.
Subwoofer output is now on.
• You can turn off subwoofer output by pressing
∞.
4 Press 2 or 3 to select the phase of subwoofer output.
Press 2 to select reverse phase and Rev.
appears in the display. Press 3 to select normal
phase and Normal appears in the display.
Adjusting subwoofer settings
When the subwoofer output is on, you can
adjust the cut-off frequency and the output level
of the subwoofer.
1 Press
OPEN to open the front panel.
2 Press AUDIO
to select Sub-W2.
When the subwoofer output is on, you can
select
Sub-W2. Press AUDIO until Sub-W2 80
(Hz) appears in the display.
• If the subwoofer setting has been previously
adjusted, the frequency of that previously
selected will be displayed, such as 50 (Hz) or 125
(Hz).
3 Press 2 or 3 to select cut-off frequency.
Press 2 or 3 until the desired cut-off frequency
appears in the display.
50—80—125 (Hz)
• Only frequencies lower than those in the
selected range are output from the subwoofer.
4 Press 5 or ∞ to adjust the output level of
the subwoofer.
Each press of 5 or ∞ increases or decreases
the level of the subwoofer. +6 – –6 is displayed
as the level is increased or decreased.
Press 5 or ∞ until you see the desired value
displayed.
English
Español
Deutsch
Français
Italiano
Nederlands
07
Section
Page 42

Audio Adjustments
Using no fading output
When the non fading output setting is on, the
audio signal does not pass through this unit’s
low pass filter (for the subwoofer), but is output
through the RCA output.
1 Press
OPEN to open the front panel.
2 Press AUDIO to select non fading output
on/off mode.
When the subwoofer controller setting is
S.W
Control:EXT, you can select non fading output
on/off mode. Press AUDIO until NonFad ON
appears in the display.
3 Press 5 to turn non fading output on.
NonFad ON appears in the display. non fading
output is now on.
• You can turn off non fading output by pressing
∞.
Adjusting non fading output level
When the non fading output is on, you can
adjust the level of non fading output.
1 Press OPEN to open the front panel.
2 Press
AUDIO to select non fading output
setting mode.
Press
AUDIO until NonFad 0 appears in the dis-
play.
3 Press 5 or ∞ to adjust the output level of
the non fading.
Each press of 5 or ∞ increases or decreases
the level of the non fading. +6 – –6 is displayed
as the level is increased or decreased.
Press 5 or ∞ until you see the desired value
displayed.
Using the high pass filter
When you do not want low sounds from the
subwoofer output frequency range to play from
the front or rear speakers, switch the HPF (high
pass filter) on. Only frequencies higher than
those in the selected range are output from the
front and rear speakers.
1 Press
OPEN to open the front panel.
2 Press AUDIO to select HPF.
Press
AUDIO until HPF appears in the display.
3 Press 5 to turn high pass filter on.
HPF 80 Hz appears in the display. High pass
filter is now on.
• To turn high pass filter off, press ∞.
4 Press 2 or 3 to select a high pass filter
range.
Press 2 or 3 until the desired cut-off frequency
appears in the display.
50—80—125 (Hz)
• Only frequencies higher than those in the
selected range are output from the front or rear
speakers.
Note
• If you switch the SFEQ mode, the H.P.F. function is automatically switched off. By switching the H.P.F. function on after selecting the
SFEQ mode, you can combine H.P.F. function
with SFEQ function.
En
42
07
Section
Page 43

Audio Adjustments
En
43
Adjusting source levels
SLA (Source level adjustment) lets you adjust
the volume level of each source to prevent radical changes in volume when switching between
sources.
• Settings are based on the volume level of the
FM tuner, which remains unchanged.
1 Compare the FM tuner volume level with
the level of the source you wish to adjust.
2 Press
OPEN to open the front panel.
3 Press
AUDIO
to select SLA.
Press
AUDIO until SLA appears in the display.
4 Press 5 or ∞ to adjust the source volume.
Each press of 5 or ∞ increases or decreases
the source volume.
• SLA +4 – SLA –4 is displayed as the source
volume is increased or decreased.
Notes
• Since the FM tuner volume is the control, it is
not possible to apply source level adjustments
to the FM tuner.
• The AM tuner volume level can also be
adjusted with source level adjustments.
• The built-in CD and the multi-CD players are
both set to the same source level adjustment
volume automatically.
• External unit 1 and External unit 2 are set to
the same volume adjustment setting automatically.
Using automatic sound levelizer
During driving, noise in the car changes according to the driving speed and road conditions.
The automatic sound levelizer (ASL) monitors
such varying noise and automatically increases
the volume level, if this noise becomes greater.
The sensitivity (variation of volume level to noise
level) of ASL can be set to one of five levels.
1 Press
OPEN to open the front panel.
2 Press AUDIO to select ASL.
Press
AUDIO until ASL appears in the display.
3 Press 5 to turn
ASL on.
• To turn ASL off, press ∞.
4 Press
2 or 3 to select the desired ASL
level.
Press 2 or 3 repeatedly to switch between the
following settings:
Low (low)—Mid-Lo (mid-low)—Mid (mid)
—Mid-Hi (mid-high)—High (high)
English
Español
Deutsch
Français
Italiano
Nederlands
07
Section
Page 44

Initial Settings
Adjusting initial settings
Initial settings lets you perform initial set up of
different settings for this unit.
1 FUNCTION display
Shows the function status.
1 Press SOURCE and hold until the unit turns
off.
2 Press OPEN to open the front panel.
3 Press FUNCTION and hold until CLOCK
appears in the display.
4 Press FUNCTION to select one of the initial
settings.
Press FUNCTION repeatedly to switch between
the following settings:
CLOCK—WARN—D OPEN—AUX—DIM—
BRIGHT—SW—TEL—DISP
Use the following instructions to operate each
particular setting.
• To cancel initial settings, press BAND.
• You can also cancel initial settings by holding
down FUNCTION until the unit turns off.
Setting the time
This is used to set the time on the unit’s clock
display.
1 Press
OPEN to open the front panel.
2 Press FUNCTION to select CLOCK.
Press
FUNCTION until the time appears in the
display.
3 Select the portion of the time display you
wish to set with 2/3.
Pressing 2/3 will select a portion of the clock
display:
HOUR—MINUTE
As you select portions of the clock display the
portion selected will blink.
4 Select the correct time with 5/∞.
Pressing 5 will increase the selected hour or
minute. Pressing ∞ will decrease the selected
hour or minute.
1
En
44
08
Section
Page 45

Initial Settings
En
45
Switching the warning tone
If the front panel is not detached from the head
unit within five seconds of turning off the ignition, a warning tone will sound. You can turn off
this warning tone.
1 Press
OPEN to open the front panel.
2 Press FUNCTION to select WARN.
Press
FUNCTION until WARN appears in the
display.
3 Select WARN on or off with 5/∞.
Pressing 5/∞ will switch Warning between on
and off and that status will be displayed (e.g.,
Warning :ON).
Switching the flap auto open
For theft protection, the front panel opens automatically and easily detaches. Flap auto open is
on as a default.
1 Press OPEN to open the front panel.
2 Press FUNCTION to select D OPEN.
Press FUNCTION until D OPEN appears in the
display.
3 Select Flap Auto on or off with 5/∞.
Pressing 5/∞ will switch Flap Auto between on
and off and that status will be displayed (e.g.,
Flap Auto :ON).
Switching the auxiliary setting
It is possible to use auxiliary equipment with
this unit. Activate the auxiliary setting when
using auxiliary equipment connected to this
unit.
1 Press
OPEN to open the front panel.
2 Press FUNCTION to select AUX.
Press
FUNCTION until AUX appears in the dis-
play.
3 Select AUX on or off with 5/∞.
Pressing 5/∞ will switch AUX between on and
off and that status will be displayed (e.g.,
AUX :ON).
Switching the dimmer setting
To prevent the display from being too bright at
night, the display is automatically dimmed
when the car’s headlights are turned on. You
can switch dimmer on or off.
1 Press OPEN to open the front panel.
2 Press FUNCTION to select DIM.
Press FUNCTION until DIM appears in the dis-
play.
3 Select DIM on or off with 5/∞.
Pressing 5/∞ will switch Dimmer between on
and off and that status will be displayed (e.g.,
Dimmer :ON).
English
Español
Deutsch
Français
Italiano
Nederlands
08
Section
Page 46

Initial Settings
Selecting the brightness
You can select the display brightness. Initially
this mode is set to 12.
1 Press
OPEN to open the front panel.
2 Press FUNCTION to select BRIGHT.
Press
FUNCTION until BRIGHT appears in the
display.
3 Select the desired brightness with 2/3.
• The display shows 0 – 15.
Setting the rear output and
subwoofer controller
This product’s rear output (rear speaker leads
output and RCA rear output) can be used for
full-range speaker (Rear SP:FULL) or subwoofer
(Rear SP:S.W) connection. If you switch rear
output setting to the Rear SP:S.W, you can connect a rear speaker lead directly to a subwoofer
without using an auxiliary amp.
Initially, the unit is set for rear full-range speaker
connection (Rear SP:FULL).
When rear output are connected to full range
speakers (when Rear SP:FULL is selected), you
can connect the RCA subwoofer output to a
subwoofer. In this case, you can select whether
to use the subwoofer controller’s (low pass
filter, phase) built-in S.W Control:INT or the
auxiliary S.W Control:EXT.
Notes
• Even if you change this setting, there is no
output unless you switch the non fading output (refer to page 42) or subwoofer output
(refer to page 41) in the Audio Menu on.
• If you change the subwoofer controller, subwoofer output and non fading output in the
Audio Menu return to the factory settings.
1 Press
OPEN to open the front panel.
2 Press FUNCTION to select SW.
Press FUNCTION until SW appears in the dis-
play.
3 Change the rear output setting with 5/∞.
Pressing 5/∞ will switch between Rear SP
:FULL (full-range speaker) and Rear SP:S.W
(subwoofer) and that status will be displayed.
Notes
• When no subwoofer is connected to the rear
output, select Rear SP:FULL.
• When a subwoofer is connected to the rear
output, set for subwoofer Rear SP:S.W.
• When the rear output setting is Rear SP:S.W,
you cannot change the subwoofer controller.
4 Change the subwoofer controller with
2/3.
Pressing 2/3 will switch between
S.W Control:INT and S.W Control:EXT and that
status will be displayed.
En
46
08
Section
Page 47

Initial Settings
En
47
Switching the telephone
muting/attenuation
Sound from this system is muted or attenuated
automatically when a call is mode or received
using a cellular telephone connected to this
product.
1 Press OPEN to open the front panel.
2 Press FUNCTION to select TEL.
Press FUNCTION until TEL appears in the dis-
play.
3 Switch the telephone muting/attenuation
with 2/3.
Pressing 2/3 will switch between Telephone
:ATT (attenuation) and Telephone :MUTE (mut-
ing) and that status will be displayed.
Switching the motion screen
You can switch on/off the moving source icon
display. When off is selected, the moving source
icon disappears after opening screen is displayed.
1 Press OPEN to open the front panel.
2 Press FUNCTION to select DISP.
Press FUNCTION until DISP appears in the
display.
3 Switch DISP on or off with 5/∞.
Pressing 5/∞ will switch Motion between on
and off and that status will be displayed (e.g.,
Motion :ON).
English
Español
Deutsch
Français
Italiano
Nederlands
08
Section
Page 48

09
Section
Setting the time display on or off
You can turn the time display on even when the
sources are off.
Press CLOCK
to select the time display.
Each press of
CLOCK turns time display on or
off. Time display appears on LCD display.
• The time display disappears temporarily when
you perform other operations, but the time indication is displayed again after 5 seconds.
Using different entertainment
displays
You can enjoy entertainment displays while
listening to each sound source.
• These are different ways of displaying the
spectrum and do not affect sound output.
1 Press
OPEN to open the front panel.
2 Press
ENTERTAINMENT.
Each time you press ENTERTAINMENT the
display changes in the following order:
Source Icon Display—BGV 1—BGV 2—BGV 3—
BGV 4—BGV 5—BGV 6—Spectrum Analyzer 1—
Spectrum Analyzer 2—Level Indicator 1—
Level Indicator 2—Level Indicator 3—
Movie 1—Movie 2—Entertainment Clock
• BGV stands for Back Ground Visual.
Using the AUX source
An IP-BUS-RCA Interconnector such as the
CD-RB20 or CD-RB10 (sold separately) lets you
connect this unit to auxiliary equipment featuring RCA output. For more details, refer to the
IP-BUS-RCA Interconnector owner‘s manual.
Selecting AUX as the source
Press SOURCE
to select AUX as the source.
Press
SOURCE until AUX appears in the display.
• If the auxiliary setting is not switched on, AUX
cannot be selected. For more details, see
Switching the auxiliary setting on page 45.
Setting the AUX title
The title displayed for the AUX source can be
changed.
1 Press
OPEN to open the front panel.
2 After you have selected
AUX as the source,
press FUNCTION and hold until TITLE appears
in the display.
3 Press 1 numbered button to select the
desired character type.
Press 1 numbered button repeatedly to switch
between the following character type:
Alphabet (Upper case), Numbers and Symbols—
Alphabet (Lower case)
• You can select to input Numbers and Symbols
by pressing 2 numbered button.
Other Functions
En
48
Page 49
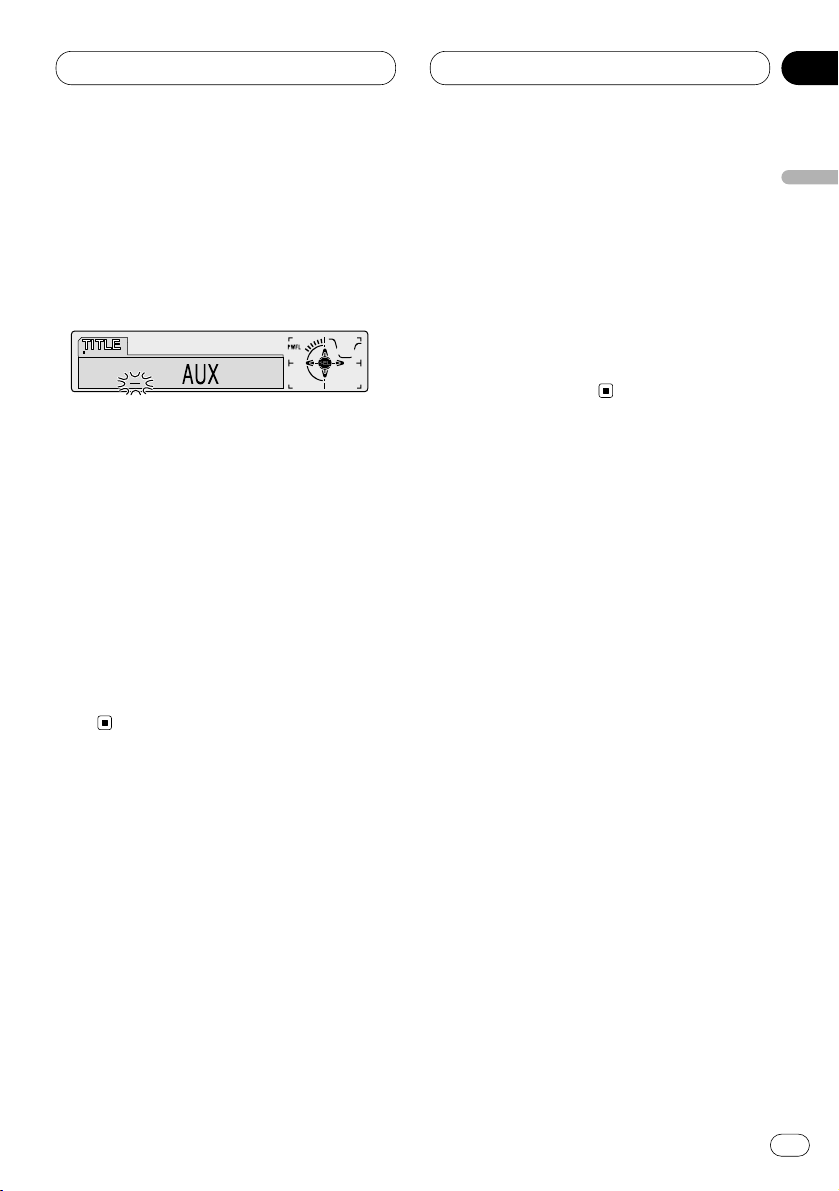
09
Section
Other Functions
En
49
English
Español
Deutsch
Français
Italiano
Nederlands
4 Press 5 or ∞ to select a letter of the alphabet.
Each press of 5 will display a letter of the alphabet in A B C ... X Y Z, numbers and symbols in 1 2
3 ... @ # < order. Each press of ∞ will display a
letter in the reverse order, such as Z Y X ... C B A
order.
5 Press 3 to move the cursor to the next
character position.
When the letter you want is displayed, press 3
to move the cursor to the next position and then
select the next letter. Press 2 to move backwards in the display.
6 Move the cursor to the last position by
pressing 3 after entering the title.
When you press 3 one more time, the entered
title is stored in memory.
7 Press
BAND to return to the playback dis-
play.
Using the telephone
muting/attenuation
Sound from this system is muted or attenuated
automatically when a call is made or received
using a cellular telephone connected to this
product.
• The sound is turned off, MUTE or ATT is displayed and no audio adjustment is possible.
• Operation returns to normal when the phone
connection is ended.
Page 50

Other Functions
Introduction of DAB operation
You can use this product with a separately sold
hide-away DAB tuner (GEX-P700DAB). For
details concerning operation, refer to the DAB
tuner’s operation manuals (This product is a
head unit group 1 unit). This section provides
information on DAB operations with this product which differs from that described in the
DAB tuner’s operation manual.
1 EXTR
indicator
The currently received Service has a
Secondary Service Component.
2
TEXT
indicator
The currently received service has a dynamic
label.
3
A (NNC) indicator *
Shows when Announce function is on.
4 W (THR) indicator *
Shows when Weather (Area Weather Flash)
function is on.
5 News ( ) indicator
Shows when a news announcement is
received.
6 Traffic ( ) indicator
Shows when a traffic announcement is
received.
* If the set announcement support is received,
the letters in parentheses light.
Operation
You can use the following functions with this
product. (Reference pages are in this manual.)
• Available PTY function (Refer to page 51.)
• Dynamic label function (Refer to page 51.)
Also, operation of the following two functions
with this product differs.
(Reference pages are in the hide-away DAB
tuner’s operation manual.)
• Changing the Label (Refer to page 13.)
• Operating Announcements with the Function
Menu (Refer to page 19.)
This product does not have the following four
functions. (Reference pages are in the hideaway DAB tuner’s operation manual.)
• Service Follow (Refer to page 8.)
• Service List Function (Refer to page 15.)
• Language Filter Function (Refer to page 15.)
• Using the PGM Button (Refer to page 26.)
Changing the label
1 Press OPEN to open the front panel.
2 Press DISPLAY.
Press DISPLAY repeatedly to switch between
the following settings:
Service Label (Service label)—SC Label (Service
component label)—DAB TEXT (Dynamic
label)—Ensemble Label—PTY (PTY label)
Notes
• With a service component that has no service
component label or dynamic label, switching
to service component label and dynamic label
is not possible.
• With displays other than service label, if you
do not perform an operation within eight seconds or press a button other than the
DISPLAY, the display returns to service label
indicators.
12 3 4 5 6
En
50
09
Section
Page 51

Other Functions
En
51
Operating announcements with the
function menu
When operating with 2/3 at step 2, indications
are displayed in the following order:
Announce (Announce)—News (News)—Weather
(Area Weather Flash)—Traffic (Traffic)
Notes
• When Announce is on, Warning/Service, Event
Announcement, Special Event, Finance, Sports
and Information are also switched on.
• When Traffic is on, Road Traffic Flash and
Transport Flash are also switched on.
Available PTY Function
You can select the desired PTY from among the
PTY that can be received.
Searching the PTY
1 Press OPEN to open the front panel.
2 Press FUNCTION to select PTY.
3 Press 2 or 3 to select a program type.
4 Press 5 to begin the search.
Using dynamic label
Dynamic label provides character information
concerning the service component you’re currently listening to. You can scroll the displayed
information.
Notes
• The tuner automatically memorizes the three
latest dynamic label received, replacing text
from the least recent reception with new text
when it is received.
• You can store data from up to six dynamic
label transmissions in buttons 1–6.
Displaying dynamic label
1 Press PAUSE and hold for about two
seconds to display dynamic label.
• Press PAUSE once more, or press BAND, and
the dynamic label mode is canceled.
• When no dynamic label is currently being
received, NO TEXT is displayed.
• If you press PAUSE and hold for about two
seconds while front panel of the head unit has
been closed, the front panel automatically
opens.
2 Press 2 or 3 to recall the three most
recent dynamic label.
Pressing 2 or 3 switches between the current
and the three dynamic label data displays.
• If there is no dynamic label data in memory
the display will not change.
English
Español
Deutsch
Français
Italiano
Nederlands
09
Section
Page 52

Other Functions
3 Press ∞ to scroll the dynamic label.
• When viewing dynamic label, do not operate
until you have parked your car safely.
• If you press 5, you return to the first line.
• If you select the dynamic label mode again
after having canceled it, the information may
switch to the latest available.
Storing and recalling dynamic label
You can store data from up to six dynamic label
transmissions at buttons 1–6.
1 Display the dynamic label you want to
store in memory.
Refer to Displaying dynamic label on page 51.
2 Press any of 1–6 and hold to store the
selected dynamic label.
The memory number will display and the
selected dynamic label has been stored in memory.
The next time you press the same 1–6 button in
the dynamic label display the stored text is
recalled from memory.
Introduction of XM operation
You can use this product with a separately sold
Universal XM satellite digital tuner system (GEXFM903XM) or XM satellite digital tuner (GEXP900XM). For details concerning operation,
refer to the XM tuner’s operation manuals. This
section provides information on XM operations
with this product which differs from that
described in the XM tuner’s operation manual.
1 CHANNEL SELECT MODE indicator
Shows what channel select mode has been
selected. CH.No is displayed when CH NUM-
BER is selected, and CAT is displayed when
CATEGORY is selected.
2 CHANNEL NUMBER indicator
Shows to which channel number the tuner is
tuned.
3 XM Tuner information
The display is switched each time DISPLAY
is pressed.
4 PRESET NUMBER indicator
Shows what preset has been selected.
5 BAND indicator
Shows the band which has been selected.
23 541
En
52
09
Section
Page 53
Other Functions
En
53
Operation
Operation of the following functions with this
product differs.
• Switching the display (Refer to this page.)
• Switching the channel select mode (Refer to
this page.)
• Display the ID code (Refer to this page.)
Switching the display
1 Press OPEN to open the front panel.
2 Press DISPLAY.
Press DISPLAY repeatedly to switch between
the following settings:
CHANNEL NUMBER—CANNEL NAME—ARTIST
NAME/FEATURE—SONG/PROGRAM TITLE—
ADDITIONAL INFORMATION
Note
• When the additional information is longer
than 16 letters, you can scroll text to the left
so that the rest of the text can be seen. Press
DISPLAY and hold until the text begins to
scroll to the left.
Switching the channel select mode
You can switch if you select a Channel with a
Channel Number or from a Channel Category
when you select a channel.
1 Press OPEN to open the front panel.
2 Press FUNCTION to select MODE.
3 Press 2 or 3 to select the desired channel
select mode.
CH NUMBER (Channel number select mode) —
CATEGORY (Channel category select mode)
Display the ID code
Each XM tuner is identified with a unique radio
ID. You will need the radio ID when activating
XM service or when reporting a problem. How to
display the ID code depends on the channel
select mode.
Channel number select mode
If you select CH 000, the ID code is displayed.
• Select the CH 000 with 2/3
Channel category select mode
RADIO ID is provided as a channel category for
displaying the ID code.
• Select the Channel Category RADIO ID
with 5/∞.
• If you select another channel, display of the ID
code is canceled.
• Display of the ID code repeats displaying
RADIO ID and the ID code one after the other.
English
Español
Deutsch
Français
Italiano
Nederlands
09
Section
Page 54

Additional Information
CD player and care
• Use only CDs that have either of the two
Compact Disc Digital Audio marks as show
below.
• Use only normal, round CDs. If you insert
irregular, non-round, shaped CDs they may
jam in the CD player or not play properly.
• Check all CDs for cracks, scratches or warped
discs before playing. CDs that have cracks,
scratches or are warped may not play properly. Do not use such discs.
• Avoid touching the recorded (non-printed
side) surface when handling the disc.
• Store discs in their cases when not in use.
• Keep discs out of direct sunlight and do not
expose the discs to high temperatures.
• Do not attach labels, write on or apply chemicals to the surface of the discs.
• To clean dirt from a CD, wipe the disc with a
soft cloth outward from the center of the disc.
• If the heater is used in cold weather, moisture
may form on components inside the CD
player. Condensation may cause the CD
player to not operate properly. If you think that
condensation is a problem turn off the CD
player for an hour or so to allow the CD player
to dry out and wipe any damp discs with a soft
cloth to remove the moisture.
• Road shocks may interrupt CD playback.
CD-R/CD-RW discs
• Playback with this product of CD-R/CD-RW
discs recorded with a music CD recorder or
PC may not be possible due to disc characteristics, scratches or dirt on the disc, or dirt or
condensation on this product’s lens.
• Playback of discs recorded with a PC may not
be possible depending on the application
software setting or environment. Be sure to
record with the correct format. (Contact the
store of purchase for details concerning the
application software.)
• Playback of CD-R/CD-RW discs may not be
possible if discs stored in your car are subjected to such conditions as direct sunlight
and high temperatures.
• Titles and other text information recorded on a
CD-R/CD-RW disc may not be displayed by
this product during playback of audio data
(CD-DA).
• This product conforms to the track skip function of the CD-R/CD-RW disc. The tracks containing the track skip information are skipped
over automatically during playback of audio
data (CD-DA).
• If you insert a CD-RW disc into this product,
time to playback will be longer than when you
insert a conventional CD or CD-R disc.
• Read the precautions with the CD-R/CD-RW
discs before using.
En
54
10
Section
Page 55
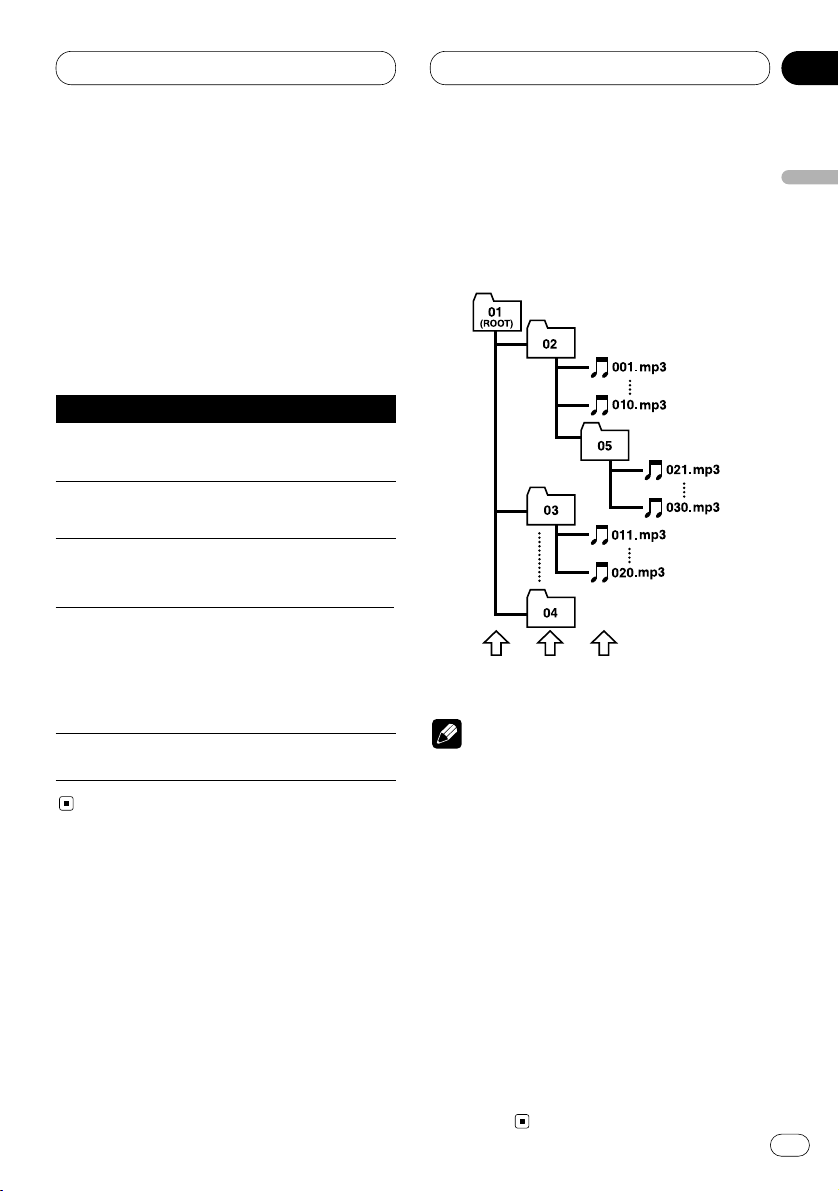
Additional Information
En
55
Understanding built-in CD player
error messages
When problems occur during CD play an error
message may appear on the display. If an error
message appears on the display refer to the
table below to see what the problem is and the
suggested method of correcting the problem. If
the error cannot be corrected, contact your
dealer or your nearest Pioneer Service Center.
About folders and MP3 files
• An outline of a CD-ROM with MP3 files on it is
shown below. Subfolders are shown as folders
in the folder currently selected.
Notes
• The equipment assigns folder numbers. The
user can not assign folder numbers.
• When playing discs with MP3 files and audio
data (CD-DA) such as CD-EXTRA and MIXEDMODE CD, both types can be played only by
switching mode between MP3 and CD-DA
with
BAND.
• It is not possible to check folders that do not
include MP3 files. (These folders will be
skipped without displaying the folder number.)
• MP3 files in up to 8 tiers of folders can be
played back. However, there is a delay in the
start of playback on discs with numerous
tiers. For this reason we recommend creating
discs with no more than 2 tiers.
• It is possible to play back up to 253 folders on
one disc.
English
Español
Deutsch
Français
Italiano
Nederlands
10
Section
Message Cause Action
ERROR-11, 12,
17, 30
Dirty disc Clean disc.
ERROR-11, 12,
17, 30
Scratched disc Replace disc.
ERROR-10, 11,
12, 17, 30, 50,
A0
Electrical or
mechanical
Turn the ignition
ON and OFF, or
switch to a
different source,
then back to the
CD player.
ERROR-44 All tracks are
skip tracks
Replace disc.
ERROR-22, 23 The CD format
cannot be
played back
Replace disc.
First Second Third
level level level
Page 56

Additional Information
MP3 files
• MP3 is short for MPEG Audio Layer 3 and
refers to an audio compression technology
standard.
• This product allows playback of MP3 files on
CD-ROM, CD-R and CD-RW discs. Disc
recordings compatible with level 1 and level 2
of ISO9660 and with the Romeo and Joliet file
system can be played back.
• It is possible to play back multi-session compatible recorded discs.
• Files are compatible with the ID3 Tag Ver. 1.0
and Ver. 1.1 formats for display of album (disc
title), track (track title) and artist (track artist).
• Only when MP3 files of 32, 44.1 and 48 kHz
frequencies are played back, the emphasis
function is valid. (16, 22.05, 24, 32, 44.1, 48 kHz
sampling frequencies can be played back.)
• MP3 files are not compatible with packet write
data transfer.
• There is no m3u playlist compatibility.
• There is no compatibility with the MP3i (MP3
interactive) or MP3 PRO format.
• The max. number of characters which can be
displayed for a file name, including the extension (.mp3), is 32 characters from the first
character.
• The max. number of characters which can be
displayed for a folder name is 32 characters.
• In case of files recorded according to the
Romeo and Joliet file system, only the first 32
characters can be displayed.
• When playing discs with MP3 files and audio
data (CD-DA) such as CD-EXTRA and MIXEDMODE CD, both types can be played only by
switching mode between MP3 and CD-DA
with BAND.
• When CD-R/CD-RW discs are used, playback
is possible only for discs which have been
finalized.
• The folder selection sequence for playback
and other operations becomes the writing
sequence used by the writing software.
For this reason, the expected sequence at the
time of playback may not coincide with the
actual playback sequence.
However, there also is some writing software
which permits setting of the playback order.
• The sound quality of MP3 files generally
becomes better with increasing bit rate. This
unit can play recordings with bit rates from 8
kbps to 320 kbps, but in order to be able to
enjoy a certain sound quality, it is
recommended to use only discs recorded with
a bit rate of at least 128 kbps.
Precautions
• When naming an MP3 file, add the
corresponding filename extension (.mp3).
• This product plays back files with the filename
extension (.mp3) as an MP3 file. To prevent
noise and malfunctions, do not use this extension for files other than MP3 files.
En
56
10
Section
Page 57

Additional Information
En
57
About folders and WMA files
• An outline of a CD-ROM with WMA files on it
is shown below. Subfolders are shown as
folders in the folder currently selected.
Notes
• The equipment assigns folder numbers. The
user can not assign folder numbers.
• When playing discs with WMA and audio data
(CD-DA) such as CD-EXTRA and MIXEDMODE CD, both types can be played only by
switching mode between WMA and CD-DA
with
BAND.
• It is not possible to check folders that do not
include WMA files. (These folders will be
skipped without displaying the folder number.)
• WMA files in up to 8 tiers of folders can be
played back. However, there is a delay in the
start of playback on discs with numerous
tiers. For this reason we recommend creating
discs with no more than 2 tiers.
• It is possible to play back up to 253 folders on
one disc.
WMA files
• WMA is short for Windows Media Audio and
refers to an audio compression technology
that is developed by Microsoft Corporation.
WMA data can be encoded by using Windows
Media Player version 7, 7.1 or Windows Media
Player for Windows XP.
• Some applications used to encode WMA files
may not operate correctly.
• With some applications used to encode WMA
files, album names and other text information
may not be correctly displayed.
• This product allows playback of WMA files on
CD-ROM, CD-R and CD-RW discs. Disc
recordings compatible with level 1 and level 2
of ISO9660 and with the Romeo and Joliet file
system can be played back.
• It is possible to play back multi-session compatible recorded discs.
• Only when WMA files of 32, 44.1 and 48 kHz
frequencies are played back.
• WMA files are not compatible with packet
write data transfer.
• The max. number of characters which can be
displayed for a file name, including the extension (.wma), is 32 characters from the first
character.
• The max. number of characters which can be
displayed for a folder name is 32 characters.
• In case of files recorded according to the
Romeo and Joliet file system, only the first 32
characters can be displayed.
• When playing discs with WMA and audio data
(CD-DA) such as CD-EXTRA and MIXED-MODE
CD, both types can be played only by switching
mode between WMA and CD-DA with BAND.
• When CD-R/CD-RW discs are used, playback
is possible only for discs which have been
finalized.
• The folder selection sequence for playback
and other operations becomes the writing
sequence used by the writing software.
For this reason, the expected sequence at the
time of playback may not coincide with the
actual playback sequence.
English
Español
Deutsch
Français
Italiano
Nederlands
10
Section
First Second Third
level level level
Page 58
10
Section
Additional Information
En
58
However, there also is some writing software
which permits setting of the playback order.
• The sound quality of WMA files generally
becomes better with increasing bit rate. This
unit can play recordings with bit rates from 48
kbps to 192 kbps, but in order to be able to
enjoy a certain sound quality, it is
recommended to use discs recorded with a
higher bit rate.
Precautions
• When naming an WMA file, add the corresponding filename extension (.wma).
• This product plays back files with the filename
extension (.wma) as an WMA file. To prevent
noise and malfunctions, do not use this extension for files other than WMA files.
Te r m s
Bit rate
This expresses data volume per second, or bps
units (bits per second). The higher the rate, the
more information is available to reproduce the
sound. Using the same encoding method (such
as MP3), the higher the rate, the better the
sound.
ID3 Tag
This is a method of embedding track-related
information in a MP3 file. This embedded information can include the track title, the artist’s
name, the album title, the music genre, the year
of production, comments and other data. The
contents can be freely edited using software
with ID3 Tag editing functions. Although the
tags are restricted to the number of characters,
the information can be viewed when the track is
played back.
ISO9660 format
This is the international standard for the format
logic of CD-ROM folders and files. For the
ISO9660 format, there are regulations for the
following two levels.
Level 1:
The file name is in 8.3 format (the name consists of up to 8 characters, half-byte English
capital letters and half-byte numerals and the
“_” sign, with a file-extension of three characters.)
Level 2:
The file name can have up to 31 characters
(including the separation mark “.” and a file
extension). Each folder contains less than 8
hierarchies.
Page 59

Additional Information
En
59
English
Español
Deutsch
Français
Italiano
Nederlands
10
Section
Extended formats
Joliet:
File names can have up to 64 characters.
Romeo:
File names can have up to 128 characters.
m3u
Playlists created using the “WINAMP” software
have a playlist file extension (.m3u).
MP3
MP3 is short for MPEG Audio Layer3. It is an
audio compression standard set by a working
group (MPEG) of the ISO (International
Standards Organization). MP3 is able to compress audio data to about 1/10th the level of a
conventional disc.
Multi-session
Multi-session is a recording method that allows
additional data to be recorded later. When
recording data on a CD-ROM, CD-R or CD-RW,
etc., all data from beginning to end is treated as
a single unit or session. Multi-session is a
method of recording more than 2 sessions in
one disc.
Packet write
This is a general term for a method of writing on
CD-R, etc. at the time required for a file, just as
is done with files on floppy or hard discs.
VBR
VBR is short for Variable Bit Rate. Generally
speaking CBR (Constant Bit Rate) is more
widely used. But to flexibly adjust the bit rate
according to the needs of audio compression, it
is possible to achieve compression prioritizes
sound quality.
WMA
WMA is short for Windows Media Audio and
refers to an audio compression technology that
is developed by Microsoft Corporation. WMA
data can be encoded by using Windows Media
Player version 7, 7.1 or Windows Media Player
for Windows XP.
Microsoft, Windows Media, and the Windows
logo are trademarks, or registered trademarks
of Microsoft Corporation in the United States
and/or other countries.
Page 60

Additional Information
Specifications
General
Power source ...................... 14.4 V DC
(10.8 – 15.1 V allowable)
Grounding system .............. Negative type
Max. current consumption
............................................. 10.0 A
Dimensions (W × H × D):
(When closed)
(DIN) Chassis ............ 178 × 50 × 157 mm
[7 × 2 × 6-1/8 in]
Nose .................. 188 × 58 × 28 mm
[7-3/8 × 2-1/4 × 1-1/8 in]
(D) Chassis ............ 178 × 50 × 162 mm
[7 × 2 × 6-3/8 in]
Nose .................. 170 × 44 × 23 mm
[6-3/4 × 1-3/4 × 7/8 in]
(When opened)
(DIN) Chassis ............ 178 × 50 × 157 mm
[7 × 2 × 6-1/8 in]
Nose .................. 188 × 68 × 50 mm
[7-3/8 × 2-5/8 × 2 in]
(D) Chassis ............ 178 × 50 × 162 mm
[7 × 2 × 6-3/8 in]
Nose .................. 170 × 64 × 45 mm
[6-3/4 × 2-1/2 × 1-3/4 in]
Weight ................................. 1.7 kg (3.74 lbs.)
Audio
Continuous power output is 22 W per channel min. into
4 ohms, both channels driven 50 to 15,000 Hz with no
more than 5% THD.
Maximum power output ..... 50 W × 4
for subwoofer (70 W × 1 ch/2 Ω)
Load impedance ................. 4 Ω (4 – 8 Ω [2 Ω for 1 ch]
allowable)
Preout max output level/output impedance
............................................. 4 V/1 kΩ
Equalizer (3-Band Parametric Equalizer):
(Low)
Frequency ............ 40/80/100/160 Hz
Q Factor ............... 0.35/0.59/0.95/1.15
(+6 dB when boosted)
Gain ..................... ±12 dB
(Mid)
Frequency ............ 200/500/1 k/2 k Hz
Q Factor ............... 0.35/0.59/0.95/1.15
(+6 dB when boosted)
Gain ..................... ±12 dB
(High)
Frequency ............ 3.15 k/8 k/10 k/12.5 k Hz
Q Factor ............... 0.35/0.59/0.95/1.15
(+6 dB when boosted)
Gain ..................... ±12 dB
Loudness contour:
(Low) ............................ +3.5 dB (100 Hz)
+3 dB (10 kHz)
(Mid) ............................ +10 dB (100 Hz)
+6.5 dB (10 kHz)
(High) .......................... +11 dB (100 Hz)
+11 dB (10 kHz)
(Volume: –30 dB)
Tone controls:
(Bass)
Frequency ............ 40/63/100/160 Hz
Gain ..................... ±12 dB
(Treble)
Frequency ............ 2.5 k/4 k/6.3 k/10 k Hz
Gain ..................... ±12 dB
HPF:
Frequency ............ 50/80/125 Hz
Slope .................... –12 dB/oct
Subwoofer:
Frequency ............ 50/80/125 Hz
Slope .................... –18 dB/oct
Gain ..................... ±12 dB
Phase ................... Normal/Reverse
CD player
System ................................ Compact disc audio
system
Usable discs ....................... Compact disc
Signal format:
Sampling frequency ... 44.1 kHz
Number of quantization bits
..................................... 16; linear
Frequency characteristics
............................................. 5 – 20,000 Hz (±1 dB)
Signal-to-noise ratio ........... 94 dB (1 kHz)
(IHF-A network)
Dynamic range ................... 92 dB (1 kHz)
Number of channels .......... 2 (stereo)
MP3 decoding format ........ MPEG-1&2 Audio Layer-3
WMA decoding format........ Ver. 7 & 8
FM tuner
Frequency range ................. 87.9 – 107.9 MHz
Usable sensitivity ............... 9 dBf (0.8 µV/75 Ω, mono,
S/N:30 dB)
50 dB quieting sensitivity ... 15 dBf (1.5 µV/75 Ω, mono)
Signal-to-noise ratio ........... 70 dB (IHF-A network)
Distortion ............................ 0.3% (at 65 dBf, 1 kHz,
stereo)
Frequency response ........... 30 – 15,000 Hz (± 3 dB)
Stereo separation ............... 40 dB (at 65 dBf, 1 kHz)
Selectivity ............................ 70 dB
Three signal intermodulation
(Desire signal level) .... 30 dBf
(two undesire signal level: 100 dBf)
AM tuner
Frequency range ................. 530 – 1,710 kHz (10 kHz)
Usable sensitivity ............... 18 µV (S/N: 20 dB)
Selectivity ............................ 50 dB (± 10 kHz)
Note
• Specifications and the design are subject to
possible modifications without notice due to
improvements.
En
60
10
Section
Page 61

En
61
English
Español
Deutsch
Français
Italiano
Nederlands
Page 62

Avant de commencer
Cher Client 5
Quelques mots sur cet appareil 6
Quelques mots sur ce mode d’emploi 6
Service après-vente des produits Pioneer 6
Précautions 6
Fonctions 7
• Lecture de CD 7
• Lecture de fichiers MP3 7
• Lecture de fichiers WMA 7
Quelques mots sur WMA 7
Quelques mots sur la marque XM READY 7
Description de l’appareil 8
• Face avant (fermée) 8
• Face avant (ouverte) 9
Télécommande monté sur le volant 10
Présentation et soin du boîtier de
télécommande 11
• Installation de la pile au lithium 11
• Remplacement de la pile au lithium 11
Indications affichées 12
• Afficheur LCD 12
• Afficheur OEL 12
Réinitialisation du microprocesseur 12
Protection de l’appareil contre le vol 13
• Dépose de la face avant 13
• Pose de la face avant 13
Quelques mots sur la démonstration 14
• Mode d’inversion 14
• Mode de démonstration des
possibilités 14
• Mode de démonstration d’ouverture
automatique 14
Mise en service, mise hors service
Mise en service de l’appareil 15
Choix d’une source 15
Mise hors service de l’appareil 15
Syntoniseur
Ecoute de la radio 16
Introduction au fonctionnement détaillé du
syntoniseur 17
Mise en mémoire et rappel des fréquences
des stations 17
Accord sur les signaux puissants 18
Mise en mémoire des fréquences des
émetteurs les plus puissants 18
Lecteur de CD intégré
Ecoute d’un CD 19
Introduction au fonctionnement détaillé du
lecteur de CD intégré 20
Répétition de la lecture 20
Ecoute des plages musicales dans un ordre
quelconque 21
Examen du contenu d’un CD 21
Pause de la lecture d’un CD 21
Utilisation des fonctions de titrage des
disques 22
• Frappe du titre d’un disque 22
• Affichage du titre d’un disque 23
Utilisation des fonctions CD TEXT 23
• Affichage du titre d’un disque
CD TEXT 23
• Défilement du titre du disque sur
l’afficheur 23
Nous vous remercions d’avoir acquis cet appareil Pioneer.
Veuillez lire attentivement ce mode d’emploi de manière à vous familiariser avec le
fonctionnement de l’appareil. Cela fait, conservez ce mode d’emploi afin de pouvoir
vous y référer en cas de besoin.
Table des matières
Fr
2
00
Section
Page 63

Lecture MP3/WMA
Ecoute d’un MP3/WMA 24
Introduction du fonctionnement évolué
(MP3/WMA) du lecteur de CD
incorporé 25
Répétition de la lecture 26
Ecoute des plages musicales dans un ordre
quelconque 26
Examen du contenu des dossiers 27
Pause de la lecture d’un MP3/WMA 27
Affichage du titre d’un disque
MP3/WMA 27
Défilement du titre du disque sur
l’afficheur 28
Lecteur de CD à chargeur
Ecoute d’un CD 29
Lecteur de CD 50 disques 29
Introduction au fonctionnement détaillé du
lecteur de CD à chargeur 30
Répétition de la lecture 30
Ecoute des plages musicales dans un ordre
quelconque 31
Examen du contenu des disques 31
Pause de la lecture d’un CD 31
Utilisation de la programmation en temps
réel (ITS) 32
• Création d’une liste par programmation
en temps réel (ITS) 32
• Lecture commandée par la liste ITS 32
• Suppression d’une plage musicale sur
la liste ITS 33
• Suppression d’un CD de la liste ITS 33
Utilisation des fonctions de titrage des
disques 34
• Frappe du titre d’un disque 34
• Affichage du titre d’un disque 34
• Choix d’un disque sur la liste des
titres 35
Utilisation des fonctions CD TEXT 35
• Affichage du titre d’un disque
CD TEXT 35
• Défilement du titre du disque sur
l’afficheur 35
Utilisation de la compression et de
l’accentuation dynamique des graves 36
Réglages sonores
Introduction aux réglages sonores 37
Réglage de l’égaliseur de focalisation
sonore 38
Réglage de l’équilibre sonore 38
Utilisation de l’égaliseur 39
• Rappel d’une courbe d’égalisation 39
• Réglage des courbes d’égalisation 39
• Réglage fin de la courbe d’égalisation 40
Réglage des graves 40
Réglage des aigus 40
Réglage de la correction physiologique 41
Utilisation de la sortie pour haut-parleur
d’extrêmes graves 41
• Réglages de la sortie vers le
haut-parleur d’extrêmes graves 41
Utilisation de la sortie préamplifiée 42
• Réglage du niveau de sortie de ligne
préamplifiée 42
Utilisation du filtre passe-haut 42
Réglage du niveau sonore de la source 43
Utilisation de la commande
automatique du niveau sonore 43
Table des matières
Fr
3
English
Français
Deutsch
Français
Italiano
Nederlands
00
Section
Page 64
Réglages initiaux
Ajustement des réglages initiaux 44
Réglage de l’heure 44
Mise en service ou hors service du signal
sonore d’avertissement 45
Annulation de l’ouverture automatique
de la face avant 45
Mise en service ou hors service de l’entrée
auxiliaire 45
Mise en service ou hors service de
l’atténuateur de luminosité 45
Choix de la luminosité 46
Réglage de la sortie arrière et du contrôleur
de l’enceinte d’extrêmes graves 46
Utilisation ou non de la sourdine/atténuation
audio téléphonique 47
Annulation de l’image animée 47
Autres fonctions
Affichage ou non de l’heure 48
Utilisation des divers affichages
divertissants 48
Utilisation de la source AUX 48
• Choix de l’entrée AUX comme source 48
• Frappe du nom de l’entrée AUX 48
Utilisation de la fonction de la
sourdine/atténuation audio
téléphonique 49
Introduction au fonctionnement DAB 50
• Fonctionnement 50
• Changement d’étiquette 50
• Traitement des annonces à partir du
menu des fonctions 51
• Fonction des PTY disponibles 51
• Recherche PTY 51
• Utilisation de l’étiquette dynamique 51
• Affichage de l’étiquette dynamique 51
• Enregistrement et rappel de l’étiquette
dynamique 52
Introduction au fonctionnement XM 52
• Fonctionnement 53
• Commutation de l’affichage 53
• Commutation du mode de sélection
du canal 53
• Affichage du code ID 53
Informations complémentaires
Soins à apporter au lecteur de CD 54
Les CD-R/CD-RW 54
Signification des messages d’erreur du
lecteur de CD intégré 55
A propos des dossiers et des fichiers MP3 55
Fichiers MP3 56
A propos des dossiers et des fichiers
WMA 57
Fichiers WMA 57
Terminologie 58
Caractéristiques techniques 60
Table des matières
Fr
4
00
Section
Page 65

Fr
5
English
Français
Deutsch
Français
Italiano
Nederlands
01
Section
Cher Client:
La sélection d’un équipement audio de qualité comme l’unité que vous venez d’acheter n’est que
le début de votre plaisir musical. Maintenant, il est temps de penser à la manière de profiter au maximum des plaisirs que vous offre votre équipement. Ce fabricant et le Groupe “Consumer
Electronics Group” de l’Association des Industries Electroniques veut que vous profitiez au maximum de votre équipement en l’utilisation à un niveau sûr. Un niveau qui permet au son d’être fort
et clair, sans beuglement ennuyant ou distorsion — et, ce qui est plus important, sans affecter votre
ouïe sensible.
Le son peut être décevant. Avec le temps, le “niveau de confort” de votre ouïe s’adapte aux volumes
sonores plus élevés. Ainsi, les sons “normaux” peuvent en fait être forts et affecter votre ouïe. Protégezvous contre cela en réglant votre équipement à un niveau sûr AVANT l’adaptation de votre ouïe.
Pour établir un niveau sûr:
• Démarrer votre commande de volume à un réglage bas.
• Augmentez lentement le son jusqu’à ce que vous l’entendiez confortablement et clairement, sans
distorsion.
Lorsque vous avez établi un niveau sonore confortable:
• Réglez le cadran et laissez-le tel quel.
En prenant une minute pour faire cela, vous pourrez éviter des dommages ou des pertes de sensibilités d’écoute dans le futur. Après tout, nous voulons que vous écoutiez pendant toute votre vie.
Nous voulons que vous écoutiez pendant toute votre vie
Utilisé avec sagesse, votre nouvel équipement sonore sera une source de plaisir pendant toute
votre vie. Comme les dommages de l’ouïe provenant d’un bruit fort ne sont souvent détectables que
lorsqu’il est trop tard, ce fabricant et le Groupe “Consumer Electronics Group” de l’Association des
Industries Electroniques vous recommandent d’éviter toute exposition prolongée à un bruit excessif. Cette liste de niveaux sonores est incluse pour votre protection.
Niveau de
Décibels Exemple
30 Bibliothèque tranquille, chuchotement
40 Salon, réfrigérateur, chambre à distance de la circulation
50 Circulation légère, conversation normale, bureau tranquille
60 Climatiseur à 20 pieds, machine à coudre
70 Aspirateur, sèche-cheveux, restaurant bruyant
80 Circulation moyenne en ville, évacuateurs de déchets, réveils à deux pieds
LES BRUITS SUIVANTS PEUVENT ETRE DANGEREUX DANS LE CAS D’UNE EXPOSITION CONSTANTE
90 Métro, motocyclette, circulation de camion, tondeuse à gazon
100 Collecteurs de poubelle, scie à chaîne, perceuse pneumatique
120 Concert de groupe rock devant les haut-parleurs, coup de tonnerre
140 Coup de pistolet, avion à réaction
180 Aire de lancement d’une fusée
Ces informations ont été gracieusement fournies par la Fondation de la Recherche pour les Sourds.
Page 66
Avant de commencer
Quelques mots sur cet appareil
La plage de fonctionnement du syntoniseur
correspond aux fréquences allouées à
l’Amérique du Nord. Toute tentative d’utilisation
dans une autre région peut conduire à une
impossibilité.
Important
Le numéro de série de trouve sur le fond de
l’appareil. Pour votre propre sécurité et votre
commodité, pensez bien à noter ce numéro sur
la carte de garantie jointe.
Quelques mots sur ce mode
d’emploi
Cet appareil est doté d’un certain nombre de
fonctions qui permettent la réception et le
fonctionnement dans les meilleures conditions.
Ces fonctions ont été élaborées pour que leur
emploi soit aussi simple que possible, mais il
exige toutefois quelques explications. Ce mode
d’emploi a été rédigé pour vous aider à profiter
au mieux de ces fonctions et à rendre votre
plaisir de l’écoute aussi grand que possible.
Nous vous conseillons de vous familiariser avec
ces fonctions et avec leurs modes opératoires
en lisant complètement ce mode d’emploi avant
de vous servir de l’appareil. Il est particulièrement
important que vous lisiez et respectiez les
précautions mentionnées sur cette page et
dans les autres sections.
Ce mode d’emploi traite du fonctionnement de
l’appareil central. Le boîtier de télécommande
de volant permet d’utiliser l’appareil dans les
mêmes conditions.
Service après-vente des produits
Pioneer
Pour toute question relative au service aprèsvente (y compris les conditions de garantie),
veuillez consulter le distributeur, ou le revendeur, qui vous a fourni cet appareil. Si les informations requises ne sont pas disponibles,
prenez contact avec les compagnies mentionnées ci-dessous:
N’expédiez pas l’appareil pour réparation à
l’une des adresses figurant ci-dessous sans
avoir pris un contact préalable.
Pour connaître les conditions de garantie,
reportez-vous au document, Garantie limitée,
qui accompagne cet appareil.
Précautions
• Conservez ce mode d’emploi à portée de main
pour vous y référer en cas de besoin.
• Veillez à ce que le niveau sonore ne soit pas
trop élevé de manière que vous puissiez
entendre les bruits extérieurs.
• Protégez l’appareil contre l’humidité.
• Si la batterie du véhicule est débranchée ou
déchargée, le contenu de la mémoire des
fréquences de station se trouve effacé et une
remise en mémoire de ces fréquences est
nécessaire.
U.S.A.
Pioneer Electronics (USA), Inc.
CUSTOMER SUPPORT DIVISION
P.O. Box 1760
Long Beach, CA 90801-1760
800-421-1404
CANADA
Pioneer électroniques du Canada, Inc.
Département de service aux consommateurs
300 Allstate Parkway
Markham, Ontario L3R OP2
(905) 479-4411
1-877-283-5901
Fr
6
01
Section
Page 67

Avant de commencer
Fr
7
Fonctions
Lecture de CD
La lecture de CD/CD-R/CD-RW est possible.
Lecture de fichiers MP3
Ce produit permet la lecture des fichiers MP3
sur des CD-ROM, CD-R et CD-RW. La lecture
des enregistrements de disque compatibles
avec le niveau 1 et le niveau 2 de ISO9660 et
avec le système de fichiers Romeo et Joliet est
possible.
Lecture de fichiers WMA
Ce produit permet la lecture des fichiers WMA
sur des CD-ROM, CD-R et CD-RW. La lecture
des enregistrements de disque compatibles
avec le niveau 1 et le niveau 2 de ISO9660 et
avec le système de fichiers Romeo et Joliet est
possible.
Quelques mots sur WMA
Le logo Windows Media imprimé sur
l’emballage indique que l’appareil peut lire les
données WMA.
WMA est l’abréviation de “Windows Media
Audio” et se rapporte à une technique de
compression du son qui a été mise au point par
Microsoft Corporation. Les données WMA
peuvent être enregistrés grâce à Windows Media
Player, version 7, 7,1 ou Windows Media Player
for Windows XP.
Microsoft, Windows Media et le logo Windows
sont des marques de commerce, déposées ou
non, par Microsoft Corporation aux Etats-Unis et
dans d’autres pays.
Remarques
• Certaines applications utilisées pour coder les
fichiers WMA peuvent ne pas fonctionner
correctement.
• Avec certaines applications utilisées pour
coder les fichiers WMA, les noms d’album et
les autres informations de texte peuvent ne
pas être affichés correctement.
Quelques mots sur la marque XM
READY
La marque XM READY, imprimée sur la face
avant, signifie que le syntoniseur Pioneer XM
(vendu séparément) peut être commandé par
cet appareil-ci. Pour connaitre précisément le
modèle de syntoniseur XM qui peut être connecté à cet appareil, consultez un revendeur ou
un centre d’entretien Pioneer agréés. Pour tout
ce qui concerne le fonctionnement du
syntoniseur XM, reportez-vous au mode d’emploi de ce syntoniseur.
Remarques
• XM Satellite Radio développe actuellement de
tout nouveaux moyens de radio aux ÉtatsUnis.
La technique de radiodiffusion directe du
satellite vers le récepteur sera utilisée pour
que l’auditeur, qu’il soit dans sa voiture ou à
son domicile, puisse recevoir les émissions
dans des conditions parfaites, cela où qu’il se
trouve dans le pays. XM propose quelque 100
canaux numériques programmant de la
musique, des bulletins d’information, des
reportages sportifs, des entretiens et des
émissions pour les enfants.
English
Français
Deutsch
Français
Italiano
Nederlands
01
Section
Page 68

01
Section
Avant de commencer
Fr
8
Description de l’appareil
Face avant (fermée)
1 Touche EJECT
Appuyez sur cette touche pour éjecter le CD
que contient le lecteur de CD intégré.
2 Touche
EQ
Appuyez sur cette touche pour choisir
diverses courbes d’égalisation.
Appuyez, pendant au moins deux secondes,
sur cette touche pour sélectionner un son
naturel avec présence.
3 Touche SOURCE
L’appareil est mis en service par le choix
d’une source. Appuyez sur cette touche pour
choisir l’une après l’autre les sources
disponibles.
4 Touche PAUSE
Appuyez une fois sur cette touche pour commander une pause de la lecture.
Appuyez, pendant au moins 2 secondes,
pour afficher l’étiquette dynamique quand
vous utilisez un syntoniseur DAB.
5 Touche CLOCK
Appuyez sur cette touche pour afficher, ou
non, l’heure.
6 Touche OPEN
Appuyez sur cette touche pour ouvrir la face
avant. Lorsque vous désirez utiliser des
touches placées derrière la face avant,
appuyez sur OPEN pour ouvrir la face avant.
7 Touches 5/∞/2/3
Appuyez sur ces touches pour effectuer un
accord manuel, atteindre rapidement le
début ou la fin du support, rechercher une
plage musicale. Ces touches servent
également aux commandes des fonctions.
8 Touche BAND
Appuyez sur cette touche pour choisir une
des trois gammes FM et une gamme AM, ou
encore abandonner la commande des fonctions.
9 Touche RESET
Vous pouvez réinitialiser l’appareil. Pour de
plus amples détails, reportez-vous à la page
12, Réinitialisation du microprocesseur.
0 Touches 1–6 (PRESET TUNING)
Appuyez sur cette touche pour choisir une
fréquence en mémoire, ou un disque si
l’installation comprend un lecteur de CD à
chargeur.
- VOLUME
Tournez la commande pour augmenter ou
diminuer le volume.
1
23
45
6
7
890-
Page 69

01
Section
Avant de commencer
Fr
9
Face avant (ouverte)
• Les touches mentionnées ci-dessous ne peuvent être utilisées que lorsque la face avant
est ouverte.
= Touche
ENTERTAINMENT
Appuyez sur cette touche pour modifier
l’affichage divertissant.
~ Touche AUDIO
Appuyez sur cette touche pour choisir les
diverses commandes de correction sonore.
! Touche FUNCTION
Appuyez sur cette touche pour choisir des
fonctions.
@ Touche DISPLAY
Appuyez sur cette touche pour choisir un
affichage différent.
English
Français
Deutsch
Français
Italiano
Nederlands
=
~
!
@
Page 70

01
Section
Fr
10
Avant de commencer
Télécommande monté sur le
volant
Il est fournis un boîtier de télécommande qui
peut être monté sur le volant et assure le
réglage de l’élément central. Pour connaître le
rôle de chacune de ses touches, reportez-vous
ci-dessus, à l’exception de celui de la touche
ATT qui est évoqué au paragraphe suivant.
# Touche
ATT
Appuyez sur cette touche pour atténuer
rapidement le niveau sonore de près de 90%.
Appuyez une nouvelle fois sur cette touche
pour rétablir le niveau initial.
$ Touche VOLUME
Appuyez sur cette touche pour augmenter
ou diminuer le niveau sonore.
Remarques
• Si vous appuyez sur FUNCTION ou AUDIO sur
le boîtier de télécommande de volant, alors
que la face avant est fermée, cette face avant
s’ouvre automatiquement.
• Si vous appuyez sur FUNCTION du boîtier de
télécommande en même temps que sur
BAND, le boîtier ne peut pas fonctionner con-
venablement. Pour annuler les effets de cette
opération et revenir à la situation antérieure,
appuyez sur AUDIO et en même temps sur
BAND.
#
3
!
7
8
$
~
Page 71

01
Section
Avant de commencer
Fr
11
English
Français
Deutsch
Français
Italiano
Nederlands
Présentation et soin du boîtier de
télécommande
Installation de la pile au lithium
• Retirez le couvercle, à l’arrière du boîtier de
télécommande monté sur le volant, et introduisez la pile en respectant les polarités
indiquées (+) et (–).
Remplacement de la pile au lithium
• Retirez la pile au lithium.
Précautions
• Remplacer la pile par une pile au lithium
CR2032.
• Remplacer la pile dans l’unité en utilisant une
barre conique non métallique.
AVERTISSEMENT
• Garder la pile au lithium hors d’atteinte d’enfants. Si une pile est avalée, consulter immediatement un médecin.
ATTENTION
• Ne pas recharger, démonter. chauffer une pile
ni la jeter dans un feu.
• N’utiliser qu’une pile au lithium CR2032 (3 V).
N’utiliser jamais d’autre type de pile avec
cette unité.
• Ne pas manipuler la pile avec un outil
métallique.
• Ne pas ranger une pile au lithium avec des
objects métalliques.
• Lorsque vous désirez mettre eu rebut une pile,
faites-le en respectant les lois et règlements
en vigueur dans votre pays ou votre état.
• Vérifier toujours soigneusement de charger la
pile avec ses pôles (+) et (–) dans le bon
sens.
Page 72

Avant de commencer
Fr
12
01
Section
Indications affichées
Cet appareil est équipé de deux types d’indicateur d’affichage: LCD et OEL. L’afficheur LCD
contient des informations de base sur chaque
source et d’autres valeurs qui sont visibles que
la face avant soit ouverte ou fermée.
L’afficheur OEL contient des informations détaillées sur chaque source et d’autres valeurs qui
ne sont visibles que si la face avant est ouverte.
Ce mode d’emploi traite principalement de
l’afficheur OEL.
Afficheur LCD (par exemple, lecteur
de CD intégré)
Afficheur OEL (par exemple, lecteur de
CD intégré)
Réinitialisation du
microprocesseur
Si une des conditions suivantes se présente, le
microprocesseur doit être réinitialisé:
• Avant d’utiliser l’appareil pour la première fois
après son installation
• L’appareil ne fonctionne pas convenablement
• Des informations erronées ou fantaisistes
s’affichent sur l’écran
Sur l’appareil central, appuyez sur RESET au
moyen d’un stylo à bille ou d’un instrument
pointu.
Touche
RESET
Durée de lecture
Numéro de la plage musicale
en cours de lecture
Nom de la source actuellement utilisée
Numéro de la plage musicale
en cours de lecture
Page 73

Avant de commencer
Fr
13
English
Français
Deutsch
Français
Italiano
Nederlands
01
Section
Protection de l’appareil contre le
vol
Afin de décourager le vol, la face avant peut être
retirée de l’appareil central et rangée dans le
boîtier fourni.
• Si vous ne retirez pas la face avant de
l’appareil central dans les cinq secondes qui
suivent la coupure de l’allumage, un signal
sonore d’avertissement se fait entendre.
• Vous pouvez mettre hors service ce signal
sonore d’avertissement. Reportez-vous à la
page 45, Mise en service ou hors service du
signal sonore d’avertissement.
Important
• N’exercez aucune force excessive, ne saisissez pas l’afficheur ni les touches pour retirer
ou fixer la face avant.
• Evitez de heurter la face avant.
• Conservez la face avant à l’abri des tempéra-
tures élevées et de la lumière directe du soleil.
Dépose de la face avant
1 Appuyez sur OPEN pour libérer la face
avant.
ATTENTION
• Quelques secondes après que le contacteur
d’allumage a été placé sur ON/OFF, le panneau avant bouge. A ce moment-là, votre
main peut être prise entre le panneau et l’ap-
pareil; tenez votre main éloignée.
• Vous pouvez annuler l’ouverture automatique
de la face avant. Reportez-vous à la page 45,
Annulation de l’ouverture automatique de la
face avant.
2 Faites glisser le panneau avant et tirez-le à
vous.
Veillez à ne pas l’endommager et à ne pas la
laisser tomber.
Remarques
• Lors du retrait du panneau avant, veillez à le
saisir par la touche ondulé de libération, à la
partie arrière du panneau avant, tout en tirant.
• Lors du retrait du panneau avant tandis que la
clé de contact est sur la position ACC, veillez à
n’appuyez sur aucune commande, à
l’exclusion du bouton de libération, faute de
quoi la fonction associée à la touche serait
exécutée.
3 Rangez la face avant dans le boîtier de
protection fourni à cet effet.
Pose de la face avant
1 Assurez-vous que le cache intérieur est
fermé.
2 Engagez la face avant de manière à obtenir
sa fixation.
Touche de déverrouillage
Page 74
Avant de commencer
Quelques mots sur la démonstration
Cet appareil possède trois modes de
démonstration: le mode d’inversion (Reverse
mode), le mode de démonstration des possibilités
(Feature DEMO) et le mode de démonstration
d’ouverture automatique (Motion DEMO).
Mode d’inversion
Si vous n’effectuez aucune opération pendant
environ 30 secondes, les indications s’affichent
sur l’écran dans l’ordre inverse et cela à intervalle
de 10 secondes. Appuyez sur la touche
numérotée 5 alors que l’appareil n’est pas sous
tension et que le contacteur d’allumage est sur
la position ACC, ou ON pour annuler le mode
d’inversion (Reverse mode). Appuyez de nouveau
sur la touche numérotée 5 pour commencer le
mode d’inversion (Reverse mode).
Mode de démonstration des
possibilités
Une pression sur la touche numérotée 4 tandis
que l’appareil n’est pas sous tension et que le
contacteur d’allumage est sur la position ACC
ou ON, provoque la démonstration des
possibilités (Feature DEMO).
Mode de démonstration d’ouverture
automatique
Une pression sur la touche numérotée 6 tandis
que l’appareil n’est pas sous tension et que le
contacteur d’allumage est sur la position ACC
ou ON, provoque la démonstration d’ouverture
automatique (Motion DEMO). Si la démonstration
d’ouverture automatique (Motion DEMO) est en
service, la face avant s’ouvre et se ferme toutes
les 30 minutes environ.
Remarques
• N’oubliez pas que la démonstration des possi-
bilités (Feature DEMO) ou celle de’ouverture
automatique (Motion DEMO) déchargent la
batterie si le moteur du véhicule est arrêté.
• Le fil rouge (ACC) de cet appareil doit être
relié à une borne couplée avec le fonctionnement de l’interrupteur d’allumage. Sinon, la
batterie risque de se décharger.
• Les modes de démonstration des possibilités
(Feature DEMO) et d’ouverture automatique
(Motion DEMO), sont initialement hors service.
Lorsque vous coupez le contacteur
d’allumage, ou bien lorsque vous mettez cet
appareil hors tension, les modes de
démonstration des possibilités (Feature DEMO)
et d’ouverture automatique (Motion DEMO) sont
remis hors service, automatiquement.
Fr
14
01
Section
Page 75

Mise en service, mise hors service
Fr
15
Mise en service de l’appareil
Appuyez sur SOURCE pour mettre en service
l’appareil.
Le fait de choisir une source met l’appareil en
service.
Choix d’une source
Vous pouvez choisir la source que vous désirez.
Pour écouter un disque, introduisez un disque
dans le lecteur de CD intégré (reportez-vous à la
page 19).
Appuyez sur SOURCE pour choisir une source.
Appuyez de manière répétée sur SOURCE pour
choisir l’une après l’autre les sources
suivantes:
Lecteur de CD intégré—Téléviseur—
Syntoniseur—Syntoniseur DAB (Digital Audio
Broadcasting)—Syntoniseur XM—Lecteur de CD
à chargeur—Appareil extérieur 1—Appareil
extérieur 2—AUX
Remarques
• Dans les cas suivants, une autre source
sonore n’est pas sélectionnée:
— Le produit correspondant à la source n’est
pas connecté à cet appareil-ci.
— L’appareil ne contient pas de disque.
— Le lecteur de CD à chargeur ne contient
pas de chargeur.
— L’entrée AUX (entrée pour un appareil
extérieur) est hors service (reportez-vous à
la page 45).
• Source extérieure désigne un produit Pioneer
(qui pourra être disponible dans le futur) qui
n’est pas à proprement parler une source
mais dont la gestion des fonctions de base
peut être assurée par cet appareil. Deux
sources extérieures peuvent être ainsi
commandées. Si deux sources extérieures
sont effectivement reliées à l’appareil,
l’attribution de leur rang, 1 et 2, est
automatiquement réalisée par l’appareil.
• Si le fil bleu/blanc de l’appareil est relié à la
prise de commande du relais de l’antenne
motorisée, celle-ci s’étend lorsque la source
est mise en service. Pour rétracter l’antenne,
mettez la source hors service.
Mise hors service de l’appareil
Appuyez, pendant au moins une seconde, sur
SOURCE pour mettre l’appareil hors service.
English
Français
Deutsch
Français
Italiano
Nederlands
02
Section
Page 76

Syntoniseur
Ecoute de la radio
Voici les opérations de base pour l’écoute de la
radio. Le fonctionnement détaillé du
syntoniseur est expliqué à partir de la page 17.
1 Indicateur BAND
Il signale la gamme d’accord choisie, AM ou
FM.
2 Indicateur STEREO (ST)
Il signale que la station émet en
stéréophonie.
3 Indicateur FREQUENCY
Il indique la valeur de la fréquence d’accord.
4 Indicateur PRESET NUMBER
Il indique le numéro de la présélection
choisie.
1 Pour choisir le syntoniseur, appuyez sur
SOURCE.
Appuyez sur SOURCE jusqu’à ce que Tuner
s’affiche.
2 Utilisez VOLUME pour régler le niveau
sonore.
Tournez la commande pour augmenter ou
diminuer le volume.
3 Appuyez sur
BAND pour choisir la gamme.
Appuyez sur BAND jusqu’à ce que la gamme
désirée, FM1, FM2, FM3 en FM ou AM, soit
affichée.
4 Pour effectuer l’accord manuel, appuyez à
intervalles rapprochés sur 2, ou sur 3.
La fréquence augmente ou diminue par pas.
5 Pour effectuer l’accord automatique,
appuyez, pendant environ une seconde, sur 2,
ou sur 3.
Le syntoniseur examine les fréquences jusqu’à
ce que se présente une émission dont la réception
est jugée satisfaisante.
• Vous pouvez arrêter l’accord automatique en
appuyant brièvement sur 2, ou sur 3.
• Si vous maintenez la pression d’un doigt sur
2, ou sur 3, les fréquences sont ignorées.
L’accord automatique ne commence qu’au
moment où vous relâchez la pression sur la
touche.
Remarque
• Si la station émet en stéréophonie, l’indicateur
STEREO (ST) s’éclaire.
1
2
3
4
Fr
16
03
Section
Page 77

Syntoniseur
Fr
17
Introduction au fonctionnement
détaillé du syntoniseur
1 Afficheur FUNCTION
Il indique l’état de la fonction.
1
Appuyez sur OPEN pour ouvrir la face avant.
2 Appuyez sur FUNCTION pour afficher le
nom de chaque fonction.
Appuyez de manière répétée sur FUNCTION
pour choisir une des fonctions suivantes:
BSM (mémoire des meilleures stations)—
LOCAL (accord automatique sur une station
locale)
• Appuyez sur BAND pour revenir à
l’affichage de la fréquence.
Remarque
• Si vous ne réglez aucun paramètre de la fonction
pendant environ 30 secondes, l’afficheur
indique à nouveau la fréquence d’accord.
Mise en mémoire et rappel des
fréquences des stations
Grâce aux touches PRESET TUNING vous pouvez
aisément mettre en mémoire six fréquences
que vous pourrez ultérieurement rappeler par
une simple pression sur la touche convenable.
Lorsque se présente une fréquence que vous
désirez mettre en mémoire, maintenez la
pression d’un doigt sur une des touches
PRESET TUNING jusqu’à ce que le numéro de
la présélection cesse de clignoter.
Le numéro de la touche sur laquelle vous avez
appuyé est affiché par l’indicateur PRESET
NUMBER; il clignote puis il demeure éclairé. La
fréquence de la station de radio est alors en
mémoire.
Lorsque vous appuyez à nouveau sur cette
même touche PRESET TUNING, la fréquence
en mémoire est rappelée.
Remarques
• La mémoire peut contenir 18 fréquences de la
gamme FM, 6 pour chacune des trois bandes,
et 6 fréquences de la gamme AM.
• Vous pouvez également rappeler une
fréquence mise en mémoire grâce aux
touches PRESET TUNING, en appuyant sur
5, ou sur ∞.
1
English
Français
Deutsch
Français
Italiano
Nederlands
03
Section
Page 78

03
Section
Fr
18
Syntoniseur
Accord sur les signaux puissants
L’accord automatique sur une station locale ne
s’intéresse qu’aux émetteurs dont le signal reçu
est suffisamment puissant pour garantir une
réception de bonne qualité.
1
Appuyez sur OPEN
pour ouvrir la face avant.
2 Appuyez sur FUNCTION pour choisir
LOCAL.
Appuyez sur FUNCTION jusqu’à ce que LOCAL
apparaisse sur l’afficheur.
3 Appuyez sur 5 pour mettre en service
l’accord automatique sur les stations locales.
Le niveau de sensibilité pour l’accord automatique
sur les stations locales (par exemple, Local 2)
apparaît sur l’afficheur.
4 Appuyez sur 2, ou sur 3, pour préciser la
sensibilité.
En FM, la sensibilité peut prendre quatre
valeurs; en AM, deux valeurs:
FM: Local 1—Local 2—Local 3—Local 4
AM: Local 1—Local 2
La valeur Local 4 permet la réception des seules
stations très puissantes; les autres valeurs
autorisent, dans l’ordre décroissant, la réception
de stations de moins en moins puissantes.
5 Pour revenir à l’accord automatique
ordinaire, appuyez sur ∞ de façon à mettre
hors service l’accord automatique sur une
station locale.
Local :OFF apparaît sur l’afficheur.
Mise en mémoire des fréquences
des émetteurs les plus puissants
La fonction BSM (Mémoire des meilleures
stations) vous permet d’utiliser les touches
PRESET TUNING 1–6 pour mémoriser les six
fréquences des émetteurs les plus puissants
que vous pouvez ultérieurement rappeler par
une simple pression sur une de ces touches.
1
Appuyez sur OPEN
pour ouvrir la face avant.
2 Appuyez sur FUNCTION
pour choisir BSM.
Appuyez sur
FUNCTION jusqu’à ce que BSM
apparaisse sur l’afficheur.
3 Appuyez sur 5 pour mettre en service
BSM.
BSM clignote. Tandis que BSM clignote, les
fréquences des six émetteurs les plus puissants
sont mises en mémoire, par ordre décroissant
de l’amplitude du signal reçu, grâce aux
touches PRESET TUNING. Cela fait, BSM cesse
de clignoter.
• Pour annuler la mise en mémoire, appuyez
sur ∞.
Remarque
• La mise en mémoire de fréquences à l’aide de
la fonction BSM peut provoquer le remplacement
d’autres fréquences déjà conservées grâce
aux touches PRESET TUNING.
Page 79

04
Section
Lecteur de CD intégré
Fr
19
English
Français
Deutsch
Français
Italiano
Nederlands
Ecoute d’un CD
Voici les opérations de base pour l’écoute d’un
CD à l’aide du lecteur intégré. Le
fonctionnement détaillé du lecteur de CD est
expliqué à partir de la page 20.
1 Indicateur
TRACK NUMBER
Il indique la plage musicale en cours de
lecture.
2 Indicateur
PLAY TIME
Il indique le temps écoulé depuis le début de
la plage musicale en cours de lecture.
1 Appuyez sur
EJECT.
La fente de chargement du CD appparaît.
2 Introduisez un CD dans le logement pour
le CD.
La lecture commence automatiquement.
Logement pour le CD
Touche
EJECT
• Vous pouvez éjecter le CD en appuyant sur
EJECT.
• Si le panneau avant est en position d’éjection
(illustrée ci-dessus), les touches autres que
EJECT, VOLUME, OPEN et ATT (sur le boîtier de
télécommande), sont sans effet.
3 Après avoir introduit un CD, appuyez sur
SOURCE pour choisir le lecteur de CD.
Appuyez sur SOURCE jusqu’à ce que Compact
Disc s’affiche.
4 Utilisez
VOLUME pour régler le niveau
sonore.
Tournez la commande pour augmenter ou
diminuer le volume.
5 Pour déplacer rapidement le capteur dans
un sens ou dans l’autre, maintenez la pression
d’un doigt sur 2, ou sur 3.
6 Pour atteindre la plage précédente ou
suivante, appuyez sur 2, ou sur 3.
Une pression sur
3 permet d’atteindre le début
de la plage suivante.
Une pression sur 2 permet d’atteindre le début
de la plage en cours de lecture. Une nouvelle
pression permet d’atteindre la plage
précédente.
Remarques
• Le lecteur de CD intégré permet la lecture
d’un CD de 12 cm, ou d’un CD de 8 cm
(Single). N’utilisez pas d’adaptateur pour la
lecture des disques de 8 cm.
• N’introduisez aucun objet dans le logement
pour le CD autre qu’un CD.
• Si vous ne parvenez pas à introduire complètement le disque, ou encore si la lecture du
disque ne commence pas après qu’il a été
introduit, assurez-vous que l’étiquette est bien
tournée vers le haut.
Appuyez sur EJECT pour éjecter le disque et
avant de tenter une nouvelle introduction du
disque, assurez-vous qu’il n’est pas endommagé.
• Les touches 5 et ∞ joue un rôle pendant la
lecture d’un fichier MP3 ou WMA.
• Si le lecteur de CD intégré présente une
anomalie, un message d’erreur tel que
ERROR-11 peut s’afficher. Reportez-vous à la
page 55, Signification des messages d’erreur
du lecteur de CD intégré.
21
Page 80

Lecteur de CD intégré
Introduction au fonctionnement
détaillé du lecteur de CD intégré
1 Afficheur FUNCTION
Il indique l’état de la fonction.
1
Appuyez sur OPEN pour ouvrir la face avant.
2 Appuyez sur
FUNCTION pour afficher le
nom de chaque fonction.
Appuyez de manière répétée sur
FUNCTION
pour choisir une des fonctions suivantes:
RPT (répétition de la lecture)—RDM (lecture au
hasard)—T.SCAN (examen du disque)—PAUSE
(pause)
• Appuyez sur BAND pour revenir à l’affichage
des conditions de lecture.
Remarque
• Si vous ne réglez aucun paramètre de la fonction pendant environ 30 secondes, l’afficheur
indique à nouveau les conditions de lecture.
Répétition de la lecture
La répétition de la lecture vous permet
d’écouter à nouveau la même plage musicale.
1
Appuyez sur OPEN
pour ouvrir la face avant.
2 Appuyez sur FUNCTION pour choisir RPT.
Appuyez sur FUNCTION jusqu’à ce que RPT
apparaisse sur l’afficheur.
3 Appuyez sur 5 pour mettre en service la
répétition de la lecture.
Repeat :ON apparaît sur l’afficheur. La plage
musicale en cours de lecture sera ensuite
répétée.
4 Appuyez sur ∞ pour mettre hors service la
répétition de la lecture.
Repeat :OFF apparaît sur l’afficheur. À la fin de
la lecture de la plage musicale commence la
lecture de la plage suivante.
Remarque
• La répétition de la lecture est automatiquement abandonnée dès que commence la
recherche d’une plage musicale ou le
déplacement rapide du capteur dans un sens
ou dans l’autre.
1
Fr
20
04
Section
Page 81

Lecteur de CD intégré
Fr
21
Ecoute des plages musicales
dans un ordre quelconque
Les plages musicales du CD sont joués dans un
ordre quelconque, choisi au hasard.
1
Appuyez sur OPEN pour ouvrir la face avant.
2 Appuyez sur FUNCTION pour choisir RDM
.
Appuyez sur
FUNCTION jusqu’à ce que RDM
apparaisse sur l’afficheur.
3 Appuyez sur 5 pour mettre en service la
lecture au hasard.
Random :ON apparaît sur l’afficheur. Les plages
musicales sont lues dans un ordre quelconque.
4 Appuyez sur ∞ pour mettre hors service la
lecture au hasard.
Random :OFF apparaît sur l’afficheur. Les
plages musicales sont lues dans l’ordre.
Examen du contenu d’un CD
Cette fonction vous permet d’écouter les 10
premières secondes de chaque plage musicale
gravée sur le CD.
1
Appuyez sur OPEN pour ouvrir la face avant.
2 Appuyez sur
FUNCTION pour choisir
T.SCAN
.
Appuyez sur
FUNCTION jusqu’à ce que T.SCAN
apparaisse sur l’afficheur.
3 Appuyez sur 5 pour mettre en service
l’examen du contenu du disque.
Track Scan:ON apparaît sur l’afficheur. Les 10
premières secondes de chaque plage musicale
sont lues.
4 Lorsque la plage musicale que vous
désirez écouter se présente, appuyez sur ∞
pour arrêter l’examen du disque.
Track Scan:OFF apparaît sur l’afficheur. La lec-
ture de la plage musicale se poursuit.
• Si les conditions de lecture se sont à nouveau
affichées d’elles-mêmes, choisissez T.SCAN
une fois encore en appuyant sur FUNCTION.
Remarque
• Lorsque l’examen du disque est terminé, la
lecture normale reprend.
Pause de la lecture d’un CD
La pause est un arrêt momentané de la lecture
du CD.
1
Appuyez sur OPEN pour ouvrir la face avant.
2 Appuyez sur
FUNCTION pour choisir
PAUSE
.
Appuyez sur
FUNCTION jusqu’à ce que PAUSE
apparaisse sur l’afficheur.
3 Appuyez sur 5 pour mettre en service la
pause.
Pause :ON apparaît sur l’afficheur. La lecture de
la plage musicale marque une pause.
4 Appuyez sur ∞ pour mettre hors service la
pause.
Pause :OFF apparaît sur l’afficheur. La lecture
reprend là où elle a été interrompue.
• Une pression sur PAUSE met également la
pause en service ou hors service.
English
Français
Deutsch
Français
Italiano
Nederlands
04
Section
Page 82

Lecteur de CD intégré
Utilisation des fonctions de
titrage des disques
Vous pouvez taper le titre d’un CD et obtenir son
affichage. Lorsque vous introduisez un CD pour
lequel vous avez tapé le titre, ce titre s’affiche.
Frappe du titre d’un disque
Le lecteur de CD intégré peut contenir 48 titres
de disque de 10 caractères.
1 Commandez la lecture du CD dont vous
désirez frapper le titre.
2
Appuyez sur OPEN pour ouvrir la face avant.
3 Maintenez la pression d’un doigt sur
FUNCTION jusqu’à ce que TITLE
apparaisse
sur l’afficheur.
• Dans le cas d’un disque CD TEXT, vous ne
pouvez pas afficher
TITLE. En effet, le titre est
déjà gravé sur le disque CD TEXT.
4 Appuyez sur la touche numéro
1 pour
choisir le type de caractères souhaité.
Appuyez de façon répétée sur la touche numéro
1 pour alterner entre les types de caractères
suivants:
Alphabet (majuscules), Chiffres et symboles—
Alphabet (minuscules)
• Vous pouvez choisir l’entrée de chiffres et de
symboles en appuyant sur la touche numéro 2.
5 Appuyez sur 5, ou sur ∞, pour choisir une
lettre de l’alphabet.
Chaque pression sur 5 provoque l’affichage,
dans l’ordre, d’une lettre
A B C ... X Y Z d’un
chiffre puis d’un symbole 1 2 3 ... @ # <. Chaque
pression sur ∞ provoque l’affichage dans l’or-
dre inverse Z Y X ... C B A.
6 Appuyez sur 3 pour placer le curseur sur
la position suivante.
Lorsque la lettre que vous désirez utiliser est
affichée, appuyez sur 3 pour placer le curseur
sur la position suivante puis choisissez la lettre
suivante. Appuyez sur 2 pour déplacer le
curseur vers le début.
7 Après avoir frappé le titre, placez le
curseur sur la dernière position en appuyant
sur la touche 3.
Lorsque vous appuyez une nouvelle fois sur 3,
le titre frappé est mis en mémoire.
8 Appuyez sur
BAND pour revenir à
l’affichage des conditions de lecture.
Remarques
• Le titre d’un disque est conservé par la
mémoire même après que le disque a été retiré
du lecteur de CD intégré; ce titre est à nouveau
utilisé lorsque le disque est réintroduit.
• Après la mise en mémoire des données concernant 48 disques, toute donnée concernant
un nouveau disque remplace les données les
plus anciennes.
• Si l’installation comporte un lecteur de CD à
chargeur, le nombre de disques que vous
pouvez titrer est porté à 100.
• Si vous raccordez un lecteur multi-CD qui
n’est pas compatible avec la fonction de titre
de disque, vous ne pourrez pas entrer des
titres de disque sur l’appareil.
Fr
22
04
Section
Page 83

Lecteur de CD intégré
Fr
23
Affichage du titre d’un disque
Vous pouvez afficher le titre de tout disque dont
le titre a été mis en mémoire.
1
Appuyez sur OPEN
pour ouvrir la face avant.
2 Appuyez sur DISPLAY.
Appuyez de manière répétée sur DISPLAY pour
passer d’un des paramètres suivants à l’autre:
PLAYBACK MODE A (durée de lecture)—Disc
Title (titre du disque)—PLAYBACK MODE B
(durée de lecture et information DAB)
Lorsque vous choisissez Disc Title, le titre du
disque en cours de lecture s’affiche.
• Si le disque en cours de lecture n’a pas reçu
de titre, NO Title s’affiche.
• Vous ne pouvez passer qu’à la lecture
PLAYBACK MODE B quand un tuner DAB
(GEX-P700DAB) est connecté.
Utilisation des fonctions CD
TEXT
Des informations sont gravées sur certains
disques pendant leur fabrication. Ces informations peuvent être le titre du disque, le nom de
l’interprète ou la durée de la lecture; ces disques sont appelés CD TEXT. Seuls les disques
CD TEXT sont concernés par les fonctions mentionnées ci-dessous.
Affichage du titre d’un disque CD
TEXT
1
Appuyez sur OPEN pour ouvrir la face avant.
2 Appuyez sur DISPLAY
pendant la lecture
du disque CD TEXT.
Appuyez de manière répétée sur
DISPLAY pour
passer d’un des paramètres suivants à l’autre:
PLAYBACK MODE A (durée de lecture)—Disc
Title (titre du disque)—DiscArtist Name (nom de
l’interprète du disque)—Track Title (titre de la
plage musicale)—TrackArtist Name (nom de
l’interprète de la plage musicale)— PLAYBACK
MODE B (durée de lecture et information DAB)
• Si aucune information spécifique n’a été
gravée sur le disque, NO XXXX s’affiche (par
exemple, NO T-Artist Name).
• Vous ne pouvez passer qu’à la lecture
PLAYBACK MODE B quand un tuner DAB
(GEX-P700DAB) est connecté.
Défilement du titre du disque sur
l’afficheur
L’appareil ne peut afficher que les 16 premiers
caractères de Disc Title, DiscArtist Name, Track
Title et TrackArtist Name. Si l’information gravée
comporte plus de 16 caractères, vous pouvez la
faire défiler vers la gauche de manière à en prendre connaissance dans sa totalité.
1
Appuyez sur OPEN pour ouvrir la face avant.
2 Maintenez la pression d’un doigt sur
DISPLAY
jusqu’à ce que le titre commence à
défiler vers la gauche.
La partie masquée du titre s’affiche peu à peu.
English
Français
Deutsch
Français
Italiano
Nederlands
04
Section
Page 84

Lecture MP3/WMA
Ecoute d’un MP3/WMA
Voici les opérations de base pour l’écoute d’un
MP3/WMA à l’aide du lecteur intégré. Le fonctionnement détaillé du lecteur de MP3/WMA est
expliqué à partir de la page 25.
1 Indicateur MP3 (WMA)
Il signale la lecture d’un fichier MP3 (WMA).
2 Indicateur FOLDER NUMBER
Il indique le numéro du dossier en cours de
lecture.
3 Indicateur
PLAY TIME
Il indique le temps écoulé depuis le début de
la plage musicale en cours de lecture.
4 Indicateur
TRACK NUMBER
Il indique la plage musicale (fichier) en cours
de lecture.
1 Appuyez sur EJECT.
La fente de chargement du CD appparaît.
2 Introduisez un CD-ROM dans le logement
pour le CD.
La lecture commence automatiquement.
Logement pour le CD
Touche
EJECT
• Vous pouvez éjecter le CD-ROM en appuyant
sur EJECT.
• Si le panneau avant est en position d’éjection
(illustrée ci-dessus), les touches autres que
EJECT, VOLUME, OPEN et ATT (sur le boîtier de
télécommande), sont sans effet.
3 Après avoir introduit un CD-ROM, appuyez
sur SOURCE pour choisir le lecteur de CD.
Appuyez sur SOURCE jusqu’à ce que Compact
Disc s’affiche.
4 Utilisez VOLUME pour régler le niveau
sonore.
Tournez la commande pour augmenter ou
diminuer le volume.
5
Appuyez sur 5ou∞pour choisir le dossier.
• Vous ne pouvez pas choisir un dossier qui ne
renferme pas de fichier MP3/WMA.
• Appuyez sur ∞ pendant 2 secondes ou plus
pour revenir au dossier 01 (ROOT). Toutefois, si
le dossier 01 (ROOT) ne renferme pas de
fichiers, la lecture commence au dossier 02.
6 Pour déplacer rapidement le capteur dans
un sens ou dans l’autre, maintenez la pression
d’un doigt sur 2, ou sur 3.
• L’avance rapide et le retour rapide s’effectuent
au sein du fichier en cours de lecture. Cette
opération s’annule lorsque le fichier précédent
ou suivant est atteint.
7 Pour atteindre la plage précédente ou
suivante, appuyez sur 2, ou sur 3.
Une pression sur 3 permet d’atteindre le début
de la plage suivante.
Une pression sur 2 permet d’atteindre le début
de la plage en cours de lecture. Une nouvelle
pression permet d’atteindre la plage
précédente.
12 3 4
Fr
24
05
Section
Page 85

Lecture MP3/WMA
Fr
25
Remarques
• Pour la lecture de disques portant des fichiers
MP3 ou WMA et des données audio (CD-DA)
comme c’est le cas des CD-EXTRA et des
MIXED-MODE CD, il faut basculer de
MP3/WMA à CD-DA au moyen de BAND.
• Si vous avez basculé entre la lecture des
fichiers MP3/WMA et des données audio (CDDA), la lecture commence avec la première
plage musicale du disque.
• Le lecteur de CD intégré est conçu pour les
fichiers MP3 et WMA enregistrés sur un CDROM. (Veuillez vous reporter aux pages 56 et
57 pour connaître les supports qui peuvent
être lus.)
• N’introduisez aucun objet dans le logement
pour le CD autre qu’un CD.
• Il peut arriver qu’il y ait un retard entre le com-
mencement de la lecture et l’émission du son,
en particulier lors de la lecture de multi-sessions et d’un grand nombre de dossiers.
Pendant la lecture, l’indication Format Read
s’affiche.
• Si vous ne parvenez pas à introduire complètement le disque, ou encore si la lecture du
disque ne commence pas après qu’il a été
introduit, assurez-vous que l’étiquette est bien
tournée vers le haut. Appuyez sur EJECT pour
éjecter le disque et avant de tenter une nouvelle introduction du disque, assurez-vous
qu’il n’est pas endommagé.
• La lecture s’effectue dans l’ordre des
numéros de fichier. Les dossiers sont sautés
s’ils ne renferment pas de fichiers. (Si le
dossier 01 (ROOT) ne renferme pas de
fichiers, la lecture commence au dossier 02.)
• Lors de la lecture de fichiers enregistrés
comme fichiers VBR (Variable bit Rate), le
temps de lecture ne s’affichera pas correctement lors d’une opération d’avance rapide ou
de retour rapide.
• Si le disque introduit ne renferme pas de
fichiers qui puissent être lus, l’indication No
Audio s’affiche.
• Il n’y a pas de son lors d’une avance rapide ou
d’un retour rapide.
• Si le lecteur de CD intégré présente une
anomalie, un message d’erreur tel que
ERROR-11 peut s’afficher. Reportez-vous à la
page 55, Signification des messages d’erreur
du lecteur de CD intégré.
Introduction du fonctionnement
évolué (MP3/WMA) du lecteur de
CD incorporé
1 Afficheur FUNCTION
Il indique l’état de la fonction.
1
Appuyez sur
OPEN pour ouvrir la face avant.
2 Appuyez sur
FUNCTION pour afficher le
nom de chaque fonction.
Appuyez de manière répétée sur
FUNCTION
pour choisir une des fonctions suivantes:
PMODE (répétition de la lecture)—RDM (lecture
au hasard)—SCAN (examen des dossiers)—
PAUSE (pause)
• Appuyez sur BAND pour revenir à l’affichage
des conditions de lecture.
Remarque
• Si vous ne réglez aucun paramètre de la fonction pendant environ 30 secondes, l’afficheur
indique à nouveau les conditions de lecture.
1
English
Français
Deutsch
Français
Italiano
Nederlands
05
Section
Page 86

Lecture MP3/WMA
Répétition de la lecture
Pour la lecture MP3/WMA, il existe trois plages
de lecture répétée: FOLDER (répétition d’un
dossier), TRK (répétition d’une plage), et DISC
(répétition de toutes les plages).
1
Appuyez sur OPEN
pour ouvrir la face avant.
2 Appuyez sur FUNCTION
pour choisir
PMODE.
Appuyez sur FUNCTION jusqu’à ce que PMODE
apparaisse sur l’afficheur.
3 Appuyez sur 2, ou sur 3 pour choisir le
mode de répétition.
Appuyez sur 2, ou sur 3, jusqu’à ce que le
mode de répétition désiré apparaisse sur
l’afficheur.
• FOLDER – le dossier en cours de lecture est
répété.
• TRK – la plage en cours de lecture est
répétée.
• DISC – le dossier tout entier est répété.
Remarques
• Si vous choisissez un autre dossier pendant la
répétition de la lecture, le mode de répétition
adopté est DISC (répétition totale).
• Si pendant la répétition TRK (répétition d’une
plage musicale), vous recherchez une plage
musicale, ou commandez le déplacement du
capteur dans un sens ou dans l’autre, le mode
de répétition adopté est FOLDER (répétition
d’un dossier).
• Si vous choisissez FOLDER, vous ne pourrez
pas lire les sous-dossiers de ce dossier.
Ecoute des plages musicales
dans un ordre quelconque
Les plages musicales sont jouées dans un ordre
quelconque à l’intérieur du mode de répétition
adopté: F.RANDOM (répétition d’un dossier) ou
RANDOM (répétition totale).
1 Choisissez le mode de répétition.
Reportez-vous sur cette page, Répétition de la
lecture.
2
Appuyez sur OPEN pour ouvrir la face avant.
3 Appuyez sur FUNCTION pour choisir RDM.
Appuyez sur FUNCTION jusqu’à ce que RDM
apparaisse sur l’afficheur.
4 Appuyez sur 5 pour mettre en service la
lecture au hasard.
Random :ON apparaît sur l’afficheur. Les plages
musicales sont lues dans un ordre quelconque
à l’intérieur du mode de répétition adopté:
F.RANDOM (répétition d’un dossier) ou
RANDOM (répétition d’un disque).
5 Appuyez sur ∞ pour mettre hors service la
lecture au hasard.
Random :OFF apparaît sur l’afficheur. Les
plages musicales sont lues dans l’ordre.
Remarque
• Si la plage de lecture est réglée sur la répétition du disque, les plages de tous les dossiers
seront lues dans un ordre au hasard.
Fr
26
05
Section
Page 87

Lecture MP3/WMA
Fr
27
Examen du contenu des dossiers
Si vous avez choisi T.SCAN (répétition d’un
dossier), les 10 premières secondes de chaque
plage musicale du dossier concerné, sont lues.
Si vous avez choisi F.SCAN (répétition totale),
les 10 premières secondes de la première plage
musicale de chaque dossier, sont lues.
1 Choisissez le mode de répétition.
Reportez-vous à la page 26, Répétition de la
lecture.
2
Appuyez sur OPEN pour ouvrir la face avant.
3 Appuyez sur
FUNCTION pour choisir SCAN.
Appuyez sur
FUNCTION jusqu’à ce que SCAN
apparaisse sur l’afficheur.
4 Appuyez sur 5 pour mettre en service
l’examen du contenu des dossiers.
Scan :ON apparaît sur l’afficheur. Les 10
premières secondes de chaque plage musicale
du dossier concerné (ou de la première plage de
chaque dossier) sont lues.
5 Lorsque la plage musicale ou dossier que
vous désirez écouter se présente, appuyez sur
∞ pour arrêter l’examen du dossier.
Scan :OFF apparaît sur l’afficheur. La lecture de
la plage musicale se poursuit.
• Si les conditions de lecture se sont à nouveau
affichées d’elles-mêmes, choisissez SCAN une
fois encore en appuyant sur FUNCTION.
Remarques
• La lecture des introductions s’annule quand
elle revient à la plage (au dossier) où elle a
commencé.
• Pendant la répétition d’une plage musicale,
l’étendue de la lecture passe à la répétition
d’un dossier si la répétition de l’examen du
disque est en service et la répétition de l’exa-
men des plages musicales commence.
Pause de la lecture d’un
MP3/WMA
La pause est un arrêt momentané de la lecture
du MP3/WMA.
1
Appuyez sur OPEN
pour ouvrir la face avant.
2 Appuyez sur FUNCTION pour choisir
PAUSE.
Appuyez sur FUNCTION jusqu’à ce que PAUSE
apparaisse sur l’afficheur.
3 Appuyez sur 5 pour mettre en service la
pause.
Pause :ON apparaît sur l’afficheur. La lecture de
la plage musicale marque une pause.
4 Appuyez sur ∞ pour mettre hors service la
pause.
Pause :OFF apparaît sur l’afficheur. La lecture
reprend là où elle a été interrompue.
• Une pression sur PAUSE met également la
pause en service ou hors service.
Affichage du titre d’un disque
MP3/WMA
1
Appuyez sur
OPEN pour ouvrir la face avant.
2 Appuyez sur DISPLAY pendant la lecture
du disque MP3/WMA.
Appuyez de manière répétée sur DISPLAY pour
passer d’un des paramètres suivants à l’autre:
PLAYBACK MODE A (temps de lecture)—Folder
Name (nom de dossier)—File Name (nom de
fichier)—Track Title (titre de plage)—Artist
Name (nom de l’artiste)—Album Title (titre de
l’album)—BIT RATE (débit)—PLAYBACK MODE
B (Temps de lecture et informations DAB)
English
Français
Deutsch
Français
Italiano
Nederlands
05
Section
Page 88

Lecture MP3/WMA
• Lors de la lecture de fichiers enregistrés
comme fichiers VBR (Variable bit Rate), la
valeur de BIT RATE ne s’affiche pas même si
vous commutez sur BIT RATE.
• Si aucune information spécifique n’a été
gravée sur le MP3/WMA, NO XXXX s’affiche
(par exemple, NO Artist Name).
• Avec certaines applications utilisées pour
coder les fichiers WMA, les noms d’album et les
autres informations de texte peuvent ne pas être
affichés correctement.
• Vous ne pouvez passer qu’à la lecture
PLAYBACK MODE B quand un tuner DAB
(GEX-P700DAB) est connecté.
Défilement du titre du disque sur
l’afficheur
L’appareil ne peut afficher que les 16 premiers
caractères de Folder Name, File Name, Track
Title, Artist Name et Album Title. Si l’information
gravée comporte plus de 16 caractères, vous
pouvez la faire défiler vers la gauche de manière
à en prendre connaissance dans sa totalité.
1
Appuyez sur OPEN pour ouvrir la face avant.
2 Maintenez la pression d’un doigt sur
DISPLAY jusqu’à ce que le titre commence à
défiler vers la gauche.
La partie masquée du titre s’affiche peu à peu.
Fr
28
05
Section
Page 89

Lecteur de CD à chargeur
Fr
29
Ecoute d’un CD
Vous pouvez utiliser cet appareil pour commander
un lecteur de CD à chargeur, vendu séparément.
Voici les opérations de base pour l’écoute d’un
CD à l’aide du lecteur de CD à chargeur. Le
fonctionnement détaillé du lecteur de CD à
chargeur est expliqué à partir de la page 30.
1 Indicateur DISC NUMBER
Il indique le disque en cours de lecture.
2 Indicateur PLAY TIME
Il indique le temps écoulé depuis le début de
la plage musicale en cours de lecture.
3 Indicateur TRACK NUMBER
Il indique la plage musicale en cours de
lecture.
1 Appuyez sur SOURCE pour choisir le
lecteur de CD à chargeur.
Appuyez sur SOURCE jusqu’à ce que Multi-CD
s’affiche.
2 Utilisez
VOLUME pour régler le niveau
sonore.
Tournez la commande pour augmenter ou
diminuer le volume.
3 Choisissez le disque que vous désirez
écouter au moyen des touches
1 à 6.
Pour les disques occupant les positions 1 à 6,
appuyez simplement sur la touche
correspondante.
Pour les disques occupant les positions 7 à 12,
maintenez la pression d’un doigt sur la touche
correspondante, c’est-à-dire sur la touche 1
pour le disque 7, et ainsi de suite, jusqu’à ce
que le numéro du disque s’affiche.
• Vous pouvez également utiliser les touches
5/∞ pour choisir les disques dans l’ordre.
4 Pour déplacer rapidement le capteur dans
un sens ou dans l’autre, maintenez la pression
d’un doigt sur
2, ou sur 3.
5 Pour atteindre la plage précédente ou
suivante, appuyez sur 2, ou sur 3.
Une pression sur 3 permet d’atteindre le début
de la plage suivante. Une pression sur 2 permet d’atteindre le début de la plage en cours de
lecture. Une nouvelle pression permet
d’atteindre la plage précédente.
Remarques
• Ready s’affiche tandis que le lecteur de CD à
chargeur procède aux opérations préalables à
la lecture.
• Si le lecteur de CD à chargeur présente une
anomalie, un message d’erreur tel que
ERROR-11 peut s’afficher. Reportez-vous au
mode d’emploi du lecteur de CD à chargeur.
• L’indication NO DISC s’affiche si le lecteur de
CD à chargeur ne contient aucun disque.
Lecteur de CD 50 disques
Seules les fonctions mentionnées dans ce mode
d’emploi sont prises en compte par les lecteurs de
CD 50 disques.
123
English
Français
Deutsch
Français
Italiano
Nederlands
06
Section
Page 90
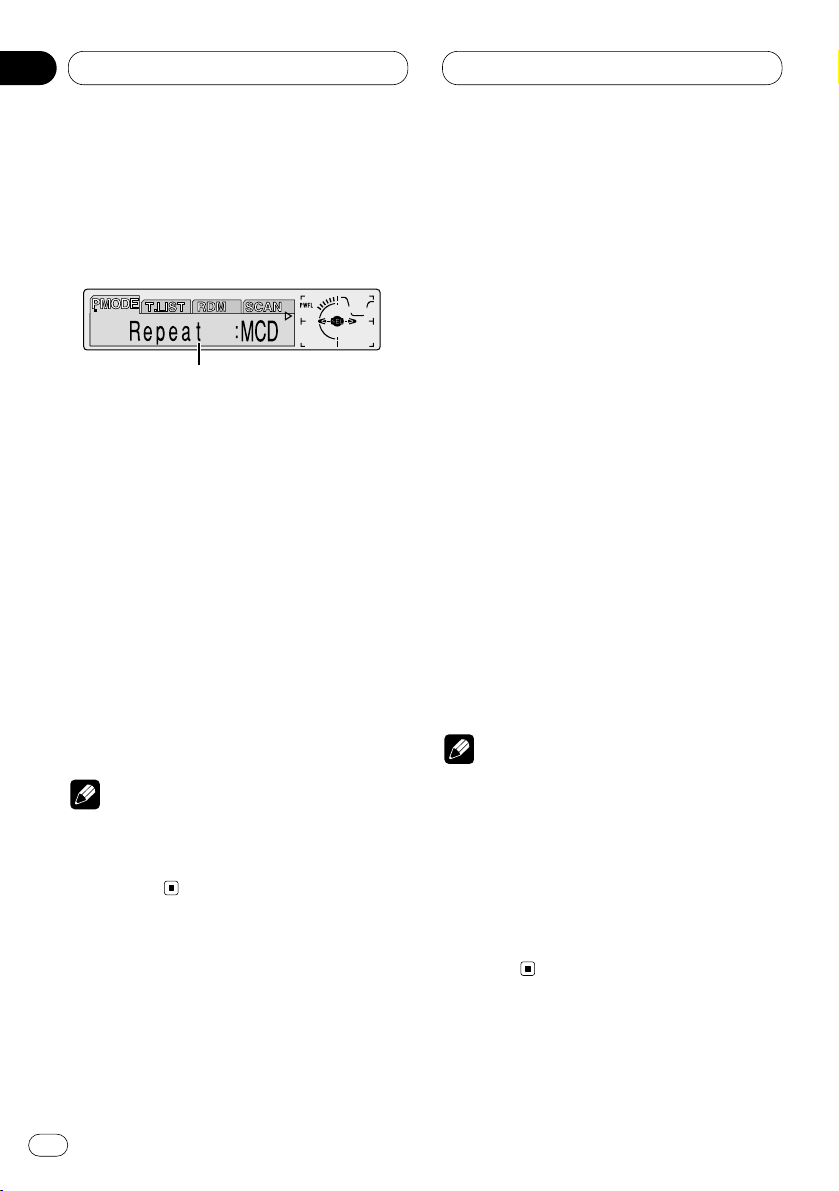
Lecteur de CD à chargeur
Introduction au fonctionnement
détaillé du lecteur de CD à
chargeur
1 Afficheur FUNCTION
Il indique l’état de la fonction.
1
Appuyez sur OPEN pour ouvrir la face avant.
2 Appuyez sur FUNCTION pour afficher le
nom de chaque fonction.
Appuyez de manière répétée sur FUNCTION
pour choisir une des fonctions suivantes:
PMODE (répétition de la lecture)—T.LIST (liste
des titres des disques)—RDM (lecture au
hasard)—SCAN (examen des disques)—ITS-P
(lecture ITS)—PAUSE (pause)—COMP
(compression et DBE)
• Appuyez sur BAND pour revenir à l’affichage
des conditions de lecture.
Remarque
• Si vous ne réglez aucun paramètre de la
fonction pendant environ 30 secondes,
l’afficheur indique à nouveau les conditions
de lecture.
Répétition de la lecture
Trois modes de répétition sont prévus pour les
disques du lecteur de CD à chargeur: MCD
(répétition des disques que contient le lecteur),
TRK (répétition d’une plage musicale) et DISC
(répétition d’un disque).
1
Appuyez sur OPEN
pour ouvrir la face avant.
2 Appuyez sur FUNCTION
pour choisir
PMODE.
Appuyez sur FUNCTION jusqu’à ce que PMODE
apparaisse sur l’afficheur.
3 Appuyez sur 2, ou sur 3 pour choisir le
mode de répétition.
Appuyez sur 2, ou sur 3, jusqu’à ce que le
mode de répétition désiré apparaisse sur
l’afficheur.
• MCD — Répétition des disques que contient
le lecteur
• TRK — Répétition de la plage musicale en
cours de lecture
• DISC — Répétition du disque en cours de
lecture
Remarques
• Si vous choisissez un autre disque pendant la
répétition de la lecture, le mode de répétition
adopté est MCD (répétition des disques que
contient le lecteur).
• Si pendant la répétition TRK (répétition d’une
plage musicale), vous recherchez une plage
musicale, ou commandez le déplacement du
capteur dans un sens ou dans l’autre, le mode
de répétition adopté est DISC (répétition d’un
disque).
1
Fr
30
06
Section
Page 91

Lecteur de CD à chargeur
Fr
31
Ecoute des plages musicales
dans un ordre quelconque
Les plages musicales sont jouées dans un ordre
quelconque à l’intérieur du mode de répétition
adopté: RANDOM (répétition des disques que
contient le lecteur) ou D.RANDOM (répétition
d’un disque).
1 Choisissez le mode de répétition.
Reportez-vous à la page 30, Répétition de la
lecture.
2
Appuyez sur OPEN pour ouvrir la face avant.
3 Appuyez sur
FUNCTION pour choisir RDM.
Appuyez sur
FUNCTION jusqu’à ce que RDM
apparaisse sur l’afficheur.
4 Appuyez sur 5 pour mettre en service la
lecture au hasard.
Random :ON apparaît sur l’afficheur. Les plages
musicales sont lues dans un ordre quelconque
à l’intérieur du mode de répétition adopté:
RANDOM (répétition des disques que contient le
lecteur) ou D.RANDOM (répétition d’un disque).
5 Appuyez sur ∞ pour mettre hors service la
lecture au hasard.
Random :OFF apparaît sur l’afficheur. Les
plages musicales sont lues dans l’ordre.
Examen du contenu des disques
Si vous avez choisi T.SCAN (répétition d’un
disque), les 10 premières secondes de chaque
plage musicale du disque concerné, sont lues.
Si vous avez choisi
D.SCAN (répétition des
disques que contient le lecteur), les 10
premières secondes de la première plage
musicale de chaque disque, sont lues.
1 Choisissez le mode de répétition.
Reportez-vous à la page 30, Répétition de la
lecture.
2
Appuyez sur OPEN pour ouvrir la face avant.
3 Appuyez sur FUNCTION pour choisir SCAN
.
Appuyez sur
FUNCTION jusqu’à ce que SCAN
apparaisse sur l’afficheur.
4 Appuyez sur 5 pour mettre en service
l’examen du contenu du disque.
Scan :ON apparaît sur l’afficheur. Les 10
premières secondes de chaque plage musicale
du disque concerné (ou de la première plage de
chaque disque) sont lues.
5 Lorsque la plage musicale ou disque que
vous désirez écouter se présente, appuyez sur
∞ pour arrêter l’examen du disque.
Scan :OFF apparaît sur l’afficheur. La lecture de
la plage musicale se poursuit.
• Si les conditions de lecture se sont à nouveau
affichées d’elles-mêmes, choisissez SCAN une
fois encore en appuyant sur FUNCTION.
Remarque
• Lorsque l’examen du disque, ou des disques,
est terminé, la lecture normale des plages
musicales reprend.
Pause de la lecture d’un CD
La pause est un arrêt momentané de la lecture
du CD.
1
Appuyez sur OPEN pour ouvrir la face avant.
2 Appuyez sur FUNCTION pour choisir
PAUSE.
Appuyez sur FUNCTION jusqu’à ce que PAUSE
apparaisse sur l’afficheur.
English
Français
Deutsch
Français
Italiano
Nederlands
06
Section
Page 92

Lecteur de CD à chargeur
3 Appuyez sur 5 pour mettre en service la
pause.
Pause :ON apparaît sur l’afficheur. La lecture de
la plage musicale marque une pause.
4 Appuyez sur ∞ pour mettre hors service la
pause.
Pause :OFF apparaît sur l’afficheur. La lecture
reprend là où elle a été interrompue.
• Une pression sur PAUSE met également la
pause en service ou hors service.
Utilisation de la programmation
en temps réel (ITS)
La programmation en temps réel (ITS) vous donne
le moyen d’établir la liste de vos plages musicales
favorites parmi toutes celles que contiennent les
disques du lecteur de CD à chargeur. Lorsque la
liste est terminée, il vous suffit de mettre en service
la fonction ITS pour n’écouter que les plages
appartenant à cette liste.
Création d’une liste par programmation
en temps réel (ITS)
Vous pouvez utiliser la fonction ITS pour choisir
99 plages musicales par disque sur un total de
100 disques (avec titre). (Avec les lecteurs de
multi-CD vendus avant le CDX-P1250 et le CDXP650, vous pouvez enregistrer un maximum de
24 plages dans la liste de lecture.)
1 Commandez la lecture du disque concerné
par la programmation.
Appuyez sur 5, ou sur ∞, pour choisir un CD.
2
Appuyez sur OPEN pour ouvrir la face avant.
3 Maintenez la pression d’un doigt sur
FUNCTION jusqu’à ce que TITLE apparaisse
sur l’afficheur puis appuyez sur FUNCTION
pour choisir ITS.
Lorsque
TITLE est affiché, appuyez de manière
répétée sur FUNCTION pour afficher les
fonctions suivantes:
TITLE (frappe du titre d’un disque)—ITS
(programmation en temps réel)
4 Choisissez la plage musicale en appuyant
sur 2, ou sur 3.
5 Appuyez sur 5 pour introduire la plage
musicale dans la liste.
ITS Input s’affiche brièvement et la plage musi-
cale sélectionnée est ajoutée à la liste. ITS
apparaît une nouvelle fois sur l’afficheur.
6 Appuyez sur BAND pour revenir à
l’affichage des conditions de lecture.
Remarque
• Après la mise en mémoire des données concernant 100 disques, toute donnée concernant un nouveau disque remplace les données les plus anciennes.
Lecture commandée par la liste ITS
ITS vous donne le moyen de n’entendre que les
plages musicales qui appartiennent à la liste
établie. Lorsque vous mettez en service la
fonction ITS, la lecture des plages musicales
des disques du lecteur de CD à chargeur qui
figurent sur la liste, commence.
1 Choisissez le mode de répétition.
Reportez-vous à la page 30, Répétition de la
lecture.
2
Appuyez sur OPEN pour ouvrir la face avant.
3 Appuyez sur FUNCTION pour choisir ITS-P.
Appuyez sur
FUNCTION jusqu’à ce que ITS-P
apparaisse sur l’afficheur.
Fr
32
06
Section
Page 93

06
Section
Lecteur de CD à chargeur
Fr
33
English
Français
Deutsch
Français
Italiano
Nederlands
4 Appuyez sur 5 pour mettre en service IT-S
.
ITS Play :ON apparaît sur l’afficheur.
Commence alors la lecture des plages musicales
de la liste établie en tenant compte du mode de
répétition MCD (répétition des disques que
contient le lecteur) ou DISC (répétition d’un
disque).
• Si le mode de répétition actuel ne contient
aucune plage musicale programmée à l’aide de
la fonction ITS, ITS Empty s’affiche.
5 Appuyez sur ∞ pour mettre hors service
ITS.
ITS Play :OFF apparaît sur l’afficheur. La lecture
se poursuit, dans l’ordre normal et à partir de la
plage musicale en cours.
Suppression d’une plage musicale sur
la liste ITS
Pour supprimer la référence à une plage musicale
de la liste ITS, il faut que la fonction ITS soit en
service.
Si ITS est déjà en service, passez à l’opération 3.
Si ITS n’est pas en service, appuyez sur
FUNCTION.
1 Commandez la lecture du CD pour lequel
la plage musicale doit être effacée, puis mettez
en service la fonction ITS.
Reportez-vous à la page 32, Lecture commandée
par la liste ITS.
2
Appuyez sur OPEN pour ouvrir la face avant.
3 Maintenez la pression d’un doigt sur
FUNCTION jusqu’à ce que TITLE apparaisse
sur l’afficheur puis appuyez sur FUNCTION
pour choisir ITS.
Lorsque TITLE est affiché, appuyez sur
FUNCTION jusqu’à ce que ITS apparaisse sur
l’afficheur.
4 Choisissez la plage musicale en appuyant
sur 2, ou sur 3.
5 Appuyez sur ∞ pour supprimer la plage
musicale de la liste.
La référence à la plage musicale sélectionnée
est supprimée de la liste et la lecture
commence au début de la plage musicale
suivante de la liste.
• Si le mode de répétition actuel ne contient
aucune plage musicale programmée à l’aide de
la fonction ITS, ITS Empty s’affiche et la lecture
normale reprend.
6 Appuyez sur BAND pour revenir à
l’affichage des conditions de lecture.
Suppression d’un CD de la liste ITS
Pour supprimer la référence à toutes les plages
musicales d’un CD de la liste ITS, il faut que la
fonction ITS hors en service.
1 Commandez la lecture du CD qui doit être
supprimé de la liste.
Appuyez sur 5, ou sur ∞, pour choisir le CD.
2
Appuyez sur OPEN
pour ouvrir la face avant.
3 Maintenez la pression d’un doigt sur
FUNCTION jusqu’à ce que TITLE apparaisse
sur l’afficheur puis appuyez sur FUNCTION
pour choisir ITS.
Lorsque TITLE est affiché, appuyez sur FUNCTION
jusqu’à ce que ITS apparaisse sur l’afficheur.
4 Appuyez sur ∞ pour supprimer de la liste
ITS la référence à toutes les plages musicales
du CD en cours de lecture.
La référence à toutes les plages musicales du
CD en cours de lecture est supprimée et ITS
Clear s’affiche.
5 Appuyez sur BAND pour revenir à
l’affichage des conditions de lecture.
Page 94

06
Section
Lecteur de CD à chargeur
Utilisation des fonctions de
titrage des disques
Vous pouvez taper le titre d’un CD et obtenir son
affichage. La prochaine fois que vous insérerez
un CD pour lequel vous avez entré un titre, le
titre de ce CD s’affichera.
Frappe du titre d’un disque
Le lecteur de CD à chargeur peut contenir 100
titres de disque de 10 caractères (avec liste ITS).
1 Commandez la lecture du CD dont vous
désirez frapper le titre.
Appuyez sur 5, ou sur ∞, pour choisir le CD.
2
Appuyez sur OPEN pour ouvrir la face avant.
3 Maintenez la pression d’un doigt sur
FUNCTION jusqu’à ce que
TITLE apparaisse
sur l’afficheur.
Lorsque
TITLE est affiché, appuyez de manière
répétée sur FUNCTION pour afficher les
fonctions suivantes:
TITLE (frappe du titre d’un disque)—
ITS (programmation en temps réel)
• Dans le cas d’un disque CD TEXT et d’un
lecteur de CD à chargeur compatible CD TEXT,
vous ne pouvez pas afficher TITLE. En effet, le
titre est déjà gravé sur le disque CD TEXT.
4 Appuyez sur la touche numéro
1 pour
choisir le type de caractères souhaité.
Appuyez de façon répétée sur la touche numéro 1 pour
alterner entre les types de caractères suivants:
Alphabet (majuscules), Chiffres et symboles—
Alphabet (minuscules)
• Vous pouvez choisir l’entrée de chiffres et de
symboles en appuyant sur la touche numéro 2.
5 Appuyez sur 5, ou sur ∞, pour choisir une
lettre de l’alphabet.
Chaque pression sur 5 provoque l’affichage, dans
l’ordre, d’une lettre
A B C ... X Y Z d’un chiffre puis
d’un symbole 1 2 3 ... @ # <. Chaque pression sur
∞ provoque l’affichage dans l’ordre inverse Z Y X ...
C B A.
6 Appuyez sur 3 pour placer le curseur sur
la position suivante.
Lorsque la lettre que vous désirez utiliser est
affichée, appuyez sur 3 pour placer le curseur
sur la position suivante puis choisissez la lettre
suivante. Appuyez sur 2 pour déplacer le
curseur vers le début.
7 Après avoir frappé le titre, placez le
curseur sur la dernière position en appuyant
sur la touche 3.
Lorsque vous appuyez une nouvelle fois sur 3, le
titre frappé est mis en mémoire.
8 Appuyez sur
BAND pour revenir à
l’affichage des conditions de lecture.
Remarques
• Le titre d’un disque est conservé par la
mémoire même après que le disque a été
retiré du chargeur; ce titre est à nouveau
utilisé lorsque le disque est réintroduit.
• Après la mise en mémoire des données concernant 100 disques, toute donnée concernant
un nouveau disque remplace les données les
plus anciennes.
Affichage du titre d’un disque
Vous pouvez afficher le titre de tout disque dont
le titre a été mis en mémoire.
1
Appuyez sur OPEN pour ouvrir la face avant.
2 Appuyez sur DISPLAY.
Appuyez de manière répétée sur DISPLAY pour
passer d’un des paramètres suivants à l’autre:
PLAYBACK MODE A (durée de lecture)—Disc
Title (titre du disque)—PLAYBACK MODE B
(durée de lecture et information DAB)
Lorsque vous choisissez Disc Title, le titre du
disque en cours de lecture s’affiche.
En
34
Page 95

Lecteur de CD à chargeur
Fr
35
• Si le disque en cours de lecture n’a pas reçu
de titre, NO Title s’affiche.
• Vous ne pouvez passer qu’à la lecture
PLAYBACK MODE B quand un tuner DAB
(GEX-P700DAB) est connecté.
Choix d’un disque sur la liste des titres
Vous pouvez choisir un disque sur la liste des
titres des disques que contient le lecteur de CD
à chargeur, puis commander la lecture du
disque.
1
Appuyez sur OPEN pour ouvrir la face avant.
2 Appuyez sur FUNCTION pour choisir T.LIST.
Appuyez sur FUNCTION jusqu’à ce que T.LIST
apparaisse sur l’afficheur.
3 Appuyez sur 2, ou sur 3, pour faire défiler
la liste des titres mis en mémoire.
• Si un disque ne porte pas de titre, NO D-TITLE
s’affiche.
4 Appuyez sur 5 pour commander la lecture
du disque choisi.
La lecture du disque sélectionné commence.
Utilisation des fonctions CD
TEXT
Vous ne pouvez utiliser ces fonctions que si le
lecteur de CD à chargeur est compatible CD TEXT.
Des informations sont gravées sur certains
disques pendant leur fabrication. Ces informations peuvent être le titre du disque, le nom de
l’interprète ou la durée de la lecture; ces disques sont appelés CD TEXT. Seuls les disques
CD TEXT sont concernés par les fonctions mentionnées ci-dessous.
Affichage du titre d’un disque CD TEXT
1
Appuyez sur OPEN pour ouvrir la face avant.
2 Appuyez sur DISPLAY pendant la lecture
du disque CD TEXT par le lecteur de CD à
chargeur.
Appuyez de manière répétée sur DISPLAY pour
passer d’un des paramètres suivants à l’autre:
PLAYBACK MODE A (durée de lecture)—Disc
Title (titre du disque)—DiscArtist Name (nom de
l’interprète du disque)—Track Title (titre de la
plage musicale)—TrackArtist Name (nom de
l’interprète de la plage musicale)—PLAYBACK
MODE B (durée de lecture et information DAB)
• Si aucune information spécifique n’a été
gravée sur le disque, NO XXXX s’affiche (par
exemple, NO T-Artist Name).
• Vous ne pouvez passer qu’à la lecture
PLAYBACK MODE B quand un tuner DAB
(GEX-P700DAB) est connecté.
Défilement du titre du disque sur
l’afficheur
L’appareil ne peut afficher que les 16 premiers
caractères de Disc Title, DiscArtist Name, Track
Title et TrackArtist Name. Si l’information gravée
comporte plus de 16 caractères, vous pouvez la
faire défiler vers la gauche de manière à en
prendre connaissance dans sa totalité.
1
Appuyez sur OPEN pour ouvrir la face avant.
2 Maintenez la pression d’un doigt sur
DISPLAY jusqu’à ce que le titre commence à
défiler vers la gauche.
La partie masquée du titre s’affiche peu à peu.
English
Français
Deutsch
Français
Italiano
Nederlands
06
Section
Page 96

Lecteur de CD à chargeur
Utilisation de la compression et
de l’accentuation dynamique des
graves
Vous pouvez utiliser ces fonctions lorsque le
lecteur de CD à chargeur en est pourvu.
La compression (COMP) et l’accentuation
dynamique des graves (DBE) permettent un
réglage précis des sons fournis par le lecteur de
CD à chargeur. Chaque fonction possède deux
niveaux de réglage. La compression (COMP)
réduit l’écart pouvant exister entre les sons
puissants et les sons faibles et agit pour les
niveaux d’écoute plutôt élevés. L’accentuation
dynamique des graves (DBE) donne des sons
plus amples. Faites l’essai de chacune de ces
corrections puis choisissez, pour chaque
disque, celle qui donne le meilleur effet.
1
Appuyez sur OPEN pour ouvrir la face avant.
2 Appuyez sur FUNCTION pour choisir COMP.
Appuyez sur FUNCTION jusqu’à ce que COMP
apparaisse sur l’afficheur.
• Si le lecteur de CD à chargeur ne possède la
fonction COMP/DBE, No Comp. s’affiche quand
vous cherchez à utilisez la compression
(COMP).
3 Appuyez sur 5, ou sur ∞, pour choisir la
correction désirée.
Appuyez de manière répétée sur 5, ou sur ∞ ,
pour passer d’un des paramètres suivants à
l’autre:
Comp. OFF—Comp. 1—Comp. 2—Comp. OFF—
DBE 1—DBE 2
Fr
36
06
Section
Page 97

Réglages sonores
Fr
37
Introduction aux réglages
sonores
1 Afficheur AUDIO
Il indique l’état des réglages sonores.
2 Indicateur PRESET EQ
Il indique la courbe d’égalisation actuellement sélectionnée.
3 Indicateur ASL
Il indique le réglage automatique du niveau
sonore.
1
Appuyez sur OPEN pour ouvrir la face avant.
2 Appuyez sur AUDIO pour afficher le nom
des fonctions audio.
Appuyez de manière répétée sur AUDIO pour
choisir une des fonctions suivantes:
Fad (réglage de la balance)—EQ (réglage fin de
la courbe d’égalisation)—Bass (graves)—Treble
(aigus)—Loud (correction physiologique)—Sub-
W1 (haut-parleur d’extrêmes graves 1)/NonFad
(marche/arrêt de sortie de ligne préamplifiée)—
Sub-W2 (haut-parleur d’extrêmes graves
2)/NonFad (réglage de sortie de ligne préamplifiée)—HPF (filtre passe haut)—SLA (réglage du
niveau sonore de la source)—ASL (réglage
automatique du niveau sonore)
• Lorsque le réglage du contrôleur de hautparleur d’extrêmes graves a seulement pour
valeur S.W Control:EXT, vous ne pouvez pas
mettre en service Sub-W1. (Reportez-vous à la
page 46.)
• Vous ne pouvez sélectionner Sub-W2 que si la
sortie pour le haut-parleur d’extrêmes graves a
été mise en service par Sub-W1.
• Lorsque le contrôleur du haut-parleur d’ex-
trêmes graves est réglé uniquement sur S.W
Control:EXT, vous pouvez régler le mode de
marche/arrêt de sortie de ligne préamplifiée.
(Reportez-vous page 46.)
• Vous ne pouvez choisir le mode de réglage de
sortie de ligne préamplifiée que si la sortie de
ligne préamplifiée est en service en mode de
marche/arrêt de sortie de ligne préamplifiée.
• Si le syntoniseur FM a été choisi comme
source, vous ne pouvez pas afficher la fonction
SLA.
• Pour revenir à l’affichage de lecture, appuyez
sur BAND.
Remarque
• Si vous ne réglez aucun paramètre de la fonction pendant environ 30 secondes, l’afficheur
indique à nouveau l’état de la source.
123
English
Français
Deutsch
Français
Italiano
Nederlands
07
Section
Page 98

07
Section
Fr
38
Réglages sonores
Réglage de l’égaliseur de
focalisation sonore
En clarifiant l’image sonore des voix et des
instruments il permet une mise en scène simple
d’un environnement sonore naturel et plaisant.
Un plaisir d’écoute encore plus grand sera
obtenu si la position d’écoute est choisie avec
attention.
• FRT1 accentue les aigus de la sortie avant et
les graves de la sortie arrière.
FRT2 accentue les aigus et les graves de la
sortie avant et les graves de la sortie arrière.
(L’accentuation des graves est la même pour
l’avant et l’arrière.)
Pour FRT1 et FRT2 le réglage H offre un effet
plus prononcé que le réglage L.
1 Maintenez la pression d’un doigt sur
EQ jusqu’à ce que
SFEQ OFF apparaisse sur
l’afficheur.
2 Appuyez sur
EQ pour choisir le mode SFEQ
souhaité.
FRT1-H (avant 1-fort)—FRT1-L (avant 1-faible)—
FRT2-H (avant 2-fort)—FRT2-L (avant 2-faible)—
CUSTOM (personnalisé)—SFEQ OFF (hors service)
3 Appuyez sur 2 ou 3 pour choisir la position
souhaitée.
LEFT (gauche)—CENTER (centre)—RIGHT
(droite)
Remarques
• Si vous ajustez les graves ou les aigus,
CUSTOM mémorise un mode SFEQ pour
lequel les graves et les aigus sont ajustés à
votre goût.
• Si vous changez le mode SFEQ, la fonction
H.P.F. est mis automatiquement hors service.
En mettant en service la fonction H.P.F. après
avoir choisi le mode SFEQ, vous pouvez
utiliser de façon combinée la fonction H.P.F. et
le mode SFEQ.
Réglage de l’équilibre sonore
Vous pouvez régler l’équilibre avant-arrière et
droite-gauche de manière que l’écoute soit
optimale quel que soit le siège occupé.
1
Appuyez sur OPEN pour ouvrir la face avant.
2 Appuyez sur AUDIO pour choisir Fad
.
Appuyez sur
AUDIO jusqu’à ce que Fad
apparaisse sur l’afficheur.
• Si le réglage de l’équilibre sonore a déjà été
effectué, Bal s’affiche.
3 Appuyez sur 5, ou sur ∞, pour régler
l’équilibre sonore entre les haut-parleurs
avant et arrière.
Chaque pression sur 5, ou sur ∞, modifie
l’équilibre sonore entre les haut-parleurs avant
et arrière.
•
Fad F 15 – Fad R 15 sont les valeurs extrêmes
qui s’affichent tandis que l’équilibre entre les
haut-parleurs avant et arrière varie.
• Fad F/R 0 est le réglage convenable dans le
cas où seulement deux haut-parleurs sont
utilisés.
• Quand le réglage de la sortie arrière est Rear
SP:S.W, vous ne pouvez pas régler l’équilibre
entre les haut-parleurs avant et arrière.
Reportez-vous à la page 46, Réglage de la sortie
arrière et du contrôleur de l’enceinte d’extrêmes
graves.
4 Appuyez sur 2, ou sur 3, pour régler
l’équilibre entre les haut-parleurs gauche et
droit.
Lorsque vous appuyez sur 2, ou sur 3, Bal L/R 0
s’affiche.
Chaque pression sur 2, ou sur 3, modifie
l’équilibre sonore entre les haut-parleurs
gauche et droit.
• Bal L 9 – Bal R 9 sont les valeurs extrêmes qui
s’affichent tandis que l’équilibre entre les hautparleurs gauche et droit varie.
Page 99

07
Section
Réglages sonores
Fr
39
English
Français
Deutsch
Français
Italiano
Nederlands
Utilisation de l’égaliseur
L’égaliseur graphique vous permet de corriger
les caractéristiques sonores de l’habitacle du
véhicule en fonction de vos goûts.
Rappel d’une courbe d’égalisation
La mémoire contient sept courbes d’égalisation
que vous pouvez utiliser à n’importe quel
moment. Voici la liste de ces six courbes:
Indication affichée Courbe d’égalisation
SUPER BASS (S.BASS) Accentuation des graves
POWERFUL (PWFL) Accentuation de la
puissance
NATURAL (NTRL) Sonorité naturelle
VOCAL (VOCAL) Chant
CUSTOM1, 2 (CSTM1 (2)) Correction personnelle
1, 2
FL AT ( FLAT ) Absence de correction
• CUSTOM1 et CUSTOM2 sont des courbes
d’égalisation ajustables.
• Une courbe CUSTOM1 séparée peut être
créée pour chaque source. (Le lecteur de CD
intégré et le lecteur de CD à changeur sont
réglés automatiquement sur le même réglage
d’ajustement de courbe d’égalisation.)
• Si vous réalisez un ajustement quand une
autre courbe que CUSTOM2 est choisie, les
réglages de la courbe d’égalisation sont
mémorisés sur CUSTOM1.
• Une courbe CUSTOM2 peut être créée en
commun pour toutes les sources.
• Si vous réalisez un ajustement lorsque
CUSTOM2 est choisi, la courbe CUSTOM2 est
mise à jour.
• Si vous choisissez FLAT, aucune correction
n’est apportée aux sons. Cette courbe est utile
pour apprécier l’effet d’une autre courbe en
basculant alternativement de la courbe FLAT à
la courbe considérée.
Appuyez sur
EQ pour choisir l’égaliseur.
Appuyez de façon répétée sur EQ pour commuter entre les réglages d’égaliseur suivants.
SUPER BASS—POWERFUL—NATURAL—
VOCAL—CUSTOM1—CUSTOM2—FLAT
Réglage des courbes d’égalisation
Vous pouvez modifier comme bon vous semble
la courbe d’égalisation présentement choisie.
Les réglages de courbe d’égalisation sont
enregistrés en mémoire sous CUSTOM1 ou
CUSTOM2.
1
Appuyez sur OPEN pour ouvrir la face avant.
2 Appuyez sur AUDIO
pour choisir le mode
d’égaliseur.
Appuyez sur
AUDIO jusqu’à ce que EQ-Low/EQ-
Mid/EQ-High apparaisse sur l’afficheur.
3 Choisissez la bande de l’égaliseur que
vous souhaitez régler avec 2/3.
EQ-Low (grave)—EQ-Mid (médium)—EQ-High
(aigu)
4 Appuyez sur 5, ou sur ∞, pour régler la
courbe d’égalisation.
Chaque pression sur 5, ou sur ∞, augmente ou
diminue l’amplitude de la courbe d’égalisation.
• +6 – –6 sont les valeurs extrêmes que peut
prendre l’égalisation tandis qu’elle augmente
ou diminue.
Remarque
• Si vous modifiez une courbe d’égalisation
autre que CUSTOM2, la courbe CUSTOM1 set
mise à jour.
Page 100
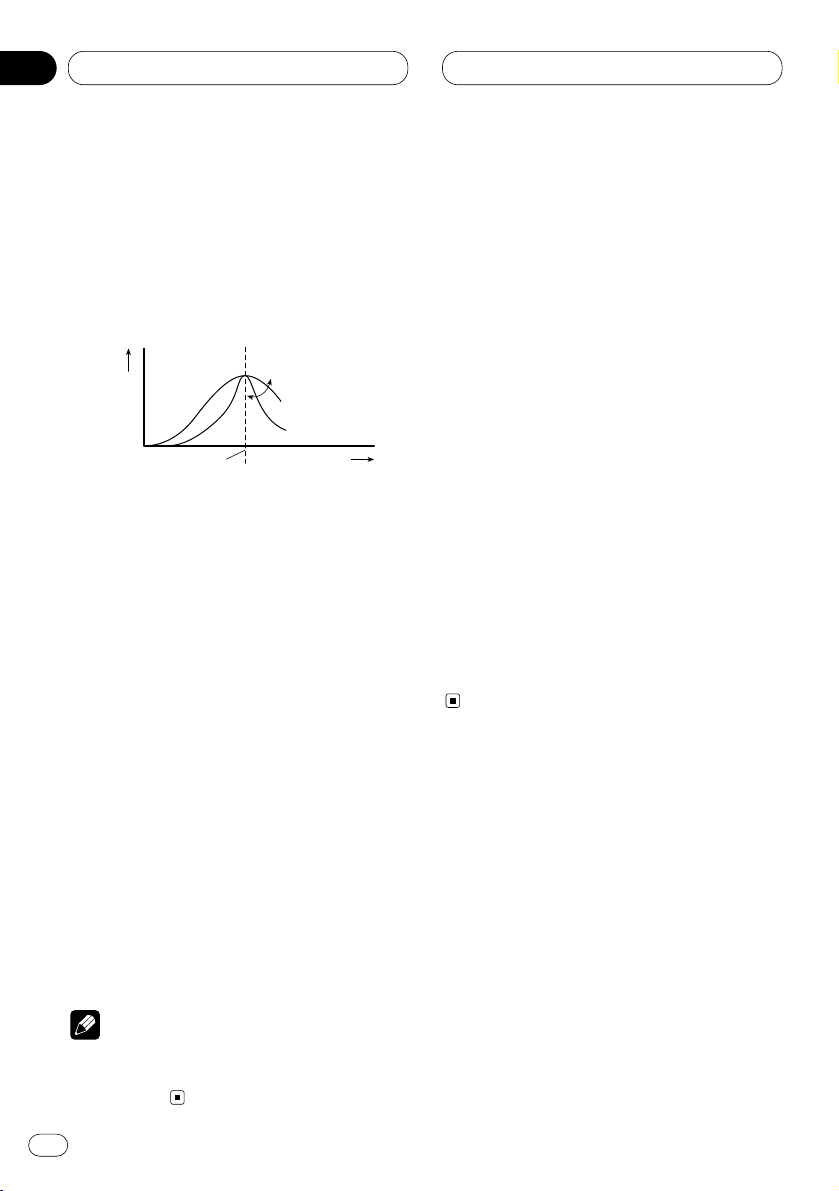
Réglages sonores
Réglage fin de la courbe d’égalisation
Vous pouvez régler la fréquence centrale et le
facteur de surtension (caractéristique de la
courbe) de chaque courbe présentement
sélectionnée par bande (EQ-Low/EQ-Mid/EQ-
High).
1
Appuyez sur OPEN pour ouvrir la face avant.
2 Maintenez la pression sur AUDIO jusqu’à ce
que la fréquence et le facteur Q (ex. F 80 Q 1W)
apparaissent sur l’afficheur.
3 Appuyez sur AUDIO pour choisir la bande
que vous souhaitez régler.
grave—médium—aigu
4 Appuyez sur 2 ou 3 pour sélectionner la
fréquence.
Appuyez sur 2 ou 3 jusqu’à ce que la
fréquence souhaitée apparaisse sur l’afficheur.
grave : 40—80—100—160 (Hz)
médium : 200—500—1 k—2 k (Hz)
aigu : 3,15 k—8 k—10 k—12,5 k (Hz)
5 Appuyez sur 5/∞ pour choisir le facteur Q.
Appuyez sur 5 ou ∞ jusqu’à ce que le facteur Q
souhaité apparaisse sur l’afficheur.
2 N—1 N—1 W—2 W
Remarque
• Si vous modifiez une courbe d’égalisation
autre que CUSTOM2, la courbe CUSTOM1 set
mise à jour.
Réglage des graves
Vous pouvez ajuster la fréquence de coupure et
le niveau des graves.
• En mode FRT1, l’ajustement des graves
affecte uniquement la sortie arrière: la sortie
avant ne peut pas être ajustée.
1
Appuyez sur OPEN
pour ouvrir la face avant.
2 Appuyez sur AUDIO
pour choisir Bass.
Appuyez sur
AUDIO jusqu’à ce que Bass appa-
raisse sur l’afficheur.
3 Appuyez sur 2 ou 3 pour sélectionner la
fréquence.
Appuyez sur 2 ou 3 jusqu’à ce que la
fréquence souhaitée apparaisse sur l’afficheur.
40—63—100—160 (Hz)
4 Appuyez sur 5 ou ∞ pour régler le niveau
des graves.
Chaque pression sur 5 ou ∞ augmente ou
diminue le niveau des graves. +6 – –6 s’affiche
lorsque vous augmentez ou diminuez le niveau.
Réglage des aigus
Vous pouvez ajuster la fréquence de coupure et
le niveau des aigus.
• En mode FRT1 et FRT2, l’ajustement des
aigus affecte uniquement la sortie avant: la
sortie arrière ne peut pas être ajustée.
1
Appuyez sur OPEN pour ouvrir la face avant.
2 Appuyez sur AUDIO pour choisir Treble.
Appuyez sur AUDIO jusqu’à ce que Treble appa-
raisse sur l’afficheur.
3 Appuyez sur 2 ou 3 pour sélectionner la
fréquence.
Appuyez sur 2 ou 3 jusqu’à ce que la
fréquence souhaitée apparaisse sur l’afficheur.
2,5k—4k—6,3k—10k (Hz)
Fr
40
07
Section
Niveau (dB)
Fréquence centrale
Fréquence (Hz)
Q=2N
Q=2W
 Loading...