

Kenwood Cooking Chef Major Quick Start Manual

1
› Quick Start Guide
› Guide de démarrage rapide
› Snel Start Gids
› Quick Start Guide
› Guida rapida di consultazione
2

2
3
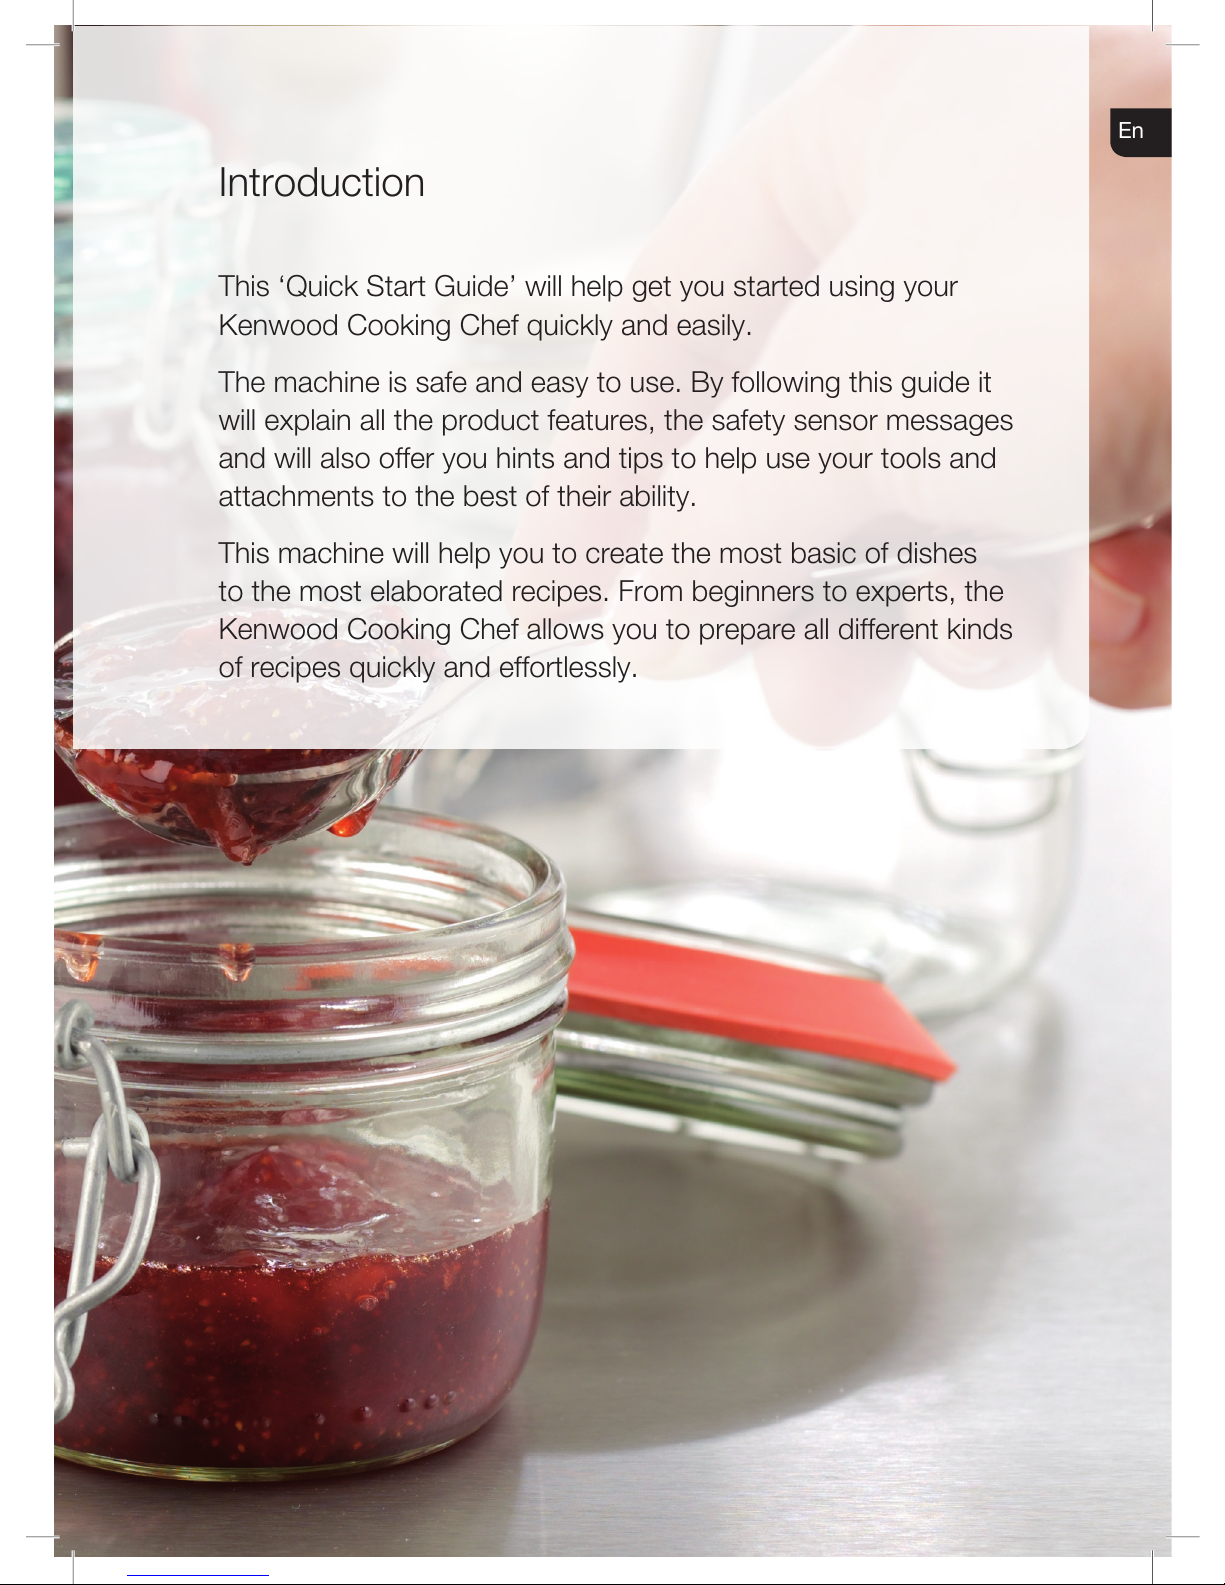
Introduction
This ‘Quick Start Guide’ will help get you started using your
Kenwood Cooking Chef quickly and easily.
The machine is safe and easy to use. By following this guide it
will explain all the product features, the safety sensor messages
and will also offer you hints and tips to help use your tools and
attachments to the best of their ability.
This machine will help you to create the most basic of dishes
to the most elaborated recipes. From beginners to experts, the
Kenwood Cooking Chef allows you to prepare all different kinds
of recipes quickly and effortlessly.
En

4
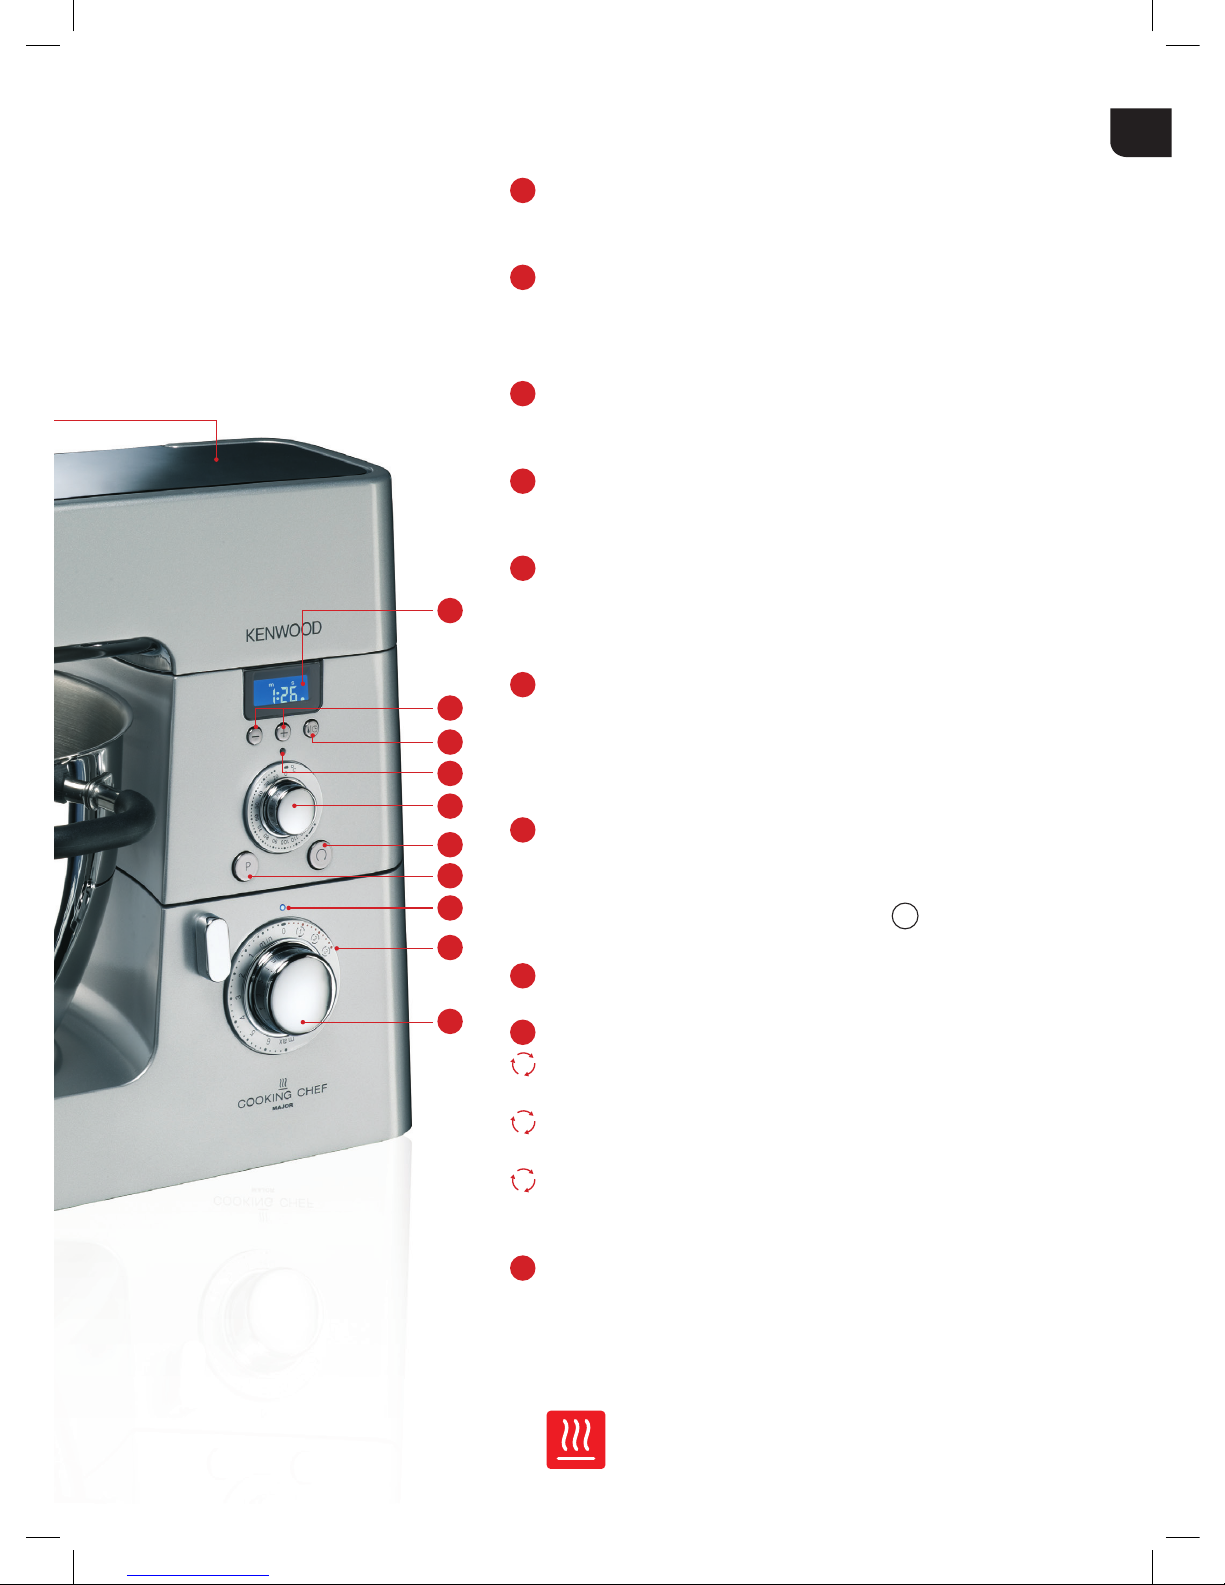
Discover your control panel
2
3
4
5
6
7
1
High Speed Outlet: This outlet operates attachments
that need high speed such as blending, juicing, high
speed slicing and shredding.
Medium speed outlet: This is for operating the food
processor attachment.
Slow speed outlet: This outlet operates attachments
that need slow speed and power for example,
mincing, pasta making, slow slicing, shredding etc.
See booklet
4
for optional “Attachments”
Tool socket: The Cooking Chef has planetary mixing
action. This is where the bowl tool revolves in one
direction and the socket turns it in the opposite
direction. The mixture is therefore picked up from
around the bowl, and brought back to the centre.
This ensures a prefect and homogenous mixing.
Bowl handles: Easy grip heat resistant handles.
Bowl: The bowl has a 6.7 litre fill capability to prepare
large quantities. It has a special base including
aluminium for even heat distribution. The bowl also
includes a sensor to activate an interlock to give the
user full safety assurance.
Induction Cooking: The Cooking Chef uses induction
heating technology which is extremely safe and energy
efficient. It heats up very quickly and the power can be
controlled very precisely, thanks to its electronic twin
probes which are located beneath the bowl.
2
3
4
5
6
7
1
For more information see: The DVD “Quick Start Guide” Chapter
or visit www.kenwoodcookingchef.com
5
8
9
12
11
13
14
15
16
17
LCD display: This is used to display either the time
or the temperature and error messages.
Timer: The timer can be set using the +/- buttons it can
count up or down with 5 seconds increments.
The maximum time can be set for up to 3 hours.
Temperature/Timer button: This button allows you
to switch or display from the time to the temperature.
Temperature LED: This will flash when the temperature
is on to indicate you are using the heating function.
Temperature dial: By turning the dial you can set the
temperature accurately between 20 and 140 degrees
with 2 degrees precision.
Fold button: This is where the machine mixes using a 2½
revolutions at a very slow speed to carefully fold ingredients
together during mixing: for example folding sugar into egg
whites when preparing meringues.
Pulse button: This is for high speed blending of
ingredients in the blender. This button can also be used
for high speed high temperature whisking. This happens
when you press for 5 seconds on the P button.
Speed LED: This will flash when the speeds are operating.
Stir speed settings:
Stir speed 1: this is a slow continuous speed to gently
mix ingredients together.
Stir speed 2: This is with a slow 2½ revolutions then
pauses for 5 seconds.
Stir speed 3: This is with a slow 2½ revolutions then
pauses for 30 seconds.
Variable speed control: Like all Kenwood kitchen
machines Cooking Chef comes with variable speed
control. Ranging from 0 – max 1 being slow speed 6
being high speed.
1
2
3
8
9
11
12
13
14
15
16
17
10
10
En

6
7
Plugging the machine in.
To cook
Get ready to cook, follow these simple steps to get
started.
Lifting the head of the
machine.
Fitting the Heat Shield. Fitting a tool (K Beater).
1 2 3
9
Setting the temperature.
To start
8
Adding ingredients.
Removing the Splashguard.
14
Turn mixing speed off.
13
To stop
Lifting the head of the
machine.
15

7
4
Locking the bowl into
position.
5
Lowering the head.
6
Fitting the Splashguard.
Removing the tool. Removing the Heat Shield. Place the bowl onto the Heat
Resistant Mat.
16 17 18
10
Setting the mixing speed.
12
Reduce the temperature.
11
Cooking will start.
En
For more information see: The DVD “Quick Start Guide” Chapter
or visit www.kenwoodcookingchef.com
8
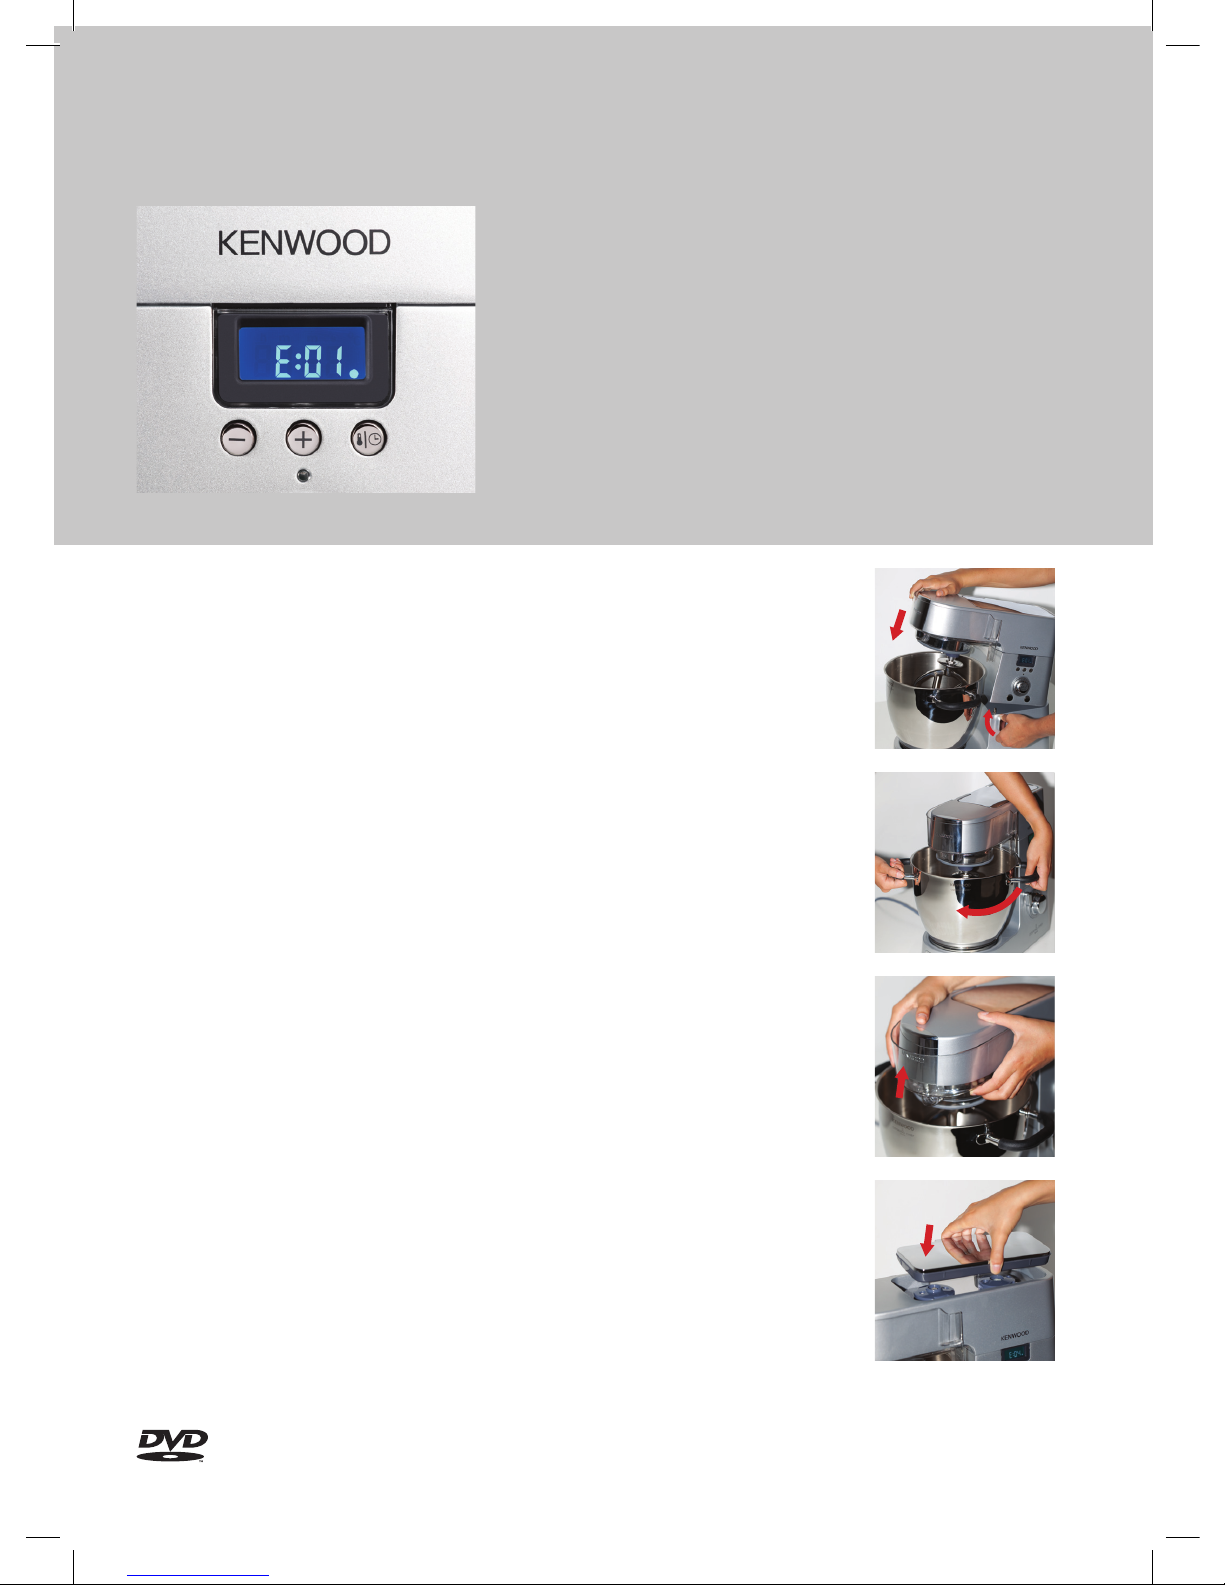
E: 01 – Head lift
If the heat function is selected and the head of the machine is not lowered
correctly or raised during cooking E: 01 will appear.
Solution: Lower the head. Turn the speed control to ‘0’ and start again.
E: 02 – The Bowl
If the bowl of the Cooking Chef is not fitted correctly then E: 02 will appear.
Solution: Check the bowl is fitted correctly. The logo should always
face the front of the machine.
E: 03 – The Heat Shield
If the Heat Shield is not fitted onto the head of the machine and you
select the heating function then E: 03 will appear. You must ensure during
cooking the Heat Shield is on as this protects the gear box.
Solution: Ensure the Heat Shield is fitted correctly. It should push
firmly up under the head of the machine.
E: 04 – Outlet covers
If the slow or medium/high speed outlet covers are not fitted correctly
(these can be found on the top of the machine) the heating function will not
work and E: 04 will appear. However, if you want to use the Cooking Chef
as a standard mixer and not to cook it will continue to work.
Solution: Ensure that all the covers are fitted correctly. Turn the speed
control to ‘0’ and then select desired speed.
Safety Sensor messages
Safety Sensor messages:
For safety the mixer is fitted with sensors which will operate
when using the mixer in cooking mode.
Error codes (or E codes) will appear on the machines LCD
display accompanied by a beeping sound if an item is not
fitted correctly. These are here to ensure you are using
the machine safely. If this occurs check the following error
messages.
For more information see: The DVD “Quick Start Guide” Chapter
or visit www.kenwoodcookingchef.com
9
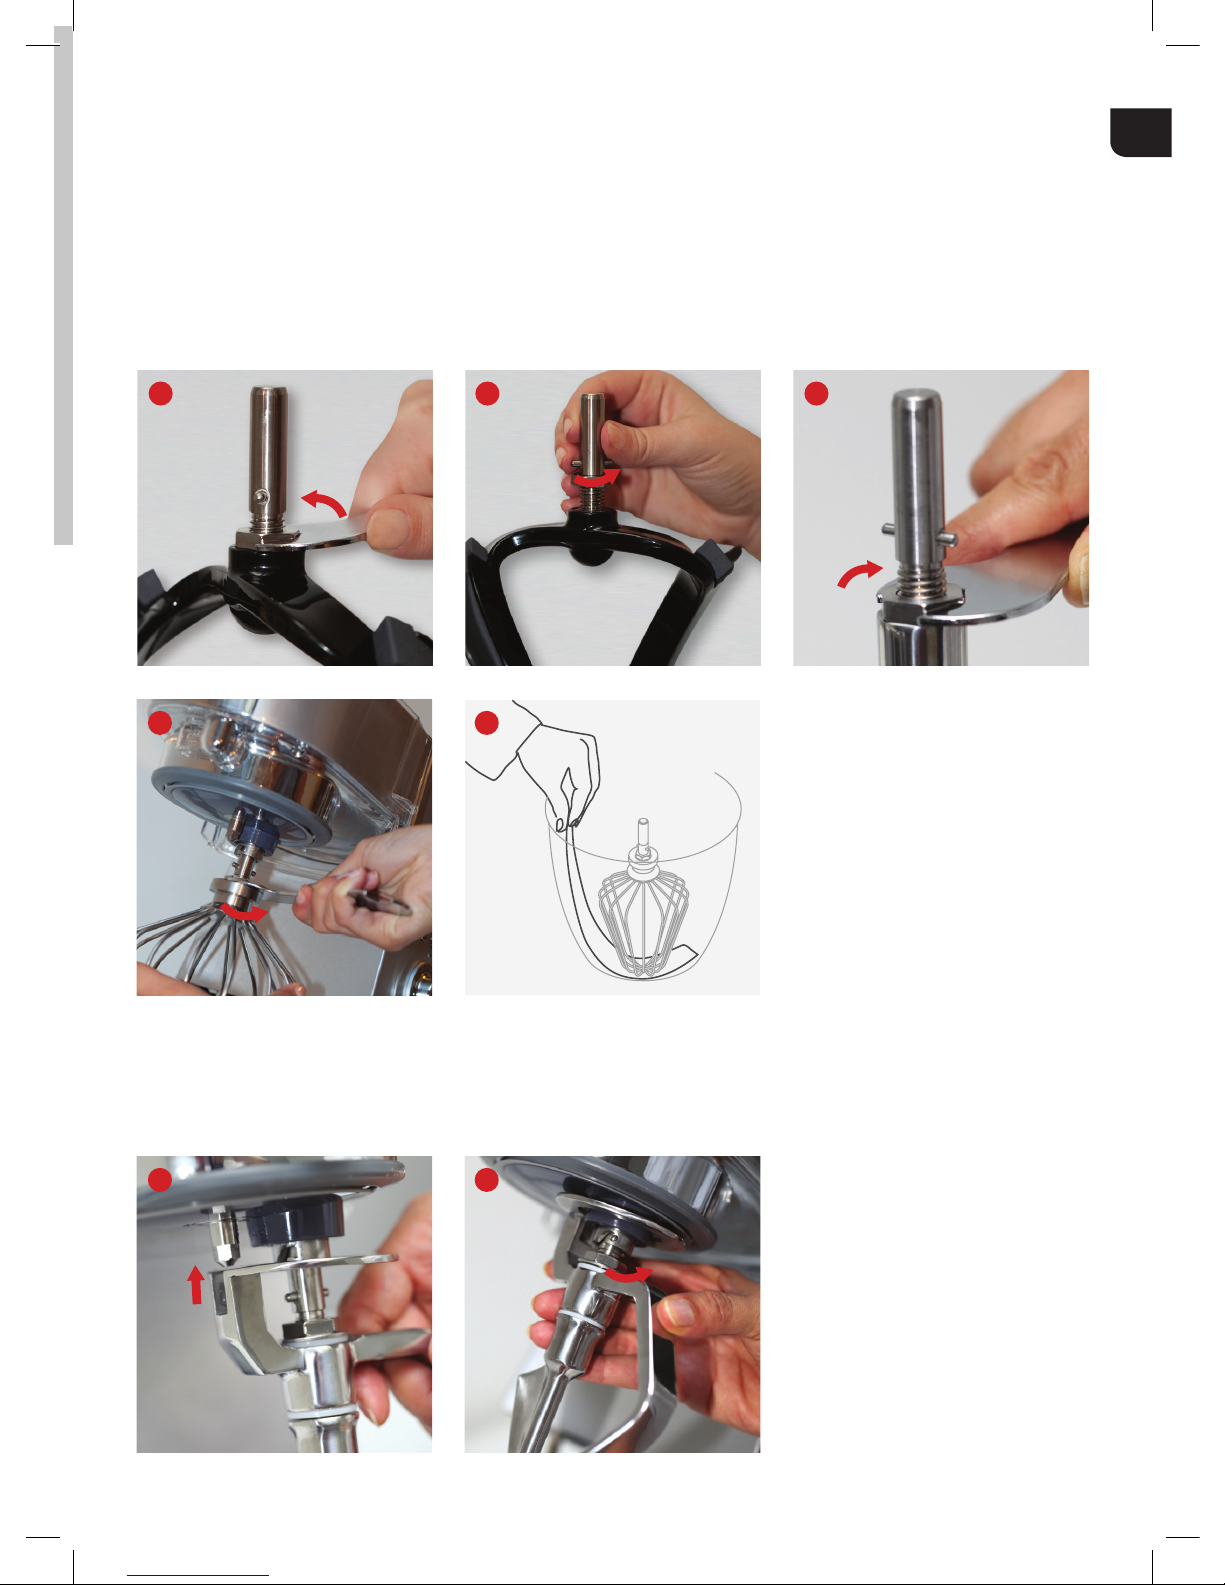
Using the tools:
1 2
For best performance the Power Whisk, K Beater and Stirring Tool should be almost touching the
bottom of the bowl. If necessary the tools can be adjusted. Simply use the spanner provided to adjust
the height of the tool.
Note: The tools need to sit roughly 5mm’s above the bottom of the bowl, ensure that the tools are not
lowered too much as they may scratch the bottom of the bowl.
1 2
Stirring Tool: The Stirring Tool fits onto the machine in a slightly different way compared to the other
tools. Simply line up the slot on the rim of the tool with the metal pin on the underside of the mixer head.
Then, holding the centre paddle of the tool, push the tool into the socket and twist to lock into position.
En
Tip: By using a sheet of paper
you can ensure your whisk is at
the right height.
Place a sheet paper in between
the whisk and bowl. You should
be able to pull the sheet of
paper out with out tearing it.
So the bowl tool sits just above
the bottom of the bowl (but not
touching the bottom).
1 2 3

10
Splashguard: The Splashguard can be used in 2 different ways. A guard to cover the bowl, using the
feed chute to add ingredients or a lid for use when cooking (similar to a sauce pan lid) to keep any
moisture and steam in the bowl.
Note: When using the Steamer ensure you use the Splashguard and keep the feed chute closed. This
also allows the machine to heat up quicker and generate more steam.
Flexi Beater: Carefully fit the flexible wiper blade onto the tool by locating the base of the wiper blade
into the slot, then feed the sides into the groove.
Note: The wiper blade of the Flexi Beater can be removed for easy cleaning.
1 2
For more information see: The DVD “Quick Start Guide” Chapter
or visit www.kenwoodcookingchef.com
1 2 3

11
1 2 3
Steamer Basket: The Steamer Basket comes in two parts. The metal base and the plastic outer ring
with handles. This makes it much easier to clean after use. Place the plastic outer ring onto the metal
base ensuring the handle supports on the ring fit next to the ‘V’ shaped cut outs in the tray. Fold out the
handles and clip into place.
Note: To use the Steamer Basket you need to have between 500ml and 650ml of water in the bottom
of the bowl depending on the food you are steaming.
En
12
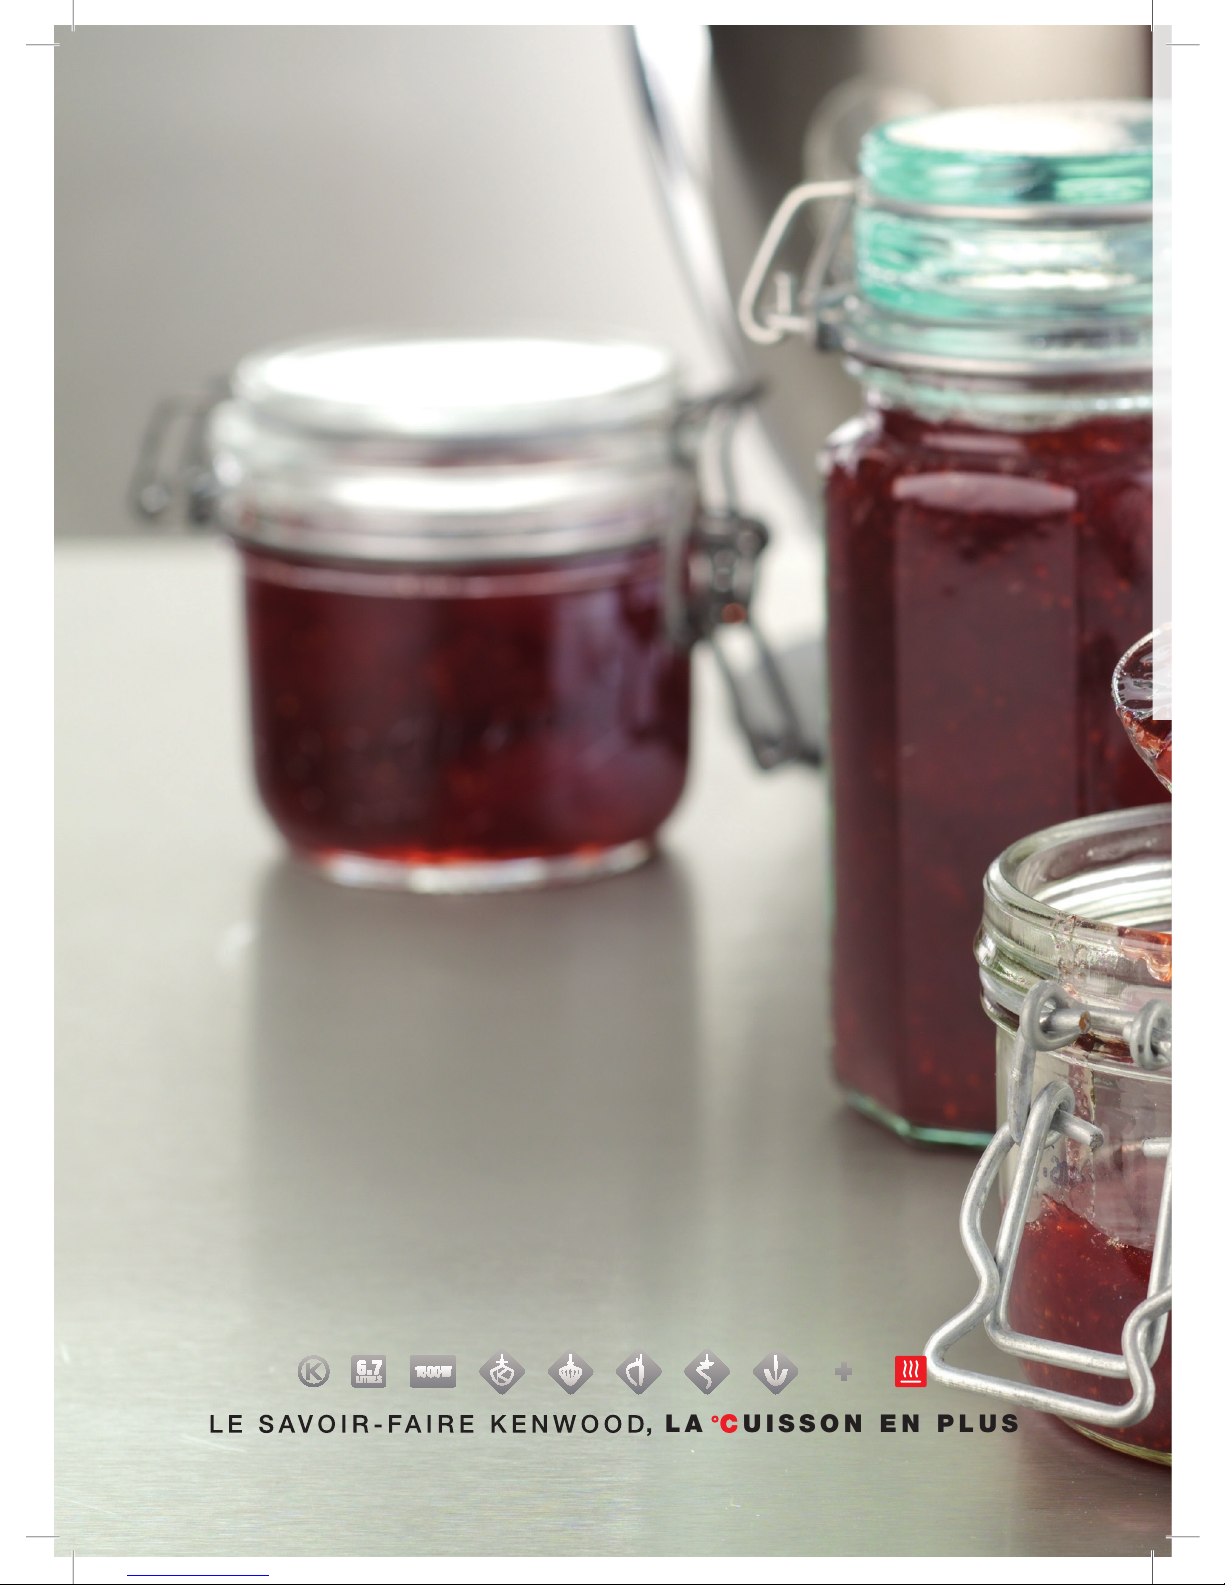
LA C UISSON EN PLUS,

13
Introduction
Découvrez comment utiliser votre Cooking Chef !
Ce guide vous présente votre robot en détail, les messages de
sécurité qui peuvent apparaître sur l’écran, ainsi que des trucs et
astuces pour vous aider à utiliser les outils et les accessoires au
maximum de leurs capacités.
Grâce au Cooking Chef vous pourrez réaliser des recettes
basiques comme des plats élaborés. Que vous soyez débutant
ou expert en cuisine, le Cooking Chef vous aide à préparer un
nombre infini de préparations.
Fr
14
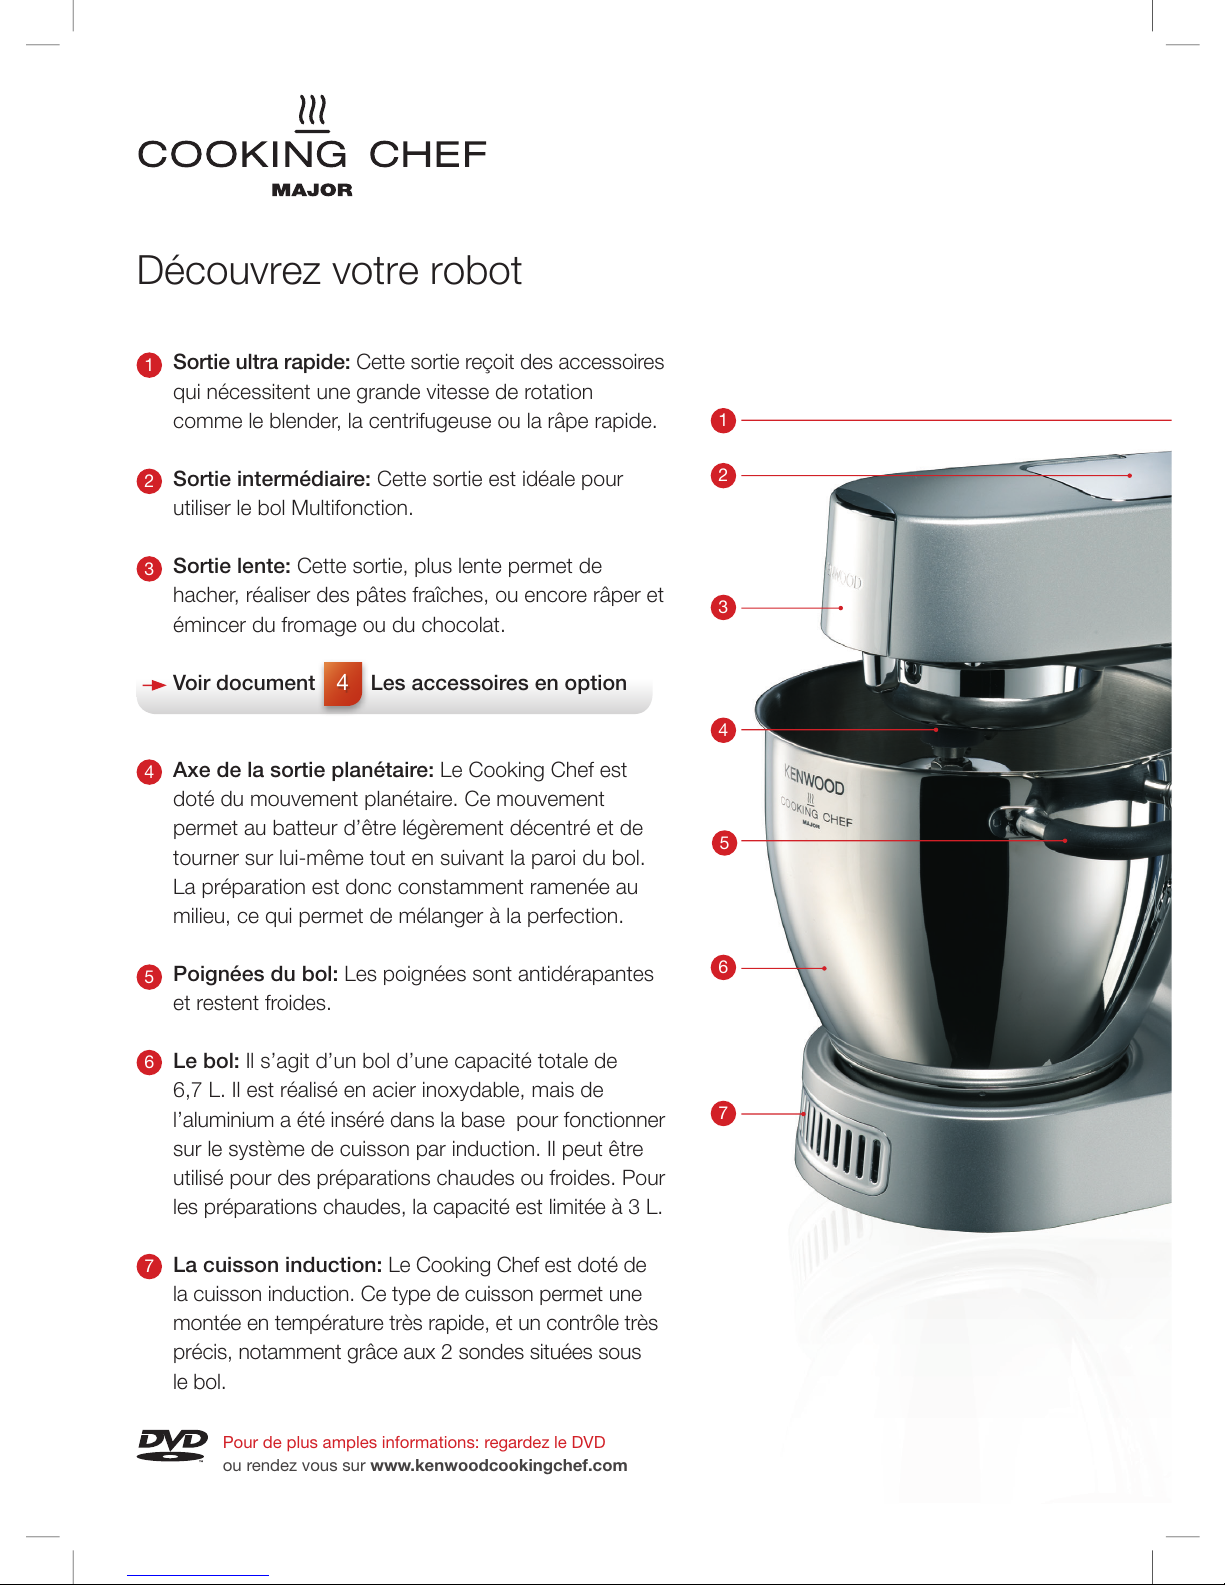
Découvrez votre robot
2
3
4
5
6
7
1
Sortie ultra rapide: Cette sortie reçoit des accessoires
qui nécessitent une grande vitesse de rotation
comme le blender, la centrifugeuse ou la râpe rapide.
Sortie intermédiaire: Cette sortie est idéale pour
utiliser le bol Multifonction.
Sortie lente: Cette sortie, plus lente permet de
hacher, réaliser des pâtes fraîches, ou encore râper et
émincer du fromage ou du chocolat.
Voir document
4
Les accessoires en option
Axe de la sortie planétaire: Le Cooking Chef est
doté du mouvement planétaire. Ce mouvement
permet au batteur d’être légèrement décentré et de
tourner sur lui-même tout en suivant la paroi du bol.
La préparation est donc constamment ramenée au
milieu, ce qui permet de mélanger à la perfection.
Poignées du bol: Les poignées sont antidérapantes
et restent froides.
Le bol: Il s’agit d’un bol d’une capacité totale de
6,7 L. Il est réalisé en acier inoxydable, mais de
l’aluminium a été inséré dans la base pour fonctionner
sur le système de cuisson par induction. Il peut être
utilisé pour des préparations chaudes ou froides. Pour
les préparations chaudes, la capacité est limitée à 3 L.
La cuisson induction: Le Cooking Chef est doté de
la cuisson induction. Ce type de cuisson permet une
montée en température très rapide, et un contrôle très
précis, notamment grâce aux 2 sondes situées sous
le bol.
2
3
4
5
6
7
1
Pour de plus amples informations: regardez le DVD
ou rendez vous sur www.kenwoodcookingchef.com
15
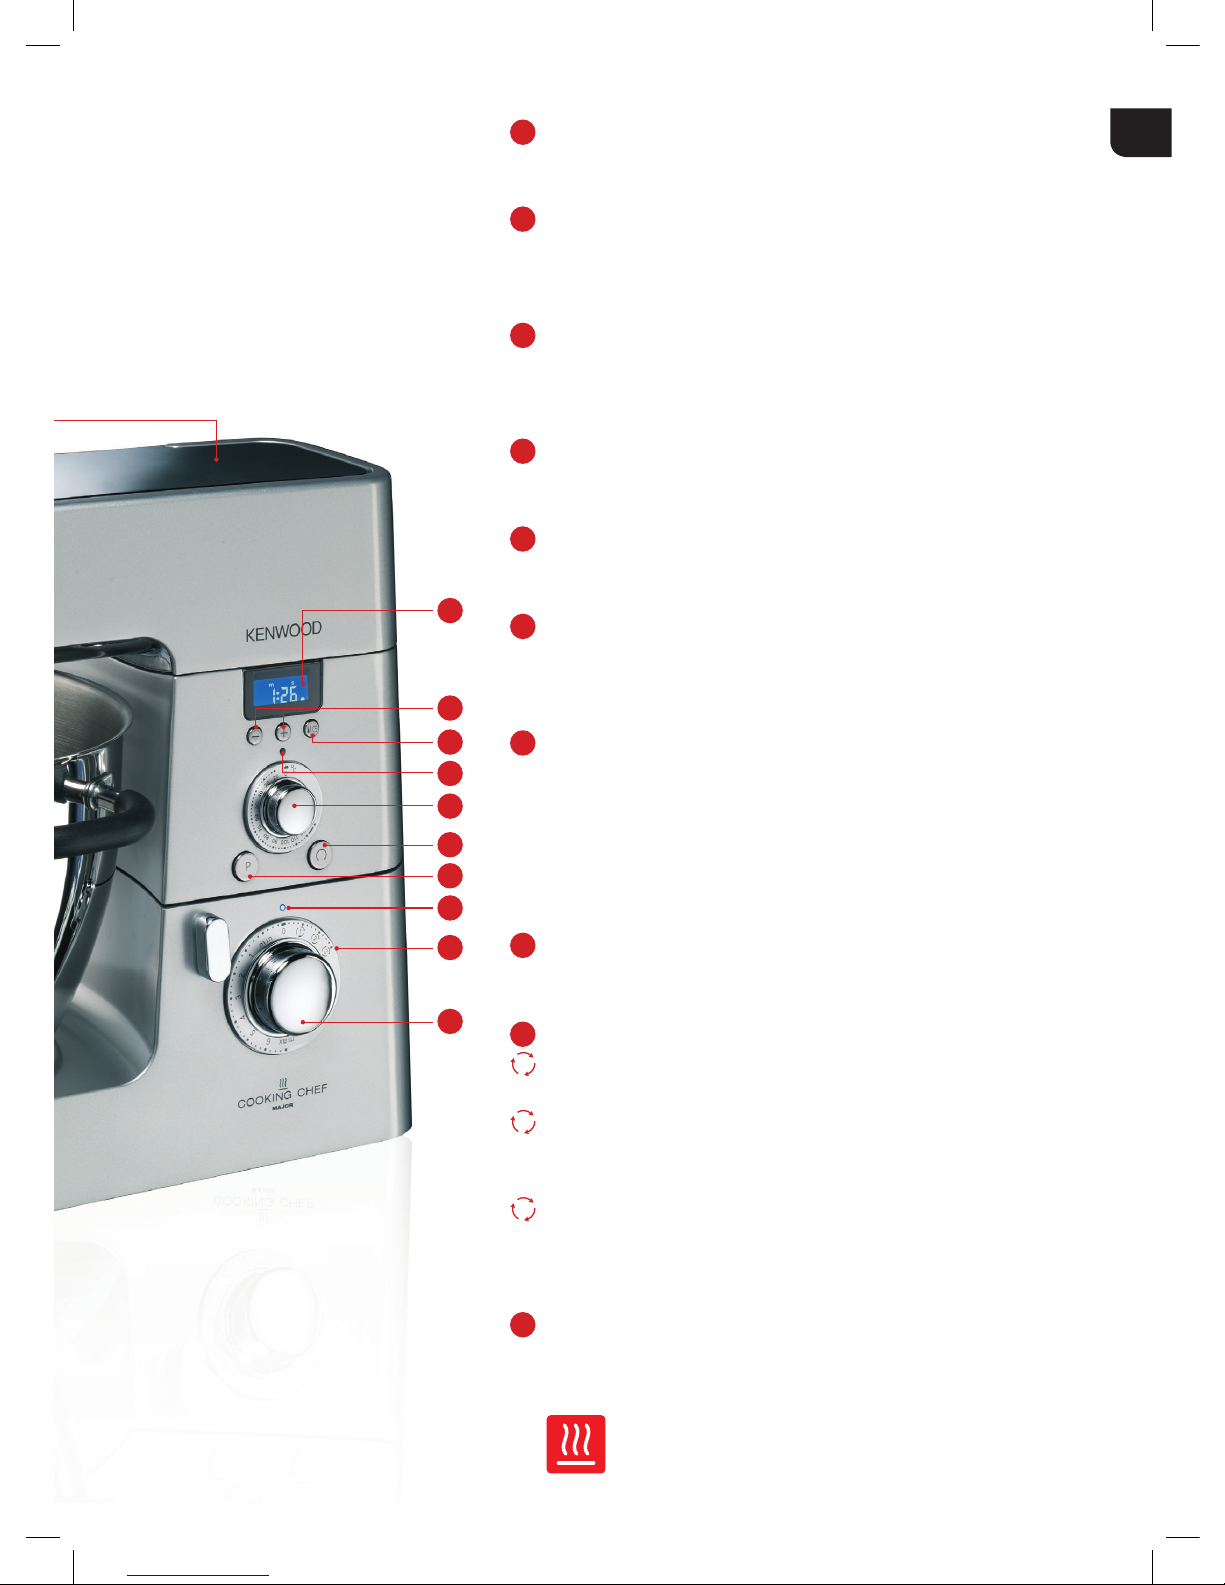
8
9
12
11
13
14
15
16
17
L’écran LCD: L’écran affiche avec précision la température
et le temps de préparation.
Le minuteur: Le minuteur se programme à l’aide des touches
+/- situées sous l’écran. Le réglage se fait de 5 secondes
en 5 secondes. Il peut être réglé de 5 secondes à 3 heures.
Touche de température / temps: Cette touche vous
permet de voir alternativement le temps de préparation et
la température de la préparation dans le bol.
LED de température: La LED bleue clignote, ou est
allumée lorsque la fonction cuisson est utilisée.
Le thermostat: Le thermostat vous permet de régler la
température désirée de 20 à 140°C.
To uc he mé la n ge d é li ca t: Cette touche permet de mélanger
ou d’incorporer très délicatement les ingrédients. A chaque
pression, le robot effectue 2 tours ½ à vitesse très lente.
Touche Pulse: Cette touche permet d’atteindre
directement la vitesse maximum. Elle permet également de
débloquer la sécurité, limitant la vitesse du robot, lorsque la
température de la préparation dans le bol dépasse 60°C. Il
suffit de maintenir la touche pulse enfoncée jusqu’à ce que
la vitesse désirée soit atteinte.
LED de vitesse: La LED bleue clignote, lorsqu’une vitesse
est sélectionnée.
Les positions spéciales cuisson:
Mélange 1: Le robot tourne à vitesse très lente. Idéal pour
que les crèmes et les sauces n’attachent pas.
Mélange 2: Le robot effectue 2,5 tours toutes les 5
secondes. Parfait pour les ingrédients peu fragiles qui ont
tendances à attacher à la cuisson.
Mélange 3: Le robot effectue 2,5 tours toutes les 30
secondes pour les préparations chaudes délicates qui
nécessitent une cuisson lente et douce.
Le variateur de vitesses: Comme tous les robots Chef &
Major Kenwood, le Cooking Chef est doté d’un variateur
de vitesses à 8 positions.
1
2
3
8
9
11
12
13
14
15
16
17
10
10
Fr
16
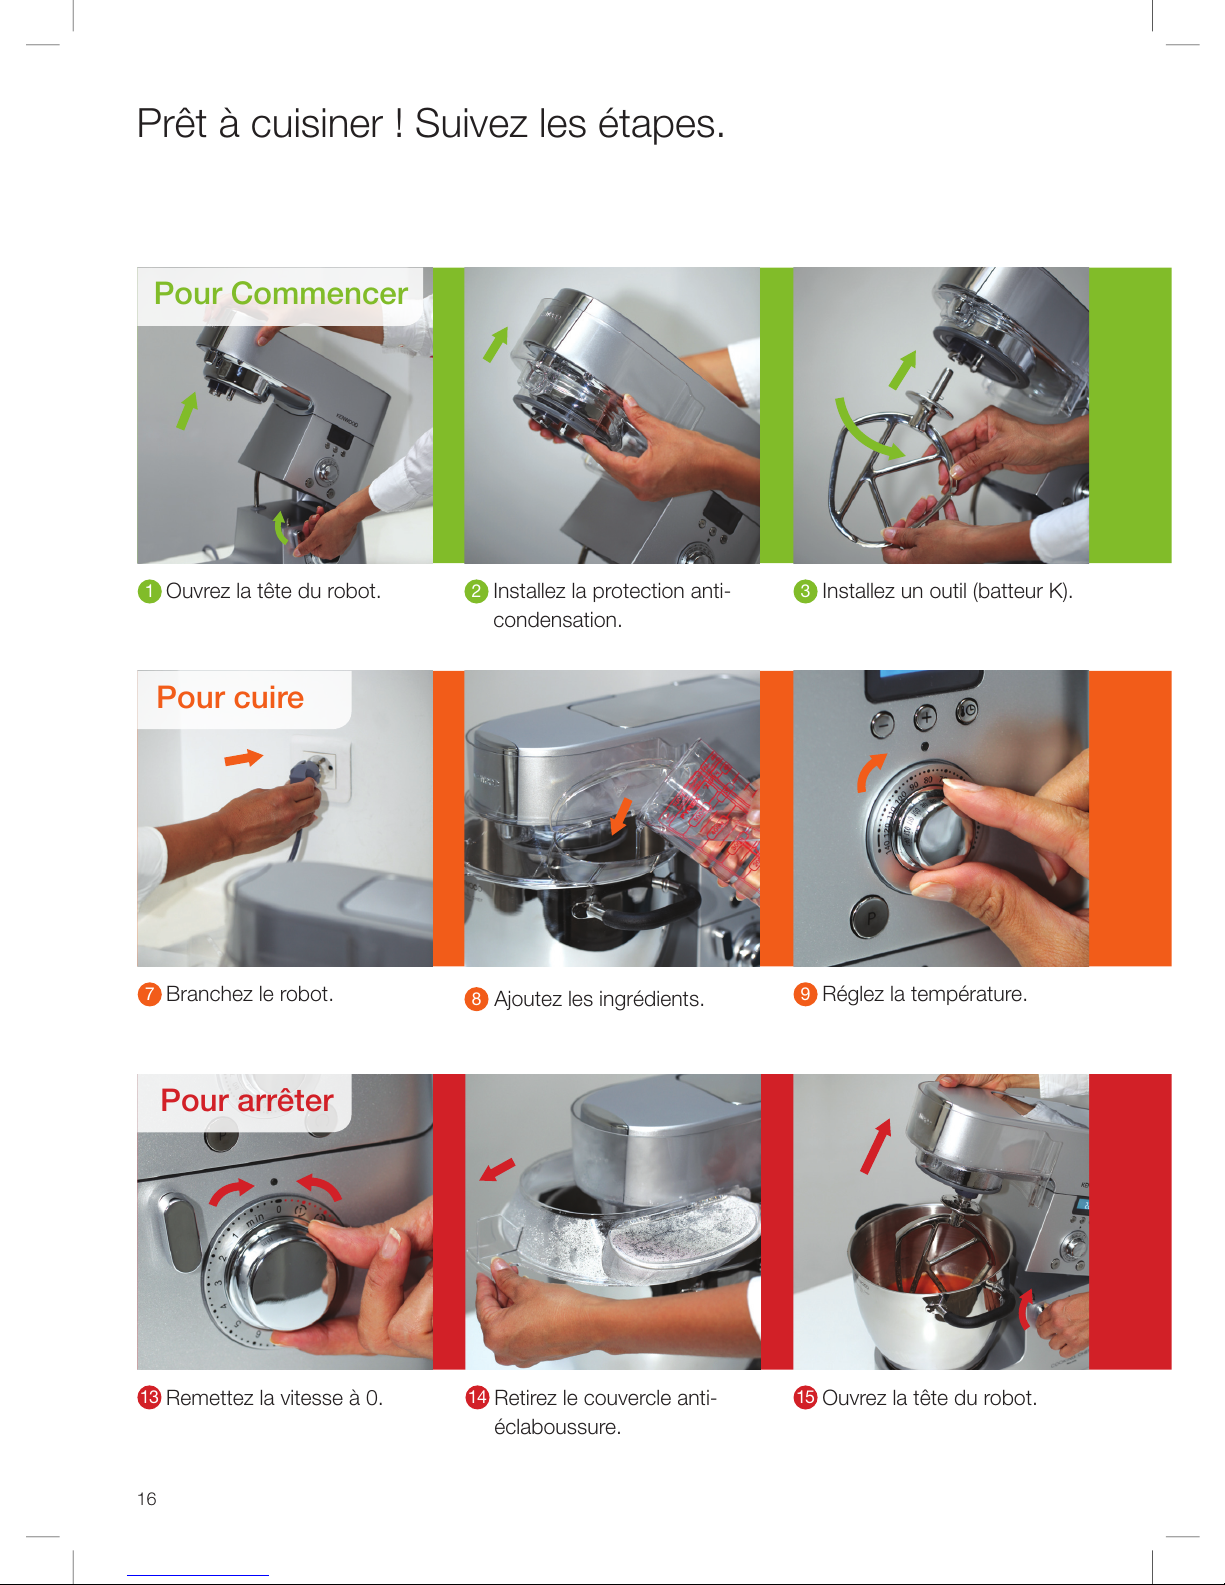
7
Branchez le robot.
Pour cuire
Prêt à cuisiner ! Suivez les étapes.
Ouvrez la tête du robot. Installez la protection anti-
condensation.
Installez un outil (batteur K).
1 2 3
9
Réglez la température.
Pour Commencer
8
Ajoutez les ingrédients.
Retirez le couvercle anti-
éclaboussure.
14
Remettez la vitesse à 0.
13
Pour arrêter
Ouvrez la tête du robot.
15
 Loading...