

Kensington KS-SAL-20 User Manual

User Manual
KS-SAL-20 |Pocket
Salinity Tester
Kensington Scientific
22a Cavan Rd, Dry Creek
South Australia, 5094
helpme@kensingtonscientific.com.au
www.kensingtonscientific.com.au
OVERVIEW
Below are the steps you need to follow to begin using your Kensington KS-SAL-20 pocket salinity tester. This manual
will cover how insert the batteries, using the function keys, making measurements, calibration and sensor replacement.
PACKAGE CONTENTS
1. Conductivity calibration solutions (1413 µS/cm, 12.88m µS/cm, 111.8 S/cm,)
2. AAA batteries
3. Carrying case
INSERTING THE BATTERIES
1. Your Kensington Pocket KS-SAL-20 pocket salinity tester uses two AAA batteries.
2. Remove the button cap found on the bottom of the tester as shown in the above image.
3. Place the battery into its designated slot. Take note of the proper position of the battery to ensure the polarities
placed correctly.
4. Replace the battery cap.
KEYPAD INDEX
Key
Function
1. Serves as the power button of the tester
2. Initiates Data Hold. Press once to hold the current reading, press again to resume making
measurements.
3. Exit button during calibration
1. Press once to conduct calibration of the instrument
2. Press and hold to enter setup menu
3. In calibration mode, press to set calibration values.
4. In setup mode, press to select default option
User Manual
KS-SAL-20 |Pocket
Salinity Tester
Kensington Scientific
22a Cavan Rd, Dry Creek
South Australia, 5094
helpme@kensingtonscientific.com.au
www.kensingtonscientific.com.au
1. Press to confirm calibration or chosen option
2. Toggles between conductivity, TDS and salinity measurement modes.
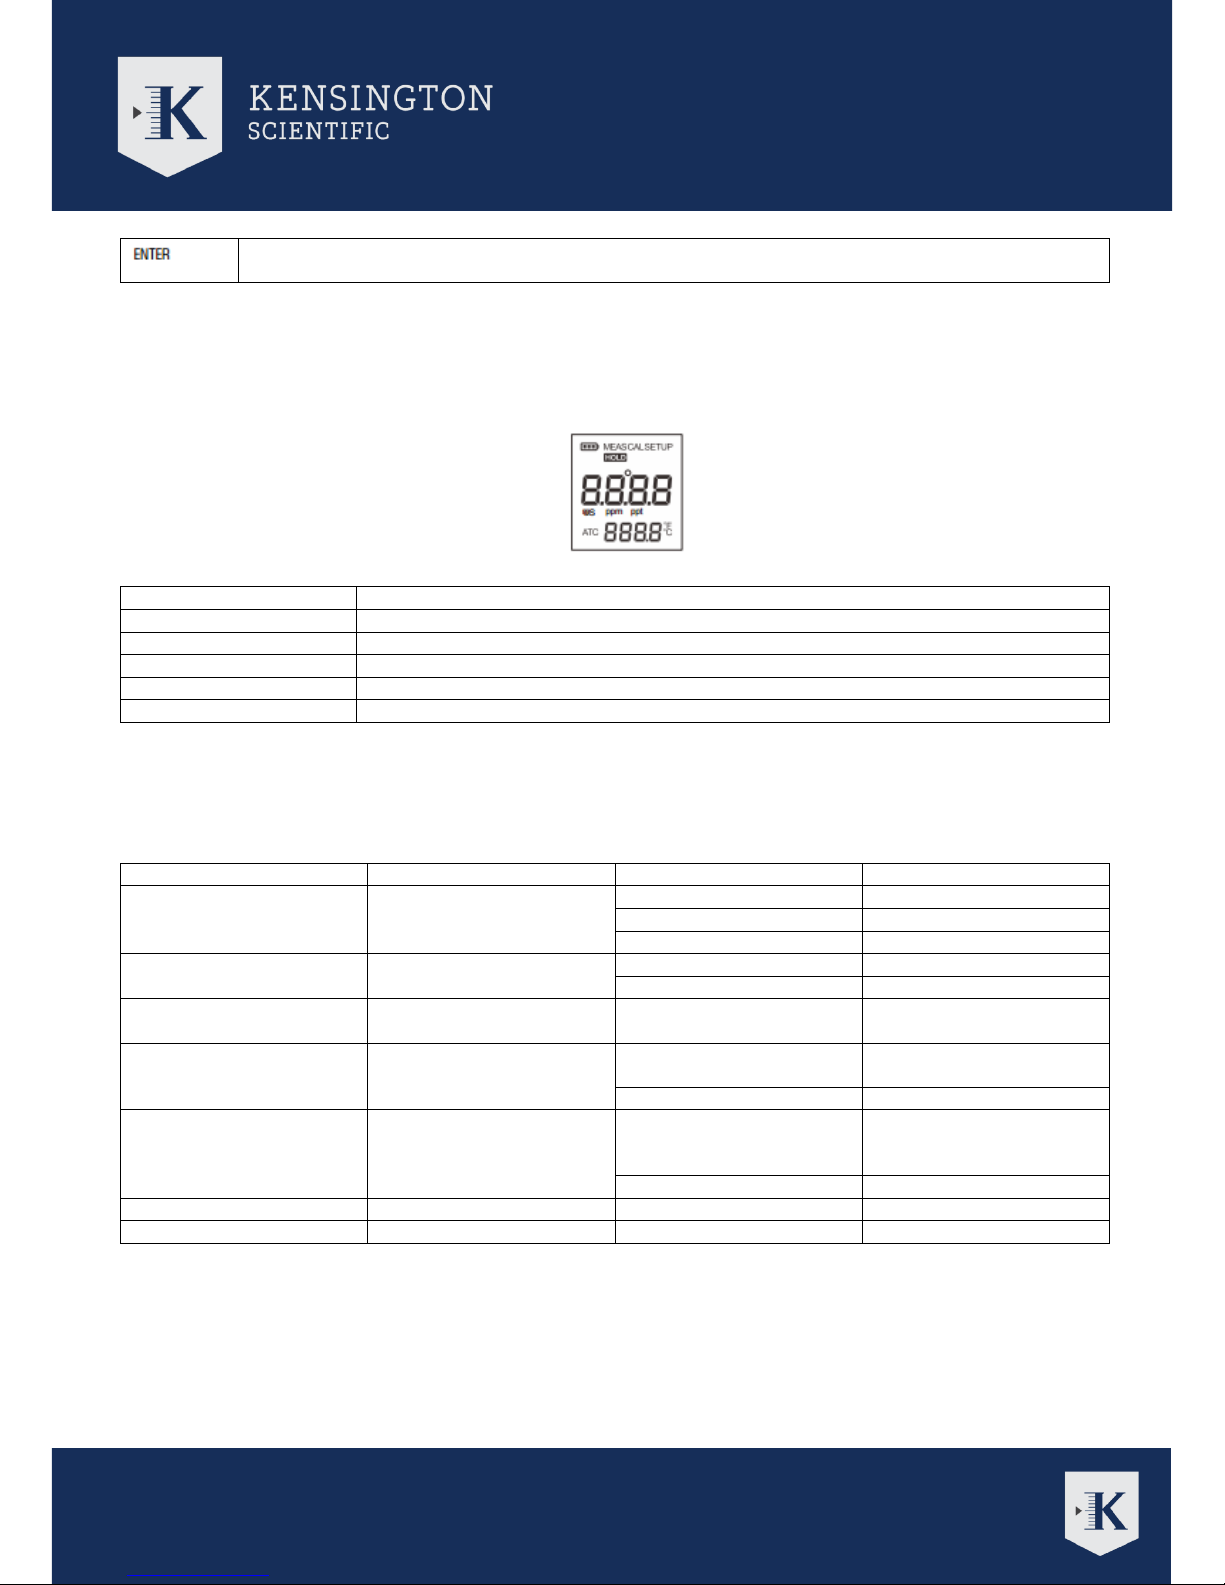
DISPLAY
The KS-SAL-20 is built with a clear LCD display that shows the measured value, various mode indicators and units.
Below is a summary to describe the meaning behind each notification on the display.
Indicator
Description
MEAS
Indicates tester is in the measurement mode
CAL
Indicates tester is in calibration mode
SETUP
Indicates tester is in SETUP mode
HOLD
Indicates the HOLD function is active and the current displayed value is on hold.
ATC
Indicates temperature compensation is enabled
SETUP MENU
The KS-SAL-20 contains integrated setup menu that allows you to customize your tester’s features to fit your
measurement requirements.
Parameter
Description
Options
Description
CAL
Calibration Points
1 (Default)
1 point calibration
2
2 points calibration
3
3 points calibration
UNIT
Temperature Unit
°C (Default)
Celsius
°F
Fahrenheit
°C
Temperature calibration
CAL
Temperature calibration
mode
HOLD
Auto-Hold
YES
Automatically freezes
stable readings
NO (Default)
Disable
OFF
Auto-off
YES (Default)
Automatically turns off
tester after 8 seconds of
idle
NO
Disable
RST
Reset
YES
Restores factory settings
NO (Default)
Disable
User Manual
KS-SAL-20 |Pocket
Salinity Tester
Kensington Scientific
22a Cavan Rd, Dry Creek
South Australia, 5094
helpme@kensingtonscientific.com.au
www.kensingtonscientific.com.au
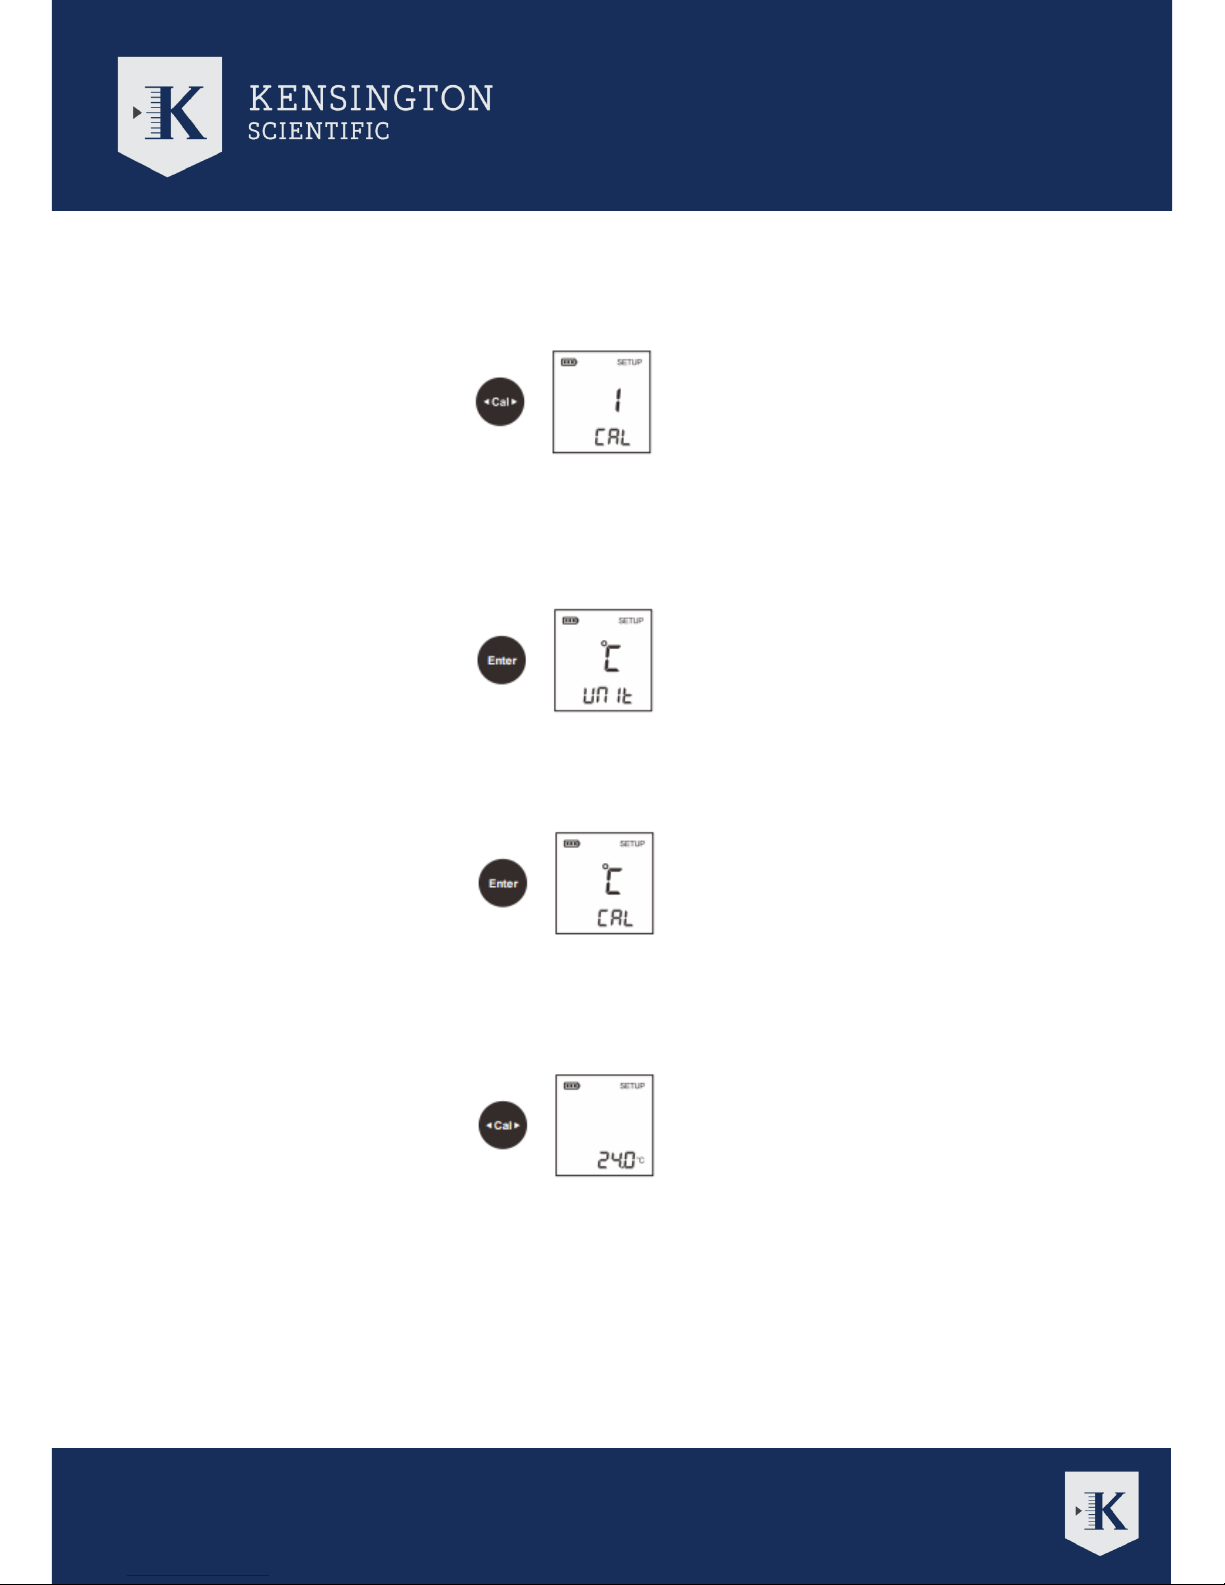
SETTING OF DEFULAT PARAMETERS
1. Press the CAL button to enter setup menu. The first display should be the default number of calibration points.
2. Press the CAL key again to change the default calibration point, selecting 1, 2 or 3 points. Press the ENTER key
to confirm.
3. The tester will now automatically display the temperature unit selection mode. The display should show °C/UNIT
6. Press CAL to the select the chosen temperature unit (°C or °F). Press ENTER to confirm.
7. The next display will show the temperature calibration mode. The display should show ‘°C/CAL’.
8. If you do not wish to conduct temperature calibration, press ENTER to proceed with the next option. If temperature
calibration is needed, press CAL key to begin calibration. The display should show the current temperature reading.
8. Press the CAL key to set the desired temperature value. Press ENTER to confirm.
 Loading...