

Kensington KS-PH-220-BASIC User Manual
User Manual
KS-PH-220-BASIC | Portable
pH/mV Meter
Kensington Scientific
22a Cavan Rd, Dry Creek
South Australia, 5094
helpme@kensingtonscientific.com.au
www.kensingtonscientific.com.au
OVERVIEW
Below are the steps you need to follow to begin using your Kensington KS-PH-220-BASIC portable pH/mV meter. This
manual provides a step-by-step guide to help you operate the meter.
METER CONTENTS
The following are included as standard accessories of the KS-PH-220-BASIC:
1. E201-BNC pH Electrode
2. TP-100K Temperature Probe
3. pH Buffer Solutions (pH4.01/7.00/10.01)
4. 9V Battery
5. Carrying Case
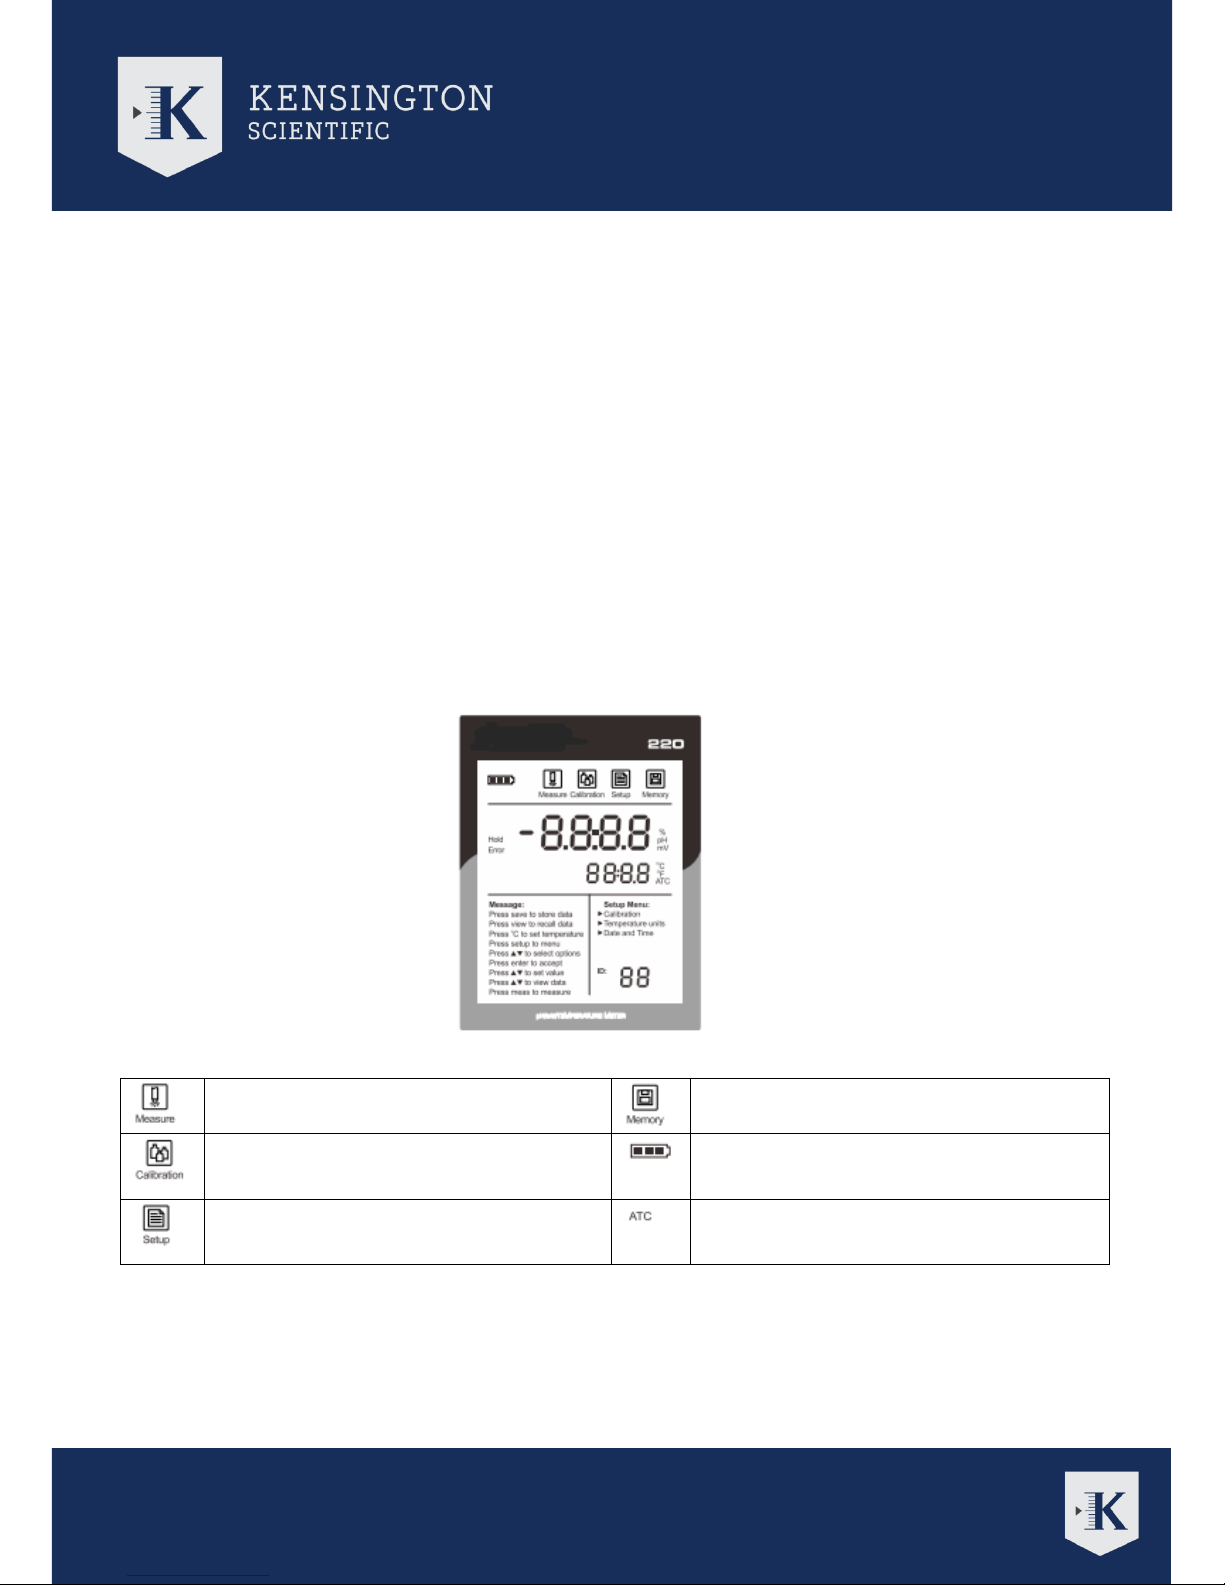
DISPLAY
The KS-PH-220-BASIC is built with a large and clear LCD display that shows measured values, mode indicators and
notifications. The following table describes the meaning of each icon on the screen.
Measurement mode indicator:
Indicates meter is in measurement mode
Memory mode indicator:
Indicates data is tired into memory
Calibration mode indicator:
Indicates meter is in calibration mode
Low Battery Alarm:
When the battery is depleted the indicator will
appear
Setup mode indicator:
Indicates meter is in SETUP mode
Automatic Temperature Compensation:
Indicates meter is in temperature compensation
mode

User Manual
KS-PH-220-BASIC | Portable
pH/mV Meter
Kensington Scientific
22a Cavan Rd, Dry Creek
South Australia, 5094
helpme@kensingtonscientific.com.au
www.kensingtonscientific.com.au
KEYPAD
The KS-PH-220-BASIC has six (6) multi-function keys. Below are their names and functions
Key
Description
1. Press this button to activate HOLD function
2. Freezes the measured value on the display, press the key again to resume measuring.
3. In the calibration or setting mode, exits current mode and returns to measurement.
Press to enter SETUP mode
Press to activate temperature setting mode
1. In the measurement modem press this key to store current measured value.
2. In the temperature setting mode, pressing the key increases the value by 0.1. Press and hold the
key to increase the value by 1.
3. In memory mode, press to search the previous saved measurements
1. In the measurement mode, press this key to recall stored data in the memory
2. In the temperature setting mode, press to search the next stored data
1. Toggles between pH and mV measurement modes
2. In the setup mode, press this key to confirm option or input values.
CONNECTING THE pH ELECTRODE
1. Take out the pH electrode from the carrying case.
2. Insert the connector of the electrode into the BNC connector socket on the meter. Rotate and push the connector
until it locks.
3. Do not pull on the sensor cord once the electrode is connected to the meter.
USER SETTINGS
SELECTING THE TEMPERATURE UNIT
1. Press SETUP key to enter the setup menu
2. Press or key to select the ‘Temperature Units’ option
3. Press ENTER key to confirm. The ‘C’ indicator should begin flashing.
4. Press or keys to select the desired temperature units (°C or °F)
5. Press ENTER to confirm.

User Manual
KS-PH-220-BASIC | Portable
pH/mV Meter
Kensington Scientific
22a Cavan Rd, Dry Creek
South Australia, 5094
helpme@kensingtonscientific.com.au
www.kensingtonscientific.com.au
SETTING THE REAL TIME CLOCK
1. Press SETUP key to enter the setup menu.
2. Press or key to select ‘Date and Time’ option.
3. Press ENTER key to confirm, the date digit will then start to flash
4. Press or key to set the data and press ENTER to confirm. The hour digit will then start to flash
5. Press or key to set the time and press ENTER to confirm. The settings are now saved and the meter will then
return to measurement mode.
TEMPERATURE COMPENSATION
Temperature compensation is needed to make accurate measurement results. You need to choose between automatic
and manual temperature compensation before measurement or calibration.
AUTOMATIC TEMPERATURE COMPENSATION
1. Automatic temperature compensation will readily activate when the temperature probe is inserted into the meter’s
phone jack.
2. Insert the connector of the temperature probe into the meter’s phone jack
3. The ‘ATC’ indicator should immediately show on the display, indicating that automatic temperature compensation is
now enabled.
 Loading...