

Karcher IVC 60/24-2 Tact² M User guide
IVC 60/24-2 Tact² M
Deutsch 5
English 15
Français 25
Italiano 35
Nederlands 45
Español 55
Português 65
Dansk 75
Norsk 85
Svenska 94
Suomi 103
Ελληνικά 112
Türkçe 123
Русский 133
Magyar 144
Čeština 154
Slovenščina 163
Polski 172
Româneşte 182
Slovenčina 192
Hrvatski 202
Srpski 212
Български 222
Eesti 233
Latviešu 242
Lietuviškai 251
Українська 261
Register
your product
www.kaercher.com/welcome
001
59639510 03/19


– 1
Lesen Sie vor der ersten Benut-
zung Ihres Gerätes diese Originalbetriebsanleitung, handeln Sie danach
und bewahren Sie diese für späteren Gebrauch oder für Nachbesitzer auf.
–
Vor erster Inbetriebnahme Sicherheitshinweise Nr. 5.956-249.0 unbedingt lesen!
– Bei Nichtbeachtung der Betriebsanlei-
tung und der Sicherheitshinweise können Schäden am Gerät und Gefahren
für den Bediener und andere Personen
entstehen.
– Bei Transportschaden sofort Händler
informieren.
Hinweise zu Inhaltsstoffen (REACH)
Aktuelle Informationen zu Inhaltsstoffen finden Sie unter:
www.kaercher.de/REACH
GEFAHR
Für eine unmittelbar drohende Gefahr, die
zu schweren Körperverletzungen oder zum
Tod führt.
몇 WARNUNG
Für eine möglicherweise gefährliche Situation, die zu schweren Körperverletzungen
oder zum Tod führen könnte.
몇 VORSICHT
Hinweis auf eine möglicherweise gefährliche Situation, die zu leichten Verletzungen
führen kann.
ACHTUNG
Hinweis auf eine möglicherweise gefährliche Situation, die zu Sachschäden führen
kann.
Inhaltsverzeichnis
Umweltschutz . . . . . . . . . . . . . DE 1
Gefahrenstufen . . . . . . . . . . . . DE 1
Bestimmungsgemäße Verwen-
dung . . . . . . . . . . . . . . . . . . . . DE 2
Symbole auf dem Gerät . . . . . DE 2
Sicherheitshinweise . . . . . . . . DE 2
Geräteelemente . . . . . . . . . . . DE 3
Inbetriebnahme . . . . . . . . . . . . DE 3
Bedienung. . . . . . . . . . . . . . . . DE 4
Transport. . . . . . . . . . . . . . . . . DE 6
Lagerung. . . . . . . . . . . . . . . . . DE 6
Pflege und Wartung . . . . . . . . DE 6
Hilfe bei Störungen . . . . . . . . . DE 8
Garantie . . . . . . . . . . . . . . . . . DE 8
Zubehör und Ersatzteile . . . . . DE 9
EU-Konformitätserklärung. . . . DE 9
Technische Daten . . . . . . . . . . DE 10
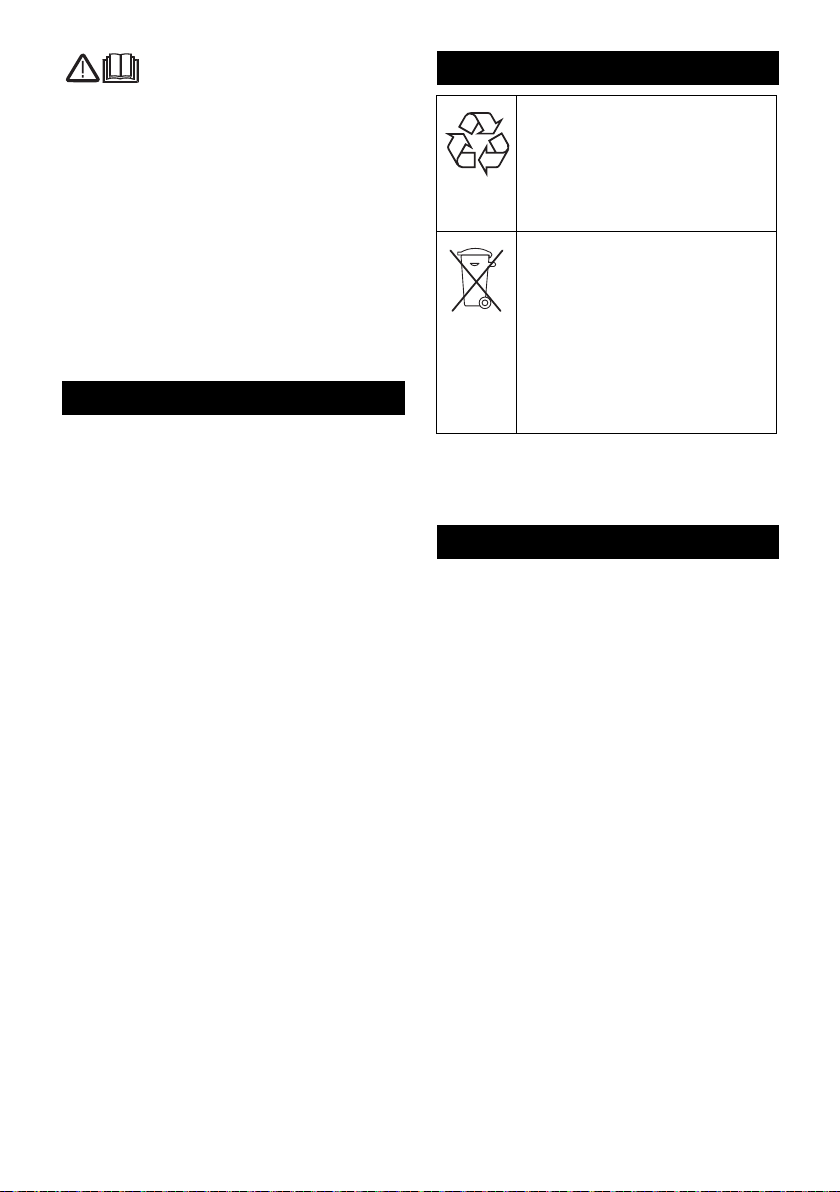
Umweltschutz
Die Verpackungsmaterialien
sind recyclebar. Bitte werfen Sie
die Verpackungen nicht in den
Hausmüll, sondern führen Sie
diese einer Wiederverwertung
zu.
Altgeräte enthalten wertvolle recyclingfähige Materialien, die einer Verwertung zugeführt werden sollten. Batterien, Öl und
ähnliche Stoffe dürfen nicht in
die Umwelt gelangen. Bitte entsorgen Sie Altgeräte deshalb
über geeignete Sammelsysteme.
Gefahrenstufen
5DE
Bestimmungsgemäße
Verwendung
– Dieser Sauger ist zur Nass- und Tro-
ckenreinigung von Boden- und Wandflächen bestimmt.
– Das Gerät ist zur Absaugung trockener,
nicht brennbarer, gesundheitsschädlicher Stäube; Staubklasse M nach
EN 60 335–2–69 geeignet. Einschränkung: Es dürfen keine krebserzeugende Stoffe aufgesaugt werden.
– Dieses Gerät ist für den industriellen
Gebrauch geeignet, z.B. in Lager- und
Fertigungsbereichen.
– Das Gerät ist für Kranverladung nicht
zugelassen.
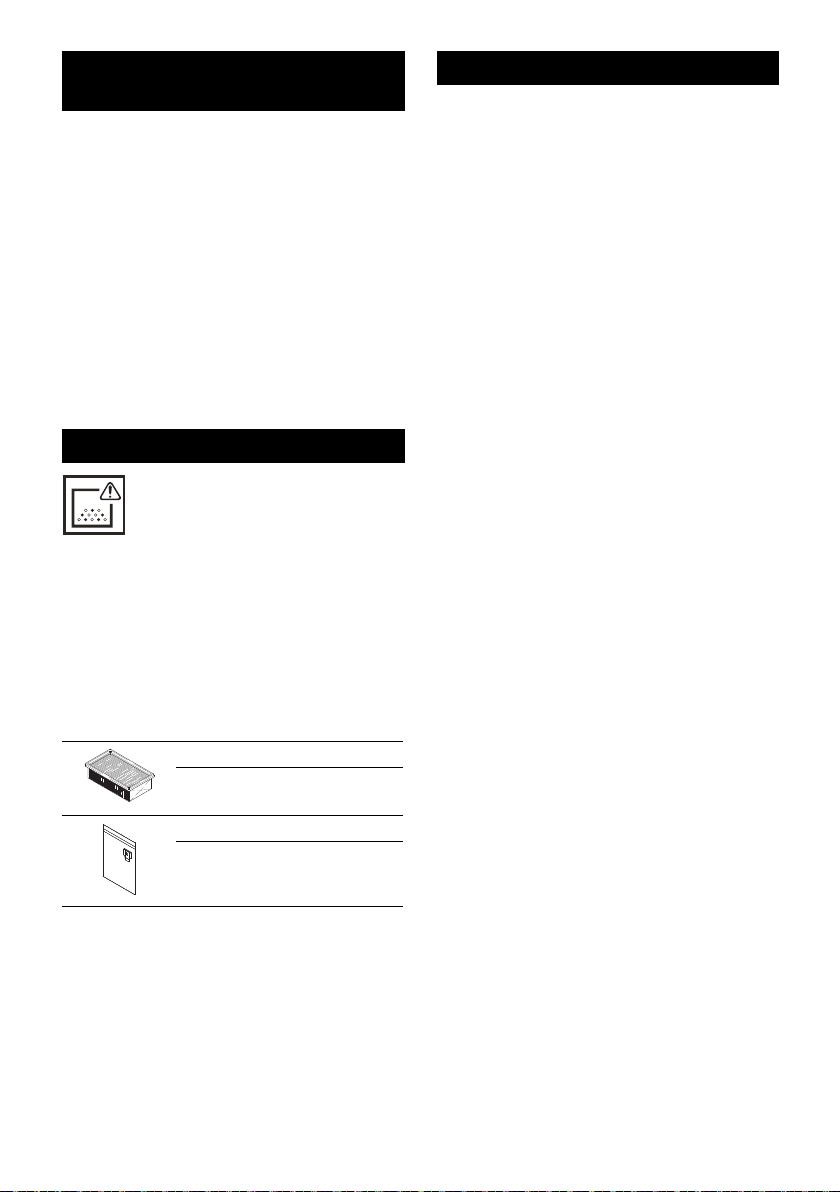
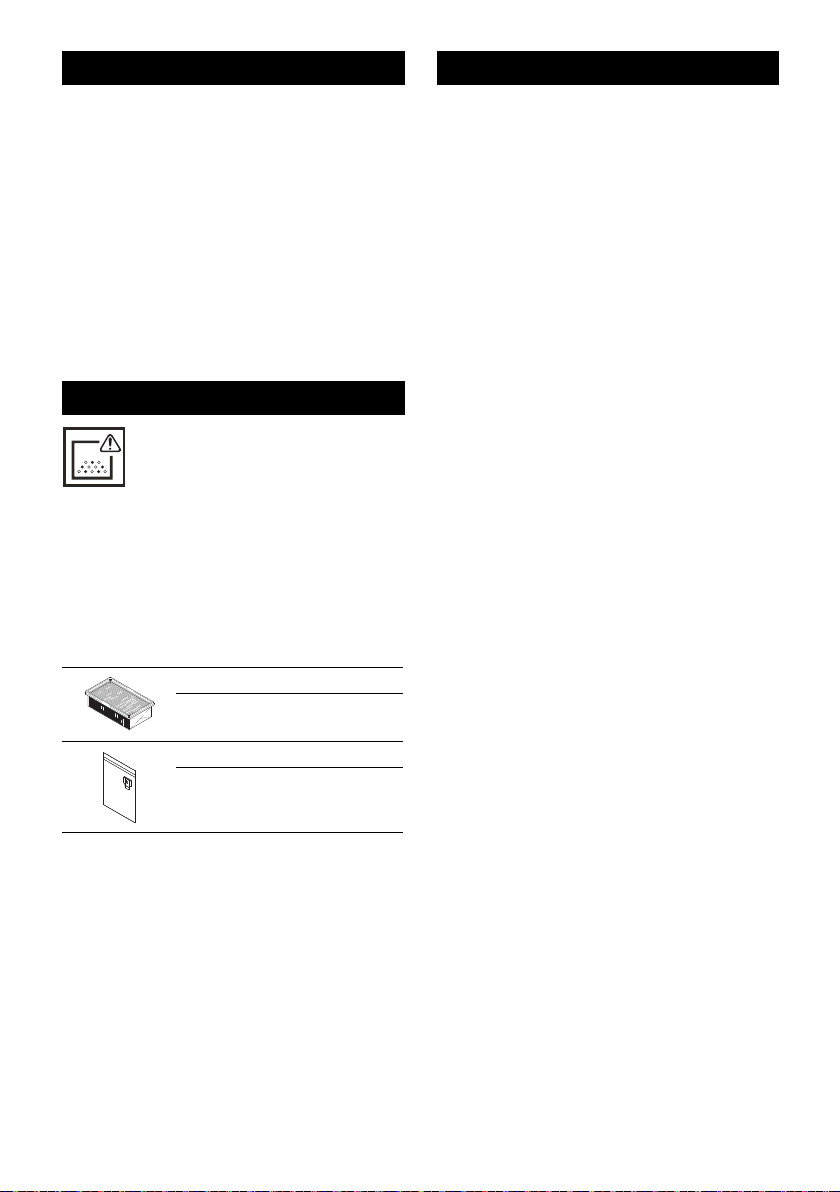
Symbole auf dem Gerät
WARNUNG: Dieses Gerät enthält gesundheitsgefährliche
Stäube. Entleerung und Wartung, einschließlich der Entfernung des
Staubbeutels, dürfen nur von sachkundigen Personen vorgenommen werden, die
geeignete persönliche Schutzausrüstung
tragen. Nicht einschalten, bevor das komplette Filtersystem installiert ist und die
Funktion der Volumenstromkontrolle überprüft wurde.
Flachfaltenfilter
Bestell-Nr. 6.907-276.0
Sicherheitshinweise
GEFAHR
– Wenn die Abluft in den Raum zurückge-
führt wird, muss eine ausreichende
Luftwechselrate L im Raum vorhanden
sein. Um die geforderten Grenzwerte
einzuhalten, darf der zurückgeführte
Volumenstrom maximal 50% des
Frischluftvolumenstroms (Raumvolumen V
x Luftwechselrate LW) betragen.
R
Ohne besondere Lüftungsmaßnahme
gilt: L
=1h–1.
– Gebrauch des Gerätes und der Substan-
– Dieses Gerät enthält gesundheits-
– Gerät nicht ohne das vollständige Filtra-
– Die anwendbaren Sicherheitsbestim-
W
zen, für die es benutzt werden soll, einschließlich des sicheren Verfahrens der
Beseitigung des aufgenommenen Materials nur durch geschultes Personal.
schädlichen Staub. Leerungs- und Wartungsvorgänge, einschließlich der Beseitigung der Staubsammelbehälter,
dürfen nur von Fachleuten durchgeführt
werden, die entsprechende Schutzausrüstung tragen.
tionssystem betreiben.
mungen, die für die zu behandelnden
Materialien zutreffen, sind zu beachten.
Entsorgungsbeutel
Bestell-Nr. 6.907-336.0
6 DE
– 2

Geräteelemente Inbetriebnahme
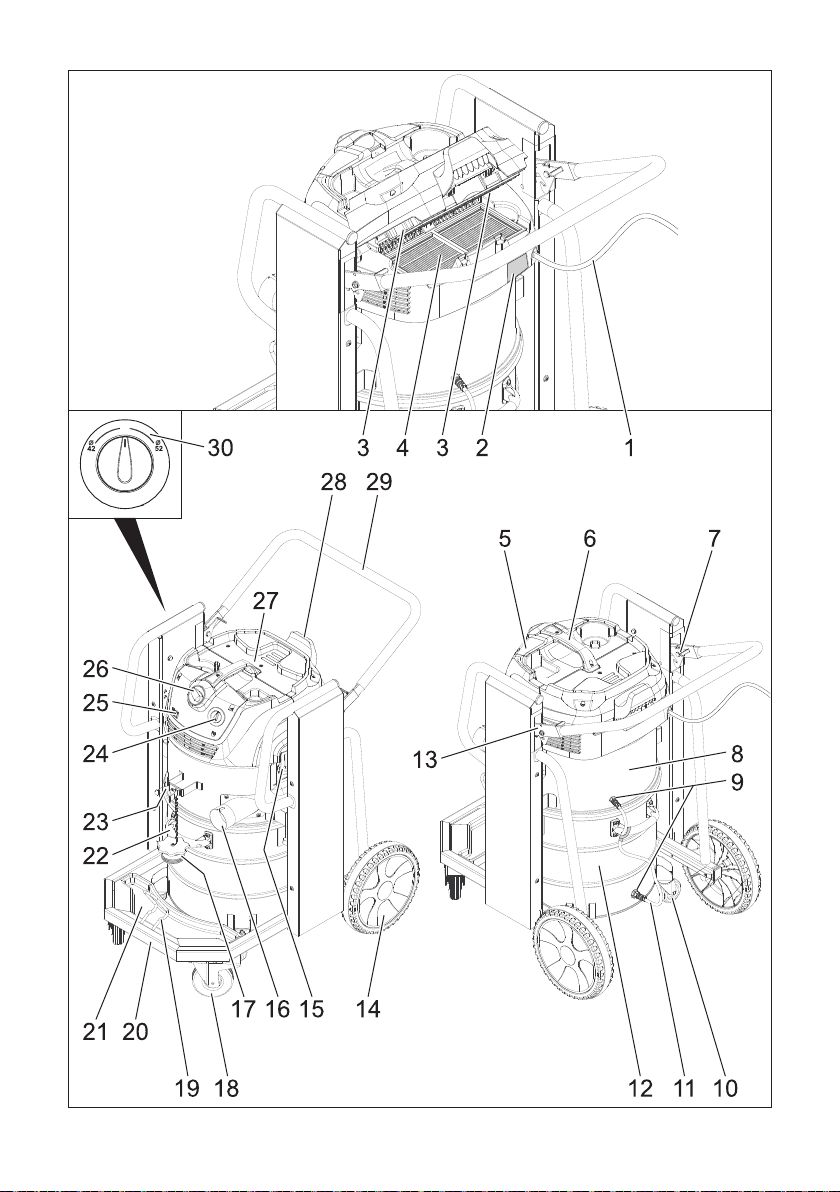
1 Netzkabel
2 Typenschild
3 Filterabreinigung
4 Flachfaltenfilter
5 Saugkopf
6 Handgriff des Saugkopfs
7 Rechte Entriegelung der Absetzmechanik
8 Zwischenring
9 Kupplung für Druckausgleich
10 Lenkrolle des Schmutzbehälters
11 Druckausgleich
12 Schmutzbehälter
13 Linke Entriegelung der Absetzmechanik
14 Laufrad
15 Verriegelung des Saugkopfs
16 Saugstutzen
17 Anschlussmuffe
18 Lenkrolle des Fahrgestells mit Feststell-
bremse
19 Halter für Bodendüse
20 Fahrgestell
21 Auffangwanne
22 Handgriff des Schmutzbehälters
23 Halter für Saugrohr
24 Drehschalter für Saugschlauchquerschnitt
25 Kontrolllampe
26 Drehschalter
27 Filterabdeckung
28 Kabelhalter
29 Schubbügel
30 Skala des Saugschlauchquerschnitts
몇 WARNUNG
Nicht ohne Filterelement saugen, da sonst
der Saugmotor beschädigt wird und eine
Gesundheitsgefährdung durch erhöhten
Feinstaubausstoß auftritt.
Das Gerät in Arbeitsposition bringen, wenn
nötig mit Feststellbremsen sichern.
Saugschlauch (nicht im Lieferumfang)
in den Saugstutzen einstecken.
Füllstand im Schmutzbehälter vor Ar-
beitsbeginn kontrollieren und Behälter
gegebenenfalls entleeren.
Sicherstellen, dass der Schmutzbehäl-
ter ordnungsgemäß eingesetzt ist.
Gewünschtes Zubehör (nicht im Liefer-
umfang) aufstecken.
Automatische
Saugleistungsüberwachung
Das Gerät ist mit einer Saugleistungsüberwachung ausgerüstet. Sinkt die Luftgeschwindigkeit im Saugschlauch unter eine
Geschwindigkeit von 20 m/s, so leuchtet
die Kontrolllampe auf.
Hinweis: Die Kontrolllampe kann während
des normalen Betriebs (z.B. beim Arbeiten
mit einer Bodendüse) zeitweise aufleuchten, wenn sich die Luftmenge reduziert
(Querschnittsverkleinerung) und sich dadurch der Unterdruck erhöht.
Hinweis: In diesen Fällen handelt es sich
jedoch nicht um einen Defekt, sondern um
einen Hinweis, dass sich, wie oben angegeben, die Luftmenge reduziert und der
Unterdruck erhöht hat.
– 3
7DE
Anti-Statik-System
Durch den geerdeten Anschlussstutzen
werden statische Aufladungen abgeleitet.
Dadurch werden Funkenbildung und
Stromstöße mit elektrisch leitendem Zubehör (Option) verhindert.
Bedienung
몇 VORSICHT
Beim Saugen darf niemals der Flachfaltenfilter entfernt werden.
Sauganschluss verschließen
몇 WARNUNG
Gesundheitsgefährdung durch Feinstaub!
Wird der Saugschlauch entfernt, muss der
Sauganschluss verschlossen werden.
Abbildung
Anschlussmuffe passgenau in Saugan-
schluss einsetzen.
Anschlussmuffe bis zum Anschlag ein-
schieben.
Sauganschluss mit der Anschlussmuffe
durch eine Rechtsdrehung fest ver-
schließen.
Hinweis: Passgenauigkeit ist durch „Bajonettanschluss“ vorgegeben.
Schmutzbehälter
Hinweis: Der Schmutzbehälter muss ent-
leert werden, wenn er bis ca. 3 cm unter
dem oberen Rand gefüllt ist.
– Füllstand im Schmutzbehälter regelmä-
ßig kontrollieren, da das Gerät nicht au-
tomatisch abschaltet.
Trockensaugen
– Das Gerät ist mit einem Entsorgungs-
beutel ausgerüstet, Bestell-Nr. 6.907-
336.0 (5 Stück).
Hinweis: Mit diesem Gerät können alle Arten von Stäuben bis Staubklasse M aufgesaugt werden. Die Verwendung eines
Staubsammelbeutels (Bestell-Nr. siehe Filtersysteme) ist gesetzlich vorgeschrieben.
Hinweis: Das Gerät ist als Industriestaubsauger zum Aufsaugen von trockenen,
nicht brennbaren Stäuben mit MAK-Werten
größer gleich 0,1 mg/m
– Beim Aufsaugen von Feinstaub muss
zusätzlich ein Entsorgungsbeutel verwendet werden.
몇 VORSICHT
Beim Wechsel von Nass- auf Trockensaugen beachten:
Saugen von trockenem Staub bei nassem
Filterelement setzt den Filter zu und kann
ihn unbrauchbar machen.
Nassen Filter vor Benutzung gut trock-
nen oder durch trockenen ersetzen.
Bei Bedarf Filter wechseln, wird unter Punkt
"Pflege und Wartung" beschrieben.
Entsorgungsbeutel einbauen
Feststellbremsen arretieren.
Abbildung
Druckausgleich am oberen Ende aus-
stecken.
Entriegelungen der Absetzmechanik
nach oben ziehen.
Schubbügel nach oben ziehen. Behäl-
ter wird entriegelt und abgesenkt.
Abbildung
Behälter am Handgriff herausziehen.
Abbildung
Entsorgungsbeutel so einsetzen, dass
dieser eng an der Behälterwand und
am Behälterboden anliegt.
Entsorgungsbeutel über Behälter stül-
pen.
Behälter wieder einsetzen und mit
Schubbügel verriegeln.
몇 WARNUNG
3
geeignet.
8 DE
– 4
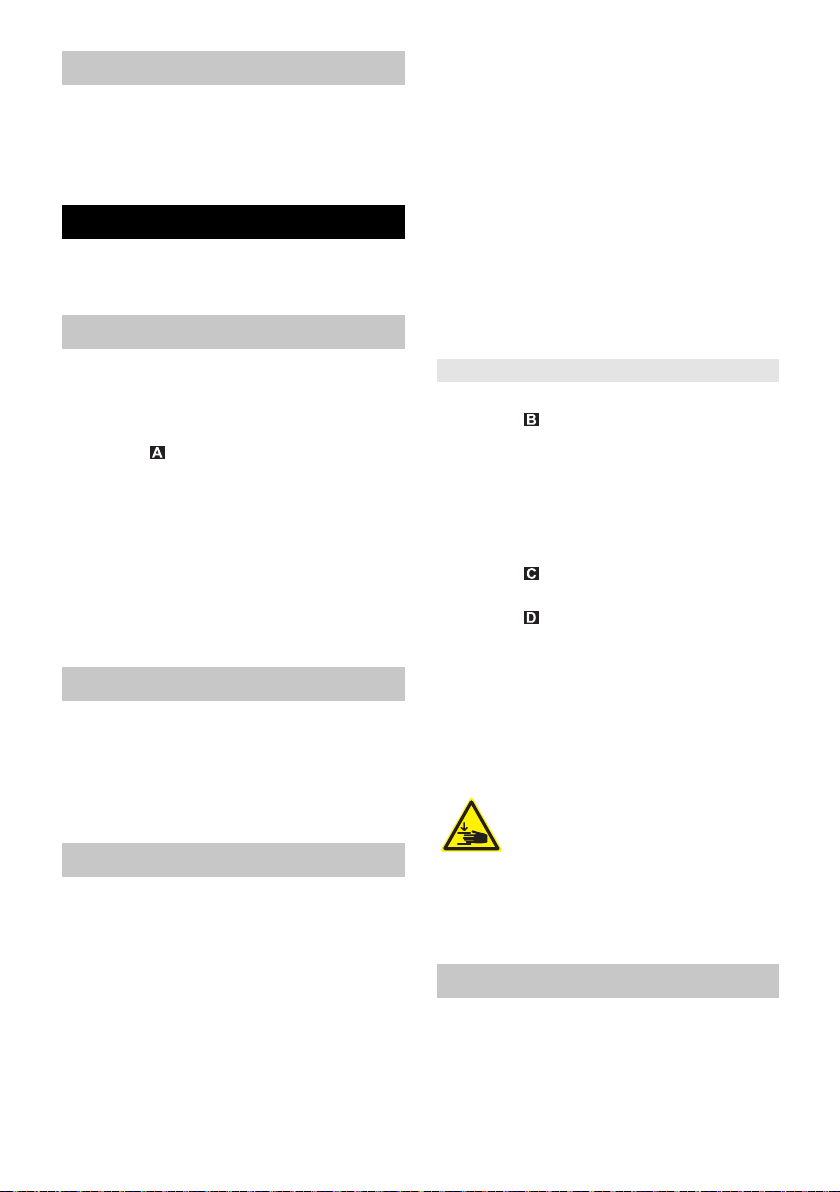
Quetschgefahr! Während der
Verriegelung keinesfalls die
Hände zwischen Schmutzbehälter und Zwischenring halten oder in die
Nähe der Hebemechanik bringen. Behälter
durch Betätigung des Schubbügels mit beiden Händen verriegeln.
Druckausgleich wieder einstecken.
Nasssaugen
Achtung: Füllstand im Schmutzbehälter
bei Aufnahme von hohen Flüssigkeitsmengen ständig kontrollieren, da der
Behälter innerhalb von wenigen Sekunden gefüllt werden und dadurch überlaufen kann.
GEFAHR
Beim Nasssaugen dürfen keine gesundheitsgefährlichen Stäube aufgenommen
werden.
– Beim Aufsaugen von Nassschmutz
muss immer der Entsorgungsbeutel
entfernt werden.
Allgemein
몇 VORSICHT
Örtliche Vorschriften zur Abwasserbehandlung beachten.
– Beim Aufsaugen von Nassschmutz mit
der Fugendüse, beziehungsweise
wenn überwiegend hohe Flüssigkeitsmengen eingesaugt werden, empfiehlt
es sich, die Funktion „Filterabreinigung“
abzuschalten.
– Nach Beendigung des Nasssaugens:
Flachfaltenfilter trocknen. Behälter mit
einem feuchten Tuch reinigen und
trocknen.
Entsorgungsbeutel entfernen
Feststellbremsen arretieren.
Abbildung
Druckausgleich am oberen Ende aus-
stecken.
Entriegelungen der Absetzmechanik
nach oben ziehen.
Schubbügel nach oben ziehen. Behäl-
ter wird entriegelt und abgesenkt.
Abbildung
Behälter am Handgriff herausziehen.
Abbildung
Entsorgungsbeutel hochstülpen.
Entsorgungsbeutel mit Verschlussstrei-
fen unterhalb der Öffnung dicht verschließen.
Entsorgungsbeutel herausnehmen.
Entsorgungsbeutel gemäß den gesetz-
lichen Bestimmungen entsorgen.
Behälter wieder einsetzen und mit
Schubbügel verriegeln.
몇 WARNUNG
Quetschgefahr! Während der
Verriegelung keinesfalls die
Hände zwischen Schmutzbehälter und Zwischenring halten oder in die
Nähe der Hebemechanik bringen. Behälter
durch Betätigung des Schubbügels mit beiden Händen verriegeln.
Druckausgleich wieder einstecken.
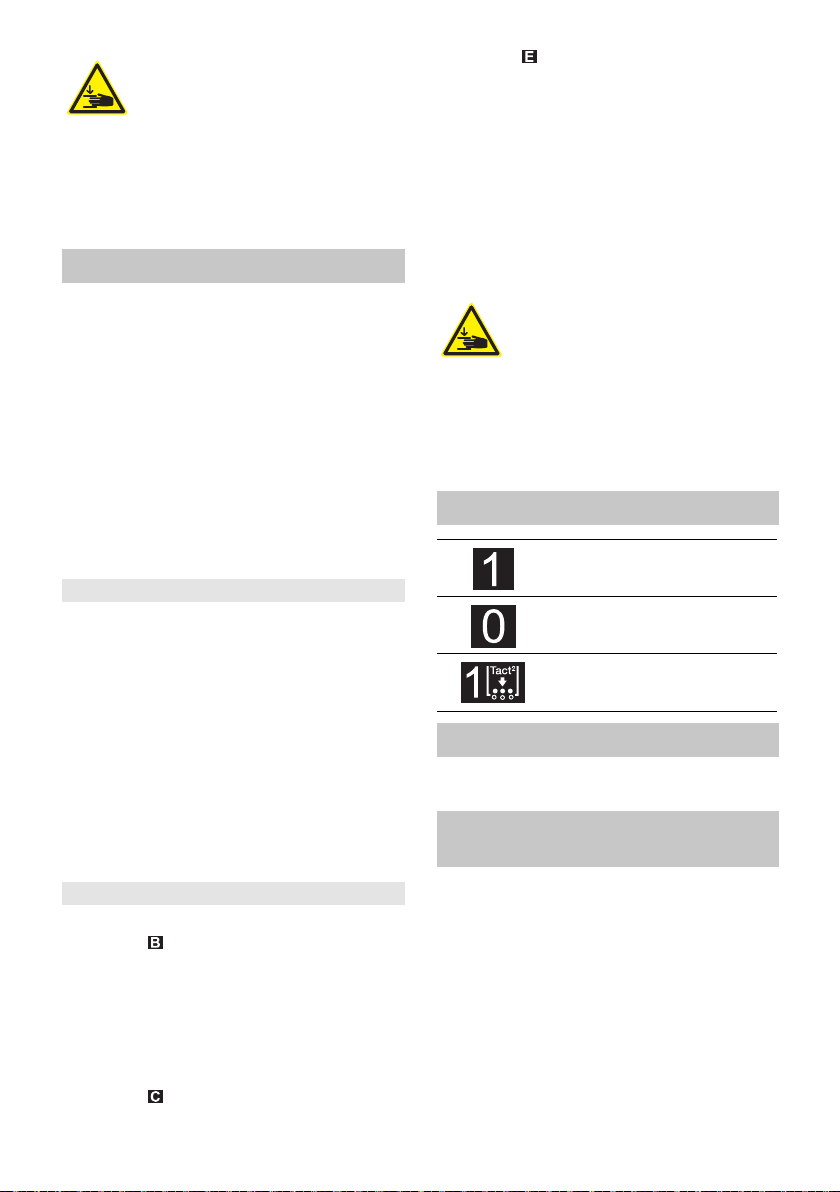
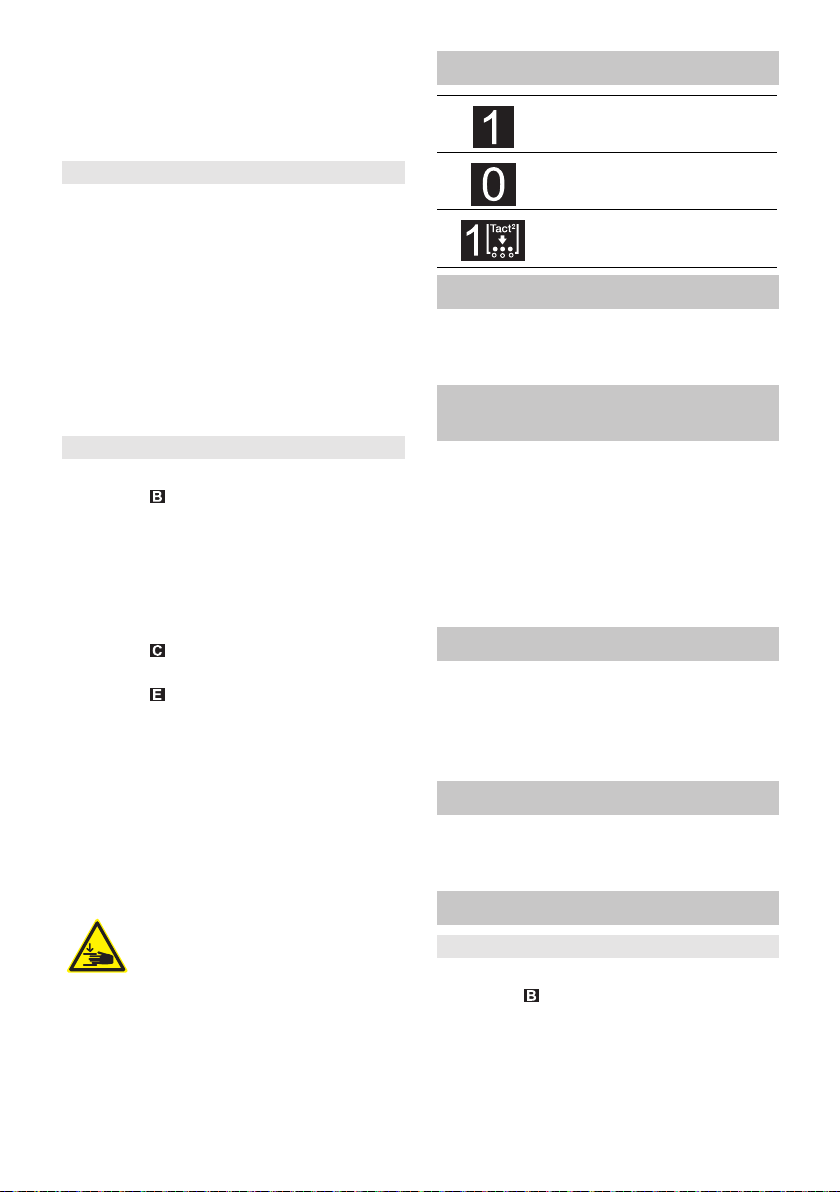
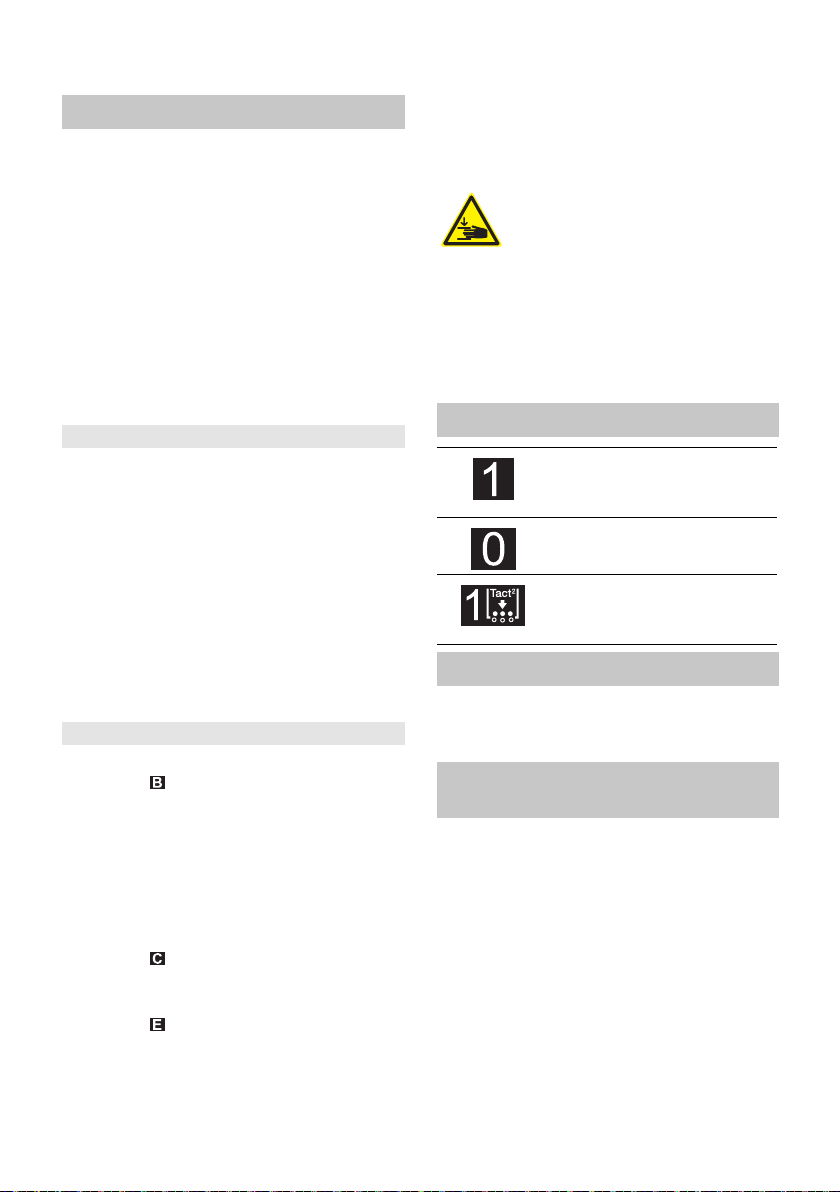
Drehschalter
– Gerät EIN
– Filterabreinigung AUS
– Gerät AUS
– Gerät EIN
– Filterabreinigung EIN
Gerät einschalten
Netzstecker einstecken.
Gerät am Drehschalter einschalten.
Saugschlauchquerschnitt
einstellen
Hinweis: Die verschiedenen Saug-
schlauchquerschnitte sind notwendig, um
eine Anpassung an die Anschlussquerschnitte der Zubehörteile zu ermöglichen.
Mindestvolumenstrom am Drehschalter
für Saugschlauchquerschnitt einstellen.
Die Skala zeigt den Saugschlauchquerschnitt an.
– 5
9DE
Automatische Filterabreinigung
Das Gerät verfügt über eine neuartige,
doppelte Filterabreinigung, besonders
wirksam bei feinem Staub. Dabei wird der
Flachfaltenfilter alle 7,5 Sekunden durch einen Luftstoß automatisch gereinigt (pulsierendes Geräusch).
Gerät ausschalten
Gerät am Drehschalter ausschalten.
Netzstecker ziehen.
Nach jedem Betrieb
Behälter entleeren
Feststellbremsen arretieren.
Abbildung
Druckausgleich am oberen Ende aus-
stecken.
Entriegelungen der Absetzmechanik
nach oben ziehen.
Schubbügel nach oben ziehen. Behäl-
ter wird entriegelt und abgesenkt.
Abbildung
Behälter am Handgriff herausziehen.
Behälter entleeren.
Behälter wieder einsetzen und mit
Schubbügel verriegeln.
몇 WARNUNG
Quetschgefahr! Während der
Verriegelung keinesfalls die
Hände zwischen Schmutzbehälter und Zwischenring halten oder in die
Nähe der Hebemechanik bringen. Behälter
durch Betätigung des Schubbügels mit beiden Händen verriegeln.
Druckausgleich wieder einstecken.
Gerät reinigen
Gerät innen und außen durch Absau-
gen und Abwischen mit einem feuchten
Tuch reinigen.
Gerät aufbewahren
Netzkabel um den Kabelhalter wickeln.
Saugschlauch um den Schubbügel wi-
ckeln.
Bodendüse und Saugrohr in die jeweili-
gen Halter stecken.
Gerät in einem trockenen Raum abstellen
und vor unbefugter Benutzung sichern.
Transport
몇 VORSICHT
Verletzungs- und Beschädigungsgefahr!
Gewicht des Gerätes beim Transport beachten.
Sauganschluss verschließen, siehe Be-
dienung.
Feststellbremsen lösen und Gerät am
Schubbügel schieben.
Gerät zum Verladen am Fahrgestell
fassen, nicht am Schubbügel.
Beim Transport in Fahrzeugen Gerät
nach den jeweils gültigen Richtlinien
gegen Rutschen und Kippen sichern.
Lagerung
몇 VORSICHT
Verletzungs- und Beschädigungsgefahr!
Gewicht des Gerätes bei Lagerung beachten.
Dieses Gerät darf nur in Innenräumen gelagert werden.
Pflege und Wartung
GEFAHR
Vor allen Arbeiten am Gerät, Gerät ausschalten und Netzstecker ziehen.
Staubbeseitigende Maschinen sind Sicherheitseinrichtungen zur Verhütung oder Beseitigung von Gefahren im Sinne von
BGV A1.
– Zur Wartung durch den Benutzer muss
das Gerät auseinandergenommen, gereinigt und gewartet werden, soweit es
durchführbar ist, ohne dabei eine Gefahr für das Wartungspersonal und andere Personen hervorzurufen. Geeignete Vorsichtsmaßnahmen beinhalten
Entgiftung vor dem Auseinanderneh-
10 DE
– 6
men. Vorsorge treffen für örtlich gefilterte Zwangsentlüftung, wo das Gerät
auseinandergenommen wird, Reinigung der Wartungsfläche und geeigneter Schutz des Personals.
– Das Äußere des Gerätes sollte durch
Staubsaugverfahren entgiftet und sauber abgewischt werden, oder mit Abdichtmittel behandelt werden, bevor es
aus dem gefährlichen Gebiet genommen wird. Alle Geräteteile müssen als
verunreinigt angesehen werden, wenn
sie aus dem gefährlichen Gebiet genommen werden. Es müssen geeignete
Maßnahmen ergriffen werden, um eine
Staubverteilung zu vermeiden.
– Bei der Durchführung von Wartungs-
und Reparaturarbeiten müssen alle verunreinigten Gegenstände, die nicht zufriedenstellend gereinigt werden können, weggeworfen werden. Solche Gegenstände müssen in undurchlässigen
Beuteln, in Übereinstimmung mit den
gültigen Bestimmungen für die Beseitigung solchen Abfalls, entsorgt werden.
– Die Ansaugöffnung bei Transport und
Wartung des Gerätes ist mit der Anschlussmuffe zu verschließen.
몇 WARNUNG
Sicherheitseinrichtungen zur Verhütung
von Gefahren müssen regelmäßig gewartet werden. Das heißt, mindestens einmal
jährlich vom Hersteller oder einer unterwiesenen Person auf ihre sicherheitstechnisch
einwandfreie Funktion überprüft werden,
z.B. Dichtheit des Gerätes, Beschädigung
des Filters, Funktion der Kontrolleinrichtungen.
몇 VORSICHT
Beschädigungsgefahr! Keine silikonhaltigen Pflegemittel zum Reinigen verwenden.
– Einfache Wartungs- und Pflegearbeiten
können Sie selbst durchführen.
– Die Geräteoberfläche und die Behälte-
rinnenseite sollten regelmäßig mit einem feuchten Tuch gereinigt werden.
GEFAHR
Gefahr durch gesundheitsschädlichen
Staub. Bei Wartungsarbeiten (z.B. Filter-
wechsel) Atemschutzmaske P2 oder höherwertig und Einwegkleidung tragen.
Flachfaltenfilter wechseln
Filterabdeckung öffnen.
Flachfaltenfilter herausnehmen.
Gebrauchten Flachfaltenfilter im staub-
dicht verschlossenen Beutel, gemäß
den gesetzlichen Bestimmungen entsorgen.
Angefallenen Schmutz auf der Reinluft-
seite entfernen.
Neuen Flachfaltenfilter einsetzen.
Filterabdeckung schließen, muss hör-
bar einrasten.
Entsorgungsbeutel wechseln
Feststellbremsen arretieren.
Abbildung
Druckausgleich am oberen Ende aus-
stecken.
Entriegelungen der Absetzmechanik
nach oben ziehen.
Schubbügel nach oben ziehen. Behäl-
ter wird entriegelt und abgesenkt.
Abbildung
Behälter am Handgriff herausziehen.
Abbildung
1 Entsorgungsbeutel hochstülpen.
2 Entsorgungsbeutel mit Verschlussstrei-
fen unterhalb der Öffnung dicht ver-
schließen.
3 Entsorgungsbeutel herausnehmen.
4 Entsorgungsbeutel gemäß den gesetz-
lichen Bestimmungen entsorgen.
Abbildung
Neuen Entsorgungsbeutel so einset-
zen, dass dieser eng an der Behälter-
wand und am Behälterboden anliegt.
Entsorgungsbeutel über Behälter stül-
pen.
Behälter wieder einsetzen und mit
Schubbügel verriegeln.
몇 WARNUNG
Quetschgefahr! Während der
Verriegelung keinesfalls die
Hände zwischen Schmutzbehäl-
ter und Zwischenring halten oder in die
– 7
11DE

Nähe der Hebemechanik bringen. Behälter
durch Betätigung des Schubbügels mit beiden Händen verriegeln.
Druckausgleich wieder einstecken.
Hilfe bei Störungen
GEFAHR
Vor allen Arbeiten am Gerät, Gerät ausschalten und Netzstecker ziehen.
Hinweis: Tritt eine Störung (z.B. Filterbruch) auf, muss das Gerät sofort abgeschaltet werden. Vor erneuter Inbetriebnahme muss die Störung beseitigt werden.
Saugturbine läuft nicht
Kabel, Stecker, Sicherung und Steck-
dose überprüfen.
Gerät einschalten.
Saugkraft lässt nach
Verstopfungen aus Saugdüse, Saug-
rohr, Saugschlauch oder Flachfaltenfilter entfernen.
Gefüllten Entsorgungsbeutel wechseln.
Saugkopf und Behälter auf richtigen
Sitz prüfen.
Filterabdeckung richtig einrasten.
Flachfaltenfilter wechseln.
Druckausgleich an beiden Enden ein-
stecken.
Staubaustritt beim Saugen
Korrekte Einbaulage des Flachfaltenfil-
ters überprüfen.
Flachfaltenfilter wechseln.
Kontrolllampe leuchtet rot
Filterabreinigung durchführen.
Flachfaltenfilter wechseln.
Drehschalter auf richtigen Saug-
schlauchquerschnitt stellen.
Bei gefülltem Entsorgungsbeutel und Un-
terschreitung des Mindestvolumenstroms
muss dieser gewechselt werden.
Automatische Filterabreinigung
arbeitet nicht
Saugschlauch nicht angeschlossen.
Verwendeter Saugschlauch ist zu kurz
(< 3m) oder hat einen zu großen Durch-
messer.
Kundendienst benachrichtigen.
Automatische Filterabreinigung
lässt sich nicht abschalten
Kundendienst benachrichtigen.
Garantie
In jedem Land gelten die von unserer zuständigen Vertriebsgesellschaft herausgegebenen Garantiebedingungen. Etwaige
Störungen an Ihrem Gerät beseitigen wir
innerhalb der Garantiefrist kostenlos, sofern ein Material- oder Herstellungsfehler
die Ursache sein sollte. Im Garantiefall
wenden Sie sich bitte mit Kaufbeleg an Ihren Händler oder die nächste autorisierte
Kundendienststelle.
12 DE
– 8

Zubehör und Ersatzteile EU-Konformitätserklärung
– Es dürfen nur Zubehör und Ersatzteile
verwendet werden, die vom Hersteller
freigegeben sind. Original-Zubehör und
Original-Ersatzteile bieten die Gewähr
dafür, dass das Gerät sicher und störungsfrei betrieben werden kann.
– Eine Auswahl der am häufigsten benö-
tigten Ersatzteile finden Sie am Ende
der Betriebsanleitung.
– Weitere Informationen über Ersatzteile
erhalten Sie unter www.kaercher.com
im Bereich Service.
– Im Lieferumfang ist kein Zubehör ent-
halten. Das Zubehör muss je nach Anwendung separat bestellt werden.
– Die einwandfreie Funktion des Gerätes
wird nur durch die Saugschlauch-Nennweiten DN42 und DN52 gewährleistet.
– Ersatzteile und Zubehör erhalten Sie
bei ihrem Händler oder bei ihrer KÄRCHER-Niederlassung.
Hiermit erklären wir, dass die nachfolgend
bezeichnete Maschine aufgrund ihrer Konzipierung und Bauart sowie in der von uns
in Verkehr gebrachten Ausführung den einschlägigen grundlegenden Sicherheitsund Gesundheitsanforderungen der EURichtlinien entspricht. Bei einer nicht mit
uns abgestimmten Änderung der Maschine
verliert diese Erklärung ihre Gültigkeit.
Produkt: Nass- und Trockensauger
Typ: 1.576-xxx
Einschlägige EU-Richtlinien
2006/42/EG (+2009/127/EG)
2014/30/EU
Angewandte harmonisierte Normen
EN 55014–1: 2006+A1: 2009+A2: 2011
EN 55014–2: 2015
EN 60335–1
EN 60335–2–69
EN 61000–3–2: 2014
EN 61000–3–3: 2013
EN 62233: 2008
Angewandte nationale Normen
-
5.966-010
Die Unterzeichnenden handeln im Auftrag
und mit Vollmacht des Vorstands.
Chairman of the Board of Management
Director Regulatory Affairs & Certification
Dokumentationsbevollmächtigter:
S. Reiser
Alfred Kärcher SE & Co. KG
Alfred-Kärcher-Straße 28-40
71364 Winnenden (Germany)
Tel.: +49 7195 14-0
Fax: +49 7195 14-2212
Winnenden, 2018/10/01
– 9
13DE

Technische Daten
IVC 60/24-2
Netzspannung V 220-240
Frequenz Hz 1~ 50/60
Max. Leistung W 2760
Nennleistung W 2400
Behälterinhalt l 60
Luftmenge (max.) m
Unterdruck (max.) kPa (mbar) 22,4 (224)
Schutzart -- IP X4
Schutzklasse -- I
Saugschlauchanschluss (C-DN/C-ID) DN 72
Saugschlauch-Nennweite DN 42/52
Länge x Breite x Höhe mm 970 x 690 x 995
Filterfläche m
Gewicht kg 60
Umgebungstemperatur (max.) °C +40
Ermittelte Werte gemäß EN 60335-2-69
Schalldruckpegel L
Unsicherheit K
pA
pA
Hand-Arm Vibrationswert m/s
Unsicherheit K m/s
Netzkabel H07RN-F 3x1,5 mm
2
Teile-Nr. Kabellänge
EUR 6.649-915.0 10 m
3
/h 260
2
0,95
dB(A) 73
dB(A) 1
2
2
<2,5
0,2
14 DE
– 10
Please read and comply with
these original instructions prior
to the initial operation of your appliance and
store them for later use or subsequent owners.
– Before first start-up it is definitely nec-
essary to read the safety indications Nr.
5.956-249.0!
– The non-compliance of the operating
and safety instructions may lead to
damages of the appliance and to dangers for the operator and other persons.
– In case of transport damage inform ven-
dor immediately.
Contents
Environmental protection . . . . EN 1
Danger or hazard levels . . . . . EN 1
Proper use . . . . . . . . . . . . . . . EN 2
Symbols on the machine. . . . . EN 2
Safety instructions. . . . . . . . . . EN 2
Device elements . . . . . . . . . . . EN 3
Start up . . . . . . . . . . . . . . . . . . EN 3
Operation . . . . . . . . . . . . . . . . EN 4
Transport. . . . . . . . . . . . . . . . . EN 6
Storage . . . . . . . . . . . . . . . . . . EN 6
Care and maintenance . . . . . . EN 6
Troubleshooting . . . . . . . . . . . EN 7
Warranty . . . . . . . . . . . . . . . . . EN 8
Accessories and Spare Parts . EN 8
EU Declaration of Conformity . EN 9
Technical specifications . . . . . EN 10
Environmental protection
The packaging material can be
recycled. Please do not throw
the packaging material into
household waste; please send it
for recycling.
Old appliances contain valuable
materials that can be recycled;
these should be sent for recycling. Batteries, oil, and similar
substances must not enter the
environment. Please dispose of
your old appliances using appropriate collection systems.
Notes about the ingredients (REACH)
You will find current information about the
ingredients at:
www.kaercher.com/REACH
Danger or hazard levels
DANGER
Immediate danger that can cause severe
injury or even death.
몇 WARNING
Possible hazardous situation that could
lead to severe injury or even death.
몇 CAUTION
Pointer to a possibly dangerous situation,
which can lead to minor injuries.
ATTENTION
Pointer to a possibly dangerous situation,
which can lead to property damage.
– 1
15EN
Proper use
– The machine is meant for dry and wet
cleaning of floors and walls.
– The appliance is suited for the extrac-
tion of dry, non-combustible, harmful
dusts; dust class M according to
EN 60 335–2–69. Restriction: No carcinogenic substances may be vacuumed
up.
– This appliance is suited for industrial
use, e.g. in storage and assembly areas.
– The appliance is not approved for crane
loading.
Symbols on the machine
WARNING: This unit contains
hazardous dust. Emptying and
maintenance, including the removal of the dust bag, may only be carried
out by someone who is familiar with the unit
and is wearing suitable protective gear. Do
not switch on the unit until the complete filter system has been installed and the function of the volume-flow control has been
tested.
Flat fold filter
Order No. 6.907-276.0
Safety instructions
DANGER
– When the outgoing air is carried back
into the room, a sufficient ventilation
rate L in the room must be ensured. To
comply with the required limit values the
carried back volume flow must be 50%
of the fresh air volume flow (room volume V
x ventilation rate LW) at maxi-
R
mum. Without a specific ventilation system the following applies: L
– Only persons trained in the use of the
machine and the handling of substances for which the machine is to be used
including training in the safe disposal of
the sucked-in material may use the machine.
– This appliance contains harmful dust.
Evacuation and maintenance work, including the disposal of the dust collection containers, may only be performed
by specialists who wear the appropriate
protective equipment.
– Do not use the appliance without the
complete filtering system.
– Please follow the safety regulations ap-
plicable to the materials that are to be
treated.
=1h–1.
W
Dust disposal bag
Order No. 6.907-336.0
16 EN
– 2

Device elements Start up
1 Power cord
2 Nameplate
3 Filter dedusting
4 Flat fold filter
5 Suction head
6 Handle of the suction head
7 Right unlocking of the placement me-
chanics
8 Intermediate ring
9 Coupling for pressure balancing
10 Steering roller of the dirt container
11 Pressure equalisation
12 Dirt receptacle
13 Left unlocking of the placement me-
chanics
14 Impeller
15 Suction head lock
16 Suction support
17 Connection bushing
18 Steering roller of the chassis with park-
ing brake
19 Floor nozzle holder
20 Chassis
21 Drain pan
22 Handle of the dirt container
23 Holder for suction pipe
24 Rotary switch for suction hose cross
section
25 Indicator lamp
26 Rotating knob
27 Filter cover
28 Cable clamp
29 Push handle
30 Scale of the suction hose cross section
몇 WARNING
Do not vacuum without the filter elements;
otherwise, the suction motor can get damaged and this can be hazardous to health
on account of increased release of fine dust
particles.
Bring the appliance to working position
- secure it, if required, with parking
brakes.
Insert the suction hose (not included)
into the suction hose connection.
Check the fill level in the dirt container
prior to starting work and empty the
container if necessary.
Ensure that the dirt container has been
inserted properly.
Attach the desired accessories (not in-
cluded).
Automatic monitoring of suction
capacity
The machine is equipped with a suction
power monitor. The control lamp lights up if
the air speed in the suction hose falls below
20 m/s.
Note: The control lamp can light up occasionally during normal operation (e.g.,
while working with a floor nozzle), if the air
volume comes down (cross-sectional reduction) causing a low pressure.
Note: There is no defect in this case; only
an indication that, as specified above, the
air volume has reduced and the low pressure has increased.
– 3
17EN
Anti-static system
Static charge is deflected by providing
earthing to the connection nozzles. This
prevents the formation of sparks and current shocks due to attachments (option)
with electrical conductivity.
Operation
몇 CAUTION
The flat pleated filter must always be in
place while vacuuming.
Close the suction connection
몇 WARNING
Health risk on account of fine dust! If the
suction hose is removed, the suction connection must be closed.
Illustration
Properly insert the connection socket in
the suction connection.
Push in the connection socket until it
locks into place.
Turn the suction connection with the
connection socket to the right to close it
tightly.
Note: The accurate fit is ensured by means
of a "bayonet connection".
Dirt receptacle
Note: The dirt container needs to be emp-
tied if it is full until about 3 cm below the upper rim.
– Check the fill level of the dirt container
at regular intervals, as the appliance
does not shut off automatically.
Dry vacuum cleaning
– The appliance is fitted with a disposal
bag, order no. 6.907-336.0 (5 ea.).
Note: You can use this appliance to take up
all types of dust up to dust class M. It is statutorily necessary to use a dust collection
bag (see Filter systems for order number).
Note:The appliance is suited as industrial
vacuum cleaner to take up dry, non-combustible dusts with MAK values greater
than or equal to 0.1 mg/m
3
.
– To vacuum fine dust, you must use an
additional disposal bag.
몇 CAUTION
Please note the following when switching from wet to dry vacuum cleaning:
If you vacuum dry dust while the filter element is still wet the filter will become obstructed and may be damaged beyond repair.
Dry the wet filter properly before use or
replace it with a dry one.
Change the filter, if required, according
to instructions under the section "Maintenance and Care".
Installing the dust disposal bag
Lock parking brakes.
Illustration
Remove the pressure balancing at the
upper end.
Pull the locks of the placement mechan-
ics up.
Pull the push handle upward. The con-
tainer is unlocked and lowered.
Illustration
Pull the container out by the handle.
Illustration
Insert the disposal bag so that it is snug
against the reservoir wall and the reser-
voir bottom.
Pull disposal bag over the container.
Reinsert the container and lock it with
the push handle.
몇 WARNING
Crush hazard. Never hold your
hands between the dirt contain-
er and the intermediate ring or
put them near the lifting mechanism while
locking. Lock the container by pressing the
sliding bow with both hands.
Plug in the pressure balancing.
Wet vacuum cleaning
Caution: Constantly monitor the fill level
in the dirt receptacle when vacuuming
high volumes of liquid, as the receptacle
can be filled within a matter of seconds
and could overflow.
18 EN
– 4
DANGER
No dusts hazardous to health should be
sucked in during wet vacuuming.
– To suck wet dirt, always remove the dis-
posal bag.
General
몇 CAUTION
Please observe the local provisions regarding the wastewater treatment.
– If wet dirt is vacuumed with the crevice
nozzle or if high volumes of liquid are
sucked up from a container, it is recommended to deactivate the "Filter Dedusting" function.
– After the wet vacuuming: Clean the flat-
fold filter. Clean the container with a
damp rag and dry it.
Removing the dust disposal bag
Lock parking brakes.
Illustration
Remove the pressure balancing at the
upper end.
Pull the locks of the placement mechan-
ics up.
Pull the push handle upward. The con-
tainer is unlocked and lowered.
Illustration
Pull the container out by the handle.
Illustration
Put the disposal bag over.
Tightly seal the disposal bag with clo-
sure strips underneath the opening.
Remove disposal bag.
Dispose of the disposal bag according
to the local provisions.
Reinsert the container and lock it with
the push handle.
몇 WARNING
Crush hazard. Never hold your
hands between the dirt contain-
er and the intermediate ring or
put them near the lifting mechanism while
locking. Lock the container by pressing the
sliding bow with both hands.
Plug in the pressure balancing.
Rotating knob
– Appliance ON
– Filter dedusting OFF
– Appliance OFF
– Appliance ON
– Filter dedusting ON
Turning on the Appliance
Plug in the mains plug.
Switch on the appliance at the rotating
knob.
Adjust the suction hose cross
section
Note: The different suction hose sections
are required to allow an adjustment to the
connection sections of the accessory parts.
Set the minimum volume flow for the
suction hose cross section at the rotary
switch.
The scale displays the suction hose cross
section.
Automatic filter cleaning
The appliance has an innovative dual filter
cleaning system that is particularly effective
with fine dust. The flat pleated filter is automatically cleaned every 7.5 seconds
through an air jet (pulsating sound).
Turn off the appliance
Switch off the appliance at the rotating
knob.
Pull out the mains plug.
After each operation
Empty the container
Lock parking brakes.
Illustration
Remove the pressure balancing at the
upper end.
Pull the locks of the placement mechan-
ics up.
– 5
19EN
Pull the push handle upward. The con-
tainer is unlocked and lowered.
Illustration
Pull the container out by the handle.
Empty the container.
Reinsert the container and lock it with
the push handle.
몇 WARNING
Crush hazard. Never hold your
hands between the dirt contain-
er and the intermediate ring or
put them near the lifting mechanism while
locking. Lock the container by pressing the
sliding bow with both hands.
Plug in the pressure balancing.
Cleaning the device
Vacuum and wipe the appliance inside
and outside with a damp cloth.
Storing the Appliance
Wrap the mains cord around the cable
holder.
Wind the suction hose around the slid-
ing bow.
Insert the floor nozzle and the suction
pipe into their respective holder.
Place the appliance in a dry room and
secure it from unauthorized use.
Transport
몇 CAUTION
Risk of injury and damage! Observe the
weight of the appliance when you transport
it.
Close the suction connection, see oper-
ating instructions.
Release the park brakes and push the
appliance by the push handle.
Grab the appliance by the chassis, not
by the sliding bow to load it.
When transporting in vehicles, secure
the appliance according to the guidelines from slipping and tipping over.
Storage
몇 CAUTION
Risk of injury and damage! Note the weight
of the appliance in case of storage.
This appliance must only be stored in interior rooms.
Care and maintenance
DANGER
First pull out the plug from the mains before
carrying out any tasks on the machine.
Dust extracting machines are safeguards
for the prevention or elimination of hazards
defined in the regulations of BGV A1.
– In order to carry out maintenance work,
the user must disassemble, clean and
service the unit, in so far as this is possible without endangering maintenance
personnel and other persons. Suitable
precautions include decontamination
before the unit is disassembled. Precautions must be taken for local filtered
forced air ventilation at the place where
the unit is disassembled, the cleaning of
the maintenance surface and suitable
protection of the personnel.
– The outside of the unit should be
cleaned thoroughly and any harmful
substances removed. Alternatively, a
sealed coating may be applied before
the unit is removed from the danger area. All unit parts are to be considered
contaminated when they are removed
from the danger area. To avoid distribution of the dust, you must take the appropriate measures.
– In the framework of maintenance and
repair work all contaminated objects
that cannot be cleaned satisfactorily
must be disposed of. Such objects must
be disposed of in impermeable bags in
accordance with the valid provisions for
the disposal of such waste.
– During the transport and maintenance
of the appliance the extraction opening
is to be closed with the connection
socket.
20 EN
– 6
몇 WARNING
Safety equipment for preventing hazards
must be serviced and maintained regularly.
This means that the manufacturer's staff or
persons trained by the manufacturer must
check the equipment for proper functioning
at least once a year, i.e. check for leaks, filter damage, functioning of the controlling
elements, etc.
몇 CAUTION
Risk of damage! Do not use detergents
containing silicone to clean.
– No outside help is required for carrying
out basic maintenance and cleaning.
– The appliance surface and the inside of
the container should be cleaned regularly using a damp cloth.
DANGER
Risk due to dust hazardous to health. Always use disposal clothing and P2 or higher breath-safe masks while carrying out
maintenance tasks (such as changing filters).
Exchanging the flat pleated filter
Open filter door.
Take out the flat folded filter.
Dispose off the used flat-folded filter in
a dust-tight bag according to the statutory provisions.
Remove the dirt that has accumulated
on the pure air side.
Insert new flat-folded filter.
Close the filter door, it must lock into
place.
Replace the disposal bag
Lock parking brakes.
Illustration
Remove the pressure balancing at the
upper end.
Pull the locks of the placement mechan-
ics up.
Pull the push handle upward. The con-
tainer is unlocked and lowered.
Illustration
Pull the container out by the handle.
Illustration
1 Put the disposal bag over.
2 Tightly seal the disposal bag with clo-
sure strips underneath the opening.
3 Remove disposal bag.
4 Dispose of the disposal bag according
to the local provisions.
Illustration
Insert the new disposal bag so that it is
snug against the reservoir wall and the
reservoir bottom.
Pull disposal bag over the container.
Reinsert the container and lock it with
the push handle.
몇 WARNING
Crush hazard. Never hold your
hands between the dirt contain-
er and the intermediate ring or
put them near the lifting mechanism while
locking. Lock the container by pressing the
sliding bow with both hands.
Plug in the pressure balancing.
Troubleshooting
DANGER
First pull out the plug from the mains before
carrying out any tasks on the machine.
Note: In case of a failure (e.g. filter breakage) the appliance must be turned off immediately. The failure must be remedied
before the appliance is put into operation
again.
Suction turbine does not run
Check cables, plugs, fuse, and socket.
Turn on the appliance.
Suction capacity decreases
Remove blockages in the suction noz-
zle, suction tube, suction hose, or flat
pleated filter.
Replace the filled disposal bag
Check the suction head and the recep-
tacle for proper seating.
Ensure the filter cover properly locks
into place.
Replace the flat pleated filter.
Connect the pressure balancing at both
ends.
– 7
21EN

Dust comes out while vacuuming
Check for proper installation of the flat
pleated filter.
Replace the flat pleated filter.
Indicator lamp glows red
Perform the filter cleaning.
Replace the flat pleated filter.
Set the rotary switch to the correct suc-
tion hose cross-section.
If the disposal bag is full and the mini-
mum volume flow is fallen short of it has
to be replaced.
Automatic filter cleaning is not
working
Suction hose is not connected.
Suction hose used is too short (< 3m) or
the diameter is too large.
Inform Customer Service.
Automatic filter cleaning cannot be
switched off
Inform Customer Service.
Warranty
The warranty terms published by the relevant sales company are applicable in each
country. We will repair potential failures of
your appliance within the warranty period
free of charge, provided that such failure is
caused by faulty material or defects in manufacturing. In the event of a warranty claim
please contact your dealer or the nearest
authorized Customer Service centre.
Please submit the proof of purchase.
Accessories and Spare Parts
– Only use accessories and spare parts
which have been approved by the manufacturer. The exclusive use of original
accessories and original spare parts
ensures that the appliance can be operated safely and trouble free.
– At the end of the operating instructions
you will find a selected list of spare parts
that are often required.
– For additional information about spare
parts, please go to the Service section
at www.kaercher.com.
– Accessories are not included in the de-
livery. The accessories for the device
must be ordered separately, depending
on the application.
– The proper functioning of the unit is only
ensured when a suction hose of a nominal width of DN42 or DN52 is used.
– You can procure the spare parts and
the attachments from your dealer or
your KÄRCHER branch office.
22 EN
– 8
EU Declaration of Conformity
We hereby declare that the machine described below complies with the relevant
basic safety and health requirements of the
EU Directives, both in its basic design and
construction as well as in the version put
into circulation by us. This declaration shall
cease to be valid if the machine is modified
without our prior approval.
Product: Wet and dry vacuum cleaner
Type: 1.576-xxx
Relevant EU Directives
2006/42/EC (+2009/127/EC)
2014/30/EU
Applied harmonized standards
EN 55014–1: 2006+A1: 2009+A2: 2011
EN 55014–2: 2015
EN 60335–1
EN 60335–2–69
EN 61000–3–2: 2014
EN 61000–3–3: 2013
EN 62233: 2008
Applied national standards
-
5.966-010
The signatories act on behalf of and with
the authority of the company management.
Chairman of the Board of Management
Director Regulatory Affairs & Certification
Documentation supervisor:
S. Reiser
Alfred Kärcher SE & Co. KG
Alfred-Kärcher-Straße 28-40
71364 Winnenden (Germany)
Tel.: +49 7195 14-0
Fax: +49 7195 14-2212
Winnenden, 2018/10/01
– 9
23EN

Technical specifications
IVC 60/24-2
Mains voltage V 220-240
Frequency Hz 1~ 50/60
Max. performance W 2760
Rated power W 2400
Container capacity l 60
Air volume (max.) m
Negative pressure (max.) kPa (mbar) 22,4 (224)
Type of protection -- IP X4
Protective class -- I
Suction hose connection (C-DN/C-ID) DN 72
Nominal width of suction hose DN 42/52
Length x width x height mm 970 x 690 x 995
Filter area m
Weight kg 60
Max. ambient temperature °C +40
Values determined to EN 60335-2-69
Sound pressure level L
Uncertainty K
pA
pA
Hand-arm vibration value m/s
Uncertainty K m/s
Power cord H07RN-F 3x1,5 mm
2
Part no.: Cable
length
EUR 6.649-915.0 10 m
3
/h 260
2
0,95
dB(A) 73
dB(A) 1
2
2
<2,5
0,2
24 EN
– 10
Lire ce manuel d'utilisation origi-
nal avant la première utilisation
de votre appareil, le respecter et le conserver pour une utilisation ultérieure ou pour le
futur propriétaire.
– Avant la première mise en service, vous
devez impérativement avoir lu les
consignes de sécurité N° 5.956-249.0 !
– En cas de non-respect des instructions
de service et des consignes de sécurité, l'appareil risque de subir des dommages matériels et l'utilisateur ainsi
que toute tierce personne sont exposés
à des dangers potentiels.
– Contactez immédiatement le revendeur
en cas d'avarie de transport.
Table des matières
Protection de l’environnement FR 1
Niveaux de danger . . . . . . . . . FR 1
Utilisation conforme . . . . . . . . FR 2
Symboles sur l'appareil. . . . . . FR 2
Consignes de sécurité . . . . . . FR 2
Éléments de l'appareil. . . . . . . FR 3
Mise en service . . . . . . . . . . . . FR 3
Utilisation . . . . . . . . . . . . . . . . FR 4
Transport. . . . . . . . . . . . . . . . . FR 6
Entreposage . . . . . . . . . . . . . . FR 6
Entretien et maintenance . . . . FR 6
Assistance en cas de panne . . FR 8
Garantie . . . . . . . . . . . . . . . . . FR 8
Accessoires et pièces de re-
change . . . . . . . . . . . . . . . . . . FR 9
Déclaration UE de conformité . FR 9
Caractéristiques techniques . . FR 10
Protection de
l’environnement
Les matériaux constitutifs de
l’emballage sont recyclables. Ne
pas jeter les emballages dans
les ordures ménagères, mais les
remettre à un système de recyclage.
Les appareils usés contiennent
des matériaux précieux recyclables lesquels doivent être apportés à un système de recyclage. Il est interdit de jeter les
batteries, l'huile et les substances similaires dans l'environnement. Pour cette raison, utiliser des systèmes de collecte
adéquats afin d'éliminer les appareils hors d'usage.
Instructions relatives aux ingrédients
(REACH)
Les informations actuelles relatives aux ingrédients se trouvent sous :
www.kaercher.com/REACH
Niveaux de danger
DANGER
Pour un danger immédiat qui peut avoir
pour conséquence la mort ou des blessures corporelles graves.
몇 AVERTISSEMENT
Pour une situation potentiellement dangereuse qui peut avoir pour conséquence des
blessures corporelles graves ou la mort.
몇 PRÉCAUTION
Remarque relative à une situation potentiellement dangereuse pouvant entraîner
des blessures légères.
ATTENTION
Remarque relative à une situation éventuellement dangereuse pouvant entraîner
des dommages matériels.
– 1
25FR
Utilisation conforme
– Cet aspirateur est destiné au nettoyage
à sec et au nettoyage par voie humide
des sol et murs.
– L'appareil convient à l'aspiration de
poussières sèches, non inflammables,
nocives pour la santé ; classe de poussières M selon EN 60 335–2–69. Restriction : il est interdit d'aspirer des substances cancérigènes.
– Cet appareil convient à un usage indus-
triel, par ex. dans le secteur entrepôt et
fabrication.
– L'appareil n'est pas homologué pour un
chargement par grue.
Symboles sur l'appareil
AVERTISSEMENT : cet appareil
contient des poussières nocives
pour la santé. Le vidage et la
maintenance, y compris le retrait du sac à
poussière, ne doivent être faits que par des
personnes expertes, portant l'équipement
de protection personnel approprié. Ne pas
enclencher avant que l'ensemble du système filtrant ne soit installé et que le fonctionnement du contrôle de débit volumique
ne soit vérifié.
Filtre plat de plis
N° de réf. 6.907-276.0
Consignes de sécurité
DANGER
– Si l'air évacué est renvoyé dans la
pièce, le taux de renouvellement d'air L
dans la pièce doit être suffisant. Pour
respecter les valeurs limites exigées, le
débit volumétrique réintroduit doit représenter au maximum 50% du débit
volumétrique d’air frais (Volume espace
V
x taux de renouvellement de l’air LW).
R
Le suivant est valable sans mesures
particulières de ventilation : L
– Seul du personnel formé est habilité à
opérer l'appareil et les substances pour
lesquels il doit être utilisé, y compris le
comportement sûr d'élimination du matériau aspiré.
– Cet appareil contient des poussières
nocives pour la santé. Les opérations
de vidange et de maintenance, y compris l’élimination du collecteur de poussières, ne doivent être effectuées que
par des spécialistes portant un équipement de protection approprié.
– Ne jamais utiliser l'appareil sans le sys-
tème complet de filtration.
– Respecter les dispositions de sécurité
applicables qui concernent les matériaux à traiter.
=1h–1.
W
Sac d'élimination
N° de réf. 6.907-336.0
26 FR
– 2

Éléments de l'appareil Mise en service
1 Câble d’alimentation
2 Plaque signalétique
3 Nettoyage du filtre
4 Filtre plat de plis
5 Tête d'aspiration
6 Poignée de la tête d'aspiration
7 Déverrouillage droit du mécanisme de
pose
8 Bague intermédiaire
9 Coupleur pour équilibrage de pression
10 Roulette du collecteur de saletés
11 Équilibrage de pression
12 Récipient collecteur
13 Déverrouillage gauche du mécanisme
de pose
14 Roue
15 Verrouillage de la tête d'aspiration
16 Raccord d'aspiration
17 Manchon de jonction
18 Roulette du châssis avec frein d'arrêt
19 Support pour buse de sol
20 Châssis
21 Cuve de récupération
22 Poignée du collecteur de saletés
23 Support pour tube d'aspiration
24 Bouton rotatif pour la section du flexible
d'aspiration
25 Témoin de contrôle
26 Interrupteur rotatif
27 Recouvrement du filtre
28 Attache-câble
29 Guidon de poussée
30 Graduation de la section du flexible
d'aspiration
몇 AVERTISSEMENT
Ne pas aspirer sans élément filtrant, sous
peine d'endommager le moteur d'aspiration
et de mettre la santé en danger par émission accrue de poussière fine
Amener l'appareil en position de travail,
si nécessaire le bloquer au moyen des
freins d'immobilisation.
Insérer le flexible d'aspiration (ne fai-
sant pas partie de la fourniture) dans la
tubulure d'aspiration.
Avant de commencer le travail, vérifier
le niveau de remplissage dans le collecteur de saletés et vider le cas échéant le
collecteur.
S'assurer que le collecteur de saletés
est positionné correctement.
Insérer les accessoires voulus (ne fai-
sant pas partie de la fourniture).
Surveillance automatique de la
puissance d'aspiration
L'appareil est équipé d'un dispositif de surveillance de la puissance d'aspiration. La
lampe témoin s'allume si la vitesse de l'air
dans le flexible d'aspiration baisse à une
valeur inférieure à 20 m/s.
Remarque : Durant le fonctionnement normal (par exemple lors de travaux avec une
buse de sol), le témoin de contrôle peut
s'allumer temporairement si la quantité
d'air diminue (réduction de la section) et si,
par conséquent, la dépression augmente.
Remarque : Il ne s'agit alors pas d'une défaillance, mais d'un symptôme d'une diminution de la quantité d'air et donc d'une
augmentation de la dépression, comme
précédemment signalé.
– 3
27FR
Système antistatique
Les charges statiques sont évacuées par
les embouts de raccordement reliés à la
terre. La formation d'étincelles et les chocs
électriques avec les accessoires conduisant l'électricité (option) sont ainsi évités.
Utilisation
몇 PRÉCAUTION
Le filtre à plis plats ne doit jamais être retiré
durant l'aspiration.
Fermer le raccord d'aspiration
몇 AVERTISSEMENT
Impact des poussières fines sur la santé !
Si le flexible est retiré, le raccord d'aspiration doit être obturé.
Illustration
Placer le manchon de jonction exacte-
ment dans le raccord d'aspiration.
Enfoncer le manchon de jonction jus-
qu'à la butée.
Fermer fermement le raccord d'aspira-
tion avec le manchon de jonction en
tournant vers la droite.
Remarque : la précision d'adaptation est
prescrite par le "raccord à baïonnette".
Récipient collecteur
Remarque : le collecteur de saletés doit
être vidé, lorsqu'il est plein jusqu'à env. 3
cm sous le bord supérieur.
– Vérifier régulièrement le niveau de rem-
plissage dans le collecteur de saletés,
vu que l'appareil ne se coupe pas auto-
matiquement.
Aspiration de poussières
– L'appareil est équipé d'un sachet d'éli-
mination, référence 6 907-336.0 (5 en
tout).
Remarque : Cet appareil permet d'aspirer
tout type de poussières jusqu'à la classe de
poussière M. L'utilisation d'un sac collecteur de poussières (référence voir systèmes de filtrage) est imposée par la loi.
Remarque :L'appareil convient à une utilisation en tant qu'aspirateur industriel pour
l'aspiration de poussières sèches, non inflammables avec une concentration maximale supérieure ou égale à 0,1 mg/m
– Pour l'aspiration de poussières fines, il
faut utiliser en plus un sac à éliminer.
몇 PRÉCAUTION
Avant de passer de l’aspiration humide
à l’aspiration à sec, il faut noter que :
aspirer de la poussière sèche avec une cartouche de filtre mouillée peut boucher le
filtre et le rendre inutilisable.
Il faut donc bien sécher un filtre mouillé
avant de l'utiliser ou bien le remplacer
par un filtre sec.
Le cas échéant, remplacer le filtre (se
référer au point 'Entretien et maintenance').
Monter le sac d'élimination
Bloquer le frein de stationnement.
Illustration
Débrancher l'équilibrage de pression
au niveau de l'extrémité supérieure.
Tirer les déverrouillages du mécanisme
de pose vers le haut.
Tirer le guidon de poussée vers le haut.
Le collecteur est déverrouillé et
s'abaisse.
Illustration
Retirer le collecteur au niveau de la poi-
gnée.
Illustration
Disposer le sachet pour le recyclage de
telle sorte qu'il soit bien plaqué sur la
paroi extérieure et sur le fond du réser-
voir.
Retourner le sachet d'élimination sur le
réservoir.
Remettre le collecteur en place et le
verrouiller avec le guidon de poussée.
몇 AVERTISSEMENT
Risque d'écrasement ! Ne
mettre en aucun cas les mains
entre le collecteur de saletés et
la bague intermédiaire ou à la proximité
mécanisme de levage pendant le verrouillage. Verrouiller le collecteur en actionnant
le guidon de poussée des deux mains.
3
.
28 FR
– 4
Rebrancher le système d'équilibrage de
pression.
Aspiration humide
Attention : Contrôler en permanence le
niveau de remplissage dans le récipient
collecteur lors de l'absorption de
grandes quantités de liquide, car le récipient se remplit en l'espace de quelques
secondes et risque de déborder.
DANGER
Pour l'aspiration de liquide, il est interdit
d'aspirer des poussières nocives pour la
santé.
– En cas d'aspiration de saletés humides,
il faut toujours enlever le filtre d'élimination.
Généralités
몇 PRÉCAUTION
Tenir compte des prescriptions locales
pour le traitement des eaux usées.
– Pour l'aspiration de saletés humides
avec le petit suceur, ou bien si l'aspiration consiste surtout à aspirer de
grandes quantités d'eau, il est recommandé de désactiver la fonction "Nettoyage du filtre".
– À la fin de l'aspiration humide : sécher
le filtre à plis plat. Nettoyer le réservoir
avec un chiffon humide et le sécher.
Retirer le sac d'élimination
Bloquer le frein de stationnement.
Illustration
Débrancher l'équilibrage de pression
au niveau de l'extrémité supérieure.
Tirer les déverrouillages du mécanisme
de pose vers le haut.
Tirer le guidon de poussée vers le haut.
Le collecteur est déverrouillé et
s'abaisse.
Illustration
Retirer le collecteur au niveau de la poi-
gnée.
Illustration
Retourner le sac d'élimination.
Fermer le sac d'élimination de manière
étanche avec la bande fermeture en
dessous de l'ouverture.
Retirer le sac d'élimination.
Eliminer le sac d'élimination selon les
dispositions légales.
Remettre le collecteur en place et le
verrouiller avec le guidon de poussée.
몇 AVERTISSEMENT
Risque d'écrasement ! Ne
mettre en aucun cas les mains
entre le collecteur de saletés et
la bague intermédiaire ou à la proximité
mécanisme de levage pendant le verrouillage. Verrouiller le collecteur en actionnant
le guidon de poussée des deux mains.
Rebrancher le système d'équilibrage de
pression.
Interrupteur rotatif
– Appareil MARCHE
– Nettoyage de filtre AR-
RÊT
– Appareil ARRÊT
– Appareil MARCHE
– Nettoyage de filtre
MARCHE
Mettre l'appareil en marche
Brancher la fiche secteur.
Enclencher l'appareil à l'aide de l'inter-
rupteur rotatif.
Régler la section du flexible
d'aspiration
Remarque : Les différentes sections du
tuyau d'aspiration sont nécessaires pour
pouvoir garantir une adaptation aux sections de raccord des accessoires.
Régler le débit volumique minimum sur
le bouton rotatif pour la section du
flexible d'aspiration.
La graduation indique la section du flexible
d'aspiration.
– 5
29FR
Nettoyage automatique du filtre
L'appareil est équipé d'un nouveau type de
nettoyage double de filtre particulièrement
efficace pour les poussières fines. Avec ce
procédé, le filtre à plis plats est automatiquement nettoyé par un souffle (bruit pulsant) toutes les 7,5 secondes.
Mise hors service de l'appareil
Couper l'appareil à l'aide de l'interrup-
teur rotatif.
Retirer la fiche secteur.
Après chaque mise en service
Vider le réservoir
Bloquer le frein de stationnement.
Illustration
Débrancher l'équilibrage de pression
au niveau de l'extrémité supérieure.
Tirer les déverrouillages du mécanisme
de pose vers le haut.
Tirer le guidon de poussée vers le haut.
Le collecteur est déverrouillé et
s'abaisse.
Illustration
Retirer le collecteur au niveau de la poi-
gnée.
Vider le réservoir.
Remettre le collecteur en place et le
verrouiller avec le guidon de poussée.
몇 AVERTISSEMENT
Risque d'écrasement ! Ne
mettre en aucun cas les mains
entre le collecteur de saletés et
la bague intermédiaire ou à la proximité
mécanisme de levage pendant le verrouillage. Verrouiller le collecteur en actionnant
le guidon de poussée des deux mains.
Rebrancher le système d'équilibrage de
pression.
Nettoyage de l’appareil
Nettoyer la partie intérieure et exté-
rieure de l'appareil en l'aspirant et en
l'essuyant avec un chiffon humide.
Ranger l’appareil
Enrouler le câble secteur autour de l'at-
tache-câbles.
Enrouler le flexible d'aspiration autour
du guidon de poussée.
Insérer la buse de sol et le tube d'aspi-
ration dans le support correspondant.
Entreposer l’appareil dans un endroit
sec et le sécuriser contre toute utilisation non autorisée.
Transport
몇 PRÉCAUTION
Risque de blessure et d'endommagement !
Respecter le poids de l'appareil lors du
transport.
Fermer le raccord d'aspiration, voir la
commande.
Desserrer le frein d'arrêt et pousser
l'appareil au niveau du guidon de poussée.
Pour porter l’appareil, toujours le saisir
au niveau du châssis et jamais au niveau du guidon de poussée.
Sécuriser l'appareil contre les glisse-
ments ou les basculements selon les directives en vigueur lors du transport
dans des véhicules.
Entreposage
몇 PRÉCAUTION
Risque de blessure et d'endommagement !
Prendre en compte le poids de l'appareil à
l'entreposage.
Cet appareil doit uniquement être entreposé en intérieur.
Entretien et maintenance
DANGER
Avant d'effectuer tout type de travaux sur
l'appareil, le mettre hors service et débrancher la fiche électrique.
Des machines destinées à éliminer les
poussières sont des dispositifs de sécurité
permettant d'éviter ou d'éliminer d'éventuels risques au sens de BGV A1.
– Pour la maintenance par l'utilisateur,
l'appareil doit être désassemblé, net-
30 FR
– 6
 Loading...