

Page 1
Register and win!
www.karcher.com
59661590 03/13
FP 303
ΔϳΒήόϠ
183
Deutsch 3
English 9
Français 15
Italiano 21
Nederlands 27
Español 33
Português 40
Dansk 47
Norsk 53
Svenska 59
Suomi 65
Ελληνικά 71
Türkçe 79
Русский 85
Magyar 93
Čeština 99
Slovenščina 105
Polski 111
Româneşte 119
Slovenčina 126
Hrvatski 132
Srpski 138
Български 144
Eesti 151
Latviešu 157
Lietuviškai 163
Українська 169
Page 2
2
Page 3

Deutsch
– 3
Sehr geehrter Kunde,
Lesen Sie vor der ersten Benut-
zung Ihres Gerätes diese Originalbetriebsanleitung, handeln Sie danach
und bewahren Sie diese für späteren Gebrauch oder für Nachbesitzer auf.
Dieses Gerät wurde für den privaten
Gebrauch entwickelt und ist nicht für die
Beanspruchungen des gewerblichen
Einsatzes vorgesehen.
Das Gerät gestattet das Polieren von
Holzböden, Laminat, Steinböden, Linoleum und PVC-Böden.
Das Gerät ist nur zum Absaugen des
Polierabriebs geeignet.
Das Gerät ist kein Staubsauger! Nicht
zum Aufsaugen von trockenem
Schmutz verwenden!
Kein lösungsmittelhaltiges Pflegemittel
verwenden.
Das Gerät darf nicht auf Teppichböden
o.ä. angewandt werden.
Das Gerät nicht mit zusätzlichem Ge-
wicht beschweren.
Das Gerät darf nicht im Freien oder bei
nassen Bedingungen verwendet oder
abgestellt werden.
Das Gerät nur mit Original-Filterbeu-
teln, Original-Ersatzteilen, -Zubehör
oder -Sonderzubehör benutzen.
Das laufende Gerät immer bewegen.
Nicht lange auf einer Stelle verweilen,
sonst können Schäden am Bodenbelag
entstehen.
Bitte immer die Hinweise des Bodenbe-
lag- und Pflegemittelherstellers beachten!
Der Hersteller haftet nicht für eventuelle
Schäden, die durch nicht bestimmungsgemäßen Gebrauch oder falsche Bedienung
verursacht werden.
Die Verpackungsmaterialien sind re-
cyclebar. Bitte werfen Sie die Verpackungen nicht in den Hausmüll, sondern
führen Sie diese einer Wiederverwertung zu.
Altgeräte enthalten wertvolle recyclingfähige Materialien, die einer Ver-
wertung zugeführt werden sollten.
Bitte entsorgen Sie Altgeräte deshalb über
geeignete Sammelsysteme.
Hinweise zu Inhaltsstoffen (REACH)
Aktuelle Informationen zu Inhaltsstoffen finden Sie unter:
www.kaercher.de/REACH
In jedem Land gelten die von unserer zuständigen Vertriebsgesellschaft herausgegebenen Garantiebedingungen. Etwaige
Störungen an Ihrem Gerät beseitigen wir
innerhalb der Garantiefrist kostenlos, sofern ein Material- oder Herstellungsfehler
die Ursache sein sollte. Im Garantiefall
wenden Sie sich bitte mit Kaufbeleg an Ihren Händler oder die nächste autorisierte
Kundendienststelle.
(Adresse siehe Rückseite)
Bei Fragen oder Störungen hilft Ihnen unsere KÄRCHER-Niederlassung gerne weiter.
Inhalt
Allgemeine Hinweise . . . . . DE . . .3
Sicherheitshinweise . . . . . . DE . . .4
Inbetriebnahme . . . . . . . . . DE . . .4
Bedienung . . . . . . . . . . . . . DE . . .5
Betrieb beenden. . . . . . . . . DE . . . 6
Pflege und Wartung . . . . . . DE . . .7
Störungshilfe . . . . . . . . . . . DE . . .7
Technische Daten. . . . . . . . DE . . .7
Sonderzubehör. . . . . . . . . . DE . . .8
Allgemeine Hinweise
Bestimmungsgemäße Verwendung
Umweltschutz
Garantie
Kundendienst
3DE
Page 4

– 4
Eine Auswahl der am häufigsten benötigten Ersatzteile finden Sie am Ende der Betriebsanleitung.
Ersatzteile und Zubehör erhalten Sie bei ihrem Händler oder bei ihrer KÄRCHER-Niederlassung.
Stromanschluss
– Das Gerät nur gemäß Typenschild an-
schließen und in Betrieb nehmen.
– Den Netzstecker niemals mit nassen
Händen anfassen.
– Nicht am Netzanschlusskabel, sondern
am Stecker ziehen, um das Gerät vom
Netz zu trennen.
– Das Netzanschlusskabel oder das Ver-
längerungskabel nicht durch Überfahren, Quetschen, Zerren oder
dergleichen verletzen oder beschädigen. Das Kabel vor Hitze, Öl und scharfen Kanten schützen.
– Gerät vor externer Witterung, Feuchtig-
keit und Hitzequellen schützen.
Anwendung
– Bei längeren Arbeitspausen Gerät am
Hauptschalter / Geräteschalter ausschalten oder Netzstecker ziehen.
– Dieses Gerät ist nicht dafür bestimmt,
durch Personen (einschließlich Kinder)
mit eingeschränkten physischen, sensorischen oder geistigen Fähigkeiten
oder mangels Erfahrung und/oder mangels Wissen benutzt zu werden, es sei
denn, sie werden durch eine für ihre Sicherheit zuständige Person beaufsichtigt oder erhielten von ihr Anweisungen,
wie das Gerät zu benutzen ist. Kinder
sollten beaufsichtigt werden, um sicherzustellen, dass sie nicht mit dem Gerät
spielen.
– Die Bedienperson hat das Gerät be-
stimmungsgemäß zu verwenden. Sie
hat die örtlichen Gegebenheiten zu be-
rücksichtigen und beim Arbeiten mit
dem Gerät auf Dritte, insbesondere Kinder, zu achten.
– Die Bedienperson hat darauf zu achten,
dass sich keine Gegenstände im Arbeitsbereich befinden, die von der rotierenden Scheibe erfasst und
weggeschleudert werden können.
Transport
– Beim Transport des Gerätes ist der Mo-
tor stillzusetzen und das Gerät sicher
zu befestigen.
Wartung
– Vor allen Arbeiten am Gerät Netzste-
cker ziehen.
– Um Gefährdungen zu vermeiden, dür-
fen Reparaturen und der Austausch
von Ersatzteilen am Gerät nur vom autorisierten Kundendienst durchgeführt
werden.
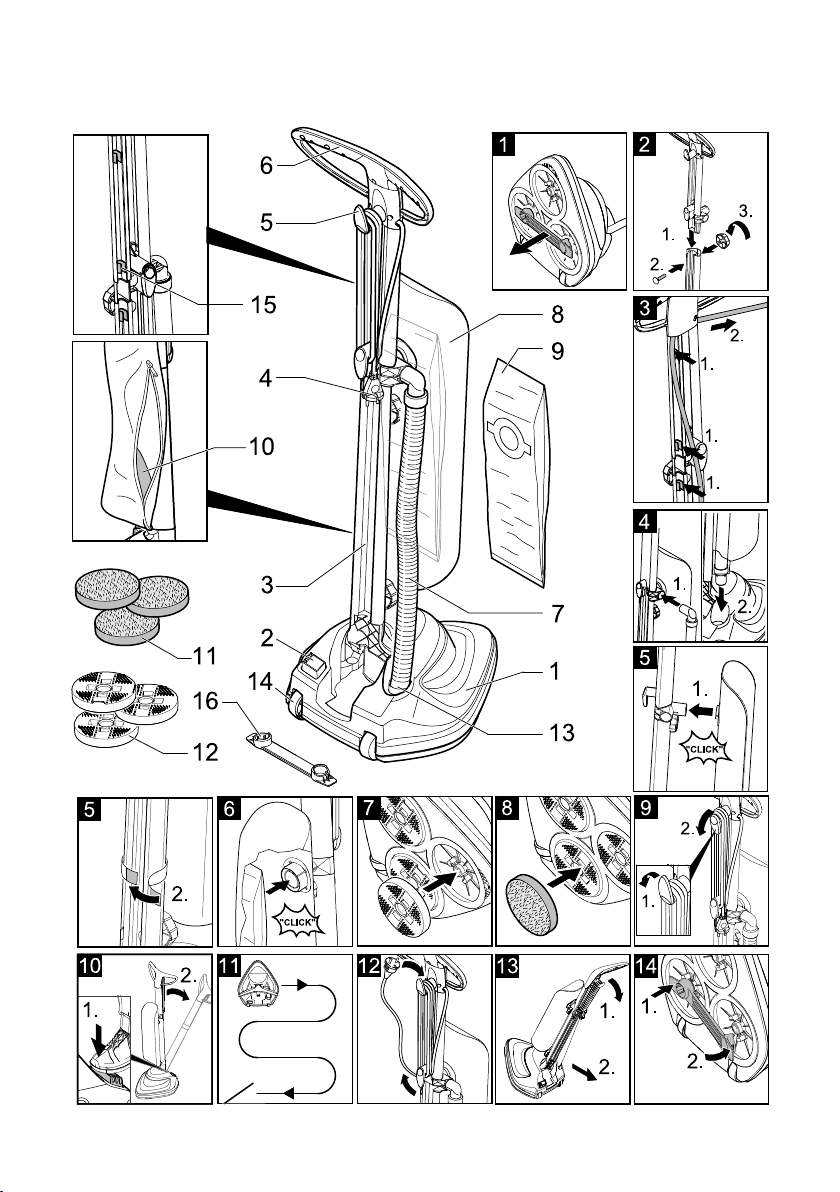
1 Polierkopf
2 Fußtaster für Stielentriegelung
3 Stiel
4 Netzanschlusskabel mit Stecker
5 Aufbewahrung, Netzanschlusskabel
6 Handgriff
7 Saugschlauch
8 Textilbeutel
9 Filterbeutel
10 Aufbewahrungsfach für Polierpads
11 Polierpads
12 Padhalter
13 Saugschlauchanschluss
14 Transportrollen
15 Fixierungen für Netzanschlusskabel
(4x)
16 Transportsicherung
Bestellung von Ersatzteilen und
Sonderzubehör
Sicherheitshinweise
Inbetriebnahme
Gerätebeschreibung
4 DE
Page 5

– 5
Abbildung
Entfernen Sie erstmalig und vor Benut-
zung des Gerätes die Transportsicherung durch Abziehen.
Abbildung
Beide Teile des Stiels zusammenste-
cken und mit der beiliegenden Schraube und Mutter sichern.
Den kompletten Stiel in Polierkopf ste-
cken und mit Schraube fixieren.
Hinweis: Hierbei auf die Lage des
Netzanschlusskabels achten.
Abbildung
Netzanschlusskabel in Fixierungen ein-
drücken und straff ziehen.
Abbildung
Gerades Saugschlauchende in Polier-
kopf stecken, gebogenes Ende in den
Anschluss am Stiel stecken.
Abbildung
Zuerst den oberen Teil des Textilbeu-
tels in Aufnahme eindrücken bis er einrastet.
Anschließend den unteren Teil mit dem
Klettband am Stiel befestigen.
Abbildung
Reißverschluss des Textilbeutels öff-
nen.
Den Filterbeutel einlegen und den Kar-
ton mit der Öffnung über den Stutzen
schieben bis er einrastet. Korrekter Sitz
des Filterbeutels nochmals prüfen.
Textilbeutel mit dem Reißverschluss
wieder verschließen.
Abbildung
Gerät auf den Boden legen, so dass der
Polierkopf senkrecht zur Fläche steht.
Padhalter einfach in Aufnahme eindrü-
cken. Darauf achten dass die Nasen
der Padhalter in der Aufnahme gut einrasten.
Zur Entnahme die Padhalter einfach
abziehen.
Abbildung
Polierpads auf Padhalter aufsetzen, auf
mittige Ausrichtung achten.
Zur Entnahme die Polierpads einfach
abziehen.
Die Polierpads können im unteren Teil
des Textilbeutels in einem separaten
Fach aufbewahrt werden.
Hinweis:
Immer mit eingesetztem Filterbeutel arbeiten.
몇 Achtung
Bevor Sie den Netzstecker einstecken,
müssen sie sicherstellen dass sich der Stiel
in senkrechter Stellung befindet. In dieser
Stellung ist das Gerät ausgeschaltet.
Abbildung
Oberen Kabelhaken drehen und Netz-
anschlusskabel abnehmen. Netzstecker in eine Steckdose einstecken.
Abbildung
Entriegelung drücken und halten. Stiel
nach hinten ziehen, Gerät schaltet sich
ein.
Um anzuhalten den Stiel in die senk-
rechte Stellung zurückbringen, bis er
einrastet.
Transportsicherung entfernen
Stiel zusammenbauen und
anbringen
Saugschlauch anschließen
Textilbeutel anbringen
Filterbeutel einsetzen
Padhalter einsetzen
Polierpads aufsetzen
Polierpads verstauen
Bedienung
5DE
Page 6
– 6
Es wird empfohlen, die Vollpflege 2 - 3 mal
pro Jahr durchzuführen.
Belag/Boden kehren, saugen oder bei
Bedarf nebelfeucht wischen.
Pflegemittel mit Wischmop gleichmäßig
auf den Boden aufbringen. Vollständig
trocknen lassen
Hinweise: Anwendungshinweise des
Bodenbelag- und Pflegemittelherstellers beachten!
Kein lösungsmittelhaltiges Pflegemittel
verwenden.
Abbildung
Fläche mehrmals wie in der Abbildung
gezeigt überfahren bis der gewünschte
Glanz erreicht ist.
Das laufende Gerät immer bewegen.
Nicht lange auf einer Stelle verweilen,
sonst können Schäden am Bodenbelag
entstehen.
Hinweis: Herstellerangaben bezüglich
Begehbarkeit bzw. Möbel rücken einhalten. Wir empfehlen, mindestens 12
Stunden zu warten. In dieser Zeit die
polierte Fläche vorsichtig und nicht mit
Straßenschuhen begehen. Keine Möbel rücken, kein Wasser auf den Belag
bringen.
Es wird empfohlen, die Unterhaltspflege
einmal pro Monat durchzuführen um wieder einen gleichmäßigen Glanz zu erzielen.
Je nach Pflegemittelhersteller kann das
Pflegemittel direkt ins Wischwasser gegeben werden. Bitte Hinweise des Bodenbelag- und Pflegemittelherstellers
beachten!
Anschließend Fläche aufpolieren.
Je nach Bedarf und Beanspruchung
des Bodens (Fußspuren, Streifen ..)
kann die Pflegeschicht mehrmals aufpoliert werden ohne vorher neues Pflegemittel aufzubringen.
Stiel in die senkrechte Stellung zurück-
bringen. Gerät schaltet ab.
Abbildung
Netzstecker ausstecken und Netzan-
schlusskabel um die am Stiel angebrachten Haken wickeln. Oberen
Kabelhaken vorher nach oben drehen.
Achten Sie bitte darauf, dass das Gerät auf
den Transportrollen bewegt wird, wenn Sie
es zum Aufbewahrungsort oder in einen
anderen Raum bringen wollen.
Abbildung
Dazu den Handgriff nach hinten neigen
und Gerät ziehen.
Es wird empfohlen, bei längerer Nichtbenutzung des Gerätes die Transportsicherung zu befestigen.
Abbildung
Gerät auf den Boden legen, so dass der
Polierkopf senkrecht zur Fläche steht.
Padhalter vom Gerät abziehen und in
Aufbewahrungsfach legen.
Transportsicherung auf einer Seite in
die Aufnahme vom Padhalter drücken
und festhalten. Andere Seite der Transportsicherung in die Aufnahme vom
zweiten Padhalter fest eindrücken und
einrasten.
Gerät stehend in einem trockenen
Raum aufbewahren.
Vollpflege
Boden von Schmutz befreien
Aufbringen von Pflegemittel
Polieren
Unterhaltspflege
Zwischendurchpflege
Betrieb beenden
Transport des Gerätes
Gerät aufbewahren
6 DE
Page 7

– 7
Verletzungsgefahr
Vor allen Pflege– und Wartungsarbeiten
das Gerät ausschalten und den Netzstecker ziehen.
몇 Achtung
Keine Scheuermittel, Glas- oder Allzweckreiniger verwenden! Gerät niemals in Wasser tauchen.
Polierpads nach jedem Betrieb entfer-
nen und ausklopfen. Bei Bedarf auswaschen und trocknen lassen.
Hinweis: Maschinenwäsche bis 60 °C
möglich, keinen Weichspüler verwenden, nicht im Wäschetrockner trocknen.
Trockene Polierpads in Aufbewah-
rungsfach legen.
Wechseln Sie den Filterbeutel in regelmäßigen Zeitabständen.
Siehe dazu im Kapitel „Filterbeutel ein-
setzen“.
Prüfen Sie regelmäßig den Zustand der
Polierpads, bei Abnutzung ersetzen.
Siehe dazu im Kapitel „Polierpads auf-
setzen“.
Geräusch ist systembedingt. Gerät wur-
de nicht mit Transportsicherung aufbewahrt. Geräusch verschwindet beim
Poliervorgang nach einiger Zeit von
selbst.
Technische Änderungen vorbehalten!
Pflege und Wartung
Gerät und Zubehör reinigen
Polierpads reinigen
Filterbeutel einsetzen
Polierpads wechseln
Störungshilfe
Unruhig laufende Scheiben / klap-
perndes Geräusch
Technische Daten
Spannung 230 V
Stromart 1~50/
60
Hz
Schutzklasse II
Anschlussleistung 600 W
Drehzahl, Polierscheiben
1000 U/
min
Gewicht 7 kg
Abmessungen 385 x
340 x
1155
mm
Volumen, Filterbeutel 4 l
7DE
Page 8
– 8
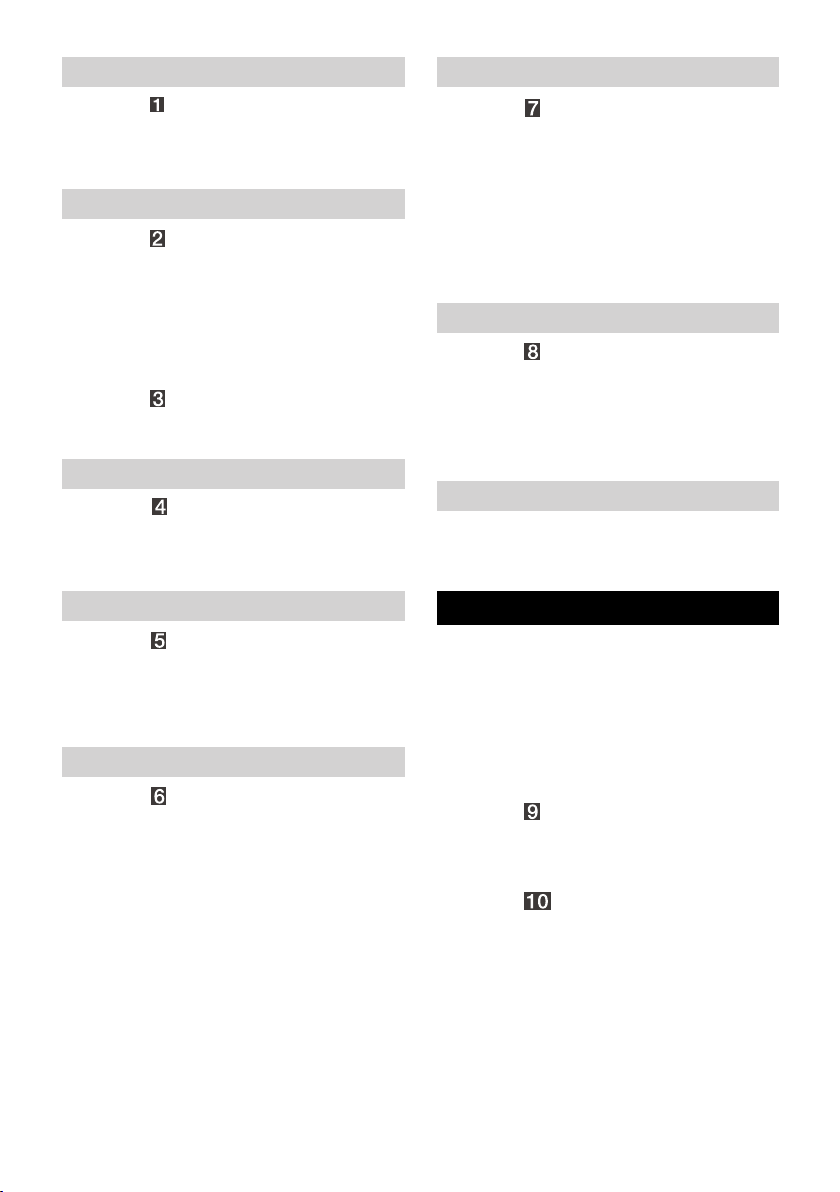
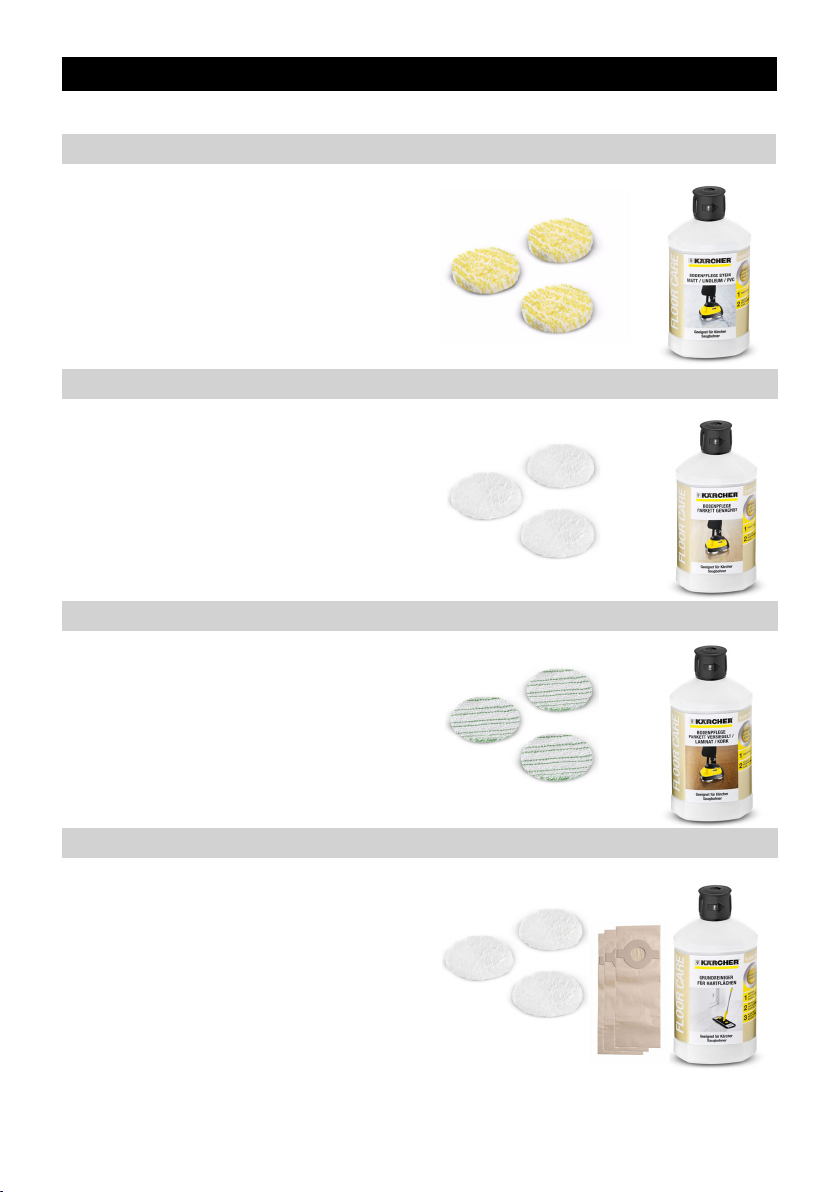
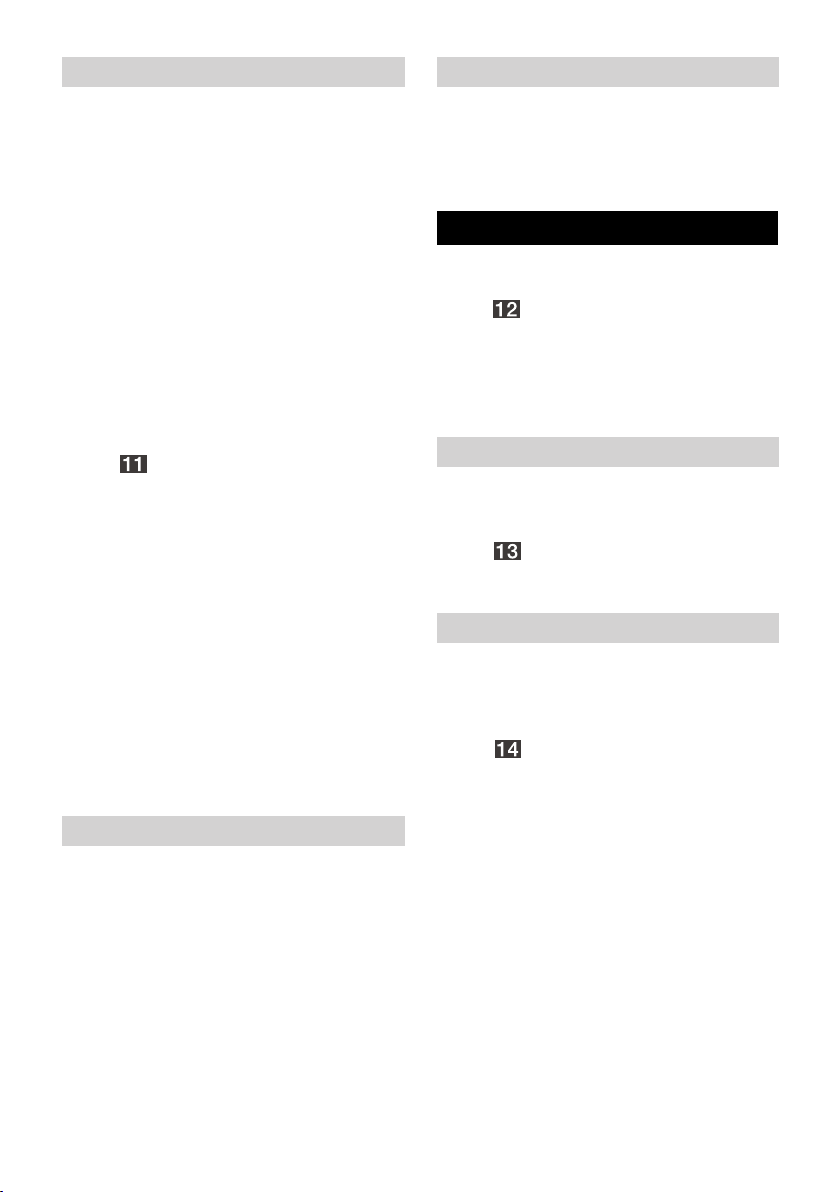
Optimale Pflege und Schutz für matte
Kunst- und Natursteinböden, Linoleum und
PVC.
Polierpads Stein / Linoleum / PVC
(3 St.)
(Bestell-Nr. 2.863-198.0)
Bodenpflege Stein matt RM 532
(1 Ltr.)
(Bestell-Nr. 6.295-776.0)
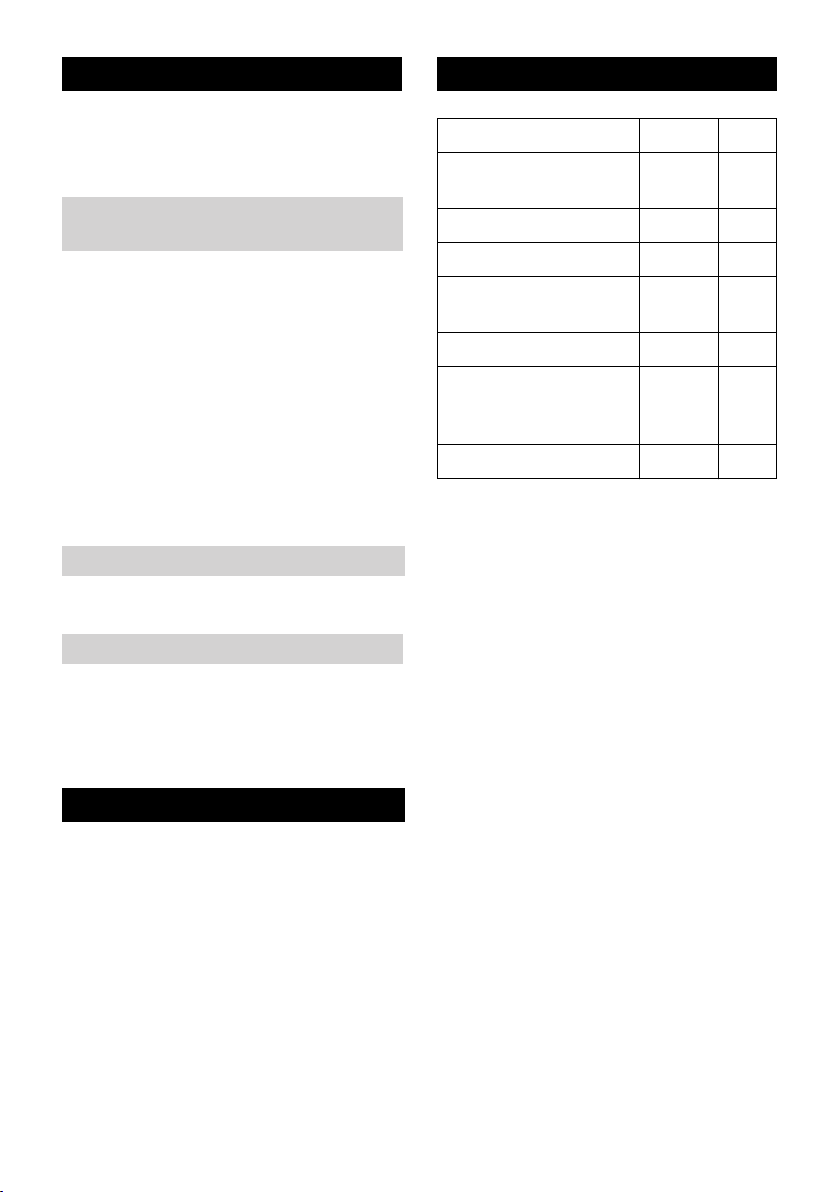
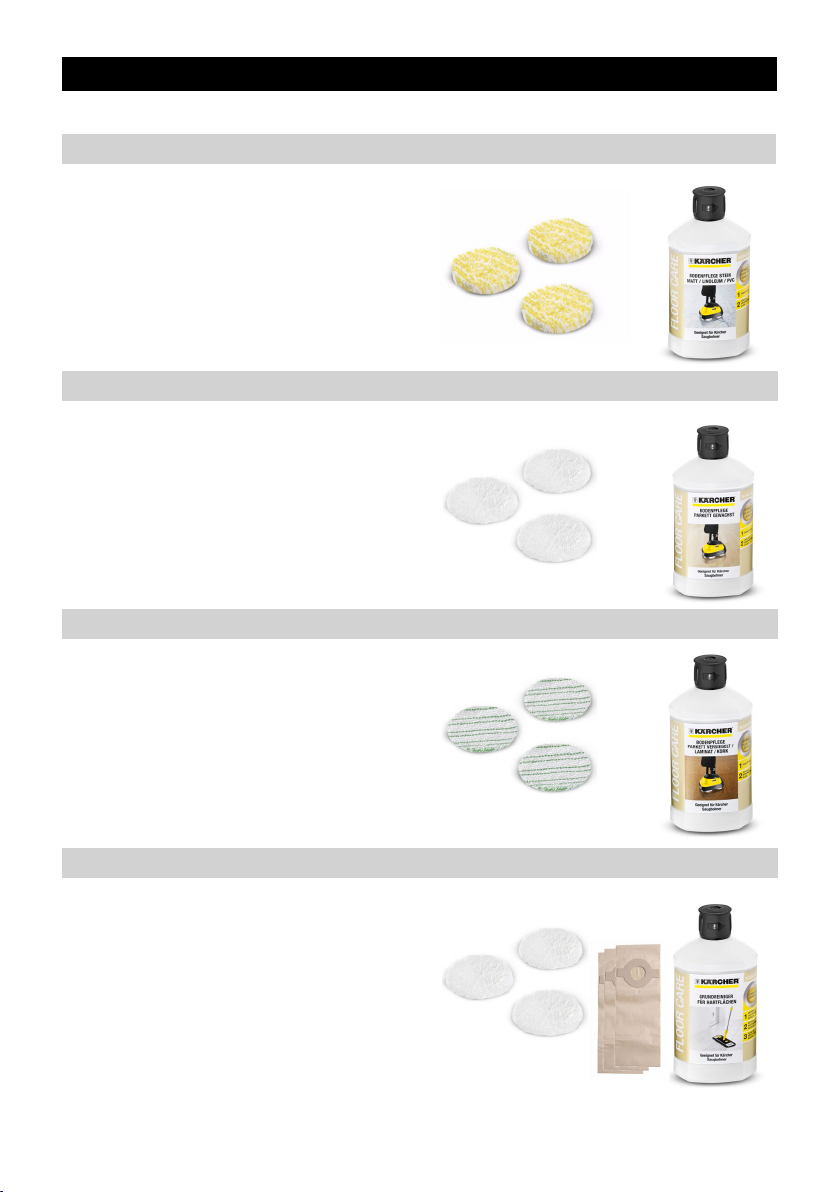
Optimale Pflege und Schutz für gewachstes Parkett oder Holzböden mit Öl-WachsFinish.
Polierpads Parkett gewachst (3 St.)
(Bestell-Nr. 2.863-196.0)
Bodenpflege Parkett gewachst
RM 530 (1 Ltr.)
(Bestell-Nr. 6.295-778.0)
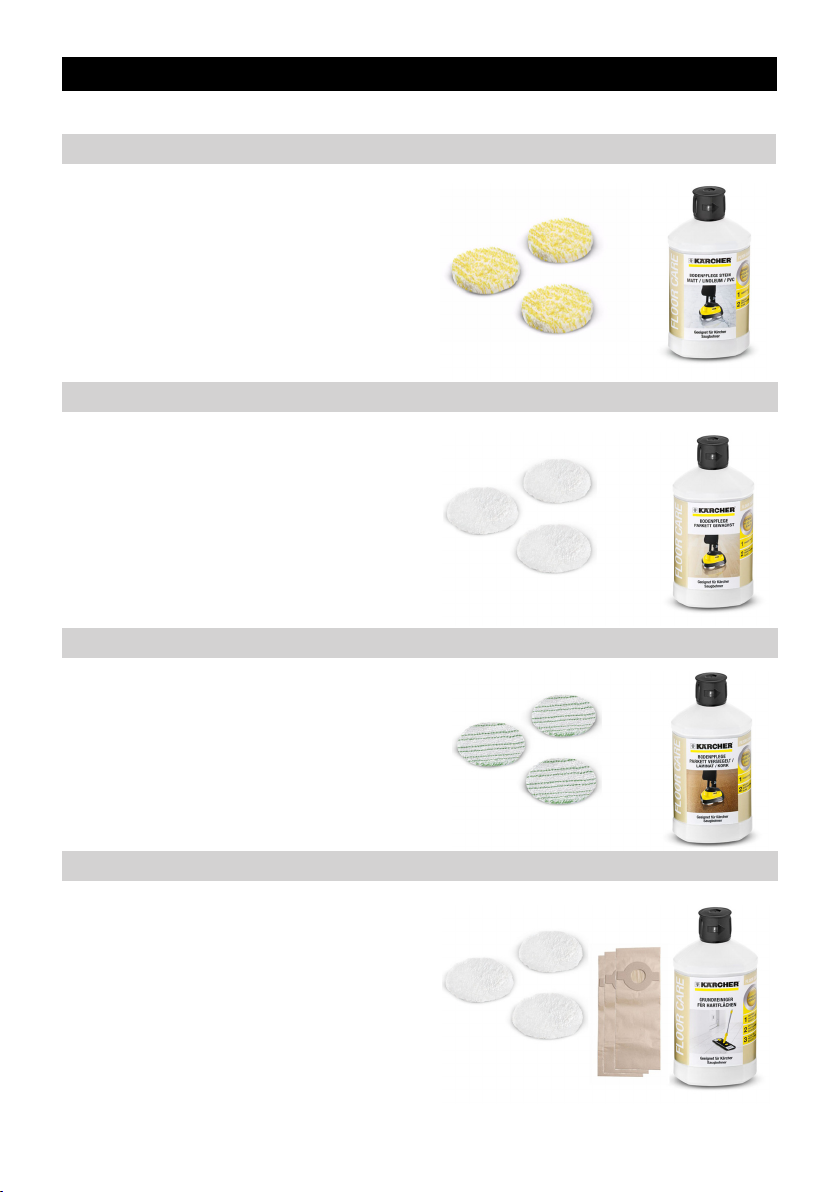
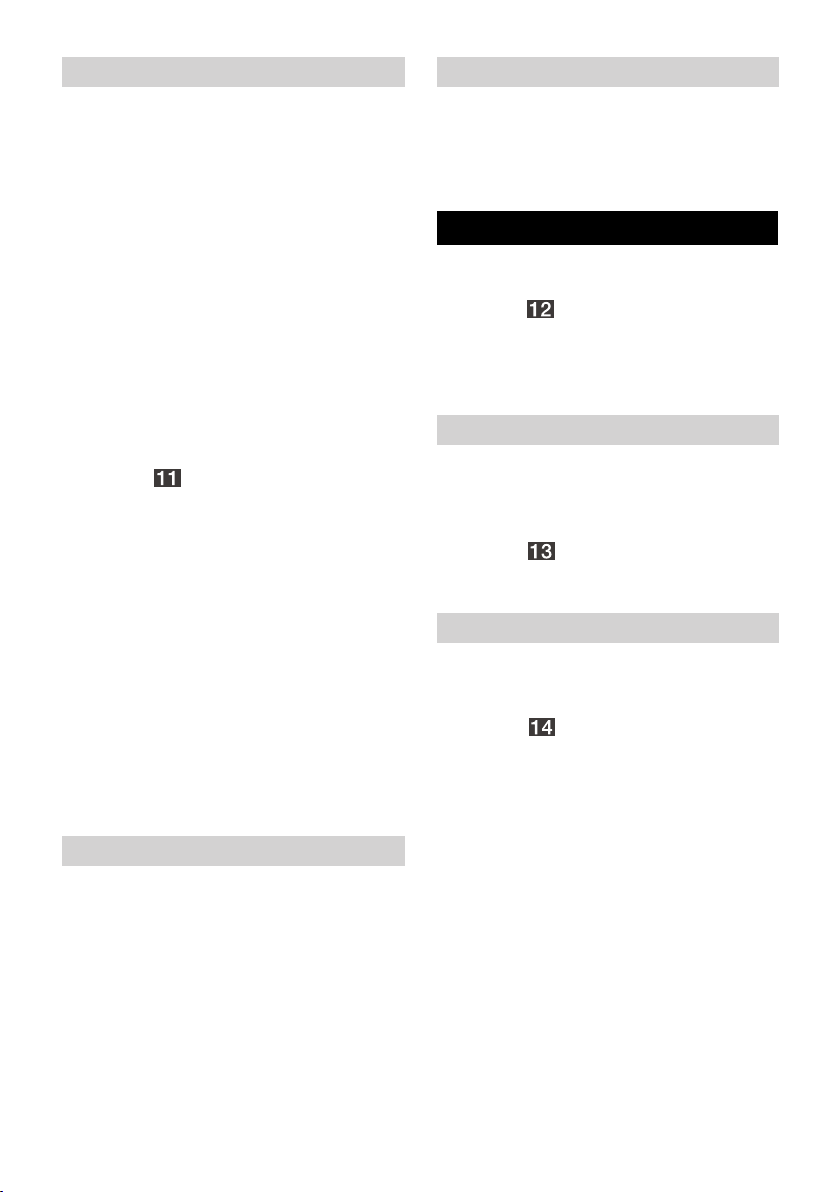
Optimale Pflege und Schutz für versiegelte
Parkett-, Laminat- und Korkböden.
Polierpads Parkett versiegelt / Kork /
Laminat (3 St.)
(Bestell-Nr. 2.863-197.0)
Bodenpflege Parkett versiegelt
RM 531 (1 Ltr.)
(Bestell-Nr. 6.295-777.0)
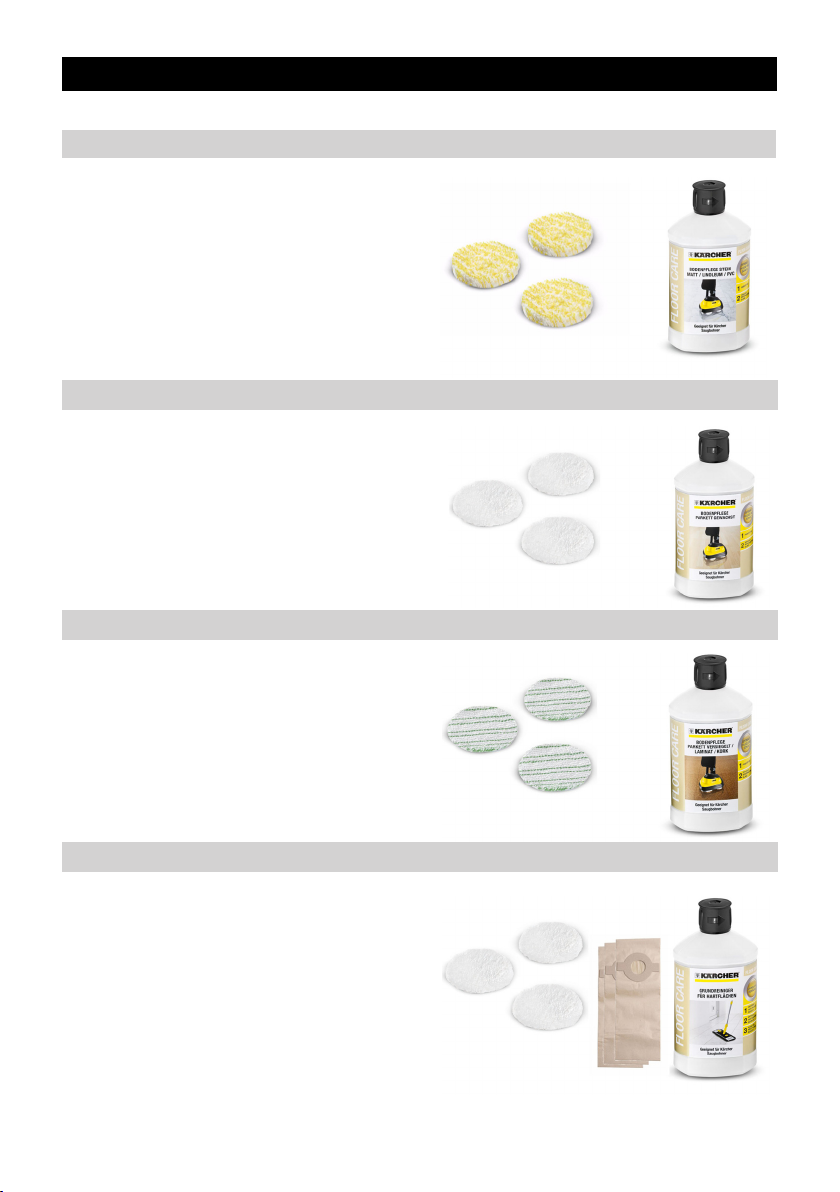
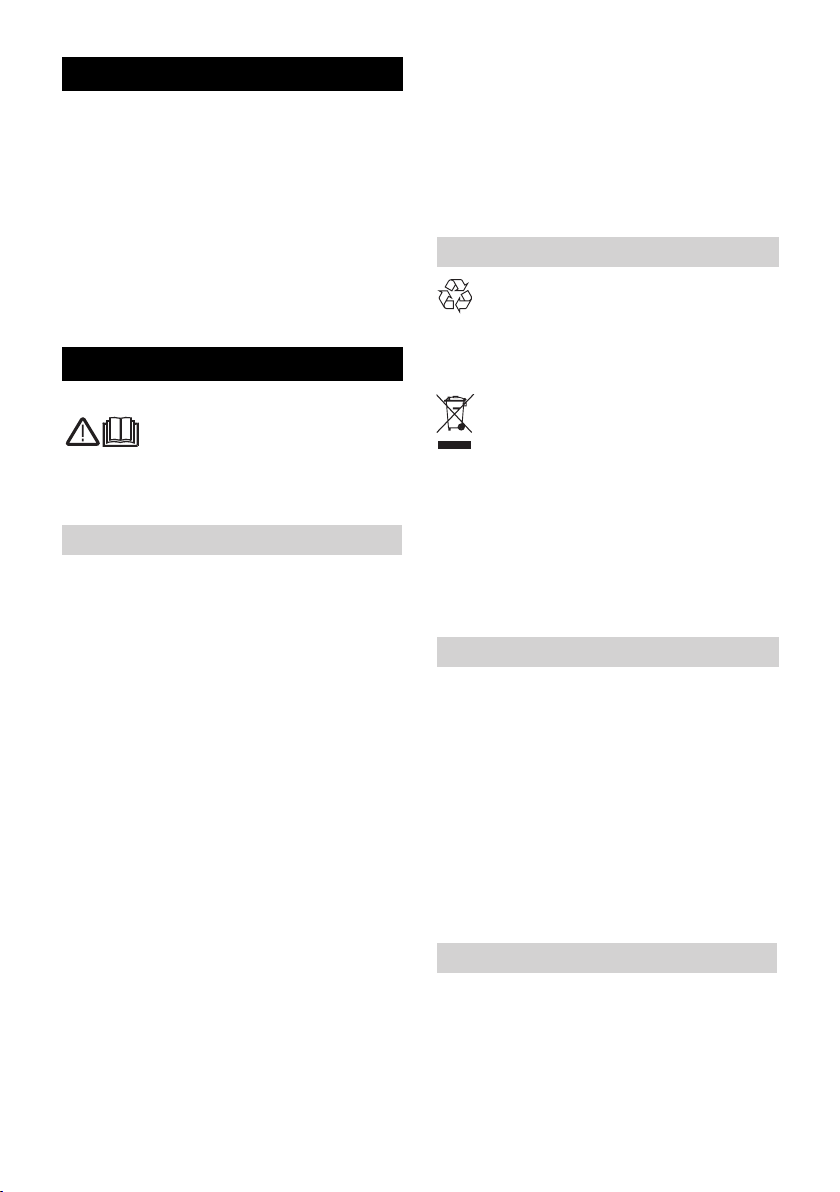
Grundreiniger für Hartflächen
RM 533 (1 Ltr.)
(Bestell-Nr. 6.295-775.0)
Zur gründlichen Entfernung alter Pfle-
geschichten und hartnäckiger Verschmutzungen auf Stein, Linoleum,
PVC.
Polierpads universal (3 St.)
(Bestell-Nr. 2.863-193.0)
Filterbeutel (3 St.)
(Bestell-Nr. 6.904-128.0)
Sonderzubehör
Folgendes Sonderzubehör können Sie für dieses Gerät nachkaufen:
Steinböden / Linoleum / PVC
Gewachstes Parkett / Holzböden mit Öl-Wachs-Finish
Versiegeltes Parkett / Kork / Laminat
Weiteres Sonderzubehör
8 DE
Page 9

– 3
Dear Customer,
Please read and comply with
these original instructions prior
to the initial operation of your appliance and
store them for later use or subsequent owners.
This appliance has been designed for
use in private households and is not intended for commercial use.
This appliance can be used for polish-
ing parquet, laminate, stone floors, linoleum and PVC floors.
The appliance is only meant for sucking
polishing dust.
The appliance is not a vacuum cleaner!
Do not use to draw in dry dust!
Do not use care products containing
solvents.
The appliance should not be used on
carpets and similar surfaces.
Do not load down the appliance with ad-
ditional weights.
The appliance should not be used or
stored in the open or under wet conditions.
The appliance may only be used with
original filter bags, original spare parts,
accessories or special accessories.
Always move the appliance while it is
running. Do not stay in one place for extended periods, because this could
cause damages to the flooring.
Please observe the notes of the flooring
and care product manufacturers!
The manufacturer is not responsible for any
damages that may occur on account of improper use or wrong operations.
The packaging material can be recy-
cled. Please do not place the packaging into the ordinary refuse for disposal,
but arrange for the proper recycling.
Old appliances contain valuable materials that can be recycled. Please
arrange for the proper recycling of old
appliances. Please dispose your old appliances using appropriate collection systems.
Notes about the ingredients (REACH)
You will find current information about the
ingredients at:
www.kaercher.com/REACH
The terms of the guarantee applicable in
each country have been published by our
respective national distributors. We will repair possible faults on your unit free of
charge within the warranty period, insofar
as the faults are caused by material defects
or defective workmanship. Guarantee
claims should be addressed to your dealer
or the nearest authorized customer service
centre, and supported by documentary evidence of purchase.
(See address on the reverse)
Our KÄRCHER branch will be pleased to
help you further in the case of questions or
faults.
(See address on the reverse)
Contents
General notes. . . . . . . . . . . EN . . .3
Safety instructions . . . . . . . EN . . . 4
Start up. . . . . . . . . . . . . . . . EN . . .4
Operation . . . . . . . . . . . . . . EN . . .5
Finish operation . . . . . . . . . EN . . .6
Maintenance and care . . . . EN . . .7
Troubleshooting . . . . . . . . . EN . . .7
Technical specifications . . . EN . . .7
Special accessories . . . . . . EN . . .8
General notes
Proper use
Environmental protection
Warranty
Customer Service
English
9EN
Page 10

– 4
At the end of the operating instructions you
will find a selected list of spare parts that
are often required.
You can procure the spare parts and the attachments from your dealer or your
KÄRCHER branch office.
(See address on the reverse)
Power connection
– Always commission and use the appli-
ance according to the type plate.
– Never touch the mains plug with wet
hands.
– To separate the machine from the
mains, pull the plug and not the power
cord.
– Do not damage the power cord or the
extension cable by running over, pinching, dragging or similar. Protect the cable from heat, oil, and sharp edges.
– Protect the appliance against external
weather, humidity and heat sources.
Application
– In case of extended downtimes, switch
the appliance off at the main switch / appliance switch or remove the mains
plug.
– This device is not intended for use by
persons (including children) with reduced physical, sensory or mental abilities or lacking experience and/or
knowledge, unless they are supervised
by a person responsible for their safety
or are instructed by these persons on
the use of the device. Children should
be supervised, to ensure that they do
not play with the device.
– The operator must use the appliance
properly. The person must consider the
local conditions and must pay attention
to third parties, in particular children,
when working with the appliance.
– The operator must ensure that no ob-
jects that can be sucked in or thrown
away by the rotating disc are present in
the working area.
Transport
– The engine is to be brought to a stand-
still and the appliance is to be fastened
properly during transportation.
Maintenance
– First pull out the plug from the mains be-
fore carrying out any tasks on the machine.
– To avoid risks, all repairs and replace-
ment of spare parts in the machine may
only be carried out by the authorised
customer service personnel.
1 Polishing head
2 Foot switch for strut release
3 Strut
4 Power cord with plug
5 Storage, power cord
6 Handle
7 Suction hose
8 Cloth bag
9 Filter bag
10 Storage compartment for polishing
pads
11 Polishing pads
12 Pad holder
13 Suction hose connection
14 Transport rolls
15 Attachments for mains cable (4 ea.)
16 Transport lock
Ordering spare parts and special
attachments
Safety instructions
Start up
Description of the Appliance
10 EN
Page 11
– 5
Illustration
Remove the transport locks the first
time you use and before using the appliance by pulling them off.
Illustration
Assemble both parts of the strut and se-
cure with the enclosed screw and nut.
Insert the entire strut into the polishing
head and attach with a screw.
Note: Here, take into account the loca-
tion of the mains cable.
Illustration
Press the mains cable into the attach-
ments and tension it.
Illustration
Insert the straight end of the suction
hose into the polishing head, insert the
bent end into the strut connection.
Illustration
First, push the upper part of the cloth
bag into the intake until it locks.
Then attach the bottom part to the strut
using the Velcro pad.
Illustration
Open the zipper of the cloth bag.
Insert the filter bag and slide the carton
with the opening over the support until it
locks into place. Recheck the correct
positioning of the filter bag.
Close the zipper on the cloth bag.
Illustration
Place the appliance on the floor so that
the polishing head is positioned perpen-
dicular to the surface.
Simply press the pad holder into the in-
take. Ensure that the noses of the pad
holders lock well into the intake.
To remove the pad holders, simply pull
them off.
Illustration
Install the polishing pads on the pad
holders and ensure that they are cen-
tered properly.
To remove the polishing pads, simply
pull them off.
The polishing pads can be stored in a
separate compartment in the bottom
part of the cloth bag.
Note:
Always work with the filter bag inserted.
몇 Caution
Before inserting the mains plug, ensure
that the strut is located in a vertical position.
The appliance is switched off in this position.
Illustration
Turn the upper cable hook and remove
the mains cable. Insert the mains plug
into a socket.
Illustration
Press hold down the unlocking key. Pull
the shaft in the rear direction. The de-
vice is activated.
To stop the appliance, bring the strut
back to the vertical position until it locks.
Remove transport lock
Assemble the strut and attach it
Connect suction hose
Inserting the cloth bag
Inserting a filter bag
Insert pad holder
Insert the polishing pads
Storing the polishing pads
Operation
11EN
Page 12

– 6
It is recommended to perform the complete
care 2 to 3 times per year.
Sweep, vacuum or wipe the floor or
floor covering with a moist rag if necessary.
Use a mop to distribute the care product
evenly on the floor. Let dry completely
Notes: Please observe the instructions
for use of the flooring and care product
manufacturers!
Do not use care products containing
solvents.
Illustration
Drive across the surface multiple times
as shown in the illustration until the desired shine is achieved.
Always move the appliance while it is
running. Do not stay in one place for extended periods, because this could
cause damages to the flooring.
Note: Observe the manufacturer's instructions regarding when to walk on
the floor or move furniture, etc. We recommend waiting at least 12 hours. During this period, only walk on the surface
carefully and not in street shoes. Do not
move any furniture and do not apply
water to the floor.
We recommend performing the maintenance care procedures once per month to
achieve an evenly distributed shine.
Depending on the manufacturer, the
care product can be poured directly into
the cleaning water. Please observe the
instructions for use of the flooring and
care product manufacturers!
Then polish the surface.
Depending on the requirements and the
use of the floor (foot marks, streaks...),
the care coat can be polished multiple
times without the need of applying new
care products to the floor.
Bring the strut back to a vertical posi-
tion. Appliance switches off.
Illustration
Remove the mains plug and wrap it
around the hook provided at the strut.
First turn the upper cable hook up-
wards.
Ensure that the appliance moves on the
transport wheels while transporting it from
one room to another or moving it to its storage location.
Illustration
For this, press handle backwards and
pull the appliance.
We recommend activating the transport
lock if the appliance will not be used for extended period of time.
Illustration
Place the appliance on the floor so that
the polishing head is positioned perpen-
dicular to the surface.
Remove the pad holder from the appli-
ance and place it into the storage com-
partment.
Press the transport lock into the intake
of the pad holder on one side and hold
it there. Firmly press the other side of
the transport lock into the intake of the
second pad holder and lock into place.
Store the appliance upright in a dry
room.
Complete care
Remove the dirt from the floor
Applying care products
Polishing
Maintenance care
Intermediate care
Finish operation
Transporting the appliance
Storing the Appliance
12 EN
Page 13
– 7
Risk of injury
Turn off the appliance and remove the
mains plug prior to any care and maintenance works.
몇 Caution
Do not use abrasives, glass or universal
cleaners! Never immerse the appliance in
water.
Remove and tap the polishing pads af-
ter every use. Wash and dry as needed.
Note: Can be washed at 60 °C; please
do not use any soft detergents, do not
dry in dryer.
Place dry polishing pads into the stor-
age compartment.
Change the filter bag at regular intervals.
See Chapter "Inserting a filter bag".
Check the state of the polishing pads at
regular intervals; replace them if they are
worn out.
See Chapter "Insert the polishing
pads".
This sound is caused by the system.
The appliance was not stored with the
transport lock activated. This sound will
disappear on its own after a while during polishing.
Subject to technical modifications!
Maintenance and care
Cleaning the appliance and
accessories
Cleaning the polishing pads
Inserting a filter bag
Replacing polishing pads
Troubleshooting
Discs running unevenly / rattling
sound
Technical specifications
Voltage 230 V
Current type 1~50/
60
Hz
Protective class II
Connected load 600 W
Rotating speed, polishing discs
1000 rpm
Weight 7 kg
Dimensions 385 x
340 x
1155
mm
Volume, filter bag 4 l
13EN
Page 14
– 8
Optimised care and protection for matte artificial and natural stone floors, linoleum
and PVC.
Polishing pads stone / linoleum /
PVC (3 pc.)
(order no. 2.863-198.0)
Floor care stone matte RM 532
(1 litre)
(order no. 6.295-776.0)
Optimised care and protection for waxed
parquet flooring or wooden floors with oilwax finish.
Polishing pads parquet flooring
waxed (3 pc.)
(order no. 2.863-196.0)
Floor care parquet flooring waxed
RM 530 (1 litre)
(order no. 6.295-778.0)
Optimised care and protection for sealed
parquet, laminate and cork flooring.
Polishing pads parquet sealed / cork
/ laminate (3 pc.)
(order no. 2.863-197.0)
Floor care parquet sealed RM 531
(1 litre)
(order no. 6.295-777.0)
Basic cleaner for hard surfaces
RM 533 (1 litre)
(order no. 6.295-775.0)
For the thorough removal of old layers
of care products and stubborn soiling
on stone, linoleum, PVC.
Polishing pads universal (3 pc.)
(order no. 2.863-193.0)
Filter bags (3 ea.)
(order no. 6.904-128.0)
Special accessories
The following optional accessories for this appliance can be purchased later:
Stone floors / linoleum / PVC
Waxed parquet flooring / wooden floors with oil-wax finish
Sealed parquet / cork / laminate
Additional Accessories
14 EN
Page 15
– 3
Cher client,
Lire cette notice originale avant
la première utilisation de votre
appareil, se comporter selon ce qu'elle requièrt et la conserver pour une utilisation ultérieure ou pour le propriétaire futur.
Cet appareil ne doit être utilisé que pour
un usage domestique.
L'appareil permet de polir les sols de
bois, le stratifié, les sols de pierre, le linoleum et les sols en PVC.
L’appareil est uniquement approprié
pour aspirer les déchets de polissage.
L'appareil n'est pas un aspirateur! Ne
pas utiliser pour aspirer des salissures
sèches!
Ne pas utiliser de produits d'entretien
contenant des solvants.
L'appareil ne doit pas être utilisé sur
des moquettes ou équivalent.
Ne pas alourdir l'appareil en y rajoutant
du poids.
L'appareil ne peut être utilisé ou installé
à l'air libre ni dans les endroits humides.
Utiliser l'appareil uniquement avec les
sacs de filtre originaux, les pièces de
rechange, l'accessoire ou l'accessoire
spécial originales.
Toujours déplacer l'appareil quand il
fonctionne. Ne pas rester longtemps en
un même point car cela pourrait endommager le revêtement de sol.
Toujours respecter les instructions du
fabricant du revêtement de sol et du
produit d'entretien !
Le fabricant décline toute responsabilité en
cas de dommages dus à une utilisation non
conforme ou incorrecte de l'appareil.
Les matériaux constitutifs de l’em-
ballage sont recyclables. Ne pas jeter les emballages dans les ordures
ménagères, mais les remettre à un système de recyclage.
Les appareils usés contiennent des
matériaux précieux recyclables les-
quels doivent être apportés à un système de recyclage. Pour cette raison,
utilisez des systèmes de collecte adéquats
afin d'éliminer les appareils usés.
Instructions relatives aux ingrédients
(REACH)
Les informations actuelles relatives aux ingrédients se trouvent sous :
www.kaercher.com/REACH
Dans chaque pays, les conditions de garantie en vigueur sont celles publiées par
notre société de distribution responsable.
Nous éliminons gratuitement d’éventuelles
pannes sur l’appareil au cours de la durée
de la garantie, dans la mesure où une erreur de matériau ou de fabrication en sont
la cause. En cas de recours en garantie, il
faut s'adresser avec le bon d’achat au revendeur respectif ou au prochain service
après-vente.
(Adresse au dos)
Notre succursale Kärcher
®
se tient à votre
entière disposition pour d'éventuelles questions ou problèmes.
(Adresse au dos)
Contenu
Consignes générales . . . . . FR . . .3
Consignes de sécurité . . . . FR . . . 4
Mise en service . . . . . . . . . FR . . . 4
Utilisation . . . . . . . . . . . . . . FR . . . 5
Fin de l'utilisation . . . . . . . . FR . . .6
Entretien et maintenance . . FR . . . 7
Service de dépannage . . . . FR . . . 7
Caractéristiques techniques FR . . .7
Accessoires en option . . . . FR . . . 8
Consignes générales
Utilisation conforme
Protection de l’environnement
Garantie
Service après-vente
Français
15FR
Page 16

– 4
Une sélection des pièces de rechange utilisées le plus se trouve à la fin du mode
d'emploi.
Vous obtiendrez des pièces détachées et
des accessoires chez votre revendeur ou
auprès d'une filiale Kärcher
®
.
(Adresse au dos)
Raccordement électrique
– Se conformer impérativement à la
plaque signalétique pour le branchement et la mise en service de l'appareil.
– Ne jamais saisir le câble d’alimentation
avec des mains mouillées.
– Pour débrancher l'appareil, tirer au ni-
veau de la fiche secteur et non sur le
câble d'alimentation.
– Veiller à ne pas abîmer ni endommager
le câble d’alimentation ni le câble de rallonge en roulant dessus, en les coinçant, en tirant violemment dessus ou
autres. Protéger le câble d’alimentation
contre la chaleur, l’huile et les arêtes
tranchantes.
– Conserver l'appareil à l'abris des intem-
péries, de l'humidité et des sources de
chaleur.
Application
– Lors des pauses d'exploitation prolon-
gées, mettre l'appareil hors service au
niveau du sectionneur général / de l'interrupteur d'appareil ou de la fiche secteur.
– Cet appareil n'est pas conçu pour être
utilisé par des personnes (y compris
des enfants) avec des capacités physiques, sensorielles ou mentales limitées ou manquant d'expérience et/ou
de connaissances, sauf si elles sont
surveillées par une personne responsable de leur sécurité ou si elles en obtiennent des instructions sur la manière
d'utiliser l'appareil. Les enfants doivent
être surveillés afin de s'assurer qu'ils ne
jouent pas avec l'appareil.
– L’utilisateur doit utiliser l’appareil de fa-
çon conforme. Il doit prendre en considération les données locales et lors du
maniement de l’appareil, il doit prendre
garde aux tierces personnes, et en particulier aux enfants.
– L'opérateur doit faire attention qu'au-
cuns objets ne se trouve dans la zone
de travail, qui pourraient être happés
par les disques rotatifs et qui pourraient
être lancés.
Transport
– Au transport, le moteur de l'appareil doit
être arrêté et l'appareil doit être bien
fixé.
Maintenance
– Avant d'effectuer tout type de travaux
sur l'appareil, débrancher la fiche secteur.
– Afin d'éviter tout endommagement, seul
le service après-vente agréé est habilité
à effectuer des réparations ou à remplacer des pièces sur l'appareil.
1 Tête de polissage
2 Bouton au pied pour le déverrouillage
du manche
3 Manche
4 Câble d’alimentation avec fiche secteur
5 Rangement, câble d'alimentation
6 Poignée
7 Flexible d’aspiration
8 Sac en textile
9 Sac filtrant
10 Compartiment de conservation pour les
pads de polissage
11 Pads de polissage
12 Support de pad
13 Raccord du tuyau d'aspiration
14 Rouleaux de transport
15 Fixations pour le câble d'alimentation
(4x)
16 Fixations de transport
Commande de pièces détachées et
d'accessoires spécifiques
Consignes de sécurité
Mise en service
Description de l’appareil
16 FR
Page 17

– 5
Illustration
Retirer les fixations de transport la pre-
mière fois et avant l'utilisation de l'appareil.
Illustration
Enficher les deux parties du manche et
les fixer avec la vis et l'écrou joints.
Enficher le manche complet dans la
tête de polissage et fixer avec une vis.
Remarque : Veiller ce faisant à la posi-
tion du câble d'alimentation.
Illustration
Enfoncer le câble d'alimentation dans
les fixations et le tendre.
Illustration
Enficher l'extrémité droite du flexible
d'aspiration, enficher l'extrémité coudée dans le raccord sur le manche.
Illustration
Enfoncer en premier lieu la partie supé-
rieure du sac textile dans la réception
jusqu'à ce qu'il s'enclenche.
Fixer ensuite la partie inférieure avec la
bande velcro sur le manche.
Illustration
Ouvrir la fermeture éclair du sac textile.
Insérer le sac filtrant et enficher le car-
ton avec l'ouverture au-dessus des embouts jusqu'à ce qu'il s'enclenche.
Contrôler une nouvelle fois que le sac
filtrant est bien en place.
Refermer le sac textile avec la ferme-
ture éclair.
Illustration
Poser l'appareil sur le sol de sorte que
la tête de polissage soit en position ver-
ticale par rapport à la surface.
Enfoncer tout simplement le support de
pad dans la réception. Faire attention
que les nez des supports de pad s'en-
clenchent bien dans la réception.
Pour prélever retirer seulement les sup-
ports de pad.
Illustration
Mettre les pads de polissage en place
sur les supports de pad, veiller qu'ils
soient bien centrés.
Pour prélever les pads de polissage, les
retirer simplement.
Les pads de polissage peuvent être
conservés dans la partie inférieure du
sac textile dans un compartiment sépa-
ré.
Remarque :
Le sac filtrant doit toujours être en place
pour le travail.
몇 Attention
Avant de brancher la fiche secteur, s'assurer que le manche se trouve en position
verticale. Dans cette position, l'appareil est
arrêté.
Illustration
Tourner le crochet de câble supérieur et
enlever le câble d'alimentation. Bran-
cher la fiche secteur dans une prise
électrique.
Illustration
Appuyer sur le déverrouillage et lemain-
tenir enfoncé. Tirer le manche versl’ar-
rière, l’appareil se met en service.
Pour arrêter, ramener le manche en po-
sition verticale jusqu'à ce qu'il s'en-
clenche.
Retirer les fixations de transport
Assembler le manche et le mettre en
place
Raccorder le flexible d'aspiration
Fixer la poche pour les textiles
Mise en place du sac filtre
Mettre en place le support du pad
Déposer les pads de polissage
Rangement des pads de polissage
Utilisation
17FR
Page 18
– 6
Il est recommandé de procéder 2 ou 3 fois
par an à un soin complet.
Balayer le revêtement/le sol, l'aspirer
ou si nécessaire le laver humide.
Appliquer le produit d'entretien à la ser-
pillière uniformément sur le sol. Laisser
totalement sécher
Note : respecter les instructions d'application du fabricant du revêtement de
sol et du produit de soin !
Ne pas utiliser de produits d'entretien
contenant des solvants.
Illustration
Parcourir la surface à plusieurs reprises
de la manière représentée dans l'illustration jusqu'à atteindre le brillant désiré.
Toujours déplacer l'appareil quand il
fonctionne. Ne pas rester longtemps en
un même point car cela pourrait endommager le revêtement de sol.
Remarque : Respecter les indications
du fabricant relatives à la possibilité de
parcourir la surface ou au déplacement
des meubles. Nous recommandons
d'attendre au moins 12 heures. Pendant cette période, parcourir la surface
polie avec précaution et en aucun cas
avec des chaussures de rue. Ne pas
déplacer de meubles, ne pas déposer
d'eau sur le revêtement.
Il est recommandé de procéder au moins
une fois par moi à un entretien pour obtenir
de nouveau un brillant uniforme.
Le produit d'entretien peut être éven-
tuellement directement ajouté à l'eau
de lavage en fonction du fabricant du
produit d'entretien. Respecter les instructions du fabricant du revêtement de
sol et du produit de soin !
Ensuite, polir la surface.
En fonction des besoins et du degré
d'utilisation du sol (traces de pied, stries
...), la couche de soin peut être polie à
plusieurs reprises sans avoir à apporter
un nouveau produit de soin auparavant.
Ramener le manche en position verti-
cale. L'appareil se met hors service.
Illustration
Débrancher la fiche secteur et enrouler
le câble d'alimentation autour du cro-
chet qui se trouve sur le manche. Tour-
ner au préalable le crochet de câble
supérieure vers le haut.
Veiller que l'appareil soit déplacer sur les
roulettes de transport lorsque l'appareil est
transporté sur le lieu d'entreposage ou
dans une autre pièce.
Illustration
Pour cela, incliner la poignée vers l'ar-
rière et tirer l'appareil.
Il est recommandé de fixer les fixations de
transport en cas d'inutilisation prolongée de
l'appareil.
Illustration
Poser l'appareil sur le sol de sorte que
la tête de polissage soit en position ver-
ticale par rapport à la surface.
Retirer les supports de pads de l'appa-
reil et les déposer dans le compartiment
de rangement.
Pousser la fixation de transport d'un
côté dans la réception du support de
pad et la maintenir. Enfoncer l'autre
côté de la fixation de transport dans la
réception du deuxième support de pad
et l'enclencher.
Stocker l’appareil verticalement dans
un local sec.
Entretien complet
Nettoyer le sol des encrassements.
Apport de produits de soin.
Polissage
Entretien
Entretien intermédiaire
Fin de l'utilisation
Transport de l'appareil
Ranger l’appareil
18 FR
Page 19
– 7
Risque de blessures
Avant tout travail d'entretien et de maintenance, mettre l'appareil hors tension et débrancher la fiche secteur.
몇 Attention
N'utiliser aucun produit moussant, pour
vitres ou multi-usage ! Ne jamais plonger
l'appareil dans l'eau.
Retirer et les frapper pour en faire tom-
ber les impuretés après chaque utilisation. Le cas échéant, les rincer et les
laisser sécher.
Remarque : lavage à la machine jusqu'à 60° C possible, ne pas utiliser
d'adoucissant, ne pas sécher au sèchelinge.
Insérer des pads de polissage secs
dans le compartiment de rangement.
Changer le sac filtre régulièrement.
Voir pour cela dans le chapitre "Mettre
le sac filtrant en place".
Contrôler régulièrement l'état des pads de
polissage, les remplacer lorsqu'ils sont
usés.
Voir pour cela dans le chapitre "Mettre
en place les pads de polissage".
Le bruit est imposé par le système L'ap-
pareil a été conservé avec fixation de
transport. Le bruit disparaît de lui-
même au bout d'un certain temps lors
du processus de polissage.
Sous réserve de modifications
techniques !
Entretien et maintenance
Nettoyer l’appareil et les acces-
soires
Nettoyer les pads de polissage
Mise en place du sac filtre
Remplacement des pads de polis-
sage
Service de dépannage
Disque déséquilibré / bruits de cli-
quètement
Caractéristiques techniques
Tension 230 V
Type de courant 1~50/
60
Hz
Classe de protection II
Puissance de raccordement
600 W
Vitesse de rotation,
disques de polissage
1000 tr/
min
Poids 7 kg
Dimensions 385 x
340 x
1155
mm
Volumes, sacs filtrants 4 l
19FR
Page 20
– 8
Entretien optimal et protection des sols mats
artificiels ou naturels, linoléum et PVC.
Tampons de polissage, pierre /
linoléum / PVC (3 pc.)
(n° de commande 2.863-198.0)
Entretien du sol, pierre matte RM 532
(1 l.)
(Réf. 6.295-776.0)
Entretien optimal et protection du parquet ciré
ou sols en bois avec finition cirée huilée.
Tampons de polissage, parquet ciré
(3 pc.)
(n° de commande 2.863-196.0)
Entretien du sol, parquet ciré RM 530
(1 l.)
(n° de commande 6.295-778.0)
Entretien optimal et protection des parquets vitrifiés, des sols stratifiés et liège.
Tampons de polissage, parquet vitri-
fié / liège / stratifié (3 pc.)
(n° de commande 2.863-197.0)
Entretien du sol, vitrifié RM 531 (1 l.)
(n° de commande 6.295-777.0)
Nettoyant de base pour surface dure
RM 533 (1 l.)
(n° de commande 6.295-775.0)
Pour l'élimination minutieuse des an-
ciennes couches d'entretien et des salissures tenaces sur la pierre, le
linoléum, le PVC.
Tampons de polissage, universel (3 pc.)
(n° de commande 2.863-193.0)
Sac filtrant (3 pc.)
(n° de commande 6.904-128.0)
Accessoires en option
Les accessoires en option peuvent être rachetés pour cet appareil :
Sols en pierre / linoléum / PVC
Parquet ciré / Sols en bois avec finition cirée huilée
Parquet vitrifié / liège / revêtement de sol stratifié
Autres accessoires spéciaux
20 FR
Page 21
Italiano
– 3
Gentile cliente,
Prima di utilizzare l'apparecchio
per la prima volta, leggere le
presenti istruzioni originali, seguirle e conservarle per un uso futuro o in caso di rivendita dell'apparecchio.
Questo apparecchio è concepito per il
solo uso domestico e non deve essere
adibito ad uso commerciale o industriale.
L’apparecchio consente di lucidare pa-
vimenti di legno, laminati, pavimenti di
pietra, linoleum e pavimenti in PVC.
L’apparecchio è idoneo soltanto per
l’aspirazione della polvere e dei residui
derivanti dalla lucidatura.
L’apparecchio non è un aspirapolvere!
Non utilizzare per l’aspirazione di sporco secco!
Non usare detergenti contenenti sol-
venti.
L'apparecchio non deve essere utilizza-
to su tappeti o simili.
Non appesantire l’apparecchio con ulte-
riori pesi.
L’apparecchio non deve essere adope-
rato o riposto all’aperto e in presenza di
umidità.
Utilizzare esclusivamente sacchetti fil-
tro originali, pezzi di ricambio originali,
accessori e accessori optional originali.
Spostare sempre l'apparecchio in fun-
zione. Non fermarsi a lungo su un punto
altrimenti il pavimento si potrebbe danneggiare.
Si prega di osservare sempre le indica-
zioni del produttore del rivestimento del
pavimento e del detergente!
Il produttore non è responsabile per eventuali danni causati dall'uso improprio e/o
uso che non corrisponde a quello conforme
a destinazione.
Tutti gli imballaggi sono riciclabili. Gli
imballaggi non vanno gettati nei rifiuti
domestici, ma consegnati ai relativi centri di
raccolta.
Gli apparecchi dimessi contengono
materiali riciclabili preziosi e vanno
perciò consegnati ai relativi centri di
raccolta. Si prega quindi di smaltire gli apparecchi dimessi mediante i sistemi di raccolta differenziata.
Avvertenze sui contenuti (REACH)
Informazioni aggiornate sui contenuti sono
disponibili all'indirizzo:
www.kaercher.com/REACH
In tutti i paesi sono valide le condizioni di
garanzia pubblicate dalla nostra società di
vendita competente. Entro il termine di garanzia eliminiamo gratuitamente eventuali
guasti all’apparecchio, se causati da un difetto di materiale o di produzione. Nei casi
previsti dalla garanzia si prega di rivolgersi
al proprio rivenditore, oppure al più vicino
centro di assistenza autorizzato, esibendo
lo scontrino di acquisto.
(Indirizzo vedi retro)
In caso di domande o anomalie la filiale
KÄRCHER è felice di poterla aiutare.
(Indirizzo vedi retro)
Indice
Avvertenze generali . . . . . . IT . . .3
Norme di sicurezza . . . . . . IT . . .4
Messa in funzione . . . . . . . IT . . .4
Uso. . . . . . . . . . . . . . . . . . . IT . . . 5
Terminare il lavoro . . . . . . . IT . . .6
Cura e manutenzione. . . . . IT . . . 7
Risoluzione guasti . . . . . . . IT . . .7
Dati tecnici . . . . . . . . . . . . . IT . . .7
Accessori optional . . . . . . . IT . . .8
Avvertenze generali
Uso conforme a destinazione
Protezione dell’ambiente
Garanzia
Servizio assistenza
21IT
Page 22

– 4
La lista dei pezzi di ricambio più comuni è
riportata alla fine del presente manuale
d'uso.
I ricambi e gli accessori sono reperibili
presso il rivenditore di fiducia o una filiale
KÄRCHER.
(Indirizzo vedi retro)
Allacciamento alla rete elettrica
– Accendere e mettere in funzione l’appa-
recchio solo in conformità alla targhetta.
– Non toccare mai la spina di alimentazio-
ne con le mani bagnate.
– Non scollegare la spina dalla presa ti-
rando il cavo di collegamento.
– Aver cura di non danneggiare il cavo di
alimentazione o il cavo prolunga passandovi sopra con l’apparecchio,
schiacciandoli o tirandoli in alcun modo.
Proteggere il cavo dal calore e dal contatto con oli o spigoli taglienti.
– Proteggere l'apparecchio da intempe-
rie, umidità e fonti di calore.
Impiego
– In caso di pause di esercizio prolungate
disattivare l'apparecchio dall'interruttore principale / interruttore dell'apparecchio o tirare la spina di rete.
– Questo apparecchio non è destinato
all’uso da parte di persone (compresi
bambini) dalle facoltà fisiche, sensoriali
o intellettuali limitate o carenti di esperienza e/o conoscenze, a meno che costoro non vengano sorvegliati da una
persona responsabile della loro sicurezza o ricevano da questa istruzioni
sull’uso dell’apparecchio. Sorvegliare i
bambini per assicurarsi che non giochino con l’apparecchio.
– Utilizzare sempre l’apparecchio confor-
memente alla destinazione d’uso tenendo in considerazione le condizioni
locali e prestando attenzione durante il
lavoro all’eventuale presenza di terzi,
soprattutto bambini.
– Fare sempre attenzione che la zona di
lavoro sia sgombra da oggetti, che venendo a contatto con il disco rotante
potrebbero venire scagliati lontano.
Trasporto
– Durante il trasporto dell’apparecchio il
motore deve essere spento – assicurarsi inoltre che l’apparecchio sia in posizione stabile e sicura.
Manutenzione
– Estrarre la spina di alimentazione prima
di effettuare interventi sull'apparecchio.
– Per escludere qualsiasi rischio, gli inter-
venti di riparazione e la sostituzione di
pezzi di ricambio dell'apparecchio vanno effettuati esclusivamente dal servizio assistenza autorizzato.
1 Testa lucidante
2 Tasto a pedale per lo sblocco del mani-
co
3 Manico
4 Cavo di allacciamento alla rete con spi-
na
5 Custodia, cavo di allacciamento alla
rete
6 Impugnatura
7 Tubo flessibile di aspirazione
8 Sacco raccoglipolvere in tessuto
9 Sacchetto filtro
10 Scomparto di conservazione per pad lu-
cidante
11 Pad lucidanti
12 Sostegno per pad
13 Raccordo tubo flessibile di aspirazione
14 Rotelle di trasporto
15 Fissaggi per cavo di allacciamento alla
rete (4x)
16 Protezione per il trasporto
Ordinare ricambi e accessori
speciali
Norme di sicurezza
Messa in funzione
Descrizione dell’apparecchio
22 IT
Page 23

– 5
Figura
Prima della messa in funzione dell’ap-
parecchio, togliere le protezioni per il
trasporto.
Figura
Assemblare le due parti del manico ed
assicurare con la vite ed il dado compreso nella fornitura.
Inserire l'intero manico nella testa luci-
dante e fissare con la vite.
Nota: Prestare attenzione alla posizio-
ne del cavo di allacciamento alla rete.
Figura
Introdurre il cavo di allacciamento alla
rete nei fissaggi e stringere.
Figura
Inserire l'estremità diritta del tubo flessi-
bile di aspirazione, inserire l'estremità
curva nell'attacco del manico.
Figura
Inserire prima la parte superiore del
sacco in tessuto nell'alloggiamento fino
al suo aggancio.
Successivamente fissare la parte infe-
riore al manico con il nastro a velcro.
Figura
Aprire la cerniera del sacco di tessuto.
Inserire il sacchetto filtro e spingere il
cartone con l'apertura sul raccordo fino
al suo aggancio. Controllare nuovamente la corretta posizione del sacchetto filtro.
Chiudere nuovamente il sacchetto di
tessuto con la cerniera.
Figura
Posizionare l'apparecchio sul pavimen-
to in modo tale che la testa lucidante sia
rivolta in verticale rispetto alla superfi-
cie.
Inserire semplicemente il sostegno per
pad nell'alloggiamento. Accertarsi che i
naselli dei sostegni per pad si agganci-
no correttamente nell'alloggiamento.
Per la rimozione è sufficiente tirare il so-
stegno per pad.
Figura
Posizionare i pad lucidanti sul sostegno
per pad ed accertarsi della corretta po-
sizione al centro.
Per la rimozione dei pad lucidanti è suf-
ficiente estrarli dall’alloggiamento.
I pad lucidanti possono essere conser-
vati nella parte inferiore del sacchetto di
tessuto in uno scomparto a parte.
Avviso:
Operare sempre con il sacchetto filtro inserito.
몇 Attenzione
Prima di inserire la spina, assicurarsi che il
manico si trovi in posizione verticale. In
questa posizione l’apparecchio è spento.
Figura
Ruotare il gancio superiore del cavo e
rimuovere il cavo di allacciamento alla
rete. Inserire la spina in una presa elet-
trica.
Figura
Mettere in funzione l'apparecchio sbloc-
cando il manico con il tasto a pedale e
tirando verso di se l'impugnatura.
Per spegnere l’apparecchio, riportare il
manico in posizione verticale fino al suo
aggancio.
Rimuovere la protezione per il
trasporto
Montare il manico ed applicarlo
Collegare il tubo flessibile di
aspirazione
Posizionare il sacco
raccoglipolvere in tessuto
Inserire il sacchetto filtro
Introdurre il sostegno per pad
Posizionare i pad lucidanti
Conservare i pad lucidanti
Uso
23IT
Page 24
– 6
Si consiglia di effettuare la cura completa 2
- 3 volte all'anno.
Spazzare il rivestimento/pavimento op-
pure all'occorrenza lavare umido.
Applicare il detergente con il mop in
modo uniforme sul pavimento. Far
asciugare completamente
Note: Si prega di osservare le indicazioni del produttore del rivestimento del
pavimento e del detergente!
Non usare detergenti contenenti solventi.
Figura
Percorrere più volte la superficie come
illustrato nella figura fino al raggiungimento della lucentezza desiderata.
Spostare sempre l'apparecchio in funzione. Non fermarsi a lungo su un punto
altrimenti il pavimento si potrebbe danneggiare.
Nota: Rispettare le indicazioni del produttore in merito alla percorribilità o lo
spostamento di mobili. Consigliamo di
attendere almeno 12 ore. Durante questo periodo percorrere la superficie lucidata con cautela e non con scarpe da
strada. Non spostare mobili, non spargere acqua sul pavimento.
Consigliamo di effettuare la manutenzione
una volta al mese per ottenere una lucentezza uniforme.
In base al produttore del detergente
questo può essere aggiunto direttamente all'acqua usata per la pulizia. Si
prega di osservare le indicazioni del
produttore del rivestimento del pavimento e del detergente!
Successivamente lucidare la superficie.
In base all'occorrenza e sollecitazione
del pavimento (tracce di scarpe, stri-
sce..) lo strato può essere lucidato nuo-
vamente senza applicare
precedentemente dell'altro detergente.
Riportare il manico nella posizione ver-
ticale. L'apparecchio si spegne.
Figura
Staccare la spina di alimentazione e av-
volgere il cavo di allacciamento alla rete
intorno agli appositi ganci del manico.
Girare prima verso l'alto il gancio supe-
riore del cavo.
L’apparecchio è munito di ruote, per spostarlo da un luogo all’altro quando non è in
funzione.
Figura
A tal fine inclinare il manico all'indietro e
spingere l'apparecchio.
In caso di inutilizzo per un periodo prolungato dell'apparecchio si consiglia di fissare
la protezione per il trasporto dell'apparecchio.
Figura
Posizionare l'apparecchio sul pavimen-
to in modo tale che la testa lucidante sia
rivolta in verticale rispetto alla superfi-
cie.
Rimuovere il sostegno per pad dall'ap-
parecchio e posizionarlo in uno scom-
parto.
Premere e reggere la protezione per il
trasporto su un lato nell'alloggiamento
del sostegno per pad. Inserire e far ag-
ganciare l'altro lato della protezione per
il trasporto nell'alloggiamento del se-
condo sostegno per pad.
Conservare l’apparecchio in un luogo
asciutto in posizione diritta.
Cura completa
Liberare il pavimento dallo sporco
Applicazione del detergente
Lucidatura
Manutenzione
Trattamento intermedio
Terminare il lavoro
Trasporto dell'apparecchio
Deposito dell’apparecchio
24 IT
Page 25

– 7
Rischio di lesioni
Prima di ogni intervento di cura e di manutenzione, spegnere l'apparecchio e staccare la spina.
몇 Attenzione
Non usare detergenti abrasivi, detergenti
per il vetro o detergenti universali! Non immergere mai l'apparecchio in acqua.
Rimuovere dopo ogni utilizzo i pad luci-
danti e batterli. Se necessario sciacquare e far asciugare.
Nota: Lavabile in lavatrice fino a 60 °C,
non usare alcun ammorbidente, non
asiugare nell'asciugabiancheria.
Inserire i pad lucidanti nello scomparto
di conservazione.
Cambiare regolarmente il sacchetto filtro.
Vedere capitolo „Inserire il sacchetto fil-
tro“.
Controllare regolarmente che i pad lucidanti siano in buono stato, se dovessero presentare segni di usura, è necessario
cambiarli.
Vedere capitolo „Posizionare i pad luci-
danti“.
L'apparecchio è dovuto al sistema.
L'apparecchio non è stato conservato
con la protezione per il trasporto. Il rumore scompare da solo dopo un po durante la lucidatura.
Con riserva di modifiche tecniche!
Cura e manutenzione
Pulire l’apparecchio e gli accessori
Pulire i pad lucidanti
Inserire il sacchetto filtro
Sostituire i pad lucidanti
Risoluzione guasti
Dischi rumorosi / rumore di battiti
Dati tecnici
Tensione 230 V
Tipo di corrente 1~50/
60
Hz
Grado di protezione II
Potenza allacciata 600 W
Numero giri, dischi lucidanti
1000 giri/
min.
Peso 7 kg
Dimensioni 385 x
340 x
1155
mm
Volume, sacchetto filtro 4 l
25IT
Page 26
– 8
Trattamento ottimale e protezione per pavimenti opaci sintetici e pietre naturali, linoleum e PVC.
Pad lucidanti per pietra / linoleum /
PVC (3 pz.)
(Cod. d’ordin. 2.863-198.0)
Cura dei pavimenti, mattone opaco
RM 532 (1 litro)
(N. ordinazione 6.295-776.0)
Trattamento ottimale e protezione per parquet cerato o pavimenti in legno con finish
olio-cera.
Pad lucidanti per parquet cerato
(3 pz.)
(Cod. d’ordin. 2.863-196.0)
Cura dei pavimenti per parquet cera-
to RM 530(1 litro)
(N. ordinazione 6.295-778.0)
Trattamento ottimale e protezione per pavimenti in parquette sigillato, laminato e sughero.
Pad lucidanti per parquet sigillato /
sughero / laminato (3 pz.)
(Cod. d’ordin. 2.863-197.0)
Cura dei pavimenti per parquet sigil-
lato RM 531(1 litro)
(N. ordinazione 6.295-777.0)
Detergente base per superfici dure
RM 533(1 litro)
(N. ordinazione 6.295-775.0)
Per l'eliminazione accurata di vecchi
strati di prodotti di trattamento e dello
sporco più resistente su mattoni, linoleum, PVC.
Pad lucidanti universale (3 pz.)
(Cod. d’ordin. 2.863-193.0)
Sacchetto filtro (3 pz.)
(Cod. d’ordin. 6.904-128.0)
Accessori optional
Per questo apparecchio è possibile acquistare i seguenti accessori opzionali:
pavimenti in pietra / linoleum / PVC
Parquet cerato / pavimenti in legno con finish olio-cera
Parquet sigillato / sughero / laminato
Altri accessori optional
26 IT
Page 27

– 3
Beste klant,
Lees vóór het eerste gebruik
van uw apparaat deze originele
gebruiksaanwijzing, ga navenant te werk
en bewaar deze voor later gebruik of voor
een latere eigenaar.
Dit apparaat is voor privé-gebruik ont-
wikkeld en is niet bedoeld voor industrieel gebruik.
Hat apparaat maakt het polijsten moge-
lijk van houten vloeren, laminaat, stenenvloeren, linoleum en pvcvloerbedekkingen.
Het apparaat is alleen geschikt voor het
zuigen van wat bij het opwrijven vrijkomt.
Het apparaat is geen stofzuiger! Niet
voor het opzuigen van droog vuil gebruiken!
Geen oplosmiddelhoudende onder-
houdsproducten gebruiken.
Het apparaat mag niet gebruikt worden
op tapijten e.d.
Het apparaat mag niet met extra ge-
wicht verzwaard worden.
Het apparaat mag niet in de open lucht
of bij vochtige omstandigheden gebruikt
of weggezet worden.
Het apparaat alleen met originele filter-
zakken, originele onderdelen, originele
accessoires en originele extra accessoires gebruiken.
Hat draaiende apparaat altijd bewegen.
Niet lang op één plaats blijven staan anders kan de vloerbedekking beschadigd
worden.
Gelieve altijd de instructies van de fabri-
kant van de vloerbedekking en de on-
derhoudsproducten in acht nemen!
De fabrikant is niet aansprakelijk voor
eventuele schade die ontstaat wanneer het
apparaat niet volgens de voorschriften of
op een verkeerde manier wordt gebruikt.
Het verpakkingsmateriaal is her-
bruikbaar. Deponeer het verpakkingsmateriaal niet bij het huishoudelijk
afval, maar bied het aan voor hergebruik.
Onbruikbaar geworden apparaten
bevatten waardevolle materialen die
geschikt zijn voor hergebruik. Lever
de apparaten daarom in bij een inzamelpunt voor herbruikbare materialen.
Aanwijzingen betreffende de inhoudsstoffen (REACH)
Huidige informatie over de inhoudsstoffen
vindt u onder:
www.kaercher.com/REACH
In elk land gelden de door onze hiervoor
verantwoordelijke verkoopmaatschappij
uitgegeven garantievoorwaarden. Eventuele storingen aan het apparaat verhelpen
wij zonder kosten binnen de garantietermijn als een materiaal of fabrieksfout hiervan de oorzaak is. Neem bij klachten
binnen de garantietermijn contact op met
uw leverancier of de dichtstbijzijnde klantenservicewerkplaats en neem de accessoires en uw aankoopbewijs mee.
(adres zie achterzijde)
Bij vragen of storingen helpt onze KÄRCHER-filiaal u graag verder.
(adres zie achterzijde)
Inhoud
Algemene instructies . . . . . NL . . . 3
Veiligheidsinstructies . . . . . NL . . .4
Inbedrijfstelling . . . . . . . . . . NL . . .4
Bediening . . . . . . . . . . . . . . NL . . .5
Werking stopzetten. . . . . . . NL . . .6
Onderhoud . . . . . . . . . . . . . NL . . .7
Hulp bij storingen . . . . . . . . NL . . .7
Technische gegevens. . . . . NL . . .7
Bijzondere toebehoren . . . . NL . . .8
Algemene instructies
Reglementair gebruik
Zorg voor het milieu
Garantie
Klantenservice
Nederlands
27NL
Page 28

– 4
Een selectie van de meest frequent benodigde reserveonderdelen vindt u achteraan
in de gebruiksaanwijzing.
Reserveonderdelen en toebehoren zijn
verkrijgbaar bij uw handelaar of uw KÄRCHER-filiaal.
(adres zie achterzijde)
Elektrische aansluiting
– De stofzuiger alleen volgens het type-
plaatje aansluiten en in gebruik nemen.
– De stekker nooit met natte handen aan-
raken.
– Trek niet aan het snoer, om de stekker
uit het stopcontact te trekken, maar aan
de stekker.
– Het snoer of het verlengsnoer niet be-
schadigen door erover heen te rijden,
erop te drukken, eraan te trekken of iets
dergelijks. Het snoer beschermen tegen hitte, olie en scherpe randen.
– Apparaat tegen externe weersinvloe-
den, vocht en warmtebronnen beschermen.
Toepassingen
– Bij langdurige bedrijfsonderbrekingen
moet het apparaat aan de hoofdschakelaar / apparaatschakelaar uitgeschakeld worden of moet de netstekker
uitgetrokken worden.
– Dit apparaat is niet geschikt om door
personen (inclusief kinderen) met beperkte fysieke, sensorische of geestelijke vaardigheden of met gebrek aan
ervaring en/of kennis gebruikt te worden, tenzij ze door een voor hun veiligheid verantwoordelijke persoon in de
gaten gehouden worden of van hem
aanwijzingen ontvingen hoe het apparaat gebruikt moet worden. Kinderen
dienen in de gaten gehouden te worden
om er zeker van te zijn dat ze niet met
het apparaat spelen.
– Degene die het apparaat bedient dient
het te gebruiken volgens de voorschriften. Deze dient rekening te houden met
de plaatselijke omstandigheden en bij
het werken met het apparaat te letten
op derden, speciaal op kinderen.
– Degene die het apparaat bedient dient
erop te letten, dat geen voorwerpen, die
door de roterende schijf gepakt en weggeslingerd kunnen worden, zich in het
te bewerken gebied bevinden.
Vervoer
– Bij vervoer van het apparaat dient u de
motor af te zetten en het apparaat goed
vast te zetten.
Onderhoud
– Bij alle werkzaamheden aan het appa-
raat netstekker eruit trekken.
– Om risico 's te vermijden, mogen repa-
raties en het vervangen van onderdelen
aan het apparaat alleen worden uitgevoerd door een erkende klantendienst.
1 Politoerkop
2 Voetschakelaar voor de ontgrendeling
van de handgreep
3 Steel
4 Netsnoer met stekker
5 Opbergen, netkabel
6 Handgreep
7 Zuigslang
8 Stoffen zak
9 Filterzak
10 Opbergvak voor polijstpads
11 Polijstpads
12 Padhouder
13 Zuigslangaansluiting
14 Transportrollen
15 Bevestigingen voor stroomkabel (4x)
16 Transportbeveiliging
Bestelling van reserveonderdelen
en bijzondere toebehoren
Veiligheidsinstructies
Inbedrijfstelling
Beschrijving apparaat
28 NL
Page 29

– 5
Afbeelding
Verwijder eerst en voor gebruik van het
apparaat de transportbeveiliging.
Afbeelding
Beide delen van de handgreep ineen
steken en met de bijgevoegde schroef
en moer borgen.
De volledige handgreep in de polijstkop
steken en met de schroef vastzetten.
Instructie: Daarbij moet gelet worden
op de positie van de stroomkabel.
Afbeelding
Stroomkabel in de bevestigingen du-
wen en stevig aanspannen.
Afbeelding
Recht uiteinde van de zuigslang in de
polijstkop steken, gebogen uiteinde in
de aansluiting aan de handgreep steken.
Afbeelding
Eerst het bovenste deel van de stoffen
zak in de opname duwen tot het vastklikt.
Vervolgens het onderste deel met de
klittenband aan de handgreep bevestigen.
Afbeelding
Ritssluiting van de stoffen zak openen.
De filterzak erin leggen en het karton
met de opening over het aansluitstuk
schuiven tot het vastklikt. Correcte positionering van de filterzak nogmaals controleren.
Stoffen zak met de ritssluiting opnieuw
afsluiten.
Afbeelding
Apparaat op de grond leggen zodat de
polijstkop verticaal op het vlak staat.
Padhouder gewoon in de opname du-
wen. Erop letten dat de uitstekende ge-
deeltes van de padhouders in de
opname vastklikken.
Om te verwijderen de padhouders er
gewoon uittrekken.
Afbeelding
Polijstpads op padhouder plaatsen, let-
ten op centrale uitrichting.
Om te verwijderen de polijstpads er ge-
woon uittrekken.
De polijstpads kunnen in het onderste
deel van de stoffen zak in een afzonder-
lijk vak bewaard worden.
Instructie:
Altijd werken met een aangebrachte filterzak.
몇 Let op
Vooraleer u de stekker in het stopcontact
steekt, dient u zich ervan te vergewissen
dat de handgreep verticaal staat. In deze
positie is het apparaat uitgeschakeld.
Afbeelding
Bovenste kabelhaak draaien en
stroomkabel wegnemen. Netstekker in
een stopcontact steken.
Afbeelding
Het apparaat in beweging zetten, daar-
toe met de voetschakelaar de hand-
greep ontgrendelen en handgreep naar
zich toe trekken.
Om te stoppen de handgreep in de ver-
ticale stand terugbrengen tot hij vast-
klikt.
Transportbeveiliging verwijderen
Handgreep ineen steken en
aanbrengen
Zuigslang aansluiten
Stoffen zak aanbrengen
Filterzak aanbrengen
Padhouder aanbrengen
Polijstpads aanbrengen
Polijstpads opbergen
Bediening
29NL
Page 30
– 6
Er wordt aanbevolen om de volledige verzorging 2 - 3 keer per jaar uit te voeren.
Vloerbedekking / vloer vegen, stofzui-
gen of indien nodig nevelvochtig
schoonmaken.
Onderhoudsproduct met wismop gelijk-
matig op de vloer aanbrengen. Volledig
laten drogen
Instructie: Gebruiksinstructies van de
fabrikant van de vloerbedekking en onderhoudsproducten in acht nemen!
Geen oplosmiddelhoudende onderhoudsproducten gebruiken.
Afbeelding
Meermaals zoals op de afbeelding
weergegeven over het oppervlak rijden
tot de gewenste glans bereikt is.
Hat draaiende apparaat altijd bewegen.
Niet lang op één plaats blijven staan anders kan de vloerbedekking beschadigd
worden.
Instructie: Gegevens van de fabrikant
wat betreft begaanbaarheid resp. meubelen respecteren. Wij bevelen aan om
minstens 12 uren te wachten. Gedurende die tijd het gepolijste oppervlak voorzichtig en met proper schoeisel
betreden. Geen meubelen verschuiven,
geen water op de vloerbedekking aanbrengen.
Er wordt aanbevolen om de onderhoudsverzorging één keer per maand uit te voeren om opnieuw een gelijkmatige glans te
verkrijgen.
Afhankelijk van de fabrikant van het on-
derhoudsproduct kan het product direct
aan het poetswater toegevoegd worden. Gelieve de instructies van de fabrikant van de vloerbedekking en
onderhoudsproducten in acht te nemen!
Vervolgens het oppervlak polijsten.
In functie van de behoefte en de belas-
ting van de vloer (voetsporen, stre-
pen,..) kan de bovenste laag
meermaals gepolijst worden zonder
vooraf nieuw product aan te brengen.
Handgreep opnieuw verticaal zetten.
Apparaat schakelt uit.
Afbeelding
De stekker uit stopcontact trekken en
de stroomkabel om de haak aan de
handgreep wikkelen. Bovenste kabel-
haak eerst naar boven draaien.
Gelieve erop te letten dat het apparaat op
de transportrollen vervoerd wordt, wanneer
u het naar de opslagplaats of naar een andere ruimte brengt.
Afbeelding
Daartoe de handgreep naar achteren
trekken en het apparaat verplaatsen.
Er wordt aanbevolen om bij een langdurige
stilstand van het apparaat de transportbeveiliging aan te brengen.
Afbeelding
Apparaat op de grond leggen zodat de
polijstkop verticaal op het vlak staat.
Padhouder van het apparaat trekken en
in het opbergvak leggen.
Transportbeveiliging aan één kant in de
opname van de padhouder duwen en
vasthouden. Andere kant van de trans-
portbeveiliging stevig in de opname van
de tweede padhouder en laten vastklik-
ken.
Apparaat staand in een droge ruimte
bewaren.
Volledige verzorging
Vloer van vuil ontdoen
Aanbrengen van onderhoudsproducten
Polijsten
Onderhoudsverzorging
Tussentijdse verzorging
Werking stopzetten
Transport van het apparaat
Apparaat opslaan
30 NL
Page 31

– 7
Letselrisico
Bij reiniging en onderhoud altijd het apparaat uitschakelen en de stekker uit het stopcontact trekken.
몇 Let op
Geen schuurmiddelen, glas of reinigingsmiddelen gebruiken! Dompel het apparaat
nooit in water.
Polijstpads na elk gebruik verwijderen
en uitkloppen. Indien nodig uitwassen
en laten drogen.
Instructie: Machinewas tot 60 °C mogelijk, geen wasverzachter gebruiken,
niet in de droogtrommel drogen.
Droge polijstpads in het opbergvak leg-
gen.
De filterzak regelmatig verwisselen.
Zie daartoe hoofdstuk "Filterzak aan-
brengen"
Controleer regelmatig de toestand van de
polijstpads, bij slijtage vervangen.
Zie daartoe hoofdstuk "Polijstpads aan-
brengen"
Geluid is inherent aan het systeem. Ap-
paraat werd niet bewaard met de transportbeveiliging. Geluid verdwijnt bij het
polijsten na enige tijd vanzelf.
Technische veranderingen voorbehouden!
Onderhoud
Apparaat en accessoires reinigen
Polijstpads reinigen
Filterzak aanbrengen
Polijstpads vervangen
Hulp bij storingen
Onrustig draaiende schijven / klap-
perend geluid
Technische gegevens
Spanning 230 V
Stroomsoort 1~50/
60
Hz
Beschermingsklasse II
Aansluitvermogen 600 W
Toerental, polijstschijven
1000 u/
min
Gewicht 7 kg
Afmetingen 385 x
340 x
1155
mm
Volume, filterzak 4 l
31NL
Page 32

– 8
Optimale verzorging en bescherming van
matte kunststof- en natuursteenvloeren, linoleum en PVC.
Polijstpads steen / linoleum / PVC
(3 st.)
(bestel-nr. 2.863-198.0)
Vloerverzorging steen mat RM 532
(1 l.)
(bestel-nr. 6.295-776.0)
Optimale verzorging en bescherming van
gewaxt parket of houten vloeren met oliewax-finish.
Polijstpads parket gewaxt (3 st.)
(bestelnr. 2.863-196.0)
Vloerverzorging parket gewaxt
RM 530 (1 l.)
(bestel-nr. 6.295-778.0)
Optimale verzorging en bescherming van
verzegeld parket, laminaat- en kurkvloeren.
Polijstpads parket verzegeld / kurk /
laminaal (3 st.)
(bestel-nr. 2.863-197.0)
Vloerverzorging parket verzegeld
RM 531 (1 l.)
(bestel-nr. 6.295-777,0)
Basisreiniger voor harde oppervlak-
ken RM 533 (1 l.)
(bestel-nr. 6.295-775,0)
Voor de grondige verwijdering van oude
verzorgingslagen en hardnekkig vuil op
steen, linoleum, PVC.
Polijstpads universeel (3 st.)
(bestel-nr. 2.863-193.0)
filterzak (3 st.)
(bestel-nr. 6.904-128.0)
Bijzondere toebehoren
De volgende bijzondere toebehoren kunt u voor dit apparaat achteraf
aankopen:
stenen vloeren / linoleum / PVC
Gewaxt parket / houten vloeren met olie-wax-finish
Verzegeld parket / kurk / laminaat
Andere speciale accessoires
32 NL
Page 33

– 3
Estimado cliente:
Antes del primer uso de su apa-
rato, lea este manual original,
actúe de acuerdo a sus indicaciones y
guárdelo para un uso posterior o para otro
propietario posterior.
Este aparato ha sido diseñado para el
uso particular y no para los esfuerzos
del uso industrial.
El aparato permite el pulido de suelos
de madera, laminado, suelos de piedra,
linóleo y suelos de PVC.
Este aparato es únicamente apto para
la aspiración del material sobrante del
pulido.
¡El aparato no es un aspirador! ¡No
usar para aspirar suciedad seca!
No utilizar productos de cuidado que
contenga disolventes.
El aparato no se puede utilizar sobre
moquetas o similares.
No cargar el aparato con peso adicio-
nal.
No se puede usar ni colocar el aparato
al aire libre ni con humedad.
Utilizar el aparato sólo con bolsas fil-
trantes originales, piezas de repuestos
originales, accesorios o accesorios opcionales.
Mientras está en marcha debe moverse
el aparato. No permanecer mucho tiem-
po en un punto, de lo contrario pueden
producirse daños en el revestimiento
del suelo.
Tener siempre en cuenta las instruccio-
nes del fabricante del revestimiento del
suelo y del producto de cuidado.
El fabricante no asume responsabilidad alguna por los daños que pudieran derivarse
de un uso inadecuado o incorrecto.
Los materiales de embalaje son reci-
clables. Po favor, no tire el embalaje
a la basura doméstica; en vez de ello, entréguelo en los puntos oficiales de recogida
para su reciclaje o recuperación.
Los aparatos viejos contienen materiales valiosos reciclables que debe-
rían ser entregados para su
aprovechamiento posterior. Por este motivo, entregue los aparatos usados en los
puntos de recogida previstos para su reciclaje.
Indicaciones sobre ingredientes
(REACH)
Encontrará información actual sobre los ingredientes en:
www.kaercher.com/REACH
En todos los países rigen las condiciones
de garantía establecidas por nuestra sociedad distribuidora. Las averías del aparato
serán subsanadas gratuitamente dentro
del período de garantía, siempre que las
causas de las mismas se deban a defectos
de material o de fabricación. En un caso de
garantía, le rogamos que se dirija con el
comprobante de compra al distribuidor
donde adquirió el aparato o al Servicio al
cliente autorizado más próximo a su domicilio.
(La dirección figura al dorso)
Índice de contenidos
Indicaciones generales . . . ES . . .3
Indicaciones de seguridad . ES . . .4
Puesta en marcha . . . . . . . ES . . . 5
Manejo . . . . . . . . . . . . . . . . ES . . .6
Finalización del funcionamiento ES . . .7
Cuidados y mantenimiento. ES . . .8
Subsanación de averías. . . ES . . .8
Datos técnicos . . . . . . . . . . ES . . .8
Accesorios especiales . . . . ES . . .9
Indicaciones generales
Uso previsto
Protección del medio ambiente
Garantía
Español
33ES
Page 34

– 4
En caso de dudas o alteraciones, la sucursal de KÄRCHER estará encantada de
ayudarle.
(La dirección figura al dorso)
Podrá encontrar una selección de las piezas de repuesto usadas con más frecuencia al final de las instrucciones de uso.
En su distribuidor o en la sucursal de KÄRCHER podrá adquirir piezas de repuesto y
accesorios.
(La dirección figura al dorso)
Toma de corriente
– La conexión y puesta en funcionamien-
to del aparato debe efectuarse de
acuerdo con las indicaciones en la placa de características.
– No toque nunca la clavija con las ma-
nos mojadas.
– No tire del cable para desconectar el
aparato de la red, sino de la clavija de
enchufe.
– Colocar el cable de conexión a la red o
el cable prolongador de forma que no
se dañen o deterioren al pisarlos,
aplastarlos, tirar de ellos, etc. Proteja el
cable de red del calor, aceite o cantos
afilados.
– Proteja el aparato de la intemperie, la
humedad y las fuentes de calor.
Empleo
– Para pausas de operación prolongadas
desconecte el aparato del interruptor
principal / interruptor del aparato o desenchufe la clavija de red.
– Este aparato no es apto para ser opera-
do por personas (incl. niños) con capacidades físicas, sensoriales o
intelectuales limitadas, o con falta de
experiencia y/o conocimientos, a no ser
que sea supervisado por una persona
para responsable para su seguridad o
haya sido instruida para utilizar el aparato. Mantener fuera del alcance de los
niños.
– El usuario debe utilizar el aparato con-
forme a las instrucciones. Durante los
trabajos con el aparato, debe tener en
cuenta las condiciones locales y evitar
causar daños a terceras personas, sobre todo a niños.
– El operario tiene que procurar que no
haya objetos en el área de trabajo, que
puedan ser agarrados y lanzados por
los discos giratorios.
Transporte
– Al transportar el aparato se debe parar
el motor y fijar el aparato de forma segura.
Mantenimiento
– Desenchufar la clavija de red antes de
realizar cualquier trabajo en el aparato.
– Para evitar riesgos, es necesario que
las reparaciones y el cambio de piezas
de repuesto sean realizados únicamente por el servicio técnico autorizado.
Servicio de atención al cliente
Pedido de piezas de repuesto y
accesorios especiales
Indicaciones de seguridad
34 ES
Page 35

– 5
1 Cabezal de pulido
2 Pulsador de pie para desbloqueo de
mango largo
3 mango
4 Cable de conexión a red con enchufe
5 Zona de recogida del cable de alimen-
tación de red
6 Mango
7 Manguera de aspiración
8 Bolsa de tela
9 Bolsa del filtro
10 Compartimento de recogida para pads
de pulido
11 Pads de pulido
12 Soporte de pad
13 Racor de empalme de la manguera de
aspiración
14 Rodillos de transporte
15 Fijaciones para cable de conexión de
red (4 unidades)
16 Dispositivo de bloqueo para el transpor-
te
Figura
Quite, estirando, el seguro de transpor-
te antes de usar el aparato por primera
vez.
Figura
Unir, insertándolas, las dos partes del
mango largo y asegurar con el tornillo y
la tuerca anexos.
Insertar el mango largo completo en el
cabezal pulidor y fijar con tornillo.
Indicación: Al hacerlo, tener en cuenta
la posición del cable de conexión de
red.
Figura
Presionar el cable de conexión de red
en las fijaciones y estirarlo hasta que
quede tenso.
Figura
Insertar el extremo recto de la mangue-
ra de aspiración en el cabezal de pulido, insertar el extremo combado en la
conexión del mango largo.
Figura
Primero presionar la parte superior de
la bolsa de tela en el alojamiento hasta
que encaje.
A continuación fijar la parte inferior con
la cinta de velcro al mango largo.
Figura
Abrir la cremallera de la bolsa de tela.
Introducir la bolsa filtrante y empujar la
caja con la abertura sobre el manguito
hasta que encaje. Comprobar nuevamente si la posición de la bolsa filtrante
es correcta.
Volver a cerrar la bolsa de tela con la
cremallera.
Puesta en marcha
Descripción del aparato
Retirar el seguro de transporte
Montar y colocar el mango largo
Conecte la manguera de aspiración
Colocar la bolsa de tela
Colocación de la bolsa filtrante
35ES
Page 36

– 6
Figura
Dejar el aparato sobre el suelo, de
modo que el cabezal pulidor quede per-
pendicular a la superficie.
Presionar simplemente el soporte de
pad en el alojamiento. Procure que la
lengüeta del soporte de pad encaje
bien en el alojamiento.
Para retirar el soporte de pad sólo tiene
que tirar.
Figura
Colocar los pads de pulido sobre el so-
porte de pad, debe quedar bien centra-
do.
Para retirar los pads de pulido sólo tie-
ne que tirar.
Los pads de pulido pueden conservar-
se en la parte inferior de la bolsa de tela
en un compartimento separado.
Nota:
Trabajar siempre con el filtro colocado.
몇 Atención:
Antes de enchufar el aparato, asegúrese
de que el mango largo esté en posición vertical. En esta posición el aparato está apagado.
Figura
Girar el gancho de cable superior y reti-
rar el cable de conexión de red. Enchu-
far la clavija de red a una toma de
corriente.
Figura
Poner el aparato en movimiento, para
ello desbloquear el mango largo con el
pulsador de pie y estirar hacia sí el
mango.
Para parar coloque de nuevo el mango
largo en la posición vertical, hasta que
se encaje.
Se recomienda efectuar el cuidado completo 2 ó 3 veces al año.
Barrer, aspirar o si es necesario limpiar
con un trapo ligeramente humedecido
el revestimiento/suelo.
Administrar el producto de cuidado de
forma uniforme sobre el suelo con una
mopa. Dejar secar completamente
Indicaciones: Tener en cuenta las instrucciones de uso del fabricante del resvestimiento del suelo y del producto de
cuidado.
No utilizar productos de cuidado que
contenga disolventes.
Figura
Dar varias pasadas sobre la superficie,
como se muestra en la figura, hasta lograr el brillo deseado.
Mientras está en marcha debe moverse
el aparato. No permanecer mucho tiempo en un punto, de lo contrario pueden
producirse daños en el revestimiento
del suelo.
Indicación: Respetar las instrucciones
del fabricante sobre transitabilidad o
desplazamiento de los muebles. Recomendamos esperar al menos 12 horas. Durante este tiempo transitar con
cuidado sobre la superficie pulida y
nunca con zapatos de calle. No mover
muebles, no echar agua sobre el revestimiento.
Insertar el soporte de pad
Colocar encima los pads de pulido
Conservare los pads de pulido
Manejo
Cuidado completo
Eliminar la suciedad del suelo
Administrar el producto de cuidado
Pulir
36 ES
Page 37

– 7
Se recomienda efectuar el cuidado de
mantenimiento una vez al mes para lograr
de nuevo un brillo uniforme.
Dependiendo del fabricante del produc-
to de cuidado, es posible añadir directa-
mente el producto de cuidado al agua
de lavado. Tener en cuenta las instruc-
ciones del fabricante del revestimiento
del suelo y del producto de cuidado.
A continuación pulir la superficie.
Si es necesario y si el suelo se somete
a grandes esfuerzos (sendas de pisa-
das, tiras ..), puede pulirse varias veces
la capa de cuidado sin necesidad de
administrar previamente producto de
cuidado.
Colocar el asa de nuevo en posición
vertical. El aparato se apaga.
Figura
Desenchufar el aparato y enrollar el ca-
ble de conexión de red alrededor de los
ganchos del mango largo. Girar antes
hacia arriba el gancho de cable superior.
Procure mover el aparato sobre las ruedas
de transporte cuando quiera llevarlo hasta
su lugar de almacenamiento u otra habitación.
Figura
Para ello inclinar el asa hacia atrás y
estirar el aparato.
Si el aparato no se utiliza durante largo
tiempo, se recomienda fijar el seguro de
transporte.
Figura
Dejar el aparato sobre el suelo, de
modo que el cabezal pulidor quede perpendicular a la superficie.
Sacar el soporte de pad del aparato y
dejarlo en el compartimento de recogida.
Presionar el seguro de transporte a un
lado en el alojamiento del soporte de
pad y sujetarlo. Introducir, apretando
con fuerza el otro lado del seguro de
transporte en el alojamiento del segundo soporte de pad y encajarlo.
Guarde el aparato de pie en un lugar
seco.
Cuidado de mantenimiento
Cuidado intermedio
Finalización del
funcionamiento
Transporte del aparato
Almacenamiento del aparato
37ES
Page 38

– 8
Peligro de lesiones
Apague el aparto y desenchufe la clavija de
red antes de efectuar los trabajos de cuidado y mantenimiento.
몇 Atención:
No utilice detergentes abrasivos, ni detergentes para cristales o multiuso. No sumerja jamás el aparato en agua.
Retirar los pads de pulido después de
cada uso y sacudirlos. En caso necesa-
rio, lavar y poner a secar.
Indicación: Lavar a máquina posible
hasta 60 ºC, no usar suavizante, no se-
car en secadora.
Colocar los pads de pulido secos en el
compartimento de recogida.
Cambiar la bolsa filtrante con regularidad.
Más información en el capítulo „Coloca-
ción de la bolsa filtrante“.
Compruebe regularmente el estado de los
pads de pulido, en caso de desgaste, sustituir.
Más información en el capítulo „Colocar
encima los pads de pulido“.
El ruido está condicionado por el siste-
ma. El aparato no se ha conservado
con seguro de transporte. El ruido des-
aparece por sí mismo después de al-
gún tiempo del proceso de pulido.
Reservado el derecho a realizar modificaciones técnicas.
Cuidados y mantenimiento
Limpie el aparato y los accesorios
Limpiar los pads de pulido
Colocación de la bolsa filtrante
Cambio los pads de pulido
Subsanación de averías
Discos que marchan de forma
inestable / ruido de golpeteo
Datos técnicos
Tensión 230 V
Tipo de corriente 1~50/
60
Hz
Clase de protección II
Potencia conectada 600 W
Velocidad, discos de
pulido
1000 rpm
Peso 7 kg
Dimensiones 385 x
340 x
1155
mm
Volumen, bolsa filtrante 4 l
38 ES
Page 39

– 9
Cuidado óptimo y protección para suelos
artificiales y de piedra natural mates, linóleo y PVC.
Almohadillas para pulir piedra/linó-
leo/PVC (3 uds.)
(Ref. 2.863-198.0)
Cuidado para suelos, mate
RM 532(1 l)
(Ref. 6.295-776.0)
Tratamiento y protección óptima para suelo
encerado o suelos de madera con acabado
de aceite y cera.
Almohadillas para pulir, parqué en-
cerado (3 uds.)
(Ref. 2.863-196.0)
Tratamiento para suelos parqué en-
cerado RM 530 (1 l)
(Ref. 6.295-778.0)
Tratamiento y protección óptima de suelos
de parqué sellado, laminado y corcho.
Almohadillas para pulir, parqué se-
llado/corcho/laminado (3 uds.)
(Ref. 2.863-197.0)
Tratamiento para suelos parqué se-
llado RM 531 (1 l)
(Ref. 6.295-777.0)
Detergente básico para superficies
duras RM 533 (1 l)
(Ref. 6.295-775.0)
Para la limpieza eficaz de antiguas ca-
pas de tratamiento y suciedades difíci-
les en piedra, linóleo, PVC.
Almohadillas para pulir, universal
(3 uds.)
(Ref. 2.863-193.0)
Bolsas filtrantes (3 uds.)
(Ref. 6.904-128.0)
Accesorios especiales
Puede comprar los siguientes accesorios especiales para este aparato:
Suelos de piedra / linóleo / PVC
Parqué encerado / suelo de madera con acabado de aceite y cera
Parqué sellado / corcho / laminado
Otros accesorios especiales
39ES
Page 40

Português
– 3
Estimado cliente,
Leia o manual de manual origi-
nal antes de utilizar o seu aparelho. Proceda conforme as indicações no
manual e guarde o manual para uma consulta posterior ou para terceiros a quem
possa vir a vender o aparelho.
Este aparelho foi desenvolvido para o
uso privado e não foi concebido para
suster as necessidades de uma utilização industrial.
O aparelho permite polir pavimentos
em madeira, laminado, pedra, linóleo e
PVC.
O aparelho só serve para aspirar as ca-
madas soltas durante o polimento.
O aparelho não é um aspirador! Não
utilize o aparelho para aspirar sujidade
seca!
Não utilizar produtos de conservação
que contenham solventes.
O aparelho não pode ser aplicado em
carpetes ou similares.
Não aplicar peso complementar no
aparelho.
O aparelho não pode ser utilizado nem
armazenado ao ar livre ou sob condições climatéricas adversas (chuva).
Utilize o aparelho somente com sacos
de filtro, peças sobressalentes, acessórios e acessórios especiais originais.
Movimentar sempre o aparelho em fun-
cionamento. Não permanecer durante
muito tempo no mesmo local, de modo
a evitar danos no pavimento.
Respeitar sempre as instruções do fa-
bricante do pavimento ou do produto de
conservação!
O fabricante não se responsabiliza por
eventuais danos causados por uma utilização indevida ou erros de manuseamento.
Os materiais de embalagem são re-
cicláveis. Não coloque as embalagens no lixo doméstico, envie-as para uma
unidade de reciclagem.
Os aparelhos velhos contêm materiais preciosos e recicláveis e deve-
rão ser reutilizados. Por isso, elimine
os aparelhos velhos através de sistemas
de recolha de lixo adequados.
Avisos sobre os ingredientes (REACH)
Informações actuais sobre os ingredientes
podem ser encontradas em:
www.kaercher.com/REACH
Em cada país são válidas as condições de
garantia emitidas pelas nossas Empresas
de Comercialização competentes. Eventuias avarias no aparelho, durante o período de garantía, serão reparadas sem
encargos para o cliente, desde que se trate
de um defeito de material ou de fabricação.
Em caso de garantia, dirija-se ao seu revendedor ou ao Serviço Técnico mais próximo, com o aparelho e documento de
compra.
(Endereços no verso)
Em caso de dúvidas ou avarias, a nossa filial KÄRCHER local está à sua disposição.
(Endereços no verso)
Índice
Instruções gerais . . . . . . . . PT . . .3
Avisos de segurança . . . . . PT . . .4
Colocação em funcionamento PT . . .4
Manuseamento . . . . . . . . . PT . . .5
Desligar o aparelho . . . . . . PT . . .6
Conservação e manutenção PT . . .7
Localização de avarias. . . . PT . . .7
Dados técnicos. . . . . . . . . . PT . . .7
Acessórios especiais . . . . . PT . . .8
Instruções gerais
Utilização conforme o fim a que se
destina a máquina
Protecção do meio-ambiente
Garantia
Serviço de assistência técnica
40 PT
Page 41

– 4
No final das instruções de Serviço encontra
uma lista das peças de substituição mais
necessárias.
As peças sobressalentes e acessórios podem ser adquiridos junto do seu revendedor ou em cada filial da KÄRCHER.
(Endereços no verso)
Conexão de energia eléctrica
– O aparelho só deverá ser ligado à cor-
rente e colocado em funcionamento segundo as indicações que constam na
placa de características.
– Nunca tocar na ficha de rede com as
mãos molhadas.
– Para desligar o aparelho da rede, não
puxe no cabo eléctrico, mas sim na ficha.
– Assegurar que os cabos de rede e de
extensão não sejam danificados por
trânsito, esmagamento, puxões ou problemas similares. Proteger o cabo contra calor, óleo e arestas afiadas.
– Proteger o aparelho do tempo atmosfé-
rico, da humidade e de fontes de calor.
Aplicação
– No caso de longas interrupções de fun-
cionamento deve-se desligar o interruptor principal / interruptor do aparelho ou
retirar a ficha da tomada.
– Este aparelho não foi concebido para
ser utilizado por pessoas (incluindo
crianças) com capacidades físicas,
sensoriais e psíquicas reduzidas ou por
pessoas com falta de experiência ou
conhecimentos, excepto se estas forem
supervisionadas por uma pessoa responsável pela sua segurança ou receberem as necessárias instruções sobre
como utilizar o aparelho. As crianças
devem ser supervisionadas, de modo a
assegurar que não brinquem com o
aparelho.
– O utilizador deve utilizar o aparelho de
acordo com as especificações. Deve
observar as condições locais e prestar
atenção a terceiros e especialmente a
crianças quando trabalhar com o aparelho.
– O utilizador deve verificar que não se
encontram objectos na área de trabalho
que possam ser projectados pelo disco
rotativo do aparelho.
Transporte
– Durante o transporte o motor do apare-
lho deve estar imobilizado e o aparelho
deve ser fixado de modo seguro.
Manutenção
– Retirar a ficha da tomada antes de
efectuar quaisquer trabalhos no aparelho.
– Para evitar riscos, as reparações e a
substituição de peças sobresselentes
no aparelho pode somente ser executadas pelo serviço pós-venda autorizado.
1 Cabeça para polir
2 Interruptor de pé para o desbloqueio da
barra
3 Barra
4 Cabo de ligação à rede com ficha
5 Depósito, cabo de ligação à rede
6 Punho
7 Tubo flexível de aspiração
8 Saco de pano
9 Saco-filtro
10 Compartimento de armazenamento
para almofadas de polimento (pads)
11 Almofadas de polimento (pads)
12 Suporte da almofada
13 Ligação do tubo flexível de aspiração
14 Rolos de transporte
15 Fixação para cabo de ligação à rede
(4x)
16 Protecção de transporte
Encomenda de peças sobressalen-
tes e acessórios especiais
Avisos de segurança
Colocação em
funcionamento
Descrição da máquina
41PT
Page 42

– 5
Figura
Remova, pela primeira vez, a protecção
de transporte antes de utilizar o aparelho, puxando a mesma.
Figura
Encaixar as duas partes da barra e fixar
com o parafuso e porca.
Encaixar a barra completa na cabeça
de polimento e fixar com parafuso.
Aviso: Neste contexto, ter atenção à
posição do cabo de ligação à rede.
Figura
Pressionar o cabo de ligação à rede
contra a respectiva fixação e esticar.
Figura
Inserir a extremidade recta do tubo fle-
xível de aspiração na cabeça de polimento e encaixar a extremidade
curvada, na ligação da barra.
Figura
Inserir primeiro a parte superior do saco
de panos no respectivo encaixe, até encaixar.
Fixar de seguida a parte inferior com a
fita de velcro na barra.
Figura
Abrir o fecho do saco de pano.
Inserir o saco de pano e deslocar o car-
tão com a abertura sobre o bocal, até
encaixar. Verificar novamente o posicionamento correcto do saco de filtro.
Voltar a fechar o saco de pano com o
fecho.
Figura
Posicionar o aparelho no chão, de
modo que a cabeça de polimento esteja
posicionada verticalmente em relação à
superfície.
Pressionar o suporte da almofada sim-
plesmente no encaixe. Ter em atenção
que os pinos do suporte da almofada
encaixem correctamente no encaixe.
Para remover basta puxar os suportes
da almofada.
Figura
Posicionar as almofadas de polimento
no suporte de almofada e alinhar cen-
tralmente.
Para remover basta puxar as almofa-
das de polimento.
As almofadas de polimento podem ser
guardadas na parte inferior do saco de
pano, num compartimento separado.
Aviso:
Trabalhar sempre com o saco de filtro instalado.
몇 Atenção
Antes de conectar a ficha de rede deve certificar-se que a barra está na posição vertical. Nesta posição o aparelho está
desligado.
Figura
Rodar o gancho superior do cabo e re-
tirar o cabo de ligação de rede. Ligar a
ficha de rede à tomada de rede.
Figura
Colocar o aparelho em funcionamento,
desbloqueando a barra com o interrup-
tor de pé, e puxar o punho em direcção
ao corpo.
Posicionar a barra na posição vertical
até encaixar, para parar.
Remover a protecção de transporte.
Montar a barra e posicionar
Conectar o tubo flexível de
aspiração
Colocar o saco de pano
Colocar saco de filtro
Inserir o suporte da almofada
Posicionar as almofadas de
polimento
Arrumar as almofadas de polimento
Manuseamento
42 PT
Page 43

– 6
Recomenda-se que a conservação total
seja efectuada 2 - 3 vezes por ano.
Varrer o pavimento/revestimento, aspi-
rar e, se necessário, passá-lo a pano.
Aplicar o produto de conservação uni-
formemente com uma mopa. Deixar secar
Avisos: ter atenção aos avisos de aplicação do fabricante do pavimento e do
produto de conservação!
Não utilizar produtos de conservação
que contenham solventes.
Figura
Passar várias vezes por cima da super-
fície, conforme ilustrado, até atingir o
grau de brilho desejado.
Movimentar sempre o aparelho em funcionamento. Não permanecer durante
muito tempo no mesmo local, de modo
a evitar danos no pavimento.
Aviso: Cumprir as indicações do fabricante, relativamente à circulação resp.,
deslocação de móveis. Aconselhamos
que aguarde, pelo menos, 12 horas.
Durante este período deve-se circular
por cima da superfície com precaução
e nunca com calçado da rua. Não empurrar móveis, não aplicar água no pavimento/revestimento.
Recomenda-se que os trabalhos de conservação de manutenção sejam efectuados uma vez por mês, de modo a obter
sempre um brilho uniforme.
Dependendo do fabricante do produto
de conservação é possível adicioná-lo
directamente à água da mopa. P. f. ter
atenção aos avisos de aplicação do fabricante do pavimento e do produto de
conservação!
De seguida, polir a superfície.
Consoante o estado do pavimento (pe-
gadas, riscos, ...) é possível polir várias
vezes a camada de conservação, sem
para isso ter que aplicar novo produto
de conservação.
Reposicionar a barra na posição verti-
cal. O aparelho desliga.
Figura
Retirar a ficha de rede e enrolar o cabo
de ligação à rede, em torno do gancho
situado na barra. Rodar previamente o
gancho superior do cabo para cima.
É de especial importância que se certifique
que o aparelho é movimentado sobre os rolos de transporte, sempre que deslocar o
aparelho para outro quarto ou para o local
de armazenamento.
Figura
Inclinar, para isso, o punho para trás e
puxar o aparelho.
Recomenda-se a montagem do dispositivo
de protecção de transporte, sempre que o
aparelho não for utilizado por longos períodos.
Figura
Posicionar o aparelho no chão, de
modo que a cabeça de polimento esteja
posicionada verticalmente em relação à
superfície.
Retirar o suporte da almofada do apa-
relho e posicionar no compartimento de
armazenamento.
Pressionar o dispositivo de protecção
de transporte, num dos lados, no encai-
xe do suporte da almofada e segurar.
Do outro lado do dispositivo de protec-
ção de transporte deve-se pressionar o
encaixe do segundo suporte de almofa-
da e encaixar.
Guardar o aparelho, de pé, num local
seco.
Conservação total
Libertar o pavimento de sujidade
Aplicação do produto de conservação
Polir
Conservação de manutenção
Conservação intermédia
Desligar o aparelho
Transporte do aparelho
Guardar a máquina
43PT
Page 44

– 7
Perigo de lesão
Antes de efectuar trabalhos de conservação e de manutenção desligar o aparelho e
retirar a ficha de rede.
몇 Atenção
Não utilize produtos abrasivos, produtos
para a limpeza de vidros ou universais!
Nunca mergulhe o aparelho em água.
Retirar e limpar (com leves pancadas/
sacudir) as almofadas de polimento
após cada utilização. Em caso de necessidade lavar e deixar secar.
Aviso: é possível lavar as almofadas
nas máquinas de roupa a uma temperatura de até 60 °C: Não utilizar amaciador nem secar na máquina de secar.
Posicionar as almofadas de polimento
secas no compartimento de armazenamento.
Substitua o saco de filtro em intervalos regulares.
Consulte para isso o capítulo "Colocar
saco de filtro".
Verifique regularmente o estado das almofadas de polimento e substituir em caso de
desgaste.
Consulte para isso o capítulo "Posicio-
nar as almofadas de polimento".
Ruído normal do sistema. Aparelho não
foi guardado com o dispositivo de pro-
tecção de transporte. Ruído desapare-
ce automaticamente após algum tempo
de polimento.
Reservados os direitos a alterações técnicas!
Conservação e manutenção
Limpar o aparelho e os acessórios
Limpar as almofadas de polimento
Colocar saco de filtro
Substituir as almofadas de
polimento
Localização de avarias
Funcionamento irregular dos discos
/ ruído cintilante
Dados técnicos
Tensão 230 V
Tipo de corrente 1~50/
60
Hz
Classe de protecção II
Potência da ligação 600 W
Rotação, discos de polimento
1000 rpm
Peso 7 kg
Dimensões 385 x
340 x
1155
mm
Volume do saco do filtro
4l
44 PT
Page 45

– 8
Conservação e protecção ideal para pavimentos mate em plástico e pedra natural,
linóleo e PVC.
Almofadas de polimento, pedra /
linóleo / PVC (3 u.)
(n.º de encomenda: 2.863-198.0)
Conservação de pavimentos em pe-
dra mate RM 532 (1 ltr.)
(n.º de encomenda: 6.295-776.0)
Conservação e proteção perfeitas para
parquete encerado ou pavimentos em madeira com acabamento de óleo/cera.
Almofadas de polimento, parquet en-
cerado (3 u.)
(n.º de encomenda: 2.863-196.0)
Conservação de pavimentos, par-
quet encerado RM 530 (1 ltr.)
(n.º de encomenda: 6.295-778,0)
Conservação e protecção perfeita para pavimentos de parquet, laminado e de cortiça
selados.
Almofadas de polimento, parquet se-
lado / cortiça / laminado (3 u.)
(n.º de encomenda: 2.863-197.0)
Conservação de pavimentos, par-
quet selado RM 531 (1 ltr.)
(n.º de encomenda: 6.295-777,0)
Acessórios especiais
Pode adquirir numa fase posterior os seguintes acessórios especiais para
este aparelho:
Pavimentos em pedra / linóleo / PVC
Parquete encerado / pavimentos em madeira com acabamento de óleo/cera
Parquet selado / cortiça / laminado
45PT
Page 46

– 9
Produto d elimpeza básico para su-
perfícies duras RM 533 (1 ltr.)
(n.º de encomenda: 6.295-775,0)
Para a eliminação de camadas de con-
servação antigas e sujidade resistente
em pedra, linóleo, PVC.
Almofadas de polimento, universais
(3 u.)
(n.º de encomenda: 2.863-193.0)
Sacos de filtro (3 u.)
(n.º de encomenda: 6.904-128.0)
Outros acessórios especiais
46 PT
Page 47

– 3
Kære kunde
Læs original brugsanvisning in-
den første brug, følg anvisningerne og opbevar vejledningen til senere
efterlæsning eller til den næste ejer.
Denne maskine blev udviklet til privat
brug og er ikke beregnet til erhvervsmæssig brug.
Maskinen må bruges til at polere træg-
ulve, laminat, stengulv, linoleum og
pvc-gulv.
Maskinen er kun egnet til at støvsuge
materiale der blev afslidt under poleringen.
Maskinen er igen støvsuger! Den må
ikke bruges til sugning af tørt snavs!
Der må ikke bruges plejemidler som in-
deholder opløsningsmiddel.
Maskinen må ikke anvendes på gulv-
tæpper. eller lignende.
Maskinen må ikke belastes med sup-
plerende vægt.
Maskinen må ikke bruges eller opbeva-
res udendørs eller under våde betingelser.
Maskinen må kun bruges med originale
filterposer, reservedele, tilbehør eller
ekstra tilbehør.
Den kørende maskine skal altid bevæ-
ges. Maskinen må ikke stå på et sted
over et længere tidsrum, det kan forårsage skader på gulvbelægningen.
Tag venligst altid højde for gulvbelæg-
nings- og plejemiddelproducentens anvisninger!
Producenten garanterer ikke for eventuelle
skader som blev forårsaget af ikke bestemmelsesmæssigt brug eller ukorrekt betjening af apparatet.
Emballagen kan genbruges. Smid
ikke emballagen ud sammen med
det almindelige husholdningsaffald, men
aflever den til genbrug.
Udtjente apparater indeholder værdifulde materialer, der kan og bør afle-
veres til genbrug. Aflever derfor
udtjente apparater på en genbrugsstation
eller lignende.
Henvisninger til indholdsstoffer
(REACH)
Aktuelle oplysninger til indholdsstoffer finder du på:
www.kaercher.com/REACH
I de enkelte land gælder de garantibetingelser, som er udgivet af vores respektive ansvarlige forhandlere. Inden for
garantifristen afhjælper vi gratis eventuelle
fejl på Deres maskine, såfremt disse er forårsaget af materiale- eller produktionsfejl.
Hvis De vil gøre Deres garanti gældende,
bedes De henvende Dem til Deres forhandler eller nærmeste autoriserede kundeservice medbringende kvittering.
(Se adressen på bagsiden)
Vores KÄRCHER-afdeling hjælper gerne,
hvis De har spørgsmål, eller der er fejl på
støvsugeren.
(Se adressen på bagsiden)
Indhold
Generelle henvisninger . . . DA . . .3
Sikkerhedsanvisninger . . . . DA . . .4
Ibrugtagning . . . . . . . . . . . . DA . . .4
Betjening . . . . . . . . . . . . . . DA . . .5
Efter brug . . . . . . . . . . . . . . DA . . .6
Pleje og vedligeholdelse . . DA . . .7
Afhjælpning af fejl. . . . . . . . DA . . .7
Tekniske data . . . . . . . . . . . DA . . . 7
Ekstratilbehør . . . . . . . . . . . DA . . .8
Generelle henvisninger
Bestemmelsesmæssig‚
anvendelse
Miljøbeskyttelse
Garanti
Kundeservice
Dansk
47DA
Page 48

– 4
Et udvalg over de reservedele som bruges
meget ofte finder De i slutningen af betjeningsvejledningen
Reservedele og tilbehør får du ved din forhandler eller i den KÄRCHER-afdeling.
(Se adressen på bagsiden)
Strømtilslutning
– Apparatet må kun tilsluttes og ibrugta-
ges ifølge typeskiltet.
– Rør aldrig ved netstikket med våde
hænder.
– Træk i stikken og ikke i ledningen for at
fjerne apparatet fra strømforsyningen.
– Kør ikke over, klem, træk, ryk osv. ikke
i net- eller forlængerledninger, da dette
ødelægger eller beskadiger dem. Beskyt netkablet mod varme, olie og skarpe kanter.
– Beskyt apparatet imod vejr, fugtighed
og varmekilder.
Anvendelse
– Ved længere arbejdspauser skal maski-
nen afbrydes via hovedafbryderen / kontakten eller netstikket skal trækkes ud.
– Dette apparat er ikke beregnet til brug
af personer (inklusive børn) med indskrænkede fysiske, sensoriske eller åndelige evner eller som ikke har
erfaringer med brugen og/eller kendskab til brugen, med mindre de er under
opsyn af en person som er ansvarligt
for deres sikkerhed eller blev anvist i
brugen af apparatet. Børn skal være
under opsyn for at sørge for, at de ikke
leger med apparatet.
– Brugeren skal anvende maskinen iht.
dens anvendelsesformål. Brugeren
skal tage hensyn til lokale forhold og
under arbejdet med apparatet være opmærksom på andre personer, især
børn
– Brugeren skal holde øje med at der ikke
ligger genstande i arbejdsområdet som
kan gribes fat af de roterende skiver og
kastes bort.
Transport
– Ved transport skal maskinens motor
sættes i stå og maskinen selv skal befæstes.
Vedligeholdelse
– Træk netstikket inden der arbejdes på
apparatet.
– For at undgå truende farer, må repara-
tioner og udskiftning af reservedele på
apparatet kun gennemføres af en godkendt kundeservice.
1 Poleringshoved
2 Fodkontakt til løsning af håndtaget
3 Skaft
4 Nettilslutningskabel med stik
5 Opbevaring, nettilslutningskablet
6 Håndtag
7 Sugeslange
8 Tekstilpose
9 Filterpose
10 Opbevaringsrum til poleringspuder
11 Poleringspuder
12 Pudeholder
13 Sugeslangetilslutning
14 Transportruller
15 Fiksering til nettilslutningskablet (4x)
16 Transportsikring
Bestilling af reservedele og
ekstratilbehør
Sikkerhedsanvisninger
Ibrugtagning
Beskrivelse af apparatet
48 DA
Page 49

– 5
Figur
Fjern transportsikringen før maskinen
bruges ved at trække den af.
Figur
Sæt begge dele af håndtaget sammen
og fikser dem med vedlagt skrue og
møtrik.
Sæt hele håndtaget ind i poleringshove-
det og skru det fast med skruen.
Bemærk: Tag herved hensyn til nettil-
slutningskablets position.
Figur
Tryk nettilslutningskablet ind i fikserin-
gen og stram det.
Figur
Sæt sugeslangens lige endestykke i po-
leringshovedet, sæt det krummede endestykke ind i tilslutningen på
håndtaget.
Figur
Tryk først den øverste del af tekstilpo-
sen ind i holderen indtil den går i hak.
Fastgør derefter den nederste del på
håndtaget med velkrobånd.
Figur
Åbn tekstilposens lynlås.
Løg filterposen i og skub emballagen
med åbningen over studsen indtil den
går i hak. Kontroller om filterposen sidder korrekt.
Luk tekstilposens lynlås igen.
Figur
Læg maskinen på gulvet så polerings-
hovedet er lodret til overfladen.
Tryk pudeholderen ind i holderen. Hold
øje med at pudeholderens næser går i
hak i åbningen.
Træk pudeholderne fra for at fjerne
dem.
Figur
Sæt poleringspuderne på pudeholde-
ren, hold øje med at de sidder i midten.
Træk poleringspuderne fra for at fjerne
dem.
Poleringspuderne kan opbevares i den
nederste del af tekstilposen i et separat
rum.
Bemærk:
Arbejd altid med isat filterpose.
몇 OBS
Forvis dig om at håndtaget er i lodret position inden du trækker netstikket. I denne
position er maskinen slukket.
Figur
Drej den øverste kabelkrog og fjern net-
tilslutningskablet. Sæt netstikket i en
stikdåse.
Figur
Sæt maskinen i gang ved at løsne
håndtaget med fodkontakten og træk
håndgrebet til dig selv.
Sæt håndtaget tilbage i lodret position
indtil det går i hak for at standse.
Fjern transportsikringen
Sæt håndtaget sammen og monter
det
Tilslut sugeslangen
Monter tekstilposen.
Isætning af filterpose
Isætte pudeholderen
Påsætte poleringspuder
Opbevaring af poleringspuder
Betjening
49DA
Page 50

– 6
Det anbefales at gennemføre fuldplejen 23 gange om året.
Fej, sug eller evt. vask gulvet/gulvbe-
lægningen.
Påfør plejemidlet regelmæssigt på gul-
vet med en mop. Gulvet skal tørres fuldstændigt
Bemærk: Tag højde for gulvbelægnings- og plejemiddelproducentens anvisninger!
Der må ikke bruges plejemidler som indeholder opløsningsmiddel.
Figur
Kør flere gange over overfladen som
vist på figuren indtil den ønskede glans
opnås.
Den kørende maskine skal altid bevæges. Maskinen må ikke stå på et sted
over et længere tidsrum, det kan forårsage skader på gulvbelægningen.
Bemærk: Producenternes anvisninger
mht. til at rykke møbler eller hvornår
man igen kan gå på gulvet skal overholdes. Vi anbefaler at vente mindst 12 timer. I dette tidsrum skal man gå
forsigtigt på gulvet og uden sko. Ryk ingen møbler og spild intet vand på gulvbelægningen.
Det anbefales at gennemføre vedligeholdelsesplejen en gang per måned for at
opnå en regelmæssig glans.
Afhængigt af plejemiddelproducentens
anvisninger kan man tilsætte plejemiddel direkte til vandet. Tag højde for
gulvbelægnings- og plejemiddelproducentens anvisninger!
Derefter skal overfladen poleres.
Afhængigt af gulvets belastning (fod-
spor, striber....) kan man polere plejela-
get flere gange uden at påføre nyt
plejemiddel.
Sæt håndtaget tilbage til lodret position.
Maskinen afbrydes.
Figur
Træk netstikket ud og sno den omkring
krogene på håndtaget. Den øverste kabelkrog skal først drejes opad.
Hold øje med at maskinen bevæges på de
bageste ruller hvis du transporterer den til
opbevaringsstedet eller til et andet rum.
Figur
Vip hertil håndtaget tilbage og træk ma-
skinen.
Det anbefales at fastgøre transportsikringen hvis maskinen ikke bruges over et længere tidsrum.
Figur
Læg maskinen på gulvet så polerings-
hovedet er lodret til overfladen.
Træk pudeholderen fra maskinen og
læg den ind i opbevaringsstedet.
Tryk transportsikringen på en ind i pu-
deholderens åbning og hold den fast.
Tryk den anden side af transportsikringen ind i åbningen af den næste pudeholder og lad den gå i hak.
Opbevar maskinen i tørre rum.
Fuldpleje
Fjern snavs fra gulvet
Påføring af plejemiddel
Polering
Vedligeholdelsespleje
Midlertidigt pleje
Efter brug
Maskinens transport
Opbevaring af damprenseren
50 DA
Page 51

– 7
Risiko for tilskadekomst!
Sluk for damprenseren og træk stikket ud
ved alle former for vedligeholdelsesarbejde.
몇 OBS
Undlad at bruge skuremidler, glas- eller
universalrengøringsmiddel! Nedsænk aldrig apparatet i vand.
Fjern poleringspuderne efter hver brug
og ryst dem. Vask dem efter behov og
lad dem tørre.
Bemærk: Maskinvask op til 60 °C er
muligt, brug ingen blødgører, må ikke
tørres i tørretumbleren.
Læg de tørre poleringspuder ind i opbe-
varingsrummet.
Udskift filterposen i regelmæssige afstande.
Se hertil kapitel "Isætte filterposer".
Kontroller regelmæssigt poleringspudernes
tilstand, udskift hvis de er slidt.
Se hertil kapitel "Påsætte poleringspu-
der".
Lyden er systembetinget. Maskinen
blev ikke opbevaret med transportsikringen. Lyden forsvinder automatisk
ved poleringen efter et stykke tid.
Forbehold for tekniske ændringer!
Pleje og vedligeholdelse
Rengøring af maskinen og tilbehør
Rense poleringspuderne
Isætning af filterpose
Udskifte poleringspuder
Afhjælpning af fejl
Uroligt kørende skiver / klaprende
lyde
Tekniske data
Spænding 230 V
Strømtype 1~50/
60
Hz
Beskyttelsesklasse II
Tilslutningseffekt 600 W
Omdrejningstal, poleringsskiver
1000 o/
min
Vægt 7 kg
Mål 385 x
340 x
1155
mm
Filterposens volumen 4 l
51DA
Page 52

– 8
Optimal pleje og beskyttelse til matte kunstog naturstengulve, linoleum og PVC.
Polerpads sten / linoleum / PVC
(3 stk.)
(bestillingsnr. 2.863-198.0)
Gulvpleje sten mat / linoleum RM
532 (1 liter)
(best-nr. 6.295-776.0)
Optimal pleje og beskyttelse for voksede
parket- eller trægulve med olie-voks-finish.
Polerpads, parket voksbehandlet
(3 stk.)
(bestillingsnr. 2.863-196.0)
Gulvpleje, parket voksbehandlet RM
530 (1 liter)
(bestillingsnr. 6,295-778.0)
Optimal pleje og beskyttelse til forseglede
parket- / laminat- og korkgulve.
Polerpads, parket forseglet / kork /
laminat (3 stk.)
(bestillingsnr. 2.863-197.0)
Gulvpleje, parket forseglet RM 531
(1 liter)
(bestillingsnr. 6,295-777.0)
Grundrenser for hårde overflader RM
533 (1 liter)
(bestillingsnr. 6,295-775.0)
Til grundig fjernelse af gamle glanslag
og hårdnakkede tilsmudsninger på
sten, linoleum, PVC.
Polerpads, universal (3 stk.)
(bestillingsnr. 2.863-193.0)
Filterpose (3 stk.)
(bestillingsnr. 6.904-128.0)
Ekstratilbehør
Det følgende ekstratilbehør kan købes til maskinen:
Stengulv / linoleum / PVC
Vokset parket / trægulve med olie-voks-finish
Forseglet parket / kork / laminat
Supplerende ekstratilbehør
52 DA
Page 53

– 3
Kjære kunde,
Før første gangs bruk av appa-
ratet, les denne originale bruksanvisningen, følg den og oppbevar den for
senere bruk eller for overlevering til neste
eier.
Dette apparatet er utviklet for privat
bruk og er ikke forberedt for kravene
som stilles i kommersiell bruk.
Apparatet brukes for polering av tremø-
bler, laminat, steingulv, linoleum og
PVC-gulv.
Maskinen egner seg kun til å suge opp
poleringsstøv.
Apparatet er ikke en støvsuger! Skal
ikke brukes til å suge opp tørt smuss!
Ikke bruk løsemiddelholdige rengjø-
ringsmidler.
Maskinen må ikke brukes på teppegulv
og lignende.
Ikke legg ekstra vekt på apparatet.
Apparatet skal ikke brukes utendørs, og
skal ikke brukes eller lagres under fuktige forhold.
Apparatet skal kun brukes med origina-
le filterposer, originale reservedeler, tilbehør eller ekstrautstyr.
Apparatet må hele tiden beveges når
det er i gang. Ikke stå lenge på ett sted,
da kan det oppstå skader på gulvbelegget.
Følg alltid anvisningene fra produsen-
ten av gulvbelegg og pleiemiddel!
Produsenten er ikke ansvarlig for eventuelle skader forårsaket av ikke-tiltenkt eller feil
bruk.
Materialet i emballasjen kan resirku-
leres. Ikke kast emballasjen i husholdningsavfallet, men lever den inn til
resirkulering.
Gamle maskiner inneholder verdifulle
materialer som kan resirkuleres. Dis-
se bør leveres inn til gjenvinning.
Gamle maskiner skal derfor avhendes i egnede innsamlingssystemer.
Anvisninger om innhold (REACH)
Aktuell informasjon om stoffene i innholdet
finner du under:
www.kaercher.com/REACH
De garantibestemmelser som er utgitt av
vår distribusjonsavdeling, gjelder i alle
land. Eventuelle feil på maskinen blir reparert gratis i garantitiden, dersom disse kan
føres tilbake til material- eller produksjonsfeil. Ved behov for garantireparasjoner
henvender du deg til din forhandler eller
nærmeste autoriserte serviceforhandler.
(Se adresse på baksiden)
Våre KÄRCHER-avdelinger hjelper deg
gjerne ved feil eller om du har spørsmål.
(Se adresse på baksiden)
Et utvalg av de vanligste reservedelene finner du bak i denne bruksanvisningen.
Reservedeler og tilbehør får du hos din forhandler eller ved en KÄRCHER-avdeling.
(Se adresse på baksiden)
Innhold
Generelle merknader . . . . . NO . . .3
Sikkerhetsanvisninger . . . . NO . . .4
Ta i bruk . . . . . . . . . . . . . . . NO . . .4
Betjening . . . . . . . . . . . . . . NO . . .5
Etter bruk . . . . . . . . . . . . . . NO . . .6
Pleie og vedlikehold . . . . . . NO . . .7
Hjelp ved funksjonsfeil . . . . NO . . .7
Tekniske data . . . . . . . . . . . NO . . . 7
Tilleggsutstyr . . . . . . . . . . . NO . . .8
Generelle merknader
Forskriftsmessig bruk
Miljøvern
Garanti
Kundetjeneste
Bestilling av reservedeler og
spesialtilbehør
Norsk
53NO
Page 54

– 4
Strømtilkobling
– Støvsugeren må kobles til og tas i bruk
i henhold til opplysningene på typeskiltet.
– Berør aldri støpselet med våte hender.
– Trekk i støpselet, ikke i nettkabelen når
du skal koble maskinen fra nettet.
– Strømledningen eller skjøteledningen
må ikke skades ved at den kjøres over,
klemmes, strekkes eller lignende. Beskytt ledningen mot sterk varme, olje og
skarpe kanter.
– Beskytt maskinen mot vær og vind, fuk-
tighet og varmekilder.
Anvendelse
– Ved lengre driftspauser slå av appara-
tet med hovedbryter/apparatbryter eller
trekk ut støpselet.
– Dette apparatet er ikke egnet for bruk
av personer (inkludert barn) med reduserte fysiske, sensoriske eller sjelelige
evner. Det skal heller ikke benyttes dersom brukeren mangler erfaring og/eller
kunnskap. Slike personer skal kun bruke apparatet under oppsyn av en ansvarlig person som skal sørge for
sikkerheten, eller som kan gi informasjon om bruken. Barn skal holdes under
oppsyn ved bruk av apparatet, for å sikre at de ikke leker med det.
– Apparatet må brukes på korrekt måte.
Du må ta hensyn til forholdene på det
aktuelle bruksstedet, og være oppmerksom på andre personer, og spesielt
barn.
– Brukeren må passe på at det ikke er
gjenstander i arbeidsområdet som kan
slynges ut av den roterende skiven.
Transport
– Ved transport av apparatet skal moto-
ren slås av og apparatet skal festes
godt.
Vedlikehold
– Før alt arbeide på apparatet skal strøm-
kabelen trekkes ut.
– For å unngå farer skal reparasjon og
skifte av reservedeler på maskinen kun
utføres av autorisert kundeservice.
1 Poleringshode
2 Fotbryter for skaftlåsing.
3 Skaft
4 Nettkabel med plugg
5 Oppbevaring, strømkabel
6 Håndtak
7 Sugeslange
8 Tekstilpose
9 Filterpose
10 Oppbevaringsrom for polerings-pads.
11 Polerings-pads
12 Pad-holder
13 Sugeslangetilkobling
14 Transporruller
15 Feste for strømkabel (4x)
16 Transportsikring
Sikkerhetsanvisninger
Ta i bruk
Beskrivelse av apparatet
54 NO
Page 55

– 5
Figur
Før første bruk skal transportsikringen
fjernes fra apparatet ved at de trekkes
ut.
Figur
Sett sammen de to delene av skaftet og
lås med vedlagt skrue og mutter.
Komplett skaft settes i poleringshodet
og festes med skrue.
Merk: Pass da på posisjon av strømka-
bel.
Figur
Trykk strømkabelen inn i festene og
trekk til.
Figur
Rett ende av sugeslangen settes i pole-
ringshodet, bøyd ende settes i tilkobling
på skaftet.
Figur
Trykk først den øvre delen av tekstilpo-
sen i holderen og trykk til den fester
seg.
Fest deretter den nedre delen med bor-
relås på skaftet.
Figur
Åpne glidelås på tekstilposen.
Filterposen legges inn og pappstykket
skyves over åpneingen på stussen til
den går i lås. Kontroller en gang til at filterposen sitter korrekt.
Lukk igjen tekstilposen ved hjelp av gli-
delåsen.
Figur
Legg apparatet slik på gulvet at pole-
ringshodet står lodderett på flaten.
Stikk pad-holderen inn i holderen. Pass
på at knasten på pad-holderen går ordentlig i lås i holderen.
For å ta av pad-holder, trekk den ut.
Figur
Sette polerings-pads på pad-holderen,
pass på sentrert innretting.
For å ta av polerings-pads trekkes de
ut.
Polerings-pads kan lagres i nedre del
av tekstilposen, i en separat lomme.
Merk:
Ved bruk ha alltid filterposen innsatt.
몇 Forsiktig
Før du setter inn støpselet pass på at skaftet står i loddrett stilling. I den stillingen er
apparatet avslått.
Figur
Øvre kabelkroker dreies og strømkabe-
len tas av. Sett støpselet i en stikkontakt.
Figur
Sett apparatet i bevegelse, lås først opp
skaftet med fotbryteren og trekk håndtaket mot deg.
For å stanse settes skaftet tilbake til
loddrett posisjon, til det går i lås.
Fjerne transportsikringene
Montere sammen skaft og sette det
på
Koble til sugeslange
Sett på tøyposen
Sette inn filterpose
Sette inn pad-holder
Sette på polerings-pads
Lagre polerings-pads
Betjening
55NO
Page 56

– 6
Det anbefales at det gjennomføres full pleie
2 - 3 ganger pr. år.
Fei gulvet, eller støvsug, eller våtvask
om nødvendig.
Pleiemiddel påføres med mopp jevnt
over gulvet. La tørke helt
Merknader: Følg anvisningene fra pro-
dusentene av gulvbelegg og pleiemiddel!
Ikke bruk løsemiddelholdige rengjøringsmidler.
Figur
Flaten kjøres over flere ganger som vist
i figuren, til du har fått den glansen du
ønsker.
Apparatet må hele tiden beveges når
det er i gang. Ikke stå lenge på ett sted,
da kan det oppstå skader på gulvbelegget.
Merk: Overhold produsentens anvisninger om når du kan gå/sette møbler
på flaten. Vi anbefaler å vente minst 12
timer. I denne tiden kan du gå på den
polerte flaten forsiktig, ikke med utesko. Ikke sett inn møbler, ikke påfør
vann.
Det anbefales at vedlikeholdspleie utføres
en gang pr. måned for å opprettholde en
jevn glans.
Alt etter pleiemiddelprodusent kan
pleiemiddelet tilsettes direkte i vannet
som gulvet tørkes over med. Følg anvisningene fra produsentene av gulvbelegg og pleiemiddel!
Poler deretter flaten.
Alt etter behov og belastning av gulvet
(forspor, striper ...) kan gulvet poleres
flere ganger uten at det påføres nytt
pleiemiddel.
Før skaftet tilbake til loddrett posisjon.
Apparatet slår seg av.
Figur
Ta ut støpselet og vikle opp strømkabe-
len på krokene på skaftet. Drei først
øvre kroker oppover.
Pass på at apparatet rulles på de transportrullene når det transporteres til oppbevaringsstedet eller til et annet rom.
Figur
Bøy håndtaket bakover og trekk i appa-
ratet.
Det anbefales å feste transportsikringen
når apparatet ikke benyttes på lengre tid.
Figur
Legg apparatet slik på gulvet at pole-
ringshodet står lodderett på flaten.
Pad-holder trekkes av apparatet og leg-
ges i oppbevaringsrommet.
Trykk transportsikringen på en side inn
i holdren for pad-holder, og hold fast.
Trykk andre neden av transportsikring i
holderen for den andre pad-holderen, la
den gå i lås.
Oppbevar maskinen stående i et tørt
tom.
Full pleie
Fjern smuss fra gulvet
Påføring av pleiemiddel
Polering
Vedlikeholdsstell
Mellom-fullplee
Etter bruk
Transport av apparat
Oppbevaring av apparatet
56 NO
Page 57

– 7
Fare for personskader
Slå av apparatet og ta ut strømstøpselet
innen service eller vedlikeholdsarbeider
påbegynnes.
몇 Forsiktig
Ikke bruk skuremiddel, glass eller universalrengjøringsmiddel! Dypp aldri apparatet
under vann.
Ta av og rist av polerings-pads etter
hver bruk. Rengjør ved behov, og la
den tørke.
Merk: Maskinvask ved 60 °C mulig,
bruk ikke tøymykner, ikke tørkes i tørketrommel.
Legg tørre polerings-pads i oppbeva-
ringsrommet.
Skift filterpose med jevne mellomrom.
Se kapittel "Sette inn filterpose".
Kontroller regelmessig tilstand av polerings-pads, skift ut ved slitasje.
Se kapittel "Sette på polerings-pads".
Støyen er systemavhengig Apparatet er
blitt oppbevart uten transportsikring.
Støyen forsvinner av seg selv etter
noen tid med polering.
Det tas forbehold om tekniske endringer!
Pleie og vedlikehold
Rengjør støvsugeren og tilbehøret
Rengjøre polerings-pads
Sette inn filterpose
Skifting av polerings-pads
Hjelp ved funksjonsfeil
Skive går urolig, klaprende lyd
Tekniske data
Spenning 230 V
Strømtype 1~50/
60
Hz
Beskyttelsesklasse II
Kapasitet 600 W
Turtall, poleringsskiver 1000 o/
min.
Vekt 7 kg
Mål 385 x
340 x
1155
mm
Volum, filterpose 4 l
57NO
Page 58

– 8
Optimal pleie og beskyttelse for matte
kunst- og natursteingulv, linoleum og PVC.
Polerings-pads for stein /linoleum/
PVC (3 Stk.)
(Bestill.-nr. 2.863-198.0)
Gulvpleie, stein matt RM 532 (1 liter)
(Bestillingsnr. 6 295-776.0)
Optimal pleie og beskyttelse for vokset parkett eller tregulv med olje-voks-overflatebehandling.
Polerings-pads for vokset parkett
(3 stk.)
(Bestill.-nr. 2.863-196.0)
Gulvpleie for vokset parkett RM 530
(1 liter)
(Bestillingsnr. 6.295-778.0)
Optimal pleie og beskyttelse for forseglet
parkett-, laminat- og korkgulv.
Polerings-pads for forseglet parkett /
kork / laminat (3 stk.)
(Bestill.-nr. 2.863-197.0)
Gulvpleie for forseglet parkett
RM 531 (1 liter)
(Bestillingsnr. 6.295-777.0)
Grunnrengjøringsmiddel for harde
flater RM 533 (1 liter)
(Bestillingsnr. 6.295-775.0)
For grundig fjerning av gammel overflatebehandling og gjenstridig smuss på
stein, linoleum, PVC.
Polerings-pads, universal (3 stk.)
(Bestill.-nr. 2.863-193.0)
Filterpose (3 Stk.)
(Bestill.-nr. 6.904-128.0)
Tilleggsutstyr
Følgende tilbehør kan kjøpes til dette apparatet:
Steingulv / linoleum / PVC
Vokset parkett / tregulv med olje-voks-overflatebehandling
Forseglet parkett / kork / laminat
Annet spesialtilbehør
58 NO
Page 59

– 3
Bäste kund,
Läs bruksanvisning i original
innan aggregatet används första
gången, följ anvisningarna och spara driftsanvisningen för framtida behov, eller för
nästa ägare.
Denna produkt har konstruerats för pri-
vat användning och är ej avsedd för påfrestande, industriell användning.
Maskinen kan användas till att polera
trägolv, laminat, stengolv, linoleum och
PVC-golv.
Maskinen är endast avsedd för uppsug-
ning av poleringsrester.
Maskinen är ingen dammsugare! An-
vänd den inte till uppsugning av torr
smuts!
Använd inte poleringsmedel som inne-
håller lösningsmedel.
Maskinen får inte användas på heltäck-
ningsmattor eller liknande.
Utsätt inte maskinen för extra viktbe-
lastning.
Makinen får inte användas eller förva-
ras utomhus eller i våt omgivning.
Använd endast maskinen med filterpå-
sar, reservdelar, tillbehör eller specialdelar i originalutförande.
Håll alltid maskinen i rörelse när den ar-
betar. Stanna inte på samma fläck för
länge eftersom detta kan ge skador på
golvbeläggningen.
Följ alltid anvisningarna från golvbe-
läggnings- och poleringsmedeltillverkaren!
Tillverkaren påtar sig inget ansvar för eventuella skador som uppkommer på grund av
felaktig användning eller felaktig hantering.
Emballagematerialen kan återvinnas. Kasta inte emballaget i hus-
hållssoporna utan för dem till återvinning.
Skrotade aggregat innehåller återvinningsbara material som bör gå till
återvinning. Överlämna skrotade ag-
gregat till ett lämpligt återvinningssystem.
Upplysningar om ingredienser (REACH)
Aktuell information om ingredienser finns
på:
www.kaercher.com/REACH
I alla länder gäller de av vårt ansvariga försäljningsbolag utformade garantivillkor.
Eventuella fel på apparaten åtgärdas utan
kostnad under garantitiden, om det var ett
material- eller tillverkarfel som var orsaken.
Gäller det garantiärenden, ber vi er vända
er till försäljaren med köpbeviset eller
närmsta auktoriserade kundtjänst.
(Se baksidan för adress)
Vid frågor eller problem hjälper närmaste
KÄRCHER-filial gärna till.
(Se baksidan för adress)
I slutet av bruksanvisningen finns ett urval
av de reservdelar som oftast behövs.
Reservdelar och tillbehör finns att få på inköpsstället, eller från närmaste KÄRCHERfilial.
(Se baksidan för adress)
Innehåll
Allmänna hänvisningar. . . . SV . . .3
Säkerhetsanvisningar. . . . . SV . . .4
Idrifttagning . . . . . . . . . . . . SV . . .4
Handhavande. . . . . . . . . . . SV . . .5
Avsluta driften. . . . . . . . . . . SV . . .6
Skötsel och underhåll. . . . . SV . . .7
Åtgärder vid fel . . . . . . . . . . SV . . . 7
Tekniska data . . . . . . . . . . . SV . . .7
Specialtillbehör. . . . . . . . . . SV . . .8
Allmänna hänvisningar
Ändamålsenlig användning
Miljöskydd
Garanti
Kundservice
Beställning av reservdelar och
specialtillbehör
Svenska
59SV
Page 60

– 4
Elanslutning
– Apparaten får endast anslutas och tas
ibruk enligt typskylt.
– Vidrör aldrig nätkabeln med våta hän-
der.
– Drag inte i kabeln utan i kontakten för
att skilja apparaten från nätet.
– Se till att nät- och förlängningskabeln
inte skadas genom överkörning, klämning, sönderdragning eller liknande.
Skydda kabeln mot stark värme, olja
och vassa kanter.
– Skydda apparaten mot yttre väderlek,
fukt och värmekällor.
Användning
– Stäng av maskinen med huvudström-
brytaren / Maskinbrytaren under längre
driftsuppehåll, eller dra ur nätkontakten.
– Denna apparat är ej avsedd att använ-
das av personer (även barn) med begränsad fysisk, sensorisk eller mental
färdighet eller av personer som saknar
erfarenhet och/eller kunnande, såvida
de inte övervakas av en person ansvarig för deras säkerhet eller har fått instruktioner av en sådan person hur
apparaten ska användas. Barn ska hållas under uppsikt för att garantera att de
inte leker med apparaten.
– Användaren ska bruka maskinen enligt
föreskrift. Beakta lokala föreskrifter och
var, vid arbete med maskinen, uppmärksam på personer i närheten, speciellt barn.
– Användaren måste se till att inga före-
mål, som kan fastna i den roterande skivan och slungas iväg, befinner sig i
arbetsområdet.
Transport
– Vid transport ska motorn stängas av
och maskinen säkras ordentligt.
Skötsel
– Drag ur nätkontakten före alla arbeten
på apparaten.
– För att undvika risker får reparationer
och byte av reservdelar på apparaten
endast utföras av auktoriserad kundtjänst.
1 Poleringshuvud
2 Fotreglage för att släppa spärren som
håller fast skaftet.
3 Rör
4 Nätkabel med kontakt
5 Förvaring, nätförsörjningskabel
6 Handtag
7 Sugslang
8 Textilsäcken
9 Filterbehållare
10 Förvaringsfack för poleringsdynor
11 Poleringsdynor
12 Hållare för dynor
13 Sugslangsanslutning
14 Transporthjul
15 Fixeringar för nätsladd (4 x)
16 Transportsäkring
Säkerhetsanvisningar
Idrifttagning
Beskrivning av aggregatet
60 SV
Page 61

– 5
Bild
Börja med att dra bort transportsäkring-
en innan maskinen används.
Bild
Skjut ihop de båda skaftdelarna och
säkra med medföljande skruv och mutter.
Sätt in det kompletta skaftet i polerings-
huvudet och fixera med skruv.
Anvisning: Tänk på nätsladdens läge.
Bild
Tryck in nätsladden i fixeringarna och
dra i så att den blir stram.
Bild
Stick in den raka sugslangsänden i po-
leringshuvudet och den böjda änden i
anslutningen på skaftet.
Bild
Tryck först in övre delen av textilsäcken
i fästet, tills den hakar fast.
Fäst sedan den undre delen med kard-
borreband på skaftet.
Bild
Öppna dragkedjan på textilsäcken.
Lägg in filterpåsen och skjut kartongen
med öppningen över fästet tills den hakar fast. Kontrollera på nytt att filterpåsen sitter ordentligt.
Stäng textilsäcken igen med dragked-
jan.
Bild
Lägg maskinen på golvet, så att pole-
ringshuvudet befinner sig lodrätt mot
ytan.
Tryck in dynhållaren i fästet. Var noga
med att de spetsiga delarna på dynhål-
laren hakar fast ordentligt.
Drag bara av dynhållarna när de ska tas
bort.
Bild
Sätt poleringsdynor på poleringshålla-
ren och var noga med att de sitter i mit-
ten.
Poleringsdynorna dras enkelt av när de
ska tas bort.
Poleringsdynorna kan förvaras i ett se-
parat fack i undre delen av textilsäcken.
Hänvisning:
Arbeta alltid med isatt filterpåse.
몇 Observera
Kontrollera att skaftet befinner sig i lodrätt
läge innan nätkontakten sätts i. I denna position är maskinen avstängd.
Bild
Vrid på övre sladdlindningshaken och
lyft av nätsladden. Anslut nätkontakten
till ett vägguttag.
Bild
Börja förflytta maskinen;släpp skaftet
med hjälp av fotreglaget och dra hand-
taget mot dig.
Vill du stanna för du tillbaka skaftet till
lodrätt läge, tills det hakar fast.
Ta bort transportsäkring
Sätta ihop skaftet och hänga det på
plats
Anslut sugslang
Sätta i textilpåse
Sätta i filterpåse
Sätt in dynhållaren
Sätt på poleringsdynor
Förvara poleringsdynor
Handhavande
61SV
Page 62

– 6
Det rekommenderas att fullrengöring utförs 2 - 3 gånger per år.
Sopa golvbeläggning/golv eller våttorka
om detta behövs.
Fördela poleringsmedel jämnt över gol-
vet med hjälp av en tvättmopp. Låt det
torka fullständigt.
Information: Följ anvisningarna från
golvbeläggnings- och poleringsmedeltillverkaren beträffande användningen!
Använd inte poleringsmedel som innehåller lösningsmedel.
Bild
Kör över ytan flera gånger, så som vi-
sas på bilden, tills önskad glans har
uppnåtts.
Håll alltid maskinen i rörelse när den arbetar. Stanna inte på samma fläck för
länge eftersom detta kan ge skador på
golvbeläggningen.
Anvisning: Följ tillverkarens information om när man kan gå normalt på
ytan, eller flytta möbler på den. Vi rekommenderar att man väntar minst tolv
timmar. Gå försiktigt på ytan under denna period, utan ytterskor. Flytta inga
möbler, häll inte vatten på golvbeläggningen.
Vi rekommenderar att underhållet utförs en
gång i månaden för att bibehålla en jämn
glans över hela ytan.
Rengöringsmedlet kan tillsättas direkt i
tvättvattnet, beroende på aktuell tillverkare. Följ anvisningarna från golvbeläggnings- och
poleringsmedeltillverkaren!
Polera sedan ytan.
Om det behövs, med tanke på hur
mycket golvet används (fotspår, rän-
der..) kan ytan poleras upp flera gånger
utan att nytt poleringsmedel läggs på.
Ställ tillbaka skaftet i lodrätt läge. Ma-
skinen stängs av.
Bild
Drag ur kontakten och linda nätsladden
runt hakarna på skaftet. Vrid först upp
den övre sladdlindningshaken.
Var noga med att använda transporthjulen
när maskinen transporteras till förvaringsplatsen, eller flyttas till ett annat rum.
Bild
Luta då handtaget bakåt och dra maski-
nen.
Det rekommenderas att transportsäkringen
sätts i om maskinen inte ska användas under en längre period.
Bild
Lägg maskinen på golvet, så att pole-
ringshuvudet befinner sig lodrätt mot
ytan.
Drag bort dynhållaren från maskinen
och lägg den i förvaringsfacket.
Tryck in ena sidan av transportsäkring-
en i uttaget på dynhållaren och håll fast.
Tryck in andra sidan av transportsäk-
ringen ordentligt i uttaget till den andra
dynhållaren och haka fast.
Förvara maskinen stående och i torrt ut-
rymme.
Fullrengöring
Rengöra golvet.
Lägga på poleringsmedel
Polera
Underhåll
Underhåll i mellantiden
Avsluta driften
Transportera maskinen
Förvara aggregatet
62 SV
Page 63

– 7
Risk för skada
Stäng av apparaten och dra ut nätkontaken
innan vård och skötselarbeten ska utföras.
몇 Varning
Använd inte skurmedel, glas- eller allrengöringsmedel! Doppa aldrig ner apparaten i
vatten.
Tag bort och skaka ur poleringsdynorna
efter varje användningstillfälle. Vid behov ska de tvättas och torkas.
Anvisning: Maskintvätt upp till 60 °C
möjlig, använd inget mjukmedel, torka
inte i torktumlare.
Lägg de torra poleringsdynorna i förva-
ringsfacket.
Byt filterpåse med regelbundna mellanrum.
Se kapitlet "Sätta i ny filterpåse".
Kontrollera skicket på poleringsdynorna regelbundet, och byt ut dem om de är slitna.
Se kapitlet "Sätta fast poleringsdynor".
Detta är ett systemljud. Transportsäk-
ring användes inte vid förvaringen. Ljudet försvinner av sig själv efter en stund
när man polerar.
Med reservation för tekniska ändringar!
Skötsel och underhåll
Rengöring av maskin och tillbehör
Rengöra poleringsdynor
Sätta i filterpåse
Byta poleringsdynor
Åtgärder vid fel
Obalans i skivor / knackande ljud
Tekniska data
Spänning 230 V
Strömart 1~50/
60
Hz
Skyddsklass II
Anslutningseffekt 600 W
Varvtal, poleringsskivor 1000 V/
min
Vikt 7 kg
Mått 385 x
340 x
1155
mm
Volym, filterpåse 4 l
63SV
Page 64

– 8
Optimal vård för matta konst- och naturstensgolv, linoleum och PVC.
Polerkuddar sten / linoleum / PVC
(3 st.)
(Beställ.nr 2.863-198.0)
Golvvård, sten matt RM 532 (1 ltr.)
(Beställnr. 6.295-776.0)
Optimal vård och skydd för vaxad parkett
eller trägolv med oljevax-finish.
Polerkuddar parkett vaxad (3 st.)
(Beställ.nr 2.863-196.0)
Golvvård parkett vaxad RM 530
(1 liter.)
(Beställ.nr 6 295-778,0)
Optimal vård och skötsel för förseglade
parkett- /laminat- och korkgolv.
Polerkuddar parkett förseglad/kork/
laminat (3 st.)
(Beställ.nr 2.863-197.0)
Golvvård parkett förseglad RM 531
(1 liter.)
(Beställ.nr 6 295-777,0)
Grundrengöringsmedel för hårda
ytor RM 533 (1 Ltr.)
(Beställ.nr 6 295-775,0)
Gör grundligt avlägsnande av gamla
rengöringsmedelsskikt och hårdnackad
smuts på sten, linoleum, PVC.
Polerkuddar universell (3 st.)
(Beställ.nr 2.863-193.0)
Filterpåse (3 st.)
(Beställ.nr 6.904-128.0)
Specialtillbehör
Följande specialtillbehör kan köpas till denna maskin:
Stengolv / linoleum / PVC
Vaxad parkett/trägolv med oljevax-finish
Förseglad parkett/kork/laminat
Andra specialtillbehör
64 SV
Page 65

– 3
Arvoisa asiakas,
Lue käyttöohje ennen laitteesi
käyttämistä, säilytä käyttöohje
myöhempää käyttöä tai mahdollista myöhempää omistajaa varten.
Tämä laite on suunniteltu yksityiskäyt-
töön eikä vastaa ammattikäyttöön tarkoituksia vaatimuksia.
Laitetta käytetään puulattioiden, lami-
naattien, kivilattioiden, linoleumin ja
PVC-lattioiden kiillottamisen.
Laite soveltuu ainoastaan kiillotusai-
neen jäämien imurointiin.
Laite ei ole pölyimuri! Älä käytä laitetta
kuivan lian imurointiin!
Älä käytä liuotinainetta sisältävää hoito-
ainetta.
Laitetta ei saa käyttää kokolattiamatoil-
la tai vastaavilla.
Älä tee laitetta painavammaksi lisäpai-
noja käyttämällä.
Laitetta ei saa käyttää tai säilyttää ulko-
na tai kosteissa olosuhteissa.
Käytä laitteessa ainoastaan alkuperäi-
siä suodatinpusseja, alkuperäisiä varaosia, alkuperäisiä lisä- tai
erityistarvikkeita.
Liikuta laitetta jatkuvasti sen ollessa
käynnissä. Älä anna laitteen olla pitkän
aikaa samassa kohdassa, koska muuten lattiapinnoite voi vahingoittua.
Noudata aina lattianpinnoitteen ja hoito-
aineen valmistajan ohjeita!
Valmistaja ei vastaa mahdollisista vahingoista, jotka johtuvat ohjeidenvastaisesta
käytöstä.
Pakkausmateriaalit ovat kierrätettä-
viä. Älä käsittelee pakkauksia kotitalousjätteenä, vaan toimita ne jätteiden
kierrätykseen.
Käytetyt laitteet sisältävät arvokkaita
kierrätettäviä materiaaleja, jotka tulisi
toimittaa kierrätykseen. Tästä syystä
toimita kuluneet laitteet vastaaviin keräilylaitoksiin.
Huomautuksia materiaaleista (REACH)
Ajantasaisia tietoja ainesosista löytyy osoitteesta:
www.kaercher.com/REACH
Kussakin maassa ovat voimassa valtuuttamamme myyntiorganisaation julkaisemat
takuuehdot. Materiaali- ja valmistusvirheistä aiheutuvat virheet laitteessa korjaamme
takuuaikana maksutta. Takuutapauksessa
ota yhteys ostostositteineen jälleenmyyjään tai lähimpään valtuutettuun asiakaspalveluun.
(Osoite, katso takasivua)
KÄRCHER -edustustomme vastaa mielellään kysymyksiisi ja auttaa mahdollisissa
häiriötilanteissa.
(Osoite, katso takasivua)
Tärkeimpien osien varaosaluettelo löytyy
tämän käyttöohjeen lopusta.
Varaosat ja erityisvarusteet saat kauppiaaltasi tai lähimmältä KÄRCHER tytäryhtiöltä.
(Osoite, katso takasivua)
Sisältö
Yleisiä ohjeita . . . . . . . . . . . FI . . .3
Turvaohjeet . . . . . . . . . . . . FI . . .4
Käyttöönotto . . . . . . . . . . . . FI . . .4
Käyttö . . . . . . . . . . . . . . . . . FI . . .5
Käytön lopetus . . . . . . . . . . FI . . .6
Hoito ja huolto . . . . . . . . . . FI . . .7
Häiriönpoisto . . . . . . . . . . . FI . . .7
Tekniset tiedot . . . . . . . . . . FI . . . 7
Erikoisvarusteet . . . . . . . . . FI . . .8
Yleisiä ohjeita
Käyttötarkoitus
Ympäristönsuojelu
Takuu
Asiakaspalvelu
Varaosien ja erityisvarusteiden
tilaaminen
Suomi
65FI
Page 66

– 4
Sähköliitäntä
– Liitä pölynimuri tyyppikilven mukaisesti
ja ota se käyttöön.
– Älä koskaan tartu märillä käsillä virta-
pistokkeeseen.
– Kun irrotat laitteen sähköverkosta, vedä
pistokkeesta, ei johdosta.
– Verkko- tai jatkojohtoa ei saa vahingoit-
taa eikä vaurioittaa ajamalla johdon yli
eikä puristamalla tai kiskomalla sitä.
Suojaa verkkojohto kuumudelta, öljyltä
ja teräviltä reunoilta.
– Suojaa laite sääolosuhteilta, kosteudel-
ta ja lämmönlähteiltä.
Käyttö
– Pitempien käyttötaukojen aikana pää-
kytkin/laitekytkin kytketään pois tai
verkkopistoke irrotetaan.
– Tämä laite ei ole tarkoitettu sellaisten
henkilöiden (lapset mukaan lukien) käytettäväksi, joiden fyysiset kyvyt, aistit tai
henkiset ominaisuudet ovat rajoittuneet
tai, joilta puuttuu riittävä kokemus ja/tai
riittävä tietämys, paitsi, jos he ovat heidän turvallisuudestaan vastaavan henkilön valvonnassa tai ovat saaneet
häneltä ohjeistuksen koneen käyttämiseen. Lapsia pitäisi valvoa, jotta he eivät leikkisi koneen kanssa.
– Käyttäjän on käytettävä laitetta tarkoi-
tuksenmukaisesti. Käyttäjän on huomioitava paikalliset olosuhteet ja
työskennellessään laitteella kiinnitettävä huomiota muihin henkilöihin, erityisesti lapsiin.
– Käyttäjän on huomioitava, että työsken-
telyalueella ei ole esineitä, jotka voivat
tarttua pyörivään levyyn ja sinkoutua
pyörimisliikkeen voimalla poispäin.
Kuljetus
– Laitteen moottori on sammutettava kul-
jetuksen ajaksi ja laite on kiinnitettävä
huolellisesti.
Huolto
– Virtapistoke on vedettävä irti laitteesta
ennen kaikkia laitteen huoltotöitä.
– Vaaratilanteiden eliminoimiseksi saa
koneen korjata ja sen varaosat vaihtaa
vain valtuutetussa huoltopisteessä.
1 Kiillotuspää
2 Jalkapainike varren irrottamiseksi luki-
tuksesta
3 Varsi
4 Verkkokaapeli ja pistoke
5 Sähköjohdon säilytyspaikka
6 Käsikahva
7 Imuletku
8 Kangaspussi
9 Suodatinpussi
10 Kiillotuslaikan säilytyslokero
11 Kiillotuslaikat
12 Laikanpidin
13 Imuletkuliitäntä
14 Kuljetusrullat
15 Verkkoliitäntäkaapelin kiinnittimet (4x)
16 Kuljetusvarmistin
Turvaohjeet
Käyttöönotto
Laitekuvaus
66 FI
Page 67

– 5
Kuva
Irrota poisvetämällä laitteen kuljetus-
varmistus ennen laitteen käyttöä.
Kuva
Liitä toisiinsa varren kummatkin osat ja
varmista mukana olevalla ruuvilla ja
mutterilla.
Pistä koottu varsi kiillotuspäähän ja kiin-
nitä ruuvilla.
Huomautus: Huomioi tällöin verkkolii-
täntäkaapelin asento.
Kuva
Paina verkkoliitäntäkaapeli kiinnittimiin
ja vedä kaapeli suoraksi.
Kuva
Pistä imuletkun suora pää kiillotuspää-
hän ja taivutettu pää varren liittimeen.
Kuva
Paina ensin kangaspussin yläosa kan-
nattimeen kunnes se lukittuu paikalleen.
Kiinnitä sitten pussin alaosa tarranau-
halla varteen.
Kuva
Avaa kangaspussin vetoketju.
Aseta suodatinpussi sisään ja paina
reiällinen pahvi kauluksen päälle lukitukseen asti. Tarkasta vielä suodatinpussin korrekti istuvuus.
Sulje kangaspussi jälleen vetoketjulla.
Kuva
Aseta laite lattialle siten, että kiillotus-
pää on kohtisuorassa pintaan nähden.
Paina laikanpidin istukkaan. Varmista,
että laikanpitimen nokat lukittuvat hyvin
paikoilleen.
Poista laikanpidin yksinkertaisesti vetä-
mällä se irti.
Kuva
Huomioi kiillotuslaikkaa paikalleen ase-
tettaessa, että se tulee laikanpitimen
keskelle.
Laikan voi irrottaa yksinkertaisesti vetä-
mällä irti.
Kiillotuslaikkoja voi säilyttää kangas-
pussin alaosan erillisessä lokerossa.
Huomautus:
Työskentele aina vain, kun suodatinpussi
on asetettuna paikalleen.
몇 Huomio
Ennen pistokkeen pistämistä pistorasiaan,
varmista, että varsi on pystysuorassa asennossa. Tässä asennossa laite on kytkettynä pois päältä.
Kuva
Kierrä ylempää kaapelin kannatinkouk-
kua ja poista verkkoliitäntäkaapeli. Pis-
tä virtapistoke pistorasiaan.
Kuva
Käynnistä laite vapauttamalla varsi jal-
kapainikkeella lukituksestaan ja vetä-
mällä käsikahvaa itseäsi kohti.
Kun haluat pysäyttää laitteen, aseta
varsi jälleen pystysuoraan asentoon lu-
kitukseen asti.
Kuljetusvarmistuksen poisto
Varren kokoaminen ja kiinnitys
laitteeseen
Imuletkun liittäminen
Kankaisen pölypussin asentaminen
paikoilleen
Suodatinpussin asettaminen
paikalleen
Laikanpitimen asetus paikalleen
Kiillotuslaikkojen asetus paikalleen
Kiillotuslaikkojen säilytys
Käyttö
67FI
Page 68

– 6
Suosittelemme, että täyshoito suoritetaan 2
- 3 kertaa vuodessa.
Lakaise, imuroi tai pyyhi tarvittaessa
lattian pinnoite/lattia kosteana.
Levitä hoitoaine tasaisesti pyyhinmopil-
la lattiaan. Anna hoitoaineen kuivua kokonaan
Huomautus: Noudata lattianpinnoiteja hoitoainevalmistajan hoito-ohjeita!
Älä käytä liuotinainetta sisältävää hoitoainetta.
Kuva
Aja useampaan kertaan pinnan ylitse,
kuten kuvassa on esitetty, kunnes haluttu kiilto on saavutettu.
Liikuta laitetta jatkuvasti sen ollessa
käynnissä. Älä anna laitteen olla pitkän
aikaa samassa kohdassa, koska muuten lattiapinnoite voi vahingoittua.
Huomautus: Noudata valmistajan ohjeita koskien sitä, milloinka kiillotetulla
pinnalla voi kävellä tai siirtää huonekaluja. Suosittelemme odottamaan vähintään 12 tuntia. Mene tänä aikana
kiillotetulle pinnalle vain varovasti ja ilman ulkokenkiä. Älä siirrä huonekaluja,
älä päästä vettä pinnoitteelle.
Suosittelemme suorittamaan ylläpitohoidon
kerran kuukaudessa, jotta saavutettaisiin
jälleen tasainen kiilto.
Hoitoaineen valmistajasta riippuen, hoi-
toainetta voi lisätä suoraan pinnan pyyhintäveteen. Noudata lattianpinnoite- ja
hoitoainevalmistajan ohjeita!
Suorita sitten kiillotus.
Kulloisenkin tarpeen ja lattian rasituk-
sen mukaan (kengänjäljet, juovat ..),
lattian pinnan hoitoainekerros voidaan
kiillottaa useampaan kertaan ilman, että
uutta hoitoainetta levitetään.
Aseta varsi pystysuoraan asentoon.
Laite kytkeytyy pois päältä.
Kuva
Irrota verkkopistoke ja kelaa johto var-
ressa oleviin koukkuihin. Kierrä sitä en-
nen ylin kaapelikoukku pystyasentoon.
Huomioi, että liikutat laitetta kuljetusrullien
varassa, kun haluat siirtää laitteen säilytyspaikkaansa tai toiseen huoneeseen.
Kuva
Tee se kääntämällä laitteen vartta taak-
sepäin ja vetämällä.
Suosittelemme kiinnittämään kuljetusvarmistuksen kun laitetta ei käytetä pitempään
aikaan.
Kuva
Aseta laite lattialle siten, että kiillotus-
pää on kohtisuorassa pintaan nähden.
Vedä laikanpidin irti laitteesta ja aseta
se säilytyslokeroon.
Paina kuljetusvarmistin yhdeltä sivulta
laikanpitimen istukkaan ja pidä siitä
kiinni. Työnnä kuljetusvarmistimen toi-
nen sivu tiukkaan toisen laikanpitimen
istukkaan ja lukitse paikalleen.
Säilytä laitetta seisoaltaan kuivassa ti-
lassa.
Täyshoito
Lattian puhdistaminen
Hoitoaineen levitys
Kiillotus
Ylläpitohoito
Välihoito
Käytön lopetus
Laitteen kuljetus
Laitteen säilytys
68 FI
Page 69

– 7
Loukkaantumisvaara
Ennen kaikkia hoito- ja huoltotöitä laite on
kytkettävä pois päältä ja vedettävä virtapistoke irti.
몇 Huomio
Älä käytä hankausaineita, lasia tai monikäyttöpuhdistusaineita! Älä koskaan upota
laitetta veteen.
Poista kiillotuslaikat jokaisen käytön jäl-
keen ja kopista ne puhtaaksi. Pese tarvittaessa ja anna kuivua.
Huomautus: Konepesu on mahdollista
60 °C asti, älä käytä pehmennysaineellista huuhtelua, älä kuivaa pyykinkuivauskoneessa.
Aseta kuivat kiillotuslaikat säilytysloke-
roon.
Vaihda suodatinpussi säännöllisin väliajoin.
Katso lukua "Suodatinpussin asetus
paikalleen".
Tarkasta säännöllisin väliajoin kiillotuslaikkojen kunto, uusi tarvittaessa.
Katso lukua "Kiillotuslaikkojen asetus
paikalleen".
Ääni johtuu laitteen rakenteesta. Laitet-
ta ei ole säilytetty kuljetusvarmistettuna.
Ääni häipyy itsestään jonkin ajan kuluttua kiillotuksen aikana.
Oikeus teknisiin muutoksiin pidätetään!
Hoito ja huolto
Laitteen ja lisävarusteiden
puhdistus
Kiillotuslaikkojen puhdistus
Suodatinpussin asettaminen
paikalleen
Kiillotuslaikkojen vaihto
Häiriönpoisto
Epätasaisesti pyörivät kiekot / kopi-
seva ääni
Tekniset tiedot
Jännite 230 V
Virtatyyppi 1~50/
60
Hz
Kotelointiluokka II
Liitosjohto 600 W
Kiillotuskiekkojen kierrosluku
1000 kierr.
/min
Paino 7 kg
Mitat 385 x
340 x
1155
mm
Suodatinpussin tilavuus
4l
69FI
Page 70

– 8
Optimaalinen hoito ja suojaus mattapintaisille keino- ja luonnonkivilattioille, linoleumi- ja PVC-lattioille.
Kiillotuslaikat, kivi / linoleumi / PVC
(3 kpl.)
(tilausnro 2.863-198.0)
Lattianhoitoaine matta kivi RM 532
(1 litra)
(Tilausnumero: 6.295-776.0)
Optimaalinen hoito ja suojaus vahatulle
parketille / öljy-vaha-käsitellyille puulattioille.
Kiillotuslaikat vahattu parketti (3 kpl.)
(tilausnro 2.863-196.0)
Lattianhoitoaine vahattu parketti
RM 530 (1 litra)
(Tilausnumero: 6.295-778.0)
Optimaalinen hoito ja suojaus pintakäsitellyille parketti-, laminaatti- ja korkkilattioille.
Kiillotuslaikat lakattu parketti / kork-
ki / laminaatti (3 kpl.)
(tilausnro 2.863-197.0)
Lattianhoitoaine lakattu parketti
RM 531 (1 litra)
(Tilausnumero: 6.295-777.0)
Lattianhoitoaine koville pinnoille
RM 533 (1 litra)
(Tilausnumero: 6.295-775.0)
Vanhojen hoitoainekerrostumien ja sitkeiden likaantumien perusteelliseen
poistamiseen kivestä, linoleumista,
PVC.
Kiillotuslaikat yleiskäyttö (3 kpl.)
(tilausnro 2.863-193.0)
Suodatinpussi (3 kpl.)
(tilausnro 6.904-128.0)
Erikoisvarusteet
Tätä laitteeseen voi jälkikäteen ostaa seuraavia lisävarusteita:
Kivilattiat / linoleumi / PVC
Vahattu parketti / öljy-vaha-käsitellyt puulattiat
Lakattu parketti / korkki / laminaatti
Muita erikoisvarusteita
70 FI
Page 71

Περιεχόμενα
Γενικές υποδείξεις . . . . . . . EL . . .3
Υποδείξεις ασφαλείας. . . . . EL . . .4
Έναρξη λειτουργίας . . . . . . EL . . .5
Χειρισμός . . . . . . . . . . . . . . EL . . .6
Τερματισμός λειτουργίας . . EL . . . 7
Φροντίδα και συντήρηση . . EL . . .8
Βοήθεια για την αντιμετώπιση
βλαβών. . . . . . . . . . . . . . . . EL . . . 8
Τεχνικά χαρακτηριστικά . . . EL . . .8
Πρόσθετα εξαρτήματα . . . . EL . . .9
Γενικές υποδείξεις
Αγαπητέ πελάτη,
Πριν χρησιμοποιήσετε τη συ-
σκευή σας για πρώτη φορά, διαβάστε αυτές τις πρωτότυπες οδηγίες
χρήσης, ενεργήστε σύμφωνα με αυτές και
κρατήστε τις για μελλοντική χρήση ή για τον
επόμενο ιδιοκτήτη.
Χρήση σύμφωνα με τους
κανονισμούς
Η παρούσα συσκευή σχεδιάστηκε ειδι-
κά για ιδιωτική χρήση και δεν είναι σε
θέση να ανταποκριθεί στις καταπονήσεις που συνεπάγεται μία ενδεχόμενη
επαγγελματική της χρήση.
Η συσκευή επιτρέπει το γυάλισμα δα-
πέδων από ξύλο, λαμινάτ, πέτρα, μουσαμά και PVC.
Η συσκευή δεν ενδείκτυται για αναρρό-
φηση των υπολειμμάτων του γυαλίσματος.
Η συσκευή δεν είναι ηλεκτρική σκούπα!
Να μην χρησιμοποιείται για την αναρρόφηση ξηρών ρύπων!
Μην χρησιμοποιείτε προϊόντα περιποί-
ησης που περιέχουν διαλυτικά.
Η συσκευή δεν πρέπει να χρησιμοποιεί-
ται σε μοκέτες ή παρόμοια υλικά.
Μην επιβαρύνετε τη συσκευή με πρό-
σθετο φορτίο.
Η συσκευή δεν πρέπει να χρησιμοποιεί-
ται ή να φυλάσσεται στο ύπαιθρο ή σε
υγρό περιβάλλον.
Χρησιμοποιείτε την συσκευή αποκλει-
στικά με τις αυθεντικές σακούλες φίλτρων και τα αυθεντικά ανταλλακτικά,
εξαρτήματα ή ειδικά εξαρτήματα.
Κινείτε συνεχώς τη συσκευή κατά τη δι-
άρκεια της λειτουργίας της. Μην παραμένετε για μεγάλο διάστημα σε ένα
σημείο, διαφορετικά θα προκληθούν
βλάβες στην επίστρωση του δαπέδου.
Λαμβάνετε πάντα υπόψη τις υποδείξεις
του κατασκευαστή της επίστρωσης δαπέδου και του προϊόντος περιποίησης!
Ο κατασκευαστής δεν ευθύνεται για ενδεχόμενες ζημιές, που οφείλονται σε μη ενδεδειγμένη χρήση ή σε λάθος χειρισμό.
Προστασία περιβάλλοντος
Τα υλικά συσκευασίας είναι ανακυ-
κλώσιμα. Μην πετάτε τη συσκευασία
στα οικιακά απορρίμματα, αλλά παραδώστε την προς ανακύκλωση.
Οι παλιές συσκευές περιέχουν ανακυκλώσιμα υλικά, τα οποία θα πρέπει
να παραδίδονται προς επαναχρησιμοποίηση. Για το λόγο αυτό αποσύρετε τις
παλιές συσκευές με κατάλληλες διαδικασίες συγκέντρωσης αποβλήτων.
Υποδείξεις για τα συστατικά (REACH)
Ενημερωμένες πληροφορίες για τα συστατικά μπορείτε να βρείτε στη διεύθυνση:
www.kaercher.com/REACH
Εγγύηση
Σε κάθε χώρα ισχύουν οι όροι εγγύησης
που εκδόθηκαν από την αρμόδια αντιπροσωπεία μας. Εντός της προθεσμίας της παρεχόμενης εγγύησης αποκαθιστούμε
δωρεάν οποιαδήποτε βλάβη στη συσκευή
σας εφόσον έχει προκληθεί από σφάλμα
υλικού ή κατασκευής. Σε περίπτωση που
επιθυμείτε να κάνετε χρήση της εγγύησης,
παρακαλούμε απευθυνθείτε με την απόδειξη αγοράς στο κατάστημα από το οποίο
προμηθευτήκατε τη συσκευή ή στην πλησιέστερη εξουσιοδοτημένη υπηρεσία τεχνικής εξυπηρέτησης πελατών μας.
(Για τη διεύθυνση βλ. στην πίσω σελίδα)
– 3
71EL
Page 72

Υπηρεσία εξυπηρέτησης πελατών
Σε περίπτωση αποριών ή βλαβών μπορείτε να απευθύνεστε στο πλησιέστερο υποκατάστημα του Οίκου KÄRCHER, το οποίο
θα σας βοηθήσει ευχαρίστως.
(Για τη διεύθυνση βλ. στην πίσω σελίδα)
Παραγγελία ανταλλακτικών και
ειδικών εξαρτημάτων
Μία επιλογή των ανταλλακτικών που χρειάζονται συχνότερα θα βρείτε στο τέλος των
οδηγιών χρήσης.
Μπορείτε να προμηθευθείτε ανταλλακτικά
και εξαρτήματα από
τον αρμόδιο έμπορο ή
από το υποκατάστημα της KÄRCHER της
περιοχής σας.
(Για τη διεύθυνση βλ. στην πίσω σελίδα)
Υποδείξεις ασφαλείας
Ηλεκτρολογικές συνδέσεις
– Συνδέστε και θέστε σε λειτουργία την
συσκευή αποκλειστικά σύμφωνα με την
πινακίδα τύπου.
– Μην πιάνετε ποτέ το φις με υγρά χέρια.
– Για να αποσυνδέσετε τη συσκευή από
το δίκτυο παροχής ρεύματος, τραβήξτε
τον ρευματολήπτη από την πρίζα και
όχι το καλώδιο σύνδεσης.
– Το καλώδιο τροφοδοσίας δικτύου ή το
καλώδιο προέκτασης δεν πρέπει να
υποστούν φθορές ή βλάβες από συνθλίψεις, τραβήγματα, πατήματα ή παρόμοιες αιτίες. Προστατέψτε το καλώδιο
τροφοδοσίας δικτύου από τη ζέστη, τα
λάδια και τις αιχμηρές ακμές.
– Προστατεύετε τη συσκευή από τις δυ-
σμενείς καιρικές συνθήκες, την υγρασία
και τις πηγές θερμότητας.
Χρήση
– Σε περίπτωση μεγάλων διαλειμμάτων
από τις εργασίες, απενεργοποιήστε τη
συσκευή από το γενικό διακόπτη/το διακόπτη της συσκευής ή βγάλτε το καλώδιο ρεύματος.
– Η συσκευή αυτή δεν πρέπει να χρησιμο-
ποιείται από άτομα (συμπεριλαμβανομένων των παιδιών) με σωματικές,
διανοητικές και αισθητήριες ανεπάρκειες ή άτομα που δεν έχουν την κατάλληλη εμπειρία ή γνώση, εκτός εάν
επιτηρούνται από κατάλληλο για την
ασφάλειά τους άτομο ή έλαβαν προηγουμένως οδηγίες για την κατάλληλη
χρήση
της συσκευής.
– Τα παιδιά πρέπει να επιτηρούνται για να
διασφαλιστεί ότι δεν θα παίζουν με τη
συσκευή.
– Ο χειριστής της συσκευής πρέπει να
την χρησιμοποιεί σύμφωνα με τους κανονισμούς. Λαμβάνετε πάντα υπόψη τις
τοπικές συνθήκες και και λάβετε υπόψη
την παρουσία άλλων ανθρώπων, και
ιδιαίτερα παιδιών, κατά την χρήση της
συσκευής.
– Ο χεριστής οφείλει να προνοεί, ώστε
στο χώρο εργασίας να μην υπάρχουν
αντικείμενα, τα οποία μπορούν να παρασυρθούν από τον περιστρεφόμενο
δίσκο και να εκσφενδονιστούν στον περιβάλλοντα χώρο.
Μεταφορά
– Κατά τη μεταφορά της συσκευής ο κινη-
τήρας να είναι απενεργοποιημένος και
η συσκευή να είναι καλά στερεωμένη.
Συντήρηση
– Πριν από όλες τις εργασίες στην συ-
σκευή, βγάζετε οπωσδήποτε το φις από
την πρίζα.
– Για να αποφύγετε πιθανούς κινδύνους,
αναθέστε την επιδιόρθωση ή την αντικατάσταση των εξαρτημάτων της συσκευής στην εξουσιοδοτημένη
υπηρεσία εξυπηρέτησης πελατών.
72 EL
– 4
Page 73

Έναρξη λειτουργίας
Περιγραφή συσκευής
1 Κεφαλή γυαλίσματος
2 Επαφέας ποδός για απασφάλιση του
στελέχους
3 Στέλεχος
4 Καλώδιο σύνδεσης δικτύου με φις
5 Αποθήκευση, καλώδιο τροφοδοσίας
6 Χειρολαβή
7 Εύκαμπτος σωλήνας αναρρόφησης
8 Υφασμάτινη σακούλα
9 Σακούλα φίλτρου
10 Θήκη φύλαξης των μάκτρων γυαλίσμα-
τος
11 Επενδύσεις γυαλίσματος
12 Στήριγμα επένδυσης
13 Σύνδεση εύκαμπτου σωλήνα αναρρό-
φησης
14 Τροχοί μεταφοράς
15 Στηρίγματα για το καλώδιο σύνδεσης με
το δίκτυο
16 Ασφάλεια μεταφοράς
Αφαίρεση ασφάλειας μεταφοράς
Εικόνα
Την πρώτη φορά και πριν τη χρήση της
συσκευής αφαιρέστε με τράβηγμα την
ασφάλεια μεταφοράς.
Συναρμολόγηση και τοποθέτηση
Εικόνα
Εισάγετε τα δύο τμήματα του στελέχους
το ένα μέσα στο άλλο και ασφαλίστε τα
με το συνοδευτικό κοχλία και το περικόχλιο.
Εισάγετε το συναρμολογημένο στέλε-
χος στην κεφαλή γυαλίσματος
ρεώστε το με τον κοχλία.
Υπόδειξη: Λάβετε υπόψη σχετικά τη
θέση του καλωδίου σύνδεσης με το δίκτυο.
Εικόνα
Πιέστε το καλώδιο σύνδεσης με το δί-
κτυο στα στηρίγματα και τραβήξτε το για
να τεντωθεί.
(4x)
του στελέχους
και στε-
Σύνδεση του ελαστικού σωλήνα
αναρρόφησης
Εικόνα
Εισάγετε το ευθύγραμμο άκρο του ελα-
στικού σωλήνα αναρρόφησης στην κεφαλή γυαλίσματος και εισάγετε το
κυρτωμένο άκρο στη σύνδεση του στελέχους.
Τοποθέτηση της υφασμάτινης
σακούλας
Εικόνα
Πιέστε πρώτα το επάνω μέρος της υφα-
σμάτινης σακούλας στην υποδοχή,
ώσπου να κλειδώσει.
Στη συνέχεια στερεώστε το κάτω μέρος
στο στέλεχος με την κολλητική ταινία.
Τοποθέτηση σακούλας φίλτρου
Εικόνα
Ανοίξτε το φερμουάρ της υφασμάτινης
σακούλας.
Τοποθετήστε τη σακούλα
σπρώξτε το χαρτόνι με το άνοιγμα
πάνω από το στόμιο, ώσπου να κλειδώσει. Ελέγξτε ξανά τη σωστή εφαρμογή της σακούλας φίλτρου.
Κλείστε ξανά το φερμουάρ της σακού-
λας φίλτρου.
φίλτρου και
Τοποθέτηση του στηρίγματος
συγκράτησης της επένδυσης
Εικόνα
Τοποθετήστε τη συσκευή στο δάπεδο,
έτσι ώστε η κεφαλή γυαλίσματος να είναι κάθετη προς
Απλά πιέστε το στήριγμα συγκράτησης
της επένδυσης στην υποδοχή. Φροντίστε ώστε τα δόντια του στηρίγματος συγκράτησης της επένδυσης να
κλειδώσουν καλά στην υποδοχή.
Απλά τραβήξτε το στήριγμα συγκράτη-
σης της επένδυσης, για να το αφαιρέσετε.
– 5
την επιφάνεια.
73EL
Page 74

Τοποθέτηση των μάκτρων
γυαλίσματος
Εικόνα
Τοποθετήστε τα μάκτρα γυαλίσματος
στο στήριγμα συγκράτησης, φροντίζοντας να βρίσκονται ακριβώς στο κέντρο.
Απλά τραβήξτε τα μάκτρα γυαλίσματος,
για να τα αφαιρέσετε.
Φύλαξη των μάκτρων γυαλίσματος
Μπορείτε να φυλάξετε τα μάκτρα γυαλί-
σματος σε μια ξεχωριστή θήκη, στο
κάτω τμήμα της υφασμάτινης σακούλας.
Χειρισμός
Υπόδειξη:
Να εργάζεστε πάντα με τοποθετημένη τη
σακούλα φίλτρου.
몇 Προσοχή
Πριν βάλετε το φις στην πρίζα, βεβαιωθείτε
ότι το στέλεχος βρίσκεται σε όρθια θέση. Η
συσκευή δεν λειτουργεί σε αυτή τη θέση.
Εικόνα
Περιστρέψτε το επάνω άγκιστρο του
καλωδίου και αφαιρέστε το καλώδιο
σύνδεσης με το δίκτυο. Βάλτε το ρευματολήπτη σε μια πρίζα.
Εικόνα
Θέστε σε κίνηση τη
ζοντας το στέλεχος με τον επαφέα ποδός και τραβώντας προς το μέρος σας
τη χειρολαβή.
Για να σταματήσετε, μεταφέρετε το στέ-
λεχος ξανά στην όρθια θέση, ώσπου να
κλειδώσει.
Πλήρης περιποίηση
Συνιστάται να εκτελείτε το πλήρες πρόγραμμα περιποίησης 2 -3 φορές το χρόνο.
Απαλλαγή του δαπέδου από ρύπους
Σκουπίστε την επίστρωση/το δάπεδο
με απλή
πίστε τα με ελαφρά νοτισμένο πανί κατά
περίπτωση.
ή ηλεκτρική σκούπα ή με σκου-
συσκευή απασφαλί-
Άπλωμα προϊόντος περιποίησης
Απλώστε ομοιόμορφα το προϊόν περι-
ποίησης στο δάπεδο με τη σφουγγαρίστρα. Αφήστε να στεγνώσει εντελώς
Υποδείξεις: Λάβετε υπόψη τις οδηγίες
εφαρμογής του κατασκευαστή της επίστρωσης δαπέδου και του προϊόντος
περιποίησης!
Μην χρησιμοποιείτε προϊόντα περιποίησης που περιέχουν διαλυτικά.
Γυάλισμα
Εικόνα
Περάστε επανειλημμένα πάνω από την
επιφάνεια όπως φαίνεται στην εικόνα,
έως ότου επιτύχετε την επιθυμητή λάμψη.
Κινείτε συνεχώς τη συσκευή κατά τη διάρκεια της λειτουργίας της. Μην παραμένετε για μεγάλο διάστημα σε ένα
σημείο, διαφορετικά θα προκληθούν
βλάβες στην επίστρωση του δαπέδου.
Υπόδειξη: Τηρείτε τα στοιχεία του κατασκευαστή όσον αφορά τη δυνατότητα
διέλευσης και τη μετακίνηση των επίπλων. Συνιστούμε να περιμένετε τουλάχιστον 12 ώρες. Στο διάστημα αυτό
περπατάτε πάνω στη γυαλισμένη επιφάνεια προσεκτικά και χωρίς τα παπούτσια που χρησιμοποιείτε όταν βγαίνετε
έξω. Μην μετακινείτε τα έπιπλα και μην
απλώνετε
νερό πάνω στην επίστρωση.
74 EL
– 6
Page 75

Φροντίδα συντήρησης
Συνιστάται να εκτελείτε το πρόγραμμα φροντίδας συντήρησης μια φορά το μήνα, για
να διατηρήσετε μια ομοιόμορφη λάμψη.
Ανάλογα με τον κατασκευαστή, το προ-
ϊόν συντήρησης μπορεί να προστεθεί
απευθείας στο νερό σφουγγαρίσματος.
Λάβετε υπόψη τις υποδείξεις του κατασκευαστή της επίστρωσης δαπέδου και
του προϊόντος περιποίησης!
Στη συνέχεια
νεια.
γυαλίστε ξανά την επιφά-
Περιποίηση στο μεσοδιάστημα
Ανάλογα με τις ανάγκες και την καταπό-
νηση του δαπέδου (ίχνη ποδιών, γραμμές...), μπορείτε να γυαλίσετε ξανά τη
στρώση περιποίησης, χωρίς να απλώσετε προηγουμένως προϊόν περιποίησης.
Τερματισμός λειτουργίας
Φέρτε ξανά το στέλεχος σε όρθια θέση.
Η συσκευή απενεργοποιείται.
Εικόνα
Βγάλτε το καλώδιο σύνδεσης
κτυο από την πρίζα και τυλίξτε το στο ειδικό άγκιστρο που υπάρχει στο
στέλεχος. Προηγουμένως περιστρέψτε
το επάνω άγκιστρο καλωδίου προς τα
πάνω.
Μεταφορά της συσκευής
Η συσκευή πρέπει να κινείται με τους τροχούς μεταφοράς, όταν θέλετε να τη μεταφέρετε προς τον χώρο φύλαξης ή σε άλλο
χώρο
.
Εικόνα
Για το σκοπό αυτόν γείρετε προς τα
πίσω τη χειρολαβή και τραβήξτε τη συσκευή.
με το δί-
Φύλαξη της συσκευής
Συνιστάται να στερεώσετε την ασφάλεια μεταφοράς, εάν δεν χρησιμοποιήσετε τη συσκευή για μεγάλο διάστημα.
Εικόνα
Τοποθετήστε τη συσκευή στο δάπεδο,
έτσι ώστε η κεφαλή γυαλίσματος να είναι κάθετη προς την
Τραβήξτε το στήριγμα συγκράτησης της
επένδυσης από τη συσκευή και τοποθετήστε το στη θήκη φύλαξης.
Πιέστε την ασφάλεια μεταφοράς από τη
μια πλευρά στην υποδοχή του στηρίγματος συγκράτησης της επένδυσης και
κρατήστε την εκεί. Πιέστε δυνατά την
άλλη πλευρά της ασφάλειας μεταφοράς
στην υποδοχή του δεύτερου στηρίγμα
τος συγκράτησης της επένδυσης και
ασφαλίστε την.
Αποθηκεύστε τη συσκευή σε όρθια
θέση σε στεγνό χώρο.
επιφάνεια.
-
– 7
75EL
Page 76

Φροντίδα και συντήρηση
Κίνδυνος τραυματισμού
Πριν από την εκτέλεση εργασιών περιποίησης και συντήρησης απενεργοποιήστε τη
συσκευή και αποσυνδέστε το ρευματολήπτη από την πρίζα.
Καθαρισμός συσκευής και
εξαρτημάτων
몇 Προσοχή
Μην χρησιμοποιείτε λειαντικά μέσα, γυαλί ή
καθαριστικά γενικής χρήσης! Ποτέ μην βυθίζετε τη συσκευή μέσα σε νερό.
Καθαρισμός των μάκτρων γυαλίσματος
Αφαιρείτε και ξεσκονίζετε τα μάκτρα γυ-
αλίσματος έπειτα από κάθε χρήση.
Πλύνετε και αφήστε τα να στεγνώσουν
κατά περίπτωση.
Υπόδειξη: Μπορούν να πλυθούν στο
πλυντήριο στους 60 °C, χωρίς μαλακτικό και χωρίς στεγνωτήριο
Τοποθετήστε τα στεγνά μάκτρα γυαλί-
σματος στη θήκη φύλαξης.
Τοποθέτηση σακούλας φίλτρου
Αλλάζετε τακτικά την σακούλα φίλτρου.
Ανατρέξτε σχετικά στο κεφάλαιο "Τοπο-
θέτηση σακούλας φίλτρου".
Αντικατάσταση των μάκτρων
γυαλίσματος
Ελέγχετε τακτικά την κατάσταση των μάκτρων γυαλίσματος και αντικαταστήστε τα
σε περίπτωση φθοράς.
Ανατρέξτε σχετικά στο κεφάλαιο "Τοπο-
θέτηση των μάκτρων γυαλίσματος".
.
Βοήθεια για την
αντιμετώπιση βλαβών
Θορυβώδης κίνηση δίσκων / κρότος
Ο θόρυβος προέρχεται
μα. Η συσκευή δεν αποθηκεύθηκε με
χρήση της ασφάλειας μεταφοράς. Ο θόρυβος εξαφανίζεται έπειτα από λίγο
από μόνος του κατά τη διαδικασία γυαλίσματος.
από το σύστη-
Τεχνικά χαρακτηριστικά
Τάση 230 V
Ρεύμα 1~50/
60
Κατηγορία προστασίας II
Ισχύς σύνδεσης 600 W
Αριθμός στροφών, δίσκοι γυαλίσματος
Βάρος 7kg
Διαστάσεις 385 x
Όγκος, σακούλα φίλτρου
Με την επιφύλαξη τεχνικών αλλαγών!
1000 U/
340 x
1155
4l
Hz
min
mm
76 EL
– 8
Page 77

Πρόσθετα εξαρτήματα
Μπορείτε να αγοράσετε τον ακόλουθο ειδικό εξοπλισμό για τη συσκευή
αυτή:
Πέτρα / μουσαμάς / PVC
Άριστη περιποίηση και προστασία για ματ
δάπεδα από συνθετική και φυσική πέτρα,
μουσαμά και PVC.
Μάκτρα γυαλίσματος, πέτρα / μου-
σαμάς / PVC (3 τεμ.)
(Κωδ. παραγγελίας 2.863-198.0)
Περιποίηση δαπέδου, πέτρα ματ
RM 532 (1 λίτρο)
(Κωδ. παραγγελίας 6.295-776.0)
Κερωμένα παρκέ / ξύλινα δάπεδα με φινίρισμα ελαίων-κεριού
Άριστη περιποίηση και προστασία για κερωμένα παρκέ ή ξύλινα δάπεδα με φινίρισμα ελαίων-κεριού.
Μάκτρα
παρκέ (3 τεμ.)
(Κωδ. παραγγελίας 2.863-196.0)
Περιποίηση δαπέδου, κερωμένο
παρκέ RM 530 (1 λίτρο)
(Κωδ. παραγγελίας 6.295-778.0)
Άριστη περιποίηση και προστασία για δάπεδα από στεγανοποιημένα παρκέ, λαμινάτ και φελλό.
Μάκτρα γυαλίσματος, στεγανοποιη-
μένο παρκέ / φελλός / λαμινάτ
(3 τεμ.)
(Κωδ. παραγγελίας 2.863-197.0)
Περιποίηση δαπέδου, στεγανοποιη-
μένο παρκέ RM 531 (1 λίτρο)
(Κωδ. παραγγελίας 6.295-777.0)
γυαλίσματος, κερωμένο
Στεγανοποιημένο παρκέ / φελλός / λαμινάτ
– 9
77EL
Page 78

Περισσότερα ειδικά αξεσουάρ
Καθαριστικό σκληρών επιφανειών
RM 533 (1 λίτρο)
(Κωδ. παραγγελίας 6.295-775.0)
Για ριζική αφαίρεση παλιών στρώσεων
προϊόντων περιποίησης και επίμονων
ρύπων σε δάπεδα από πέτρα, μουσαμά, PVC.
Μάκτρα γυαλίσματος, γενικής χρή-
σης (3 τεμ.)
(Κωδ. παραγγελίας 2.863-193.0)
Σακούλα φίλτρου (3 τεμ.)
(Κωδ. παραγγελίας 6.904-128.0)
78 EL
– 10
Page 79

İçindekiler
Türkçe
Genel bilgiler . . . . . . . . . . . TR . . .3
Güvenlik uyarıları . . . . . . . . TR . . .4
İşletime alma . . . . . . . . . . . TR . . . 4
Kullanımı . . . . . . . . . . . . . . TR . . .5
Çalışmanın tamamlanması TR . . .6
Koruma ve Bakım. . . . . . . . TR . . .7
Arıza yardımı . . . . . . . . . . . TR . . .7
Teknik Bilgiler . . . . . . . . . . . TR . . .7
Özel aksesuar . . . . . . . . . . TR . . .8
Genel bilgiler
Sayın müşterimiz,
Cihazın ilk kullanımından önce
bu orijinal kullanma kılavuzunu
okuyun, bu kılavuza göre davranın ve daha
sonra kullanım veya cihazın sonraki sahiplerine vermek için bu kılavuzu saklayın.
Kurallara uygun kullanım
Bu cihaz özel kullanım için geliştirilmiş-
tir ve cihazın ticari kullanım taleplerini
karşılaması öngörülmemiştir.
Cihaz, ahşap zeminler, laminat, taş ze-
minler,linolyum ve PVC zeminlerin parlatılmasını sağlar.
Cihaz, sadece polisaj artıklarının emil-
mesi için uygundur.
Cihaz, bir elektrik süpürgesi değildir!
Kuru kiri emmek için kullanmayın!
Çözücü madde içeren koruma madde-
leri kullanmayın.
Cihaz, halı zeminlerde ya da benzeri or-
tamlarda kullanılmamalıdır.
Ek a
Cihaz, açık havada ya da ıslak koşullar-
Cihazı sadece orijinal filtre torbaları, ori-
Çalışmakta olan cihazı her zaman hare-
ğırlık uygulayarak cihazı ağırlaştır-
mayın.
da kullanılmamalı ve bekletilmemelidir.
jinal yedek parçalar, aksesuarlar ya da
özel aksesuarlarla birlikte kullanın.
ket ettirin. Belli bir yer üzerinde uzun
süre beklemeyin, aksi takdirde zemin
kaplamasında hasarlar oluşabilir.
Zemin kaplaması ve koruma maddesi
üreticisinin uyarılarına her zaman dikkat
edin!
Üretici, amacına uygun olmayan ya da hatalı kullanım sonucu oluşan hasarlar için
sorumluluk üstlenmez.
Çevre koruma
Ambalaj malzemeleri geri dönüştürü-
lebilir. Ambalaj malzemelerini evinizin çöpüne atmak yerine lütfen tekrar
kullanılabilecekleri yerlere gönderin
Eski cihazlarda, yeniden değerlendir-
me işlemine tabi tutulması gereken
değerli geri dönüşüm malzemeleri
bulunmaktadır. Bu nedenle eski cihazları
lütfen öngörülen toplama sistemleri aracılı
ğıyla imha edin.
İçindekiler hakkında uyarılar (REACH)
İçindekiler hakkında ayrıntılı bilgileri bulabi-
leceğiniz adres:
www.kaercher.com/REACH
Garanti
ılgili ülkede, genel distribitörümüzün belirlemiş ve yayınlamış olduğu garanti koşulları
geçerlidir. Garanti süresi dahilinde cihazda,
malzeme ve üretim hatasından oluşabilecek arızaların giderilmesi tarafımızdan ücretsiz olarak yapılır. Garanti kapsamındaki
arızaların oluşması halinde, lütfen cihazı
tüm aksesuarları ve satış belgesi ile (fiş, fatura) satın aldığınız yere yada en yakındaki
yetkili servise götürünüz. Cihazın kullanım
ömrü 10 yıldır.
(Adres için Bkz. Arka sayfa)
Müşteri hizmeti
Sorularınız veya arızalar söz konusu olursa
KÄRCHER distribütörümüz size seve seve
yardımcı olacaktır.
(Adres için Bkz. Arka sayfa)
– 3
-
79TR
Page 80

Yedek parça ve özel aksesuar
siparişi
En sık kullanılan yedek parça çeşitlerini kullanım kılavuzunun sonunda bulabilirsiniz.
Yedek parçalar ve aksesuarları yetkili satıcınız ya da KÄRCHER temsilciliğinden temin edebilirsiniz.
(Adres için Bkz. Arka sayfa)
Güvenlik uyarıları
Akım bağlantısı
– Cihazı, sadece tip etiketine uygun ola-
rak bağlayın ve işletime alın.
– Elektrik fişini kesinlikle ıslak elle tutma-
yın.
– Cihazı şebekeden ayırmak için bağlantı
kablosu yerine soketi çekin.
– Elektrik fişi veya uzatma kablosunun
üzerinden geçilerek, ezilerek, çekiştirilerek ya da benzer nedenlerle zarar
görmemesine dikkat edin. Kabloyu ısıdan, yağ ve keskin kenarlardan koruyun.
– Cihazı harici hava etkileri, nem ve ısı
kaynaklarına karşı koruyun.
Kullanım
– Uzun çalışma molalarında cihazı ana
şalterden / cihaz şalterinden kapatın ya
da elektrik fişini çekin.
– Bu cihaz, güvenlikleri için yetkili bir kişi
tarafından gözetim altında tutulmadıkları ya da cihazın nasıl kullanılacağına
yönelik gerekli talimatları almadıkları
sürece fiziksel, duyusal ya da ruhsal
açıdan kısıtlı yeteneklere sahip ya da
deneyimleri ve/veya bilgileri yetersiz kişiler (çocuklar dahil) için üretilmemiştir.
Cihazla oynamadıklarından emin olmak
için çocuklar gözetim altında tutulmalıdır.
– Kullanıcı personel cihazı talimatlara uy-
gun olarak kullanmalıdır. Personel, yerel kuralları dikkate almalı ve çalışma
sırasında özellikle çocuklar olmak üzere 3. şahıslara dikkat etmelidir.
– Kullanıcı personel, çalışma bölgesinde
dönmekte olan disk tarafından kapılacak ve dışarı savrulacak cisimlerin olmamasına dikkat etmelidir.
Taşıma
– Cihazın taşınması sırasında motor dur-
durulmalı ve cihaz güvenli bir şekilde
sabitlenmelidir.
Bakım
– Tüm çalışmalardan önce cihazı elektrik
fişinden çekin.
– Tehlikeleri önlemek için, cihazdaki ona-
rımlar ve yedek parça değişimleri sadece yetkili müşteri hizmetleri tarafından
yapılmalıdır.
İşletime alma
Cihaz tanımı
1 Parlatma kafası
2 Sap kilidini açma ayak tuşu
3 Sap
4 Soketli elektrik fişi kablosu
5 Saklama, şebeke bağlantı kablosu
6 Tutamak
7 Emme hortumu
8 Tekstil torba
9 Filtre torbası
10 Parlatma pedlerini koruma gözü
11 Parlatma pedleri
12 Ped tutucusu
13 Emme hortumu bağlantısı
14 Taşıma makaraları
15 Elektrik bağlantı kablosunun sabitleme-
leri (4x)
16 Taşıma emniyeti
80 TR
– 4
Page 81

Taşıma emniyetinin çıkartılması
Şekil
İlk başta ve cihazı kullanmadan önce
çekerek taşıma emniyetini çıkartın.
Sapın toplanması ve yerleştirilmesi
Şekil
Sapın iki parçasını birbirine geçirin ve
birlikte verilen cıvata ve somunla emniyete alın.
Komple sapı parlatma kafasına takın ve
cıvatayla sabitleyin.
Uyarı: Bu sırada elektrik bağlantı kablo-
sunun konumuna dikkat edin.
Şekil
Elektrik bağlantı kablosunu sabitleme-
lere bastırın ve gergin bir şekilde çekin.
Emme hortumunun bağlanması
Şekil
Hortumun düz ucunu parlatma kafası-
na, bükülü ucunu saptaki bağlantıya ta-
kın.
Tekstil torbanın yerleştirilmesi
Şekil
İlk önce, tekstil torbanın üst parçasını
kilitlenene kadar yuvaya bastırın.
Daha sonra, alt parçayı saptaki yapışkan bantla sabitleyin.
Filtre torbasının yerleştirilmesi
Şekil
Tekstil torbanın fermuarını açın.
Filtre torbasını yerleştirin ve açık yerin-
den kartonu kilitlenene kadar ağzın
üzerinden itin. Filtre torbasının doğru
oturup oturmadığını tekrar kontrol edin.
Tekstil torbayı fermuarla tekrar kapatın.
Ped tutucusunun yerleştirilmesi
Şekil
Parlatma kafası yüzeye dik konumda
duracak şekilde cihazı yere koyun.
Ped tutucusunu yuvanın içine bastırın.
Ped tutucusunun burunlarının yuvaya
iyice kilitlenmesine dikkat edin.
Çıkartmak için ped tutucularını hafifçe
çekin.
Parlatma pedlerinin oturtulması
Şekil
Parlatma pedlerini ped tutucusuna otur-
tun, hizanın ortada olmasına dikkat
edin.
Çı
kartmak için parlatma pedlerini hafif-
çe çekin.
Parlatma pedlerinin istiflenmesi
Parlatma pedleri, tekstil torbanın alt bö-
lümünde ayrı bir gözde saklanabilir.
Kullanımı
Not:
Her zaman filtre torbası takılıyken çalışın.
몇 Dikkat
Elektrik fişini takmadan önce, sapın dikey
konumda olduğundan emin olmalısınız. Bu
konumda cihaz kapalıdır.
Şekil
Üst kablo kancasını döndürün ve elek-
trik bağlantı kablosunu çıkartın. Elektrik
fişini prize takın.
Şekil
Cihazı hareket ettirin, bu amaçla ayak
tuşu ile sapın kilidini açın ve tutamağı
kendinize doğru çekin.
Durmak için, kilitlenene kadar sapı di-
key konuma geri getirin.
– 5
81TR
Page 82

Tam koruma
Tam korumanın yılda 2 - 3 kez yapılması
önerilir.
Zemindeki kirlerin temizlenmesi
Kaplamayı/zemini süpürün, vakumlayın
veya gerekirse nemli bir şekilde silin.
Koruma maddesinin uygulanması
Koruma maddesini yıkama şampuanı
ile eşit oranlı bir şekilde zemine uygulayın. Tamamen kurumasın sağlayın
Uyarılar: Zemin kaplaması ve koruma
maddesi üreticisinin uygulama uyarılarına dikkat edin!
Çözücü madde içeren koruma maddeleri kullanmayın.
Parlatma
Şekil
Şekilde gösterildiği gibi istediğiniz par-
laklığı elde edene kadar birkaç kez zeminin üstünden geçin.
Çalışmakta olan cihazı her zaman hareket ettirin. Belli bir yer üzerinde uzun
süre beklemeyin, aksi takdirde zemin
kaplamasında hasarlar oluşabilir.
Uyarı: Yürünebilirlik veya mobilyalara
yönelik üretici bilgilerine uyun. En az 12
saat beklenmesini öneriyoruz. Bu süre
içince, parlatılmış yüzeyin üzerinden
dikkatlice ve yol ayakkabıları olmadan
yürüyün. Mobilyalar
su değdirmeyin.
ı çekmeyin, zemine
Bakım amaçlı koruma
Eşit oranlı bir parlaklık elde etmek için bakım amaçlı korumanın ayda bir kez yapılmasını öneriyoruz.
Koruma maddesi üreticisine bağlı ola-
rak koruma maddesi direkt olarak yıkama suyuna katılabilir. Zemin kaplaması
ve koruma maddesi üreticisinin uyarıla-
rına dikkat edin!
Daha sonra yüzeyi parlatın.
Ara bakım
İhtiyaca ve zeminin durumuna (ayak iz-
leri, şeritler ...) bağlı olarak, daha önce
yeni bir koruma maddesi uygulamadan
koruma maddesi tabakası birkaç kez
parlatılabilir.
Çalışmanın tamamlanması
Sapı dikey konuma geri getirin. Cihaz
kapanır.
Şekil
Elektrik fişini çekin ve elektrik bağlantı
kablosunu sapa yerleştirilmiş kancaya
sarın. Üst kablo kancasını daha önceden yukarı döndürün.
Cihazın taşınması
Saklama yeri ya da başka bir bölüme götürmek isterseniz, cihazın taşıma makaraları
üzerinde hareket etmesine dikkat edin.
Şekil
Bu amaçla tutamağı geriye doğru bü-
kün ve cihazı çekin.
Cihazın saklanması
Cihazın uzun süre kullanılmaması durumunda taşıma emniyetinin sabitlenmesi
önerilir.
Şekil
Parlatma kafası yüzeye dik konumda
duracak şekilde cihazı yere koyun.
Ped tutucusunu cihazdan çekin ve sak-
lama gözüne yerleştirin.
Taşıma emniyetini bir taraftan ped tutu-
cusunun yuvasına bastırın ve sabit tutun. Taşıma emniyetinin diğer tarafını
ikinci ped tutucusunun yuvasına sıkıca
bastırın ve kilitleyin.
Cihazı dik konumda ve kuru bir mekan-
da muhafaza edin.
82 TR
– 6
Page 83

Koruma ve Bakım
Yaralanma tehlikesi
Bütün bakım ve temizlik çalışmalarında cihaz kapatılmalı şebeke kablosu prizden çıkartılmalıdır.
Cihazı ve aksesuarların
temizlenmesi
몇 Dikkat
Aşındırıcı maddeler, cam veya çok amaçlı
temizleyiciler kullanmayınız! Cihazı asla
suya daldırmayınız.
Parlatma pedlerinin temizlenmesi
Her çalışmadan sonra parlatma pedleri-
ni çıkartın ve pedlere hafifçe vurun. Gerektiğinde yıkayın ve kurumasını
sağlayın.
Uyarı: 60 °C'ye kadar makinede yıka-
nabilir, yumuşatıcı kullanmayın, çamaşır kurutucusunda kurutmayın.
Kuru parlatma pedlerini saklama gözü-
ne koyun.
Filtre torbasının yerleştirilmesi
Filtre torbasını düzenli aralıklarla değiştirin.
Bu konuda Bkz. "Filtre torbasının yer-
leştirilmesi".
Parlatma pedlerinin değiştirilmesi
Parlatma pedlerinin durumunu düzenli olarak kontrol edin, aşınmaları
pedleri değiştirin.
Bu konuda Bkz. "Parlatma pedlerinin
oturtulması".
durumunda
Teknik Bilgiler
Gerilim 230 V
Elektrik türü 1~50/
60
Koruma sınıfı II
Bağlantı gücü 600 W
Devir, parlatma diskleri 1000 d/dk
Ağırlık7kg
Boyutlar 385 x
340 x
1155
Hacim, Filtre torbası 4l
Teknik değişiklik yapma hakkı saklıdır!
Hz
mm
Arıza yardımı
Düzgün çalışmayan diskler / takırda-
ma sesi
Bu ses sistem gereğidir. Cihaz, taşıma
emniyeti ile saklanmamış. Parlatma işlemi sırasında ses bir süre sonra kendiliğinden kaybolur.
– 7
83TR
Page 84

Özel aksesuar
Bu cihaz için aşağıdaki özel aksesuarları satın alabilirsiniz:
Taş zemin / Linolyum / PVC
Yapay ve doğal taş zeminler, linolyum ve
PVC için optimum bakım ve koruma.
Parlatma pedleri, taş / linolyum / PVC
(3 adet)
(Sipariş No. 2.863-198.0)
Zemin temizliği, taş, mat RM 532
(1 litre)
(Sipariş No. 6.295-776,0)
Mumlu parke / yağ-mum sonlandırmalı ahşap zeminler
Mumlu parke veya yağ-mum sonlandırmalı
ahşap zeminler için optimum bakım ve koruma.
Parlatma pedleri, mumlu parke
(3 adet)
(Sipariş No. 2.863-196.0)
Zemin temizliği, mumlu parke
RM 530 (1 litre)
(Sipariş No. 6.295-778,0)
Kaynaklı parke / mantar / laminat
Kaynaklı parke, laminat ve mantar zeminler
için optimum koruma.
Parlatma pedleri, kaynaklı parke /
mantar / laminat (3 adet)
(Sipariş No. 2.863-197.0)
Zemin temizliği, kaynaklı parke
RM 531 (1 litre)
(Sipariş No. 6.295-777,0)
Diğer özel aksesuarlar
Sert yüzeyler için ana temizleyici
RM 533 (1 litre)
(Sipariş No. 6.295-775,0)
Taş, linolyum, PVC, üzerindeki eski koruma katmanlarının ve inatçı kirlerin temizlenmesinde kullanılı
Parlatma pedleri, çok amaçlı (3 adet)
(Sipariş No. 2.863-193.0)
Filtre torbası (3 adet)
(Sipariş No. 6.904-128.0)
84 TR
r.
– 8
Page 85

Содержание
Общие указания . . . . . . . . RU . . .3
Указания по технике безопа-
сности . . . . . . . . . . . . . . . . RU . . .4
Ввод в эксплуатацию . . . . RU . . .5
Управление . . . . . . . . . . . . RU . . .6
Окончание работы . . . . . . RU . . .7
Уход и техническое обслужи-
вание . . . . . . . . . . . . . . . . . RU . . . 7
Устранение неисправностей RU . . .8
Технические данные. . . . . RU . . .8
Специальные принадлежно-
сти . . . . . . . . . . . . . . . . . . . RU . . .9
Общие указания
Уважаемый покупатель!
Перед первым применением
вашего прибора прочитайте
эту оригинальную инструкцию по эксплуатации, после этого действуйте соответственно и сохраните ее для
дальнейшего пользования или для следующего владельца.
Использование по назначению
Данный прибор разработан для лич-
ного использования и не расчитан на
требования для профессионального
применения.
Прибор позволяет проводить поли-
ровку деревянных, ламинированных,
каменных полов, линолеума и полов
из поливинилхлорида.
Прибор приспособлен только для
всасывания полировочной пыли.
Прибор не является пылесосом! Не
применять для всоса сухой грязи!
Не использовать средства по уходу,
содержащие растворители.
Не разрешается использование при-
бора на ковровых и т.п. покрытиях.
Не утяжелять дополнительно
бор.
при-
Запрещается использовать или
оставлять прибор под открытым небом или в условиях влаги.
Прибор разрешается использовать
только вместе с оригинальными запасными частями, принадлежностями и особым оснащением.
Постоянно передвигать работающий
прибор. Не останавливаться надолго
на одном месте, иначе можно повредить напольное покрытие.
Всегда выполнять указания
вителя напольного покрытия и средства по уходу!
Изготовитель не несет ответственности
за повреждения, полученные в результате использования не по назначению
или неправильного обращения с прибором.
изгото-
Охрана окружающей среды
Упаковочные материалы пригод-
ны для вторичной обработки. Поэтому не выбрасывайте упаковку вместе
с домашними отходами, а сдайте ее в
один
из пунктов приема вторичного сы-
рья.
Старые приборы содержат ценные
перерабатываемые материалы,
подлежащие передаче в пункты
приемки вторичного сырья. Поэтому утилизируйте старые приборы через соответствующие системы приемки отходов.
Инструкции по применению компонентов (REACH)
Актуальные сведения о компонентах
приведены на веб-узле по следующему
адресу:
www.kaercher.com/REACH
– 3
85RU
Page 86

Гарантия
В каждой стране действуют соответственно гарантийные условия, изданные
уполномоченной организацией сбыта
нашей продукции в данной стране. Возможные неисправности прибора в течение гарантийного срока мы устраняем
бесплатно, если причина заключается в
дефектах материалов или ошибках при
изготовлении. В случае возникновения
претензий в течение гарантийного срока
просьба обращаться, имея
о покупке, в торговую организацию, продавшую вам прибор или в ближайшую
уполномоченную службу сервисного обслуживания.
(Адрес указан на обороте)
при себе чек
Сервисная служба
В случае возникновения вопросов или
поломок наш филиал фирмы KÄRCHER
поможет вам разрешить их.
(Адрес указан на обороте)
Заказ запасных частей и
специальных принадлежностей
Выбор наиболее часто необходимых запчастей вы найдете в
по эксплуатации.
Запасные части и принадлежности Вы
можете получить у Вашего дилера или в
филиале фирмы KÄRCHER.
(Адрес указан на обороте)
конце инструкции
Указания по технике
безопасности
Подключение к источнику тока
– При подсоединении к электросети и
включении пылесоса учитывайте
данные заводской таблички.
– Никогда не прикасаться к штепсель-
ной вилке влажными руками.
– При отсоединении прибора от сети
питания необходимо тянуть за штепсельную вилку, а не за кабель.
– Сетевой шнур и удлинительный ка-
бель не повреждать путем переезда
через них, сдавливания, растяжения
и т.п. Кабель защищать от воздействия жары, масел, а также от острых
краев.
– Прибор следует защищать от силь-
ных погодных влияний, влажности и
источников тепла.
Использование
– Во время продолжительных пере-
рывов в эксплуатации следует выключить прибор с помощью
главного выключателя / выключателя прибора или отсоединить его
от электросети.
– Это устройство не предназначено
для использования людьми (в том
числе и детей) с ограниченными физическими, сенсорными или умственными способностями или
лицами с отсутствием опыта и/
или знаний, за исключением случаев,
если за обеспечением безопасности
их работы наблюдают специально
подготовленные лица или они получают от них указания, касающиеся
использования
ходимо следит за детьми, не разрешать им играть с устройством.
– Обслуживающее лицо обязано ис-
пользовать прибор в соответствии с
назначением. Обслуживающее лицо
должнл учитывать местные особенности и при работе с прибором следить за третьими лицами,
находящимися поблизости, особенно детьми.
– Обслуживающее лицо должно сле-
дить за тем, чтобы в рабочей зоне не
находились предметы, которые могут быть затянуты и с силой отброшены вращающимися дисками.
Транспортировка
– При транспортировке прибора мотор
необходимо остановить и надежно
закрепить прибор.
устройства. Необ-
86 RU
– 4
Page 87

Техническое обслуживание
– Перед проведением любых работ по
уходу и техническому обслуживанию
прибора шнур питания необходимо
вынимать из розетки.
– Во избежание опасности ремонт и
замену запасных деталей прибора
должны выполнять только авторизированные сервисные центры.
Ввод в эксплуатацию
Описание прибора
1 Полировальная головка
2 Педаль блокировочной рукоятки
3 Рукоятка
4 Сетевой шнур со штепсельным разъ-
емом
5 Хранение, сетевой кабель
6 рукоятка
7 Всасывающий шланг
8 Матерчатый мешок
9 Фильтровальный мешок
10 Место для хранения полировочной
накладки
11 Полировочная накладка
12 Держатель накладки
13 Элемент подключения всасывающе-
го шланга
14 Транспортирующие ролики
15 Фиксаторы сетевого кабеля (4 шту-
ки).
16 Транспортное крепление
Снять транспортное крепление
Рисунок
Перед первым применением прибо-
ра следует снять транспортное кре-
пление, вытянув его.
Установить и разместить
рукоятку
Рисунок
Соединить обе детали рукоятки и за-
фиксировать с помощью входящих в
комплект винта и гайки.
Собранную рукоятку поместить в по-
лировочную головку и зафиксировать при помощи винта.
Указание: При этом обратить внимание на положение сетевого кабеля.
Рисунок
Вдавить сетевой кабель до фикса-
ции и туго натянуть его.
Подключить всасывающий шланг
Рисунок
Поместить выпрямленный конец вса-
сывающего шланга в полировочную
головку, вставить согнутый конец в
соединительный элемент на рукоятке.
Установка матерчатого мешка
Рисунок
Прежде всего вдавить верхнюю
часть матерчатого мешка в приемное устройство до фиксации.
Затем закрепить нижнюю часть на
рукоятке при помощи ленты-липучки.
Установка пылесборного мешка
Рисунок
Открыть молнию матерчатого мешка.
Вложить пылесборный мешок и на-
деть картонную часть с отверстием
на патрубок до фиксации. Еще раз
проверить правильность установки
пылесборного мешка.
Снова закрыть молнию матерчатого
мешка.
Установить держатель накладки
Рисунок
Установить прибор на пол так, чтобы
полировочная головка располагалась вертикально по отношению к
поверхности.
Просто вдавить держатель накладки
в приемное устройство. Проследить
за тем, чтобы выступы на держателе
накладки хорошо зафиксировались в
приемном устройстве.
Чтобы снять, необходимо просто вы-
тянуть держатель накладки.
– 5
87RU
Page 88

Надеть полировочную накладку
Рисунок
Надеть полировочную накладку так,
чтобы она приняла центральное по-
ложение.
Чтобы снять, необходимо просто вы-
тянуть полировочную накладку.
Укладка полировочной накладки
Полировочную накладку можно хра-
нить в нижней части матерчатого
мешка в предназначенном для нее
отделении.
Управление
Указание:
Всегда работать с установленным
фильтровальным мешком.
몇 Внимание
Перед тем как подключить к сети
штепсельную вилку, следует убедиться, что рукоятка находится в вертикальном положении. В этом положении
аппарат выключен.
Рисунок
Повернуть верхний крючок и снять
сетевой кабель. Вставить штепсель-
ную вилку в электророзетку.
Рисунок
Привести прибор в движение, для
этого при помощи педали разблоки-
ровать
ручку.
Для остановки привести рукоятку на-
зад в вертикальное положение до
фиксации.
Рекомендуется проводить полный уход
2 - 3 раза в год.
Очистить полы от грязи
Подмести поверхность/пол, в случае
необходимости воспользоваться пы-
лесосом или провести влажную
уборку.
рукоятку и потянуть на себя
Полный уход
Нанесение средства по уходу
Равномерно при помощи швабры на-
нести средство по уходу на пол. Пол
ностью высушить
Указание: Соблюдать указания изготовителя напольного покрытия и
средства по уходу!
Не использовать средства по уходу,
содержащие растворители.
Полировка
Рисунок
Перемещать прибор по поверхности,
как показано на рисунке, до достижения желаемого блеска.
Постоянно передвигать работающий
прибор. Не останавливаться надолго
на одном месте, иначе можно повредить напольное покрытие.
Указание: Придерживаться указаний
производителя относительно доступности для прохода или передвижения мебели. Рекомендуется
подождать не менее 12 часов. В это
время следует осторожно обращаться с полированной поверхностью и
не ступать на нее в уличной обуви.
Не передвигать мебель, не проливать воду на поверхность.
Поддерживающий уход
Поддерживающий уход рекомендуется
проводить как минимум
достижения равномерного блеска.
В зависимости от изготовителя сред-
ства по уходу, средство по уходу
можно добавлять непосредственно в
смывочный раствор. Соблюдать указания изготовителя напольного покрытия и средства по уходу!
Затем заново отполировать повер-
хность.
раз в месяц для
-
88 RU
– 6
Page 89

Промежуточный уход
По мере необходимости и с учетом
нагрузки на пол (следы ног, полосы
..) полировку защитного слоя можно
проводить много раз без нанесения
нового средства по уходу.
Окончание работы
Привести рукоятку обратно в верти-
кальное положение. Прибор отклю-
чается.
Рисунок
Вынуть штепсельную вилку и намо-
тать сетевой кабель на установлен-
ные на
крючок снова повернуть наверх.
Во время перемещения прибора к месту
хранения или в другую комнату следить
за тем, чтобы прибор передвигался на
транспортирующих роликах.
Рисунок
Для этого наклонить ручку назад и
потянуть прибор.
При длительном простое прибора рекомендуется закреплять транспортное
крепление.
Рисунок
Установить прибор на пол
полировочная головка располага-
лась вертикально по отношению к
поверхности.
Отсоединить держатель накладки от
прибора и положить его в место для
хранения.
Надавить на край транспортного кре-
пления в приемном устройстве дер-
жателя накладки и закрепить.
Сильно надавить на другой край
транспортного крепления в прием-
ном устройстве второго
накладки и зафиксировать.
Хранить прибор в сухом помещении.
рукоятке крюки. Верхний
Транспортировка прибора
Хранение прибора
так, чтобы
держателя
Уход и техническое
обслуживание
Опасность получения травм!
При проведении любых работ по уходу и
техническому обслуживанию прибор
следует выключить, а сетевой шнур вынуть из розетки.
Очистить прибор и
принадлежности
몇 Внимание
Не использовать чистящих паст, моющих средств для стекла и универсальных моющих средств! Запрещается
погружать прибор в воду.
Очистить полировочную накладку
Снимать и отряхивать полировочную
накладку после каждого применения.
В случае необходимости промыть и
высушить.
Указание: Разрешается механическая стирка при температуре до 60
°C, не использовать средства для полоскания, не сушить
шине.
Положить сухую полировочную на-
кладку в место для хранения.
Установка пылесборного мешка
Меняйте пылесборный мешок через регулярные промежутки времени.
См. главу «Установка пылесборного
мешка».
Заменить полировочную
накладку
Регулярно проверять состояние полировочной накладки, при износе заменить.
См. главу «Установка полировочной
накладки».
в сушильной ма-
– 7
89RU
Page 90

Устранение
неисправностей
Шумная работа дисков / сильный
грохот
Систематически возникающий звук.
Прибор не защищен транспортным
креплением. Шум самостоятельно
исчезает спустя некоторое время по-
сле начала полировки.
Технические данные
Напряжение 230 V
Вид тока 1~50/
60
Класс защиты II
Потребляемая мощность
Число оборотов, полировочные диски
Вес 7 кг
Габариты 385 x
Вместимость, пылесборный мешок
Изготовитель оставляет за собой
право внесения технических изменений!
600 Вт
1000 об./
340 x
1155
4 л
Hz
мин
мм
90 RU
– 8
Page 91

Специальные принадлежности
Для данного устройства вы можете дополнительно купить следующие
специальные принадлежности:
Каменные полы/линолеум/ПВХ
Оптимальный уход и защита для полов
из матового искусственного и природного камня, линолеума и ПВХ.
Полировальные пады для камня /
линолеума / ПВХ (3 шт.)
(Номер для заказа 2.863-198.0)
Средство для ухода за полом из
матового камня RM 532 (1 л.)
(Номер для заказа 6.295-776.0)
Вощеный паркет/деревянные полы с масляно-восковым покрытием
Оптимальный уход и защита для вощеного паркета или деревянных
масляно-восковым покрытием.
Полировальные пады для воще-
ного паркета (3 шт.)
(Номер для заказа 2.863-196.0)
Средство для ухода за вощеным
паркетом RM 530 (1 л.)
(Номер для заказа 6.295-778.0)
Лакированный паркет / пробковое покрытие / ламинат
Оптимальный уход и защита для лакированного паркета, ламината и пробковых полов.
Полировальные пады для лакиро-
ванного паркета / пробкового по-
крытия /
(Номер для заказа 2.863-197.0)
Средство для ухода за лакирован-
ным паркетом RM 531 (1 л.)
(Номер для заказа 6.295-777.0)
ламината (3 шт.)
полов с
– 9
91RU
Page 92

Прочие специальные принадлежности
Средство для тщательной очистки
твердых поверхностей RM 533
(1 л.)
(Номер для заказа 6.295-775.0)
Для тщательного удаления старого
защитного слоя и затвердевшей гря-
зи с каменных полов, линолеума,
ПВХ.
Полировальные пады универ-
сальные (3 шт.)
(Номер для заказа 2.863-193.0)
Фильтровальный мешок (3 шт.)
(Номер для заказа 6.904-128.0)
92 RU
– 10
Page 93

Tartalom
Magyar
Általános megjegyzések . . HU . . .3
Biztonsági tanácsok . . . . . . HU . . .4
Üzembevétel . . . . . . . . . . . HU . . .4
Használat . . . . . . . . . . . . . . HU . . .5
Használat befejezése. . . . . HU . . .6
Ápolás és karbantartás . . . HU . . .7
Üzemzavarelhárítási segítség HU . . .7
Műszaki adatok . . . . . . . . . HU . . .7
Különleges tartozékok . . . . HU . . .8
Általános megjegyzések
Tisztelt Vásárló,
A készülék első használata előtt
olvassa el ezt az eredeti használati utasítást, ez alapján járjon el és tartsa meg a későbbi használatra vagy a
következő tulajdonos számára.
Rendeltetésszerű használat
Ezt a készüléket magán használatra
fejlesztettük ki, és nem ipari használat
igénybevételére terveztük.
A készülék fa padlók, laminált padlóza-
tok, kő padlózatok, linóleum és pvc
padlók polírozását teszi lehetővé.
A készülék csak a polír reszelék felszí-
vására alkalmas.
A készülék nem porszívó! Ne használja
száraz piszok felporszívózására!
Ne használjon oldószer tartalmú ápoló-
szert.
A készüléket nem szabad padlószőnye-
gen vagy hasonlón üzemeltetni.
A készüléket ne terhelje további súllyal.
A készüléket nem szabad a szabadban
vagy nedves körülmények között használni vagy ilyen körülmények között tárolni.
A készüléket csak eredeti porzsákkal,
eredeti alkatrészekkel, tartozékkal vagy
különleges tartozékkal használja.
A járó készüléket mindig tartsa moz-
gásban. Ne álljon sokáig egy helyben,
különben a kár keletkezhet a padlózaton.
Kérem, mindig vegye figyelembe a pad-
lóburkolat és az ápolószer gyártójának
utasításait!
A gyártó nem vállal felelősséget esetleges
károkért, amelyek a nem rendeltetésszerű
használatból vagy hibás kezelésből származnak.
Környezetvédelem
A csomagolóanyagok újrahasznosít-
hatók. Ne dobja a csomagolóanyagokat a háztartási szemétbe, hanem
gondoskodjék azok újrahasznosításról.
A régi készülékek értékes újrahasznosítható anyagokat tartalmaznak,
amelyeket tanácsos újra felhasználni. Ezért a régi készülékeket az arra alkalmas gyűjtőrendszerek igénybevételével
ártalmatlanítsa!
Megjegyzések a tartalmazott anyagokkal kapcsolatban (REACH)
Aktuális információkat a tartalmazott anyagokkal kapcsolatosan a következő címen
talál:
www.kaercher.com/REACH
Garancia
Minden országban az illetékes forgalmazó
vállalat által kiadott szavatossági feltételek
érvényesek. A készülék esetleges hibáit a
garanciaidőn belül költségmentesen megszüntetjük, ha azok anyag- vagy gyártási
hibára vezethetők vissza. Garanciális igény
esetén kérjük, a számlával együtt forduljon
kereskedőjéhez vagy a legközelebbi, ilyen
esetek intézésére jogosult vevőszolgálathoz.
(A címet lásd a hátoldalon)
Szerviz
Kérdések vagy üzemzavar esetén KÄRCHER-telephelyünk szívesen segít Önnek.
(A címet lásd a hátoldalon)
– 3
93HU
Page 94

Alkatrészek és különleges
tartozékok megrendelése
Az üzemeltetési útmutató végén talál egy
válogatást a legtöbbször szükséges alkatrészekről.
Alkatrészeket és tartozékokat kereskedőjé-
nél vagy KÄRCHER-telephelyen kaphat.
(A címet lásd a hátoldalon)
Biztonsági tanácsok
Áram csatlakozás
– A készüléket csak a típus táblának
megfelelően szabad bekötni és üzembe
helyezni.
– A hálózati dugót soha ne fogja meg
nedves kézzel.
– A készülék hálózatról történő leválasz-
tásához ne a csatlakozókábelnél fogva
húzza, hanem a dugót megfogva.
– A hálózati csatlakozókábelt vagy a hos-
szabbító kábelt megkerüléssel, összenyomással, rángatással vagy más
hasonló módon ne sértse meg vagy ne
rongálja meg. A vezetéket óvja melegtől, olajtól és éles sarkoktól.
– A készüléket védeni kell a szélsőséges
időjárástól, a nedvességtől és a hőforrásoktól.
Alkalmazás
– Hosszabb üzemszünetek esetén a ké-
szülék főkapcsolóját / készülékkapcsolót ki kell kapcsolni vagy ki kell húzni a
hálózati dugót.
– Ez a készülék nem alkalmas arra, hogy
olyan korlátozott fizikai, érzékelő vagy
szellemi képességgel rendelkező személyek (beleértve a gyerekeket)
– vagy tapasztalat és/vagy ismeret nélküli
személyek használják, kivéve ha őket
biztonságukért felelős személy felügyeli
– vagy ez a személy megtanította nekik,
hogy hogyan kell a készüléket használni. Gyerekeket felügyelni kell, annak
biztosításáért, hogy a készülékkel ne
játszanak.
– A kezelőszemélynek a készüléket ren-
deltetésszerűen kell használni. Figyelembe kell vennie a helyi adottságokat,
és a készülékkel való munka közben figyelnie kell a harmadik személyekre,
különösen a gyermekekre.
– A kezelőszemélynek figyelnie kell arra,
hogy a munkaterületen ne legyenek tárgyak, amelyeket a forgó korong elkaphat és elhajíthat.
Szállítás
– A készülék szállításánál a motort moz-
dulatlanul kell elhelyezni és a készüléket biztosan rögzíteni.
Karbantartás
– A készüléken történő bármiféle munka
előtt húzza ki a hálózati csatlakozót.
– Veszélyek elkerülése érdekében a ké-
szülék pótalkatrészeinek javítását és
cseréjét csak a jóváhagyott Ügyfélszolgálatokon szabad elvégeztetni.
Üzembevétel
Készülék leírása
1 Polírozó fej
2 Nyélkioldás pedálja
3 Nyél
4 Hálózati kábel csatlakozóval
5 A hálózati kábel tárolóhelye
6 Markolat
7 Szívótömlő
8 Textil zsák
9Szűrőzsák
10 Tároló polírozó párnák számára
11 Polírozó párnák
12 Párnatartó
13 Szívótömlő-csatlakozó
14 Szállító kerekek
15 Rögzítés a hálózati csatlakozókábelhez
(4x)
16 Szállítási biztosíték
94 HU
– 4
Page 95

Távolítsa el a szállítási biztosítékot
Ábra
A készülék használata előtt lehúzással
távolítsa el a szállítási biztosítékot.
A nyél összerakása és felhelyezése
Ábra
A nyél két részét rakja össze és a mel-
lékelt csavarokkal és anyákkal rögzítse.
Az összeszerelt nyelet rakja a polírozó
fejre és rögzítse egy csavarral.
Megjegyzés: Eközben ügyeljen a háló-
zati csatlakozókábel helyzetére.
Ábra
A hálózati csatlakozókábelt nyomja
bele a rögzítésbe és húzza feszesre.
A szívócső csatlakoztatása
Ábra
A szívócső egyenes végét helyezze a
polírozó fejre, a hajlított végét a nyél
csatlakozásába.
A textilzsák felszerelése
Ábra
Először nyomja a textil zsák felső végét
a befogóba, amíg bepattan.
Ezután rögzítse az alsó részt a nyélen a
tépőzár segítségével.
Filckorong behelyezése
Ábra
Nyissa ki a textil zsák cipzárát.
Helyezze be a porzsákot és tolja a kar-
tont a nyílással a támaszték fölé, amíg
bepattan. Még egyszer ellenőrizze a
porzsák helyes elhelyezkedését.
A textil zsák cipzárját ismét bezárni.
Párnatartó behelyezése
Ábra
A készüléket a padlóra helyezni, úgy
hogy a polírozó fej a felületre merőleges legyen.
A párnatartót egyszerűen a befogóba
nyomni. Figyeljen arra, hogy a párnatartó peckei a befogókba jól bekattanjanak.
Kivételnél a párnatartót egyszerűen
csak húzza le.
Polírozó párnák felhelyezése
Ábra
A polírozó párnákat helyezze a párna-
tartóra, ügyeljen a középre helyezésre.
Kivételnél a polírozó párnát csak húzza
le.
Polírozó párnák tárolása
A polírozó párnákat a textil zsák alsó ré-
szébe egy külön tartóban lehet tárolni.
Használat
Megjegyzés:
Mindig behelyezett porzsákkal dolgozzon.
몇 Figyelem
Mielőtt a hálózati dugaljat bedugja, győződjön meg róla, hogy a nyél függőleges állásban legyen. Ebben az állásban a készülék
ki van kapcsolva.
Ábra
A felső kábel kampót fordítsa el és a há-
lózati kábelt vegye le. Csatlakoztassa a
hálózati csatlakozót egy aljzatba.
Ábra
A készülék elmozdításához oldja ki a
nyelet a pedállal, és húzza magához a
kézi markolatot.
Megállításhoz a nyelet helyezze vissza
függőleges állásba, amíg bepattan.
– 5
95HU
Page 96

Teljes ápolás
Ajánlott évente 2 -3 teljes ápolást elvégezni.
A padlót szennyeződéstől mentesíteni
Burkolatot/padlózatot felseperni, felpor-
szívózni vagy szükség esetén enyhén
nedvesen felmosni.
Ápolószer felvitele
Az ápolószert egy felmosó segítségével
egyenletesen vigye fel a padlóra. Hagyja teljesen megszáradni
Megjegyzések: Vegye figyelembe a
padlóburkolat és az ápolószer gyártójának használati utasításait!
Ne használjon oldószer tartalmú ápolószert.
Polírozás
Ábra
Az ábrán látható módon haladjon át
többször a felületen, amíg a kívánt fényességet eléri.
A járó készüléket mindig tartsa mozgásban. Ne álljon sokáig egy helyben,
különben a kár keletkezhet a padlózaton.
Megjegyzés: Tartsa be a gyártó rálépésre és a bútorok mozgatására vonatkozó utasításait. Ajánljuk, hogy
legalább 12 órát várjon. Ezen idő alatt a
polírozott felületre óvatosan és ne utcai
cipővel lépjen rá. Ne mozgassa a bútorokat, ne vigyen vizet a felületre.
Ellátási ápolás
Ajánlott havonta egyszer ellátási ápolást
végezni az ismételt fényesség eléréséhez.
Az ápolószer gyártójától függően az
ápolószert közvetlenül a felmosóvízbe
lehet adagolni. Vegye figyelembe a
padlóburkolat és az ápolószer gyártójának utasításait!
Ezután polírozza fel a felületet.
Közbenső ápolás
Igény és a padló használata (lábnyo-
mok, csíkok ...) szerint az ápolóréteget
többször föl lehet polírozni újabb ápolószer felvitele nélkül.
Használat befejezése
A nyelet helyezze vissza függőleges ál-
lásba. A készülék kikapcsol.
Ábra
Húzza ki a hálózati dugaljat, és a háló-
zati kábelt tekerje fel a nyélnél elhelyezett kampóra. A felső kábel kampót
először fordítsa felfelé.
A készülék szállítása
Kérem, figyeljen arra, hogy a készüléket a
szállító görgőkön mozgassa, amikor a tárolóhelyre vagy másik helyiségbe viszi.
Ábra
Ehhez fordítsa hátra a kézi markolatot
és húzza a készüléket.
A készülék tárolása
Ha hosszabb ideig nem használja a készüléket, akkor ajánlott a készülék szállítási
biztosítékát rögzíteni.
Ábra
A készüléket a padlóra helyezni, úgy
hogy a polírozó fej a felületre merőleges legyen.
A párnatartót húzza le a készülékről és
helyezze a tárolóba.
A szállítási biztosítékot nyomja a párna-
tartó befogójának egyik oldalába és
tartsa ott. A szállítási biztosíték másik
oldalát a másik párnatartó befogójába
erősen nyomja és pattintsa be.
A készüléket állítva, száraz helyiség-
ben kell tárolni.
96 HU
– 6
Page 97

Ápolás és karbantartás
Sérülésveszély
Ápolás és karbantartási munkák megkezdése előtt kapcsolja ki a készüléket és húzza ki a hálózati csatlakozót.
A készülék és a tartozékok
tisztítása
몇 Figyelem
Ne használjon súrolószert, üveget vagy
univerzális tisztítószert! A készüléket tilos
vízbe meríteni.
Polírozó párnák tisztítása
A polírozó párnákat minden üzem után
távolítsa el és kopogtassa le. Szükség
esetén ki kell mosni, és meg kell szárítani.
Megjegyzés: Mosógépben 60 °C-ig lehet mosni, ne használjon öblítőt, ne
szárítsa szárítógépben.
A száraz polírozó párnákat helyezze a
tárolóba.
Filckorong behelyezése
Cserélje rendszeres időközönként a porzsákot.
Ehhez lásd a „Porzsák behelyezése“ fe-
jezetet.
Polírozó párnák cseréje
Rendszeresen ellenőrizze a polírozó párnák állapotát, elkopás esetén cserélje ki.
Ehhez lásd a „Polírozó párnák felhelye-
zése“ fejezetet.
Műszaki adatok
Feszültség 230 V
Áramfajta 1~50/
60
Védelmi osztály II
Csatlakozási teljesítmény
Fordulatszám, polírozó
tárcsák
Súly 7 kg
Méretek 385 x
Űrtartalom, porzsák 4 l
A műszaki adatok módosításának jogát
fenntartjuk!
600 W
1000 U/
340 x
1155
Hz
min
mm
Üzemzavarelhárítási segítség
Nyugtalanul járó tárcsák / zörgő
hang
A zaj rendszerfüggő. A készüléket nem
tárolták szállító biztosítékokkal. A zaj
polírozáskor egy idő után magától elmúlik.
– 7
97HU
Page 98

Különleges tartozékok
A következő különleges tartozékokat tudja utólag megvenni ehhez a
készülékhez:
Kőpadló / linóleum / pvc
Optimális ápolás és védelem matt mű- és
természetes kőpadlókhoz, linóleumhoz és
pvc-hez.
Polírozó párnák / linóleum / PVC
(3 db.)
(Megrendelési szám 2.863-198.0)
Padlóápoló, matt kő RM 532 (1 lit.)
(Megrendelési szám 6.295-776.0)
Viaszolt parketta / fa padló olaj-viasz finish-el
Optimális ápolás és védelem viaszolt parkettához vagy olaj-viasz finish-el ellátott fa
padlóhoz.
Polírozó párnák, viaszos parkettá-
hoz (3 db.)
(Megrendelési szám 2.863-196.0)
Padlóápoló, viaszos parkettához
RM 530 (1 lit.)
(Megrendelési szám 6.295-778.0)
Kezelt parketta / parafa / laminát
Optimális ápolás és védelem kezelt parkettához, lamináthoz és parafa padlókhoz.
Polírozó párnák, kezelt parkettához /
parafához / lamináthoz (3 db.)
(Megrendelési szám 2.863-197.0)
Padlóápoló, kezelt parkettához
RM 531 (1 lit.)
(Megrendelési szám 6.295-777.0)
További különleges tartozékok
Alaptisztító kemény felületekhez
RM 533 (1 lit.)
(Megrendelési szám 6.295-775.0)
Régi ápolórétegek és makacs szennyeződések alapos eltávolításához kőről,
linóleumról, pvc-ről.
Polírozó párnák, univerzális (3 db.)
(Megrendelési szám 2.863-193.0)
porzsák (3 db.)
(Megrendelési szám 6.904-128.0)
98 HU
– 8
Page 99

Obsah
eština
Obecná upozornění . . . . . . CS . . .3
Bezpečnostní pokyny . . . . . CS . . .4
Uvedení do provozu . . . . . . CS . . .4
Obsluha . . . . . . . . . . . . . . . CS . . . 5
Ukončení provozu . . . . . . . CS . . .6
Ošetřování a údržba. . . . . . CS . . .7
Odstraňování poruch . . . . . CS . . .7
Technické údaje . . . . . . . . . CS . . .7
Zvláštní příslušenství . . . . . CS . . .8
Obecná upozornění
Vážený zákazníku,
Před prvním použitím svého za-
řízení si přečtěte tento původní
návod k používání, řiďte se jím a uložte jej
pro pozdější použití nebo pro dalšího majitele.
Používání v souladu s určením
Tento přístroj byl navržen pro domácí
použití a není určen pro nároky profesionálního používání.
Zařízení umožňuje leštění dřevěných
podlah, laminátů, kamenných podlah, linolea a podlah z PVC.
Přístroj je vhodný pouze pro odsávání
otěru vzniklého při leštění.
Přístroj není vysavač! Nepoužívejte k
vysávání suchých nečistot!
Nepoužívejte žádný čisticí prostředek
obsahující rozpouštědla.
Zařízení se nesmí používat na koberco-
vé a jim podobné podlahy.
Zařízení nezatěžujte přídavnou vahou.
Přístroj nepoužívejte ani neskladujte
venku ani ve vlhku.
Přístroj používejte pouze s originální fil-
trač
ními sáčky, originálními náhradními
díly a originálním příslušenstvím nebo
zvláštním příslušenstvím.
Zařízením v chodu vždy pohybujte. Ne-
zdržujte se dlouho na jednom místě, jinak může dojít k poškození podlahové
krytiny.
Vždy dodržujte pokyny výrobce podla-
hové krytiny a výrobce prostředku na
údržbu!
Výrobce neručí za případné škody způsobené nesprávným používáním nebo nesprávnou obsluhou.
Ochrana životního prostředí
Obalové materiály jsou recyklovatel-
né. Obal nezahazujte do domácího
odpadu, nýbrž jej odevzdejte k opětovnému zužitkování.
Přístroj je vyroben z hodnotných
recyklovatelných materiálů, které se
dají dobře znovu využít. Likvidujte
proto staré přístroje ve sběrnách k tomuto
účelu určených.
Informace o obsažených látkách (REACH)
Aktuální informace o obsažených látkách
naleznete na adrese:
www.kaercher.com/REACH
Záruka
V každé zemi platí záruční podmínky vydané naší příslušnou distribuční společností.
Eventuální poruchy vzniklé na přístroji odstraníme během záruční doby bezplatně v
případě, je-li příčinou poruchy chyba materiálu nebo výrobce. V případě záruky se
prosím obraťte i s příslušenstvím a prodejním úč
tem na Vašeho obchodníka nebo na
nejbližší autorizovanou servisní službu.
(Adresy poboček najdete na zadní straně)
Oddělení služeb zákazníkům
Budete-li mít otázky nebo v případě poruchy Vám naše zastoupení KÄRCHER rádo
pomůže.
(Adresy poboček najdete na zadní straně)
Objednávka náhradních dílů a
zvláštního příslušenství
Výběr nejčastěji vyžadovaných náhradních
díků najdete na konci návodu k obsluze.
Náhradní díly a příslušenství dostanete u
Vašeho prodejce nebo na pobočce
KÄRCHER.
(Adresy poboček najdete na zadní straně)
– 3
99CS
Page 100

Bezpečnostní pokyny
Přívod el. proudu
– Přístroj zapojujte a provozujte v soula-
du s údaji na identifikačním štítku.
– Nikdy se nedotýkejte síťového kabelu
mokrýma rukama.
– Nevytahujte za připojovací kabel, ale za
zástrčku.
– Dbejte, aby nedošlo k poškození síťo-
vého či prodlužovacího vedení následkem přejetí vedení, jeho skřípnutím či
taháním za něj trhavým pohybem. Síťo-
vý kabel chraňte před žárem, stykem s
olejem či ostrými hranami.
– Přístroj chraňte před extrémními vlivy
počasí, vlhkostí a zdroji tepla.
Použití
– Při delších provozních přestávkách vy-
pněte hlavní vypínač / spínač přístroje
nebo přístroj odpojte od zdroje napětí.
– Toto zařízení není určeno k tomu, aby
je používaly osoby (včetně dětí) s omezenými fyzickými, smyslovými nebo duševními schopnostmi nebo s
nedostatečnými zkušenostmi a/nebo
znalostmi, pokud ne ně nebude dohlížet
osoba odpovědná za jejich bezpečnost
a nepoučí je o tom, jak se má zařízení
používat. Na děti je třeba dohlížet, aby
bylo zajištěno, že si se zařízením nebudou hrát.
– Uživatel smí přístroj používat pouze k
účelům, ke kterým byl přístroj vyroben.
Při práci s přístrojem je uživatel povinen
dbát místních specifik a brát při práci
zřetel na třetí osoby, zvláště děti.
– Uživatel musí dbát na to, aby se v pra-
covní oblasti nenacházely žádné předměty, které by mohly být zachyceny a
smeteny rotujícím kotoučem.
Přeprava
– Při přenosu přístroje vypněte motor a
přístroj pevně upevněte.
Údržba
– Před prací na přístroji vždy vytáhněte
síťovou zástrčku.
– Aby nedošlo k ohrožení, smějí být opra-
vy a výměna náhradních dílů na přístroji
prováděny pouze autorizovanou zákaznickou službou.
Uvedení do provozu
Popis zařízení
1 Lešticí hlavice
2 Nožní tlačítko pro uvolnění násady
3 Násada
4Síťový kabel se zástrčkou
5 Úchytka, sít'ový kabel
6 Rukojet'
7 Sací hadice
8 Textilní sáček
9 Filtrační sáček
10 Úložná přihrádka na lešticí kotoučky
11 Lešticí kotoučky
12 Držák lešticího kotoučku
13 Koncovka sací hadice
14 Přepravní válečky
15 Upevňovací prvky pro síťový napájecí
kabel (4x)
16 Přepravní pojistka
100 CS
– 4
 Loading...