

Page 1

Kambrook - Australia
Ground Floor, Suite 2, 170-180 Bourke Rd
Alexandria NSW 2015, Australia
Locked Bag 2000
Botany NSW 1455
Customer Service Line 1300 139 798
Customer Service Fax 1800 621 337
www.kambrook.com.au
Due to continual improvement in design or otherwise, the product you
purchase may differ slightly from the illustration in this book. Issue A15
Kambrook - New Zealand
Private Bag 94411
Botany, Manukau
Auckland 2163
New Zealand
Customer Service Line/
Spare Parts 0800 273 845
Customer Service Fax 0800 288 513
www.kambrook.co.nz
Page 2

Suits all KBL003 modelsINSTRUCTION BOOKLET
Page 3

Important
Please retain your instruction
book for future use.
In the event that you need some assistance with your
Kambrook appliance, please contact our Customer Service
Department on 1300 139 798 (Australia) or 0800 273 845
(New Zealand). Alternatively, visit us on our website at
www.kambrook.com.au or www.kambrook.co.nz
Page 4

Contents
Kambrook Recommends
Safety First
Your Kambrook Blitz2Go
Shake It Kit
Using Your Kambrook
Shake It Kit
Care and Cleaning p14
Recipes p15
p4
p7
p8
Page 5

Kambrook Recommends Safety First
IMPORTANT: Please retain your
instruction book for future use.
At Kambrook, we believe that safe performance is the first priority in any
consumer product, so that you, our valued customer can confidently
use and trust our products. We ask that any electrical appliance that
you use be operated in a sensible fashion with due care and attention
placed on the following important operating instructions.
Important Safeguards For Your Kambrook
Blitz2Go Shake It Kit
The Blitz2Go Shake It Kit accessories are intended to be used only in conjunction with the KBL20 or
KBL63 Kambrook Blitz2Go personal blenders (blender sold separately). Therefore, the 'Important
Safeguards' section below references the safe practice required when operating the KBL20 or
KBL63 Kambrook Blitz2Go personal blender.
When using the Shake It accessory with the
Blitz2Go Personal Blender:
• Carefully read all instructions before
operating all KBL 20 and KBL63 Kambrook
TM
Blitz2Go
for future reference.
• Remove and safely di scard any packa ging
material and promotional labels before using
for the first time.
• To eliminate a choking hazard for young
children, remove and safely discard the
protective cover fitted to the power plug of
this Blender.
• Do not place the Blender near the edge of a
bench or table during operation. Ensure the
surface is level, clean and free of water and
other substances. Vibration during operation
may cause the Blender to move.
• Do not use the Blender on a s ink drain board.
• Do not place the Blender on or nea r a hot
gas or electric burner, or where it cou ld
touch a heated oven.
• Handle the Blender with care – remember
the blades are razor-sharp and should be
kept out of the reach of children.
• Always ensure the Blender is completely
assembled before operating. The Blender will
not operate unless properly assembled.
Blenders for the first time and save
• Do not use at tachments other than those
provided with the Blender or Blitz2Go
accessory packs.
• Do not attem pt to operate the Blender by
any method other than those described in
this booklet.
• When using the Blitz2Go blender motor with
the Shake It kit, always secure the removable
wave blade holder onto the bottle/cocktail
shaker before attach ing to the motor ba se.
• Ensure the ‘PULSE’/‘BLITZ’ button i s not
press ed and the Blender is switched off
at the power outlet and the power cord is
unplugged before attach ing the assembled
bottle.
• Always operate the Blender with the
assembled bottle/cocktail shaker in position.
• Keep fi nger s, hands, knives a nd other utensils
away from moving blades.
• Ensure the motor and the blades have
completely stopped before disassembling.
Ensure the ‘PULSE’/‘BLITZ’ button i s not
press ed and the Blender is switched off
at the power outlet and the power cord is
unplugged from the power outlet before
attempting to move the Blender, when
not in use, if lef t unat tended and before
disassembling, cleaning or storing.
4
Page 6

• Care should be taken when removing
the food from the bottle by ensuring the
motor and the blades have completely
stopped before disassembling. Ensure the
‘PULS E’/‘BLITZ’ button is not pressed, the
Blender is switched off at the power outlet
and unplugged before removing the bottle/
cocktail shaker. The bottle/cocktail shaker
should then be unlocked from the motor
base a nd the removable wave blade holder
unscrewed from the bottle/cockta il shaker.
The shaken contents can then be either
consumed from the bottle or removed.
• Do not operate the Blender continuously
for periods longer than 30 seconds on any
setting or if proces sing a heav y load. None
of the recipes in this book are considered
a heav y load. If the Blender is operated
continuously for too long, it should be
allowed to rest for 3 0 minutes before
recommencing.
• Never operate the Blender without adding
liquid.
• Do not proces s hot or boiling liquids – allow
liquids to cool before placing into the
Blender.
• Do not use more than 3 standard-s ized ice
cubes in the cocktail shaker. 2-3 ice cubes
will give a very chilled result.
• Do not put carbonated drinks (coke, etc.)
into the bottle as it may cause the drinking
lid to pop up.
• Do not overfil l 500ml capacity of the 60 0ml
sized bottle when operating the blender with
the wave blade to s hake ice cubes, frozen/
fresh fruit with liquid.
• Always use one hand to hold the pla stic
bottle or cocktail shaker when operating the
blender with the wave blade to shake ice
cubes, frozen/fresh fruit with liquid.
• Do not use the Blender to crush only ice
cubes. The wave blade is des igned to shake
the ice cubes, frozen/fresh fruit with liquid
in the plastic bottle or cocktail sha ker as
per the recipes provided in this book. The
wave blade does not blend the ice cubes or
frozen/fresh fruit. For a blended icy drink use
the original Blitz2Go blade that is included
with all KBL 20 and KBL63 Kambrook Blitz2Go
personal blenders (blender sold separately).
• Do not overload the bot tle/cock tail s haker.
If the motor stalls, turn the B lender off
immediately, unplug the Blender and let it
cool down for at least 30 minutes.
• Do not move the Blender whilst in operation.
• Do not leave the Blender unattended when
in use.
• Before changing accessories or approaching
parts that move, turn the power off at the
outlet and disconnect the Blender from the
power outlet.
• Do not place a ny par t of the Blender in a
microwave oven.
• Do not wash any parts of the B lender in a
dishwasher.
• Do not place a nyth ing on top of the motor
base a nd/or the bottle when in u se and
when stored.
• Do not allow children to use the Blender
without supervision.
• Keep the Blender clean. Follow the cleaning
instructions provided in this book.
5
Page 7

Important Safeguards For All Electrical
Appliances
• Fully unwind the power cord before use.
• Connect only to a 230V or 240V power outlet.
• Do not let the power cord hang over the
edge of a bench or table, touch hot surfaces
or become knot ted.
• To protect against electric shock, do not
immerse the power cord, power pl ug or
appliance in water or any other liquid or
allow moisture to come in contact with
the part, unless it is recommend ed in the
cleaning instructions.
• The appliance is not intended for use by
persons (including children) with reduced
physical, sensory or mental capabilities,
or lack of experience a nd knowledge,
unless they have been given super vision or
instruction concerning use of the appliance
by a person responsible for their safety.
• Children should be supervised to ensure that
they do not play with the appliance.
• It is recommended to regularly inspect the
appliance. To avoid a hazard, do not use
the applia nce if power cord, power plug or
appliance becomes damaged i n any way.
Return the entire appliance to the nearest
authorised Kambrook Service Centre for
examination and/or repair.
• Any maintenance other than cleaning
should be performed at an authorised
Kambrook Service Centre.
• This appliance is for household use on ly. Do
not use this appliance for anything other
than its intended use. Do not use in moving
vehicles or boats. Do not use outdoors.
Misuse may cause injury.
• The insta llation of a residual current device
(safety switch) is recommended to provide
additional safety protection when using
electrical appliances. It is advisabl e
that a safety switch with a rated res idual
operating current not exceeding 30mA be
installed in the electrical circuit supplying
the applia nce. See your electrician for
professional advice.
• Always turn the appliance to the OFF
position, switch off at the power outlet
and unplug at the power outlet when the
appliance is not in u se.
• Before clea ning, always turn the appliance
to the OFF position, switch of f at the power
outlet, unplug at the power outlet and
remove the power cord, if detachable, from
the applia nce and allow a ll parts to cool.
• Do not place this appliance on or near
a heat source, such as hot p late, oven or
heaters.
• Pos ition the appliance at a minimum
distance of 20cm away from walls, curtains
and other heat or steam sensitive materials
and provide adequate space above and on
all sides for air circulation.
6
Page 8

Your Kambrook Blitz2Go Shake It Kit
1. Removable wave blade holder
with specially designed stainless
steel 'wave' blade screws onto
your cocktail shaker or Blitz2Go
bottle then mounts to the
Blitz2Go personal blender motor
base (blender not included)
2. 300ml Stainless steel cocktail
shaker
3. Stainless steel cocktail shaker
lid with ice strainer and 20ml
shot cap
4. 600ml BPA FREE Tritan plastic
Blitz2Go bottle for making
milkshakes
5. Closable drinking lid to suit
Blitz2Go bottle with locking cap
to sip on the go
NOTE: The wave blade, cocktail
shaker and Blitz2Go bottle to be
used only in conjunction with
any KBL20 and KBL63 Kambrook
Blitz2Go personal blenders
(blender sold separately).
7
Page 9
Using Your Kambrook Shake It Kit
Before First Use
Before using your Blitz2Go accessories
for the first time, remove all packaging
material.
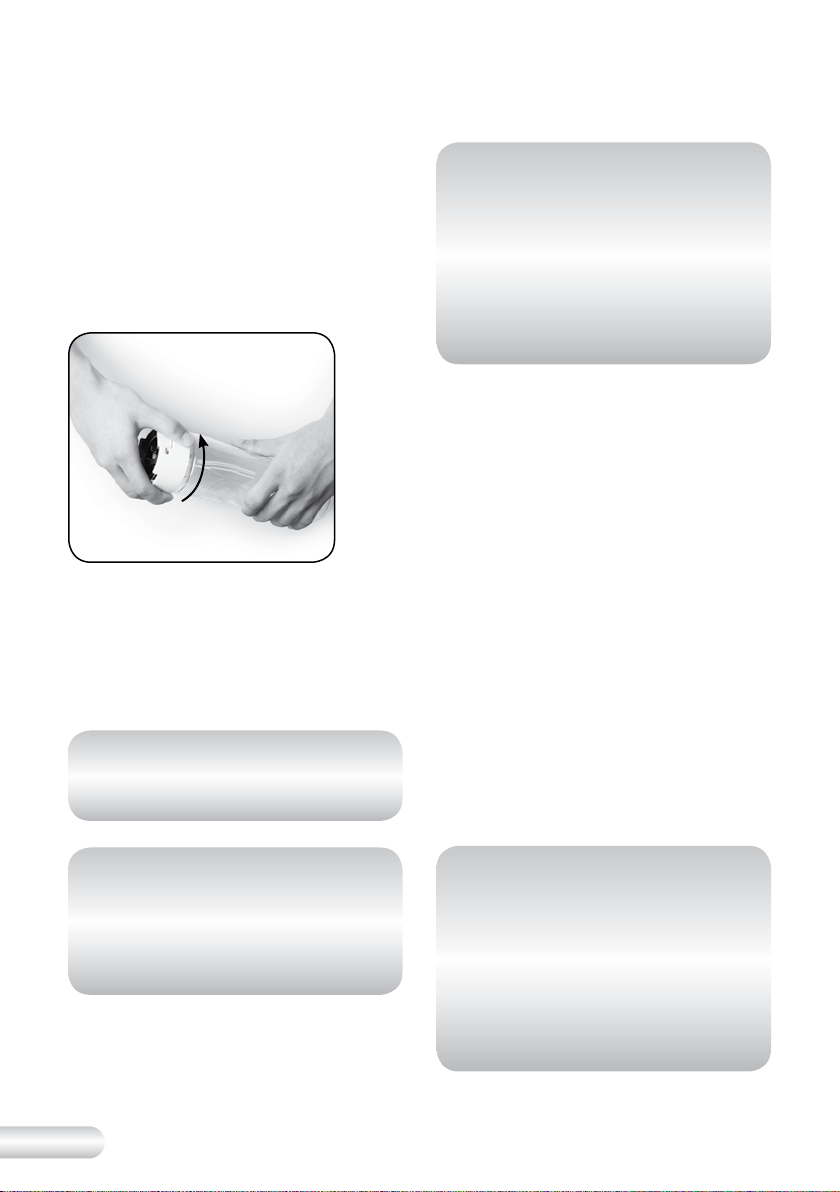
Unscrew the removable wave blade
holder from the Bltiz2Go bottle
(See Fig. 1).
Fig. 1
Wash the Bltiz2Go bottle, closable
drinking lid, removable wave blade,
stainless steel cocktail shaker and
cocktail shaker lid in warm soapy
water with a soft cloth. Rinse and dry
thoroughly.
NOTE: The removable wave blade
holder with stainless steel wave
blade is not dishwasher safe.
NOTE: There are rubber seals
situated under the drinking
lid and inside the removable
wave blade holder to prevent
leaking. In case these seals
come out, wash in warm soapy
water, rinse and dry thoroughly.
Correctly refit the seals into the
lid or inside the blade holder
before using.
Assembly and Operation of
the Removable Wave Blade
Holder with the Blitz2Go
Bottle
The specially designed Blitz2Go wave
blade used with the Blitz2Go bottle
creates aerated traditional milkshakes
and thick shakes.
1. Place any of the Blitz2Go personal
blender motor bases (purchased
separately) on a flat, dry surface.
Ensure that the blender is
switched off at the power outlet
and the power cord is unplugged.
2. Choose the 600ml (or 300ml bottle
sold separately) sized bottle.
3. Place ingredients inside the Blitz
bottle, ensuring there is a suitable
amount of liquid content.
NOTE: Kambrook does not
recommend the Bltiz2Go plastic
bottle is put in the dishwasher.
Dishwashers vary in the market
and some may have hot spots
that could distort the plastic.
8
NOTE: The wave blade is
designed for aerating ice cream
and liquid to make traditional,
frothy milkshakes and thick
shakes. For a blended result,
use the original Blitz2Go blade
that is included with all KBL20
and KBL63 Kambrook Blitz2Go
personal blenders (blender sold
separately).
Page 10

NOTE: Never shake without
adding liquid content to the
Blitz2Go.
NOTE: Do not overfill 500ml
capacity of the 600ml sized
bottle when operating the
blender with the wave blade this
ensures there is enough room in
the bottle for aeration to occur
when shaking.
4. Screw the wave blade holder
onto the Blitz2Go bottle by turning
in a clockwise direction. Make
sure that wave blade holder is
securely tightened to the bottle
(See Fig. 2).
Fig. 3
6. With one hand on the motor base
and the other hand holding the
assembled Blitz bottle, place the
assembled bottle inside the motor
base. Align the “
the wave blade holder with the “
” symbol on the motor base
(See Fig. 4). Once aligned, push
down and turn the bottle in the
direction of the “
on the motor base. Make sure
the Blitz bottle is securely locked
inside the motor base.
” symbol on
” symbol
Fig. 2
5. With the ingredients inside and
the removable wave blade
holder securely fastened on, flip
the bottle so that the removable
wave blade holder is facing
down (See Fig. 3). Ready to be
assembled onto the motor base.
Fig. 4
7. Plug the power cord into a 230V
or 240V power outlet and switch
on at the power point.
8. Press down onto the ‘PULSE/BLITZ’
button to start aerating. Do not
shake for more than 30 seconds
at a time. To stop aerating at any
time, discontinue pressing down
on the ‘PULSE’/ ‘BLITZ’ button.
9
Page 11

Using Your Kambrook Shake It Kit Continued...
12. Screw the drinking lid onto the
NOTE: Do not overfill 500ml
capacity of the 600ml sized
bottle when operating the
blender with the wave blade
to shake ice cubes, frozen/fresh
fruit with liquid.
NOTE: Always use one hand
to hold the plastic bottle when
operating the blender with
wave blade to shake ice cubes,
frozen/fresh fruit with liquid.
Do not use the blender to blend
only ice cubes.
Blitz bottle to drink on the go.
13. To keep cap open while drinking,
press cap all the way back and
past the tab (See Fig. 6).
Fig. 6
9. To remove the assembled Blitz
bottle from the motor base,
turn the assembled bottle anticlockwise and pull it away from
the motor base.
10. With the ingredients now aerated
and the removable blade holder
screwed on, flip the Blitz bottle so
the wave blade holder is facing
up (See Fig. 5).
Fig. 5
11. Carefully unscrew the wave
blade holder from the Blitz bottle
by turning the wave blade holder
in an anti-clockwise direction.
Avoid touching the sharp wave
blade.
14. After use, ensure the motor base
is switched off at the power outlet
and remove the power cord.
Allow the motor base to cool
before cleaning and storing.
NOTE: Never shake without
adding liquid content to the
Blitz2Go.
NOTE: The wave blade is
designed for aerating ice cream
and liquid to make traditional,
frothy milkshakes and thick
shakes. For a blended result,
use the original Blitz2Go blade
that is included with all KBL20
and KBL63 Kambrook Blitz2Go
personal blenders (blender sold
separately).
NOTE: The wave blade with
Blitz2Go bottle is to be used
with any Kambrook Blitz2Go
personal blender models that
are sold separately.
10
Page 12

NOTE: Additional 600ml bottles
(product code KBB2) and
300ml bottles (product code
KBL001) are also available to
purchase separately at leading
retailers.
Assembly and Operation of
the Removable Wave Blade
Holder and Cocktail Shaker
The specially designed Blitz2Go wave
blade used with the cocktail shaker
shakes up a refreshing, chilled cocktail
in seconds.
1. Place any of the Blitz2Go personal
blender motor bases (purchased
separately) on a flat, dry surface.
Ensure that the blender is
switched off at the power outlet
and the power cord is unplugged.
2. Choose the cocktail shaker with
lid removed.
3. Place the ingredients inside the
cocktail shaker, ensuring there is a
suitable amount of liquid content.
NOTE: Never shake without
adding liquid content to the
Blitz2Go.
NOTE: Do not use more than
3 standard-sized ice cubes in
your cocktail shaker. 2-3 ice
cubes will give a very chilled
result.
NOTE: The maximum capacity
of the cocktail shaker is 300ml.
All recipes in this book do not
exceed this capacity. When
making your own cocktail
creations, make sure the recipe
does not exceed 300ml.
4. Screw the wave blade holder
onto the cocktail shaker by
turning in a clockwise direction.
Make sure that the wave blade
holder is securely tightened to the
bottle (See Fig. 7).
Fig. 7
5. With the ingredients inside and
the removable wave blade
holder screwed on, flip the
cocktail shaker so that the
removable wave blade holder is
facing down (See Fig. 8). Ready
to be assembled onto the motor
base.
Fig. 8
11
Page 13

6. With one hand on the motor base
and the other hand holding the
assembled cocktail shaker, place
the assembled cocktail shaker
inside the motor base. Align the “
” symbol on the wave blade
holder holder with the “
symbol on the motor base (See
Fig. 9). Once aligned, push down
and turn the cocktail shaker in the
direction of the “
the motor base. Make sure that
the cocktail shaker is securely
locked inside the motor base.
”
” symbol on
9. To remove the assembled cocktail
shaker from the motor base, turn
the cocktail shaker anti-clockwise
and pull it away from the motor
base.
10. With the ingredients now shaken
and the wave blade holder
screwed on, flip the cocktail
shaker so the wave blade holder
is facing up (See Fig. 10).
Fig. 10
Fig. 9
7. Plug the power cord into a 230V
or 240V power outlet and switch
on at the power point.
8. Press down onto the ‘PULSE/BLITZ’
button to start shaking. Do not
shake for more than 30 seconds
at a time. To stop shaking at any
time, discontinue pressing down
on the ‘PULSE’/ ‘BLITZ’ button.
NOTE: Always use one hand
to hold the shaker when
operating the blender with
wave blade to shake ice cubes,
frozen/fresh fruit with liquid.
Do not use the blender to blend
only ice cubes.
12
11. Carefully unscrew the wave
blade holder from the cocktail
shaker by turning the wave
blade holder in an anti-clockwise
direction. Avoid touching the
sharp wave blade.
12. Screw the cocktail shaker lid with
strainer onto the cocktail shaker.
13. Using the lid, depending on
what the recipe specifies strain
the drink into a separate martini
or tall glass (not included)
(See Fig. 11).
Fi g . 11
Page 14

14. After use, ensure the motor base
is switched off at the power outlet
and remove the power cord.
Allow the motor base to cool
before cleaning and storing.
NOTE: Do not use more than 3
standard-sized ice cubes in your
cocktail shaker. 2-3 ice cubes
will give a very chilled result.
NOTE: The wave blade is
designed to shake ice cubes,
frozen/fresh fruit or alcohol
inside the cocktail shaker for a
chilled result. For a blended result
use the original Blitz2Go blade
that is included with all KBL20
and KBL63 Kambrook Blitz2Go
personal blenders (blender sold
separately).
NOTE: The wave blade with the
cocktail shaker is to be used
with any Kambrook Blitz2Go
personal blender models that
are sold separately.
13
Page 15

Care and Cleaning
Ensure the blender (sold separately)
has completely stopped operation
by not pressing down on the ‘PULSE’/
‘BLITZ’ button.
Switch off at the power outlet and
unplug the power cord.
Carefully unscrew and remove wave
blade holder from the Blitz2Go bottle
or cocktail shaker. Wash the wave
blade holder in warm soapy water
and dry thoroughly.
Ensure all liquids have been removed
from the Blitz2Go bottle or cocktail
shaker. Wash the bottle, closable
drinking lid, cocktail shaker and
cocktail shaker lid in warm soapy
water. Use a plastic bottle brush to
clean any tough foodstuffs left inside
the bottle or cocktail shaker. Dry
thoroughly.
IMPORTANT: Wave
blade must be handled
carefully as it is sharp!
NOTE: Do not immerse the
motor base, power cord or
power plug (sold separately) in
water or any other liquid.
NOTE: Kambrook does not
recommend the Blitz2Go plastic
bottle is put in the dishwasher.
Dishwashers vary in the market
and some may have hot spots
that could distort the plastic.
NOTE: There are rubber seals
situated under the drinking
lid and inside the removable
wave blade holder to prevent
leaking. In case these seals
come out, wash in warm soapy
water, rinse and dry thoroughly.
Correctly refit the seals into the
lid or inside the blade holder
before using.
NOTE: Do not place the Blitz2Go
bottle, closable drinking lid,
cocktail shaker, or removable
wave blade holder in the
dishwasher.
14
Page 16

Recipes
15
Page 17

NOTE: Never shake without
adding liquid content to the
Blitz2Go.
Recipes Using the Removable
Wave Blade Holder with
Blitz2Go Bottle
NOTE: All milkshake and thick
shakes recipes in this book use
the 600ml sized Blitz2Go bottle
included in the Blitz2Go Shake
It Kit.
NOTE: Do not overfill 500ml
capacity of the 600ml sized
bottle when operating the
blender with the wave blade to
shake ice cubes, frozen/fresh
fruit with liquid. This ensures
there is enough room in the
bottle for aeration to occur
when shaking.
NOTE: For best blending results
place liquid content and
then ice cream first inside the
Blitz2Go bottle. Add syrups,
malts or powders last to avoid
getting them stuck to the
bottom of the bottle and not
combining into the mixture.
Banana Thick Shake
Makes 1 serve
100ml milk
5 scoops vanilla ice cream
50ml banana syrup or powdered banana
Flavouring
1. Place the milk, ice cream and
banana flavouring (in this order) into
the Blitz2Go bottle; securely attach
the removable wave blade holder to
the bottle.
2. Secure the bottle onto the motor base
and press the ‘PULSE/BLITZ’ button for
30 seconds or until smooth.
3. Unscrew the removable wave blade
holder and at tach the drinking lid on
top of the bottle.
NOTE: Different kinds of milk
and ice creams may affect the
aeration of your milkshake or
thick shake.
16
Page 18

Honey Comb Thick Shake
Make 1 serve
100ml milk
5 scoops honey comb ice cream
30ml caramel syrup
1 tbsp whipped cream, optional
25g crunchy chocolate bar, crushed
1. Place the milk, ice cream and
caramel syrup (in this order) into
the Blitz2Go bottle; securely attach
the removable wave blade holder to
the bottle.
2. Secure the bottle onto the motor base
and press the ‘PULSE/BLITZ’ button for
30 seconds or until smooth.
3. Unscrew the removable wave blade
holder.
4. Pour into a tall glass, top with whipped
cream and crushed, crunchy
chocolate bar.
Chocolate Thick Shake
Makes 1 serve
100ml chocolate milk
5 scoops choc-chip ice cream
30ml chocolate syrup
1. Place the milk, ice cream and
chocolate syrup (in this order) into
the Blitz2Go bottle; securely attach
the removable wave blade holder to
the bottle.
2. Secure the bottle onto the motor base
and press the ‘PULSE/BLITZ’ button for
30 seconds or until smooth.
3. Unscrew the removable wave blade
holder and at tach the drinking lid on
top of the bottle.
17
Page 19

Strawberry Thick Shake
Makes 1 serve
100ml milk
5 scoops strawberry ice cream
30ml strawberry syrup
1. Place the milk, ice cream and
strawberry syrup (in this order) into
the Blitz2Go bottle; securely attach
the removable wave blade holder to
the bottle.
2. Secure the bottle onto the motor base
and press the ‘PULSE/BLITZ’ button for
30 seconds or until smooth.
3. Unscrew the removable wave blade
holder and at tach the drinking lid on
top of the bottle.
Vanilla Malt Thick Shake
Makes 1 serve
100ml milk
5 scoops of vanilla ice cream
1 tbsp powdered malt
1 tsp vanilla essence
1. Place the milk, ice cream, malt and
vanilla essence (in this order) into
the Blitz2Go bottle; securely attach
the removable wave blade holder to
the bottle.
2. Secure the bottle onto the motor base
and press the ‘PULSE/BLITZ’ button for
30 seconds or until smooth.
3. Unscrew the removable wave blade
holder and at tach the drinking lid on
top of the bottle.
18
Page 20

Caramel Milkshake
Makes 1 serve
200ml milk
3 scoops caramel swirl ice cream
30ml caramel syrup
1 tbsp dulce de leche
(softened caramel fudge)
1. Place the milk, ice cream,
caramel syrup and dulce de leche
(in this order) into the Blitz2Go bottle;
securely attach the removable wave
blade holder to the bottle.
2. Secure the bottle onto the motor base
and press the ‘PULSE/BLITZ’ button for
30 seconds or until smooth.
3. Unscrew the removable wave blade
holder and at tach the drinking lid on
top of the bottle.
Choc Mint Milkshake
Makes 1 serve
200ml milk
3 scoops of choc mint ice cream
30ml chocolate syrup
10ml mint essence
1 tbsp whipped cream, optional
1 peppermint crisp chocolate bar, crushed
1. Place the milk, ice cream, chocolate
syrup and mint essence (in this order)
into the Blitz2Go bottle; securely
attach the removable wave blade
holder to the bottle.
2. Secure the bottle onto the motor base
and press the ‘PULSE/BLITZ’ button for
30 seconds or until smooth.
3. Unscrew the removable wave blade
holder.
4. Pour into a tall glass, top with whipped
cream and crushed peppermint crisp.
19
Page 21

Double Chocolate Milkshake
Makes 1 serve
200ml chocolate milk
3 scoops double choc ice cream
30ml chocolate syrup
1x flake chocolate bar, grated
1. Place the milk, ice cream, chocolate
syrup and flaked chocolate bar into
the Blitz2Go bottle (in this order);
securely attach the removable wave
blade holder to the bottle.
2. Secure the bottle onto the motor base
and press the ‘PULSE/BLITZ’ button for
30 seconds or until smooth.
3. Unscrew the removable wave blade
holder and at tach the drinking lid on
top of the bottle.
Vanilla Milkshake
Makes 1 serve
200ml milk
3 scoops vanilla ice cream
1 tsp vanilla essence
1. Place the milk, ice cream and
vanilla essence (in this order) into the
600ml Blitz2Go bottle; securely attach
the removable wave blade holder to
the bottle.
2. Secure the bottle onto the motor base
and press the ‘PULSE/BLITZ’ button for
30 seconds or until smooth.
3. Unscrew the removable wave blade
holder and at tach the drinking lid on
top of the bottle.
20
Page 22

Recipes Using the Removable
Wave Blade Holder with
Cocktail Shaker
NOTE: The wave blade is
designed to shake ice cubes,
frozen/fresh fruit, or alcohol
inside the cocktail shaker for
a chilled result. For a blended
result use the original Blitz2Go
blade that is included with all
KBL20 and KBL63 Kambrook
Blitz2Go personal blenders
(blender sold separately).
NOTE: All the cocktail shaker
recipes in this book use the
wave blade for a shaken,
chilled result. They do not use
the original Blitz2Go blade
that is included with all KBL20
and KBL63 Kambrook Blitz2Go
personal blender (blender sold
separately).
NOTE: The maximum capacity
of the cocktail shaker is 300ml.
All recipes in this book do not
exceed this capacity. When
making your own cocktail
creations, make sure the recipe
does not exceed 300ml.
French Martini
Makes 1 serve
50ml vodka
15ml Chambord liqueur
100ml pineapple juice
3 cubes ice
1. Place the vodka, Chambord,
pineapple juice and ice into the
cocktail shaker; securely attach the
removable wave blade holder to the
sh aker.
2. Secure the shaker onto the motor
base and press the ‘PULSE/BLITZ’
button for 15 seconds or until smooth.
3. Unscrew the removable wave blade
holder and at tach the straining lid on
top of the shaker.
4. Strain the cocktail into a martini glass.
21
Page 23

Passionfruit Mojito
Makes 1 serve
1 tsp caster sugar
½ lime, cut in quarters
1 passionfruit, pulp only
30ml vodka
60ml white rum
3 cubes ice
½ cup lemonade
1 cup crushed ice
1. Place the sugar, lime, passionfruit,
vodka, rum and ice into the cocktail
shaker; securely attach the removable
wave blade holder to the shaker.
2. Secure the shaker onto the motor
base and press the ‘PULSE/BLITZ’
button for 15 seconds or until shaken.
3. Unscrew the removable wave blade
holder and at tach the straining lid on
top of the shaker.
4. Strain cocktail into a large glass, filled
with crushed ice and lemonade.
Cosmopolitan
Makes 1 serve
30ml vodka
15ml Cointreau or Triple Sec
30ml cranberry juice
½ lime
3 cubes ice
5cm orange rind
1. Place the vodka, Cointreau, cranberry
juice, lime and ice into the cocktail
shaker; securely attach the removable
wave blade holder to the bottle.
2. Secure the shaker onto the motor
base and press the ‘PULSE/BLITZ’
button for 15 seconds or until shaken.
3. Unscrew the removable wave blade
holder and at tach the straining lid on
top of the shaker.
4. Strain cocktail into a martini glass and
garnish with a thin slice of orange rind.
22
Page 24

Whisky Sour
Makes 1 serve
60ml whisky
30ml fresh lemon juice
30ml sugar syrup
1 maraschino cherry
5cm lemon rind
1. Place the whisky, lemon juice and
sugar syrup into the cocktail shaker;
securely attach the removable wave
blade holder to the bottle.
2. Secure the shaker onto the motor
base and press the ‘PULSE/BLITZ’
button for 15 seconds or until shaken.
3. Unscrew the removable wave blade
holder and at tach the straining lid on
top of the shaker.
4. Strain cocktail into a martini glass and
garnish with a thin slice of lemon rind.
Toblerone
Makes 1 serve
30ml Kahlua
30ml Cream De Cacao (chocolate
liqueur)
30ml Frangelico
30ml Baileys
80ml pouring cream
3 cubes ice
1 tbsp chocolate syrup
1 tsp honey
1. Place the Kahlua, Cream De Cacao,
Frangelico, Baileys, cream and ice
into the cocktail shaker; securely
attach the removable wave blade
holder to the bottle.
2. Secure the shaker onto the motor
base and press the ‘PULSE/BLITZ’
button for 15 seconds or until shaken.
3. Unscrew the removable wave blade
holder and at tach the straining lid on
top of the shaker.
4. In a tall glass, drizzle honey and
chocolate syrup around the inside,
turning the glass as it drizzles in. Strain
cocktail into the glass to serve.
23
Page 25

Virgin Tropical Punch
Makes 1 serve
150ml pineapple juice
¼ apple diced
½ passionfruit, pulp and seeds
½ lime cut in half
¼ mango diced
¼ orange diced
3 cubes ice
100ml lemonade
1. Place the pineapple juice, apple,
passionfruit, lime, mango, orange and
ice into the cocktail shaker; securely
attach the removable wave blade
holder to the bottle.
2. Secure the shaker onto the motor
base and press the ‘PULSE/BLITZ’
button for 15 seconds or until shaken.
3. Unscrew the removable wave blade
holder and pour the shaken cocktail
with pieces of fruit into a large glass
and top with lemonade.
NOTE: This recipe does not
need to be strained; the diced
fruit makes it a punch.
24
Page 26

Notes
25
Page 27

Notes
26
Page 28

Notes
27
 Loading...