

Page 1

LT-32EM75
(32" class/ 31.51 diagonal)
INSTRUCTIONS
Before operating the un it , pl ea se r ead this manual thoroughl y.
ATTENTION
If you purchase a univers al r em ot e co ntrol from your local retai le r, pl ea se c ontact the remote manufac tu re r fo r th e
required programmin g co de .
AI R/C ABL E MODE SE LEC TIO N
When shipped from the fac to ry, the Signal Type o pt io n is s et to the “Cable” (Cable Tele vision) mode.
If not using Cable TV. set this m en u op ti on t o the “Air” position.
IF CONTACT W ITH CUSTOMER SE RVICE IS REQUIRED
PLEASE HAVE THE MODEL NUM BER READY PRIOR TO THE C AL L
CUSTOMER SE RVICE - 1-800-289-0984
FOR RECYCLING INFORMATION, PLEASE CONTAC T CUSTO ME R SE RVICE.
CUSTOMER SE RVICE -1-800-289-0984
ENGLISH
Pleas e read th e impor tant
notic e for ene rgy eff ici en cy
on page 5 .
ENTER
1 2
3
4
5
6
7 8
9
0
+CH+
VOL
MENU
SOURCE
TV
DISPLAY
S.M
P.M
CH LIST
EXIT
EPGASPECT FAV
REPEAT
RECALL
YPbPr
CC MTS VGA
DTV
STRENGTH
TV AV HDMI
SLEEPUSB VOL VOL
Page 2
-1-
SA FET Y AND WAR NIN GS
TO REDUCE THE RISK OF ELECTRIC SHOCK, DO
NOT REMOVE COVER (OR BACK).NO USER
SERVICEABLE PARTS INSIDE. REFER SERVICING
TO QUALIFIED SERVICE PERSONNEL.
RISK OF ELECTRIC SHOCK
DO NOT OPEN!
CAU TION
CAUTION:
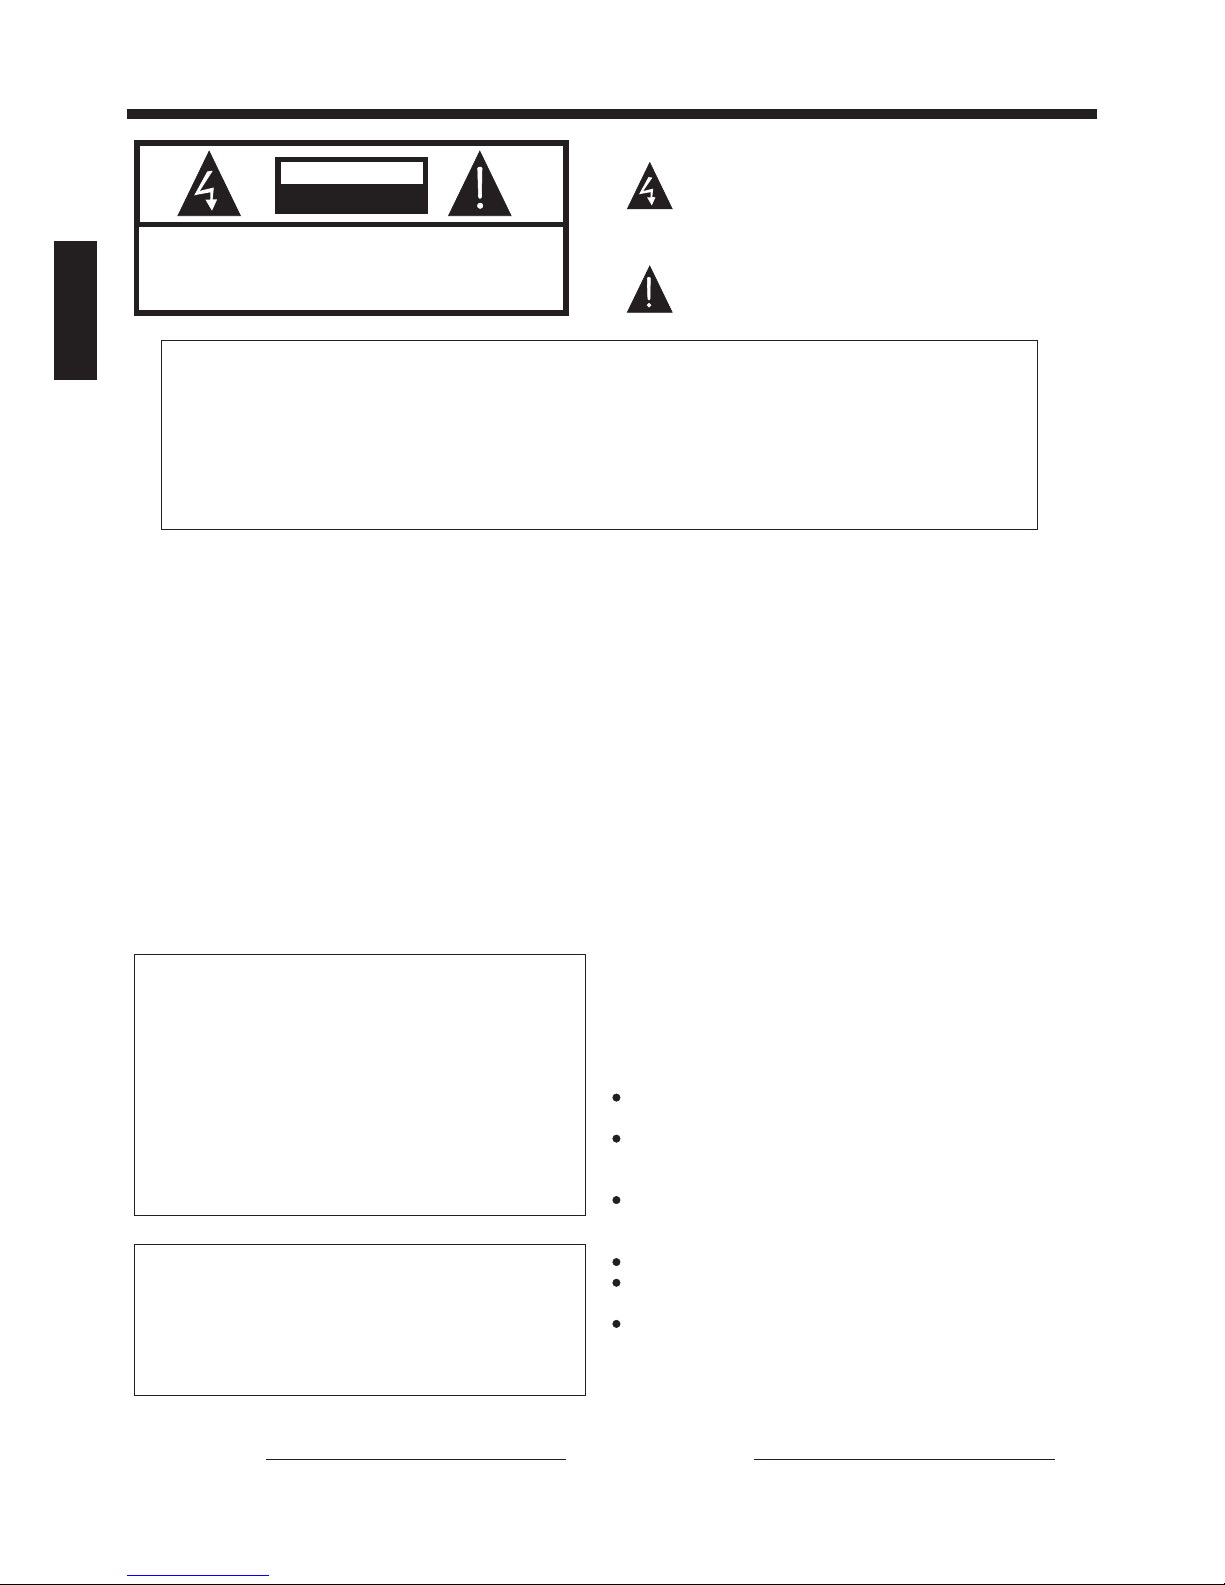
The lightning flash with arrowhead symbol,within an
equilateral triangle is intended to alert the user to the presence
of uninsulated dangerous voltage within the product’s
enclosure that may be of sufficient magnitude to constitute a
risk of electric shock.
The exclamation point within an equilateral triangle is
intended to alert the user to the presence of important
operating and maintenance (servicing) instructions in the
literatrue accompanying the appliance.
TO PREVENT FIRE OR SHOCK HAZARD, DO NOT EXPOSE THIS APPLINACE TO RAIN
OR MOISTURE.
TO PREVENT THE SPREAD OF FIRE, KEEP CANDLES OR OPEN FLAMES AWAY FROM
THIS PRODUCT AT TIMES.
WARNING:
TO PREVENT ELECTRIC SHOCK. DO NOT USE THIS POLARIZED PLUG WITH AN
EXTENSION CORD, RECEPTACLE OR OTHER OUTLET UNLESS THE BLADES CAN BE
PULLY INSERTED TO PREVENT BLADE EXPOSURE.
CAUTION:
This equipment has been tested and found to comply with the limits for a Class B digital device,
pursuant to Part 15 of the FCC Rules. These limits are designed to provide reasonable protection
against harmful interference in a residential installation. This equipment generates, uses and can
radiate radio frequency energy and, if not installed and used in accordance with the instructions,
may cause harmful interference to radio communications.
However, there is no guarantee that interference will not occur in a particular installation. if this
equipment does cause harmful interference to radio or television reception, which can be determined
by turning the equipment off and on, the user is encouraged to try to correct the interference by one
or more of the following measures:
- Reorient or relocate the receiving antenna.
- Increase the separation between the equipment and receiver.
- Connect the equipment into an outlet on a circuit different from that to which the receiver is
connected.
- Consult the dealer or an experienced radio/TV technician for help.
WARNING:
Changes or modifications not expressly approved by the party responsible for compliance with the
FCC Rules could void the user’s authority to operate this equipment.
CAUTION:
Important Note:
In the spaces below, enter the model and serial number
of your television (located at the rear of the television
cabinet). Staple your sales receipt or invoice to the inside
cover of this guide. Keep this user’s guide in a
convenient place for future reference. Keep the carton
and original packaging for future use.
Serial number:
Model number:
Location of the required marking
The rating sheet and the safety caution are on the rear of
the unit.
BATTERY PRECAUTIONS:
Batteries should not be exposed to excessive hea t su ch
as sunshine,fire or the like.
The remote control unit uses infrared beams to
transmit signals, so sunlight or fluoresce nt l ig ht o n
the remote sensor may shorten operating distan ce .
Incorrect use of batteries may cause them to leak or
burst. Read the battery warnings and use the batte ri es
properly.
Do not mix old and new batteries.
Do not mix alkaline, standard (carbon-zinc), o r
rechargeable, (Ni-Cd, Ni-MH, etc.) batteries.
Remove batteries if the remote control will not be
operated for an extended period of time.
ENGLISH
Declaration of Conformity
Model Number:
Trade Name: JVC
Responsible party:
Address: 3471 N. Union Dr.
Olney, Illinois 62450
Telephone Number: JVC Toll Free # 1-800-289-0984
This device complies with Part 15 of FCC Rules.
Operation is subject to the following two conditions:
(1)This device may not cause harmful interference, and
(2)This device must accept any interference received,
including interference that may cause undesired operation.
LT-32EM75
SANSUI AMERICA, INC.
Page 3
-2-
SA FET Y AND WAR NIN GS
IMPORTANT SAFETY INSTRUCTION
The symbol indicates that dangerous
voltages constituting a risk of electric shock
are present within this unit.
The symbol indicates that there are
important operating and maintenance
instructions in the literature accompanying
this unit.
To reduce the risk of fire or electric shock, do
not expose this apparatus to rain or moisture.
WARNING:
Important Safety Instructions
1) Read these instructions.
2) Keep these instructions.
3) Heed all warnings.
4) Follow all instructions.
5) Do not use this apparatus near water.
6) Clean only with dry cloth.
7) Do not block any ventilation openings, install in
accordance with the instructions.
8) Do not install near any heat sources such as
radiations, heat registers, stoves, or other
apparatus (including amplifiers) that produce heat.
9) Do not defeat the safety purpose of the polarized
plug. If the provided plug does not fit into your
outlet, consult an electrician for replacement of the
obsolete outlet.
10) Protected the power cord from being walked on
or pinched particularly at plugs, convenience
receptacles, and the point where they exit from the
apparatus.
11) Only use attachments/accessories specified by
the manufacturer.
12) Unplug this apparatus during lighting storms or
when unused for long periods of time.
13) Refer all servicing to qualified service
personnel. Servicing is required when the
apparatus has been damaged in any way, such as
power-supply cord or plug is damaged, liquid has
been spilled or objects have fallen into the
apparatus, the apparatus has been exposed to rain
or moisture, does not operate normally, or has been
dropped.
14) Mains plug is used as the disconnect device, the
disconnect device shall remain readily operable.
15) The ventilation should not be impeded by
covering the ventilation openings with items, such
as newspapers, table-cloth, curtains, etc.
16) No naked flame sources, such as lighted
candles, should be placed on the apparatus.
17) Attention should be drawn to the
environmental aspects of battery disposal.
18) The use of apparatus in moderate climate.
19) The apparatus shall not be exposed to dripping
or splashing and that no objects filled with liquids,
such as vases, shall be placed on the apparatus.
20) Use only with a cart , stand, tripod, bracket, or
table specified by the manufacturer, or sold with
the apparatus. When a cart is used, use caution
when moving the cart/apparatus combination to
avoid injury from tip-over.
The batteries shall not be exposed to excessive
heat such as sunshine, fire or the like.
WARNING:
The excessive sound pressure from earphones
and headphones can cause hearing loss.
WARNING:
This symbol indicates that this product
incorporates double insulation between
hazardous mains voltage and user accessible
parts. When servicing use only
identical replacement parts.
This marking indicates that this product should
not be disposed with other household wastes
throughout the EU. To prevent possible harm to
the environment or human health from
uncontrolled waste disposal, recycle it
responsibly to promote the sustainable reuse of
material resources. To return your used device,
please use the return and collection systems or
contact the retailer where the product was
purchased. They can take this product for
environmental safe recycling.
ENGLISH
Page 4
-3-
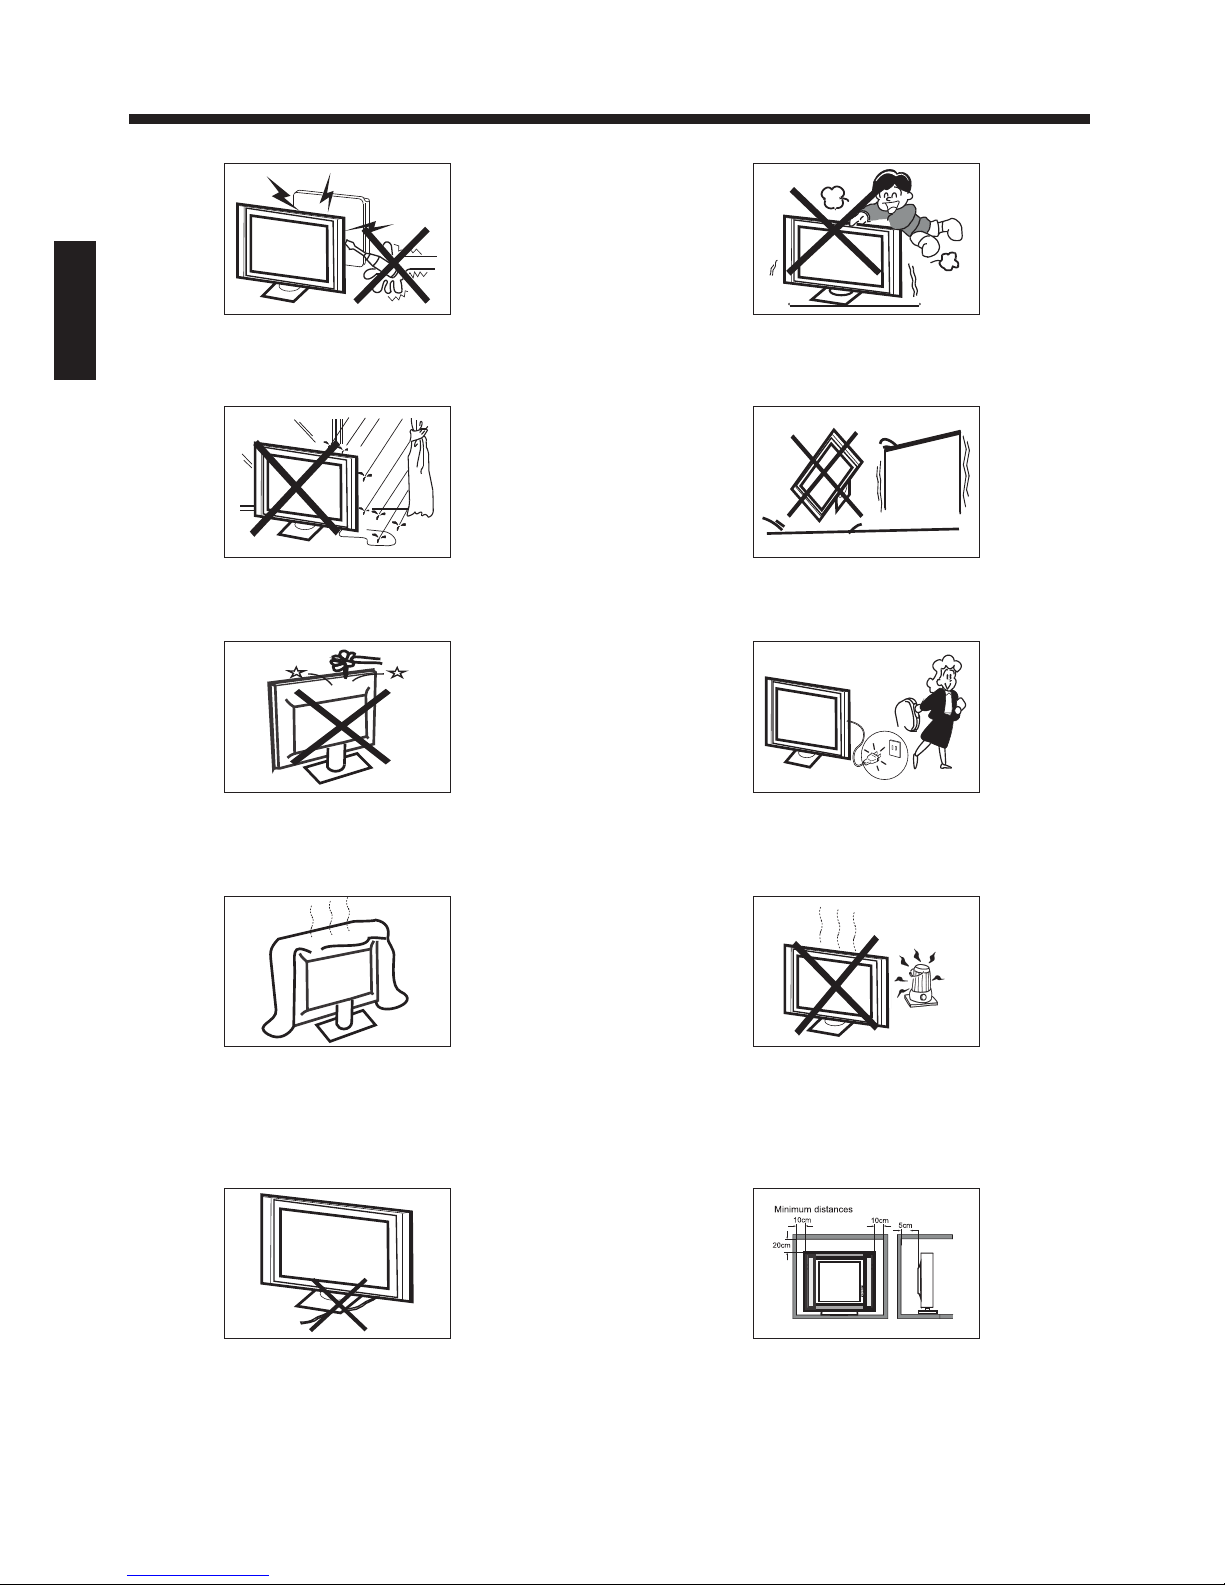
High voltages are used in the operation of this television
receiver. Do not remove the cabinet back from your set.
Refer servicing to qualified service personnel.
SA FET Y AND WARNINGS
To prevent fire or electrical shock hazard, do not expose
the television receiver to rain or moisture.
Do not drop or push objects into the television cabinet
slots or openings. Never spill any kind of liquid on the
television receiver.
Do not block the ventilation holes in the back cover.
Adequate ventilation is essential to prevent failure of
electrical components.
Do not trap the power supply cord under the television
receiver.
Never stand on, lean on, or suddenly push the television or
its stand. You should pay special attention to children.
Serious injury may result if it falls.
Do not place your television on an unstable cart, stand,
shelf or table. Serious injury to an individual , and damage
to the television, may result if it falls.
When the television receiver is not used for an
extended period of time, it is advisable to discon ne ct
the AC power cord from the AC outlet.
Avoid exposing the television receiver to direct sunlight
and other sources of heat. Do not stand the television
receiver directly on other products which give off heat,
e.g. video cassette players and audio amplifiers. Do not
place naked flame sources, such as lighted candles on
the television.
Dim:515*320m m(不包 括底座)
If the television is to be built into a compartment or similar
enclosure, the minimum distances must be maintained. Heat
build-up can reduce the service life of your television, and
can also be dangerous.
ENGLISH
Page 5

Contents
-4-
ENGLISH
Safety and warnings...................................................................................... 1-3
Introduction................................................................................... ..............5
Installation...................................................................................................6-9
.................................................................................................. 10
Remote Control............................................................................ ...............11-12
Operation.....................................................................................................13-16
Trouble Shooting..........................................................................................17
Wall Mount
Page 6
-5-
INTRODUCTION
Main features
Infrared Remote Control............. .. .. ..
1
User’s M anual ................................
1
Battery(AAA).................. .. .. .. . 2.........
Accessories
Power Cable..................... .. .. .. .. .. .. .... 1
”wide screen for a complete home theater experience
Super slim LCD TV with LED backlight
1366 x 768 native resolution for HD performance
Integrated ATSC TV tuner for HDTV broadcast reception
Beautiful color depth with a dynamic contrast ratio of
HDMI inputs for true digital connections
VGA port for connection to PC
32
1200:1
Triple
®
Specifications
Resolution:
Aspect Ratio:
TV System:
Video Signal System:
Receiving Channel:
Input Power Voltage:
Maximum Power Consumption:
YCb(Pb)Cr(Pr) Input
Horizontal definition(TV line)
Viewing Picture Size(diagonal)
1366x768
16:9
45W
Audio Output Power(THD 7%): 2 x 8W
NTSC/PAL
Cable :1-135/ Air: 2-69(ATV&DTV)
Analog RGB(VGA) Input
Side High-Definition Multimedia Interface(HDMI) Input x 3
Audio Input
Composite Video Input >=350
x 1
Others (HDMI1,HDMI2,VGA) >=400
Component (YPbPr) Video Input >=400
31.51 inches
Rear Composite Video Input
AC 100-240V 50/60Hz
ATSC Digital system and NTSC Analog system
Headphone Output
Coaxial Output
USB Input
Dimensions (approx)
with stand fitted(W.H.D)
732 x 200 x 472 mm
28.8 x 7.9 x 18.6 inch
Net weight 5.0kg (11 lbs) with STAND
x 1
x 1
x 1
x 1
x 1
x 2
Screws........................ .. .. .. .. .. . .......... 4
The terms HDMI and HDMI High-Definition Mult im ed ia I nt er fa ce , an d the HDMI Logo are trademarks or
registered trademarks of HDMI Licensing LLC in t he U ni te d St at es a nd o th er countries.
Manufactured under license from Dolby Labora to ri es . Do lb y an d th e double-D symbol are trademarks of
Dolby Laboratories.
Base stand...................... .. .. .. .. .. .. .. 2....
ENGLISH
Enabling certain features and functionality in t hi s TV(
may increase its energy consumption, possibly beyond the limits required for ENERGY STAR qualification.
Picture Mode "Personal/Vivid/Standard/Sports/Theater")
R
Page 7

INSTALLATION
Panel keys
-6-
Front panel
1. Remote control sensor.
2. Indicator LED:
RED STAND BY.
3. Key board.
REAR Connections
SIDE Connections
1.SOURCE:
Display the input source menu.In
MENU mode,press“SOURCE”to
confirm the selected item.
2.MENU:
Display main MENU.
3.V+/V-
Adjust sound level.
In MENU mode, press“V+”or“
V-”to adjust the item that you selected.
4. CH+/CH-
In TV mode,press“CH+”or“CH-”
to change the channel up and down.
In MENU mode, press “CH+”or
“CH-”to select items.
5. STANDBY
Press this button to turn the unit ON from
STANDBY mode.
Press it again to turn the set back to
STANDBY.
30 30
VOL CH
YPbPr
CC MTS VGA
DTV
STRENGTH
TV AV HDMI
EPG
CH LIST
FAV
TV
DISPLAY
S.M
P.M
ENGLISH
SOURC E MENU V- V+ CH- CH+ St andby
1 2 3 4 5
All the terminals are (from left to right):
HDMI1, HDMI2, HDMI3, USB, VGA, PC AUDIO, HEADPHONE, COAXIAL, RF.
Note: When HDMI has an input signal coming from a DVI source then the audio input signal must be
connected to the PC audio input.
R F
COA XIALPC AUD IOVGAUSB
HDM I3
HDM I1 HDM I2
HEA DPHON E
All the terminals are (from left to right):
POWER SOCKET, VIDEO, AUDIO INPUT, YPbPr INPUT.
Note: AV and component (YPbPr) share the R and L audio inputs.
(COMPONENT)
AC- INPUT
100 -240V ~50/6 0Hz
VID EO
L R
COM POSIT E
Y
Pb
Pr
COM PONEN T
3
1
2
Page 8

Antenna
INSTALLATION
Note:
Aerial connections:IEC(female).
Input impendance:75 unbalanced.
-7-
STEPS:
PC
Be sure both the TV and computer are set to
Power off.
1.Connect VGA and audio cable.
2.Connect the power cord.
3.Power on the TV, switch to PC mode.
4.Power on the PC.
This sequence is very important.
ENGLISH
R F
COAX IALPC AUDI OVGAUSB
HDMI 3
HDMI 1 HDMI 2
HEAD PHONE
Page 9

INSTALLATION
-8-
Prepare to place the TV with the display side down on a flat surface. Due to the size and weight of this
TV, the use of 2 people is recommended when moving it. Ensure the table or desk you use provides
a flat, totally clean surface, and use a soft cloth between the face of the TV and the table to protect the
TV's screen.
1. Locate the 2PCS of into the gap in the bottom of the TV , and check that it is
securely held in place as per a) below.
2.Lock 4PCS screws in the designated location as per b) below and check each screw is firmly
tightened
the base stand
Base Stand Assembly Instruction
ENGLISH
the base stand
a)
b)
4 x Screws
Page 10

INSTALLATION
-9-
AV Equipment
You can use the input terminals on TV set rear as follows.
It can be connected to the following appliances: VCR, multi disc player, DVD, camcorder, video game
or stereo system, etc.....
YPbPr can support these video formats:480i,576i,480p,576p,720p,1080i.
ENGLISH
HDMI
Yellow (video)
White(audio L)
Red(audio R or Pr)
Y
W
R
W R
G
B
R
Blue(Pb)
Green(Y)
B
G
VIDEO EQUIPMENT with YPbPr
W
R
G
B
R
W
R
W R
TO AUD IO OUTP UTS
VID EO EQUI PMENT
TO VI DEO
OUT PUTS
AC- INPUT
100 -240V ~50/6 0Hz
VID EO
L R
COMP OSITE
Y
Pb
Pr
COMP ONENT
R F
COA XIALPC AUD IOVGAUSB
HDM I3
HDM I1 H DMI2
HEA DPHON E
Page 11

Wall Mount
Dimensions for Mounting Hole Pattern
A wall mount kit (purchased separately) would allow you to mount your JVC
TV on the wall. For detailed information on installing the wall mount, refer
to the instructions provided by the wall mount manufacturer. It is strongly
recommended to contact a technician for professional assistance for wall mount
installation. is not responsible for any damagJVC e to the product or injury to
yourself or others resulting from the wall-mounting.
- This TV is compatible with a 200mm x 100mm mounting hole pattern.JVC
- Do not mount your TV at more than a 15 degree tilt.JVC
- Always use two people to mount the TV to a wall.
- Do not install your Wall Mount Kit while your TV is turned on. It may result in
personal injury due to electric shock.
- 4 pcs of type screws are required for installing the wall mount bracket to M4
your TV. Do not use screws that are longer than 10 mm. Screws that JVC
are too long may cause damage to the inside of the TV set.
- Do not fasten the screws too tight for this may damage the TV or cause the
TV to fall, resulting in personal injury. is not liable for these kinds of JVC
incidents.
Instruction for Wall Mount
-10-
ENGLISH
200
68.3
Page 12

-11-
REMOTE CONTROL
1. POWER
To set the TV standby or on.
2. MUTING
Press to disable or enable the sound output.
3. ASPECT
To change picture aspect .
4. FAV
Used to access your favourite channels in digital
TV mode.
5. CH LIST
Used to display the channel list.
6: EPG
Display all the information of DTV programs.
7. NUMBER KEY
For direct access to program.
8. RECALL
To access the previously viewed program.
9. VGA
Hot key directly go to VGA source.
10. MTS
Switch the sound stereo.
11. CC
Enable or disable the CC function.
12. YPbPr
Hot key directly go to YPbPr source.
13. DTV STRENGTH
Used to display the DTV signal strength menu.
14. TV
Hot key directly go to TV source.
15. AV
Hot key directly go to AV source.
16. HDMI
Hot key directly go to HDMI source.
17. USB
Press to launch the USB multimedia mode
18. SLEEP
Press to display the sleep timer option.
19. VOL
Adjust volume to 50.
20. VOL
Adjust volume to 75.
21. SOURCE
Press to display the Input Source List, to switch
between the different inputs to the television.
22. MENU
Press to display the TV main menu.
23. EXIT
Used to exit menu.
24. TV DISPLAY
Displays/removes the program Information.
25. CURSOR
To move within the menu.
26.
Confirms selection.
ENTER
1
6
5
7
8
9
10
16
15
20
19
21
26
24
28
29
34
33
38
37
2
3
4
12
11
13
14
17
18
22
25
23
27
30
31
32
35
36
ENTER
1 2
3
4
5
6
7
8
9
0
+
CH
+
VOL
MEN U
SOU RCE
TV
DISP LAY
S.M
P.M
CH LI ST
EXI T
EPGASP ECT FAV
REP EAT
REC ALL
YPb Pr
CC MTS VGA
DTV
STRE NGTH
TV AV H DMI
SLE EPUSB
VOL VOL
39
ENGLISH
Page 13

27. VOL+/-
To adjust sound level.
28. CH+/CH-
To access the next or previous Program.
29. S.M
To switch sound mode.
30. P.M
To switch picture mode.
31. REWIND
32. FAST FORWARD
33. SKIP BACKWARD
Press to skip the previous file or Track in USB Mode.
34. SKIP FORWARD
Press to skip the next file or track in USB Mode.
35. PLAY
Press the Play Button in USB Mode to begin or
continue Playback.
36. PAUSE
Press the Pause Button to pause play in USB Mode.
37. STOP
Press to Stop play in USB Mode.
38. REPEAT
Repeat play photo.
39. COLOR KEYS
Reserved keys.
Reserved keys.
Reserved keys.
-12-
REMOTE CONTROL
ENTER
1 2
3
4
5
6
7
8
9
0
+
CH
+
VOL
MEN U
SOU RCE
TV
DISP LAY
S.M
P.M
CH LI ST
EXI T
EPGASP ECT FAV
REP EAT
REC ALL
YPb Pr
CC MTS VGA
DTV
STRE NGTH
TV AV H DMI
SLE EPUSB
VOL VOL
1
6
5
7
8
9
10
16
15
20
19
21
26
24
28
29
34
33
38
37
2
3
4
12
11
13
14
17
18
22
25
23
27
30
31
32
35
36
39
ENGLISH
Page 14

-13-
OPERATION
MEN U
CC Mode C C Off
Basic S elect ion CC1
Advan ced Sel ectio n Servi ce1
Optio n
1. PICTURE MENU
3. TIME MENU
In this menu,you can adjust the picture effect here,
such as contrast, brightness, etc.
Press to select, press to adjust.ENTER
1.1 VGA Setting
When PC Mode is available.
Press button to select PC advanced setting
1) H-Pos: Adjust the horizontal position of the screen.
2) V-Pos: Adjust the vertical position of the screen.
3) Clock: Fine tune the screen width.
4) Phase: Fine tune the phase of the screen. Usually
don't adjust this item.
5) Auto: Auto adjust to fit the screen.
ENTER
Note:
1) If you want to adjust contrast, brightness, c ol or, and
sharpness, the picture mode must return to perso na l
status.
2) Tint is avaliable in NTSC system only.
3) There are three color temperature modes can be
selected: Normal,Warm and Cool.
2.AUDIO MENU
In this menu, you can ajust the sound effect here.
Press to select, press to adjust.ENTER
In this menu, you can adjust the sleep timer, t im e zone,
etc. Press to select,press to adjust.ENTER
Note:
1) Time zone, DST and the clock are available in ATSC
programming only, and the Clock can't be adjust.
4.OPTION
In this menu, you can ajust the Menu language, Close
Caption, Restore Default etc.
Press to select,press to adjust.
MENU
ENTER
4.1 Closed Caption
Note:
1) There are five Sound Modes can be
selected:Standard,Music,Movie,Sp or ts a nd P er so na l
2) Audio language is available in ATSC/TV
Programming only.
3) Auto volume is available only when the input signal
volume is too large or there is distortion.
MEN U
VGA Set ti ng
Auto
Color Tem per at ure Nor mal
Aspec t Ratio A uto
Noise R educt ion Middl e
Pictu re Mode E ne rgy S aving
< >
Pic ture
VGA Sett ing
*
Only u nder TV source, m enu will show ,
Unde r AV/C omponent/ HDMI1/HDMI2/VGA/
USB, m enu will not show .
ENGLISH
Audio L angua ge Engl ish
Digit al Outp ut
PCM
Surro und Sou nd
Off
Auto Vol ume
Off
Sound M ode Stan dard
Aud io
<
<
MTS Stere o
Tim e Zon e Pacif ic
DST Off
Tim e For ma t 12-h our
Clock ----/ --/-- - -
Sleep Ti mer Off
<
Tim e
<
Close d Capti on
Resto re Defa ult
Setup W izard
Menu La nguag e En gl ish
<
Opt ion
Softw are Upd ate
<
Note: The TV may not conform to the Energy Star
standard after Picture Mode is changed except
Energy Saving.
H-Pos
V-Pos
Clock
Phase
50
50
50
37
Page 15

-14-
OPERATION
Canada
Canad a Eng
MEN U
Canad a Fre
And use the ENTER key to switch lock/ unlock
feature.
Parental
Control
Rat ing Con tent
FV
(Fa ntasy
vio lence )
V
(Vio len ce)
S
(Se xual
sit uatio n)
L
(Ad ult
lan guage )
D
(Se xuall y
sug gesti ve
dia log)
Sug geste d
age
TV-Y (A ll
chi ldren )
TV-Y7 (Dire ct to
ord er chil dren)
TV-G( Gener al
aud ience )
TV-PG (Pare ntal
Gui dance
sug geste d)
TV-14 (Pare nts
str ongly
cau tione d)
TV-MA (Matu re
aud ience o nly)
X
X
X
X
X
X
X
X
X
X
X
X
Con tent
2) MPAA: Switching the m ov ie -r at in g co nt ro l le vel;
N/A, G, PG, PG-13, R, NC-17, X.
Rating
Descript ion
Age
G General au die nce s, All Ages admi tte d
PG
Parental G uid anc e sugge ste d. So me mate ria l may n ot be
Suitable f or ch ild ren.
PG-13
Parents st ron gly c autio ned . Som e mater ial . may b e
Inapprop ria te fo r child ren u nde r 13.
R
NC-17
X
Restrict . Und er 17 r equir es ac com panyi ng pa ren t or adul t
guardian (ag e var ies in so me ju ris dicti ons )
No one 17 and u nde r adm itted .
X is an order ra tin g tha t is unif ied w ith N C-17 bu t may b e
encoded in t he da ta of o rder mo vie s.
1) Canada English: Switching the English ratin g co nt ro l
level: EXEMPT, C, C8+, G, PG, 14+, 18+.
5.LOCK MENU
In this menu, you can change the password and adjust
the V-chip setting.
Enter the password, it will go into the lock menu.
Factory default password is 0000.
5.1 Change Password
old password: Input the old password.
new password: Input the new password.
3) Confirm password: Input the new passwor d ag ai n.
1) Enter
2) Enter
5.2 System Lock
When the System Lock switch is ON, the below
options listed below can be adjusted.
5.3 US
Press button the screen will display as follow.ENTER
1) TV: Press button, the screen wi ll d is pl ay a s
follows:
ENTER
5.4 Canada
Press button, the screen will be displayed as
follow:
ENTER
US
MPAA
TV
MEN U
ENTER
TV RATING
TV-Y
TV-Y7
TV-G
TV-PG
TV-14
TV-MA
ALL
ALL
ALL
ALL
ALL
ALL
FV
V
V
V
S
S
S
L
L
L D
D
BLO CK
1) CC Mode: Switching close caption mode.
2) Advanced selection: only ATSC program is
available.
3) Option: Used to edit CC font.
Note:
1) Restore Default: Restore Default will clear all t he
programs and reset all the settings to default value .
ENGLISH
Syste m Lock
US
Canad a
RRT S ettin g
Chang e Passw ord
Off
<
Loc k
Reset R RT
<
ENTER
Page 16

-15-
OPERATION
Auto Scan
Scan al l chann els
MEN U
Digit al chan nel onl y
Analo g chann el only
Rat ing
Des cript ion
Age
E Exe mpt: In clu des n ews, sp ort s, do cuments an d oth er in forma tio n
pro gramm ing: ta lk sh ows , music v ide os, a nd variety p rog ram ming.
C Chi ldren : Inten ded f or yo unger c hil dre n under the ag e of 8 ye ars .
Pay s caref ul atte ntion t o the mes t hat cou ld th rea ten t heir se nse o f
sec urity and wel l-b ein g.
C8+ C hildr en over 8 y ear s old : Conta ins n o por trayal of vi ole nce a s the
pre ferre d, acce pta ble , or only w ay to r eso lve confli ct; n or en coura ge
chi ldren t o imita te da nge rous ac ts wh ich t hey may see on t he sc ree n .
G Gen eral: C onsid ere d acc eptab le fo r all a ge groups, Ap pro pri ate
vie wing fo r the ent ire f ami ly, co ntains ver y lit tle v iolen ce, p hys ical,
ver bal or em otion al.
PG Parenta l Gui dan ce: Int end ed fo r a general au die nce , but may n ot be
suitable f or yo ung er chil dre n (un der the age of 8 ) bec aus e it coul d
con tain co ntrov ers ial t hemes o r iss ues .
14+ O ver 14 Years: Co uld c ont ain the mes w her e viole nce i s one o f the
dominant e lem ent s of the st ory lin e But it must be i nte gra l to the
dev el opme nt of plo t or ch ara cter. Langu age u sag e could b e pro fan e
and n udity , p resen t withi n the c ont ext of th eme .
18+ Ad ults: I nte nde d for viewer s 18 ye ars a nd olde r and m igh t conta in
dep ictio ns of vio len ce, w hich wh ile r ela ted to the dev elo pme nt of
plo t, char acter o r the mes , are int end ed fo r adult view ing . Cou ld
con tain gr aphic l ang uag e and por tra yal s of secreta ry an d nud ity.
2) Canada French: Switching the French-ratin g co nt ro l
level: E, G, 8ANS+, 13 ANS+, 16ANS+, 18ANS+.
Rat ing
Des cript ion
Age
E Exe mpt pro gra mmi ng
G General :A ll ag es an d child ren , con tains mini mal d ire ct viol enc e,
but may be int egr ate d into th e plo t in a hu morous or un rea lis tic
man ner .
8an s+ Gene ral but i nadvi sab le fo r young c hil dre n :May be view ed by a
wid e publi c audie nce, bu t cou ld co ntain s cen es di sturbing t o
chi ldren u nder 8 wh o can not d istin gui sh be tween imag ina ry an d
rea l situa tions . Rec omm ended f or vi ewi ng with pare n.
13a ns+ Ove r 13 year s: Coul d con tai n scene s of fr equ ent violen t sce nes
and i n tense v iolen ce.
16a ns+ Ove r 16 year s: Coul d con tai n frequ ent v iol ent scenes a nd vi ole nce.
18a ns+ Ove r 18 year s: Only f or ad ult v iewin g. Co uld c ontain fre que nt
vio lent sc enes an d extre me vi ole nce.
5.5 RRT setting
It can be adjusted when the TV is i n AT SC d ig it al
mode and the TV str ea m ha ve R RT information.
5.6 Reset RRT
It can be adjusted when the TV is i n AT SC d ig it al
mode and the TV str ea m ha ve R RT information.
6. CHANNEL MENU
In this menu, you can adjust digital and analog TV
Channels.
Press to select,press to adjust.ENTER
6.1 Air/Cable:
Select Air TV signal and cab le TV signal.
6.2 Auto Scan:
If it's the first time you use the TV, you should scan all
the TV ch an ne ls f ir st ,
Press button to confirm, you will see the menuENTER
When you select "Scan all channels", you will watch
below indication which auto scan is in progress.
6.3 Favorite:
Press button to choose/delete the favorite
channel.
6.4 Show/Hide
Press button to display or hide current
channel.
6.5 DTV signal
Display DTV strength signal. It can't be selected and
adjusted.
ENTER
ENTER
Auto Scan DT V+ATV
Found :
Analo g:
Digit al:
0
0
0
Progr amme( S)
Progr amme( S)
Progr amme( S)
1%... R F CH 2 DTV+ ATV
ENGLISH
Auto Sc an
Favor ite
Show/ Hide
DTV Sig nal
Air/C able Ca ble
Cha nnel
<
<
ENTER
Page 17

7.1
JPEG files.
Connect the USB DEVICE that contains the
OPERATION
7. Displaying JPEG files by using USB Port
You can display the JPEG fiels by using the
USB port that is located on the rear panel:
7.2 Press to enter inputsource menu.SOURCE
7.3 In the inputsource menu,Press to
select USB, and then press ENTER.
7.4 to select Photo, and then
press enter
Press
-16-
INPUTSOURCE
TV
AV
Compo nent
HDMI1
HDMI2
VGA
USB
ENT ER
PHO TO
USB 2.0
7.5 Press to select folder which
contains JEPG picture .
Sub M emu
1/1C: Picture \1 08 0\
Retu rn Up Fol der dat e or name pic t0001 -108 0.jp g
pict 0003- 108 0.jp g p ict00 04-1 080. jpg pict 0005 -108 0.jp g pi ct000 6-10 80.j pg
pict 0007 -108 0.jp g pi ct000 8-10 80.j pg pi ct000 11-108 0.jp g pic t0016 -1080. jpg
7.6 Press ENTER to dispay the picture in
the folder.
Sub M emu
1/1C: Picture \1 08 0\
Retu rn Up Fol der dat e or name pic t0001 -108 0.jp g
pict 0003- 108 0.jp g p ict00 04-1 080. jpg pict 0005 -108 0.jp g pi ct000 6-10 80.j pg
pict 0007 -108 0.jp g pi ct000 8-10 80.j pg pi ct000 11-108 0.jp g pic t0016 -1080. jpg
pic t0003 -108 0.jpg
ENGLISH
Page 18

Picture Audio
Snow Noise
antenna position, direction
or connection
Inspection Check
Interference
Noise
electronic equipment,car/
motorcycle,fluorescent light
Normal Picture
No Sound
Volume(check if mutin g fu nc ti on
is activated or if the audio system
connections are not correct)
No picture
Power cord is not inserted
Power switch is not opened
Contrast and brightness/volume
setup
Press standby key on the remote
control for inspecting
No Color Normal audio Color control
Picture
breaking up
Normal audio
or weak
retune channel
No Color
Noise
TVsystem
Normal audio
antenna position, direction
or connection
TR OUB LE SH OOT ING
Trouble phenomenon Symptom
Ghost
-17-
The LED TV panel is built with very high precision technology giving you fine picture details
in vibrant color. Occasionally, a few non-active pixels may appear on the screen as a fixed
point of red, green, blue, black or white. Please note this does not affect the performance of
the product.
No Sound
ENGLISH
Page 19

ENGLISH
32" TFT LC D TV
Sansui America In c.
Sansui America In c.
Sansui America In c
Sansui America In c.
Sansui America In c
Sansui America In c
Sansui America In c
Sansui America In c
Sansui America In c
Sansui America In c
Sansui Ame ri ca I nc
Sansui Ame ri ca I nc
Sans ui America Inc.
Sansui America In c
Page 20

Made in China
4 0 3 1 Q3 2 3 0 2 5
 Loading...