

Using a JVC Digital Camcorder with Windows XP
and Windows Movie Maker
When using JVC’s Digital Camcorder
with a DV connector, you are able to
download your video and picture files
to your Windows XP PC. This is best
to do anytime you would like to edit,
burn or even re-format the files to use
with another software. Follow these
simple instructions to transfer and
save the files to your PC.
Revised August 3, 2007
Before you begin:
Very Important - Please Read:
It is recommended that you copy the data from your JVC digital
camcorder to your Windows based PC. Once transferred, you may
use the provided Movie Maker software to perform functions as
described herein (please see the HELP feature for further
instructions). JVC shall not be responsible for the loss of any data
or other information or any damage to the Digital Camcorder or
PC.
• Make sure that you have the Movie Maker software installed, for
more information about obtaining this software please visit
www.microsoft.com
• Make sure that your camcorder is in the “OFF” position after
you have rewound the entire tape.
• Connect your JVC Digital Camcorder to your provided power
adapter to make sure your camcorder does not run out of
battery during the transfer process.
1
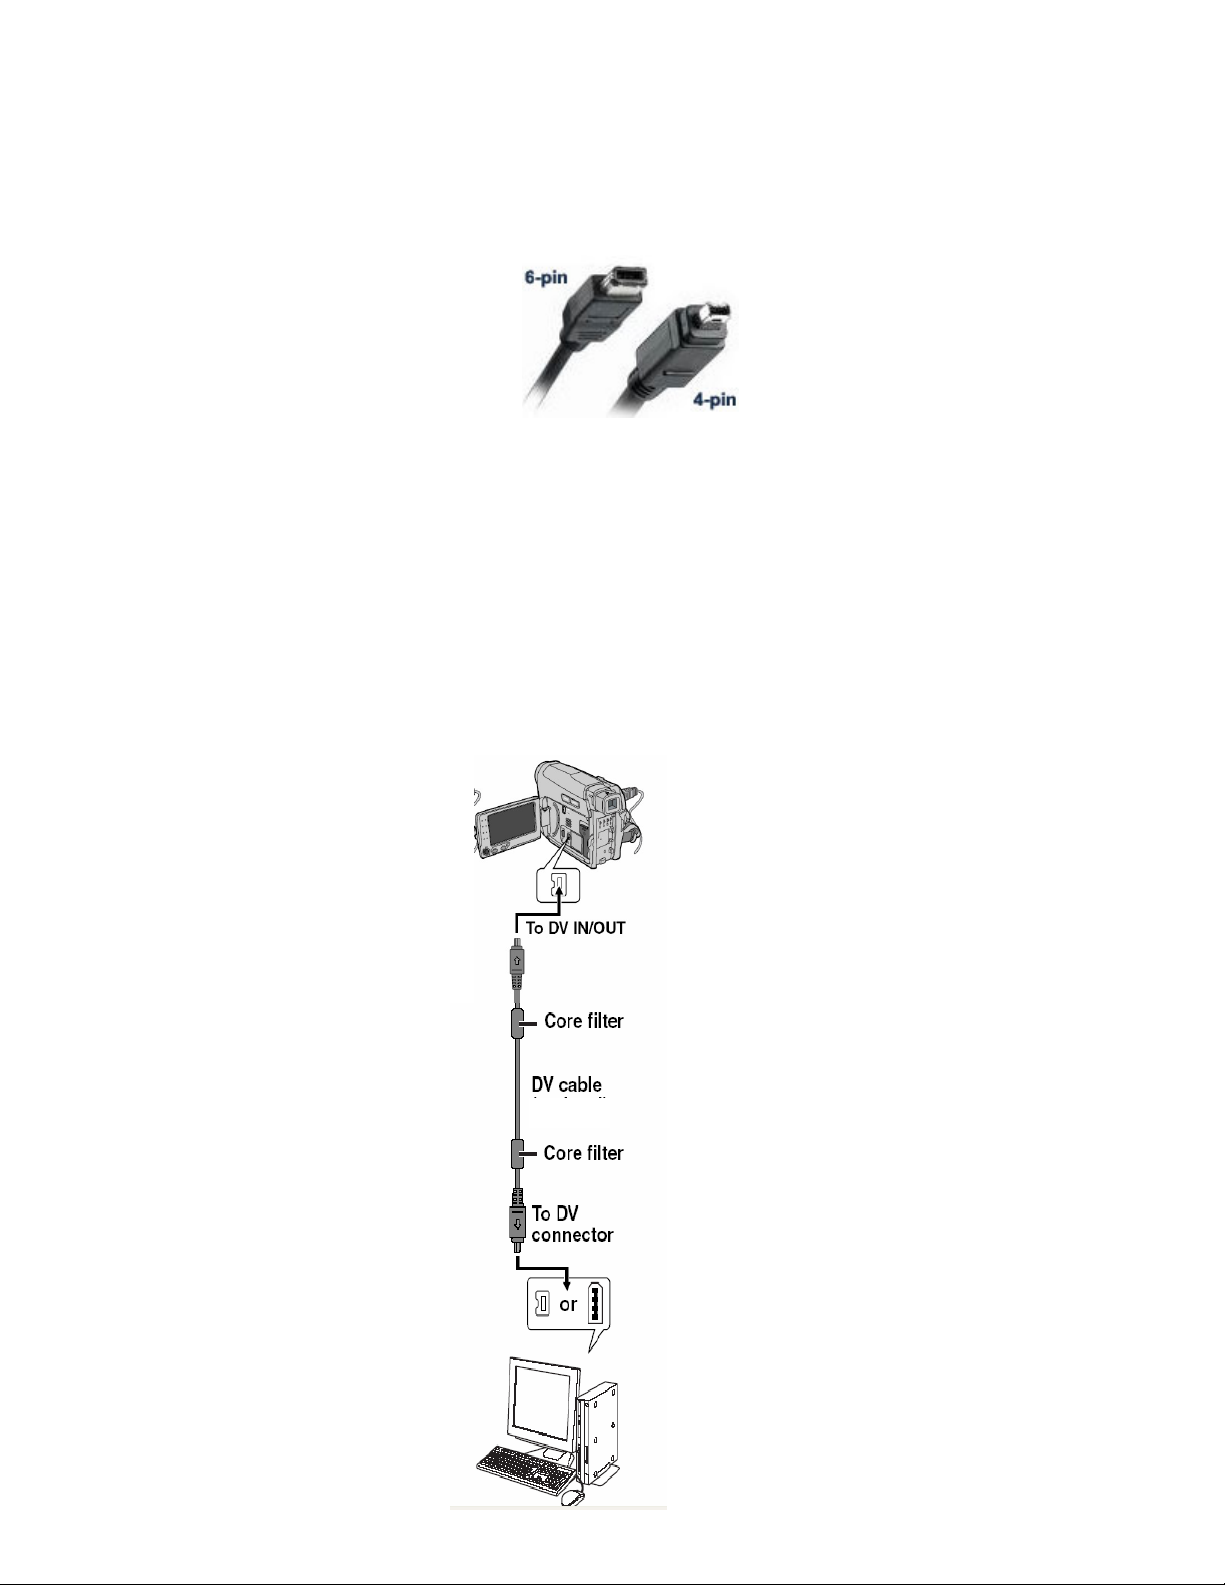
• For transfer of video from your Mini DV device you will require
a DV/Fire wire port on your PC and will also require a DV cable
(4-4 pin / 4-6 pin); see picture below:
Please note that your PC must also carry this port/connector, if
your PC is not equipped with this port/connector, visit your
local PC dealer such as Comp USA, Best Buy or Circuit City to
inquire about purchasing a fire wire card/port for your PC.
• Once determined that you have all necessary equipment,
proceed to connect your Camcorder to the PC using the
appropriate cable. See illustration below:
NOTE: ALL JVC Camcorders carry a 4 pin DV port/connector.
2

Open Windows Movie Maker from the START menu on your desk top
Turn the JVC Camcorder from the “OFF” position to the “PLAY”
position. You will see a window appear on the bottom right corner
advising you that the camcorder is being recognized, such as
illustration below:
A wizard should appear after the PC is done installing the new device,
if wizard does not appear click on “Capture from video device” such
as shown below:
3

Wizard:
Start by naming your project, followed by “NEXT”
Next select what you would like to capture, two options are available,
you can capture the entire tape automatically OR capture parts of a
tape manually. Select the option to show preview while transferring,
this has been circled on the illustration below. For these instructions
the option for parts of tape manually will be chosen. Hit “NEXT”
when option is chosen.
4

Using the DV controls located under the preview window you can
select the functions to Play, FF, Rewind and stop playback, you will
notice that playback will occur on the camcorder itself and the PC
both simultaneously. NOTE: You are not saving anything to the PC at
this point you are only viewing/watching the footage.
Position the tape where you would like to start importing/capturing
to the PC, click “START CAPTURE” when you would like to start
importing/capturing. Select “STOP CAPTURE” when you would like
for capturing to stop/end.
5

Select “FINISH” once you have obtained the video that you would like
from the tape.
A new window will advise you that video is importing the footage that
was captured from the camcorder to your PC, DO NOT hit “CANCEL”
as this will affect your video from being imported correctly
6

Once imported you will see the videos that were imported in the main screen of Windows
Movie Maker
Select the video with your mouse and click and drag it to the timeline
which is located at the bottom of your screen, once positioned over
the timeline release your mouse to drop the file
7

Your file has now been imported and you are now able to use
Windows Movie Maker to add effects, titles, music and transitions,
for assistance with this software please visit www.microsoft.com
You can also visit the “HELP” option located at the top for assistance
in using this software
8

An abundance of help and information is available through the Help
Topics
9
 Loading...