

juwel SeaSkin Instruction Manual
C
F
G
H
D
I
J
E
B
A
Instruction Manual
SeaSkim
www.juwel-aquarium.com

Introduction
Thank you for choosing a JUWEL Aquarium product.
Our products represent over 40 years experience in the manufacturing of aquariums
and their accessories applying the most modern production techniques in bringing
together the JUWEL Aquarium system, which is both easy to use and simple to
maintain.
Safety instructions:
This appliance can be used by children aged from 8 years and above and persons
with reduced physical, sensory or mental capabilities or lack of experience and
knowledge if they have been given supervision or instruction concerning use of
the appliance in a safe way and understand the hazards involved. Children shall
not play with the appliance. Cleaning and user maintenance shall not be made by
children without supervision.
Always unplug all immersed electrical equipment from mains before placing your
hands into the water.
Operation with the RC circuit breaker only, max. 30mA.
The power plugs of the electrical devices must not become moist. Connect the
power plugs to the power supply at such a height that the connection cable
forms a loop which would enable the water to drip down.
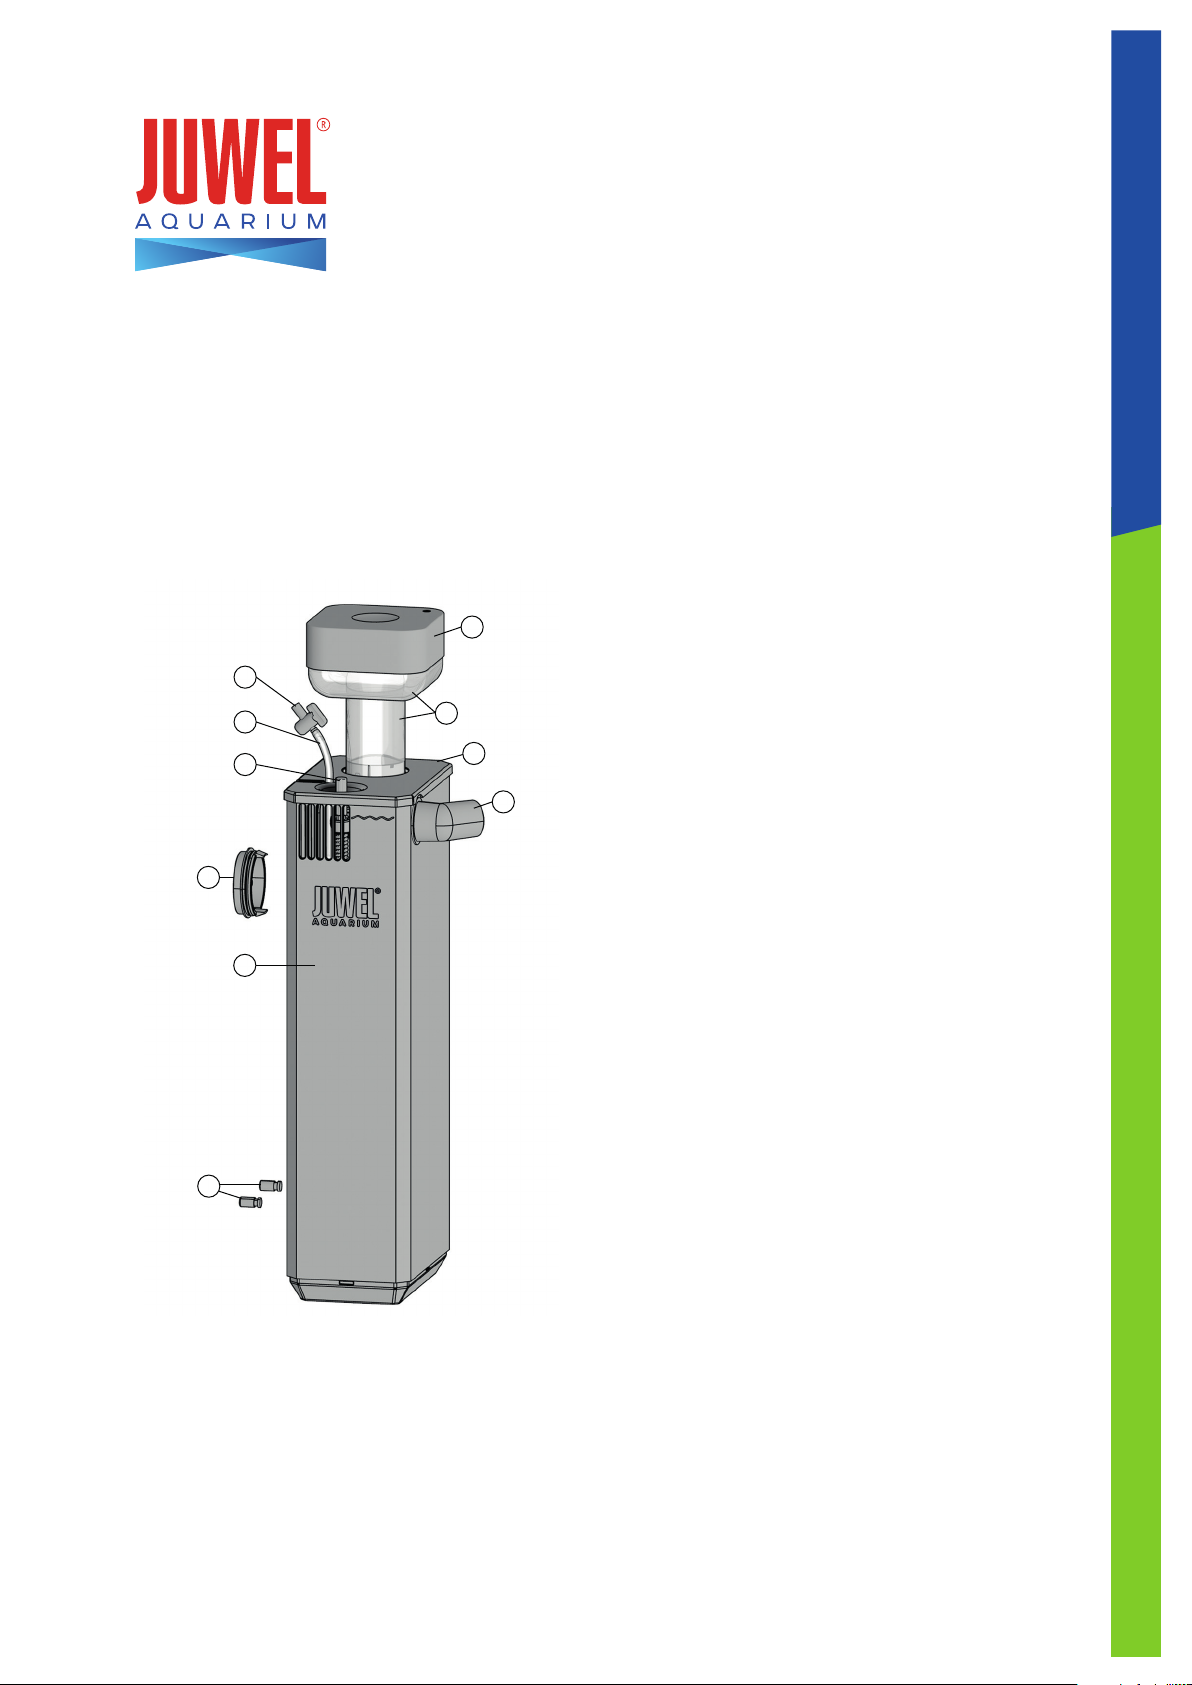
A)Foam collector unit cover
B)Foam collector unit
C)SeaSkim housing lid
D)Outlet nozzle
E)Air controller
F)Air hose
G)Air pressure controller
H)Mount
I)SeaSkim housing
J)Distance pieces
2
JUWEL SeaSkim
A
48 h
25 cm
B
The JUWEL SeaSkim combines the product benefits of an internal skimmer
characterised by the fact that no water exits the aquarium with a compact shape and
high skimming capacity.
With output of 1500 l/h, the integrated pump air intake of 150 l/h and consequently
ensures effective protein skimming for seawater aquariums with a volume of 100 - 500
litres. However, the JUWEL SeaSkim does not serve as filter system replacement in the
seawater aquarium.
The skimming utilises the fact that many so-called surface-active substances
accumulate at the boundary between water and air, especially in saltwater. This
includes proteins and their first stages of decomposition (these contain the undesired
elements nitrogen and phosphorus), but also smallest dirt particles (solids) etc.
Installation in JUWEL aquariums
The JUWEL SeaSkim is intended for installation in the JUWEL Rio, Lido, Vision and
Trigon aquariums. These Juwel aquariums are characterised by the fact that an opening
for the SeaSkim is already available and closed by means of a cap. Remove the cap
closing the cover.
Recommendation: Flap set for JUWEL SeaSkim
If the cover of your JUWEL aquarium does not include a special opening for
SeaSkim, we recommend that you contact your specialist retailer.
The matching flap set for SeaSkim can be purchased there as an original JUWEL
spare part.
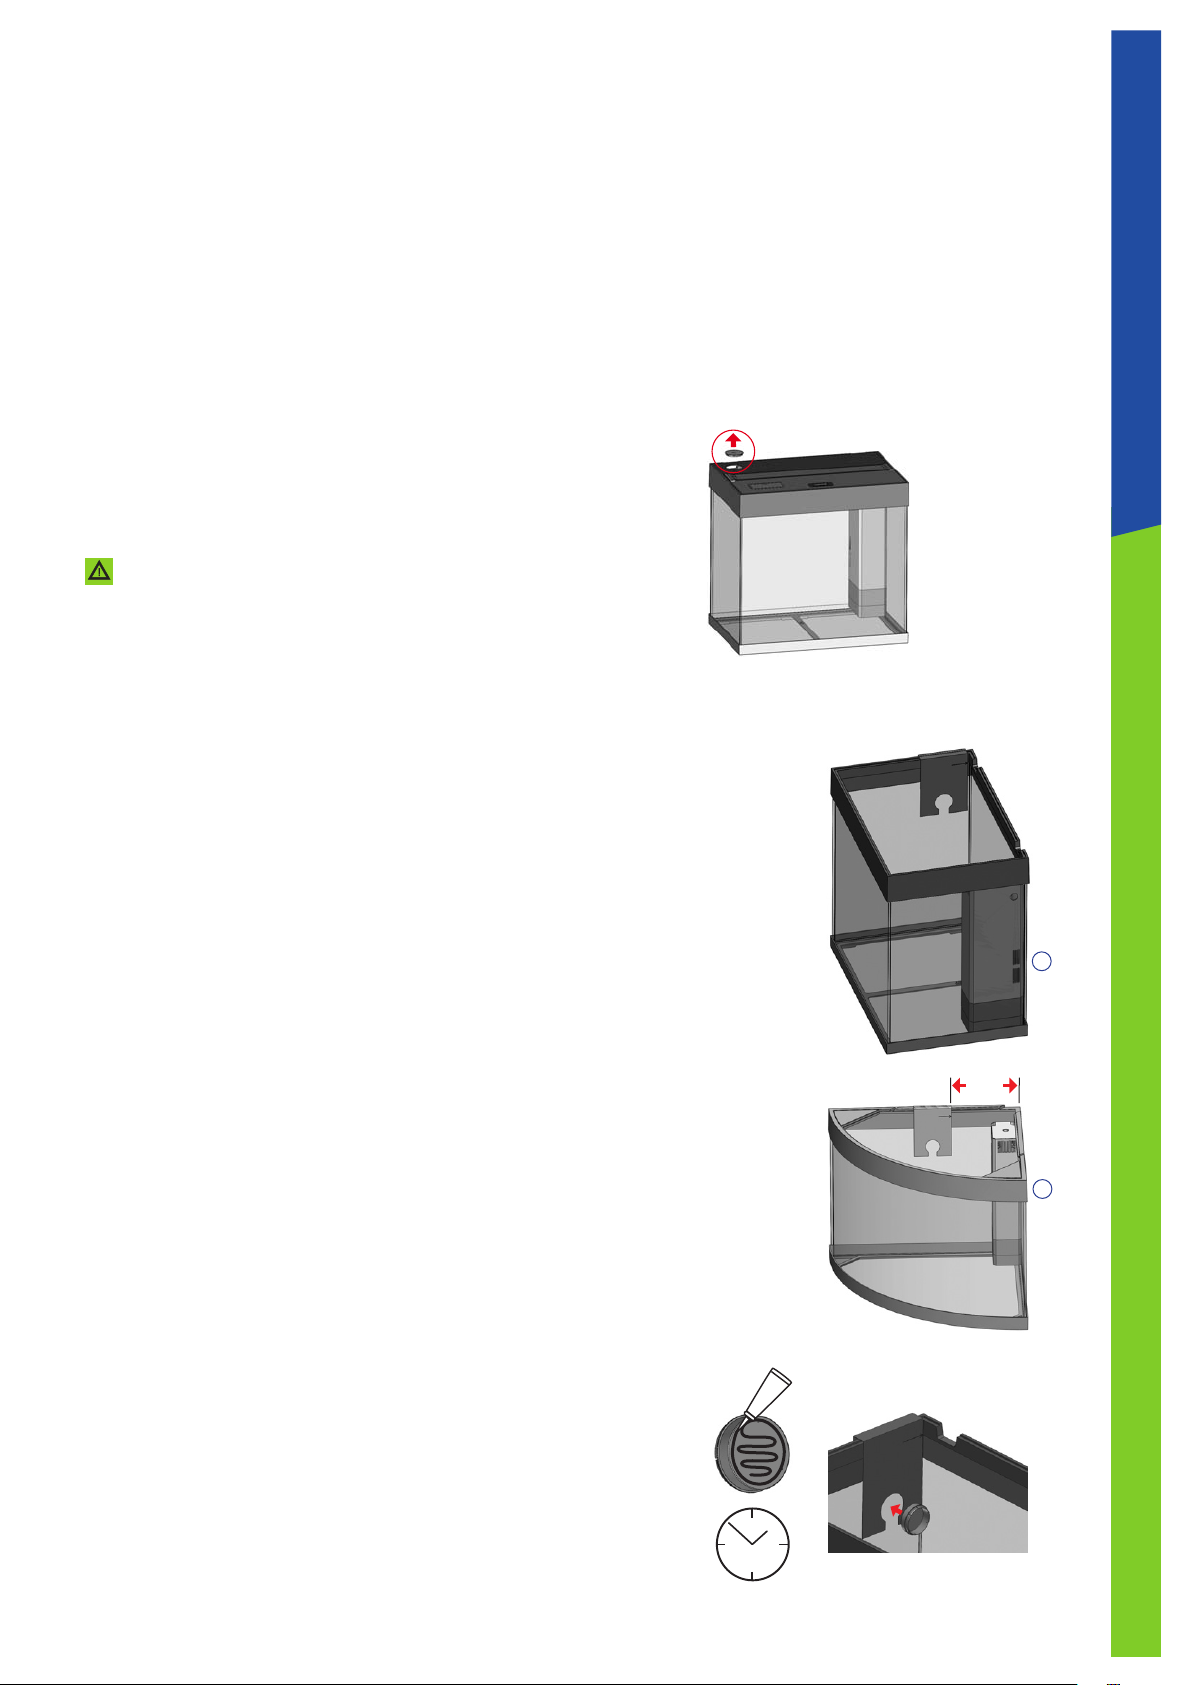
Installation of the mount for the JUWEL SeaSkim
The SeaSkim is permanently installed by means of the mount included in the delivery.
This ensures the correct position in the aquarium and consequently optimum skimming
results. The aquarium should be emptied to such an extent that you may wipe the
panes dry.
You achieve the correct position by using the enclosed template for positioning the
mount.
1. Initially fold the template at the designated lines and align it in the manner
detailed below.
2. Aquarium model RIO, LIDO, VISION:
Hang the template from the inside over the edge of the frame of the left side pane and
align it at the rear left corner (ref. figure A).
2. Aquarium model TRIGON:
Hang the template with a distance of 25 cm to the rear outer edge of the frame from
the inside over the edge of the frame of the left side pane (ref. figure B).
3. Secure the template by means of an adhesive strip in order to avoid shifting.
4. Apply a sufficient quantity of the enclosed JUWEL Conexo glue (item No. 88355) to
the outside of the mount after attaching the template.
5. Affix the mount through the designated opening of the template from the inside to
the aquarium pane and let it dry for at least 48 hours.
6. Remove the template after the drying time.
7. Check that the mount is securely seated and remove any glue residues that may
have escaped.
3
 Loading...