

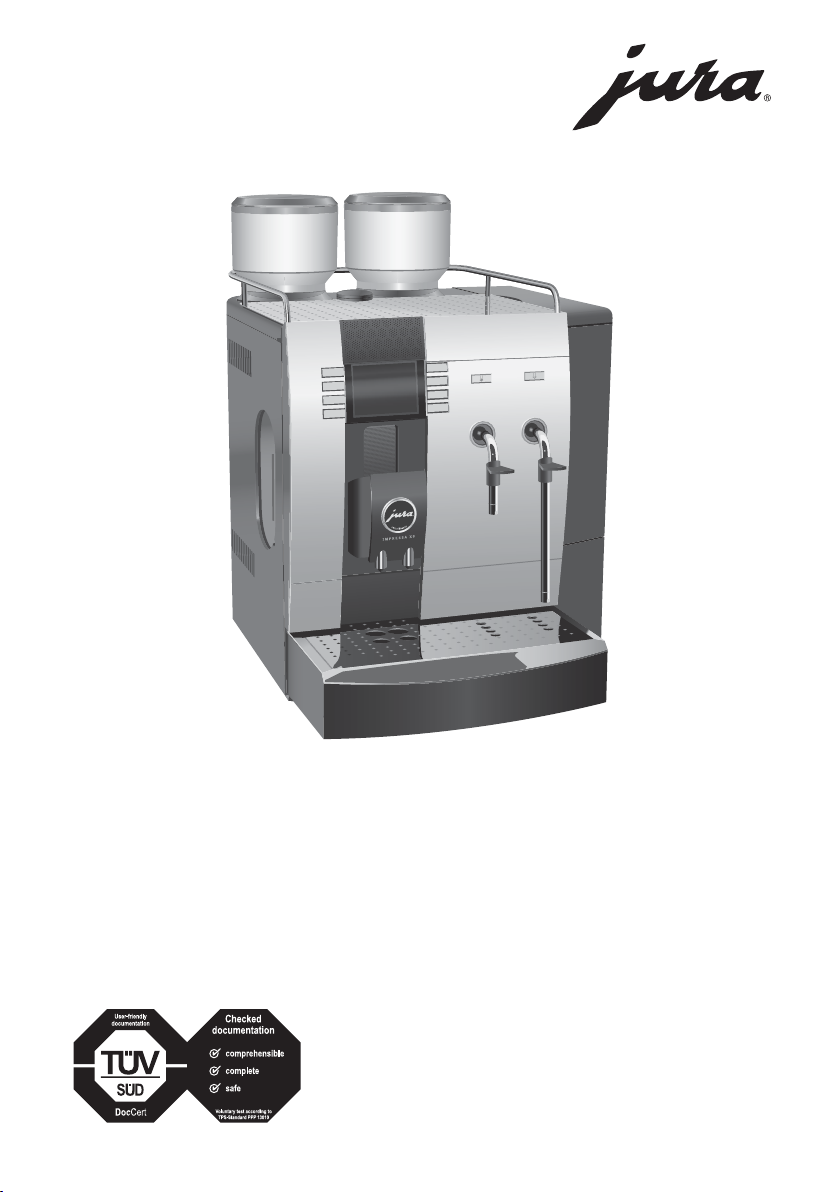
Page 1
The IMPRESSA X9 Win Manual
K
Original i nstructions for use
Before using the machine rea d the instruc tions for use.
JUR
A Type 657
The ‘IMPRESSA Manual’ has been awarded the se al of approval by the
inde pende nt German Technical Inspection Agency, TÜV SÜD, due to i ts
easy-to-understa nd st yle, its tho roughness and coverage of safety
aspe cts.
E
Page 2

2
Your IMPRESSA X9 Win
Control elements 4
Proper use
6
For your safet y
6
The IMPRESSA X9 Win Ma nual
8
S
ymbol descripti on ...... ..... ..... ..... ..... ..... ...... ..... ..... ..... ..... ..... ..... ..... ..... . ..... ..... ..... ..... ..... ..... ..... ...... ..... ..... ..... . 8
1
IMPRESSA X9 Win 9
A stylish performance ...... ...... ..... ..... ..... ..... ..... ..... ..... ..... ...... ..... ..... ..... ..... ..... ..... ..... ..... . ..... ..... ..... ..... ..... ..... . 9
JUR
A on t he Internet ...... ..... ..... ...... ..... ..... ..... ..... ..... ..... ..... ..... ...... ..... ..... ..... ..... ..... ..... ..... ...... ..... ..... ..... ..... ...10
2 Preparing and using for the first ti me
11
S
tandard product s .. ..... ...... ..... ..... ..... ..... ..... ..... ..... . ..... ..... ..... ..... ..... ..... ...... ..... ..... ..... ..... ..... ..... ..... . ..... ..... .....
11
S
et ting up ..... ..... ..... ..... ..... ..... ..... ...... ..... ..... ..... ..... ..... ..... ..... ..... ...... ..... ..... ..... ..... ..... ..... ..... ..... . ..... ..... ..... ..... ...
11
Fil ling the water t ank ....... ..... ..... ..... ..... ..... ..... ..... ..... ..... ..... ...... ..... ..... ..... ..... ..... ..... ..... ..... ...... ..... ..... ..... ..... ..12
Filling t he bean container ... ..... ..... ..... ..... ..... ..... ...... ..... ..... ..... ..... ..... ..... ..... ..... ...... ..... ..... ..... ..... ..... ..... ..... ...12
First-time use .... . ..... ..... ..... ..... ..... ..... ..... ..... ...... ..... ..... ..... ..... ..... ..... ..... ..... . ..... ..... ..... ..... ..... ..... ..... ..... ...... ..... .12
Inser ting and activati ng the fil ter cartridge .. ..... ..... ..... ..... ..... ..... ..... ..... ...... ..... ..... ..... ..... ..... ..... ..... ..... . ...14
Determining and adjusting the degree of water hardness ....... ..... ..... ...... ..... ..... ..... ..... ..... ..... ...... ..... ..14
Adjus t ing t he grinder ... . ..... ..... ..... ..... ..... ..... ..... ..... ...... ..... ..... ..... ..... ..... ..... ..... ..... . ..... ..... ..... ..... ..... ..... ..... ....16
S
witching on ... ..... ..... ..... ..... ..... ..... ..... ...... ..... ..... ..... ..... ..... ..... ..... ..... ...... ..... ..... ..... ..... ..... ..... ..... ..... ..... ...... ....17
S
witching of f (standby) .. ..... ..... ..... ..... ..... ...... ..... ..... ..... ..... ..... ..... ..... ..... . ..... ..... ..... ..... ..... ..... ..... ..... ...... ..... ..17
3 Familiarising yoursel f with the control opti ons
1
8
Preparation at the touch of a button ..... ..... ..... . ..... ..... ..... ..... ..... ..... ..... . ..... ..... ..... ..... ..... ..... ...... ..... ..... ..... .18
Permanent settings in progra mming mode ..... ..... ..... ..... ..... ..... ..... ...... ..... ..... ..... ..... ..... ..... ..... ..... . ..... ....19
Viewi ng informat ion and mainte nance status ... ..... ..... ...... ..... ..... ..... ..... ..... ..... ..... ..... . ..... ..... ..... ..... ..... .20
R
ese tting the counter .... ..... ..... ..... ..... ..... ..... ..... ..... ...... ..... ..... ..... ..... ..... ..... ..... ..... . ..... ..... ..... ..... ..... ..... ...... ... 2
1
4 Prepara tion at t he touch of a button 22
Espresso .... ..... ..... ..... ...... ..... ..... ..... ..... ..... ..... ..... ..... ...... ..... ..... ..... ..... ..... ..... ..... ..... . ..... ..... ..... ..... ..... ...... ..... .... 22
Coffee ..... ...... ..... ..... ..... ..... ..... ..... ..... ..... ...... ..... ..... ..... ..... ..... ..... ..... ..... . ..... ..... ..... ..... ..... ...... ..... ..... ..... ..... ..... .. 22
Cappuccino, milky cof fee and latt e macchi ato. ..... ..... ..... ..... ..... ..... ..... ..... ...... ..... ..... ..... ..... ..... ..... ..... .... 23
Hot mil k ... ..... ..... ..... ..... ..... ..... ..... ..... ...... ..... ..... ..... ..... ..... ..... ..... ..... . ..... ..... ..... ..... ..... ..... ..... ..... ...... ..... ..... ..... . 23
Hot wa ter ....... ..... ..... ..... ..... ..... ..... ..... . ..... ..... ..... ..... ..... ..... ..... ..... . ..... ..... ..... ..... ..... ..... ..... ..... ..... . ..... ..... ..... ..... 24
S
team ...... ..... ..... ..... ..... ..... ..... ..... ..... ...... ..... ..... ..... ..... ..... ..... ..... ..... . ..... ..... ..... ..... ..... ..... ..... ..... . ..... ..... ..... ..... .. 24
5 Permanent set tings in progra mming mode 25
Product settings .. ..... ..... ..... ..... ..... . ..... ..... ..... ..... ..... ..... ..... ..... ...... ..... ..... ..... ..... ..... ..... ..... ...... ..... ..... ..... ..... ... 25
Time and weekday .... ..... ..... ..... ..... ..... ..... ...... ..... ..... ..... ..... ..... ..... ..... ..... ...... ..... ..... ..... ..... ..... ..... ..... ...... ..... .. 26
Timer ...... ..... ...... ..... ..... ..... ..... ..... ..... ..... ..... . ..... ..... ..... ..... ..... ..... ..... ..... ...... ..... ..... ..... ..... ..... ..... ..... ...... ..... ..... .. 26
Automatic switch-off ... ..... ...... ..... ..... ..... ..... ..... ..... ...... ..... ..... ..... ..... ..... ..... ...... ..... ..... ..... ..... ..... ..... ..... ..... .... 28
Table of content s
Page 3

3
Table of content s
L
anguage ....... ..... ..... ..... ..... . ..... ..... ..... ..... ..... ..... ..... ..... ...... ..... ..... ..... ..... ..... ..... ..... ..... . ..... ..... ..... ..... ..... ..... ..... 29
Forma t (uni t of wat er amount and time forma t) .... ..... ..... ..... ..... ..... ..... ...... ..... ..... ..... ..... ..... ..... ..... . ..... .29
S
witch-on rinse .... ..... ..... ..... ..... ..... ..... ..... ...... ..... ..... ..... ..... ..... ..... ..... ..... ...... ..... ..... ..... ..... ..... ..... ..... ...... ..... ... 30
Mult imedia ...... ..... ...... ..... ..... ..... ..... ..... ..... ..... ..... ...... ..... ..... ..... ..... ..... ..... ..... ..... . ..... ..... ..... ..... ..... ..... ..... ..... ... 30
6 Maintenance 32
Maintenance tips ... ..... . ..... ..... ..... ..... ..... ..... ..... ..... ...... ..... ..... ..... ..... ..... ..... ..... ..... . ..... ..... ..... ..... ..... ..... ..... ..... . 32
R
insing the machine ... ..... ..... ..... ..... ..... ..... ..... ...... ..... ..... ..... ..... ..... ..... ..... ..... . ..... ..... ..... ..... ..... ..... ..... ..... ..... . 32
Dismantling and rinsing the dual spout ...... ...... ..... ..... ..... ..... ..... ..... ..... ..... . ..... ..... ..... ..... ..... ..... ..... ..... .... 33
Milk syste m cleaning ..... ..... ..... ..... ..... ..... ..... ..... ..... . ..... ..... ..... ..... ..... ..... ..... ..... ...... ..... ..... ..... ..... ..... ..... ..... ... 33
Coffee system cleaning .. ..... ..... ..... ..... ..... ..... ...... ..... ..... ..... ..... ..... ..... ...... ..... ..... ..... ..... ..... ..... ..... ...... ..... ..... .3 4
Combi ned cleaning ...... ..... ..... ..... ..... ..... ..... . ..... ..... ..... ..... ..... ..... ..... ..... . ..... ..... ..... ..... ..... ..... ..... ...... ..... ..... .... 35
Changing the filter ..... ..... ..... ..... . ..... ..... ..... ..... ..... ..... ..... ..... ..... ..... ...... ..... ..... ..... ..... ..... ..... ..... . ..... ..... ..... ..... . 37
Des caling the machine .... ..... ..... ..... . ..... ..... ..... ..... ..... ..... ..... ..... ...... ..... ..... ..... ..... ..... ..... ..... ..... ..... . ..... ..... ..... 38
Cleaning the bean c onta iner ... ..... ..... ..... ..... ..... ..... . ..... ..... ..... ..... ..... ..... ..... ..... ...... ..... ..... ..... ..... ..... ..... ...... .40
Des caling the water tank .. ..... ..... ..... ..... ..... ...... ..... ..... ..... ..... ..... ..... ..... ..... ...... ..... ..... ..... ..... ..... ..... ..... ..... ....40
7 Display messag e s 42
8 Troubleshooting
44
9 Transport and environme ntally neutral disposal
46
Transport / emptying the system ..... . ..... ..... ..... ..... ..... ..... ..... ..... ...... ..... ..... ..... ..... ..... ..... ..... ..... . ..... ..... ..... 46
Disposal ....... ..... ..... ..... ..... ..... ..... . ..... ..... ..... ..... ..... ..... ..... ..... ...... ..... ..... ..... ..... ..... ..... ..... ..... . ..... ..... ..... ..... ..... ...46
1
0 Technical data 47
Index
48
JUR
A cont act de tails / Legal informat ion
52
Page 4
4
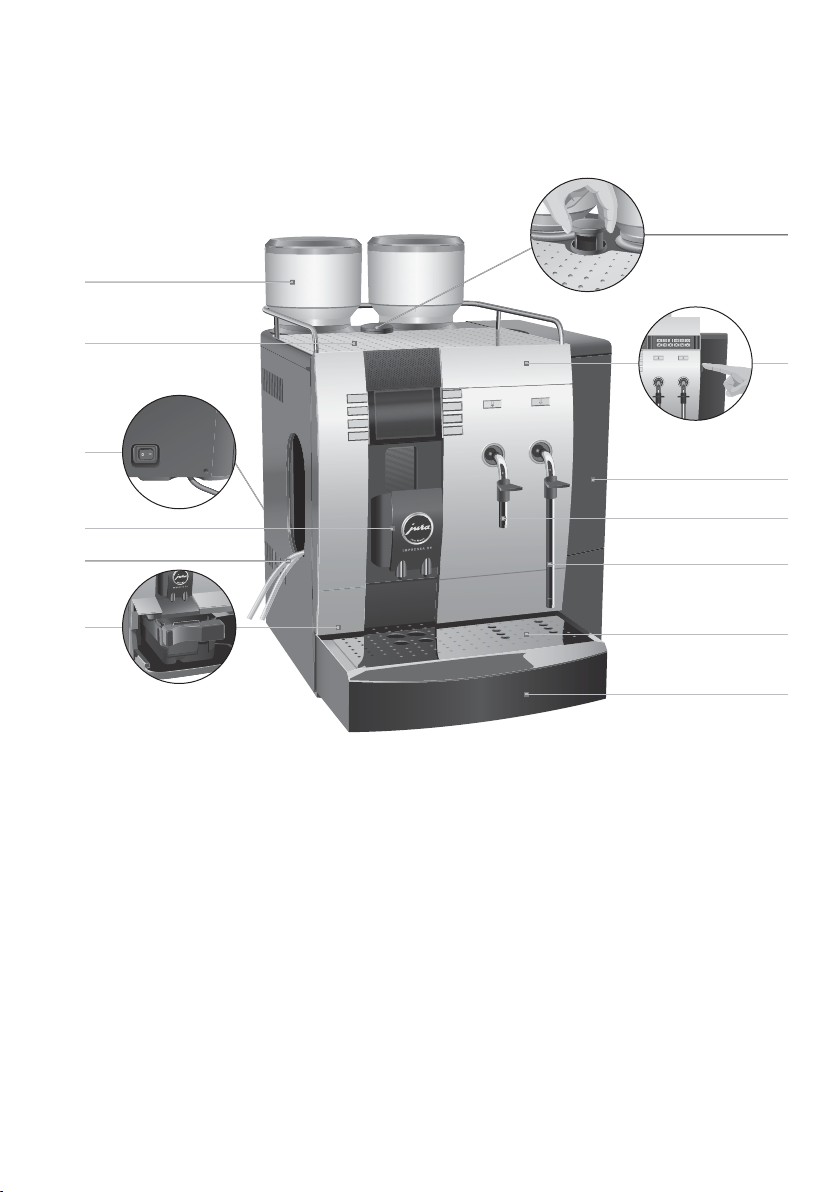
Control elements
Control elem ents
Figur e: IMPRESSA X9 Win Platinum
1
Bean cont ainer with cover
2 Cup tray
3 Power swit ch and power cable (back of
machine)
4 Dual spout (hei ght adjust able)
5 Milk pipes
6 Coffe e grounds container
7 Fi ller funne l for cl eaning t able t
8 Cover for progra mming buttons
9 Water tank with cover
1
0 Hot water pipe (pivot ing)
11 S
team pipe (pivot ing)
1
2 Cup platform
1
3 Drip tray
2
1
9
11
1
0
1
3
1
2
4
8
5
6
3
7
Ope n the cover
Page 5
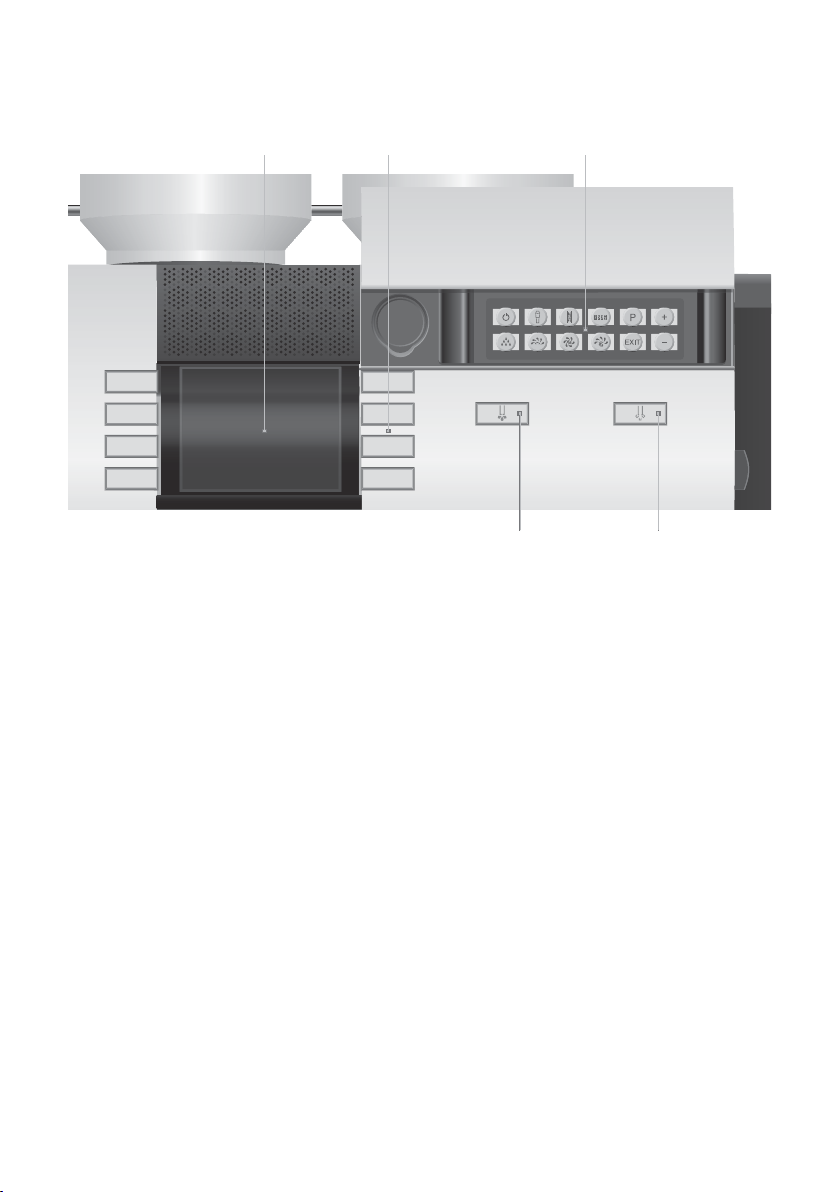
5
Control elements
1
Display
2 Product but tons (standard products ):
1 espresso but ton
1 coffee button
2 coffee button
Milk foam button
Cappuccino button
Latte macchiato button
Milk coff ee button
Milk button
(The product s are shown on the display.
)
3 Progra mming buttons:
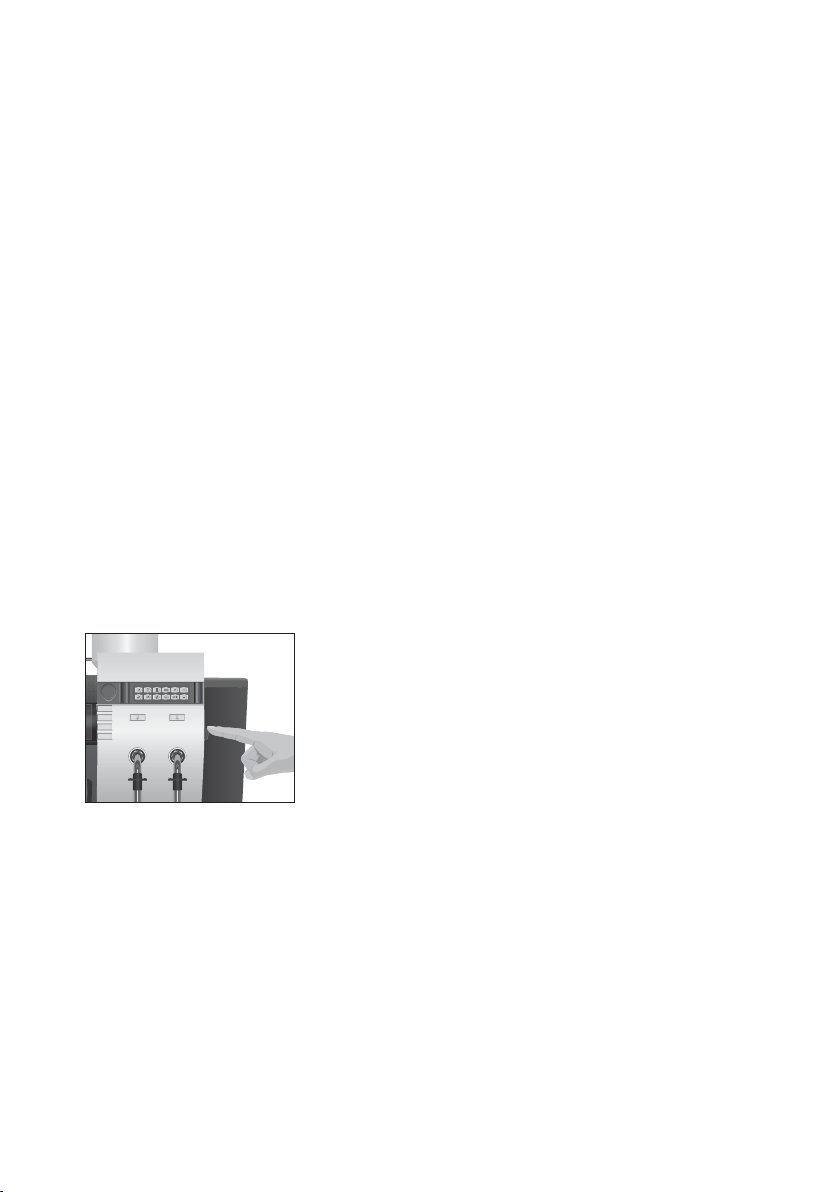
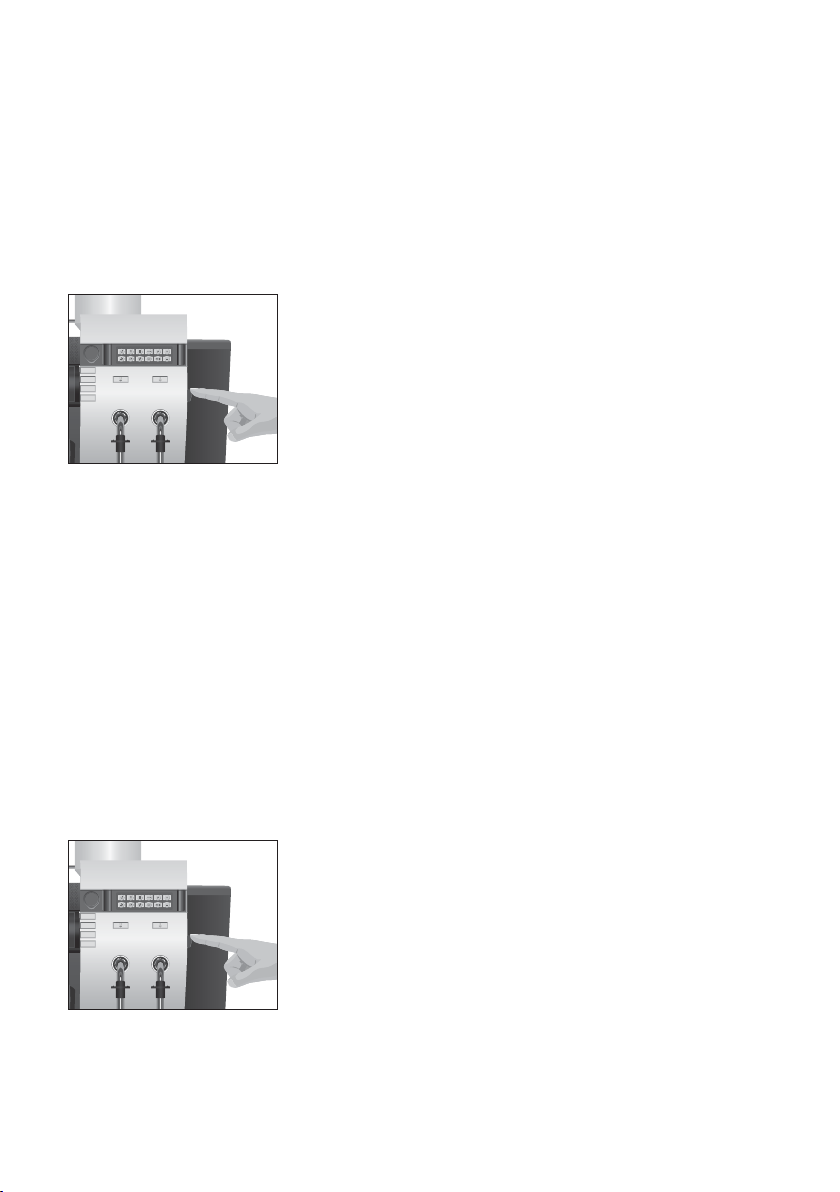
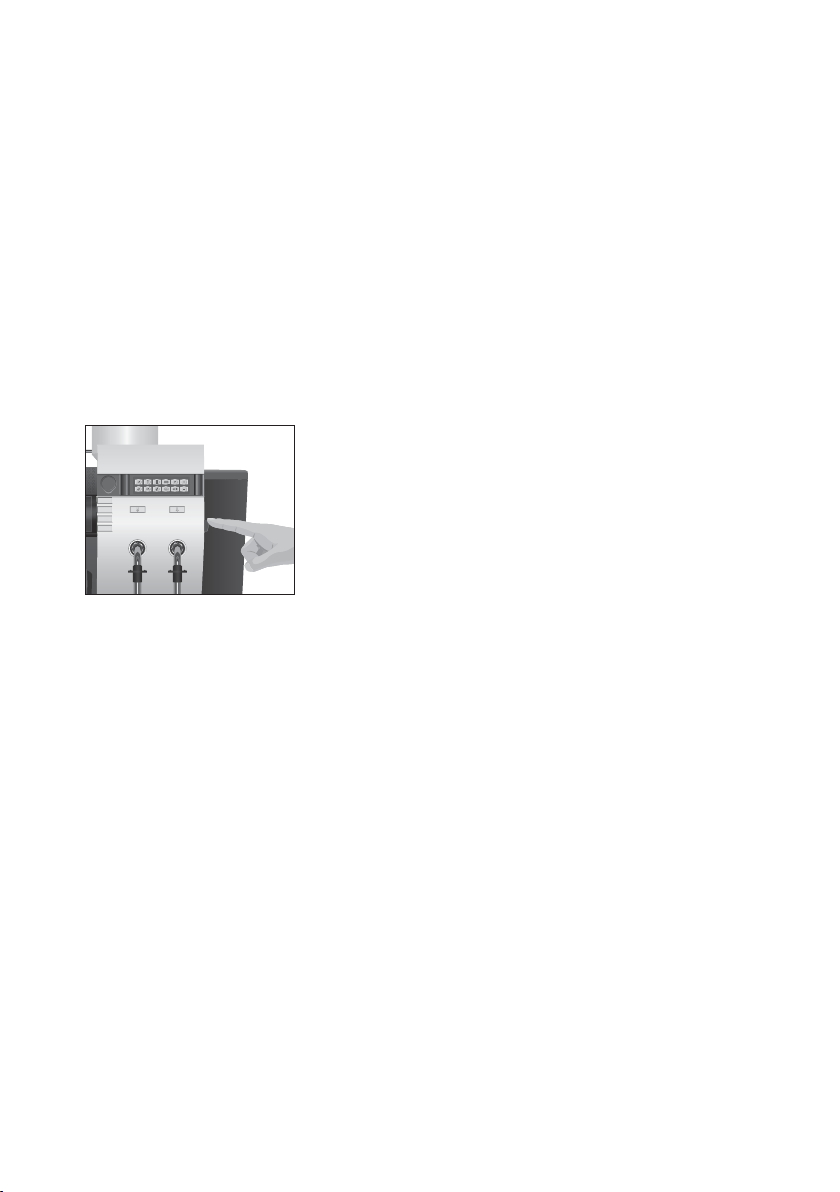
Q On/off button
$ Fi lte r button
$ Descaling but ton
9 Counter but ton
O P button
+ + but ton
c Rinse button
6 Milk syste m cle aning button
7 Coffee system cleaning button
8 Combined cl eaning but ton
0 Exit button
- - but ton
4 m Hot water button
5 n Steam button
Front left Front right
1
4
2 3
5
Page 6

6
Important notes
The ma chin e is designe d and inte nded for commercial use. It should
only be used to prepare coffee and to he at mil k and water. Use for
any other purpose will be dee med improper. JURA Elektroapparate AG can not accept any responsibility for the consequences of
improper use.
Before using the machine always carefully read and comply wit h
these instructions. Keep this manual close to the IMPRESSA and pass
it on to the next user if applicable.
The IMPRESSA may only be operated by instruc ted persons.
Always re ad the fol lowing sa fet y instructions carefully.
To preven t potenti ally fat al e lec tric shocks:
Z Never use a machine which has been damage d or has a defec-
tive power cable.
Z For information on what to do in case of damage, for example
if the re is a smell of burning, unplug the ma chine immediat ely
from the mains supply and cont act the JURA service centre.
Z If the power cable for this machine is damaged, it must be
repaired either dir ectly by JURA or by a JURA authorised ser-
vice centre.
Z Ma ke sure that the IMPRESSA and the power cable are not
located close to hot surfa ces.
Z Ensure tha t the power cable is not tra pped in any way and
does not rub a gainst sharp edges.
Z Never open and r epair the machine yourself. Do not modif y
the machine in any way tha t is not describe d in the IMPRESSA
Manual. The machine contains live part s. If opened, ther e is a
danger of serious injur y. Repairs may only be carri ed out by
authorised JURA service centre s, using original spare part s
and a ccess ories.
It is possibl e to scald or burn oneself on the spouts, on the hot water
pipe and steam pipe:
Z Pla ce t he machine out of the rea ch of c hildre n.
Z Do not touch any hot par ts. Use the handles prov i ded.
For your safety
Proper use
Page 7

7
Important notes
A def ec t ive machine is not safe and could cause injury or fir e. To
avoid damage and any associat ed risk of injury or fire:
Z Never allow t he power cable to trail, as someone could trip
over the power cabl e and/or it could get damaged.
Z Prot ect yo ur IMPRESSA from env ironmenta l influence s such
as rain, frost and dir ect sunlight.
Z Do not put the IMPRESSA, cable or conne ctions in water.
Z Never put the IMPRESSA or its component s into the dish-
washer.
Z Turn your IMPRESSA of f a t the power switch before cleaning
the machine. Always wipe your IMPRESSA wit h a damp cloth
rat her tha n a wet one, and prote ct i t from pro l onged water
splash.
Z Do not se t up the IMPRESSA anywhere where a jet of wa ter
may be used.
Z Only conne ct the machine to a power supply in accordance
with the information on the rating plat e. The rat ing pla te is
loc a ted on the re ar of your IMPRESSA. Further technical data
is given in Chapter 10 ‘Techni cal Data’.
Z Use only original JURA care products. Use of accessories that
are not expli citly recommended by JURA could da mage the
IMPRESSA.
Z Do not use any coffee beans tr eat ed with additives or carame-
lise d coff ee beans.
Z Only fi ll the wat er tank wi th fresh, col d water.
ZSwitch the machine off at the power switch if you are absent
for long periods of time.
Using the CLARIS filter cart ridge safe ly:
Z Kee p the fil ter cartridges out of the reach of children.
ZStore the fil ter cartridges in a dry pl ace in the sealed
package.
Z Prot ect the fil ter cartridges from heat and direct sunlight.
Z Never use any damaged filter cartridges.
Z Never open filter cart ridges.
Page 8
8
The IMPRESSA X9 Win Manual
You ar e holding the manua l for your IMPRESSA X9 Win in your hand.
It will help you to familiarize yourse lf with your IMPRESSA safely and
quickly and te ach you t he full range of f acilities it offers.
Chapter 2, ‘Pre paring and using for the first ti me’, expla ins ste p-byste p how to se t up and prepare the IMPRESSA.
Chapter 3, ‘Famil iarising yourse lf with the control options’ is impor-
tant for you to read as you are famili arising yourself with your
IMPRESSA. It invit es you to actively explore all the diffe rent coffee
experien ces that i t of f ers.
All the other chapters are intended to help you when you have a
spe cific query.
If you use the IMPRESSA X9 Win, you will become a master at
pre paring exciting coffee specialiti es, you will be a Barista!
You ca n download the shor t operat ing instr uctions for your machine
from the JURA websi te (www.jura.com
)
.
The IMPRESSA X9 Win Manual
Symbol description
Warnings
CAUTION
Always t ake note of a ny information marked with the CAUTION or WARNING symbol.
The signa l word WARNING points out potential risk of serious injury, and the signal
word CAUTION potential risk of slight injury.
CAUTION
The CAUTION symbol is used to draw a ttention to circumstances which could cause
the ma chine to be come damaged.
S
ymbols used
E
Information and tips to make t hings easier for you as you use your IMPRESSA.
@
R
eferences to the online JURA websit e, where you can fi nd inter esti ng further infor-
mation: www.jura.com.
T
Prompt to take action. This symbol means t hat you are being prompted to perform
som e ac tion.
Page 9

9
1
IMPRESSA X9 Win
With its ele gant desi gn and highest-quali ty materials, this luxury
machine with it s cool Nordi c st yle not only has an appealing exte-
rior, but easily fulfils the most sophisticated coffe e wishes of cus-
tomers, guest s and colle agues. In addition to such classic speci alities
such as ristre tto, espresso and coffee, the IMPRESSA X9 Win also
makes contemporary drinks such as cappuccino or latte macchia to
at the touch of a but ton.
In addition to i ts unique design and the variet y of product options,
the TF T scr een also permits adScreen adver tising. This is use ful at
the POS where eight of ten purchasing de cisio ns are made, or in
seminar centres, where attendee s can be informed about additional
offers. You too can give your customers tha t decisive impetus, and
motivate your target group to ma ke sp ontaneous extra purch ases.
The IMPRESSA X9 Win is tremendous for all kinds of applications!
Z Simple operation with ‘Smart Lead’: ‘Smar t Lead’, the inter-
active JURA user guidance with visual and audio fea tures,
guides personnel through all operat ing and care st e ps. This
makes maintenance simple and prevents incorrect interven-
tion. From filling of the water tank through to cleaning –
‘Smar t Lead’ demonstrat es each ste p with visual and audio
output. The user is gui ded through the complete procedure,
which simplif ies the process and minimises errors. This pre -
vents unnecessary ser vice cost s and loss of t urnover caused
by machine errors.
Z Coffee specialities: The IMPRESSA X9 Win makes more than
20 coffee specialities, all of which can be adapted to suit your
own personal preferences. The 3.5 inch TFT display guides you
through to the required cof fee specialit y and offers you coffee
enjoyment at the t ouch of a button. With ristre tto, espr esso,
regular coffee, mil ky coffee, coffee in a gl ass, cappuccino or a
trendy la tte macchiato: Let your t aste make the decision! Up
to 100 cups can be prepared each day with e ase.
A stylish per formance
1
IMPRESSA X9 Win
Page 10

1
0
1
IMPRESSA X9 Win
Z Programming: When the chrome-plat ed programming cover
el e gantly slides upwards, it reveals the programming panel
with the various se tting options. The cleaning, rinsi ng and
descaling programmes are also started from here, and the
integrat ed cup counter can also be a ctivated. Would you like
to restric t the programming options to a speci fic group of
users? No problem: Simply generate code groups.
Z Cust omisable: The set ting opt ions of the IMPRESSA X9 Win
are just as varied as the wishes of our custome rs. The machine
can therefore be equipped with a number of different accessories. These include a permane nt water connection, a wide
range of vending systems, a matching cup warmer or a refrig-
erator for the milk . Requ e st our full-range brochure and con-
ta ct an au t horise d dealer for advice.
Visit us on the Int erne t.
@At www.jura. com you will find interesting and up-to-date
informat ion on your IMPRESSA and on every aspect of
coff ee.
J
URA on the Internet
Page 11

11
2 Preparing and using for the first t ime
This chapter provide s you with the information you need to use your
IMPRESSA wi thout any prob l ems. You wil l prepare your IMPRESSA
ste p-by-step for your first coff e e experie nce.
Your IMPRESSA is suppl ied with t he following products as stand-
ard:
Z1 espresso
Z1 coffee
Z 2 cof fee s
Z Milk fo a m
Z Cappuccino
ZLatte macchiato
Z Milky coffe e
Z Milk
The following setti ngs can only be made by the JURA servi ce te chni-
cian:
Z Customise d product programmin g. The st andard products
can be replace d by:
U 2 espressi, 1 ristret to, 2 ristre tti, sma ll pot, macchiato, milky
coff ee, hot water, steam, 2x
UGrinder sel ect ion or rinse button (all buttons can be
arranged to preference
)
Z Blocking products
ZSet ting the filt er capaci ty
Z Assigning code groups: Thre e code groups can be assigned.
The respect ive code groups corr espond to different authorisa-
tions. It can be defined, for exa mple, t hat the programming
mode of the ma intenance progra mmes is blocked by a code.
When setting up your IMPRESSA, pl ease note the following:
Z Pla ce the I MPRESSA on a horizontal surface that is not sensi-
tiv e to wat er.
Z Choose a spot for your IMPRESSA which is protecte d against
overhe ating. Ensure tha t the ven t ila tion slots are not cov-
ered.
Standard products
Settings by the JURA service
technician
Setting up
2 Preparing and using for the first time
Page 12

1
2
2 Preparing and using for the first t ime
To enjoy perfe ct cof fee, we recommend changing the wat er every
day.
Milk, mineral wa ter or other liquids can damage the wat er tank or
the machine.
T Only fill the water tank with fresh, cold water.
TRemove the cover of the water tank.
TRemove the water tank and rinse i t wit h cold wa ter.
T Fill the water tank with fre sh, cold wate r and reinsert. It must
snap firm l y into place.
TReplace the cover on the water tank.
E You can also fill the water tank without removing it . To this
purpose remove the cover of the wa ter tank and use a recepta cle to fill the water t a nk from above with fresh, cold wat er.
Your IMPRESSA features two bean cont ainers. You therefore have
the option of usi ng two types of coffe e beans. The cover of the bean
cont ainer also act s as an aroma preservation cover. This will ensure
tha t your cof fee beans ret ain their aroma for longer.
Coffee be ans which have been tre ate d with additives (e.g. sugar),
pre-ground or freeze -drie d coff ee wi ll da mage the grinder.
T Only use untrea ted coffe e be ans to refill the bean cont ainer.
TRemove the cover of the bean container.
TRemove any dir t or foreign objects inside the bean con-
tainer.
T Fill the be an container with cof fee beans.
TReplace the cover on the bean container.
If the machine is ope rate d wi th a defe ctive power cable, t here is a
danger of e lectric shock.
T Never use a machine whi ch has a defe ctive power cable.
Precondition: The water tank and bean container are full.
T Insert t he mains pl ug into a power socket.
Filling the water tank
CAUTION
Filling the bean con-
ta iner
CAUTION
First-time use
WARNING
Page 13
1
3
2 Preparing and using for the first t ime
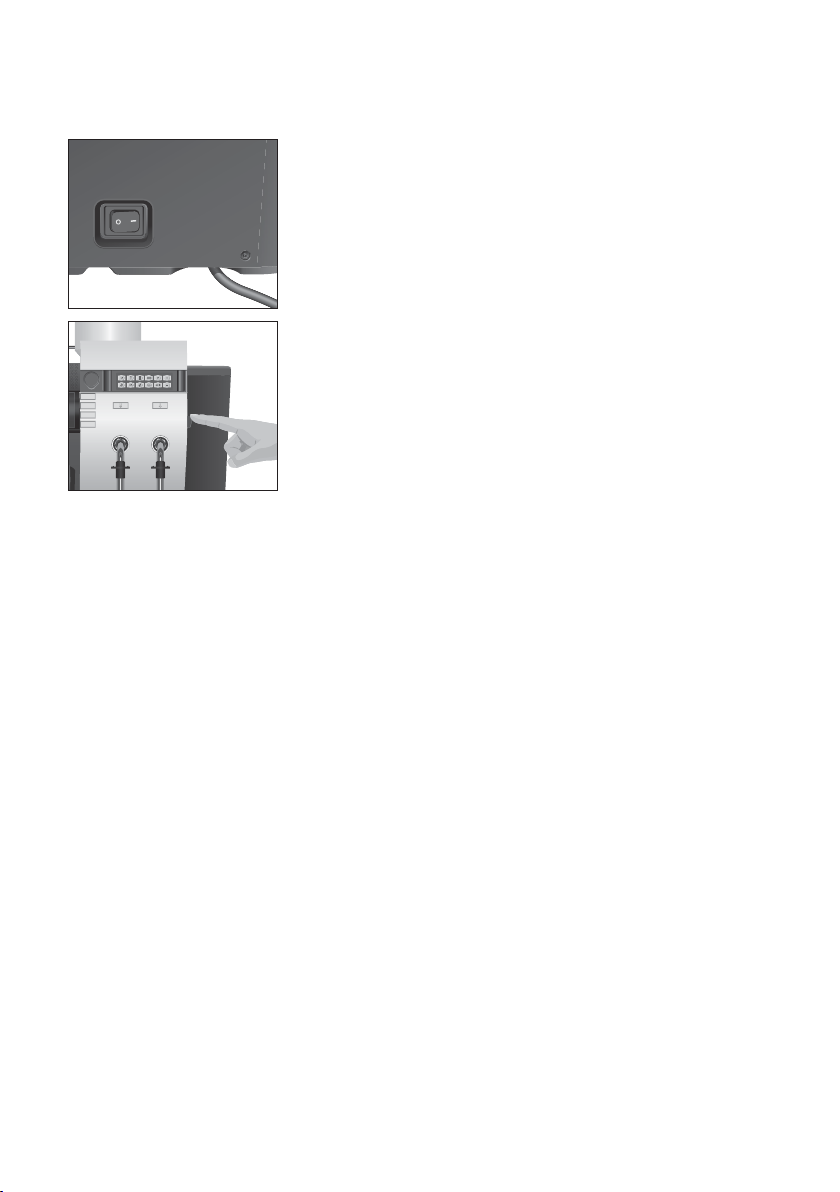
3 T Switch on the IMPRESSA using the power swi tch on the back
of the machine.
T Open the cover of the progra mming buttons.
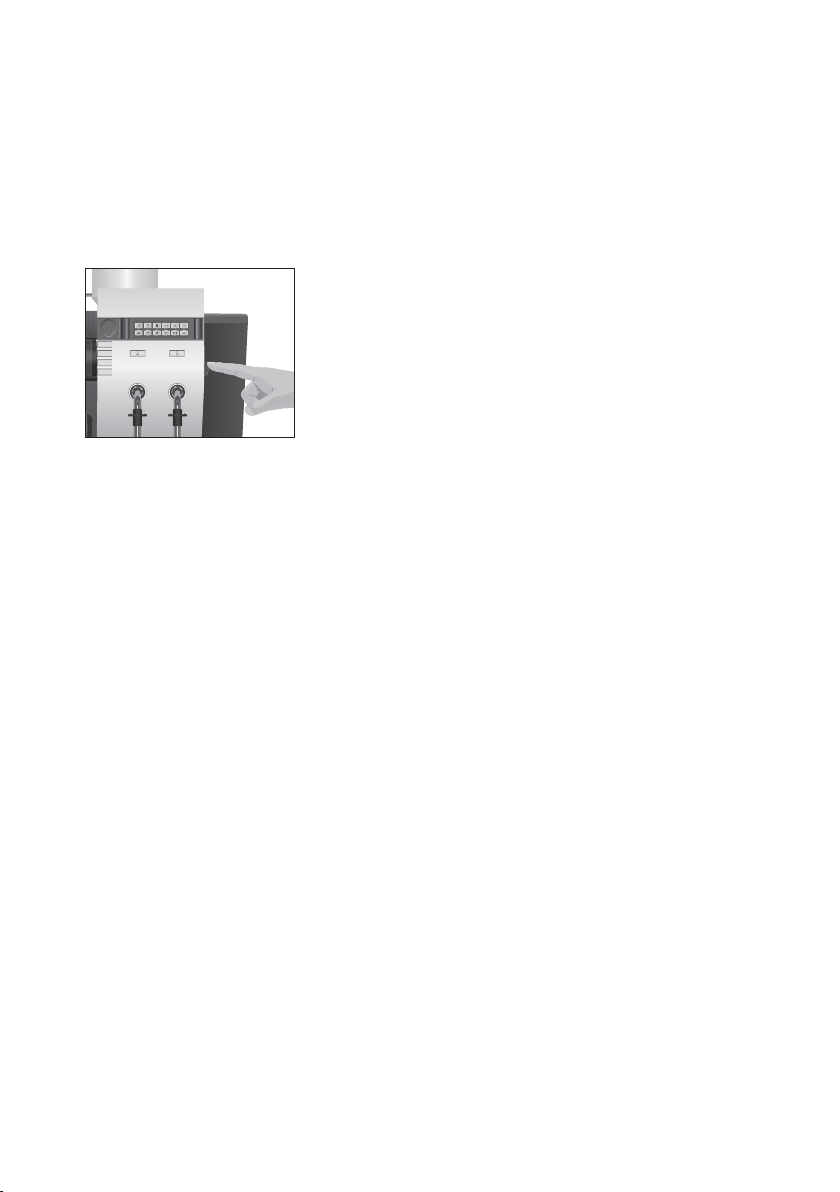
Q T Press the on/off button to swi tch the IMPRESSA on.
SPR
ACHE DEUTSCH appears on the display.
T Press the + or - button several t imes until the desired lan-
guage is displayed. For Example: LANGUAGE ENGLIS
H
O T Press the P button to confirm the language.
CONFIRMED appears bri efly on the display to confirm the
set ting.
E You have now set the language of the machine. The la n-
guage of the fil m clip s can be se t in progra mming mode with
the MULTIMEDIA LANGUAGE option.
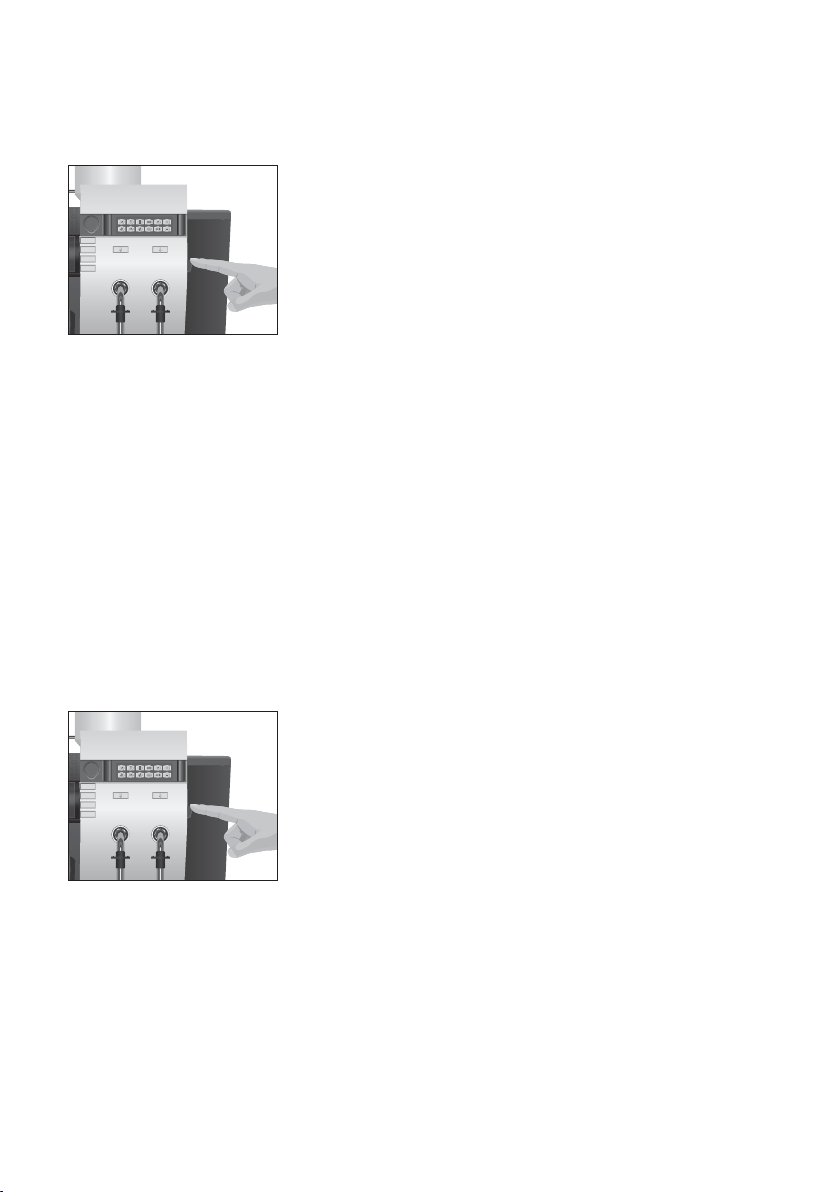
TIME HOURS
--:--
T Press the + or - but ton several t ime s to se t t he hours.
TIME HOURS 1
2:00 (Exam ple
)
O T Press the P button to confirm the hour set ting.
TIME MINUTES 12:00 (Exam ple
)
T Press the + or - but ton to set the minut es.
TIME MINUTES 12:45 (Exam ple
)
O T Press the P button to confirm the minute se tting.
CONFIRMED appears briefly on t he display.
WEEKDAY MONDAY
T Press the + or - but ton several t imes to se t the wee kday.
WEEKDAY WEDNESDAY (Example
)
O T Press the P button to co nfirm the we ekday set ting.
CONFIRMED and WELCOME TO JURA appear brie fly on the
displ ay. PRESS RINSE BUTTON is then displayed.
c T Press the rinse button.
SYS
TEM FILLS
, the system is fill ed with water. A small amount
of water flows from the hot water spout. The opera tion stops
automatically. Af ter heat ing, PRESS RINSE BUTTON is displayed.
Page 14

1
4
2 Preparing and using for the first t ime
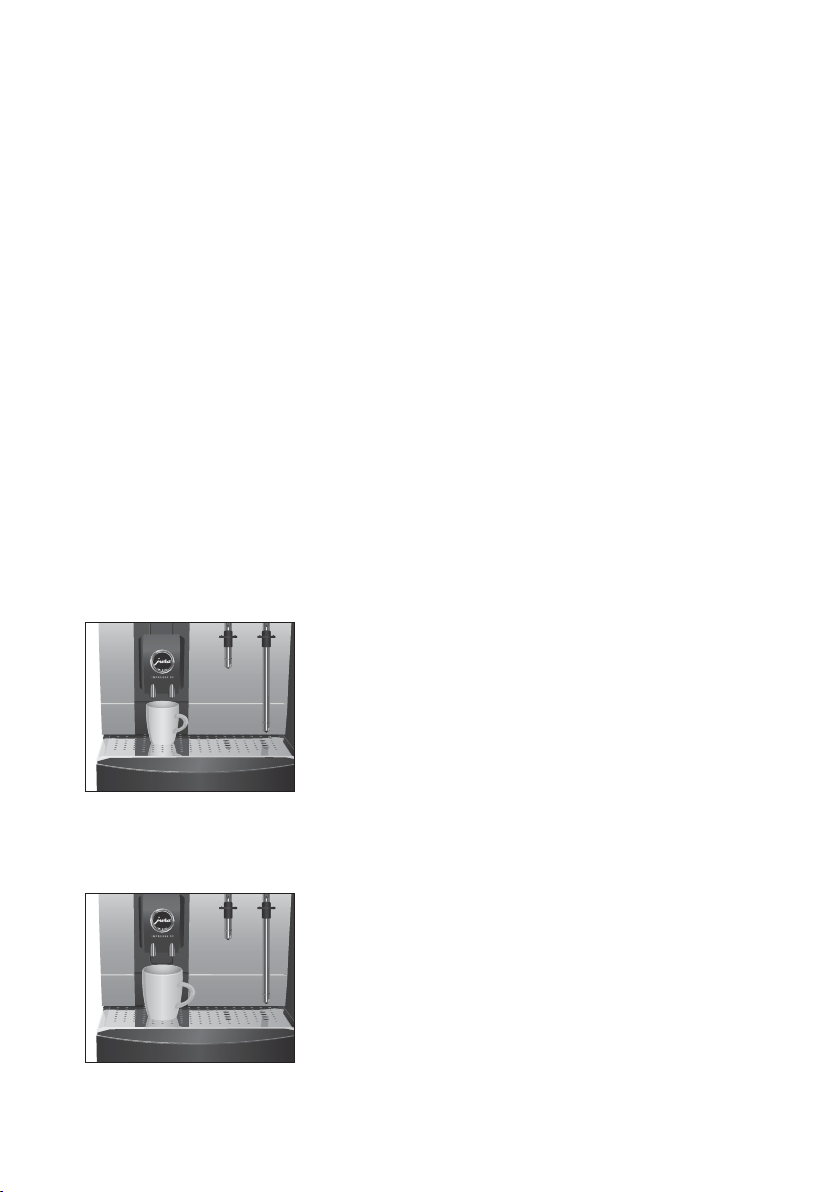
c T Press the rinse but ton to star t the rinse oper a tion.
MACHINE IS RINSING, water flows out of the dual spout . The
opera tio n stops automat ically. Your IMPRESSA is r eady for
opera tion.
E Aft er first-time use do not disconnect the IMPRESSA from the
power supply for 24 hours to e nsure that it is in the optimum
opera ting condition.
E When a coff ee speciality has been prepared for the first time,
it is possibl e that FILL BEANS is shown on the displ ay as the
grinder has not yet been complet ely fill ed wi th c offe e be ans.
In this case prepare a different coff ee specialit y.
E If you have not been able to use the ma chine for the first ti me
correctly and fully, conta ct your JURA service partner. The con-
ta ct de ta ils are given in t he ‘JURA contact s’ section on the last
page of these instructi ons.
Your IMPRESSA no longer has t o be descaled i f you are using t he
CLARIS filter cartridg e.
E The CLARIS filter cartridge must be insta lled for the first t ime
by a service technician. Please contact your JURA servi ce par t-
ner.
Water is heated in the IMPRESSA. This results in a build-up of limes-
cal e over t ime. The harder t he water, the more freq uently the
machine needs to be descaled. For this reason it is import ant to
sel ect the corre ct se tting on the IMPRESSA for the water hardness of
the used water.
The water hardness c a n be adjust e d on a continuous scale between
1° dH and 30° dH. This can also be deactiva ted, which means tha t
the IMPRESSA will not let you know when i t has to be desc a led.
E However, if you are using the CLARIS filter cartridge and it is
activated, you will not be able to adjust the water hardness.
Inser ting and activat-
ing the filter car tridge
Determining and
adjusting the degree of
water hardness
Page 15

1
5
2 Preparing and using for the first t ime
You can find out what the water hardness is by usin g the Aquadur®
test stri p suppli ed as standard.
T Hold the test strip briefly (for one second) under flowing
water. Shake off the wa ter.
T Wait for about one minute.
T You will then be able to read the d e gree of water hardness
from the discolouration of the Aquadur® t est strip and the
description on the pa ckaging.
You can now adjust the water hardness.
Example: To change the water hardness from 16° dH to 25° dH, pro-
cee d as follows:
Precondition: Your IMPRESSA is re ady for operat ion.
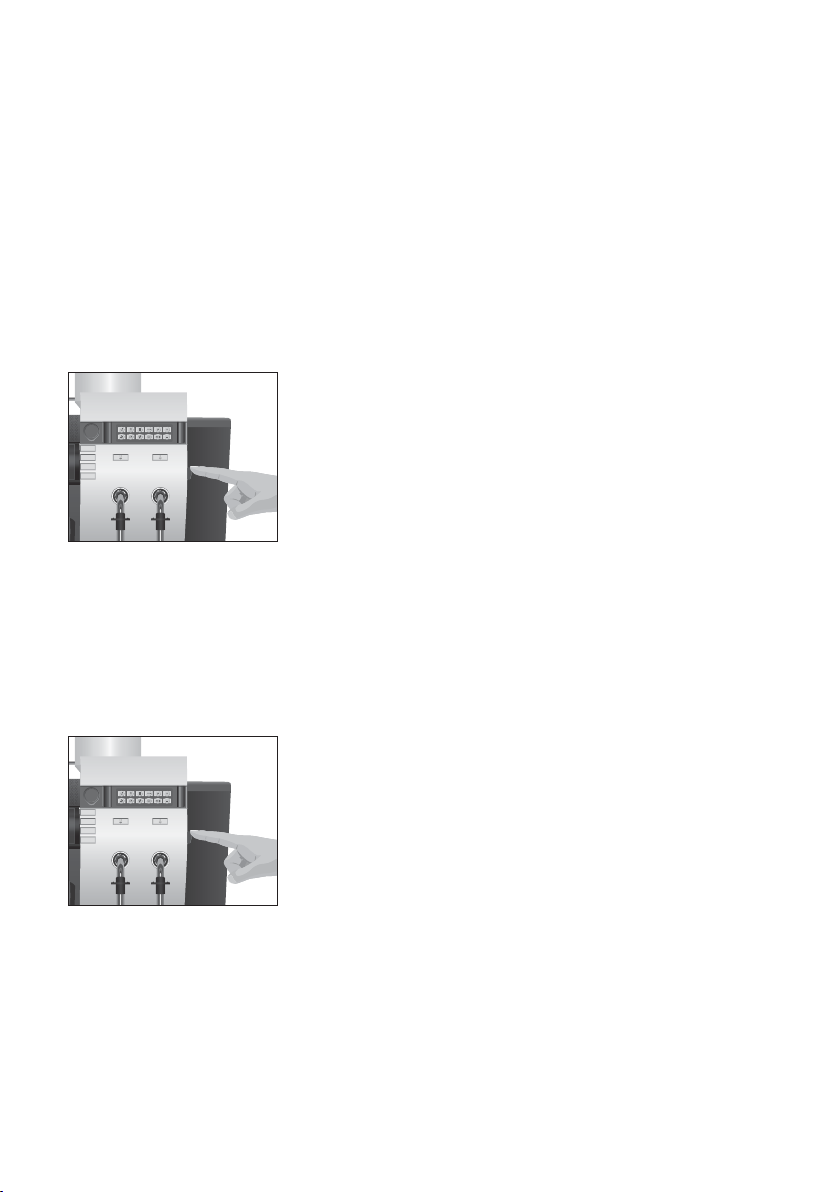
T Open the cover of the progra mming buttons.
O T Press the P button until WATER HARDNESS 16° dH
appears.
O T Press the P button to enter the programme i t em.
WATER HARDNESS 16° dH
T Press the + button several times to select the water hard-
ness.
WATER HARDNESS 25° dH (example
)
O T Press the P button to co nfirm the setting.
CONFIRMED appears briefly on t he display.
WATER HARDNESS 25° dH
0 T Press the exit button to e xit programming mode.
Your IMPRESSA is once more ready for ope ration.
Determining the water
hardness
Adjusting the water
hardness
Page 16
1
6
2 Preparing and using for the first t ime
Both gri nders can be adjust ed on a continuous scale to sui t the roast
of the respective coffee bl end.
If you adjust the fineness of grind when the grinde r is not in operation, the set tin g ring could be damaged.
T Only adjust the fineness of grind when the grinder is
running.
The fineness of grind set ting is correct if the coff ee flows regul arly
from the coffe e spout. In addition, a fine, dense crema is formed.
Our re commenda tions:
ZSel e ct a fine setting for a light roast.
U If the fineness of grind is too fine, the co f fee only drips from
the coffee spo ut.
ZSel e ct a coarse setting for a darker r oast.
U If the fineness of grind is too coarse, the coff ee flows too
quickly from the coffee spout.
Example: To change the fineness of grind during coffee preparation,
proce ed as follows:
Precondition: Your IMPRESSA is re ady for operat ion.
T Pla ce a cup unde r the dual spout.
T Press the 1 coffee button.
The grinder star ts and 1 COFFEE is displayed.
TSet the set ting ring on the bean conta iner to the required
posit ion while the grinder is running.
The coffee will be prepared and the fineness of grind is
adjusted.
Adjusting the grinder
CAUTION
Page 17
1
7
2 Preparing and using for the first t ime
When the IMPRESSA is swi t ched on, a prompt for the rinse operation
automatica lly appears which is initia ted by pressing the rinse but-
ton.
This setting can be changed in progra mmi ng mode so that the
machine automat ically acti vate s the switch-on rinse (see Chapt er 5
‘Permanent setti ngs in pro gramming mode – Switch-on rinse’
)
.
Precondition: Your IMPRESSA is switched on at the power switch.
T Open the cover of the progra mming buttons.
Q T Press the on/off button to swi tch the IMPRESSA on.
WELCOME TO JURA appears brief ly on the displ ay. Af ter
heating, PRESS RINSE BUTTON is displayed.
c T Press the rinse but ton to star t the rinse oper a tion.
MACHINE IS RINSING, water flows out of the dual spout . The
opera tio n stops automat ically. Your IMPRESSA is r eady for
opera tion.
When you swit ch your IMPRESSA off, the spouts with which a coffee
speciality or milk have been prepared are rinsed. If only hot wat er or
ste am was prepar ed, t he machine switches of f without ri nsing.
Precondition: Your IMPRESSA is re ady for operat ion.
T Open the cover of the progra mming buttons.
Q T Press the on/off button to swi tch the IMPRESSA off.
G
OODBYE appe ars on the display. The machine is rinsed,
water flows out of the dual spout. The operation stops automatically, the IMPRESSA is switched off (standby
)
.
E To disconnect the ma chin e comple tel y from the mains, switch
it off with the power switch on t he re ar of the machine.
Switching on
Switching o ff (standby)
Page 18
1
8
3 Familiar ising yourself with the control options
With the IMPRESSA, you can prepare an excellent coffe e or milk spe-
ciality at the touch of a button. You also have the optio n of adjusting
the coffee strength and tempe rature, as well as the amount of water
to your personal taste.
This chapt er will allow you to become familiar with all control options
with the aid of exampl es. To fami liarise yourself with your IMPRESSA,
we recommend that you make a point of actively t r ying the facilities
described in this chapter. You will f ind this is well worthwhile.
L
earn how to perform the following:
Z Preparation at the touch of a button
Z Permanent se ttings in programming mode
E You can stop the machine a t any time while a coff ee or milk
speciality or ho t water is being prepared. To do this, press any
but ton.
Prepare your favourit e coffee speci ality a t the touch of a button.
All coffe e specialiti es are prepared following this model.
Example: This is how to prepare one coff ee.
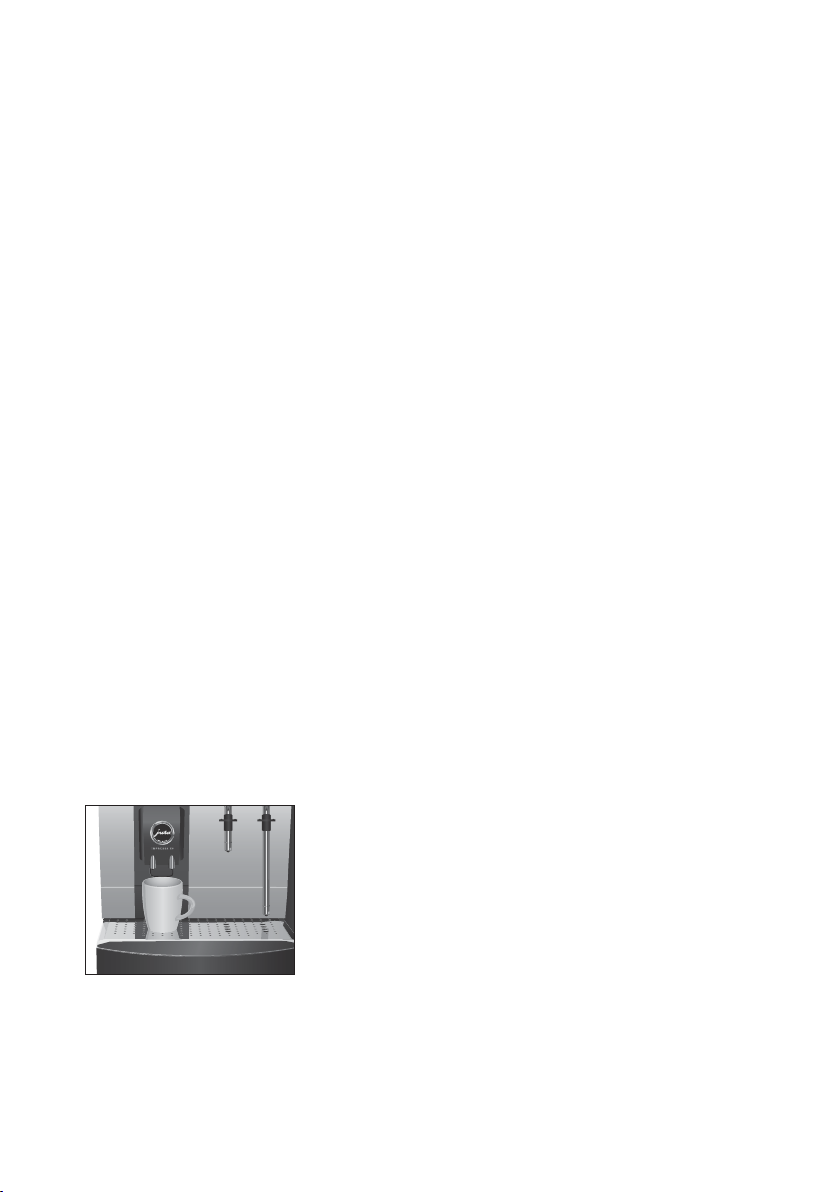
Precondition: Your IMPRESSA is re ady for operat ion.
T Pla ce a cup unde r the dual spout.
T Press the 1 coffee button.
Coffee prep aration then begins. You can follow the current
status of preparation on the progress bar. The pre-set
amo unt of wate r fl ows into the cup. The operation stops
automatically.
Your IMPRESSA is once more ready for ope ration.
Preparation at the
touch of a button
Preparing a coffee speciality
at the touch of a button
3 Familiarising yourself with the control options
Page 19

1
9
3 Familiar ising yourself with the control options
You can easily adjust your IMPRESSA to your personal cof fee blends
and specialit ies. The permanent se tting options in programming
mode are shown here:
Permanent set tings in
programming mode
Programme item Subitem Explana tion
WATER HARDNE
SS
(
is only displayed when
the filter is not activate d
)
NOT ACTIVE,
1° dH – 30° dH
T Adjust the water hardness.
PRODUCT SETTINGS
TSel e ct your set tings for the coff ee
and milk specialities as well as hot
water and stea m.
TIME --:--, WEEKDAY
TSet the time and weekday.
TIME
R
TSet the switch-on and swi tch-of f
times and specify the we ekdays on
which IMPRESSA should switch on
and of f automa tically.
OFF AFTE
R
OFF AFTER --. HRS
,
0.5 HRS
– 9 HRS
TSet the number of hours aft er
which the IMPRESSA should switch
off automat ically.
S
WITCH-ON RINSE MANUAL, AUTOMATIC
TSet whether the switch-on rinse
should be st art ed manually or
automatically.
LANGUAG
E DEUTSCH, FRANCAIS, ENGLIS
H,
ITALIANO, N
L
TSelect your language.
FORMAT UNIT,
TIME FORMAT
TSel e ct the unit of the amount of
water and the time format.
INFORMATION T Ke ep track of all prepared cof fee
and milk specialities and view the
mai ntenance sta tus.
MULTIMEDIA VOLUME, BRIGHTNE
SS
,
CONTRAST,
MULTIMEDIA LANGUAGE,
VIDEO PLAYBACK
(
INTAKE, ALERT, INSTRUCTION
)
,
VIDEO SOUND
(
INTAKE, ALERT, INSTRUCTION
)
TSel e ct your set tings for the
displ ay and the explanator y fil m
clips.
Page 20
20
3 Familiar ising yourself with the control options
S
et tings in programming mode always follow the same model.
Example: Proce ed as follows to change the am ount of powder for
an espresso.
Precondition: Your IMPRESSA is re ady for operat ion.
T Open the cover of the progra mming buttons.
O T Press the P button until WATER HARDNESS 16° dH
appears.
T Press t he + or - button several t imes until PRODUCT
S
ETTINGS
is shown.
O T Press the P button to enter the programme i t em.
SEL
ECT PRODUC T and the availa ble products are dis-
played.
T Press the 1 espresso but ton.
1 ESPRESSO /
WATER AMOUNT 35 M
L
T Press the + button several times until 1 ESPRESSO / POWDER
AMOUNT is shown.
O T Press the P button to enter the programme i t em.
1 ESPRESSO /
POWDER AMOUNT
T Press the + or - but ton several times to select the powder
amount.
O T Press the P button to co nfirm the setting.
CONFIRMED appears briefly on t he display.
1 ESPRESSO /
POWDER AMOUNT
0 T Press the exit button to e xit the programming it em.
SEL
ECT PRODUCT
0 T Press the exit button to e xit the programming it em.
PRODUCT SETTINGS
0 T Press the exit button to e xit programming mode.
Your IMPRESSA is once more ready for ope ration.
With the INFORMATION programme item you can view t he following informa tion:
Z Number of the prepared coffe e and milk speci ali ties and hot
water
Z Mainte nance st atus and number o f ma intenance programmes
per forme d (cle aning, descaling, filter change, mi lk syst em
cle aning
)
Viewing information
and maintena nce
status
Page 21
2
1
3 Familiar ising yourself with the control options
Precondition: Your IMPRESSA is re ady for operat ion.
T Open the cover of the progra mming buttons.
O T Press the P button until WATER HARDNESS appears.
T Press the + or - button several times until INFORMATION is
shown.
O T Press the P button to enter the programme i t em.
TOTAL and the overall number of preparations are dis-
played.
E Press the + or - button several times to view the various items
of i nforma tion.
0 T Press the exit button to e xit the programming it em.
INFORMATION
0 T Press the exit button to e xit programming mode.
Your IMPRESSA is once more ready for ope ration.
With the individual cou nter (count er but ton 9) you can track your
consumption over a speci fic period of time which you can speci fy.
This counter can be rese t to zero at any t ime.
Precondition: Your IMPRESSA is re ady for operat ion.
T Open the cover of the progra mming buttons.
9 T Press the counter button until an acoust ic signal is given.
1
COFFEE and the number of preparations are displayed.
E Press the + or - button several times to view the respective
number of prepare d products.
0 T Press the exit button.
COUNTER DELETE / NO
T Press the + or - but ton to change the set ting to YE
S
.
O T Press the P button to reset the counter.
DELETED appears briefly on the display.
Your IMPRESSA is once more ready for ope ration.
Reset ting the counter
Page 22
22
4 Preparation at the touch of a but ton
In this chapt er you will find out how to prepare coffee and milk spe-
cialities as well as hot water a nd ste am wi thout ma king further se t-
tings.
Chapter 3, ‘Fami liarising yourself with the control opt ions’, will teach
you how to adjust the se tt ings to your personal preferences. Al ter-
nat ively, you can use Chapt er 5, ‘Permanent settings in programming mode’.
E You can stop the machine a t any time while a coff ee or milk
speciality or ho t water is being prepared. To do this, press any
but ton.
The classic coffee drink from Italy. An espresso is crowned by a fine,
dense crema on the sur face.
Example: This is how to prepare one espresso.
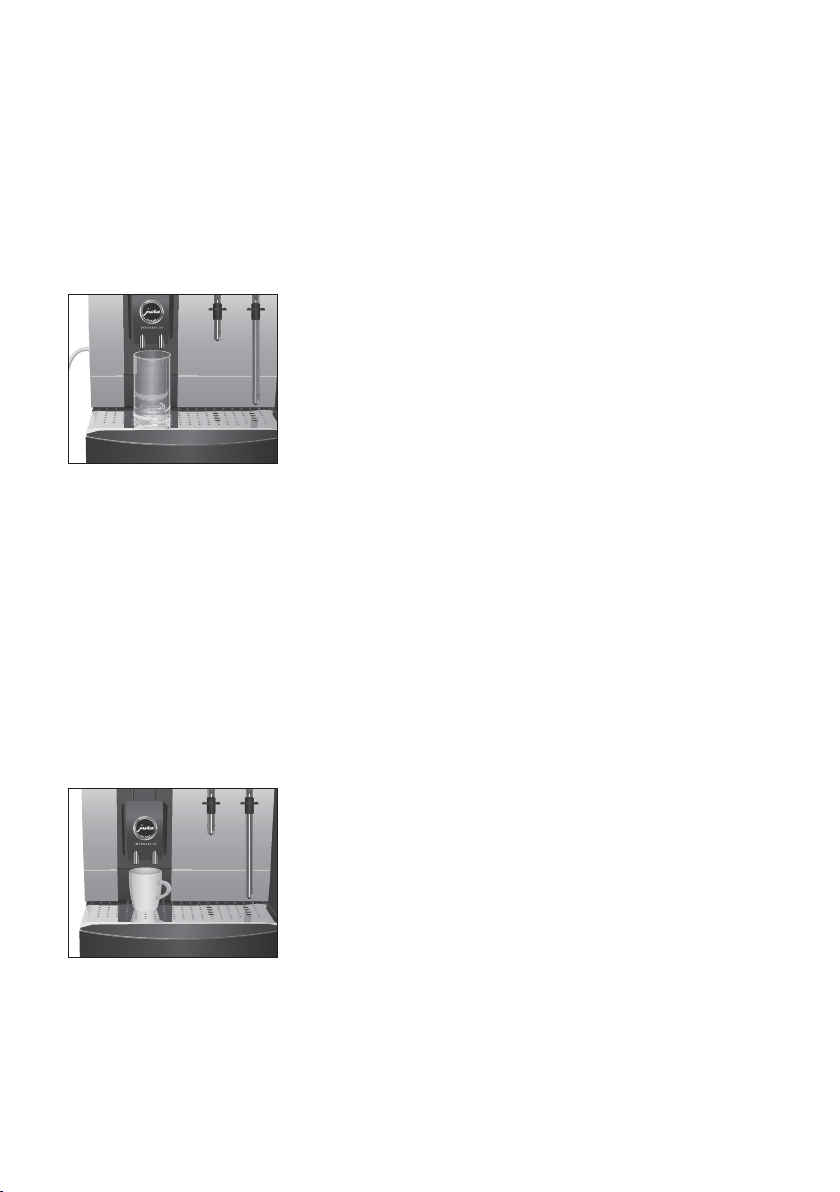
Precondition: Your IMPRESSA is re ady for operat ion.
T Pla ce an espresso cup under the dual spout.
T Press the 1 espresso but ton.
Coffee prep aration then begins. You can follow the current
status of preparation on the progress bar. The pre-set
amo unt of wate r fl ows into the cup. The operation stops
automatically.
Your IMPRESSA is once more ready for ope ration.
Example: This is how to prepare one coff ee.
Precondition: Your IMPRESSA is re ady for operat ion.
T Pla ce a cup unde r the dual spout.
T Press the 1 coffee button.
Coffee prep aration then begins. You can follow the current
status of preparation on the progress bar. The pre-set
amo unt of wate r fl ows into the cup. The operation stops
automatically.
Your IMPRESSA is once more ready for ope ration.
E To prepare t wo coffees, place two cups under the dua l spout
and press the 2 coff ees button.
Espresso
Coffee
4 Preparation at the touch of a button
Page 23
23
4 Preparation at the touch of a but ton
You can prepare cappuccino, milky coffe e and latte macchiato very
simply at the touch of a button.
Example: This is how to prepare one lat te macchiato.
Precondition: Your IMPRESSA is re ady for operat ion.
T Immerse both milk pipes compl etely in the milk .
T Pla ce a glass under the dual spout.
T Press the l atte macchi ato button.
Preparation starts and the milk foam flows into the glass.
You can follow the current sta tus of preparation on the
progress bar.
A short int erval follows. The pre-set amount of wate r of the
espresso flows into the glass.
The operat ion stops automatically.
Your IMPRESSA is once more ready for ope ration.
E Ten minut es af ter mi lk is prepared, the dual spout is automat-
ica lly rinse d. This rinsing operation is announced by an acous-
tic signal. The se tt ing can be changed by a JURA service t ech-
nici an.
You can pr e pare hot milk very simply a t the touch of a button.
Precondition: Your IMPRESSA is re ady for operat ion.
T Immerse both milk pipes compl etely in the milk .
T Pla ce a cup unde r the dual spout.
T Press the milk button.
Preparation st art s and the hot milk flows into the cup. You
can follow the current st atus of preparation on the progress
bar.
The operat ion stops automatically.
Your IMPRESSA is once more ready for ope ration.
E Ten minut es af ter mi lk is prepared, the dual spout is automat-
ica lly rinse d. This rinsing operation is announced by an acous-
tic signal. The se tt ing can be changed by a JURA service t ech-
nici an.
Cappuccino,
milky coffee and
latte macchiato
Hot milk
Page 24
24
4 Preparation at the touch of a but ton
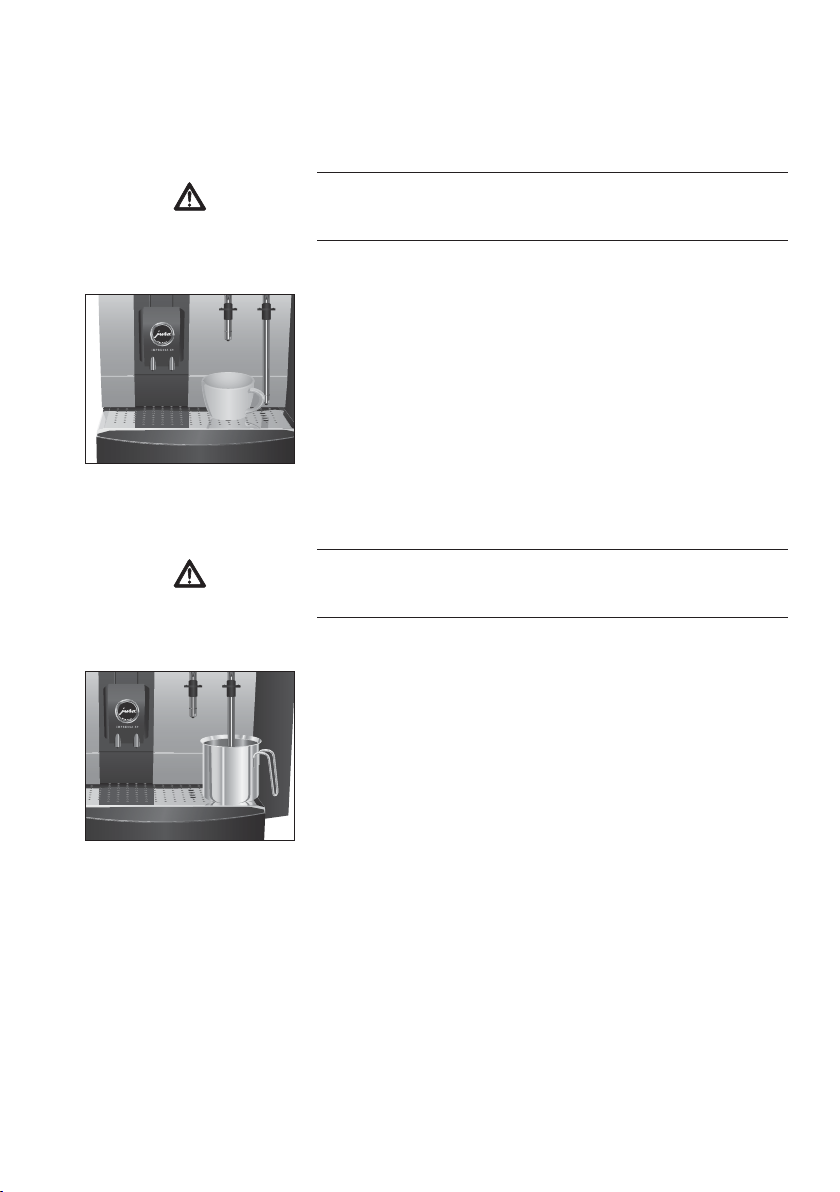
There is a danger of scalding from hot wat e r splashes.
T Avoid direct cont act with the skin.
Precondition: Your IMPRESSA is re ady for operat ion.
T Pla ce a cup unde r the hot water pi pe.
m T Press the hot water button.
Preparation then begins. You can follow the current status of
preparation on the progre ss bar.
The operation st ops automatical ly when the pre-set amount
of wat er is reached.
Your IMPRESSA is once more ready for ope ration.
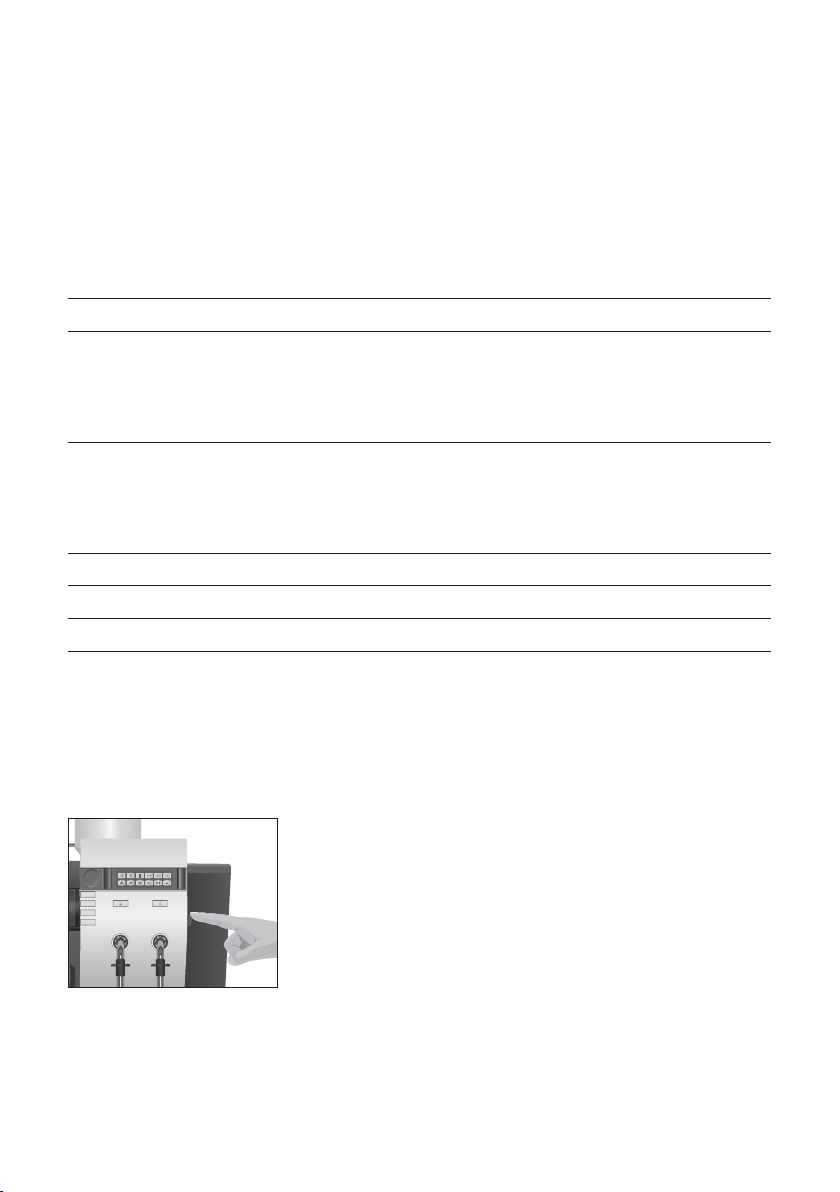
There is a danger of scalding from hot ste am.
T Avoid direct cont act with the skin.
Precondition: Your IMPRESSA is re ady for operat ion.
T Pla ce a r eceptacle u nder the steam pipe.
n T Press the steam button.
Preparation then begins. You can follow the current status of
preparation on the progre ss bar.
The operation st ops automatical ly when the pre-set amount
of st eam is rea ched.
Your IMPRESSA is once more ready for ope ration.
Hot water
CAUTION
Steam
CAUTION
Page 25
25
5 Permanent settings in programming mode
With the PRODUC T SETTINGS
programme it em you can select indi-
vidual settings for all coffee and milk speciali ties as well as hot
water.
The following permanent setti ngs can be made:
S
et tings in programming mode always follow the same model.
Example: Proc e ed as follows to change the powder am ount for
1
espresso.
Precondition: Your IMPRESSA is re ady for operat ion.
T Open the cover of the progra mming buttons.
O T Press the P button until WATER HARDNESS appears.
T Press t he + or - button several t imes until PRODUCT
S
ETTINGS
is shown.
O T Press the P button to enter the programme i t em.
SEL
ECT PRODUCT
T Press the 1 espresso but ton.
1 ESPRESSO /
WATER AMOUNT
T Press the + button several times until 1 ESPRESSO / POWDER
AMOUNT is shown.
O T Press the P button to enter the programme i t em.
POWDER AMOUNT
Product settings
5 Permanent settings in programming mode
Product Amount Additional setting option s
1
espresso,
1
coffee,
2 coffees
WATER AMOUNT: 25 ML – 300 M
L
(
with 2 coffees: a mount per cup
)
POWDER AMOUNT
GRINDER (left and right grinder
in percent
)
TEMPERATURE: LOW, NORMAL,
HIGH
Capp uccino, milky
coff ee, l atte macch i -
ato
WATER AMOUNT: 25 ML – 300 M
L
POWDER AMOUNT
MILK AMOUN T: 0 / 3 SEC – 120 SEC
MILK FOAM: 0 / 3 SEC – 120 SEC
GRINDER (left and right grinder
in percent
)
TEMPERATURE: LOW, NORMAL,
HIGH
Hot milk MILK AMOUN T: 0 / 3 SEC – 120 SEC –
Hot wa ter (port ion)WATER AMOUNT: 25 ML – 500 M
L
–
S
team (per manent
)
– –
Page 26
26
5 Permanent settings in programming mode
T Press the + or - button several times to sele ct the amount of
powder.
O T Press the P button to co nfirm the setting.
CONFIRMED appears briefly on t he display.
1 ESPRESSO /
POWDER AMOUNT
0 T Press the exit button to e xit the programming it em.
SEL
ECT PRODUCT
0 T Press the exit button to e xit the programming it em.
PRODUCT SETTINGS
0 T Press the exit button to e xit programming mode.
Your IMPRESSA is once more ready for ope ration.
You alre ady se t the time and weekday when you used the machine
for the first time. You can cha nge this se tting.
Example: How to change the time from 8:45 (example) to 9:50.
Precondition: Your IMPRESSA is re ady for operat ion.
T Open the cover of the progra mming buttons.
O T Press the P button until WATER HARDNESS 16° dH
appears.
T Press the + or - but ton several t ime s unt i l TIME is shown.
O T Press the P button to enter the programme i t em.
TIME HOURS
08:45 (Example
)
T Press the + or - but ton several t ime s to se t t he hours.
O T Press the P button to co nfirm the setting.
T Press the + or - but ton to set the minut es.
O T Press the P button to co nfirm the setting.
CONFIRMED appears briefly on t he display.
WEEKDAY MONDAY (Example
)
O T Press the P button to co nfirm the setting.
CONFIRMED appears briefly on t he display.
TIME
0 T Press the exit button to e xit programming mode.
Your IMPRESSA is once more ready for ope ration.
The followi ng set tings can be made in the TIMER menu item:
Z MACHINE ON
USet the required switch-on time.
Time and weekday
Timer
Page 27
27
5 Permanent settings in programming mode
Z MACHINE OFF
USet the required switch-off time.
Z ON/OFF
USet the weekdays on which the IMPRESSA should switch on
and of f automa tically.
E The programmable switch-on and switch-off time can only be
set when t he t ime has be en se t.
E The programmabl e swi tch-on only works when the machine
is swit ched on at the p owe r switch (standby
)
.
Example: Proceed as follows to set the swi tch-on time to 07:30 and
sti pulate tha t your IMPRESSA does not swit ch on automatically on
S
undays.
Precondition: Your IMPRESSA is re ady for operat ion.
T Open the cover of the progra mming buttons.
O T Press the P button until WATER HARDNESS 16° dH
appears.
T Press the + or - but ton several t ime s unt i l TIMER is shown.
O T Press the P button to enter the programme i t em.
MACHINE ON --:--
O T Press the P button to enter the programme i t em.
MACHINE ON / HOURS
--:--
T Press the + button several ti mes unt il MACHINE ON / HOURS
07:00 is shown.
O T Press the P button to confirm the hour set ting.
T Press the + button several times until MACHINE ON /
MINUTES 07:30 is shown.
O T Press the P button to confirm the minute se tting.
CONFIRMED appears briefly on t he display.
MACHINE ON 07:30
T Press t he + or - button several times until ON/OFF / SUNDAY
YES is displayed.
O T Press the P button to enter the programme i t em.
ON/OFF / SUNDAY YE
S
T Press the + or - but ton to change the set ting to SUNDAY
NO.
Page 28
28
5 Permanent settings in programming mode
O T Press the P button to co nfirm the setting.
CONFIRMED appears briefly on t he display.
ON/OFF / SUNDAY NO
0 T Press the exit button to e xit the programming it em.
TIME
R
0 T Press the exit button to e xit programming mode.
Your IMPRESSA is once more ready for ope ration.
By inst ruct ing your IMPRESSA to automati cally switch itself of f, you
can cut down your energy consumption. If this function is activated,
your IMPRESSA switches off automa tically a fter the l ast ac ti on on
the machine.
E The program mable switch-of f ti me can be adjusted betwee n
0.5 and 9 hours or de activated.
Example: Proceed as follows to change the automat ic switch-off
time from 5.0 HRS
TO 2.0 HRS
.
Precondition: Your IMPRESSA is re ady for operat ion.
T Open the cover of t he programming buttons.
O T Press the P button until WATER HARDNESS appears.
T Press the + or - but ton several t imes until OFF AFTER 5 HRS
is shown.
O T Press the P button to enter the programme i t em.
OFF AFTER 5.0 HRS
T Press the - but ton several times until OF F AF TER 2.0 HRS
is
shown.
O T Press the P button to co nfirm the setting.
CONFIRMED appears briefly on t he display.
OFF AFTER 2.0 HRS
0 T Press the exit button to e xit programming mode.
Your IMPRESSA is once more ready for ope ration.
Automatic s witch-off
Page 29
29
5 Permanent settings in programming mode
You sele cted the language when t he machine was use d for the first
time. You can chang e this setting.
Example: To change the language from ENGLIS
H to DEUTSCH, pro-
cee d as follows.
Precondition: Your IMPRESSA is re ady for operat ion.
T Open the cover of t he programming buttons.
O T Press the P button until WATER HARDNESS appears.
T Press the + or - but ton several t imes unt il LANGUAGE
ENGLIS
H is shown.
O T Press the P button to enter the programme i t em.
LANGUAG
E ENGLIS
H
T Press the + or - but ton several t imes to select the language,
for exa mple SPRACHE DEUTSCH.
O T Press the P button to co nfirm the setting.
GES
PEICHERT appears briefly on t he display.
SPR
ACHE DEUTSCH
0 T Press the exit button to e xit programming mode.
Your IMPRESSA is once more ready for ope ration.
You can change the unit of the amount of water from ‘ml’ to ‘oz’ and
the time format to ‘24 HRS
’ or ‘AM/PM’ in t he FORMAT programme
item.
Example: To change the unit for the amount of water from ML to
OZ, p rocee d as follows.
Precondition: Your IMPRESSA is re ady for operat ion.
T Open the cover of the progra mming buttons.
O T Press the P button until WATER HARDNESS appears.
T Press the + or - but ton several ti mes unti l FORMAT is
shown.
O T Press the P button to enter the programme i t em.
FORMAT / UNIT M
L
O T Press the P button to enter the programme i t em.
FORMAT / UNIT M
L
T Press the + or - but ton to change the set ting to UNIT OZ.
O T Press the P button to co nfirm the setting.
CONFIRMED appears briefly on t he display.
FORMAT / UNIT OZ
Language
Format (unit of water
amount and time
format)
Page 30
30
5 Permanent settings in programming mode
0 T Press the exit button to e xit the programming it em.
FORMAT
0 T Press the exit button to e xit programming mode.
Your IMPRESSA is once more ready for ope ration.
You can set whether the switch-on rinse must be started manually
or automa tically.
Example: To programme the machine for a manua l switch-on rinse,
proce ed as follows.
Precondition: Your IMPRESSA is re ady for operat ion.
T Open the cover of the progra mming buttons.
O T Press the P button until WATER HARDNESS appears.
T Press the + or - but ton several t imes unti l SWITCH-ON
RINSE /
AUTOMATIC is shown.
O T Press the P button to enter the programme i t em.
S
WITCH-ON RINSE / AUTOMATIC
T Press the + or - but ton to change the set ting to MANUA
L
.
O T Press the P button to co nfirm the setting.
CONFIRMED appears briefly on t he display.
S
WITCH-ON RINSE / MANUA
L
0 T Press the exit button to e xit programming mode.
Your IMPRESSA is once more ready for ope ration.
The following set tings can be made in the MULTIMEDIA programme
item:
Z VOLUME
Z BRIGHTNE
SS
Z CONTRAST
Z MULTIMEDIA LANGUAGE
Z VIDEO PLAYBACK - INTAKE
U Fil m cl i ps during prepara tion of a product
Z VIDEO PLAYBACK - ALERT
U Fi l m clips when your IMPRESSA prompts a n action, for
example filling t he bean container or wat er t ank
Z VIDEO PLAYBACK - INSTRUCTION
U Explanator y film clips when you have start e d a maintenance
programme
Switch-on rinse
Multimedia
Page 31

3
1
5 Permanent settings in programming mode
Z VIDEO SOUND - INTAKE
Z VIDEO SOUND - ALERT
Z VIDEO SOUND - INSTRUCTION
E In the VIDEO PLAYBACK and VIDEO SOUND programme ite ms,
the options CONTINUOUS, NEVER and ONCE are ava ilable for
playback.
Example: Proceed as fol lows to programme playback of the sound
(
VIDEO SOUND) once in t he event of an ALERT.
Precondition: Your IMPRESSA is re ady for operat ion.
T Open the cover of the progra mming buttons.
O T Press the P button until WATER HARDNESS appears.
T Press the + or - button several times until MULTIMEDIA is
shown.
O T Press the P button to enter the programme i t em.
MULTIMEDIA / VOLUME
T Press the + or - button several times until VIDEO SOUND -
ALERT is shown.
O T Press the P button to enter the programme i t em.
CONTINUOU
S
T Press the + or - button several times until VIDEO SOUND -
ALERT / ONCE i s shown.
O T Press the P button to co nfirm the setting.
CONFIRMED appears briefly on t he display.
VIDEO SOUND - ALERT
0 T Press the exit button to e xit the programming it em.
MULTIMEDIA
0 T Press the exit button to e xit programming mode.
Your IMPRESSA is once more ready for ope ration.
Page 32

32
6 Maintenance
To ensure that you ge t many ye ars of rel iabl e service out of your
IMPRESSA and to guarante e an optimum coffe e quality, the machi ne
requires da ily maintenance. Proceed as follows:
Z Empty th e coffee grounds container and the drip tray. Rinse
the m with warm wat er.
ZRinse the wa ter tank with clean water.
Z Dismantle and rinse the dual spout (S
ee Chapter 6 ‘Mainte-
nance – Dismantling and rinsing the dua l spout’
)
.
Z Wipe the surf ace of the machine with a damp cloth.
When the IMPRESSA is switched on, a prompt to perform a rinse
opera tion appears af ter heating, or this is automatically star ted.
When the IMPRESSA is switched off, a rinse operation is automati-
cal ly ini tia ted.
In programming mode you can make a set ting to stipulat e whether
the switch-on rinse ne eds to be act ivat ed manually or whether it is
activated aut omat ica lly (see Chapter 5 ‘Permanent sett ings in pro-
gramming mode – Switch-on rinse’
)
.
R
insing can be ini tia ted manually at any time.
Precondition: Your IMPRESSA is re ady for operat ion.
T Open the cover of the progra mming buttons.
c T Press the rinse button.
MACHINE IS RINSING, water flows out of the dual spout.
The operat ion stops automatically.
Your IMPRESSA is once more ready for ope ration.
Maintenance tips
Rinsing the machine
Rinsing the machine –
manually
6 Maintenance
Page 33

33
6 Maintenance
For reasons of hygiene and to e nsure that t he dua l spout works per-
fec tly, i t must be regularly dismant led and rinsed.
Precondition: Your IMPRESSA is switched off (standby
)
.
T Press the release button on the top of the dual spout and
remove the cover.
T Carefully pull the pipes out.
TRemove the spouts and dismantle all components.
TRinse all parts thoroughly with hot wa ter.
TReassembl e the individual parts. Pay att ent ion to the col our
of the individual parts.
T Mount the spout s on the ma chin e.
TReplace the cover.
For reasons of hygiene and to e nsure that t he dua l spout works per-
fec tly, you should clean the mi lk system daily if you have prepare d
mil k.
If the wrong clea ning agent is used, the machine could be damaged
and/or traces of detergent could be left behind in t he water.
T Only use original JURA care produc ts.
E The cleaning programme only lasts about 2 minutes.
E Do not interrupt the cleaning progra mme. The qual ity of
cle aning will be impaired if you do so.
E The JURA Cappuccino Cl eaner is ava ilable from stockists.
Dismantling and
rinsing the d ual spout
Milk syst em cleaning
CAUTION
Page 34

34
6 Maintenance
Precondition: Your IMPRESSA is re ady for operat ion.
T Open the cover of the progra mming buttons.
6 T Press the milk syste m cleaning button.
The current mai ntenance sta tus is s hown.
6 T Press the milk syste m cleaning button again.
STAR
T MILK SYSTEM CLEANIN
G
6 T Press the milk system cleaning butt on to start the cleaning
opera tion.
CLEANER FOR MILK SYSTEM CLEANIN
G
T Fill a rec e ptacle with 400 ml water and a dd 1 1/
2 caps of t he
JUR
A Cappuccino Cl eaner.
T Immerse both milk pipes c omple tely in the cleaning solu-
tion.
T Pla ce a r eceptacle (at least 500 ml) under the dual spout.
6 T Press the milk syste m cleaning button.
MACHINE IS CLEANING, the dual spout and the pipes are
cle aned.
The procedure is interrupted, WATER FOR MILK SYSTEM
CLEANIN
G
.
TRinse the rece ptacle thoroughly, fill it wi th approx. 400 ml of
fresh water and immerse the milk pi pes in the water.
T Empty the ot her recepta cle and pla ce it under the dual spout
once more.
6 T Press the milk syste m cleaning button.
MACHINE IS CLEANING, the dual spout and the pipes are
cle aned with fresh wat er.
The operat ion stops automatically.
Your IMPRESSA is once more ready for ope ration.
After 220 coffee preparat ions or 80 swi tch-on rinses, the IMPRESSA
will prompt you to clean the coffee syst em.
If the wrong clea ning agent is used, the machine could be damaged
and/or traces of detergent could be left behind in t he water.
T Only use original JURA care produc ts.
E The cleaning programme only lasts about 20 minutes.
E Do not interrupt the cleaning progra mme. The qual ity of
cle aning will be impaired if you do so.
Coffee system cleaning
CAUTION
Page 35

35
6 Maintenance
EJURA cle aning tablets are avai labl e from stockists.
Precondition: Your IMPRESSA is re ady for operat ion, the message
R is shown on the display.
T Open the cover of the progra mming buttons.
7 T Press the cof fee syste m cleaning button.
The current mai ntenance sta tus is s hown.
7 T Press the cof fee syste m cleaning button again.
STAR
T COFFEE SYSTEM CLEANIN
G
7 T Press the coffee system cl eaning button to star t the cle aning
opera tion.
EMPTY DRIP TRAY
T Empty t he dri p tray.
EMPTY COFFEE GR
OUNDS CONT.
T Empty t he coffee grounds conta iner.
TReplace the coffe e grounds container and the drip tray.
PRESS BUTTON
O T Press the P button.
MACHINE IS CLEANING, wa ter flows out of the dual spout .
You can follow the current cleaning sta tus of the coffe e sys-
tem on the progress bar.
The operat ion is interrupte d, ADD TABLET.
T Insert a JURA cleaning t abl e t into the filler funnel for the
cle aning tablet .
7 T Press the cof fee syste m cleaning button.
MACHINE IS CLEANING, water f lows out of the dual spout
several times.
The process is interrupte d, EMPTY DRIP TRAY.
T Empty t he dri p tray.
EMPTY COFFEE GR
OUNDS CONT.
T Empty t he coffee grounds conta iner.
TReplace the coffe e grounds container and the drip tray.
Your IMPRESSA is once more ready for ope ration.
During combin e d cleaning, both t he milk a nd coffee systems are
cle aned. After 220 coffe e preparations or 80 switch-on rinses, the
IMPRESSA will prompt you to clean the coffee system. You have the
option of cleaning the mi lk syst em in addi tion to the coff ee sys-
tem.
Combined cleaning
Page 36

36
6 Maintenance
If the wrong clea ning agent is used, the machine could be damaged
and/or traces of detergent could be left behind in t he water.
T Only use original JURA care produc ts.
E The cleaning programme only lasts about 22 minutes.
E Do not interrupt the cleaning progra mme. The qual ity of
cle aning will be impaired if you do so.
EJURA cleaning t ablets and t he JURA Cappuccino Cleaner are
available from stoc k ists.
Precondition: Your IMPRESSA is re ady for operat ion, the message
R is shown on the display.
T Open the cover of the progra mming buttons.
8 T Press the combined cleaning but ton.
The current mai ntenance sta tus is s hown.
8 T Press the combined cleaning but ton a gain.
STAR
T COMBINED CLEANIN
G
8 T Press the comb i ned cleaning bu t ton to start the cleaning
opera tion.
EMPTY DRIP TRAY
T Empty t he dri p tray.
EMPTY COFFEE GR
OUNDS CONT.
T Empty t he coffee grounds conta iner.
TReplace the coffe e grounds container and the drip tray.
CLEANER FOR MILK SYSTEM CLEANIN
G
T Fill a rec e ptacle with 400 ml water and a dd 1 1/
2 caps of t he
JUR
A Cappuccino Cl eaner.
T Immerse both milk pipes c omple tely in the cleaning solu-
tion.
T Pla ce a r eceptacle (at least 500 ml) under the dual spout.
6 T Press the milk syste m cleaning button.
MACHINE IS CLEANING. You can follow the current st atus of
combined cleaning on the progress bar.
The operat ion is interrupte d, ADD TABLET.
CAUTION
Page 37

37
6 Maintenance
T Insert a JURA cleaning t abl e t into the filler funnel for the
cle aning tablet .
8 T Press the coffee syst em cleaning button.
MACHINE IS CLEANING, water f lows out of the dual spout
several times. The dual spout and the pipes are cleane d.
The procedure is interrupted, WATER FOR MILK SYSTEM
CLEANIN
G
.
TRinse the rece ptacle thoroughly, fill it wi th approx. 400 ml of
fresh water and immerse the milk pi pes in the water.
T Empty the ot her recepta cle and pla ce it under the dual spout
once more.
6 T Press the milk syste m cleaning button.
MACHINE IS CLEANING, the dual spout and the pipes are
cle aned with fresh wat er.
The process is interrupte d, EMPTY DRIP TRAY.
T Empty t he dri p tray.
EMPTY COFFEE GR
OUNDS CONT.
T Empty t he coffee grounds conta iner.
TReplace the coffe e grounds container and the drip tray.
Your IMPRESSA is once more ready for ope ration.
After 50 litres of water have flowed through, or a ft er two mont hs,
the fil ter will cease to work. Your IMPRESSA will aut oma tically
prompt you to change the fil ter.
E The fil ter but ton is only a ctive if the amount of water of the
fil ter is set to 50 l. If anot her water amount is set, the filter can
only be repl aced by a JURA service technicia n.
Precondition: Your IMPRESSA is re ady for operat ion, the message
R is shown on the display.
T Open the cover of the progra mming buttons.
$ T Press the fi l ter button.
The current mai ntenance sta tus is s hown.
$ T Press the fi l ter button again.
STAR
T CHANGE FILTE
R
$ T Press the fi l ter button.
INSERT FILTE
R
TRemove the water tank and empty it.
Changing the filter
Page 38

38
6 Maintenance
T Take out the old CLARIS plus filter car tridge and t he exten-
sion.
T Fit the extension onto a new f ilt er cartridge.
T Fit the fil ter cartridge into the water tank, pressing slightly,
and push the cartridge holder back so that it audi bly snaps
into place.
T Pla ce a receptacle (at le ast 500 ml) under the hot water
spout .
m T Press the hot water button.
FILTER IS RINSING, water flows out of the hot water spout .
E The wa ter may be slightly discoloured. This is not harmful to
health and does not a ffe ct the taste.
Fil ter ri nsing st ops automa tically after approx. 500 ml .
Your IMPRESSA is once more ready for ope ration.
The IMPRESSA builds up deposi ts of limescale over t ime and automatically p rompts you to descale it when necessary. The degre e of
cal cifi cat ion de pends on the degre e of hardness of your water.
If the descal i ng age nt comes into contact wit h the skin or eyes, this
can cause irrit ation.
T Avoid contact wi t h the skin or eyes.
T If the descaling agent comes into contact with the ski n or the
eyes, rinse thoroughly with cle an water. Should you get a ny
descaling agent in your eye, se e a doctor.
If the wrong desca ling agent is used, the machine could be dam-
aged and/or traces of detergent could be left behind in t he water.
T Only use original JURA care produc ts.
If the descal ing operation is int errupt ed, there may be da mage to
the machine.
T Allow the descaling progra m to run to the end.
If the descaling agent comes into conta ct with sensi tive surfaces,
damage cannot be ruled out.
TRemove any spl ashes immedia tely with clean water.
Descaling the machine
WARNING
CAUTION
CAUTION
CAUTION
Page 39

39
6 Maintenance
E The descaling programme lasts approx. 45 minutes.
EJURA descaling ta blets are avai labl e from stockist s.
E If you use a CLARIS fil ter cartridge and this is activated, or the
water hardness is set to ‘not ac tive’, you will not be prompted
to descal e the ma chine.
E Do not descale the machi ne if a CLARIS f ilt er cartridge is fit-
ted.
Precondition: Your IMPRESSA is re ady for operat ion, the message
R is shown on the display.
T Open the cover of the progra mming buttons.
% T Press the descaling button.
The current mai ntenance sta tus is s hown.
% T Press the descaling button again.
STAR
T DESCALIN
G
% T Press the descaling but ton to star t the descaling operation.
EMPTY DRIP TRAY
T Empty t he dri p tray.
EMPTY COFFEE GR
OUNDS CONT.
T Empty t he coffee grounds conta iner.
TReplace the coffe e grounds container and the drip tray.
SOL
VENT IN TANK
TRemove the water tank and empty it.
T Complet ely dissolve the cont ents of one blister (thre e JURA
descaling ta blets) in a cont ainer th a t holds 700 ml of water.
This may take several minu t es.
T Pour the solution into the empty water t ank and insert it in
the machine.
T Pla ce thre e recepta cles under the dual spout, th e steam pipe
and t he hot water pipe.
% T Press the descaling button.
MACHINE IS DESCALING, water flows from the ste am pipe,
the dual spout and t he hot wat er pipe. You can follow the
current status of descaling on the progress bar.
The process is interrupte d, EMPTY DRIP TRAY.
T Empty t he dri p tray and replace the tray.
WATERTANK RINSE / FI
LL
Page 40

40
6 Maintenance
TRemove the water tank and rinse i t.
T Fill the wat er t ank wi th fresh, cold wate r and re inser t.
T Empty the three re ceptacles and place the m unde r the dual
spout , the ste am pipe and the hot wa ter pipe.
% T Press the descaling button.
MACHINE IS DESCALING, water flows from the ste am pipe,
the dual s pout and the hot wa ter pipe.
The process is interrupte d, EMPTY DRIP TRAY.
T Empty t he dri p tray.
EMPTY COFFEE GR
OUNDS CONT.
T Empty t he coffee grounds conta iner.
TReplace the coffe e grounds container and the drip tray.
Your IMPRESSA is once more ready for ope ration.
Coffee beans may be covered with a slight oil film which rema ins on
the wal ls of the bean cont ainer. These residues may negatively affe ct
the coff ee result s. For this reason clean the bea n cont ai ner from
time to time.
Danger of injury to the fingers when the grinder is runni ng.
TSwitch the machine off with the on/off but ton Q before per-
form i ng any work on the grinder.
TSwitch the machine off a t the power swi tch 3.
TRemove the cover of the bean container.
TRemove the remaining beans with a vacuum cle aner.
T Cle an the be an container wit h a sof t, dr y cloth.
T F i ll the coff ee be ans int o the bean container and replace the
cover.
L
imescal e deposi ts may for m in the wat er tank. To en sure correct
func tion of your IMPRESSA, you should descale the water t ank from
time to time.
TRemove the water tank.
T If you use a CLARIS filter car t ridge, rem ove this.
T Descal e the tank with a mild conventi onal descaling agent
in accordance with the manufacturer’s instructions.
TRinse the wa ter tank with clean water af terwards.
T If you use a CLARIS filter cart ridge, inser t this again.
Cleaning the bean
container
WARNING
Descaling the water
tank
Page 41

4
1
6 Maintenance
T Fill the wat er t ank wi th fresh, cold wate r and re inser t.
Page 42

42
7 Display messa ges
7 Display messages
Message Cause/Result Action
The message R is displaye d.
A mainte nance programme is
necessary.
T Press the mil k system
cle aning button 6 to a ctivate
the maintenance sta tus. Run
the respecti ve maintenance
programme. The corresponding
description is contained i n
sec tion 6 ‘Maintenance’.
FILL BEANS / LEFT GR
INDE
R
or
FILL BEANS / RIGHT GR
INDE
R
One of the bean containers is
empty.
You cannot prepare coffee
produc ts for which coffee beans
from this container are
required. It is possi ble to
prepare hot water or milk.
T Fil l the bea n cont ainer (S
ee
Chapter 2, ‘Prepar i ng and using
for the first time – Fil ling the
bean cont ainer’
)
FILL WATERTANK The wa ter tan k is empty.
You cannot prepare any coffee
produc ts, hot wat er or milk
products.
T Fil l the water tank (S
ee
Chapter 2, ‘Prepar i ng and using
for the first time – Fil ling the
water t a nk’
)
EMPTY COFFEE GR
OUNDS
CONT.
The coffe e groun ds container is
full . You cannot prepare any
coff ee pr oduct s, but you can
prepare hot water or milk.
T Empty the coffee gro unds
cont ainer and the drip tray.
COFFEE GR
OUNDS CONT.
MISSIN
G
The coffe e groun ds container is
missing. You cannot prepare
any cof fee products, hot wat er
or milk products.
T Insert the coffee grounds
cont ainer.
EMPTY DRIP TRAY The drip tray is full. You cannot
prepare any coffee products,
hot wa ter or milk products.
T Empty the drip tray.
Page 43

43
7 Display messa ges
Message Cause/Result Action
DRIP TRAY MISSIN
G
The drip tray is not inser ted
correctly or is not inser ted at
all. You cannot prepare any
coff ee pr oduct s, hot water or
mil k produc ts .
T Cl ean and dry the met al
cont acts on the ba ck of the drip
tray.
T Insert the drip tray.
PRESS BUTTON The IMPRESSA is prompti ng
you to star t a rinse ope ration or
continue a start e d maint e nance
programme.
T Press the rinse button to st art
rinsing or to continue the main-
tenance programme.
COFFEE SPOUT MISSIN
G
The cover of t he dual spout is
either missing o r not correct ly
fit ted.
T Fit the cover of the dual
spout and ensure t hat it snaps
correctly in pla ce.
CHECK BEAN CONTAINE
R
The catch of the be an container
is not pulled completely to the
front . The g rinder cannot draw
in any coffe e be ans.
T Open the cover on the back
of the machine.
T Pull the ca tch comple tely to
the front.
Page 44

44
8 Troubleshooting
8 Troubleshooting
Problem Cause/Result Action
G
rinder is making a very loud
noise.
There are foreign obje cts in
the grinder.
T Please cont act your JURA
service partner (see Chapt er
‘JURA cont act de tails / Legal
informat ion’
)
.
Insufficient foam is produce d
when milk is foa med
The dual spo ut is d irty. TRinse and cl ean the dual
spout (ref er to Chapter 6
‘Mai ntenance – dismantling
and rinsing the dual spout ’
)
.
Coffee only comes out in drips
when it is being pr epared.
The coffe e is ground too finely
and obstructs the system.
TSet the grinder to a courser
set ting(ref er to Chapter 2,
‘Preparing a nd using for the
first ti me – Adjusti ng the
grinder’
)
.
Water hardness cannot be
adjusted.
The CLARIS filter car t ridge is
activated.
T Please cont act your JURA
service partner, who will be
able to deactiva te the CLARIS
fil ter cartridge.
FILL BEANS is di splayed
alt hough t he bean container
has been f illed.
The grinder is not ye t comple tely fil led wi th be ans.
T Prepare a cof fee speci ali ty.
Cleaning of the coff ee system
cannot be started alt hough
the machine displays the
prompt.
The machi ne request s cle aning
of the coffee syste m and
descaling / filter change.
T First per form descaling or
change the fi lter. You ca n the n
cle an the coffee system.
In spite of the empty be an
cont ainer, no bean is displayed
for the respect ive product s.
The bean monitor is dir ty. T Cl ean the bean container
(
see Chapt er 6, ‘Maint enance –
Cleaning the bean conta iner’
)
.
EMPTY DRIP TRAY is always
displ ayed.
The met al conta cts of the drip
tray are dir ty or we t.
T Cl ean and dry the met al
cont acts on the ba ck of the
drip tray.
FILL WATERTANK is displayed
alt hough t he water t ank is full.
The wa ter tank floa t is trappe d. T Descale the wat er tank (see
Chapter 6, ‘Maintena nce –
Descaling the water tank’
)
.
Page 45

45
8 Troubleshooting
E If it was not possible to re medy the problem, pl ease contact
your JURA servi ce par tner. Th e contact details are given in the
‘JURA cont act s’ section on the last page of these instruc-
tions.
Problem Cause/Result Action
ERROR 2 or ERROR 4 is
displ ayed.
If the machine was exposed to
the cold for a long period of
time, he ating is disabled for
saf ety reasons.
T Warm up the machine at
room temperature.
Other ERROR messages are
displ ayed.
–
T Turn the IMPRESSA off at the
power switch 3. Please
cont act your JURA service
par tner (see Chapt er ‘JURA
cont act detai ls / Legal
informat ion’
)
.
Page 46

46
9 Transport and environmentally neutral disposal
Keep the packaging for your IMPRESSA. It shoul d be used to protec t
the machine during transportation.
In order to prote ct the IMPRESSA from frost during transport ation,
the system must be e mpt ied.
Precondition: The IMPRESSA is switched off (standby
)
.
TRemove the water tank.
T Open the cover of the progra mming buttons.
c T Press the rinse button until SYSTEM EMPTYING appears.
A sma ll amount of water flows from the hot water pip e and
the steam p i pe. The opera tion stops a utomatically. The
IMPRESSA will switch itself off.
3 T Turn your IMPRESSA off at the power switc h.
The next time you use the machine, the system mus t be refilled (see
Chapter 2, ‘Prepari ng and using for the f irst time – First-ti me use’
)
.
Please dispose of old machines in an environmental ly neutral way.
Old machines cont ain valuable mat eria ls ca pabl e of being recycled
which should be salvaged for re cycling. Pl ease therefore dispose of
old machines via your regi onal colle ction system.
Transport / emptying
the system
Disposal
H
9 Tran sport and environmentally neutral disposal
Page 47

47
1
0 Technical data
1
0 Technical data
Voltage 220–240 V ~, 50 Hz
Power CH: 1500 W
EU: 2200 W
Airborne noise emitt ed
L
p
<
70 dB (A
)
Marks of conformit y
A S
Power consumption in st andby mode 4.2 Wh
Pump pr essure 2x sta tic max. 15 bar
Wate r tank ca paci ty 5.0 l
Bean cont ainer capacity 2x 650 g
Coffee grounds cont ainer capaci ty max. 40 portions
Cabl e length approx. 1.8 m
Weight 20.7 kg
Dimensions (W x H x D
)
43 x 58.5 x 51 cm
Page 48

48
Index
Index
A
Adjusting t he gri nder 16
Automatic swit ch-off 28
B
Bean cont ainer 4
Cleaning 40
Fil ling 12
C
Capp uccino 23
Changing the filter
Changing the fil ter cartridge 37
CLARIS filter car t ridge
Fil ter cartr idge 14
Cleaning
Bea n cont aine r 40
Milk syste m cle aning 33
Cleaning tablet
Fil ler funnel 4
Coffee 22
Coffee gro unds cont ainer 4
Coffee grounds cont aine r 4
Coffee system clea ning 34
Combi ned cleaning 35
Control options
Def ault set tings in programming mode 19
Cover
Bea n cont aine r 4
Programming buttons 4
Water tank 4
D
Descaling
Descaling the machine 38
Machine 38
Water tank 40
Determining and adjusti ng the degr ee of
water hardness 14
Displ ay 5
Messa ges 42
Displ ay messages 42
Disposal 46
Drip tray 4
Drip tray 4
Dual spout 4
Dismantling and rinsing 33
E
Environmentally neutral disposal 46
Espresso 22
F
Fil ler funnel for cle aning tablet 4
Fil ling
Bea n cont aine r 12
Fil m
Mult ime dia 30
Fil ter cartridge
Changing 37
Inser ting and ac tivating 14
Fineness of grind
Adjust ing the grinder 16
First-time use 12
G
G
rinder
Adjust ing the grinder 16
H
Hot wa ter 24
Hot wa ter pipe 4
I
Internet 10
L
L
anguage 29
L
atte macchiato 23
M
Machine
Descaling 38
First-time use 12
R
insing 32
S
et ting up
11
S
witching on 17
Maintenance 32
Maintenance 32
Maintenance status
Viewi ng infor mat ion an d maintenance
status 20
Maintenance tips 32
Milk
Hot milk 23
Milk pipe 4
Milk syste m cleaning 33
Milky cof fee 23
Page 49

49
Index
P
Permanent settings in progra mming mode
25
Power consumption
Technical da ta 47
Power switch 4
Preparation
Cappuccino 23
Espresso 22
Hot wa ter 24
L
atte macchi ato 23
Milky cof fee 23
Prep a ration at the t ouch of a button 22
S
team 24
Preparation at the touch of a but ton 18
Products
S
tandard products
11
Product settings 25
Programming buttons 4, 5
Programming mode
L
anguage 29
Permanent set tings in programming mode
25
Product set tings 25
Time and we ekday 26
Time format 29
Unit of wat er amount 29
Prompt to t ake action
S
ymbols used 8
Proper use 6
R
R
ese tting the counter 2
1
R
insing
Dual spout 33
Machine 32
S
S
afe ty
S
afe ty notes 6
S
et ting up
Machine
11
S
tandard products
11
Product but tons 5
S
team 24
S
team pipe 4
S
witch-off (standby
)
Automatic switch-off 28
S
witch-on rinse 30
S
witch-on time
Timer 26
S
witching of f (standby) 17
S
witching on
Machine 17
T
Technical data 47
Time and weekday 26
Time format 29
Transport 46
Troubleshooting 44
U
Unit of wat er amount 29
Use, f irst-time 12
W
Water tank 4
Descaling 40
Fil ling 12
Page 50

50
Page 51

5
1
Page 52

Art. 68411/X9/en/
20091204
Your JURA dealer:
J
URA contact details / Legal information
52
JUR
A Elektroappara te A
G
Kaffeewe ltstrasse 10
CH-4626 Ni ederbuchsi t en
Tel.: +41 62 38 98 233
www.jura. com
The machi ne complies with the following EU dire ctives:
Z 2006/42/EC – Machinery Directive
Z 2004/108/
EC – Electromagne tic Compatibi lit y
We reserve the right to make techni cal changes.
The illustrations used in the IMPRESSA X9 Win Ma nual show the
IMPRESSA X9 Win Platinu m. Your IMPRESSA cou l d incorporate
minor changes.
Your opinion is important to us!
Use the conta ct link at www.jura.com.
The Instruc tions for Use contain informa tion which is prot ected by
copyrig ht. It is not permitte d to photocopy or translate these Instruc-
tions for Use into another language without the expres s writ ten con-
sent of JURA Elektroapparate A
G
.
Directives
Technical changes
Feedback
Copyright
Page 53

Das Buch zur IM PRESSA X9 Win
JUR
A Type 657
Das »Buch zur IMPRESSA« wurde vom unabhängigen deuts chen Prüf-
institut TÜV SÜD mit dem Prüfsi egel für Verst ändli chkei t, Vollständigkeit
und Sicherheit ausge zeichnet.
K
Originalbedie nungsanleit ung
L
esen Sie die Bedienungsanle itung, bevor Sie das Gerät verwenden.
E
Page 54

2
Inhalt sverzeichnis
Ihre IMPRESSA X9 Win
Bediene lement e 4
Bes timmungsge mäße Verwe ndung 6
Zu Ihrer Sicherhei t 6
Das Buch zur IMPRESSA X9 Win 9
S
ymbolbeschreibung ..... ..... . ..... ..... ..... ..... ..... ..... ..... ..... . ..... ..... ..... ..... ..... ..... ..... ..... ...... ..... ..... ..... ..... ..... ..... ..9
1
IMPRESSA X9 Win
1
0
Ein Auf tri tt, der (sich) sehen läss t ..... ..... ..... ..... ..... ..... ..... ..... ..... ...... ..... ..... ..... ..... ..... ..... ..... ...... ..... ..... ..... .10
JUR
A im Internet .... ..... ..... ..... ...... ..... ..... ..... ..... ..... ..... ..... ..... . ..... ..... ..... ..... ..... ..... ..... ..... ...... ..... ..... ..... ...... .....
11
2 Vorbereiten und in Betri eb nehmen
1
2
S
tandardprodukte .... ..... ..... ..... ...... ..... ..... ..... ..... ..... ..... ...... ..... ..... ..... ..... ..... ..... ..... . ..... ..... ..... ..... ..... ..... ..... ..12
Aufs tell en ... ..... ..... ..... ..... ..... . ..... ..... ..... ..... ..... ..... ..... ..... . ..... ..... ..... ..... ..... ..... ..... ..... ...... ..... ..... ..... ..... ..... ..... ...12
Wasser tank fül len .... ..... ..... ..... ..... ..... ...... ..... ..... ..... ..... ..... ..... ..... ..... ...... ..... ..... ..... ..... ..... ..... ...... ..... ..... ..... ....13
Bohne nbehälter füllen .... ..... ..... ..... ..... ..... ..... ..... ..... . ..... ..... ..... ..... ..... ..... ..... ..... ..... ..... ...... ..... ..... ..... ..... ..... ..13
Erste Inbetriebnahme ..... ..... ..... ..... ...... ..... ..... ..... ..... ..... ..... ..... ..... ...... ..... ..... ..... ..... ..... ..... ..... ..... ...... ..... .....14
Fil terpatrone einsetzen und akt ivieren ... ..... ..... ..... ...... ..... ..... ..... ..... ..... ..... ..... . ..... ..... ..... ..... ..... ..... . ..... ..15
Wasserhärte ermitt eln und einstellen .... ..... ..... ..... ..... ..... ...... ..... ..... ..... ..... ..... ..... ..... ..... ...... ..... ..... ..... ....16
Mahlwerk e instellen ..... ..... ..... ..... ..... ...... ..... ..... ..... ..... ..... ..... ..... ..... ...... ..... ..... ..... ..... ..... ..... ...... ..... ..... ..... ....17
Einschalten ..... ..... ..... ..... . ..... ..... ..... ..... ..... ..... ..... ..... ...... ..... ..... ..... ..... ..... ..... ..... ..... . ..... ..... ..... ..... ..... ..... ..... . ..18
Ausschalten (S
tand-by) ...... ..... ..... ..... . ..... ..... ..... ..... ..... ..... ..... ..... ...... ..... ..... ..... ..... ..... ..... ..... ...... ..... ..... ..... .18
3 Lernen Sie die Be dienmöglichkeiten kennen
1
9
Zuber eit ung auf Knopfdruck .... ..... ...... ..... ..... ..... ..... ..... ..... ..... ..... . ..... ..... ..... ..... ..... ..... ..... ..... ...... ..... ..... ....19
Dauerhaf te Einst e llun gen im Programmiermodus .... ..... ..... ..... ..... ..... ...... ..... ..... ..... ..... ..... ..... ..... ..... . 20
Informationen und Pfle gest atus abfra gen .... ..... ..... ..... ..... ..... . ..... ..... ..... ..... ..... ..... ..... . ..... ..... ..... ..... ..... .22
Zähl er zurüc ksetzen .. ..... ..... ..... ..... ...... ..... ..... ..... ..... ..... ..... ..... ..... . ..... ..... ..... ..... ..... ..... ..... ...... ..... ..... ..... ..... .23
4 Zubereitung auf Knopfdruc k 24
Espresso .... ..... ..... ..... ...... ..... ..... ..... ..... ..... ..... ..... ..... ...... ..... ..... ..... ..... ..... ..... ..... ..... . ..... ..... ..... ..... ..... ..... ..... ... 24
Kaffee .. ...... ..... ..... ..... ..... ..... ..... ..... ..... ...... ..... ..... ..... ..... ..... ..... ..... ..... . ..... ..... ..... ..... ..... ..... ..... ..... ..... ..... . ..... .... 24
Cappuccino, Milchkaff ee und Latte macchiato ... ..... ..... ..... ..... ..... ..... ..... ..... ...... ..... ..... ..... ..... ..... ..... ..... .25
Warme Milch .. ..... ...... ..... ..... ..... ..... ..... ..... ..... ..... ...... ..... ..... ..... ..... ..... ..... ..... ..... . ..... ..... ..... ..... ..... ..... ..... ...... ..25
Hei ßwasser .... ..... ..... ..... ..... ..... ..... ..... ...... ..... ..... ..... ..... ..... ..... ..... ..... ...... ..... ..... ..... ..... ..... ..... ..... ..... . ..... ..... ... 26
Dampf ..... ..... ..... ..... ..... ..... ..... . ..... ..... ..... ..... ..... ..... ..... ..... . ..... ..... ..... ..... ..... ..... ..... ..... ..... ...... ..... ..... ..... ..... ..... 26
5 Dauerhaf te Einst e llungen im Programmiermodus 27
Produk teinstellungen .. ..... ..... ..... . ..... ..... ..... ..... ..... ..... ..... ..... . ..... ..... ..... ..... ..... ..... ..... ..... ...... ..... ..... ..... ..... ...27
Uhrze it und Wochentag ..... ..... ..... ..... ..... ..... ..... ..... . ..... ..... ..... ..... ..... ..... ..... ..... ...... ..... ..... ..... ..... ..... ..... ..... . 28
Timer ...... ..... ...... ..... ..... ..... ..... ..... ..... ..... ..... . ..... ..... ..... ..... ..... ..... ..... ..... ...... ..... ..... ..... ..... ..... ..... ..... ...... ..... ..... 29
Automatisches Ausschal ten .. ..... ..... . ..... ..... ..... ..... ..... ..... ..... . ..... ..... ..... ..... ..... ..... ...... ..... ..... ..... ..... ..... ..... . 30
Page 55

3
Inhalt sverzeichnis
S
prache ..... ..... ...... ..... ..... ..... ..... ..... ..... ..... ..... ...... ..... ..... ..... ..... ..... ..... ..... ..... . ..... ..... ..... ..... ..... ..... ..... ..... ..... .... 3
1
Anzeige (Einhe it Wass erme nge und Uhrzeitfor mat) ... ..... ...... ..... ..... ..... ..... ..... ..... ..... . ..... ..... ..... ..... ..... 32
Einschaltspülun g .... ..... ..... ..... . ..... ..... ..... ..... ..... ..... ..... ..... ...... ..... ..... ..... ..... ..... ..... ..... ..... . ..... ..... ..... ..... ..... ....33
Mult imedia ...... ..... ...... ..... ..... ..... ..... ..... ..... ..... ..... ...... ..... ..... ..... ..... ..... ..... ..... ..... . ..... ..... ..... ..... ..... ..... ..... ..... ..33
6 Pf lege 35
Pflegetipps ..... ..... ..... ..... ..... ...... ..... ..... ..... ..... ..... ..... ..... ..... . ..... ..... ..... ..... ..... ..... ..... ..... ..... . ..... ..... ..... ..... ..... ....35
G
erät spülen .... ..... ..... ..... ...... ..... ..... ..... ..... ..... ..... ..... ..... ...... ..... ..... ..... ..... ..... ..... ..... ..... . ..... ..... ..... ..... ..... ..... ..35
Kombi auslauf zerlege n und spül en .... ..... ..... ..... ..... ..... . ..... ..... ..... ..... ..... ..... ..... ..... ...... ..... ..... ..... ..... ..... .. 36
Milchreinigung. ..... ..... ...... ..... ..... ..... ..... ..... ..... ..... ..... . ..... ..... ..... ..... ..... ..... ..... ..... ...... ..... ..... ..... ..... ..... ..... ..... 36
Kaffeereini gung ...... ..... ..... ..... ...... ..... ..... ..... ..... ..... ..... ..... ..... . ..... ..... ..... ..... ..... ..... ..... ..... ...... ..... ..... ..... ..... ....3 7
Kombir einigung ....... ..... ..... ..... ..... ..... ..... ..... ..... ...... ..... ..... ..... ..... ..... ..... ..... ..... . ..... ..... ..... ..... ..... ..... ..... . ..... .. 39
Fil ter we chseln ... ..... ..... ..... ..... ..... ..... ..... ...... ..... ..... ..... ..... ..... ..... ..... ..... ...... ..... ..... ..... ..... ..... ..... ..... ..... ...... ... 40
G
erät entkalken. ..... ..... ..... ..... . ..... ..... ..... ..... ..... ..... ..... ..... ...... ..... ..... ..... ..... ..... ..... ..... ..... . ..... ..... ..... ..... ..... ..... 4
1
Bohne nbehälter reinigen .... ..... ..... . ..... ..... ..... ..... ..... ..... ..... ..... . ..... ..... ..... ..... ..... ..... ..... ..... ...... ..... ..... ..... .... 44
Wasser tank entkalken .. . ..... ..... ..... ..... ..... ..... ...... ..... ..... ..... ..... ..... ..... ..... . ..... ..... ..... ..... ..... ..... ..... ..... ...... ..... 44
7 Meldungen im Display 45
8 Störungen behebe n 47
9 Transpor t und umwelt gere chte Entsorgung 49
Transport / Syste m le eren ...... ..... ..... ..... ..... ...... ..... ..... ..... ..... ..... ..... ...... ..... ..... ..... ..... ..... ..... ..... ..... . ..... ..... . 49
Entsorgung ..... ..... ..... ..... ..... ...... ..... ..... ..... ..... ..... ..... ..... ..... ...... ..... ..... ..... ..... ..... ..... ..... ...... ..... ..... ..... ..... ..... .. 49
1
0 Technis che Da ten 50
Index 5
1
JUR
A-Kontakte / Rechtlic he Hi nweise 56
Page 56

4
Bedienelem ente
Bedienelemente
Abbil dung: IMPRESSA X9 Win Platin
1
Bohne nbehälter mit Abde ckung
2 Tassenablage
3 Netzschalter und Ne tzkabel
(Geräterüc ksei te)
4 Kombiauslauf (höhenverstellbar)
5 Milc hschläuche
6 Kaffeesa tzb e hälter
7 Einfülltricht er für Reinigungst abl ette
8 Abdec kung Programmiert asten
9 Wassert ank mit Abdec kung
1
0 H e ißwas s errohr (schwenkbar)
11
Dampfrohr (schwenkbar)
1
2 Tassenplattform
13 R
estwassersc hale
2
1
9
11
1
0
1
3
1
2
4
8
5
6
3
7
Abdeckung öf fnen
Page 57

5
Bedienelem ente
1
Display
2 Produktet ast en (S
tandardprodukte ):
Taste 1 Espresso
Taste 1 Kaffee
Taste 2 Ka ffe e
Taste Milchsc haum
Taste Cappuc cino
Taste Latte macchiato
Taste Milchk affee
Taste Milch
(Die Produkt e werden auf dem Display
ange zeigt.
)
3 Progra mmi ert asten:
Q Tast e Ein/Aus
$ Taste Fil ter
% Tast e Entkalken
9 Taste Zähler
O Taste P
+ Taste
+
c Spül t ast e
6 Taste Mi lchre inigung
7 Taste Kaffe ereinigung
8 Taste Kombireinigung
0 Taste Exi t
- Taste -
4 m Tast e He ißwass er
5 n Taste Dampf
Front links Front recht s
1
4
2 3
5
Page 58

6
Wichtige Hinweise
Dieses Gerät is t zur Verwendung durc h Fac hpersonal oder geschultes
Personal in Geschäft en, in der Leic htindustri e und in landwirtschaf t-
lichen Bet rieben vor gesehen oder zur kommerziell e n Verwendung
durch Laie n. Das Gerät dient nur der Ka ffe ezuberei tung und dem
Erwärmen von Milch und Wasser. Jede andere Verwendung gilt als
nicht bestimmungsgemäß. Die JURA Elektroapparat e AG über-
nimmt ke ine Ha ftung für Folgen aus nicht best immungsgemäßer
Verwendung.
L
esen und beac hten Sie di ese Anl eitung volls tändi g vo r Gebrauch
des Geräts. Hal ten Sie dieses Buch zur IMPRESSA beim Gerät verfüg-
bar und gebe n Sie es bei Bedarf an nachfolgende Anwender wei ter.
Die IMPRESSA darf nur von instrui ert en Persone n betri eben werden.
L
aie n müsse n bei der Verwendung überwacht werden.
L
esen und beachten Sie die folgenden wichti gen Siche rhei tshinweis e sorgfä ltig.
S
o vermeiden Sie Lebensgef ahr durch Strom s chlag:
Z Nehmen Sie ni e ein Gerät mit B eschädigungen oder schad-
haf te m Netzkabel in Betrieb.
Z Be i Hinweisen auf Beschädigungen, beispiels weise Schmor-
geruch, trenne n Sie das Gerät unverzüglich vom Netz und
wenden Sie s ich an den JURA-Serv i ce.
Z Wenn das Netzkabel dieses Gerätes be schädigt wird, muss es
ent weder direk t bei JURA oder einer von JURA autorisierte n
S
ervi cest ell e reparier t werden.
Z Achten Sie darauf, dass sich die IMPRESSA und das Netzkabel
nicht in der Nähe von hei ßen Oberflä chen befinden.
Z Ach t en Sie darauf, dass das Netzkabel nicht eingeklemmt wird
oder an schar fen Kante n scheuert .
Z Öffne n und reparieren Sie das Gerät niemals selbst. Nehmen
S
ie keine Veränderungen am Gerät vor, die nich t im Buch zur
IMPRESSA beschrieben sind. Das Gerät enthält Strom führende Teil e. Nach de m Öffne n besteht Lebensgef ahr. Repara-
turen dürfen ausschließlich von autorisi ert en JURA-Servi ceste llen mit Originalers atz- und -zubehör teilen durchge führt
werde n.
Zu Ihrer Sicherheit
Bestimmungsgemäße Verwendung
Page 59

7
Wichtige Hinweise
Verbrühungen und Verbrennungen an de n Ausläufen, a m Heißwasserrohr und Dampfrohr sind mögl ich:
ZStellen Sie das Gerät außerhalb der Reic hweit e von Kindern
auf.
Z Berühren Sie keine heißen Teile. Benutzen Sie die vorgese-
henen Griffe.
Ein beschädigt es Gerät is t nicht sicher und kann Verletzungen und
Brand verursachen. Um Schäden und damit mögli che Verletzungsund Brandgefahren zu verme iden:
ZLassen Sie das Ne tzk abel nie mals lose herabhängen. Das
Net zkabel kann zur Stolperfalle werde n oder besc hädigt wer-
den.
ZSchützen Sie die IMPRESSA vor Witt erungs einflüssen wie
R
egen, Frost und dire kter Sonneneins trahlung.
Z Tauche n Sie die IMPRESSA, di e Kabel und Anschlüss e nicht in
Wasser.
ZStellen Sie di e IMPRESSA und ihre Einzelteile nicht in die Spül-
mas c hine.
ZSchal ten Sie Ih r e IMPRESSA vor Reinigungsarbeiten am Ne tz-
schalter aus. Wischen Sie di e IMPRESSA stets feucht, aber nie-
mals nass ab und schützen Sie sie vor dauerhafte m Sprit zwas-
ser.
Z Di e IMPRESSA ist nicht zur Aufs tell ung auf e iner Fläche geeig-
net, wo ein Wasserst rahl angewendet werden kann.
Z Das Gerät darf nicht mit einem Wasserstrahl gereinigt werden.
Z Das Gerät nur an Netzspannung gemäß Typenschild anschl ie-
ßen. Das Typenschild ist auf der Rücks eit e Ihrer IMPRESSA
ange bracht . Weit e re te chnische Daten finden Sie im Kapitel 10
»
Technis che Da ten
«
.
Z Verwenden Sie ausschl ießlich original JURA-Pflegezubehör.
Nicht von JURA ausdrück lich empfohlenes Zubehör kann die
IMPRESSA bes chädigen.
Z Verwenden Sie keine mi t Zus atzs toffen behande lte n oder
karamellisie rten Kaffeebohnen.
Z Füllen Sie den Wass ert ank auss chlie ßlich mit frischem, kalt em
Wasser.
ZSchal ten Sie das Gerät bei länger er Abwesenhe it am Netz-
schalter aus.
Page 60

8
Wichtige Hinweise
Personen, e inschließlich Kinder, die aufgrund ihrer
Z physischen, sensori s chen oder geistigen Fähigkeit en ode r
Z Unerfahrenheit oder Un kenntnis
nicht in der Lage sind, das Gerät sic her zu bedi enen, dürfen das
G
erät nicht ohne Aufsicht oder Anweisung durch eine verantwor t-
liche Person nutze n.
S
iche rhei t im Umgang mit der F ilt erpatrone CLARIS:
Z Bewahren Sie Filt erpa trone n für Ki nder unerreichbar auf.
ZLagern Sie Fi lterpatronen trocken in der vers chlossenen Ver-
pac kung.
ZSchützen Sie die Fi lterpatronen vor Hi tze und dire kter Son-
nenbestra hlung .
Z Verwenden Sie keine besc hädigten F ilt erpa tronen.
Z Öffne n Sie keine Fil ter patronen.
Page 61

9
Das Buch zur IMPRESSA X9 Win
S
ie halten das Buch zu Ihrer IMPRESSA X9 Win in der Hand. Es unter-
stützt Sie, Ihre IMPRESSA si cher, schnel l und in der ganzen Vielfal t
ihrer Möglichkeiten kennen zu lernen.
Kapi tel 2 »Vorbereiten und in Be trieb nehmen« vermitt elt Schrit t für
S
chrit t das Aufstellen und Vorber eit en der IMPRESSA.
Kapi tel 3 »L
ernen Sie die Be dienmöglichke ite n kennen« empf ehle n
wir Ihnen insbesondere in der Phase, in der Sie sich mit Ihrer
IMPRESSA vertraut machen. Es lädt Sie e in, di e Vielfalt der Möglich-
kei ten individuellen Ka ffe egenusses aktiv zu erkunden.
Alle weit eren Kapitel diene n Ihnen zum gezielten Nachschlage n.
Nutzen Sie das Buch zur IMPRESSA X9 Win, werden Sie zum Profi
der Zubere itung anregender Kaffe espezialitä ten, werd e n Sie zum
Barista!
Symbolbeschreibung
Das Buch zur IMPRESSA X9 Win
Warnhinweise
VORSICHT
Beachten Sie stet s die Informa tio nen, die durch VORS
ICHT oder WARNUNG mit
Warnpiktogra mm ge kennzeichnet sind. Das Signa lwort WARNUNG weist Sie auf
mögliche, schwere Verletzungen hin, das Signa lwort VORSICHT auf mögliche,
leichte Verletzungen.
VORSICHT
VORSICHT weist Sie auf Sachverhalte hin, die zu einer Beschädigung der Maschine
führe n können.
Verwendete Symbole
E Hinweise und Tipps, da mit Ihnen der Umgang mit Ihrer IMPRESSA noch leichter
fäl lt.
@
Verweise auf das Online-Angebot von JURA mi t interessan t en, weiterführende n
Informationen: www.jura.com
T Handlungsauf forderung. Hier werden Sie zu einer Aktion aufgefordert.
Page 62

1
0
1
IMPRESSA X9 Win
Elegant in der Form und geschaffe n aus edlen Mat eria lien, brilliert
dieses Spit zengerät mit sei nem Cool Nord i c Desi gn nicht nur
optisch, es wei ß auch di e anspruchsvollst en Kaff eewünsche von
Kunden, Gästen und Mi tarbeitern ganz einfach zu erfüllen. Di e
IMPRESSA X9 Win be herrscht neben Kaffee klassikern wie Ristr etto,
Espress o oder Kaffee auch Trendgetränke wie Cappuccino oder Latte
macchia to auf Knopfdruck.
Neben dem ei nzigarti gen Design und der Vielzahl an Produk twahl-
möglichke ite n ermöglicht der TFT-Bildschirm auch adScreen-Wer-
bung. Sei es am POS, wo acht von zehn der Ka ufentscheidu ngen
getroffen werden, oder im Seminarbereich, wo Teilnehmer über wei -
tere Angebote informiert werden können. Geben Sie Ihren Kunden
den entscheidenden Impuls, un d motivieren Sie Ihre Zi elgruppe zu
spont ane n Zusat zkäufen. Die IMPRESSA X9 Win zahlt si ch in jedem
Bereich aus!
Z Einfache Bedienung dank »Smart Lead«: »S
mar t Lead«, die
mi t Grafi k und Ton unterstützte, interakt ive Bedienerführung
von JURA, leitet das Personal durch sämtliche Be dien- und
Pflegeschritte. Das macht die Wartung simpel und vermeidet
Fehl manipula tionen. Vom Füllen des Wassertanks bis zur Rei-
nigung – »S
mar t Lead« zeigt in Bi ld und Ton sämt liche Schrit te
vor. Die ausführende Person wird durch den gesamt en Ablauf
gef ührt, was den Prozess vere infa cht und Fehl er minimi ert .
Das vermeidet unnöt ige Serv i cekosten oder Umsatzeinbußen
durch Maschinensti llst and.
Z Kaffeespezialitäten: Die IMPRESSA X9 Win be herrscht mehr
als 20 Kaffeespezi alität en, di e all esamt den individuell en
G
eschmackswünschen angepasst werden können. Das 3,5
Zoll grosse TFT-Display führ t i n kürzester Zeit zur gewünschten Kaffe espezial ität und ermöglicht Ihnen Genuss auf Knopf-
druck . Egal ob Ristr etto, Espresso, Café crème, Milchkaf fee,
Kaffee i m Glas, Cappuccino oder trendiger Latte macchi ato:
Ihr Geschmack entschei det! Dabei ist die Zubereitung von bis
zu 100 Tassen pro Tag kein Problem.
Ein Auf trit t, der (sich)
sehen läss t
1
IMPRESSA X9 Win
Page 63

11
1
IMPRESSA X9 Win
Z Programmierung: Wenn die verchromte Programm i erk l appe
el e gant nach oben gleitet, eröffnet sich Ihne n das Program-
mie rfe ld mi t den verschi edensten Einste llungsmögli chkeiten.
Hier lassen sich auch die Reinigungs-, Pfl ege- und Ent kal -
kungsprogramme starten oder der integrierte Tassenzähler
abruf en. Sie möchten die Programmierung auf einen bestimm-
ten Be nutzerkre is einschränken? Kein Problem: Generiere n Sie
einfach Codegruppen.
Z Individualisierbar: So vielfält ig wie die Wünsche unserer Kun-
den, sind auch die Einsatzmöglichke iten der IMPRESSA X9
Win. Deme nts preche nd lässt sich das Gerät mit einer Vielzahl
an Zubehörartike l ergänzen. Dazu gehören etwa ein Festwasseranschluss, verschi edenste Abrechnungssyste me, ein passender Tassenwärmer oder ein Kühlschrank für die Milch. Ver-
langen Sie unsere Range broschüre und lassen Sie sich von
einem autorisierten Fa chhändler beraten.
Besuchen Sie uns im Int erne t.
@Unter www.jura.com finden Sie int eressante und aktuel le
Informationen zu Ihr er IMPRESSA und rund um das The ma
Kaffee.
J
URA im Internet
Page 64

1
2
2 Vorbereiten und in Betrieb nehmen
Dieses Kapitel vermit tel t Ihnen di e notwendige n Informa tionen, um
problemlos mit Ihrer IMPRESSA umzuge hen. Sie bereiten Ihre
IMPRESSA Schrit t für Schrit t für Ihren ersten Kaff eegenuss vor.
Ihre IMPRESSA is t standardmäßig mit folgenden Produkten ausge-
statt et:
Z1 Espresso
Z1 Kaffee
Z 2 Kaffee
Z Milchscha um
Z Cappuccino
ZLatte macchiato
Z Milchka ffe e
Z Milch
Folgende Einste llungen können nur durch den JURA-Serv i cet echni-
ker durchgeführt werden:
Z Kunde nspezifische Einrichtung der Produk te. Die Standard-
produk te können ausge tauscht werden durch:
U 2 Espressi, 1 Ristretto, 2 Ristretti, Kännchen, Macchia to, Ka f-
fee Mil ch, Heißwasse r, Dampf, 2x
U Mahlwerkvorwahl oder Spül t ast e
(
all e Tasten können beliebig ange ordnet werde n
)
Z Produkte sperren
Z Filterkapazität einstellen
Z Code gruppen verge ben: Es können drei Codegruppen verge-
ben we rden. Die jeweiligen Codegruppen e ntsprech e n unter-
schiedlichen Bere chti gungen. So kann beispielsweise defini ert
werde n, dass der Programmier modus oder das Auslösen der
Pflegeprogramme durch eine n Code gesperr t sind.
Beachten Sie beim Aufstelle n Ihrer IMPRESSA folgende Punkte:
ZStellen Sie di e IMPRESSA auf ei ne waagerechte, gegen Wasser
unempfindlic he Fl äche.
Z Wählen Sie den Standort Ihrer IMPRESSA so, dass sie vor
Überhitzung geschützt ist. Achten Sie darauf, dass die Lüf-
tungsschlit ze ni cht abgedeckt werde n.
Standardproduk te
Einstellungen d urch den
J
URA-Servicetechnike r
Aufstelle n
2 Vorbereiten und in Betrieb nehmen
Page 65

1
3
2 Vorbereiten und in Betrieb neh men
Für de n per fek ten Kaffeege nuss empfehlen wir Ihnen, das Wasser
täglich zu wechseln.
Milch, Mineralwasser oder andere Fl üssigkeiten können den Wasser-
tank oder das Gerät bes chädigen.
T Füllen Sie auss chlie ßli ch frische s, kaltes Wasser in den Wasser-
tank.
T Entfernen Sie die Abdeckung des Wass ert anks .
T Entnehmen Sie den Wassertank und spülen Sie ihn mi t ka l-
tem Wasser a us.
T Fülle n Sie den Wasser tank mit frischem, kaltem Wasser und
set zen Sie ihn wieder ein. Er mus s gut e inrast en.
TSetzen Sie die Abdeckung wieder auf den Wass ert ank.
ESie können den Wass ert ank auch f ülle n, ohne ihn zu entneh-
men. Hierzu die Abdeckung des Wassert anks entfernen und
den Wassertank mi t einem Gefäß von oben mit frischem, kal-
ten Wasser füllen.
Ihre IMPRESSA besi tzt zwei Bohnenbe hälter. Dadurch haben Sie die
Mögli chkeit, zwei verschiedene Sorten Kaffe ebohnen zu verwenden.
Die Abdeckung des Bohnenbehälters hat gle ichzeitig die Funk tion
eines Aromas chutzdec kels. So bleibt das Aroma Ihrer Ka ffe ebohnen
länger erhalten.
Kaffeebohnen, die mit Zusatzs toff en (z.B. Zucker) behandelt sind,
vorgemahlener sowie ge friergetrockneter Kaf f ee beschädigen das
Mahlwerk.
T Füllen Sie ausschließlich Kaffeebohnen ohne Nachbehand-
lung in den Bohnenbehäl ter.
T Entfernen Sie die Abdeckung des Bohnenbehäl ters .
T Entfernen Sie Vers chmut zungen oder Fremdkörper, die sich
eventuell im Bohnenbehälter befinden.
T Fülle n Sie Ka ffe ebohnen in den Bohnenbehält er.
TSetzen Sie die Abdeckung wieder auf den Bohnenbehäl ter.
Wassertank füllen
VORSICHT
Bohnenbehälter füllen
VORSICHT
Page 66

1
4
2 Vorbereiten und in Betrieb nehmen
L
ebensgef ahr durch Stromschlag bei Betrieb mi t schadhaft em Netz-
kabel.
T Nehmen Sie nie e in Gerät mi t schadhaf tem Net zkabel in
Betrieb.
Voraussetzung: Der Wassertank und der Bohnenbehälter sind
gef üll t .
TStecken Sie den Ne tzstecker in eine Netzs tec kdose.
3 T Schal ten Sie die IMPRESSA am Netzschal ter auf der Gerä-
terückse ite ein.
T Öffnen Sie die Abdeckung der Progra mmi ert ast en.
Q T Drücke n Sie di e Taste Ein/Aus, um die IMPRESSA einzuschal-
ten.
Im Display ersche int SPRACHE DEUTSCH.
O T Drücken Sie die Taste P, um die Sprache zu bes tät igen.
Im Display ersche int kurz GESPEICHERT, um die Einst ellung
zu bes tät igen.
ESie haben soeben die Sprache des Geräts einges tellt. Die
S
prache der Fil msequenzen können Sie im Programmiermo-
dus unt er MULTIMEDIA SPRACHE einstellen.
UHRZEIT STUNDEN --:--
T Drü c ken Sie mehrmals die Taste + oder -, um die Stunden
einzustellen.
UHRZEIT STUNDEN 12:00 (Beispiel
)
O T Drücken Sie die Taste P, um die Eins tellung der Stunden zu
bes tätigen.
UHRZEIT MINUTEN 12:00 (Beispiel
)
T Drü c ken Sie me hrmals die Taste + oder -, um die Minut en
einzustellen.
UHRZEIT MINUTEN 12:45 (Beispiel
)
Erste Inbetriebnahme
WARNUNG
Page 67

1
5
2 Vorbereiten und in Betrieb nehmen
O T Drücken Sie die Taste P, um die Einst ellung der Minuten zu
bes tätigen.
Im Display e rscheint kurz GESPEICHERT.
WOCHENTAG MONTA
G
T Drü c ken Sie mehrmals die Tast e + oder -, um den Wochen-
tag einzustellen.
WOCHENTAG MITTWOCH (Beispiel
)
O T Drücken Sie di e Taste P, um die Eins tellung des Wochentags
zu bes tät igen.
Im Display erscheint kurz GESPEICHERT und WILLKOMMEN
BEI JURA. D a nach wird SPÜLTASTE DRÜCKEN angezeigt.
c T Drücken Sie die Spül t ast e.
SYS
TEM FÜLLT, das Syste m wird mit Wasser gefüllt. Es
erfolgt e in geringer Wasserauslauf aus de m Heißwasse raus-
lauf. Der Vorgang stoppt automat isch. Nach dem Aufhe izen
wird SPÜLTASTE DRÜCKEN angezeigt.
c T Drücken Sie die Spültast e, um die Spülung zu starten.
GER
ÄT SPÜLT, es fli eßt Wass er aus de m Kombiauslauf. Der
Vorgang stoppt automatisch. Ihre IMPRESSA ist betriebsbe-
rei t.
E Trennen Sie die IMPRESSA nac h der ersten Inbetriebnahme
24 Stunden nicht vom Netz, dami t sie sic h im opti mal en
Betriebszustand befindet.
E Nach der ersten Zubereitung einer Kaff eespezialit ät kann es
vorkommen, dass im Display BOHNEN FÜLLEN angezeigt
wird, da das Mahlwerk noch nicht komple tt mit Kaff eebohnen
gef üllt ist . Bereit en Sie in di esem Fall eine weit ere Kaffeespe-
zialität zu.
E Konnte die Inbetri ebnahme nicht korrekt und volls tändig
durchgeführ t werden, kontakti eren Sie Ihren JURA-Servi ce-
par tner. Di e Kontaktdaten finden Sie unter »JUR
A-Kontakte«
auf der le tzt en Seite di eser Bedie nungsanlei tung.
Ihre IMPRESSA muss nicht mehr e ntk alkt werden, wenn Sie die Fil -
terpatrone CLARIS verwe nden.
E Die Erstins tal lat ion der Filterpatrone muss durch den Servi ce-
techniker erfolgen. Kontaktieren Sie Ihren JURA-Servi cepart-
ner.
Filterpatrone einsetzen
und ak tivieren
Page 68

1
6
2 Vorbereiten und in Betrieb nehmen
In der IMPRESSA wird Wasser er hitzt. Dies führt zu ein e r gebrauchs-
bedingten Verkalkung. Je härter das Wasser, desto häufiger muss
das Gerät ent kalkt werden. Deshalb ist es wichtig, di e IMPRESSA auf
die Wasserhär te des verwende ten Wassers einzustellen.
Die Wasserhärte kann st ufenlos zwischen 1°
dH und 30° dH eingeste llt werden. Sie ka nn auch auf »nicht akt iv« gesetzt werden, sodass
die IMPRESSA nicht me hr meldet, wann si e entka lkt werden muss.
E Das Einst ell en der Wasserhärte ist nicht mögl ich, wenn Sie di e
Fil terpatrone CLARIS verwe nden und diese aktiviert ist .
Mit d e m im Lieferumfang enthal tenen Aquadur®-Teststäbche n kön-
nen Sie die Wasserhärte ermit teln.
T Ha lte n Sie das Stäbchen kurz (eine Sekunde) unter fli e-
ßendes Wasser. Schüt tel n Sie das Wasser ab.
T Warten Sie circa eine Minut e.
TLesen Sie den Wass e rhärtegrad anha nd der Verfä rbungen
des Aquadur®-Teststäbche ns und der Beschreibung auf der
Verpackung a b.
S
ie können jet zt die Wasserhärt e einste llen.
Beispiel: So ändern Sie die Wasserhärte von »16°
dH« auf »25° dH
«
.
Voraussetzung: Ihr e IMPRESSA ist betriebsberei t.
T Öffnen Sie die Abdeckung der Progra mmi ert ast en.
O T Drücken Sie die Taste P so lange, bis WASSERHÄRTE 16° dH
erscheint .
O T Drücken Sie die Taste P, um in den Progra mmpunkt einzu-
ste igen.
WASSERHÄRTE 16° dH
T Drücken Sie mehrmals di e Taste +, um die Wasserhärt e ein-
zustelle n.
WASSERHÄRTE 25° dH (Beispiel
)
O T Drücken Sie die Taste P, um die Ei nstellung zu best äti gen.
Im Display e rscheint kurz GESPEICHERT.
WASSERHÄRTE 25° dH
0 T Drücken Sie die Taste Exit, um den Programmiermodus zu
verlassen.
Ihre IMPRESSA ist wied e r betrieb sbereit.
Wasserhärte ermitteln
und einstellen
Wasserhärte ermitteln
Wasserhärte einstellen
Page 69

1
7
2 Vorbereiten und in Betrieb nehmen
S
ie können be ide Mahlwerke stufenlos dem Röstgrad der jewe iligen
Kaffeesorte anpassen.
Wenn Sie den Mahlgrad bei ruhendem Mahlwerk einstellen, sind
S
chäden am Einstellring nicht ausz uschließen.
T Verste llen Sie den Mahlgrad nur bei l aufendem Mahlwerk.
Die richtige Einstellung des Mahlgra des erkennen Sie daran, dass der
Kaffee glei chmä ßig aus de m Kaff eeauslauf fli eßt . Zudem entsteht
eine feine, dichte Crema.
Wir e mpfe hlen:
Z Für e ine he lle Röstung e ine feine Einstel lung des Mahl-
grades.
U Ist der Mahlgrad zu fei n eingestellt, fli eßt der Kaffee nur
tropf enweise aus dem Ka ffe eauslauf.
Z Für ei ne dunkle Röstung eine grobe Einstellung des Mahl -
grades.
U Bei einem zu groben Mahlgra d flie ßt der Ka ffe e zu schnell
aus de m Kaf fee auslauf.
Beispiel: So ändern Sie den Mahlgrad während der Zubereit ung von
einem Kaffee.
Voraussetzung: Ihr e IMPRESSA ist betriebsberei t.
TStellen Sie eine Tasse unter den Kombiauslau f.
T Dr ücken Sie die Taste 1 Kaffee.
Das Ma hlwerk starte t, im Displ ay erscheint 1 KAFFEE.
TStellen Sie den Einst ellring a m Bohnenbehält er in die
gewünschte Posi tio n, während das Ma hlwerk läuf t.
Der Ka ffe e wird zubereite t, der Mahlgrad ist eingestellt.
Mahlwerk einstellen
VORSICHT
Page 70

1
8
2 Vorbereiten und in Betrieb nehmen
Bei m Einschalt en der IMPRESSA wird der Spülvorgang automatis ch
verlangt, er wird durch Drüc ken d e r Spül t ast e aus gelös t.
Im Programmiermodus haben Sie die Möglichkeit , diese Einstellung
zu ände rn, so dass das Gerät die Eins chaltspülung automatisch aus-
löst (siehe Kapi tel 5 »Dauerhaf te Einstellunge n im Programmiermodus – Eins chaltspülung«)
.
Voraussetzung: Ihr e IMPRESSA ist am Ne tzsc halt er eingesc halt et.
T Öffnen Sie die Abdeckung der Progra mmi ert ast en.
Q T Drücke n Sie di e Taste Ein/Aus, um die IMPRESSA einzuschal-
ten.
Im Display erscheint kurz WILLKOMMEN BEI JURA. Nach
dem Aufheizen wird SPÜLTASTE DRÜCKEN angezeigt.
c T Drücken Sie die Spültast e, um die Spülung zu starten.
GER
ÄT SPÜLT, es fli eßt Wass er aus de m Kombiauslauf. Der
Vorgang stoppt automatisch. Ihre IMPRESSA ist betriebsberei t.
Wenn Sie Ihre IMPRESSA auss c halt en, werden die Ausl äufe gespült,
bei denen ei ne Kaff eespezia lit ät oder Milch zubere itet wurde. Wurde
nur Heißwasser oder Dampf zubereitet , schal tet das Gerät aus ohne
zu spül en.
Voraussetzung: Ihr e IMPRESSA ist betriebsberei t.
T Öffnen Sie die Abdeckung der Progra mmi ert ast en.
Q T Drücke n Sie die Tast e Ein/Aus, um die IMPRESSA auszuschal-
ten.
Im Display erschei nt AUF WIEDERS
EHEN. Das Gerät wird
gespült, es fließt Wasser aus dem Kombiauslauf. Der Vor-
gang stoppt automatisch, die IMPRESSA ist ausgeschal tet
(Stand-by
)
.
E Um das Gerät vollständig vom Netz zu t rennen, s chalten Sie
es am Net zschalter auf der Geräterü c kseite aus.
Einschal ten
Ausschalten (Stand-by)
Page 71

1
9
3 Lernen Sie di e Bedienmögli chkeiten kennen
Die IMPRESSA bereite t Ihnen auf Knopfdruck eine exzellente Kaf fee -
oder Milchspezia lit ät zu. Darüber hinaus haben Sie die Möglichkeit,
die Kaffeestärke und -temperatur, sowie die Wasserm e nge Ihren
individuellen Wünschen anzupassen.
In diese m Kapitel lerne n Sie an Hand von Beispi elen alle Bedi enmög-
lichkeiten ke nnen. Um sich mi t Ihrer IMPRESSA vertraut zu machen,
empfehl en wir Ihnen, d i e Angebot e dieses Kapi tels ei nmal ak tiv zu
nutzen. Es lohnt si ch.
L
ernen Sie die folgenden Bedienmögli chkeiten kennen:
Z Zuberei tung auf Knopfdruck
Z Dauerha ft e Einst ellungen im Programmiermodus
E Währe nd eine Kaffee- oder Mil chspezialität sowie Heißwasser
zubereit et wird, können Sie die Zuberei tung jederzeit stop-
pen. Drücken Sie hierzu eine beliebige Taste.
Bereiten Sie Ihr e favorisier te Kaffe espe zialität auf Knopfdruck zu.
Die Zubereitung al l er Kaf fee speziali täten folgt diese m Muster.
Beispiel: So bereiten Sie einen Kaff ee zu.
Voraussetzung: Ihr e IMPRESSA ist betriebsberei t.
TStellen Sie eine Tasse unter den Kombiauslau f.
T Dr ücken Sie die Taste 1 Kaffee.
Die Kaffe ezubereitung startet. De n aktuell en Stand der
Zuber eit ung können Sie am Fortsch ritt sbal ken mitver fol-
gen. Die vore ingestel lte Wassermenge fließt in di e Tasse.
Der Vorgang stoppt automa tisc h.
Ihre IMPRESSA ist wied e r betrieb sbereit.
Zubereitung auf
Knopfdruck
Eine Kaffeespezial ität auf
Knopfdruck zuberei ten
3 Lernen Sie die Bedienmöglichkeiten kennen
Page 72

20
3 Lernen Sie di e Bedienmögli chkeiten kennen
Ihre IMPRESSA können Sie ganz einfach auf die persönlichen Ka ffe e-
sort en und -spezia lit äte n abst immen. Sehen Sie hier, welche dauer-
haf ten Einste llungen Sie im Programmiermodus vornehmen können:
Dauerha f te Einstellungen im Programmier-
modus
Programmpunkt Unterpunkt Erläuterung
WASSERHÄRTE
(
wird nur angezeigt,
wenn Filt er nicht
aktiviert ist
)
NICHT AKTIV, 1°
dH – 30° dH TStellen Sie die Wasserhärte ein.
PRODUK T-
EINSTELLUNGEN
T Wählen Sie Ihre Einst ellungen für die
Kaffee- und Mil chspezialitäten sowi e
Heißwasser und Dampf.
UHRZEIT --:--, WOCHENTA
G
TStellen Sie die Uhrzeit und den Wochen-
tag ein.
TIME
R
TStellen Sie die Ein- und Ausscha ltzeit ein
und de fini eren Sie, an welc hen Woche nt a gen s ich die IMPRESSA automa tisch ein-
und ausschal tet.
AUS NACH AUS NACH --. STD,
0.5 STD – 9 STD
TStellen Sie ein, nach wie vielen Stunden
sich die IMPRESSA automa tisch ausscha l-
tet.
EINSCHALTSPÜLUNG
MANUELL, AUTOMATISCH TStellen Sie ein, ob die Einschal tspülung
manuell ausgelöst werden muss oder
automatisch ausgelöst wird.
SPR
ACHE DEUTSCH, FRANCAIS,
ENGLIS
H, ITALIANO, N
L
T Wählen Sie Ihre Sprache.
ANZEIGE EINHEIT,
ZEITFORMAT
T Wählen Sie die Einheit der Wass er-
menge und das Uhrze itforma t.
INFORMATION T B ehalten Sie den Überblic k über alle
zubereit eten Kaf fee - und Mil chspeziali-
täten und rufen Sie den Pfl eges tatus ab.
Page 73

2
1
3 Lernen Sie di e Bedienmögli chkeiten kennen
Die Einstellungen im Progra mmi ermodus folgen immer dem glei-
chen Muster.
Beispiel: So ändern Sie die Pulverme nge e ines Espressos.
Voraussetzung: Ihr e IMPRESSA ist betriebsberei t.
T Öffnen Sie die Abdeckung der Progra mmi ert ast en.
O T Drücken Sie die Taste P so lange, bis WASSERHÄRTE 16° dH
erscheint .
T Drü cken Sie mehrmals d i e Taste + oder -, bis PRODUKTEIN-
STELLUNG
EN angezei gt wird.
O T Drücken Sie die Taste P, um in den Progra mmpunkt einzu-
ste igen.
PRODUKT WÄHLEN und die jeweil igen Produkte werden
ange zeigt.
T Drücken Sie die Taste 1 Espresso.
1 ESPRESSO /
WASSERMENGE 35 M
L
T Drü cken Sie mehrmals die Tast e +, bis 1 ESPRESSO /
PULVERMENGE angezei gt wird.
O T Drücken Sie die Taste P, um in den Progra mmpunkt einzu-
ste igen.
1 ESPRESSO /
PULVERMENGE
T Drücken Sie mehrmals die Taste + oder -, um die Pulver-
menge einzustellen.
O T Drücken Sie die Taste P, um die Ei nstellung zu best äti gen.
Im Display e rscheint kurz GESPEICHERT.
1 ESPRESSO /
PULVERMENGE
Programmpunkt Unterpunkt Erläuterung
MULTIMEDIA
L
AUTSTÄRKE,
HELLIGKEIT,
KONTRAST,
MULTIMEDIA SPRACHE,
WIEDERG
ABE
(
BEZUG, ALARM, ANLEI-
TUNG)
,
VIDEO SOUND
(
BEZUG, ALARM, ANLEI-
TUNG)
T Wählen Sie Ihre Einst ellungen für das
Displ ay und d i e unt erst ütz e nden Filmse-
quenzen.
Page 74

22
3 Lernen Sie di e Bedienmögli chkeiten kennen
0 T Drücken Sie die Tast e Exit, um den Programmpunkt zu ver-
lass en.
PRODUKT WÄHLEN
0 T Drücken Sie die Tast e Exit, um den Programmpunkt zu ver-
lass en.
PRODUKTEINSTELLUNGEN
0 T Drücken Sie die Taste Exit, um den Programmiermodus zu
verlassen.
Ihre IMPRESSA ist wied e r betrieb s bereit.
Im Progra mmpunkt INFORMATION können Sie folgende Informati-
onen abfragen:
Z Anzahl d e r zubereit eten Kaffee- und Milchspezia lit äte n sowie
Heißwasser
Z Pfl egesta tus und Anzahl der durchgeführten Pfle gepro-
gramme (R
einigung, Entkalkung, Filterwe chsel , Milchreini-
gung
)
Voraussetzung: Ihr e IMPRESSA ist betriebsberei t.
T Öffnen Sie die Abdeckung der Progra mmi ert ast en.
O T Drücken Sie die Taste P so lange, bis WASSERHÄRTE
erscheint .
T Drü c ken Sie mehrmals die Taste + oder -, bis INFORMATION
ange zeigt wird.
O T Drücken Sie die Taste P, um in den Progra mmpunkt einzu-
ste igen.
TOTAL und die Gesamtzahl der Zubereitungen wird angezeigt.
E Drüc ken Sie die Tast e + oder -, um die verschi edenen Informa-
tionen abzufragen.
0 T Drücken Sie die Tast e Exit, um den Programmpunkt zu ver-
lass en.
INFORMATION
0 T Drücken Sie die Taste Exit, um den Programmiermodus zu
verlassen.
Ihre IMPRESSA ist wied e r betrieb s bereit.
Informa tionen und
Pflegesta tus abfragen
Page 75

23
3 Lernen Sie di e Bedienmögli chkeiten kennen
Mit dem Individual zähler (Taste Zähler 9) haben Sie die Möglich-
kei t, Ihren Konsum über eine von Ihne n bestimmte Zeitspanne fest-
zuhalten. Diesen Zä hler können Sie jederzei t auf Null zurückse tzen.
Voraussetzung: Ihr e IMPRESSA ist betriebsberei t.
T Öffnen Sie die Abdeckung der Progra mmi ert ast en.
9 T Drücken Sie die Taste Zähler so lange, bis ein akustisches
S
igna l ertönt.
1
KAFFEE und die Anzahl der Zubereitungen wird ange-
zeigt.
E Drücken Sie di e Taste + oder -, um die jewe ilige Anzahl der
zubereit eten Produk te abzufragen.
0 T Drücken Sie die Taste Exit.
ZÄHLER LÖSCHEN / NEIN
T Drü cken Sie die Tast e + oder -, um die Einstellung auf JA zu
ände rn.
O T Drücken Sie die Taste P, um den Zähler zurückzusetzen.
Im Display e rscheint k urz GELÖSCHT.
Ihre IMPRESSA ist wied e r betrieb sbereit.
Zähler zurücksetzen
Page 76

24
4 Zubereitung auf Knopfdruck
In diese m Kapitel erfahren Sie, wie Sie Kaffee- und Milchspeziali täten
sowie Heißwasse r und Dampf ohne weitere Einstellungen zuberei-
ten.
Im Kapite l 3 »L
ernen Sie die Bedienmögli chkeiten kennen« lernen
S
ie, die Einste llungen Ihren individue llen Wünschen entspr e chend
anzupassen. Oder Sie nutzen Kapitel 5 »Dauerhaf te Einstel lungen im
Programmiermodus
«
.
E Währe nd eine Kaffee- oder Mil chspezialität sowie Heißwasser
zubereit et wird, könne n Sie die Zubereit ung jederzei t abbrechen. Drücken Sie hierzu eine beliebige Taste.
Der Kl assiker aus It ali en schl echt hin. Gekrönt wird der Espresso von
einer feinen, dichten Cre ma.
Beispiel: So bereiten Sie einen Espresso zu.
Voraussetzung: Ihr e IMPRESSA ist betriebsberei t.
TStellen Sie eine Espressot asse unter den Kombiausl auf.
T Dr ücken Sie die Taste 1 Espresso.
Die Kaffe ezubereitung startet. De n aktuell en Stand der
Zuber eit ung können Sie am Fortsch ritt sbal ken mitver fol-
gen. Die vore ingestel lte Wassermenge fließt in di e Tasse.
Der Vorgang stoppt automa tisc h.
Ihre IMPRESSA ist wied e r betrieb sbereit.
Beispiel: So bereiten Sie einen Kaff ee zu.
Voraussetzung: Ihr e IMPRESSA ist betriebsberei t.
TStellen Sie eine Tasse unter den Kombiauslau f.
T Dr ücken Sie die Taste 1 Kaffee.
Die Kaffe ezubereitung startet. De n aktuell en Stand der
Zuber eit ung können Sie am Fortsch ritt sbal ken mitver fol-
gen. Die vore ingestel lte Wassermenge fließt in di e Tasse.
Der Vorgang stoppt automa tisc h.
Ihre IMPRESSA ist wied e r betrieb sbereit.
E Zwei Kaffees berei ten Sie entsprechend zu, inde m Sie zwei
Tassen unter den Kombi ausla uf stellen und die Taste 2 Kaffee
drücken.
Espresso
Kaffee
4 Zubereitung auf Knopfdruck
Page 77

25
4 Zubereitung auf Knopfdruck
S
ie können Cappuc cino, Milchka ffe e und Latte macchiato ganz e in-
fac h auf Knopfdruc k zubereiten.
Beispiel: So bereiten Sie einen Latte macchiat o zu.
Voraussetzung: Ihr e IMPRESSA ist betriebsberei t.
T Tauchen Sie beide Milc hschläuche vol lst ä ndig in die Milch.
TStellen Sie ein Glas unter den Kombi auslauf.
T Dr ücken Sie die Taste Latte macchiato.
Die Zubere itung starte t, der Milc hschaum fließt in das Glas.
Den aktuellen Stand der Zube reitung können Sie an den
Fort schritts balken mi tver folgen.
Es folgt eine kurze Pause. Di e voreinges tell te Wasserm e nge
des Espressos fließt in das Glas.
Der Vorgang stoppt automa tisc h.
Ihre IMPRESSA ist wied e r betrieb s bereit.
E Zehn Minuten nach der Zuberei tung von Milch wird automa-
tisc h der Kombiauslauf gespült. Diese Spülung wird durch ei n
akus tisches Signa l angekündigt. Die Ei nstel lung kann durch
den JURA-Serv i cet echniker geändert werden.
S
ie können warme Milch ganz einfach auf Knopfdruck zub e reiten.
Voraussetzung: Ihr e IMPRESSA ist betriebsberei t.
T Tauchen Sie beide Milc hschläuche vol lst ä ndig in die Milch.
TStellen Sie eine Tass e unter den Kombiauslau f.
T Drücken Sie die Taste Mil c h.
Die Zubere itung starte t, d i e warme Milch fließt in die Tasse.
Den aktue lle n Stand der Zubere itung können Sie am Fort-
schritt s balken mi tverfolgen.
Der Vorgang stoppt automa tisc h.
Ihre IMPRESSA ist wied e r betrieb s bereit.
E Zehn Minuten nach der Zuberei tung von Milch wird automa-
tisc h der Kombiauslauf gespült. Diese Spülung wird durch ei n
akus tisches Signa l angekündigt. Die Ei nstel lung kann durch
den JURA-Serv i cet echniker geändert werden.
Cappuccino,
Milchkaffee und
Latte macchiato
Warme Milch
Page 78

26
4 Zubereitung auf Knopfdruck
Verbrühungsgefahr durch heiße Wasserspritzer.
T Vermeiden Sie direk ten Haut kontakt .
Voraussetzung: Ihr e IMPRESSA ist betriebsberei t.
TStellen Sie eine Tass e unter das Heißwasserrohr.
m T Drücken Sie die Taste Hei ßwasser.
Die Zubereitung s tar tet . Den aktue llen Stand der Zubereitung können Sie an den Fortschrit tsbalken mit ver folgen.
Der Vorgang stoppt automatisch nach Erreichen der vore inges tell ten Wassermenge.
Ihre IMPRESSA ist wied e r betrieb s bereit.
Verbrühungsgefahr durch heißen Da mpf.
T Vermeiden Sie direk ten Haut kontakt .
Voraussetzung: Ihr e IMPRESSA ist betriebsberei t.
TStellen Sie ein Gefäß unt er das Dampfrohr.
n T Drüc ken Sie die Taste Dampf.
Die Zubereitung s tar tet . Den aktue llen Stand der Zubereitung können Sie an den Fortschrit tsbalken mit ver folgen.
Der Vorgang stoppt automatisch nach Erreichen der vore inges tellten Dampfmenge.
Ihre IMPRESSA ist wied e r betrieb s bereit.
Heißwasser
VORSICHT
Dampf
VORSICHT
Page 79

27
5 Dauerhaf te Einstel lungen im Programmiermodus
Unter dem Programmpunkt PRODUKTEINSTELLUNGEN können Sie
individuelle Einstellungen f ür alle Ka ffe e- und Milchproduk te s owie
Hei ßwasser vornehmen.
Folgende Einstellungen können Sie dauerhaft vornehmen:
Die Eins tellungen im Progra mmi ermodus folgen immer dem glei-
chen Muster.
Beispiel: So ändern Sie die Pulverme nge von 1 Espresso.
Voraussetzung: Ihr e IMPRESSA ist betriebsberei t.
T Öffnen Sie die Abdeckung der Progra mmi ert ast en.
O T Drücken Sie die Taste P so lange, bis WASSERHÄRTE
erscheint .
T Drü c ken Sie mehrmals d i e Taste + oder -, bis PRODUKTEIN-
STELLUNG
EN angezei gt wird.
O T Drücken Sie die Taste P, um in den Progra mmpunkt einzu-
ste igen.
PRODUKT WÄHLEN
T Drüc ken Sie die Taste 1 Espresso.
1 ESPRESSO /
WASSERMENGE
T Drü c ken Sie mehrmals die Tast e +, bis 1 ESPRESSO /
PULVERMENGE angezei gt wird.
Produkteinstellungen
5 Dauerhafte Ein s tellungen im Programmiermodus
Produkt Menge Weitere Einstellmöglichkeiten
1
Espresso ,
1
Kaffee,
2 Kaffee
WASSERMENGE: 25 ML – 300 M
L
(
bei 2 Kaffee: Menge pro Tasse
)
PULVERMENGE
MAHLWERK (linkes und rechtes
Mahlwerk in Prozent
)
TEMPERATUR: NIEDRIG, NOR-
MAL, HOCH
Cappuccin o,
Milchkaf fee,
L
atte macchiato
WASSERMENGE: 25 ML – 300 M
L
PULVERMENGE
MILCHMENGE: 0/3 SEC – 120 SEC
MILCHSCHAUM: 0/3 SEC – 120 SEC
MAHLWERK (linkes und rechtes
Mahlwerk in Prozent
)
TEMPERATUR: NIEDRIG, NOR-
MAL, HOCH
Warme Milch MILCHMENGE: 0/3 SEC – 120 SEC –
Hei ßwasser (Portion
)
WASSERMENGE: 25 ML – 500 M
L
–
Dampf (Permanent
)
– –
Page 80

28
5 Dauerhaf te Einstel lungen im Programmiermodus
O T Drücken Sie die Taste P, um in den Progra mmpunkt einzu-
ste igen.
PULVERMENGE
T Drüc ken Sie mehrmals die Taste + oder -, um die Pulver-
menge einzustellen.
O T Drücken Sie die Taste P, um die Ei nstellung zu best äti gen.
Im Display e rscheint kurz GESPEICHERT.
1 ESPRESSO /
PULVERMENGE
0 T Drücken Sie die Tast e Exit, um den Programmpunkt zu ver-
lass en.
PRODUKT WÄHLEN
0 T Drücken Sie die Tast e Exit, um den Programmpunkt zu ver-
lass en.
PRODUKTEINSTELLUNGEN
0 T Drücken Sie die Taste Exit, um den Programmiermodus zu
verlassen.
Ihre IMPRESSA ist wied e r betrieb s bereit.
Die Uhrzei t und de n Wochen t ag ha ben Sie bereits bei der ersten
Inbe trie bnahme einges tel lt. Dies e Einstellung können Sie ändern.
Beispiel: So ändern Sie die Uhrzei t von 8:45 (Beispiel) auf 9:50 Uhr.
Voraussetzung: Ihr e IMPRESSA ist betriebsberei t.
T Öffnen Sie die Abdeckung der Progra mmi ert ast en.
O T Drücken Sie die Taste P so lange, bis WASSERHÄRTE 16° dH
erscheint .
T Drü c ken Sie mehrma ls die Taste + oder -, bis UHRZEIT ange -
zeigt wird.
O T Drücken Sie die Taste P, um in den Progra mmpunkt einzu-
ste igen.
UHRZEIT STUNDEN 08:45 (Beispiel
)
T Drü c ken Sie mehrmals die Taste + oder -, um die Stunden
einzustellen.
O T Drücken Sie die Taste P, um die Ei nstellung zu best äti gen.
T Drü c ken Sie me hrmals die Taste + oder -, um die Minut en
einzustellen.
O T Drücken Sie die Taste P, um die Ei nstellung zu best äti gen.
Im Display e rscheint kurz GESPEICHERT.
WOCHENTAG MONTAG (Beispiel
)
Uhrzeit und Wochentag
Page 81

29
5 Dauerhaf te Einstel lungen im Programmiermodus
O T Drücken Sie die Taste P, um die Ei nstellung zu best äti gen.
Im Display e rscheint kurz GESPEICHERT.
UHRZEIT
0 T Drücken Sie die Taste Exit, um den Programmiermodus zu
verlassen.
Ihre IMPRESSA ist wied e r betrieb s bereit.
Im Programmpunkt TIMER können Sie folge nde Einste llungen vor-
nehmen:
ZGERÄT EIN
UStellen Sie die g ewünschte Einschaltzeit ein.
ZGERÄT AU
S
UStellen Sie die g ewünschte Ausscha ltzeit ein.
Z EIN/AU
S
UStellen Sie e in, an welchen Wochent agen sich die IMPRESSA
automatisch ein- und aussch a lt e t.
E Die programmierbare Ein- und Ausschal tzeit kann nur einge-
ste llt werden, wenn di e Uhrzeit eingeste llt ist.
E Die automatische Eins chal t ung funk tionier t nur, wenn das
G
erät am Netzschal ter e ingeschal tet ist (S
tand-by
)
.
Beispiel: So stell e n Sie die Ei nschaltze it auf 07:3 0 Uhr ein und definieren, dass sich Ihre IMPRESSA am Sonnt ag nic ht automatisch e inschalte t.
Voraussetzung: Ihr e IMPRESSA ist betriebsberei t.
T Öffnen Sie die Abdeckung der Progra mmi ert ast en.
O T Drücken Sie die Taste P so lange, bis WASSERHÄRTE 16° dH
erscheint .
T Drü c ken Sie me hrmals die Taste + oder -, bis TIMER ange-
zeigt wird.
O T Drücken Sie die Taste P, um in den Progra mmpunkt einzu-
ste igen.
GER
ÄT EIN --:--
O T Drücken Sie die Taste P, um in den Progra mmpunkt einzu-
ste igen.
GER
ÄT EIN / STUNDEN --:--
T Drü c ken Sie mehrmals die Tas te +, bis GERÄT EIN / STUNDEN
07:00 angezeigt wird.
Timer
Page 82

30
5 Dauerhaf te Einstel lungen im Programmiermodus
O T Drücken Sie die Taste P, um die Eins tellung der Stunden zu
bes tätigen.
T Drü c ken Sie me hrmals die Taste +, bis GERÄT EIN / MINUTEN
07:30 angezeigt wird.
O T Drücken Sie die Taste P, um die Einst ellung der Minuten zu
bes tätigen.
Im Display e rscheint kurz GESPEICHERT.
GER
ÄT EIN 07:30
T Drü c ken Sie mehrma ls die Taste + oder -, bis EIN/AUS /
S
ONNTAG JA angezeigt wird.
O T Drücken Sie die Taste P, um in den Progra mmpunkt einzu-
ste igen.
EIN/AUS / SONNTAG JA
T Drü c ken Sie die Taste + oder -, um di e Eins tellung auf
S
ONNTAG NEIN zu ändern.
O T Drücken Sie die Taste P, um die Ei nstellung zu best äti gen.
Im Display e rscheint kurz GESPEICHERT.
EIN/AUS / SONNTAG NEIN
0 T Drücken Sie die Tast e Exit, um den Programmpunkt zu ver-
lass en.
TIME
R
0 T Drücken Sie die Taste Exit, um den Programmiermodus zu
verlassen.
Ihre IMPRESSA ist wied e r betrieb s bereit.
Durch das automatis che Ausschalt en Ihrer IMPRESSA können Sie
Energie sparen. Ist di e Funktion aktiviert, schaltet sic h Ihre IMPRESSA
nach der let zte n Aktion am Gerät automatis ch nach der eingestell-
ten Zeit aus.
E Das automa tisc he Ausschal ten kann zwische n 0,5 und 9 Stun-
den eingestellt oder inakt iv ges etzt werden.
Beispiel: So ändern Sie das automatische Ausschal ten von 5.0 STD
auf 2.0 STD.
Voraussetzung: Ihr e IMPRESSA ist betriebsberei t.
Automatisches Aus-
schalten
Page 83

3
1
5 Dauerhaf te Einstel lungen im Programmiermodus
T Öffnen Sie die Abdeckung der Progra mmi ert ast en.
O T Drücken Sie die Taste P so lange, bis WASSERHÄRTE
erscheint .
T Drü c ken Sie mehrmals die Taste + od e r -, bis AUS NACH
5.0 STD angezeigt wird.
O T Drücken Sie die Taste P, um in den Progra mmpunkt einzu-
ste igen.
AUS NACH 5.0 STD
T Drü c ken Sie mehrmals die Tast e -, bis AUS NACH 2.0 STD
ange zeigt wird.
O T Drücken Sie die Taste P, um die Ei nstellung zu best äti gen.
Im Display e rscheint kurz GESPEICHERT.
AUS NACH 2.0 STD
0 T Drücken Sie die Taste Exit, um den Programmiermodus zu
verlassen.
Ihre IMPRESSA ist wied e r betrieb s bereit.
Die Sprache habe n Sie bei der ersten Inbetrie bnahme einges tellt.
Diese Eins tellung können Sie ändern.
Beispiel: So ändern Sie die Sprache von DEUTSCH auf ENGLIS
H.
Voraussetzung: Ihr e IMPRESSA ist betriebsberei t.
T Öffnen Sie die Abdeckung der Progra mmi ert ast en.
O T Drücken Sie die Taste P so lange, bis WASSERHÄRTE
erscheint .
T Drü c ken Sie mehrmals die Tas te + oder -, bis SPRACHE
DEUTSCH an gezeigt wi rd.
O T Drücken Sie die Taste P, um in den Progra mmpunkt einzu-
ste igen.
SPR
ACHE DEUTSCH
T Drü c ken Sie mehrma ls die Taste + oder -, um di e Sprache
einzustellen, zum Beispiel LANGUAGE ENGLIS
H.
O T Drücken Sie die Taste P, um die Ei nstellung zu best äti gen.
Im Display e rscheint kurz CONFIRMED.
LANGUAG
E ENGLIS
H
0 T Drücken Sie die Taste Exit, um den Programmiermodus zu
verlassen.
Ihre IMPRESSA ist wied e r betrieb s bereit.
Sprache
Page 84

32
5 Dauerhaf te Einstel lungen im Programmiermodus
Im Programmpunkt ANZEIGE können Sie die Einheit der Wassermenge von »ml« auf »oz« ändern und das Uhrzei tformat auf »24 STD«
oder »AM/PM« einstellen.
Beispiel: So ändern Sie die Ei nheit der Wass erme nge von ML auf OZ.
Voraussetzung: Ihr e IMPRESSA ist betriebsberei t.
T Öffnen Sie die Abdeckung der Progra mmi ert ast en.
O T Drücken Sie die Taste P so lange, bis WASSERHÄRTE
erscheint .
T Drü c ken Sie mehrm a ls die Taste + oder -, bis ANZEIGE ange-
zeigt wird.
O T Drücken Sie die Taste P, um in den Progra mmpunkt einzu-
ste igen.
ANZEIGE / EINHEIT M
L
O T Drücken Sie die Taste P, um in den Progra mmpunkt einzu-
ste igen.
ANZEIGE / EINHEIT M
L
T Drü c ken Sie die Taste + oder -, um di e Eins tellung auf
EINHEIT OZ zu ändern.
O T Drücken Sie die Taste P, um die Ei nstellung zu best äti gen.
Im Display e rscheint kurz GESPEICHERT.
ANZEIGE / EINHEIT OZ
0 T Drücken Sie die Tast e Exit, um den Programmpunkt zu ver-
lass en.
ANZEIGE
0 T Drücken Sie die Taste Exit, um den Programmiermodus zu
verlassen.
Ihre IMPRESSA ist wied e r betrieb s bereit.
Anzeige (Einheit
Wassermenge und
Uhrzeitformat)
Page 85

33
5 Dauerhaf te Einstel lungen im Programmiermodus
S
ie könne n einste llen, ob die Spülung beim Einschalten manuell
ausge löst we rden muss oder automatisch erfolgt.
Beispiel: So stellen Sie ein, dass die Einschal tspülung manuell aus-
gelöst werden muss .
Voraussetzung: Ihr e IMPRESSA ist betriebsberei t.
T Öffnen Sie die Abdeckung der Progra mmi ert ast en.
O T Drücken Sie die Taste P so lange, bi s WASSERHÄRTE
erscheint .
T Drü c ken Sie mehrmals di e Taste + oder -, bis
EINSCHALTSPÜLUNG/
AUTOMATISCH angezeigt wird.
O T Drücken Sie die Taste P, um in den Programmpunkt einzu-
ste igen.
EINSCHALTSPÜLUNG/
AUTOMATISCH
T Drü c ken Sie die Taste + oder -, um die Einst ellung auf
MANUELL zu ändern.
O T Drücken Sie die Taste P, um die Ei nstellung zu best äti gen.
Im Display e rscheint kurz GESPEICHERT.
STARTSPÜLUNG/MANUE
LL
0 T Drücken Sie die Taste Exit , um den Programmiermodus zu
verlassen.
Ihre IMPRESSA ist wied e r betrieb s bereit.
Im Programmpunkt MULTIMEDIA können Sie folgende Einst el-
lungen vornehmen:
ZLAUTSTÄRKE
Z HELLIGKEIT
Z KONTRAST
Z MULTIMEDIA SPRACHE
Z WIEDERG
ABE – BEZU
G
U Fil msequenze n während der Zubereitung eines Produkt s
Z WIEDERG
ABE – ALARM
U Fi l msequenze n, wenn Ihre IMPRESSA zu einer Aktion auffor-
der t, beispie lsweis e Bohnenbehälter oder Wassertank füll en
Z WIEDERG
ABE – ANLEITUN
G
U Unterstützende Filmsequenzen, nachde m Sie ein Pfl egepro-
gramm gest artet habe n
Einschal tspülung
Multimedia
Page 86

34
5 Dauerhaf te Einstel lungen im Programmiermodus
Z VIDEO SOUND – BEZU
G
Z VIDEO SOUND – ALARM
Z VIDEO SOUND – ANLEITUN
G
E In den Programmpunkten WIEDERG
ABE und VID E O SOUND
können Sie jewei ls zwischen FORTLAUFEND, NIE und EINMAL
»
abspi ele n« wähl en.
Beispiel: So ste llen Sie ein, dass der Ton bei HANDLUNGS
AUFFOR-
DERUNGEN einmal abgespiel t wird.
Voraussetzung: Ihr e IMPRESSA ist betriebsberei t.
T Öffnen Sie die Abdeckung der Progra mmi ert ast en.
O T Drücken Sie die Taste P so lange, bis WASSERHÄRTE
erscheint .
T Drü cken Sie mehrmals di e Tast e + oder -, bis MULTIMEDIA
ange zeigt wird.
O T Drücken Sie die Taste P, um in den Progra mmpunkt einzu-
ste igen.
MULTIMEDIA / LAUTSTÄRKE
T Drü cken Sie mehrmals die Taste + oder -, bis VIDEO SOUND
– ALARM angezei gt wird.
Drüc ken
O T Drücken Sie die Taste P, um in den Progra mmpunkt einzu-
ste igen.
FORTLAUFEND
T Drücken Sie mehrmals die Taste + oder -, bis VIDEO SOUND –
ALARM / EINMAL angezei gt wird.
O T Drücken Sie die Taste P, um die Ei nstellung zu best äti gen.
Im Display e rscheint kurz GESPEICHERT.
VIDEO SOUND – ALARM
0 T Drücken Sie die Tast e Exit, um den Programmpunkt zu ver-
lassen.
MULTIMEDIA
0 T Drücken Sie die Taste Exit, um den Programmiermodus zu
verlassen.
Ihre IMPRESSA ist wied e r betrieb sbereit.
Page 87

35
6 Pflege
Damit Sie lange Freude an I hrer IMPRESSA haben und um stets die
optimale Kaffe equalit ät siche rzustellen, sollte sie tägli ch g e pflegt
werde n. Gehen Sie dabei wie folgt vor:
ZLeer en Sie den Kaf feesatzbehält e r un d die Restwassers chale.
S
püle n Sie diese mit warme m Wasser.
ZSpüle n Sie den Wasser tank mit klarem Wasser.
Z Zerlegen und spülen Sie den Komb i auslauf (siehe Kapite l 6
»
Pflege – Kombiauslauf zerlegen und spüle n«)
.
Z Wischen Sie die Geräteoberfl äche mit einem fe uchten Tuch
ab.
Bei m Einschalten der IMPRESSA wird nach dem Aufheizen eine Spü-
lung verlang t oder automa tisch a usgelöst. Beim Ausschalten wird
der Spülvorgang automatisch ausge löst.
Im Programmiermodus können Sie e instelle n, ob die Spülung beim
Einschalten manuell ausgelöst we rden muss ode r a utomatisch
erfolgt (siehe Kapite l 5 »Dauerhaf te Einste llungen im Programmier-
modus – Einschaltspülung«)
.
S
ie können jederzeit manuell eine Spülung auslösen.
Voraussetzung: Ihr e IMPRESSA ist betriebsberei t.
T Öffnen Sie die Abdeckung der Progra mmi ert ast en.
c T Drücken Sie die Spül t ast e.
GER
ÄT SPÜLT, es fließt Wasser aus dem Kombiauslauf.
Der Vorgang stoppt automa tisc h.
Ihre IMPRESSA ist wied e r betrieb sbereit.
Pflegetipps
Gerät spülen
Gerät spülen – manuell
6 Pflege
Page 88

36
6 Pflege
Aus hygienischen Gründe n und damit der Kombiauslauf einwand-
frei funk tioniert, muss er regelmäßig zerlegt und gespül t werden.
Voraussetzung: Ihr e IMPRESSA ist ausgeschal tet (S
tand-by
)
.
T Dr ücken Sie die Entriegel ungst aste auf der Obersei te des
Kombi auslaufs und entferne n Sie die Abdeckung.
T Zi ehen Sie die Schläuche vorsichtig hera us.
T Entfernen Sie die Ausläufe und zerle gen Sie diese in die Ein-
zel tei le.
TSpüle n Sie alle Teile gründlich mit warme m Wasser.
TSetzen Sie die Einzelteile wieder zusammen. Achten Sie hier-
bei auf die Farbe der Einzel teile.
T Montieren Sie die Ausl äufe am Gerät.
TSetzen Sie die Abdeckung auf.
Aus hygienischen Gründe n und damit der Kombiauslauf einwand-
frei f unkt ioniert, so l lte n Sie täglich eine Milchreinigung durchfüh-
ren , wenn Sie Milch zubereite t haben.
S
chäden am Gerät und Rücks tände im Wasser durch falsche Reiniger
sind nicht auszuschließen.
T Verwenden Sie ausschließlich ori ginal JURA-Pflegezubehör.
E Das Reinigungsprogramm dauert c a. 2 Minuten.
E Unterbrechen Sie das Reinigungsprogramm nicht. Die Reini-
gungsqualität wird dadurch beeinträcht igt.
E Der JURA-Cappuccino-Reiniger ist im Fachhandel erhältlich.
Kombiauslauf zerlegen
und spülen
Milchreinigung
VORSICHT
Page 89

37
6 Pflege
Voraussetzung: Ihr e IMPRESSA ist betriebsberei t.
T Öffnen Sie die Abdeckung der Progra mmi ert ast en.
6 T Drücken Sie die Taste Milc hreinigung.
Der aktuell e Pfleges tat us wird angeze igt.
6 T Drücken Sie nochma ls die Taste Milchreinigung.
MILCHREINIGUNG STARTEN
6 T Drücken Sie die Taste Milchrei nigung, um den Reinigungs-
vorgang zu st arte n.
R
EINIGER FÜR MILCHREINIGUN
G
T Füllen Sie ein Gefäß mit 400 ml Wasser und gebe n Sie 1,5
Dosie rkappen des JURA-Cappuccino-Reinigers hinzu.
T Tauche n Sie beide Milchschläuche in di e Reinigerlösung.
TStellen Sie ein Gefäß (mind. 500 ml) unter de n Kombiaus-
lauf.
6 T Drücken Sie die Taste Milc hreinigung.
GER
ÄT REINIGT, der Kombiauslauf und die Schläuche wer-
den gerei nigt.
Der Vorgang unterbricht, WASSER FÜR MILCHREINIGUN
G
.
TSpüle n Sie das Gefäß gründ l ich aus , füllen Sie es mit 400 ml
frisc hem Wasser und tauchen Sie die Mi lchschl äuche hin-
ein.
TLeer en Sie das andere Gefäß und st ell en Sie es wieder unter
den Kombiauslauf.
6 T Drücken Sie die Taste Milc hreinigung.
GER
ÄT REINIGT, der Kombiauslauf und die Schläuche wer-
den mit frischem Wasser gespül t.
Der Vorgang stoppt automa tisc h.
Ihre IMPRESSA ist wied e r betrieb s bereit.
Nach 220 Kaffe ezuberei tungen oder 80 Einsc halt spülungen verla ngt
die IMPRESSA eine Kaf feereinigung.
S
chäden am Gerät und Rücks tände im Wasser durch falsche Reiniger
sind nicht auszuschließen.
T Verwenden Sie ausschließlich ori ginal JURA-Pflegezubehör.
E Das Reinigungsprogramm dauert c a. 20 Minuten.
E Unterbrechen Sie das Reinigungsprogramm nicht. Die Reini-
gungsqualität wird dadurch beeinträcht igt.
Kaffeereinigung
VORSICHT
Page 90

38
6 Pflege
EJURA-Reinigungst abl etten si nd im Fachhandel erhäl tli ch.
Voraussetzung: Ihre IMPRESSA ist betri ebsber eit , im Display wird
die Meldung E angezeigt.
T Öffnen Sie die Abdeckung der Progra mmi ert ast en.
7 T Drüc ken Sie die Taste Kaff eereinigung.
Der aktuell e Pfleges tat us wird angezigt
7 T Drüc ken Sie nochma ls die Taste Kaffeereinigung.
KAFFEEREINIGUNG STARTEN
7 T Drüc ken Sie die Taste Kaf feereinigung, um den Reinigungs-
vorgang zu st arte n.
RES
TWASSERS
CHALE LEEREN
TLeer en Sie die Restwassersc hale.
KAFFEESATZBEHÄLTER LEEREN
TLeer en Sie den Kaf feesatzbehä lter.
TSetzen Sie den Kaff ees atzbehäl ter und die Restwassers c hale
wieder ein.
TASTE DRÜCKEN
O T Drücken Sie die Taste P.
GER
ÄT REINIGT, es fl ießt Wasser aus dem Kombiauslauf. Den
aktuel len Stand der Kaffeerein i gung können Sie am Fort-
schritt s balken mi tverfolgen.
Der Vorgang unterbricht, TABLETTE EINWERFEN.
T Werfen Sie eine JURA-Reinigungst abl ette in den Einfülltrich-
ter für die Reinigungst abl ette.
7 T Drüc ken Sie die Taste Kaff eereinigung.
GER
ÄT REINIGT, es fließt mehrmals Wasser aus dem Kombi-
auslauf.
Der Vorgang unterbricht, RESTWASSERS
CHALE LEEREN.
TLeer en Sie die Restwassersc hale.
KAFFEESATZBEHÄLTER LEEREN
TLeer en Sie den Kaf feesatzbehä lter.
TSetzen Sie den Kaff ees atzbehäl ter und die Restwassers c hale
wieder ein.
Ihre IMPRESSA ist wied e r betrieb s bereit.
Page 91

39
6 Pflege
Bei der Kombireinigung werde n gleichzeitig eine Milch- und eine
Kaffeereinigung durchgeführt. Nach 220 Kaffeezubereitungen oder
80 Einschaltspülunge n verlangt die IMPRESSA eine Ka ffe ereinigun g.
S
ie haben die Möglichkeit, zusätzlich zur Kaffe ereinigung eine Milch-
reinigung durchzuführen.
S
chäden am Gerät und Rücks tände im Wasser durch falsche Reiniger
sind nicht auszuschließen.
T Verwenden Sie ausschließlich ori ginal JURA-Pflegezubehör.
E Das Reinigungsprogramm dauert c a. 22 Minuten.
E Unterbrechen Sie das Reinigungsprogramm nicht. Die Reini-
gungsqualität wird dadurch beeinträcht igt.
EJURA-Reinigungst abl etten und der JURA-Capp uccino-Reini-
ger sind im Fachhandel erhäl tlich.
Voraussetzung: Ihre IMPRESSA ist betri ebsber eit , im Display wird
die Meldung E angezeigt.
T Öffnen Sie die Abdeckung der Progra mmi ert ast en.
8 T Drücken Sie die Taste Kombireinigung.
Der aktuell e Pfleges tat us wird angezigt
8 T Drücken Sie nochma ls die Taste Kombireinigung.
KOMBIREINIGUNG STARTEN
8 T Drücken Sie die Taste Kombireinigung, um de n Reinigungs-
vorgang zu st arte n.
RES
TWASSERS
CHALE LEEREN
TLeer en Sie die Restwassersc hale.
KAFFEESATZBEHÄLTER LEEREN
TLeer en Sie den Kaf feesatzbehä lter.
TSetzen Sie den Kaff ees atzbehäl ter und die Restwassers c hale
wieder ein.
R
EINIGER FÜR MILCHREINIGUN
G
T Füllen Sie ein Gefäß mit 400 ml Wasser und gebe n Sie 1,5
Dosie rkappen des JURA-Cappuccino-Reinigers hinzu.
T Tauche n Sie beide Milchschläuche in di e Reinigerlösung.
Kombireinigung
VORSICHT
Page 92

40
6 Pflege
TStellen Sie ein Gefäß (mind. 500 ml) unter de n Kombiaus-
lauf.
6 T Drücken Sie die Taste Milc hreinigung.
GER
ÄT REINIGT. Den akt uellen Stand der Kombireinigung
können Sie am For tschritt sbal ken mitverfolgen
Der Vorgang unterbricht, TABLETTE EINWERFEN.
T Werfen Sie eine JURA-Reinigungst abl ette in den Einfülltrich-
ter für die Reinigungst abl ette.
8 T Drücken Sie die Taste Kaff eereinigung.
GER
ÄT REINIGT, es fließt mehrmals Wasser aus dem Kombi-
auslauf. De r Kombia uslauf und di e Schläuche werden gerei-
nigt.
Der Vorgang unterbricht, WASSER FÜR MILCHREINIGUN
G
.
TSpüle n Sie das Gefäß gründ l ich aus , füllen Sie es mit 400 ml
frisc hem Wasser und tauchen Sie die Mi lchschl äuche hin-
ein.
TLeer en Sie das andere Gefäß und st ell en Sie es wieder unter
den Kombiauslauf.
6 T Drücken Sie die Taste Milc hreinigung.
GER
ÄT REINIGT, der Kombiauslauf und die Schläuche wer-
den mit frischem Wasser gespül t.
Der Vorgang unterbricht, RESTWASSERS
CHALE LEEREN.
TLeer en Sie die Restwassersc hale.
KAFFEESATZBEHÄLTER LEEREN
TLeer en Sie den Kaf feesatzbehä lter.
TSetzen Sie den Kaff ees atzbehäl ter und die Restwassers c hale
wieder ein.
Ihre IMPRESSA ist wied e r betrieb s bereit.
Nach dem Durchfluss von 50 Litern Wasser durch den Filter oder
nach zwei Mona ten ist dessen Wirkung ersc höpft. Ihre IMPRESSA
verlangt eine n Filter wechse l.
E Die Taste Filt er ist nur akti v, wenn di e Wasserme nge des Filters
auf 50 l eingeste llt wurde. Ist eine andere Wassermenge ein-
ges tellt, kann der Filt erwe chsel nur durch den JURA-Serv i cetechnike r durchgeführ t werden.
Filter wechseln
Page 93

4
1
6 Pflege
Voraussetzung: Ihre IMPRESSA ist betri ebsber eit , im Display wird
die Meldung E angezeigt.
T Öffnen Sie die Abdeckung der Progra mmi ert ast en.
$ T Drücke n Sie die Taste Fi l ter.
Der aktuell e Pfleges tat us wird angezigt.
$ T Drücke n Sie nochma ls die Taste Filter.
FILTER WECHSEL STARTEN
$ T Drücke n Sie die Taste Fi l ter.
FILTER EINSETZEN
T Entnehmen Sie den Wasserta nk und leer en Sie ihn.
T Ent fernen Sie die alte Fil terpatrone und di e Verlängerung.
TStecken Sie die Verlängerung auf eine neue Filterpatrone.
TSetzen Sie die Fi lte rpatrone mit leichtem Druck in den Was-
ser tank ein und schi eben Sie die Patronenhalterung zurück,
so dass s ie hörbar einraste t.
TStellen Sie ein Gefäß (mind. 500 ml) unter das H e ißwasser-
rohr.
m T Drücken Sie die Taste Hei ßwasser.
FILTER SPÜLT, es fließt Wasser aus dem Heißwasserrohr.
E Das Wass er kann eine le icht e Verf ärbung aufweisen. Dies e ist
weder gesundheit sschädlich n och geschmac ksbeeinträcht i-
gend.
Die Fil terspülung s toppt nach c a. 500 ml automatisch.
Ihre IMPRESSA ist wied e r betrieb s bereit.
Die IMPRESSA verkalkt gebrauchsbedingt und verlangt automatisch
eine Entkalkung. Die Verkalkung hängt vom Härtegrad Ihres Wassers ab.
R
eizungen durch Haut- und Augenkontakt mit dem Entkalkungs-
mittel sind nicht auszusch l ießen.
T Vermeiden Sie Haut- und Augenkontakt.
TSpüle n Sie Entkalkungsmitte l nach Haut- oder Augenkonta kt
mi t klarem Wass er ab. Nach Auge nkont akt Arzt aufsuchen.
Gerät entkalken
WARNUNG
Page 94

42
6 Pflege
S
chäden am Gerät und Rücks tände im Wass er durch falsche Entkal-
kungs mittel sind nicht auszuschli eßen.
T Verwenden Sie ausschließlich ori ginal JURA-Pflegezubehör.
Bei Unt erbre chung des Entkalkungsvorgangs sind Schäden am
G
erät nicht aus zuschließe n.
T Führen Sie die Entkal kung komple tt durch.
S
chäden an empfindli chen F lächen durch Kontakt mit Ent kal kungs-
mittel sind nicht auszusch l ießen.
T Entf ernen Sie Sprit zer sofor t mit klare m Wasser.
E Das Entkalkungs programm daue rt c a. 45 Minuten.
EJURA-Entkalkungst able tt en sind im Fa chhandel erhältlic h.
E Wenn Sie eine Filt erpa trone CLARIS verwenden und di ese akti-
viert ist oder die Wasserhärte auf »nicht a ktiv« e inges tel lt ist,
erscheint keine Aufforderung zum Ent kal ken.
E Führen Sie keine Ent kal kung durch, wenn eine Fil terpatrone
CLARIS eingese tzt ist .
Voraussetzung: Ihre IMPRESSA ist betri ebsber eit , im Display wird
die Meldung E angezeigt.
T Öffnen Sie die Abdeckung der Progra mmi ert ast en.
% T Drück e n Sie die Taste Ent k alkung.
Der aktuell e Pfleges tat us wird angezigt.
% T Drück e n Sie nochma ls die Taste Entkal kung.
ENTKALKUNG STARTEN
% T Drücke n Sie die Taste Entkalkung, um den Entkal kungsvor-
gang zu starte n.
RES
TWASSERS
CHALE LEEREN
TLeer en Sie die Restwassersc hale.
KAFFEESATZBEHÄLTER LEEREN
TLeer en Sie den Kaf feesatzbehä lter.
TSetzen Sie den Kaff ees atzbehäl ter und die Restwassers c hale
wieder ein.
MITTEL IN TANK
T Ent fernen Sie den Wasserta nk und leer en Sie ihn.
VORSICHT
VORSICHT
VORSICHT
Page 95

43
6 Pflege
TLösen Sie de n Inhalt einer Bl iste r-Schal e (drei JURA-Entkal-
kungs tablet ten) in einem Gefäß vol lständig in 700 ml Was-
ser a uf. Di es kann einige Minut e n dauern.
T Füllen Sie die Lösung in den leere n Wassertank und se tzen
S
ie ihn ein.
TStellen Sie dr e i Gefäße unter den Kombiauslauf, das Dampf-
rohr und das Heißwasserrohr.
% T Drück e n Sie die Taste Ent k alkung.
GER
ÄT ENTKALKT, es fließt Wasser aus dem Dampfrohr, de m
Kombi auslauf und de m Heißwasserrohr. Den ak t uellen
S
tand der Entkalkung können Sie am Fortschritt sbal ken mit-
verfolgen.
Der Vorgang unterbricht, RESTWASSERS
CHALE LEEREN.
TLeer en Sie die Restwassers c hale und setzen Sie si e wieder
ein.
WASSERTANK SPÜLEN / FÜLLEN
T Entnehmen Sie den Wassert a nk und s pülen Sie ihn aus.
T Füllen Sie den Wasser tank mit frischem, kaltem Wasser und
set zen Sie ihn wieder ein.
TLeer en Sie die drei Gefäße und ste llen Sie sie wieder unter
den Kombiauslauf, das Dampfrohr und das Heißwasser-
rohr.
% T Drück e n Sie die Taste Ent k alkung.
GER
ÄT ENTKALKT, es fließt Wasser aus dem Dampfrohr, de m
Kombi auslauf und dem Heißwasserrohr.
Der Vorgang unterbricht, RESTWASSERS
CHALE LEEREN.
TLeer en Sie die Restwassersc hale.
KAFFEESATZBEHÄLTER LEEREN
TLeer en Sie den Kaf feesatzbehä lter.
TSetzen Sie den Kaff ees atzbehäl ter und die Restwassers c hale
wieder ein.
Ihre IMPRESSA ist wied e r betrieb s bereit.
Page 96

44
6 Pflege
Kaffeebohnen können ei ne leichte Fettschicht aufweis en, die an den
Wänden des Bohnenbehälters zurüc kble ibt. Diese Rücks tände können das Kaff eeresult at negat iv be einf lussen. Reinigen Sie deshalb
von Zeit zu Zeit den Bohnenbehält er.
Zerquetschen der Finger durch laufende s Mahlwerk.
TSchal ten Sie das Gerät vor Arbei ten am Mahlwerk mit der
Taste Ei n/Aus Q aus .
TSchal ten Sie das Gerät am Netzschal ter 3 aus.
T Entfernen Sie die Abdeckung des Bohnenbehäl ters .
T Entfernen Sie die restli chen Bohnen mit dem Staubsauger.
TReinigen Sie den Bohnenbe hälter mit eine m troc kenen, wei-
chen Tuch.
T Fülle n Sie Kaffeebohnen in den Bohnenbehäl ter und setzen
S
ie die Abdeckung wieder auf.
Der Wasser tank kann verkalken. Um eine einwandfreie Funktion
Ihrer IMPRESSA zu gewährleis ten, sol lte n Sie von Ze it zu Zeit den
Wasser tank entkalken.
T Entfernen Sie den Wasser ta nk.
T Fa lls Sie e ine Filterpatrone CLARIS verwenden, entfernen Sie
diese.
T Entkalken Sie den Tank mi t einem handelsüblichen, milde n
Entkalkungsmi ttel na ch Anle itung des Herstellers.
TSpüle n Sie danac h den Wass ert ank gründlich aus.
T Fa lls Sie eine Filt erpatrone CLARIS verwende n, setze n Sie
diese wie der e in.
T Fülle n Sie den Wasser tank mit frischem, kaltem Wasser und
set zen Sie ihn wieder ein.
Bohnenbehälter
reinigen
WARNUNG
Wassertank entkalken
Page 97

45
7 Meldungen im Display
7 Meldungen im Display
Meldung Ursache/Folge Maßnahme
Die Meldung E wird angeze igt.
Ein Pflegeprogramm muss
durchgeführ t werden.
T Drücken Sie die Taste
Milchreinigung 6, um den
Pflegestat us aufzurufen.
Führe n Sie dann das entsprechende Pfl egeprogramm
durch. Die jeweilige Beschre i-
bung f inden Sie in Kapi tel 6
»
Pflege
«
.
BOHNEN FÜLLEN / MAHLWERK
L
INK
S
oder
BOHNEN FÜLLEN / MAHLWERK
R
ECHT
S
Einer der Bohnenbehält er ist
leer.
S
ie können keine Kaffeepro-
dukte zuberei ten, bei denen
Kaffeebohnen aus diesem
Behälter benötigt werde n.
Hei ßwasser- oder Milchzube-
rei tung ist möglich.
T Füllen Sie den Bohnenbehäl-
ter (siehe Kapite l 2 »Vorbereiten und in Be trieb nehmen –
Bohne nbehälter füllen«)
.
WASSERTANK FÜLLEN Der Wassertank ist leer.
S
ie können weder Ka ffe eprodukte noch Hei ßwasser oder
Milchproduk te zubereiten.
T Füllen Sie den Wasser ta nk
(
siehe Kapite l 2 »Vorbereiten
und in Betrieb nehme n –
Wasser tank fül len«)
.
KAFFEESATZBEHÄLTER LEEREN Der Kaffeesat zbehälter ist voll.
S
ie können keine Kaffeeprodukte zuberei ten, Hei ßwasser-
oder Milchzubereitung ist
möglich.
TLeer en Sie den Kaf feesatzbe-
häl ter und die Restwasser-
schale.
KAFFEESATZBEHÄLTER FEHLT Der Ka ffe esatzbehält er fehlt.
S
ie können weder Ka ffe eprodukte noch Hei ßwasser oder
Milchproduk te zubereiten.
TSetzen Sie den Kaf fee satzbe-
häl ter e in.
RES
TWASSERS
CHALE LEEREN Die Restwassers chale ist vo l l.
S
ie können weder Ka ffe eprodukte noch Hei ßwasser oder
Milchproduk te zubereiten.
TLeer en Sie die Restwasser-
schale.
Page 98

46
7 Meldungen im Display
Meldung Ursache/Folge Maßnahme
RES
TWASSERS
CHALE FEHLT Die Restwassers c hale ist nicht
richtig oder gar nicht einge-
set zt. Sie können weder
Kaffeeprodukte noch Hei ßwas-
ser oder Milchproduk te
zubereit en.
TReinigen und troc knen Sie
die Met all kontakte hinten a n
der Restwassersc hale.
TSetzen Sie die Restwasser-
schale ein.
TASTE DRÜCKEN Die IMPRESSA verl angt eine
S
pülung oder die For tse tzung
eines ges tar teten Pflege programms.
T Drücken Sie die Spül t ast e,
um di e Spülung auszulösen
oder um das Pf legeprogramm
fort zusetzen.
AUSL
AUF FEHLT Die Abdec kung des Kombiaus-
laufs ist nicht oder ni cht ri chtig
aufgesetzt.
TSetzen Sie die Abdeckung
des Kombiaus laufs auf und
acht en Sie darauf, dass sie
richtig e inrast et.
BOHNENBEHÄLTER
KONTROLLIEREN
Der Schie ber des Bohnenbehäl ters ist nicht vollständig
nach vorne ge zogen. Das
Mahlwerk kann ke ine Ka ffe ebohne n einziehen.
T Öffnen Sie die Kl appe auf
der Rück s eit e des Geräts.
T Ziehen Sie den Schie ber
volls tändig nach vorne.
Page 99

47
8 Störungen beheben
8 Störungen beheben
Problem Ursache/Folge Maßnahme
Mahlwerk macht sehr laute
G
eräusche.
Im Mahlwerk bef i nden s ich
Fremdkörper.
T Kontaktieren Sie Ihr en JURA-
S
ervi cepartner (siehe Kapite l
»JURA-Kontakte / Rechtlic he
Hinwe ise«)
.
Es entsteht z u wenig Schaum
bei m Aufs chäumen von Milch.
Der Kombiaus lauf ist ver-
schmutzt .
TSpüle n und re inigen Sie den
Kombi auslauf (siehe Kapite l 6
»
Pflege – Kombiauslauf
zerl egen und spülen«)
.
Bei Kaffeezu bereitung flie ßt
der Ka ffe e nur tropfenweise.
Der Ka ffe e ist zu fe in gemah-
len und vers topf t das Syste m.
TStellen Sie das Mahlwerk
gröber ein (siehe Kapite l 2
»
Vorbereiten und in Betri eb
nehmen – Mahlwer k einstel-
len«)
.
Wasserhärte kann nicht
eingestellt werden.
Die Fil terpatrone CLARIS ist
aktiviert.
T Kontaktieren Sie Ihr en JURA-
S
ervi cepartner. Dies er kann die
Fil terpatrone CLARIS deaktivie-
ren.
BOHNEN FÜLLEN wird
ange zei gt, obwohl der
Bohne nbehälter gef üll t wurde.
Das Ma hlwerk ist noch nicht
komplet t mi t Bohnen gefüll t.
T B erei ten Sie eine Kaffeespezialität zu.
Die Kaffeere inigung kann nich t
ges tar tet werden, obwohl das
G
erät dazu auffordert.
Das Gerät verl angt glei chzei tig
eine Kaffeereini gung und e ine
Entkalkung / einen Filterwec h-
sel.
T Führe n Sie zunächs t die
Entkalkung oder den F ilt er-
wechs el durc h. Danach können
S
ie die Kaffeereinigung
starten.
Trotz le erem Bohnenbehälter
wird b e i den ent sprec hende n
Produk ten keine Kaff eebohne
ange zeigt.
Die Bohnenüberwa chung i s t
versc hmutzt.
TReinigen Sie den Bohnenbehäl ter (siehe Kapite l 6 »Pflege –
Bohne nbehälter reinigen«)
.
RES
TWASSERS
CHALE LEEREN
wird st ändig angezeigt.
Die Met all kontakt e der
R
estwassersc hale sind
versc hmutzt oder nass.
TReinigen und troc knen Sie
die Met all kontakte hinten a n
der Restwassersc hale.
Page 100

48
8 Störungen beheben
E Konnte n die Störungen nicht behoben werden, kontaktiere n
S
ie Ihren JURA-Servi cepartner. Die Kont aktdat en finde n Sie
unter »JUR
A-Kontakte / Rechtlic he Hinweise« auf der le tzten
S
eite di eser Bedie nungsanlei tung.
Problem Ursache/Folge Maßnahme
WASSERTANK FÜLLEN wird
trotz volle m Wasser ta nk
ange zeigt.
Der Wass ert anks chwimmer ist
verklemmt.
T Entka lken Sie den Wassertank (siehe Kapite l 6 »Pflege –
Wasser tank entkalken«)
.
ERROR 2 oder ERROR 4 wird
ange zeigt.
Wurde das Gerät längerer Zeit
Käl te ausgese tzt, ist aus
S
icherhei tsgründen das
Aufheizen gesperrt.
T Wärmen Sie das Gerät bei
Zimmer temperatur auf.
Andere ERROR-Meldungen
werde n angezeigt.
– TSchal ten Sie die IMPRESSA
am Netzs chal t er 3 aus.
Kontaktiere n Sie Ihr en JURA-
S
ervi cepartner (siehe Kapite l
»JURA-Kontakte / Rechtlic he
Hinwe ise«)
.
 Loading...