

3
Joy-IT® Ultrasonic Distance Sensor
Export 03.11.2017 Copyright by Joy-IT 1

3
Index
1. Using with an Arduino
1.1 Connecng the Module
1.2 Code-Example
2. Using with a Raspberry Pi
2.1 Installing the System
2.2 Connecng the Module
2.3 Code-Example
3. Support
Joy-IT® Ultrasonic Disance Sensor
Export 03.11.2017 Copyright by Joy-IT 2
Joy-IT® Ultrasonic Disance Sensor
3
Dear customer,
thank you for purchasing our product.
Please nd our instrucons below.
1. Using with an Arduino
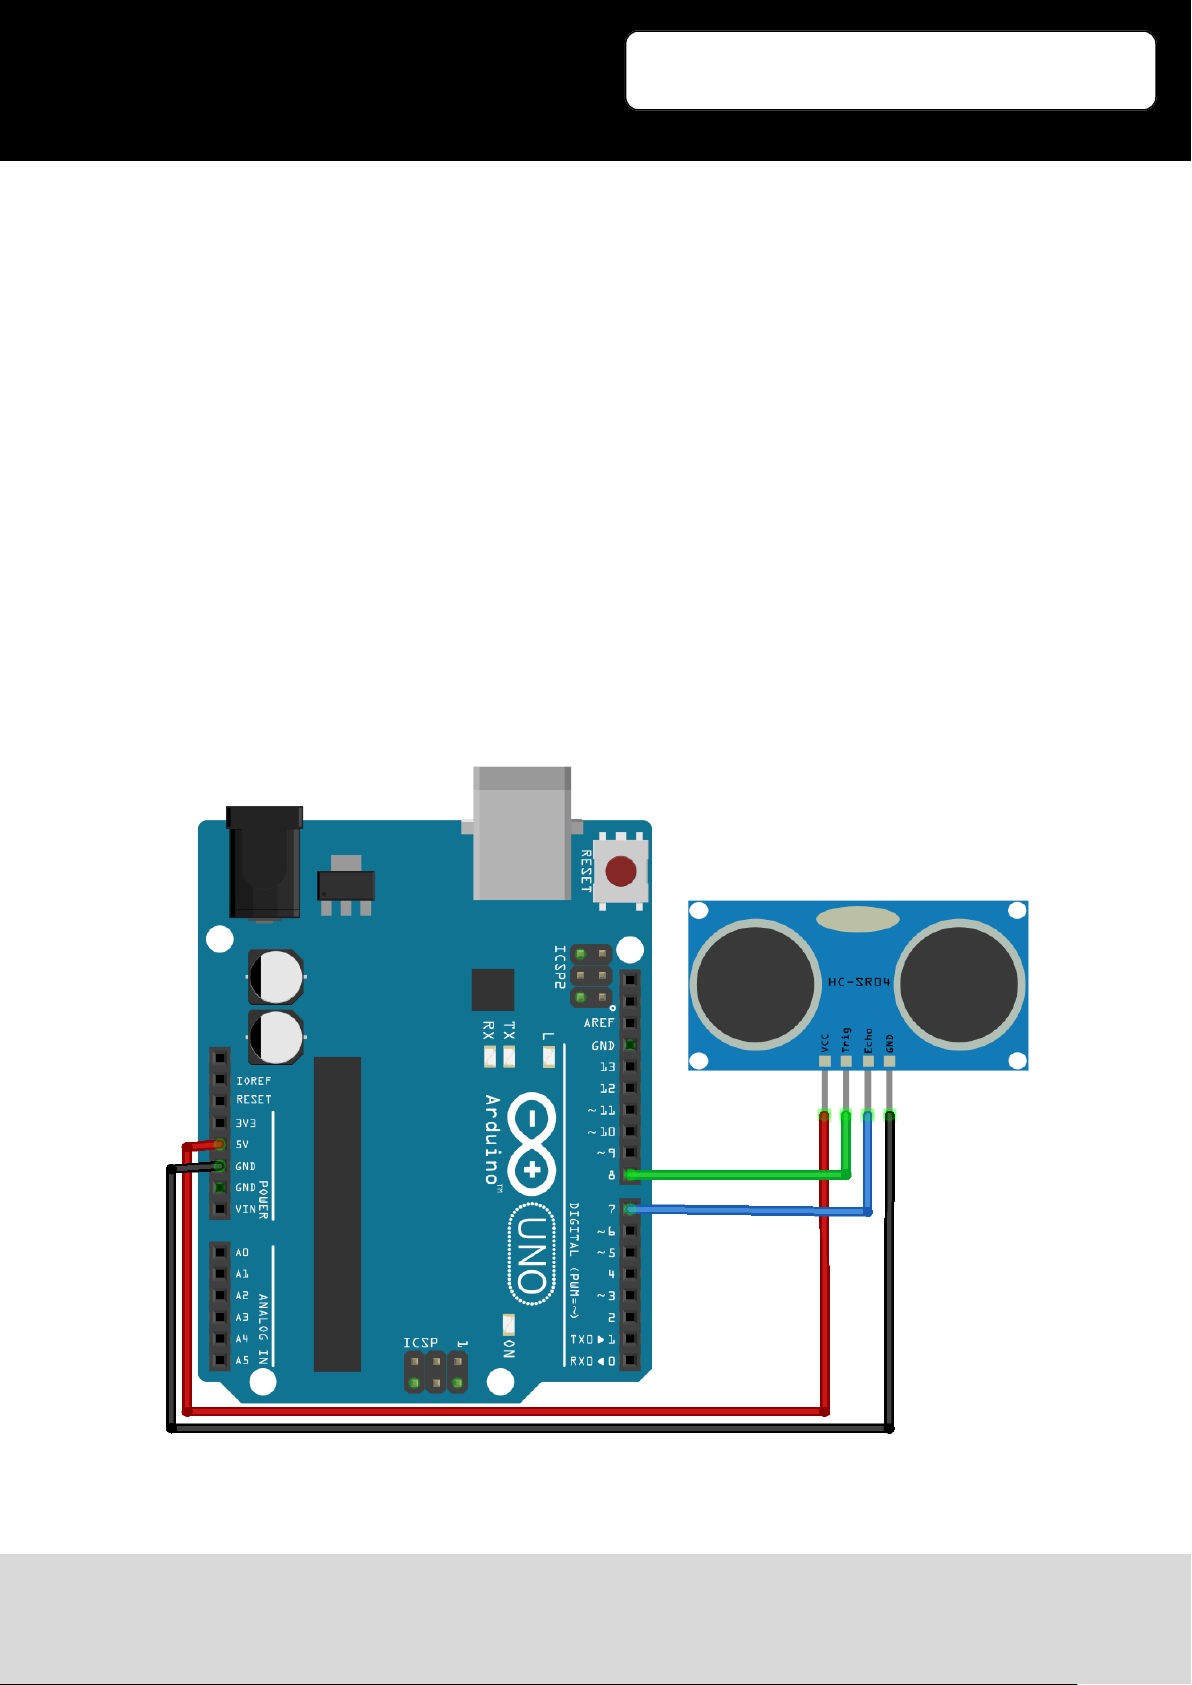
1.1 Connecting the Module
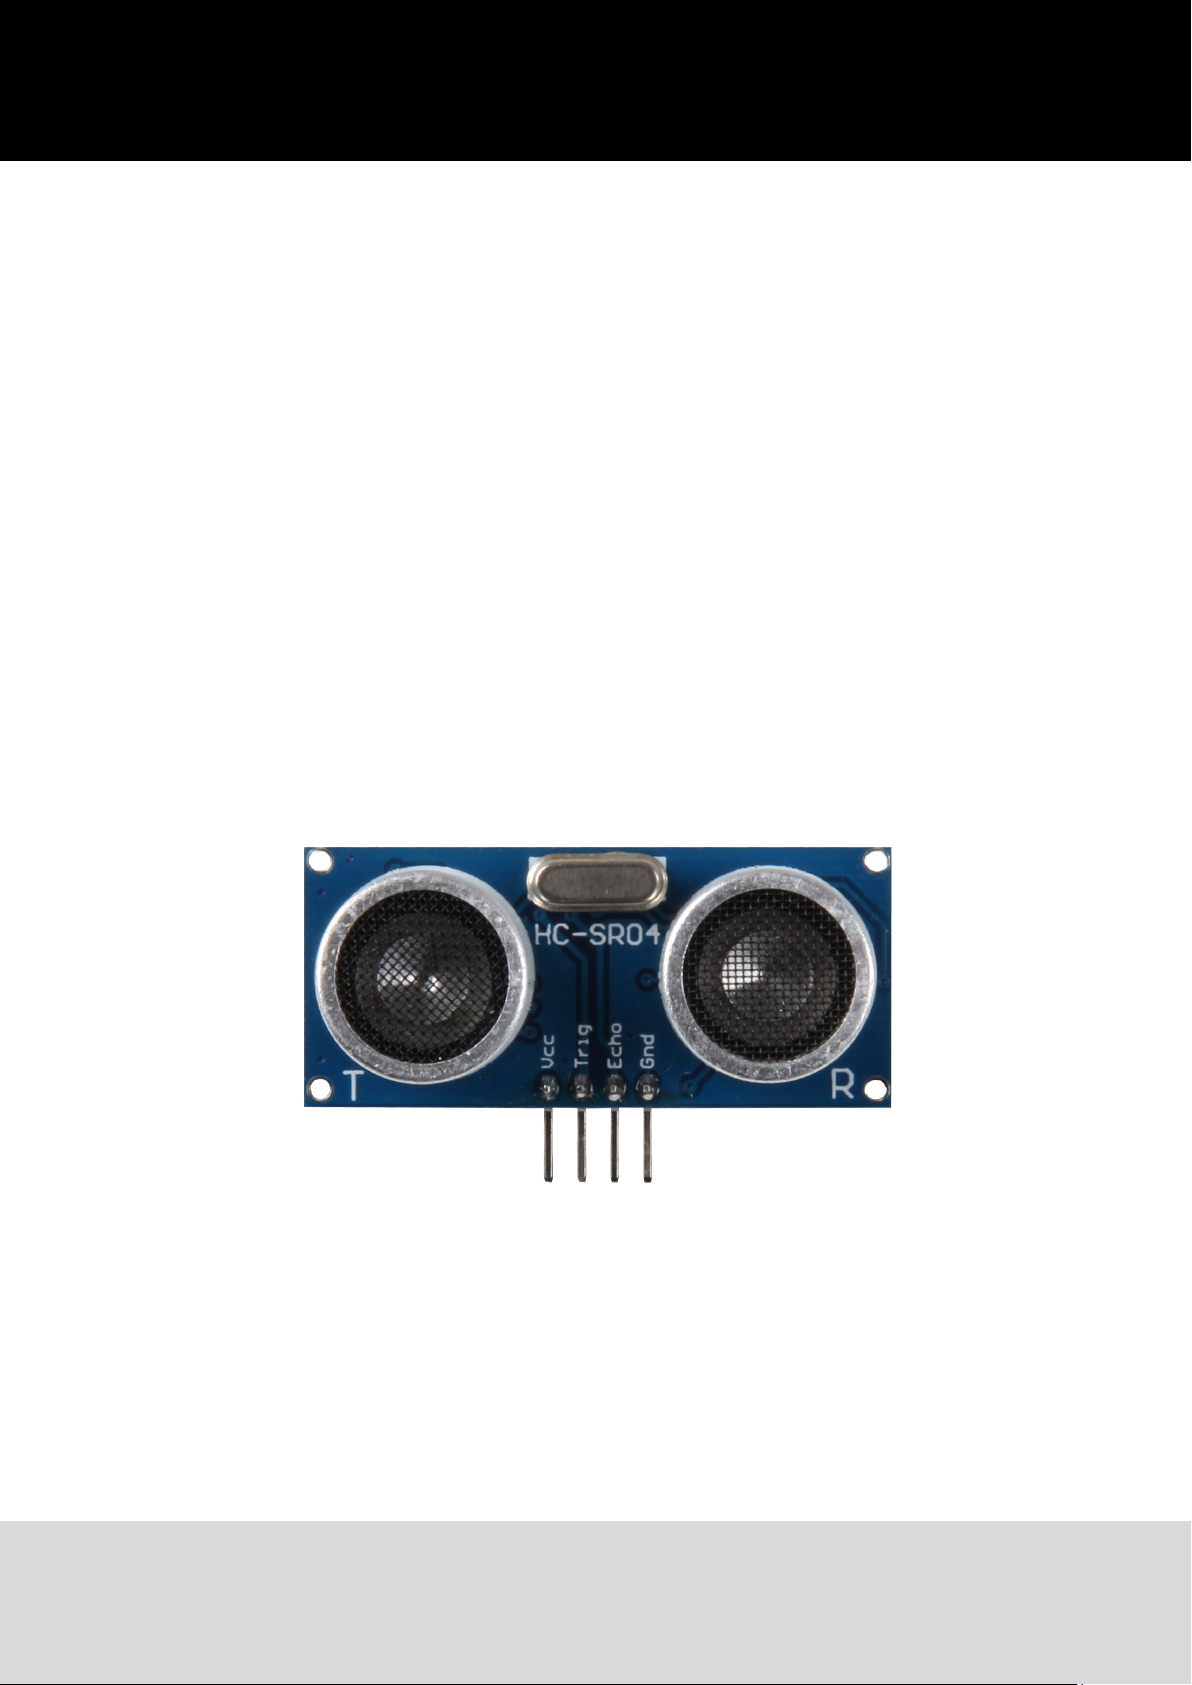
Connect the ultrasonic module, as seen image, and in the table, to your Arduino.
Export 03.11.2017 Copyright by Joy-IT 3
Joy-IT® Ultrasonic Disance Sensor
3
Arduino Ultrasonic Distance Sensor
5V VCC
GND GND
7 Echo
8 Trig
1.2 Code-Example
You can nd a code example next which can be used to demonstrate the funconality of the sensor.
Please transfer the code completely to your Arduino.
Export 03.11.2017 Copyright by Joy-IT 4

Joy-IT® Ultrasonic Disance Sensor
3
#define Echo_EingangsPin 7 // Echo Input-Pin
#define Trigger_AusgangsPin 8 // Trigger Output-Pin
// Defining the needed variables
int maximumRange = 300;
int minimumRange = 2;
long Abstand;
long Dauer;
void setup() {
pinMode(Trigger_AusgangsPin, OUTPUT);
pinMode(Echo_EingangsPin, INPUT);
Serial.begin (9600);
}
void loop() {
// starting the measurement with the 10us long trigger signal
digitalWrite(Trigger_AusgangsPin, HIGH);
delayMicroseconds(10);
digitalWrite(Trigger_AusgangsPin, LOW);
// waiting on the Echo-Input until the signal is active
// and measuring how long the signal stays active
Dauer = pulseIn(Echo_EingangsPin, HIGH);
// calculating the distance with the measured time
Abstand = Dauer/58.2;
// checking if the value is within the range
if (Abstand >= maximumRange || Abstand <= minimumRange) {
// Printing error if not
Serial.println("Abstand ausserhalb des Messbereichs");
Serial.println("-----------------------------------");
}
else {
// Printing the calculated distance
Serial.print("Der Abstand betraegt:");
Serial.print(Abstand);
Serial.println("cm");
Serial.println("-----------------------------------");
}
// break between the measurements
delay(500);
}
Export 03.11.2017 Copyright by Joy-IT 5

Joy-IT® Ultrasonic Disance Sensor
3
2. Using with a Raspberry Pi
2.1 Installing the System
You can skip this step if you are already using the latest Raspbian soware on your Raspberry Pi.
If not, please follow the instrucons.
Install the latest Raspbian System-Image on your SD-Card.
You can download the image here.
You can trasnfer the image with a suitable program (e.g. Etcher) to your card.
You can insert the SD-Card into your Raspberry Pi aer nishing the transfer.
Export 03.11.2017 Copyright by Joy-IT 6

Joy-IT® Ultrasonic Disance Sensor
3
2.2 Connecting the module
Connect the ultrasonic module, as seen in the following image and in the following table, to your
Raspberry Pi.
Warning! The Raspberry Pi is working, with its ARM processor core, on a voltage level of 3.3V.
But the ultrasonic distance sensor is working on a higher level.
If you are using the sensor on the Raspberry Pi without any protecon, it can lead to serious damage.
To avoid any damage you can use a voltage translator to adjust the voltage level and ensure a safe
operaon.
Therefore you can use our KY-051 voltage translator from our SensorKit X40.
In the following, we will describe how to use the sensor with the voltage translator.
Export 03.11.2017 Copyright by Joy-IT 7

3
Distance Sensor Voltage Translator
VCC
Trig B1
Echo B2
GND GND
Distance Sensor Raspberry Pi
VCC 5V (Pin 2)
Joy-IT® Ultrasonic Disance Sensor
Voltage Translator Raspberry Pi
5.5V 5V (Pin 3)
3.6V 3.3V (Pin 1)
A1 GPIO17 (Pin 11)
A2 GPIO27 (Pin 13)
GND GND (Pin 6)
1.2 Code-Example
You can nd a Code-Example next, which is demonstrang the sensors funconality.
Please completely transfer the code to your Raspberry Pi.
Export 03.11.2017 Copyright by Joy-IT 8

Joy-IT® Ultrasonic Disance Sensor
3
# coding=utf-8
import time
import RPi.GPIO as GPIO
GPIO.setmode(GPIO.BCM)
# defining the pins
Trigger_AusgangsPin = 17
Echo_EingangsPin = 27
# break between the measurements
sleeptime = 0.8
GPIO.setup(Trigger_AusgangsPin, GPIO.OUT)
GPIO.setup(Echo_EingangsPin, GPIO.IN)
GPIO.output(Trigger_AusgangsPin, False)
# main program loop
try:
while True:
# distance measurement with 10us long trigger signal
GPIO.output(Trigger_AusgangsPin, True)
time.sleep(0.00001)
GPIO.output(Trigger_AusgangsPin, False)
EinschaltZeit = time.time()
while GPIO.input(Echo_EingangsPin) == 0:
EinschaltZeit = time.time()
while GPIO.input(Echo_EingangsPin) == 1:
AusschaltZeit = time.time()
Dauer = AusschaltZeit - EinschaltZeit
# calculating the distance
Abstand = (Dauer * 34300) / 2
# checking if value is within the possible distance
if Abstand < 2 or (round(Abstand) > 300):
# if not - print error
print("Measurement out of range")
print("------------------------------")
Export 03.11.2017 Copyright by Joy-IT 9

Joy-IT® Ultrasonic Disance Sensor
3
else:
# formating the result
Abstand = format((Dauer * 34300) / 2, '.2f')
# printing the distance
print("The distance is:"), Abstand,("cm")
print("------------------------------")
# break between measurement
time.sleep(sleeptime)
# cleanup after program is closed
except KeyboardInterrupt:
GPIO.cleanup()
Export 03.11.2017 Copyright by Joy-IT 10

Joy-IT® Ultrasonic Disance Sensor
3
3. Support
We also support you aer your purchase.
If there are any quesons le or if you encounter any problems, please feel free to contact us by mail,
phone or by our cket-supportsystem on our website.
E-Mail: service@joy-it.net
Ticket-System: hp://support.joy-it.net
Phone: +49 (0)2845 98469 – 66 (11- 18 Uhr)
Please visit our website for more informaons:
www.joy-it.net
Export 03.11.2017 Copyright by Joy-IT 11
 Loading...