

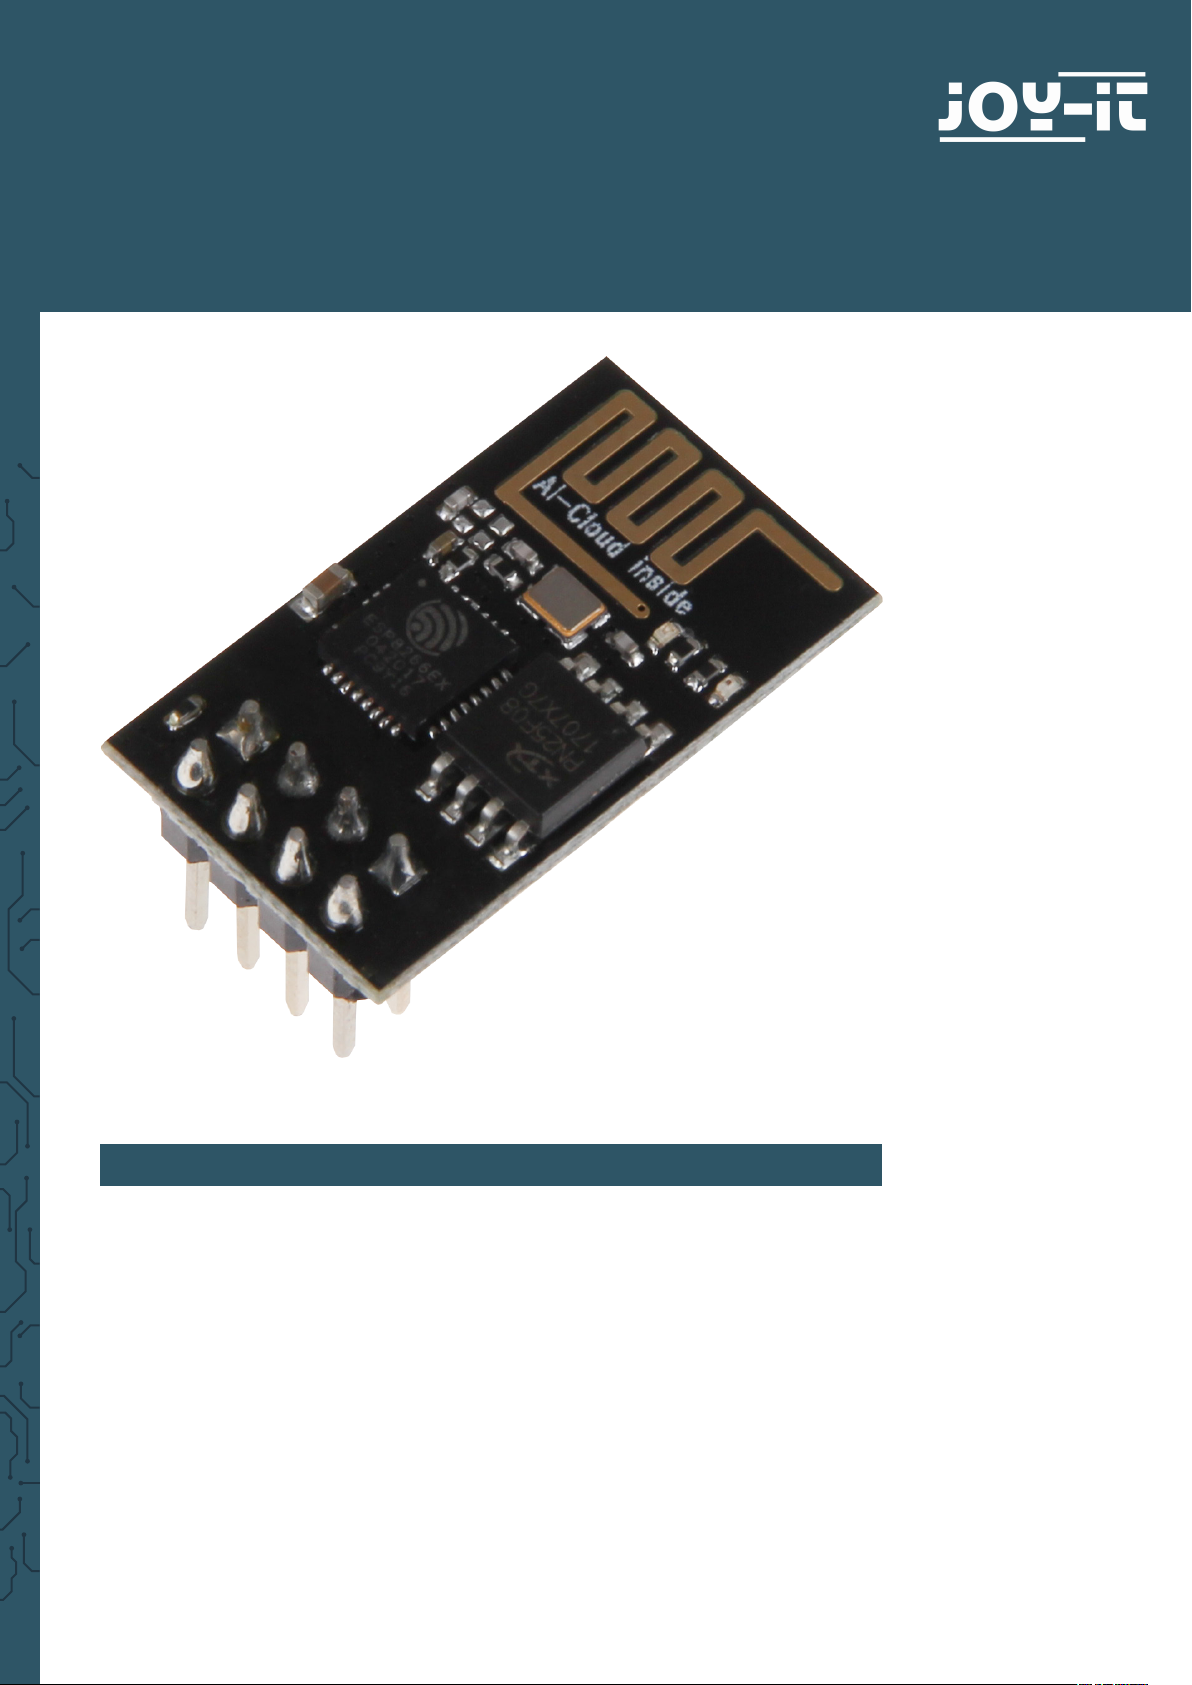
ESP8266
WiFi module
1. GENERAL INFORMATION
Dear customer,
thank you for choosing our product. In the following, we will show what
you should note at the commissioning and during the usage.
Should you encounter any unexpected problems during use, please do not
hesitate to contact us.
2. INITIAL SETUP
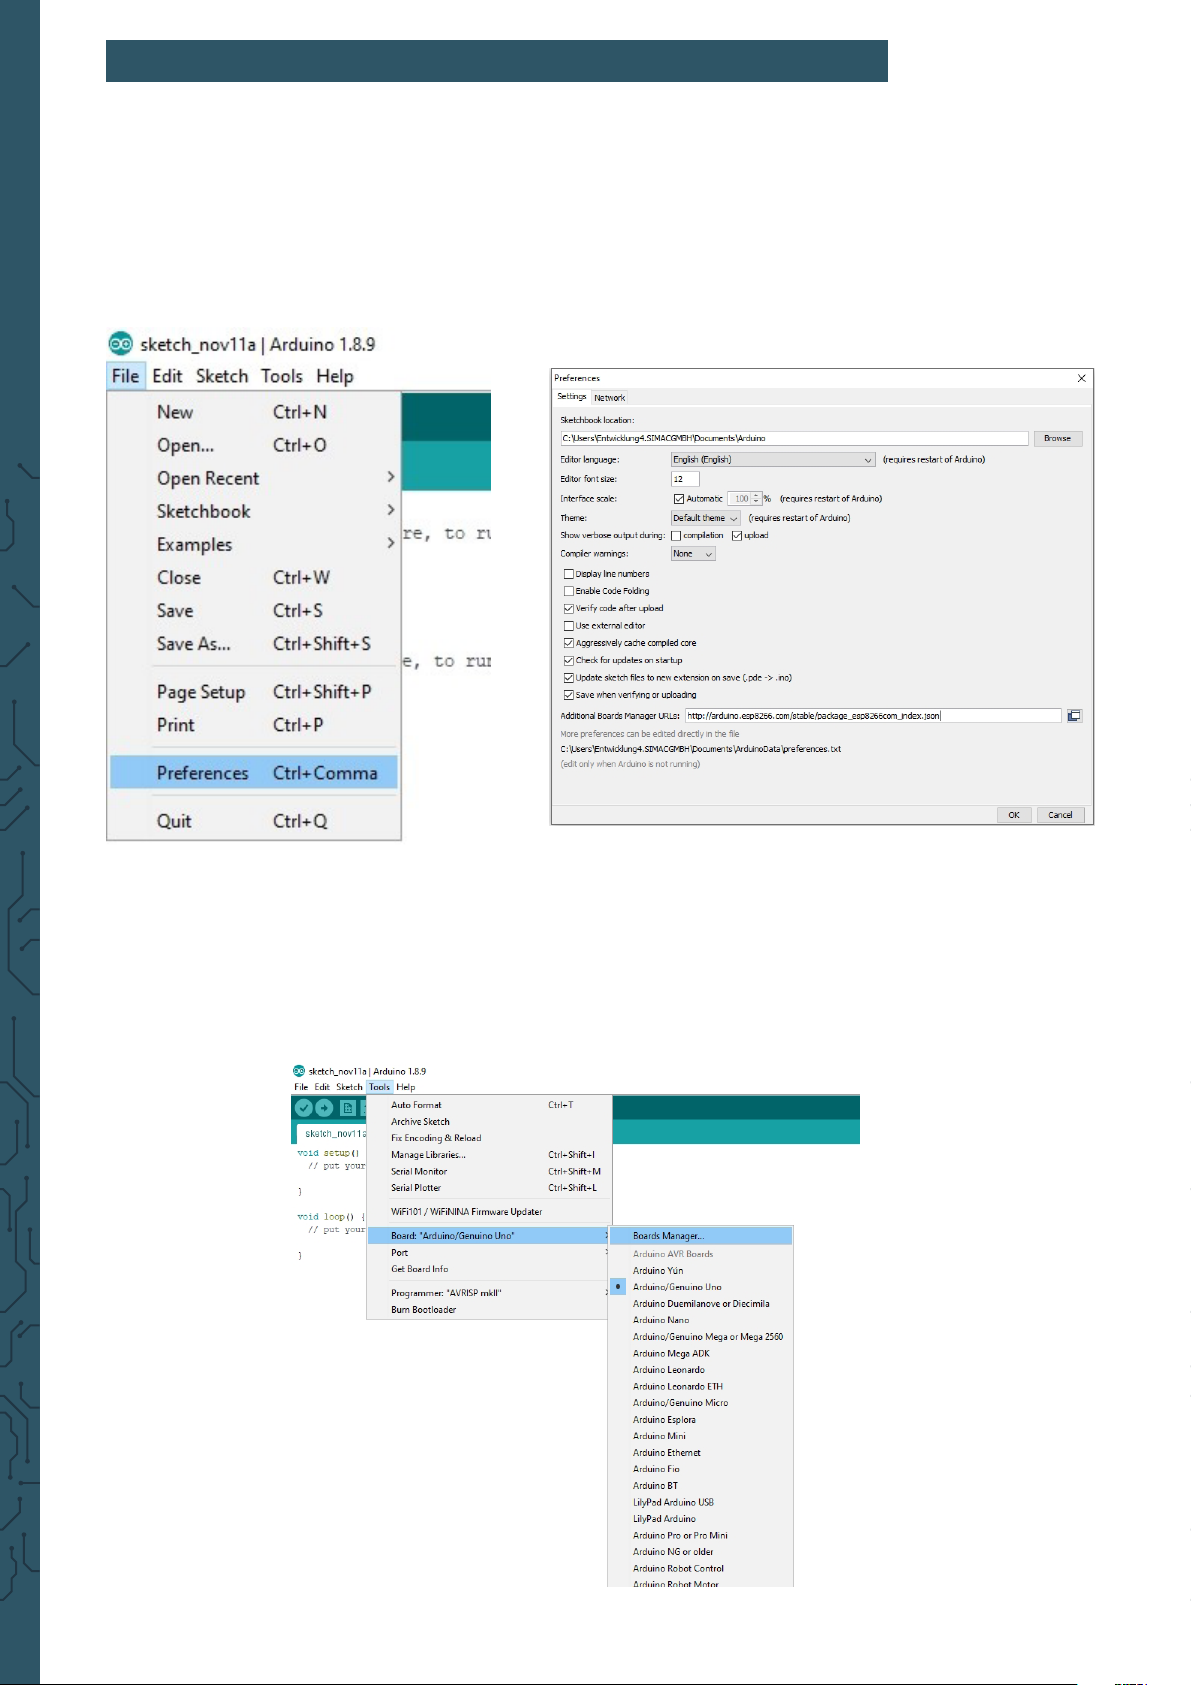
Open the preferences of your Arduino program and add the following line to
the additional board manager URLs like shown in the following pictures:
http://arduino.esp8266.com/stable/package_esp8266com_index.json
Download the additional data of the ESP8266 from the board manager.
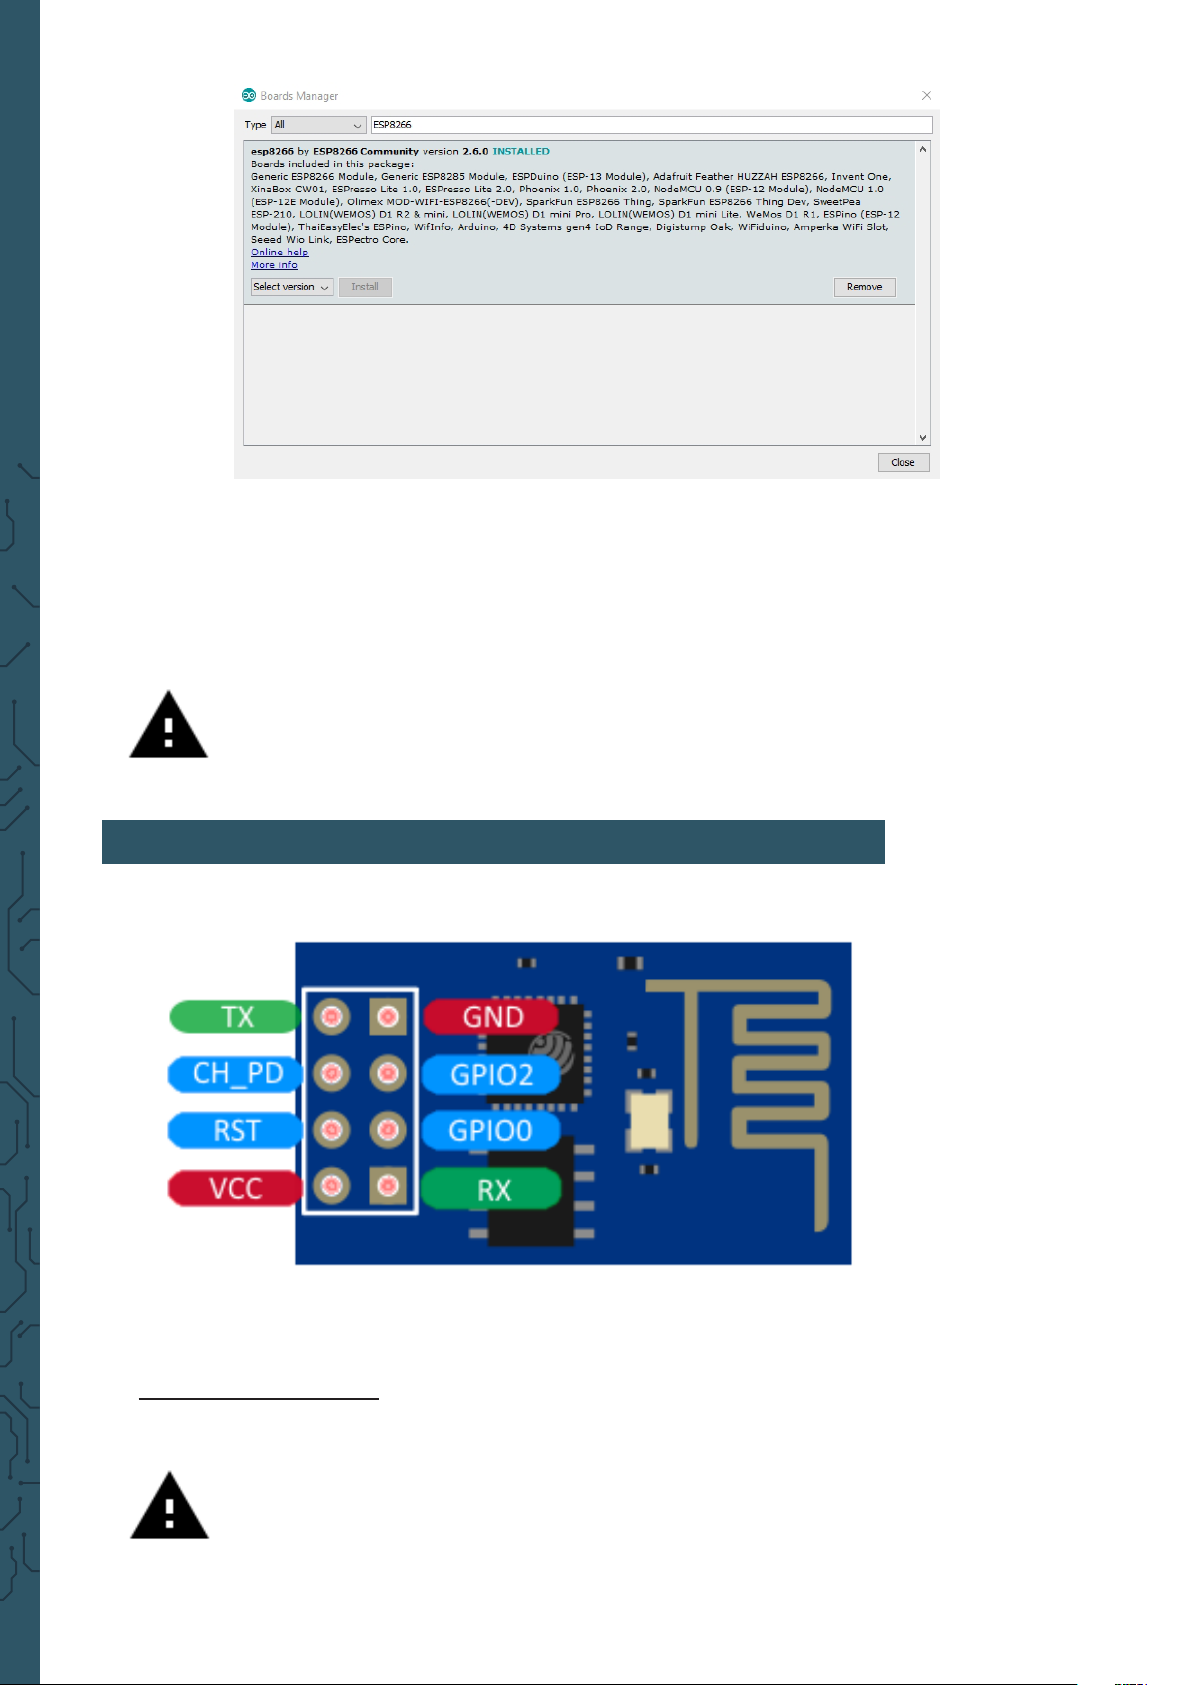
Select now the ESP8266 as the board.
Attention! Please note that you must select the accurate port from
the menu “Port“ which is beneath the board manager.
3. CONNECTION OF THE MODULE
Use with a TTL-cable
Attention! Please note that the TTL-adapter unit is set on a voltage
supply of 3.3 V and a current supply of 350 mA. Verify this if
necessary.

Connect the module with the TTL-cable with the aid of the following chart.
The pin assignment of the ESP8266 can be seen in the picture above.
ESP8266 TTL-Kabel
RX
TX
GND
VCC
CH_PD
GPIO0
TX
RX
GND
3.3 V
3.3 V
3.3 V
Use with an Arduino Uno
Connect the module with the Arduino Uno with the aid of the following
chart or rather the following picture.
The pin assignment of the ESP8266 can be seen in the above-named
picture.
ESP8266 Arduino Uno
RX
TX
GND
VCC
CH_PD
GPIO0
Pin 1
Pin 0
GND
3.3 V
3.3 V
3.3 V

4. CODE TRANSMISSION
In the following, we demonstrate the transmisson of the code with the code
example from the ESP8266-library.
To transfer the code to the ESP8266, you have to select the desired code
example from the example menu of the Arduino soware.
The used baudrate (“Upload Speed“ in the menu “Tools“)for the
transmisson should be 115200.
Attention! Before you can transfer the new code to the ESP8266,
you must set the module into the programming mode:
For the use with a TTL-cable:
Separate the power supply (VCC) from the ESP8266 module and connect
them again aerwards. The module should start in the programming mode.
If you do not have any success with this method, you can try the Arduino
method.
In some cases this alternative works better even with the TTL-cable.
For the use with an Arduino:
Separate the power supply (VCC) from the module and set the GPIO0 pin
from 3.3 V to 0 V (GND). Aer that restore the power supply.
As soon as the soware has been transferred, the module can be set again
into the normal operation status.
For this, separate again the current supply, set the GPIO0 pin to 3.3 V and
restore the power supply.
When you have set the module into the programming mode, you can start
the transmisson. Do not forget that you must switch back to the normal
operation status aer the transmisson is nished.

5. FURTHER INFORMATION
Our information and redemption obligation according to
the electro-law (ElektroG)
Symbol on electrial and electronic products :
This crossed-out bin means that electrical and electronic products do not
belong into the household waste. You must hand over your old appli-ance
to a registration oice. Before you can hand over the old appliance, you
must remove used batteries and accumulators which are not enclosed by
the device.
Return options :
As the end user, you can hand over with the purchase of a new device
your old appliance (which has essentially the same functions as the new
one) free of charge for disposal. Small devices which do not have outer
dimensions greater than 25 cm can be submitted independently of the
purchase of a new product in normal household quantities.
Possibility of restitution at our company location during our opening
hours :
Simac GmbH, Pascalstr. 8, D-47506 Neukirchen-Vluyn
Possibility of restitution nearby :
We send you a parcel stamp with which you can send us your old appliance
free of charge. For this possibility, you must contact us via e-mail at
service@joy-it.net or via telephone.
2
Information about packaging:
Please package your old appliance safe during transport. Should you not
have a suitable packaging material or you do not want to use your own
material, you can contact us and we will send you an appropriate package.
6. SUPPORT
If any questions remain open or problems arise aer your purchase, we are
available by e-mail, telephone and with a ticket support system to answer
these.
E-Mail: service@joy-it.net
Ticket-System: http://support.joy-it.net
Telephone: +49 (0)2845 98469 – 66 (10 - 17 o‘clock)
For further information visit our website:
www.joy-it.net
1
Published: 26.06.2020
www.joy-it.net
Simac Electronics Handel GmbH
Pascalstr. 8 47506 Neukirchen-Vluyn
 Loading...