

JOY-IT RPI STROMPI3 C B Instructions
www.joy-it.net
Pascalstr. 8 47506 Neukirchen-Vluyn
STROMPI 3 CASE
RB-StromPi3-Case
1. GENERAL INFORMATION
Dear costumer,
Thank you for buying our product. The structure and functions of the
StromPi3 are explained in the following chapters. We show you which
settings must be adjusted that the Raspberry Pi will work with the StromPi perfectly.
If you get any diiculties with the usage with the device, do not hesitate
to conact us.
This high-quality aluminium case oers space for your Raspberry Pi incl.
StromPi 3 and Battery Hat (-XL also). A removable cover above the GPIO bar
keeps it easily accessible.
The RB-StromPi3-PCB allows the use of the power button function. In addition, the fan can be operated with this board and optionally controlled.
www.joy-it.net
Pascalstr. 8 47506 Neukirchen-Vluyn
2. ASSEMBLY OF THE HOUSING
Please note that if you want to use the PowerOnButton function, you
must first perform the PowerOnButton modification described in the
StromPi3 manual.
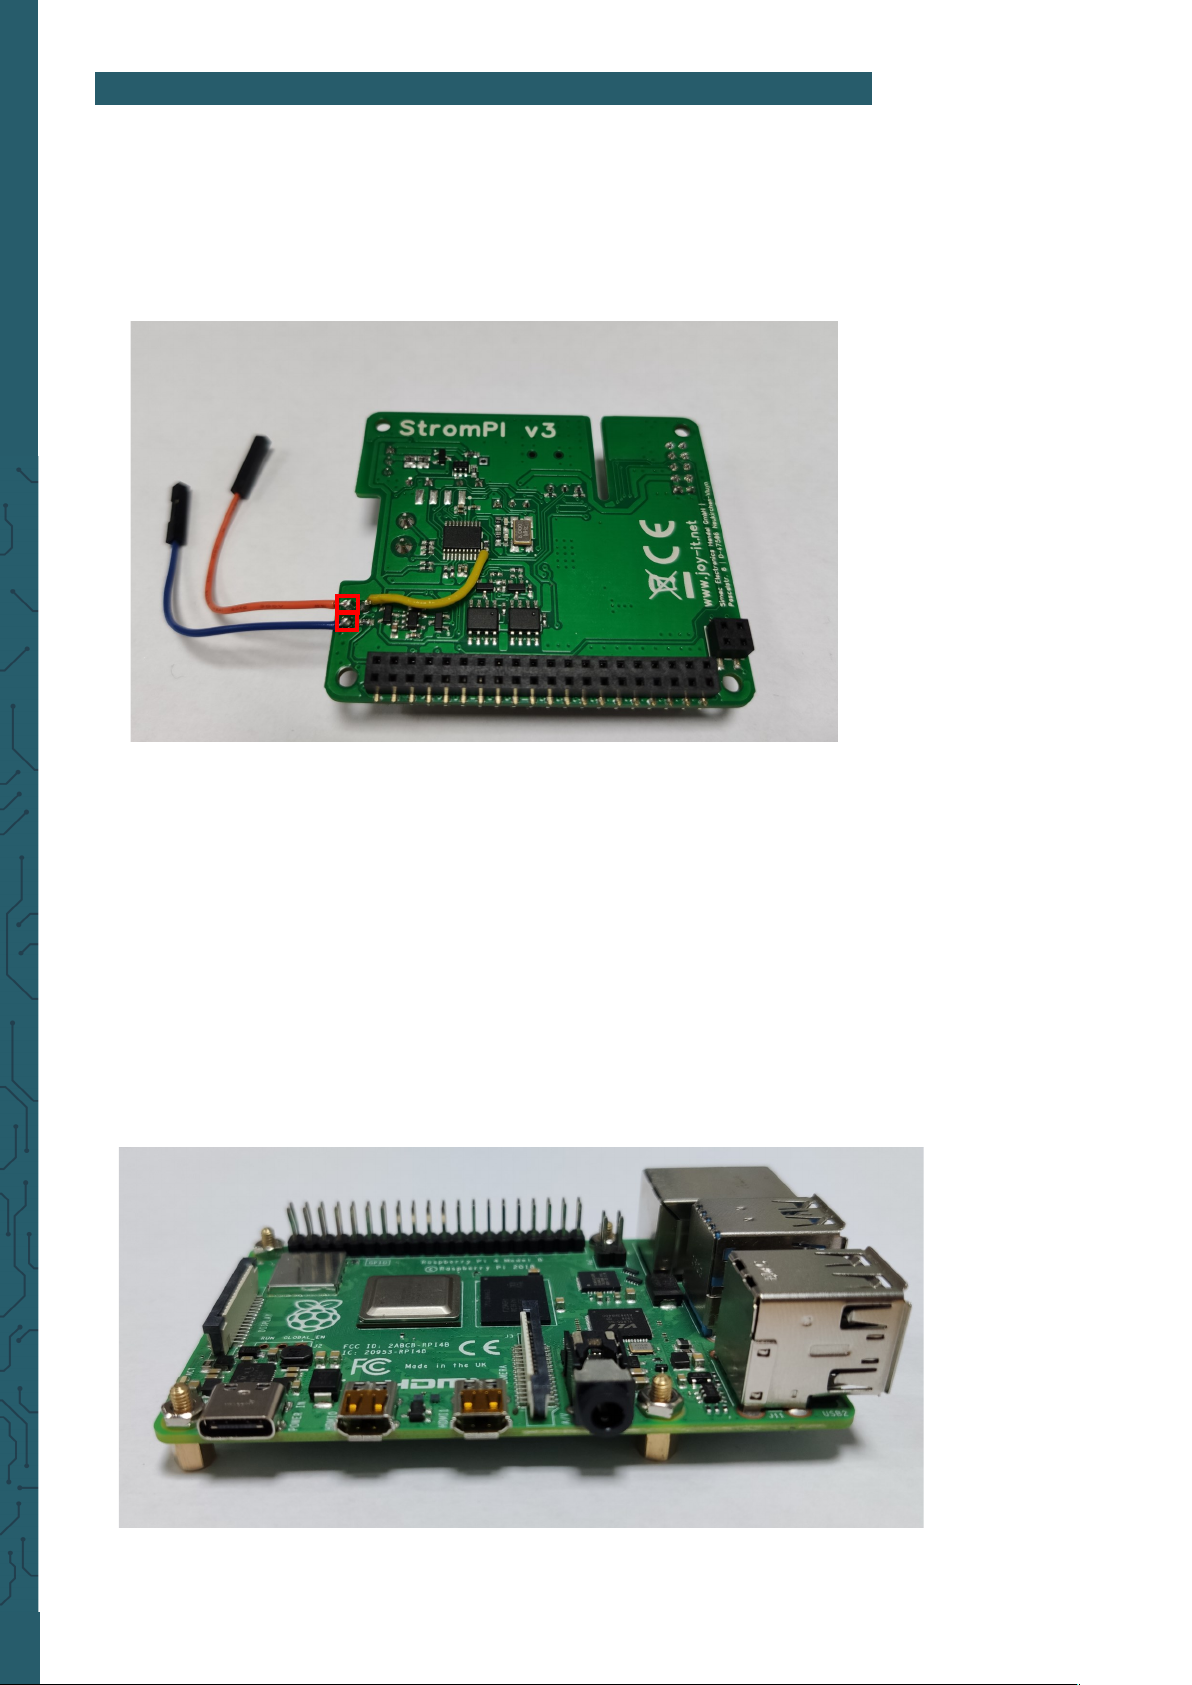
You will also need to solder the two supplied cables to your StromPi, as
shown in the picture below.
The case is delivered with the Raspberry Pi 4 side panels already screwed
on and must first be disassembled.
If you want to install a Raspberry Pi 3, you have to remove all parts.
If you want to use a Raspberry Pi 4, you can leave the side panel for the
HDMI and power connections installed.
In both cases the fan must also be removed first.
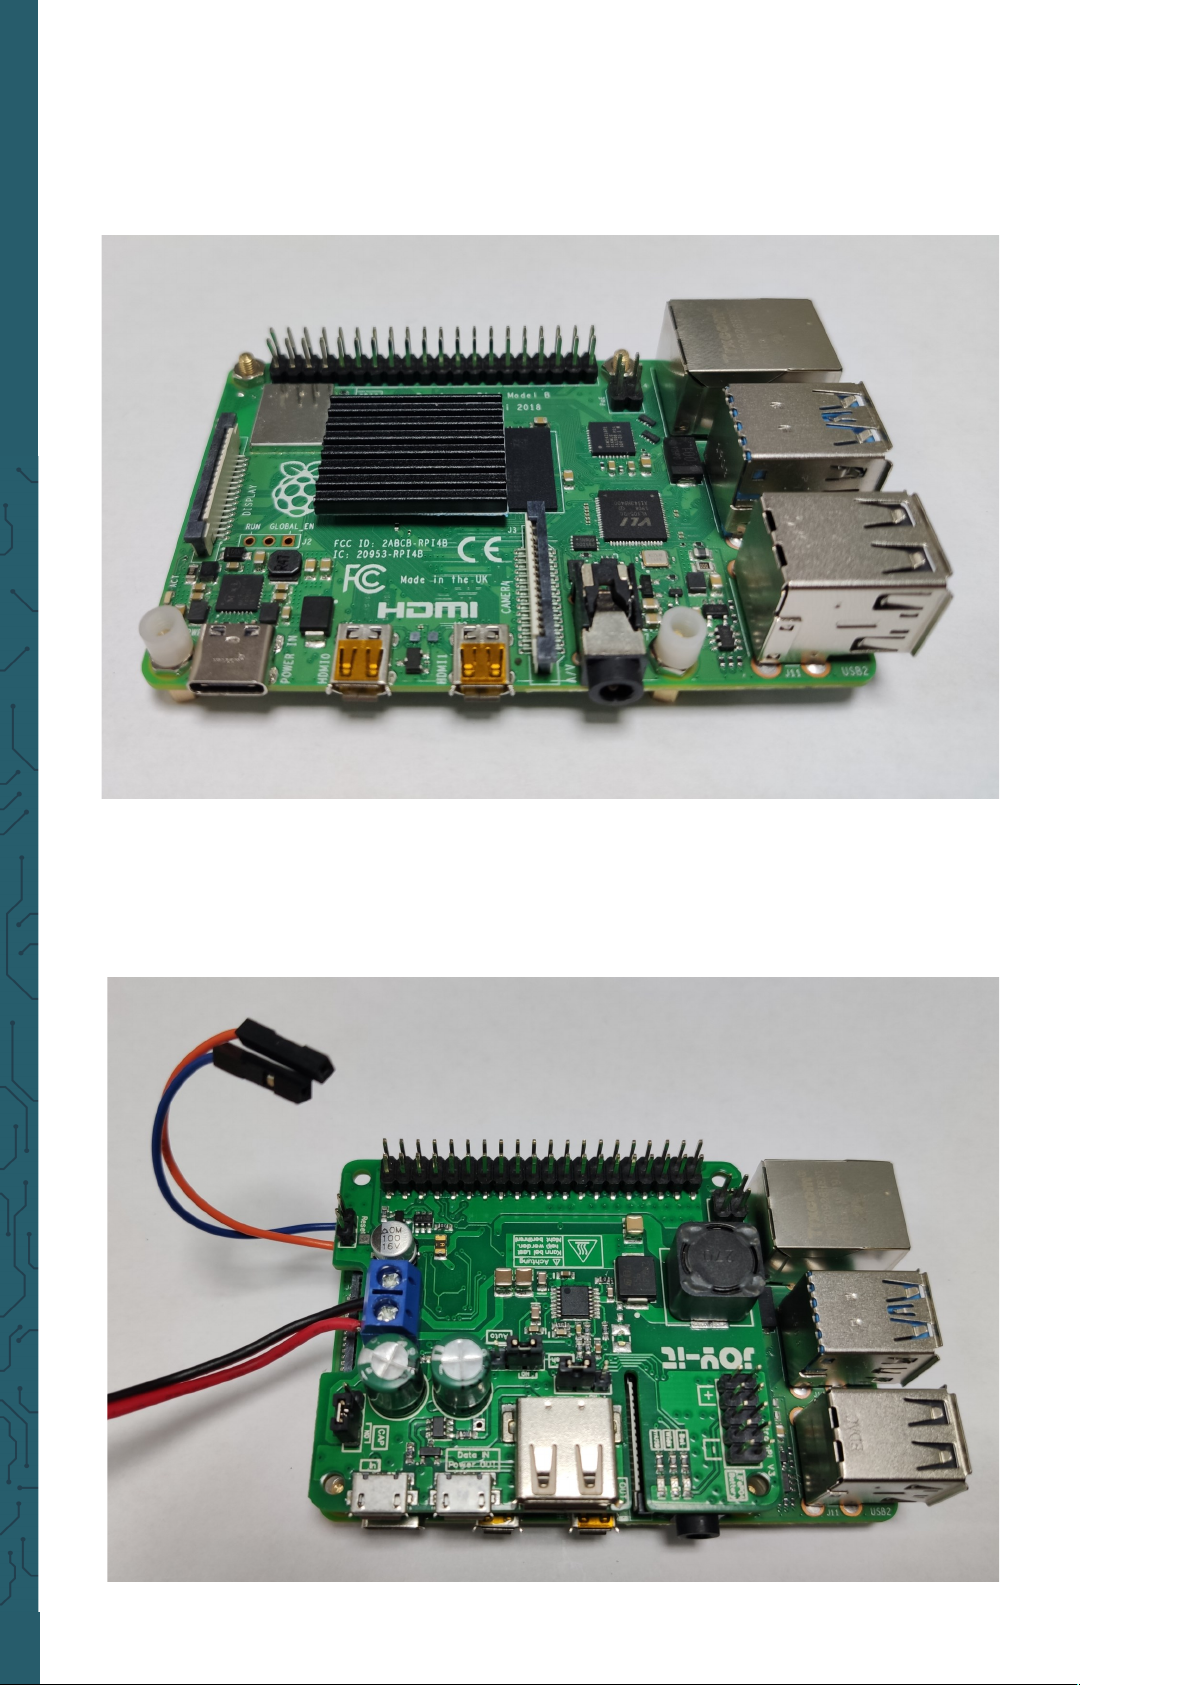
Now screw the spacers with the nuts to your Raspberry Pi.
www.joy-it.net
Pascalstr. 8 47506 Neukirchen-Vluyn
Now put on the two plastic spacers, as shown in the picture.
Also remove the foil from the aluminium heat sink and put it on the CPU
of the Raspberry Pis.
Now place your StromPi on the Raspberry Pi and connect the cable for
the wide-range power supply.
Please note that, depending on the cable you use for this, you will have to
insert it already through the hole provided in the back panel.
www.joy-it.net
Pascalstr. 8 47506 Neukirchen-Vluyn
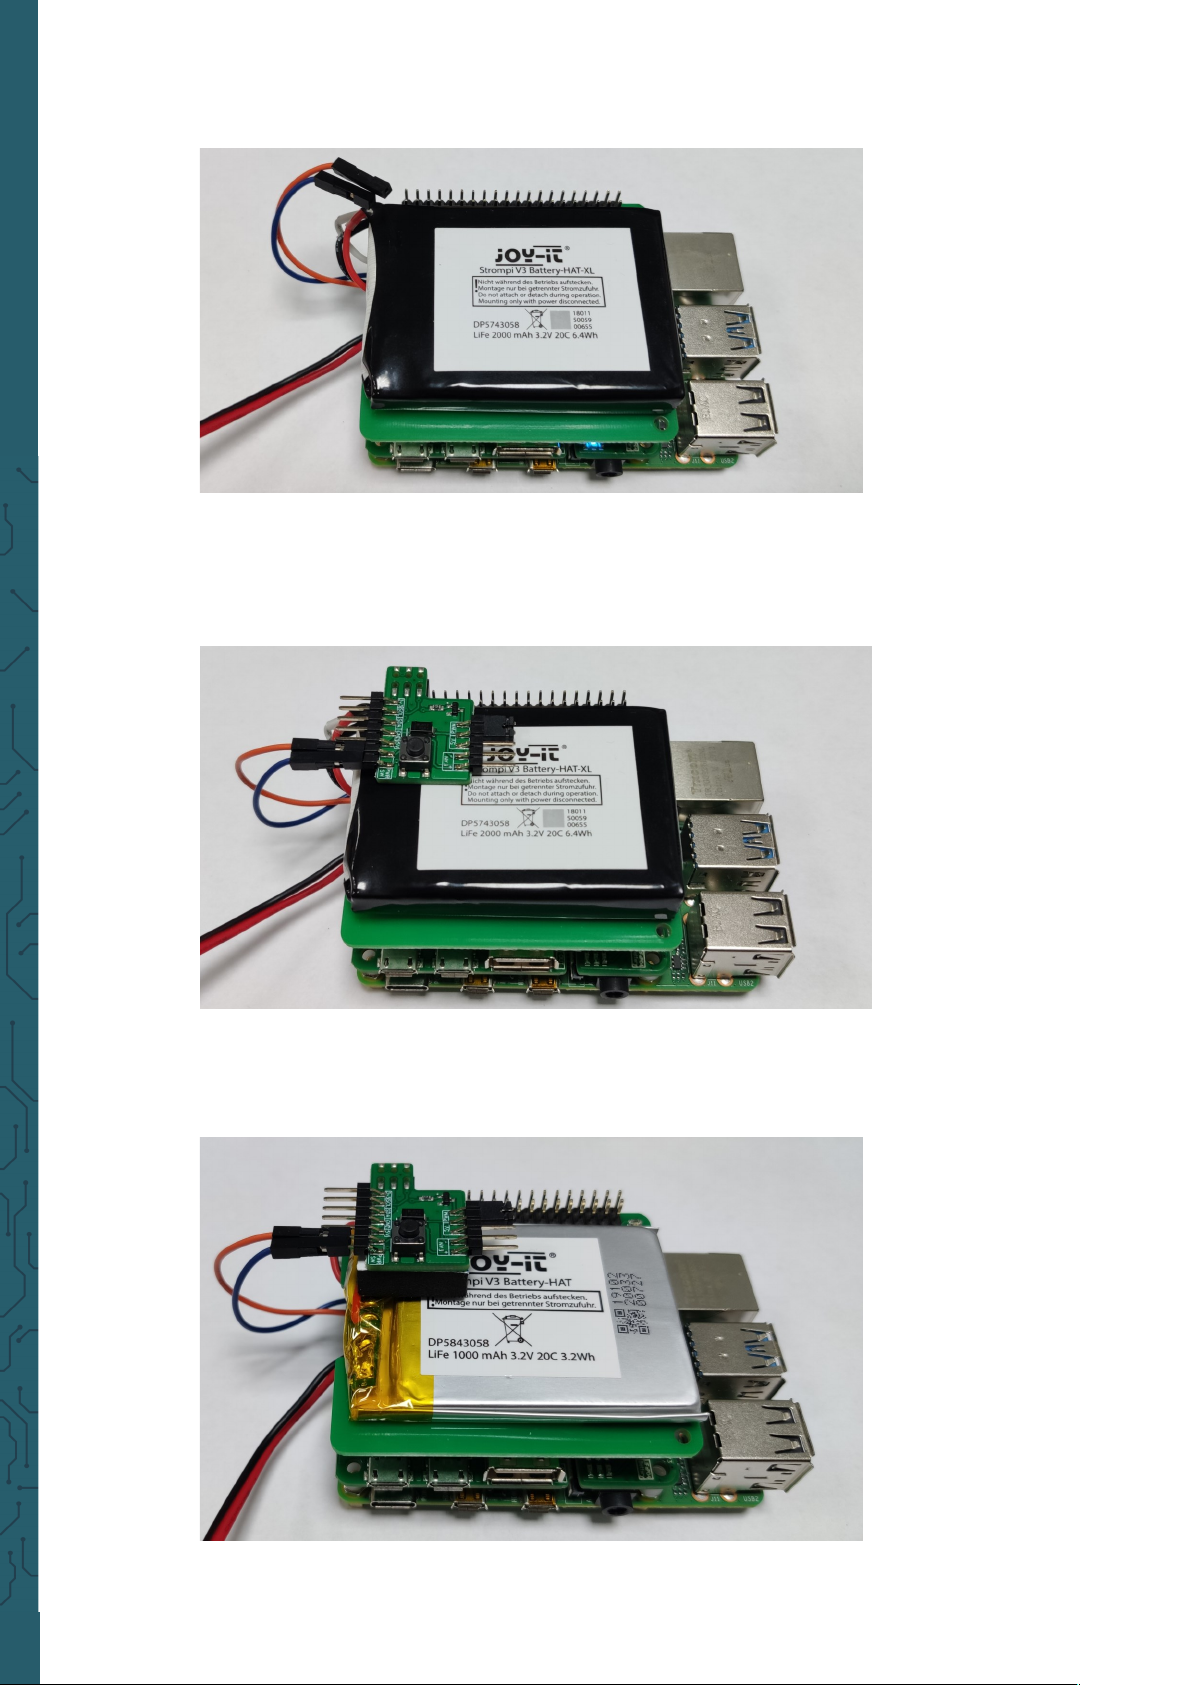
Now you can plug the Battery-HAT onto the StromPi.
Next, plug the supplied circuit board onto the first pins of the Battery-
HAT and connect the cables previously soldered to the StromPi to the lower two pins on the le side of the board. It does not matter which cable
is plugged to which pin.
If you use the smaller 1000mAh Battery-HAT, you have to stick the supplied foam spacer on the board from below.
 Loading...