

JOY-IT RPI SET JOYPI N Instructions
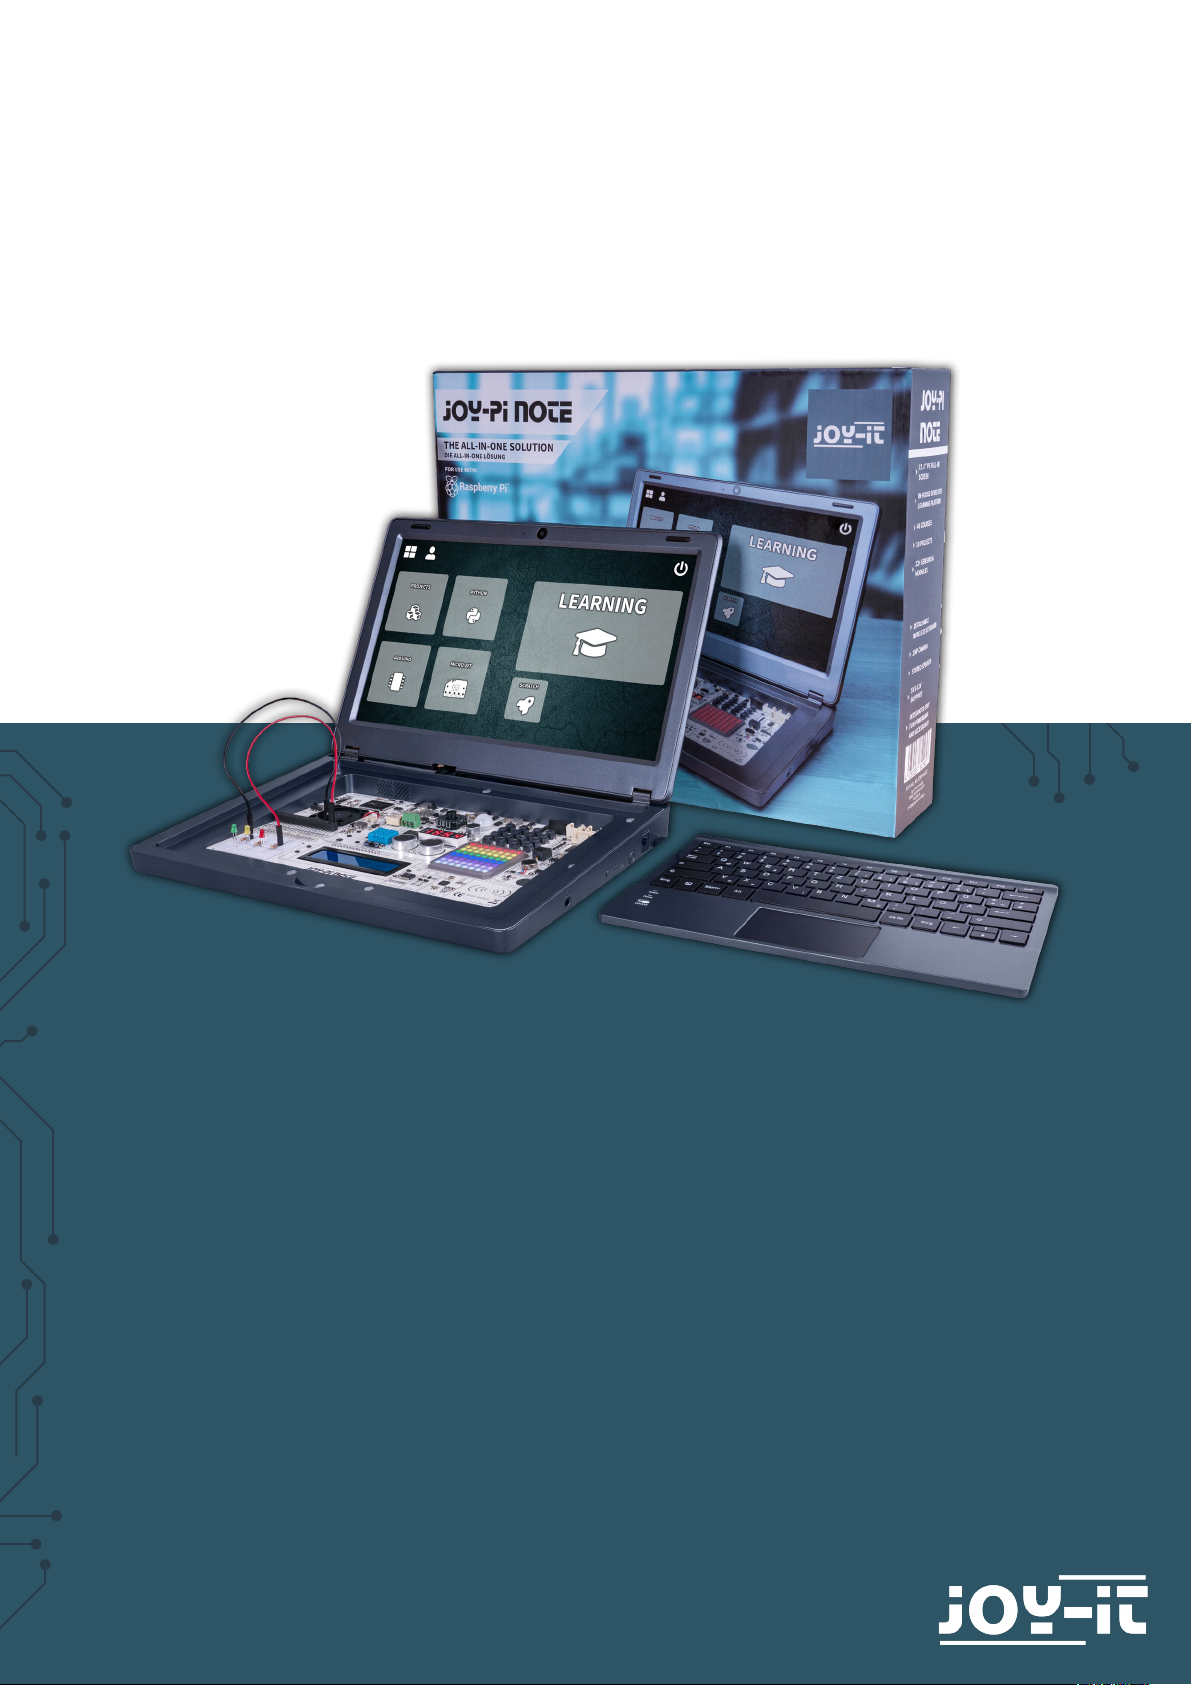
JOY-PI NOTE
3-in-1 solution: notebook, learning platform and experiment center
Joy-IT powered by SIMAC Electronics GmbH - Pascalstr. 8 - 47506 Neukirchen-Vluyn - www.joy-it.net

TABLE OF CONTENTS
1. General information
2. Requirements
3. Overview
4. Power supply
5. Mounting the Raspberry Pi
6. Learning soware
6.1 Projects
6.2 Learning
6.2.1 Python
6.2.2 Scratch
7. Reinstallation of the learning soware
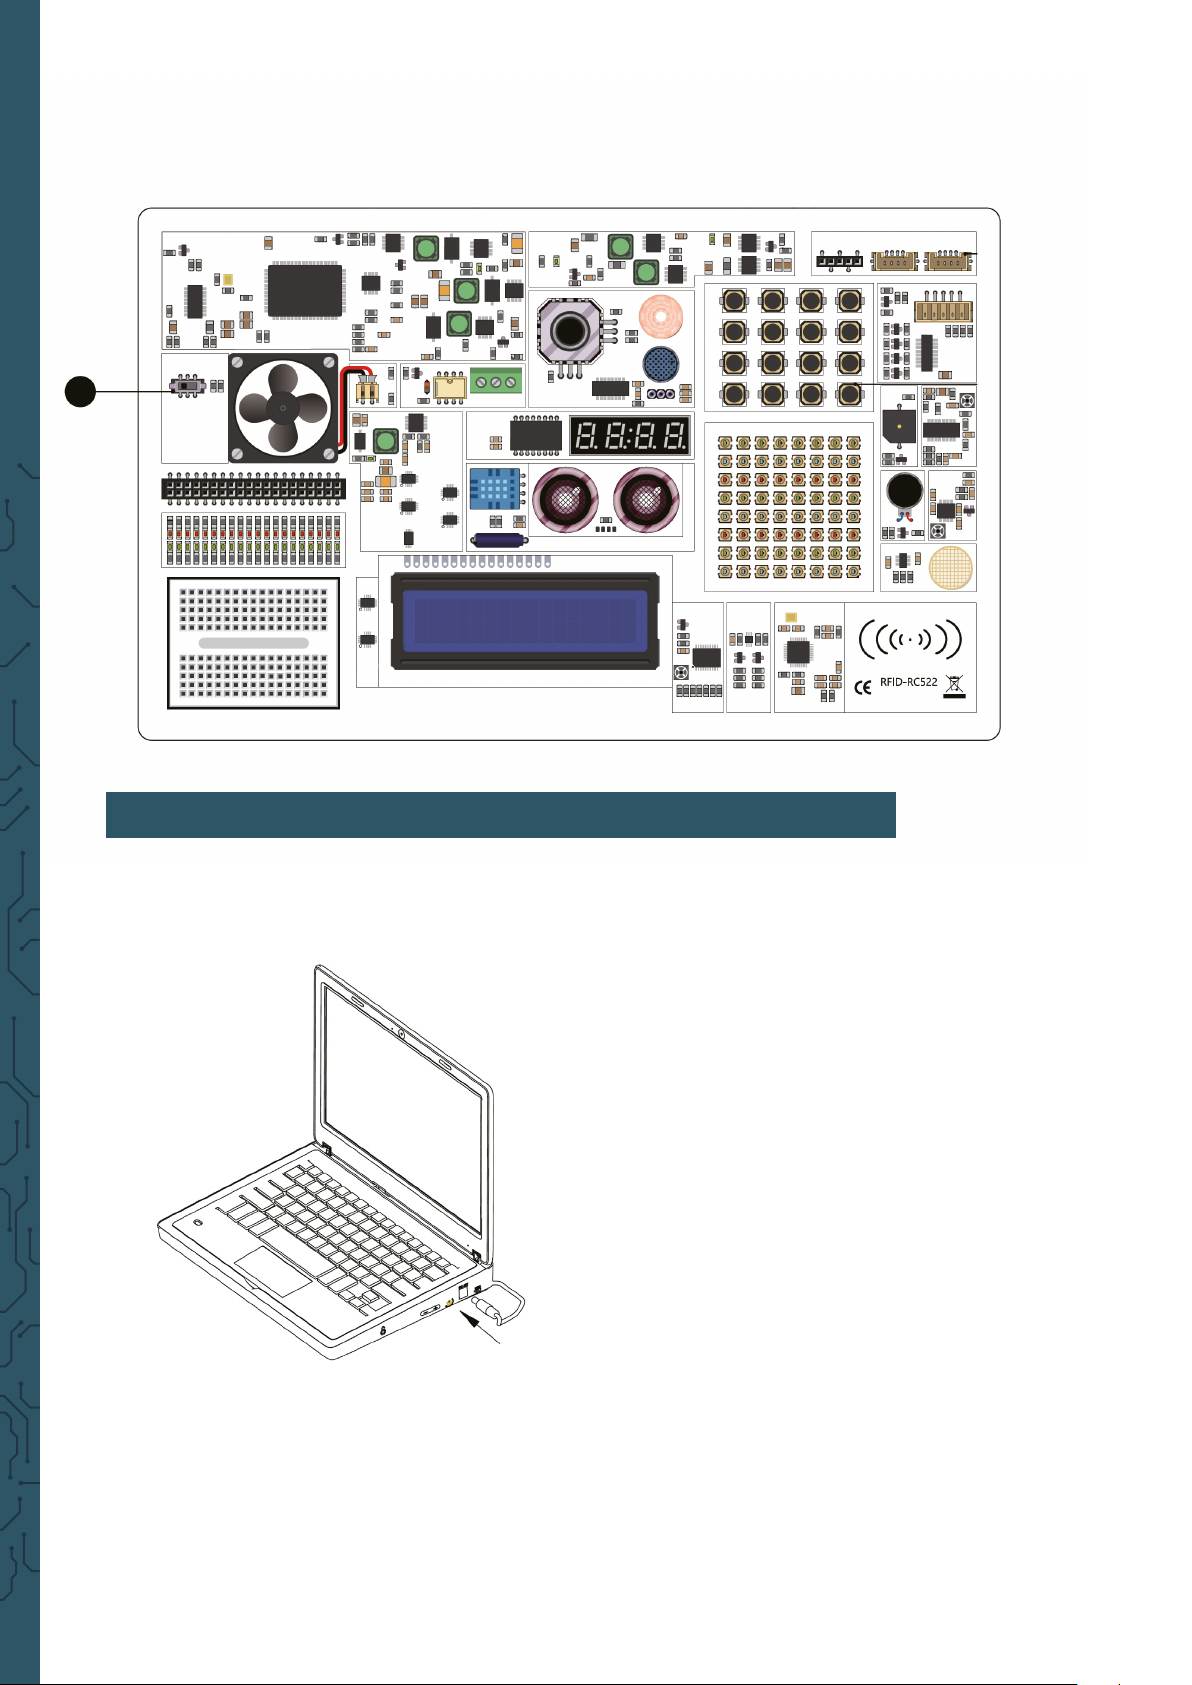
8. Control of sensors & modules
9. Information & return obligations
10. Support
1. GENERAL INFORMATION
Dear Customer,
thank you for choosing our product. In the following, we will show you what
to consider during commissioning and use.
Should you encounter any unexpected problems during use, please feel free
to contact us.
2. REQUIREMENTS
For the operation of the Joy-Pi Note we recommend the use of a Raspberry
Pi 4 with 4GB RAM or more. This is the only way the proper operation,
especially the use of Scratch applications, can be guaranteed.
The Joy-Pi Note can be operated either via the included 12 V power supply
or alternatively via the 5 V USB port.
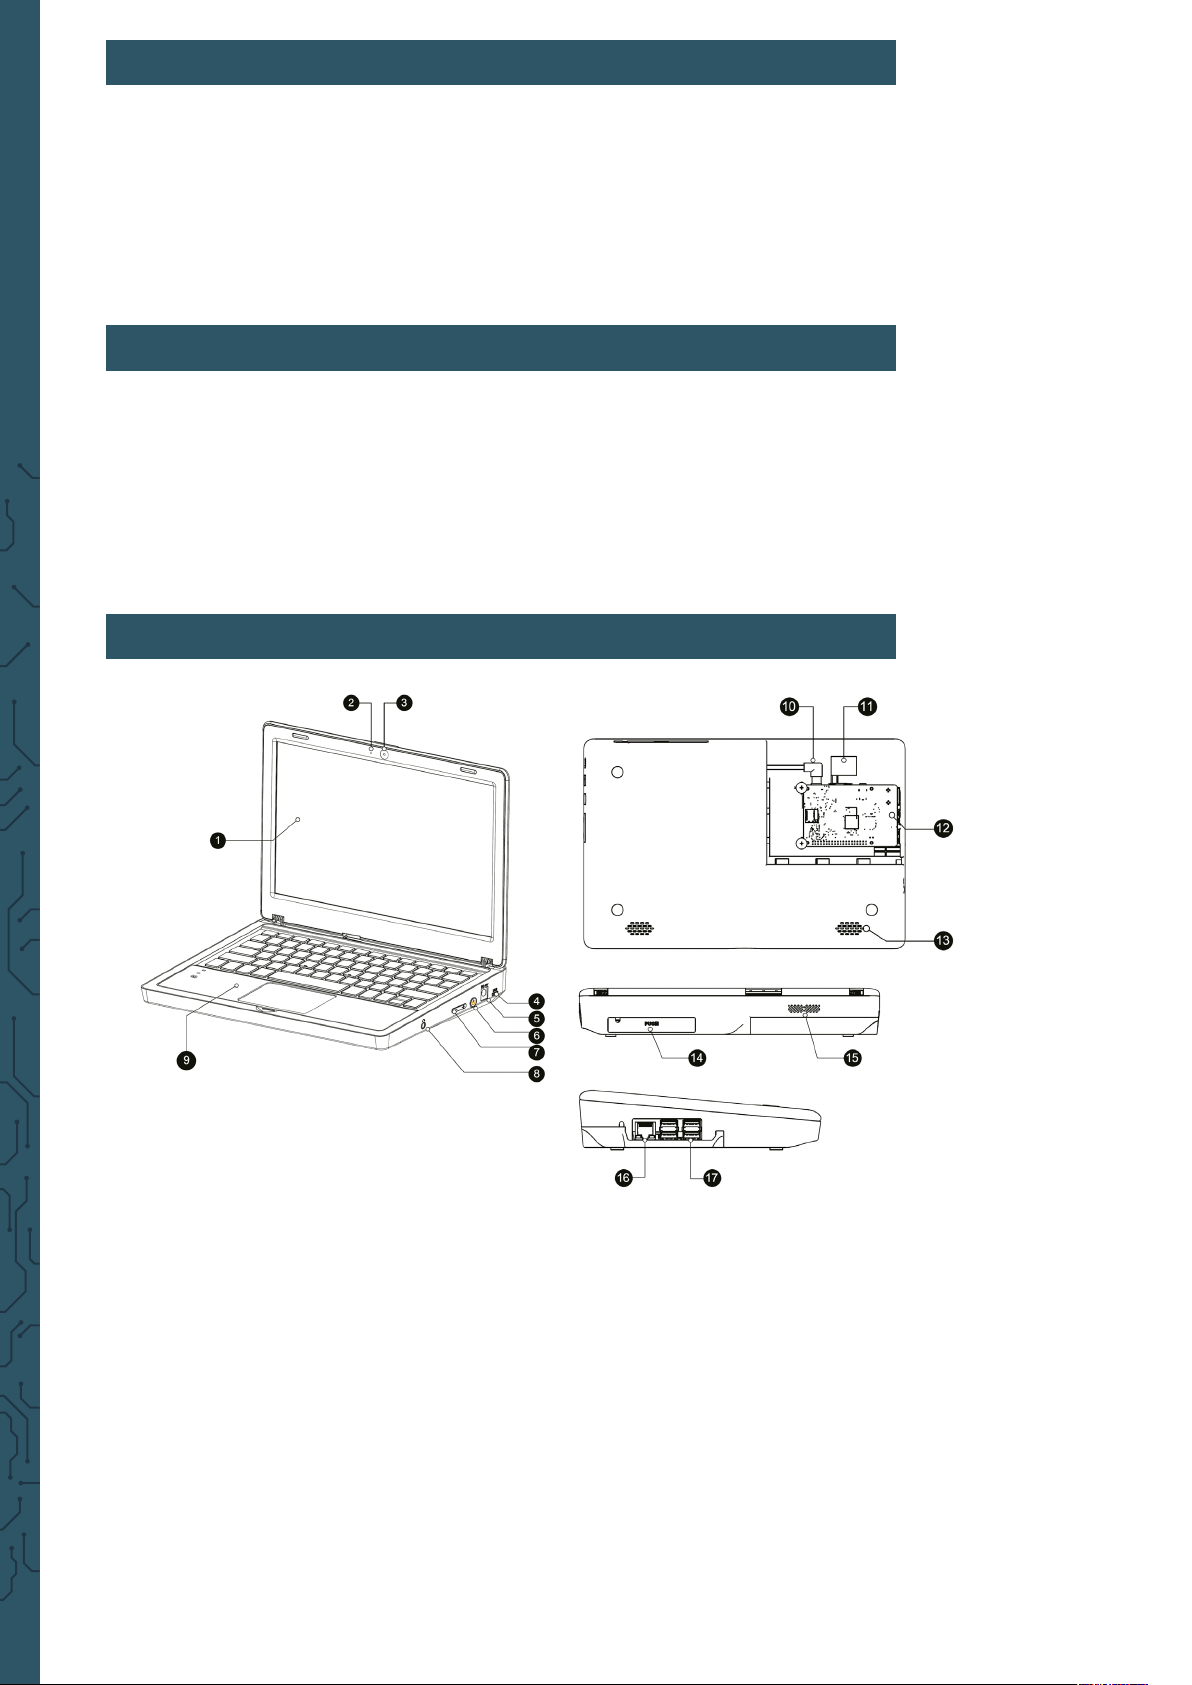
3. OVERVIEW
1. 11.6“ IPS Full-HD Screen
2. Microphone
3. 2MP Camera
4. 5V USB Power supply connection
5. DC 12V Power supply connection
6. Power button
7. Volume & brightness control
8. 3.5mm Headphone jack
9. Detachable, wireless keyboard
10. Raspberry Pi power supply
11. HDMI
12. Raspberry Pi mounting tray
13. Speaker
14. Storage tray
15. Ventilation opening
16. Network connection (Raspberry Pi)
17. USB-Connection (Raspberry Pi)
Notice: When using the Joy-Pi Note, you may want to use the GPIO connec-
tions of the Raspberry Pi, independent of the sensors and modules connected via the Joy-Pi Note.
For this case, the connection between the modules and the Raspberry Pi
can be disconnected via a switch.
4. POWER SUPPLY
Your Joy-Pi Note can be powered either via the included 12 V power supply
or alternatively via the 5 V USB port (e.g. with a powerbank).
WARNING: The 5V micro USB port is only suitable for operating
the Joy-Pi Note with a powerbank. It is not suitable for charging a
powerbank. Do not connect the 12V power plug and a powerbank
at the same time under any circumstances!
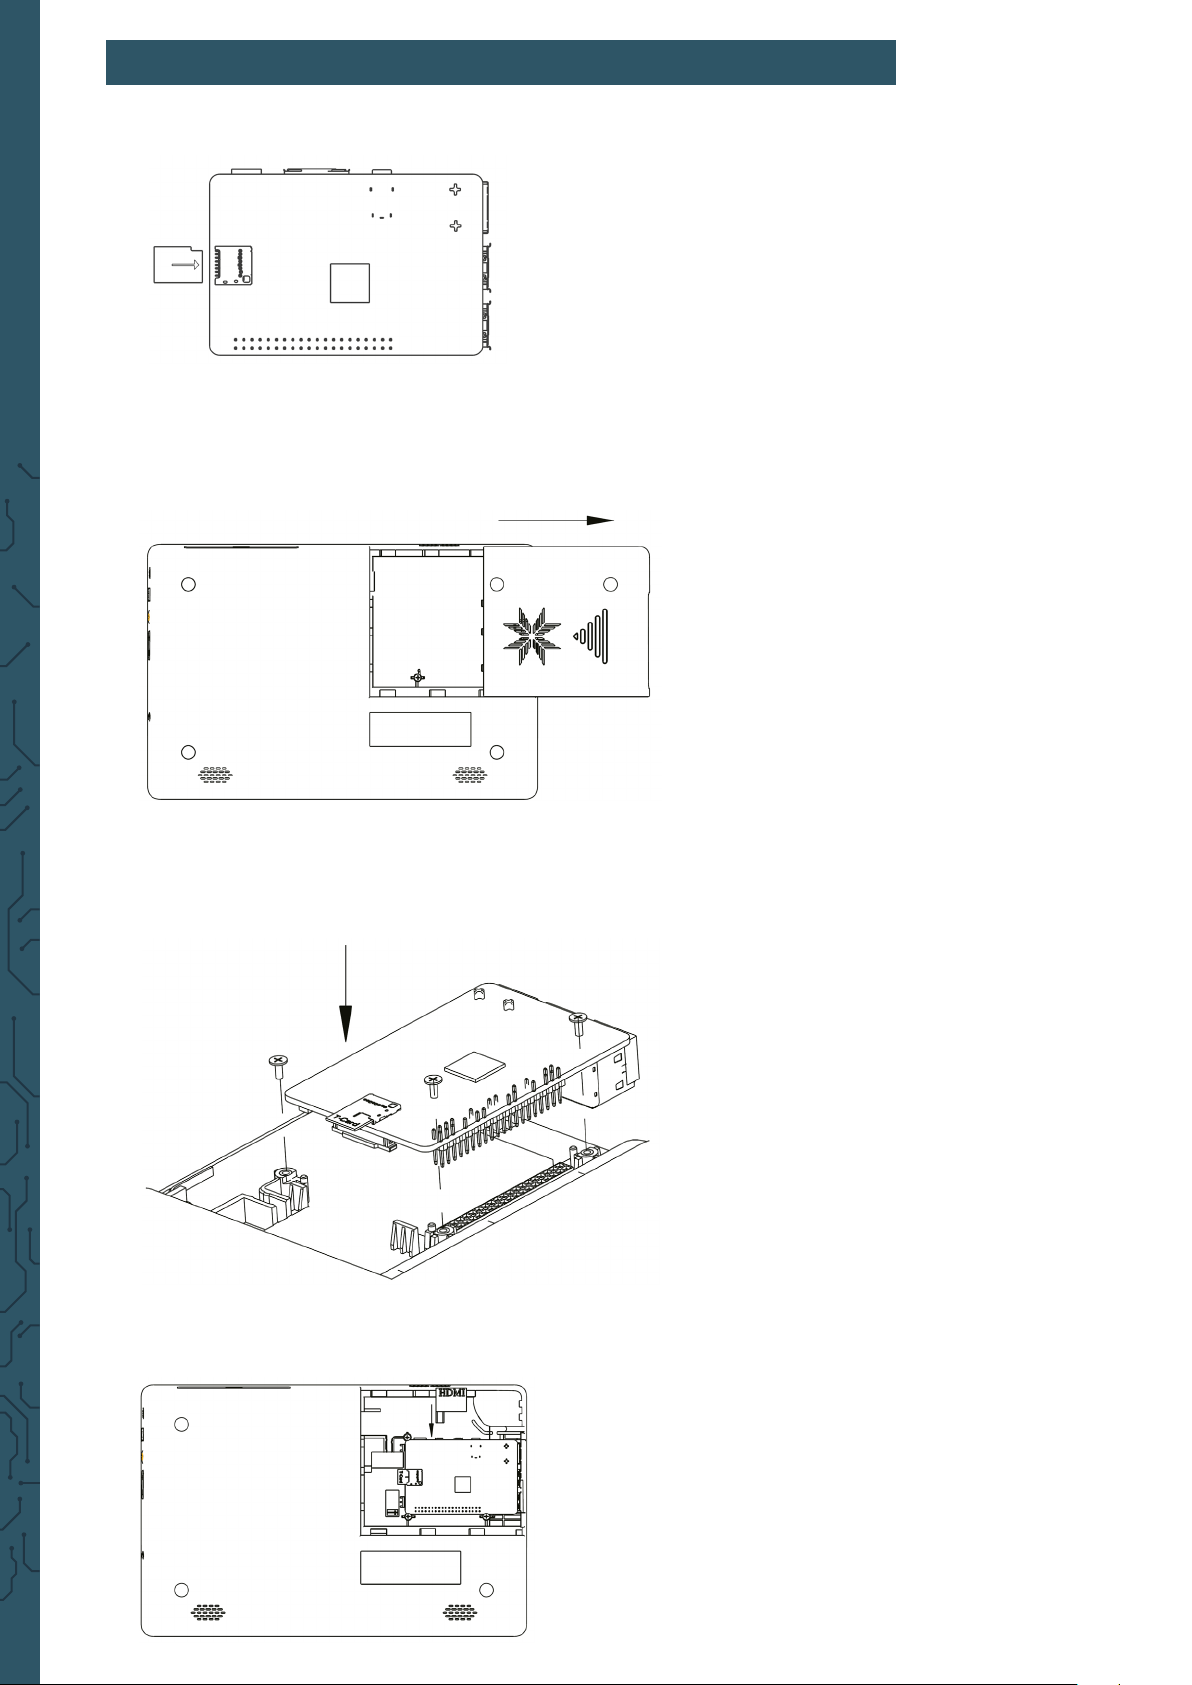
5. MOUNTING THE RASPBERRY PI
1. Insert the included SD card into the SD card slot of your Raspberry Pi.
2. Open the Raspberry Pi mounting compartment on the back of your Joy-Pi
Note by sliding the cover to the right.
3. Insert the Raspberry Pi into the mounting tray. Then insert the screws to
secure your Raspberry Pi.
4. Connect the micro-HDMI adapter board to the HDMI port of your Raspberry Pi.
 Loading...