

Page 1

ET-3410-J 7-INCH
METAL CUTTING SAW
CAUTION
RISK OF INJURY!
READ MANUAL BEFORE OPERATING!
THIS MANUAL IS AN IMPORTANT PART OF THE METAL SAW
AND SHOULD REMAIN WITH THIS UNIT WHEN YOU SELL OR RENT IT.
Metal Cutting Saw Operator's Manual 1
Page 2

Introduction
Congratulations on the purchase of your new John Deere 7-inch Metal Cutting Saw! You can be assured your
metal cutting saw was constructed and designed with quality and performance in mind. Each component has
been rigorously tested to ensure the highest level of acceptance.
This operator's manual was compiled for your benefit. By reading and following the simple safety, installation,
operation, maintenance and troubleshooting steps described in this manual, you will receive years of troublefree operation from your new tool. The contents of this manual are based on the latest product information
available at the time of publication. The manufacturer reserves the right to make changes in price, color,
materials, equipment, specifications or models at any time without notice.
Once the unit has been removed from the box, immediately write in the serial number of your unit in the space
provided below.
SERIAL NUMBER_________________________________
Inspect for signs of obvious or concealed freight damage. If damage does exist, file a claim with the transportation
company immediately. Be sure that all damaged parts are replaced and that the mechanical problems are corrected
prior to operation of the unit. If you require service, contact your Customer Service.
Mi-T-M® Corporation, 8650 Enterprise Drive, Peosta, IA 52068
1-877-JD-KLEEN / (1-877-535-5336) Fax 563-556-1235
Monday - Friday 8:00 a.m. - 5:00 p.m. CST
Please have the following information available for all service calls:
1. Model Number
2. Serial Number
3. Date and Place of Purchase
WARNING
WEAR RESPIRATORY PROTECTION
Some dust created by power sanding, sawing, grinding, drilling and other construction activities contain
chemicals known to the State of California to cause cancer, birth defects or other reproductive harm. Some
examples of these chemicals are:
• Lead from lead-base paints,
• Crystalline Silica from bricks, cement and other masonry products, and
• Arsenic and Chromium from chemically-treated lumber.
Your risk from these exposures varies, depending on how often you do this type of work. To reduce your
exposure to these chemicals, work in a well ventilated area and work with approved safety equipment, such as
those dust masks that are specially designed to filter out microscopic particles.
2 Metal Cutting Saw Operator's Manual
Page 3

Table of Content
SAFETY ...........................................................................................................................................4-13
GENERAL SAFETY RULES ...............................................................................................4-8
SPECIFIC SAFETY RULES ................................................................................................9-13
FUNCTIONAL DESCRIPTION ........................................................................................................ 14
MODEL................................................................................................................................ 14
SPECIFICATIONS...............................................................................................................14
OPERATION .................................................................................................................................... 15-18
APPLICATIONS .................................................................................................................. 15
ASSEMBLY .........................................................................................................................15
PRE-OPERATION...............................................................................................................15-16
OPERATION .......................................................................................................................17-18
MAINTENANCE AND INSPECTION ............................................................................................... 19-20
MAINTENANCE AND INSPECTION ................................................................................... 19-20
STORAGE...........................................................................................................................20
SERVICE AND REPAIR...................................................................................................... 20
ACCESSORIES ...............................................................................................................................21
TROUBLESHOOTING.....................................................................................................................22
NOTES.............................................................................................................................................23
Metal Cutting Saw Operator's Manual 3
Page 4
Safety
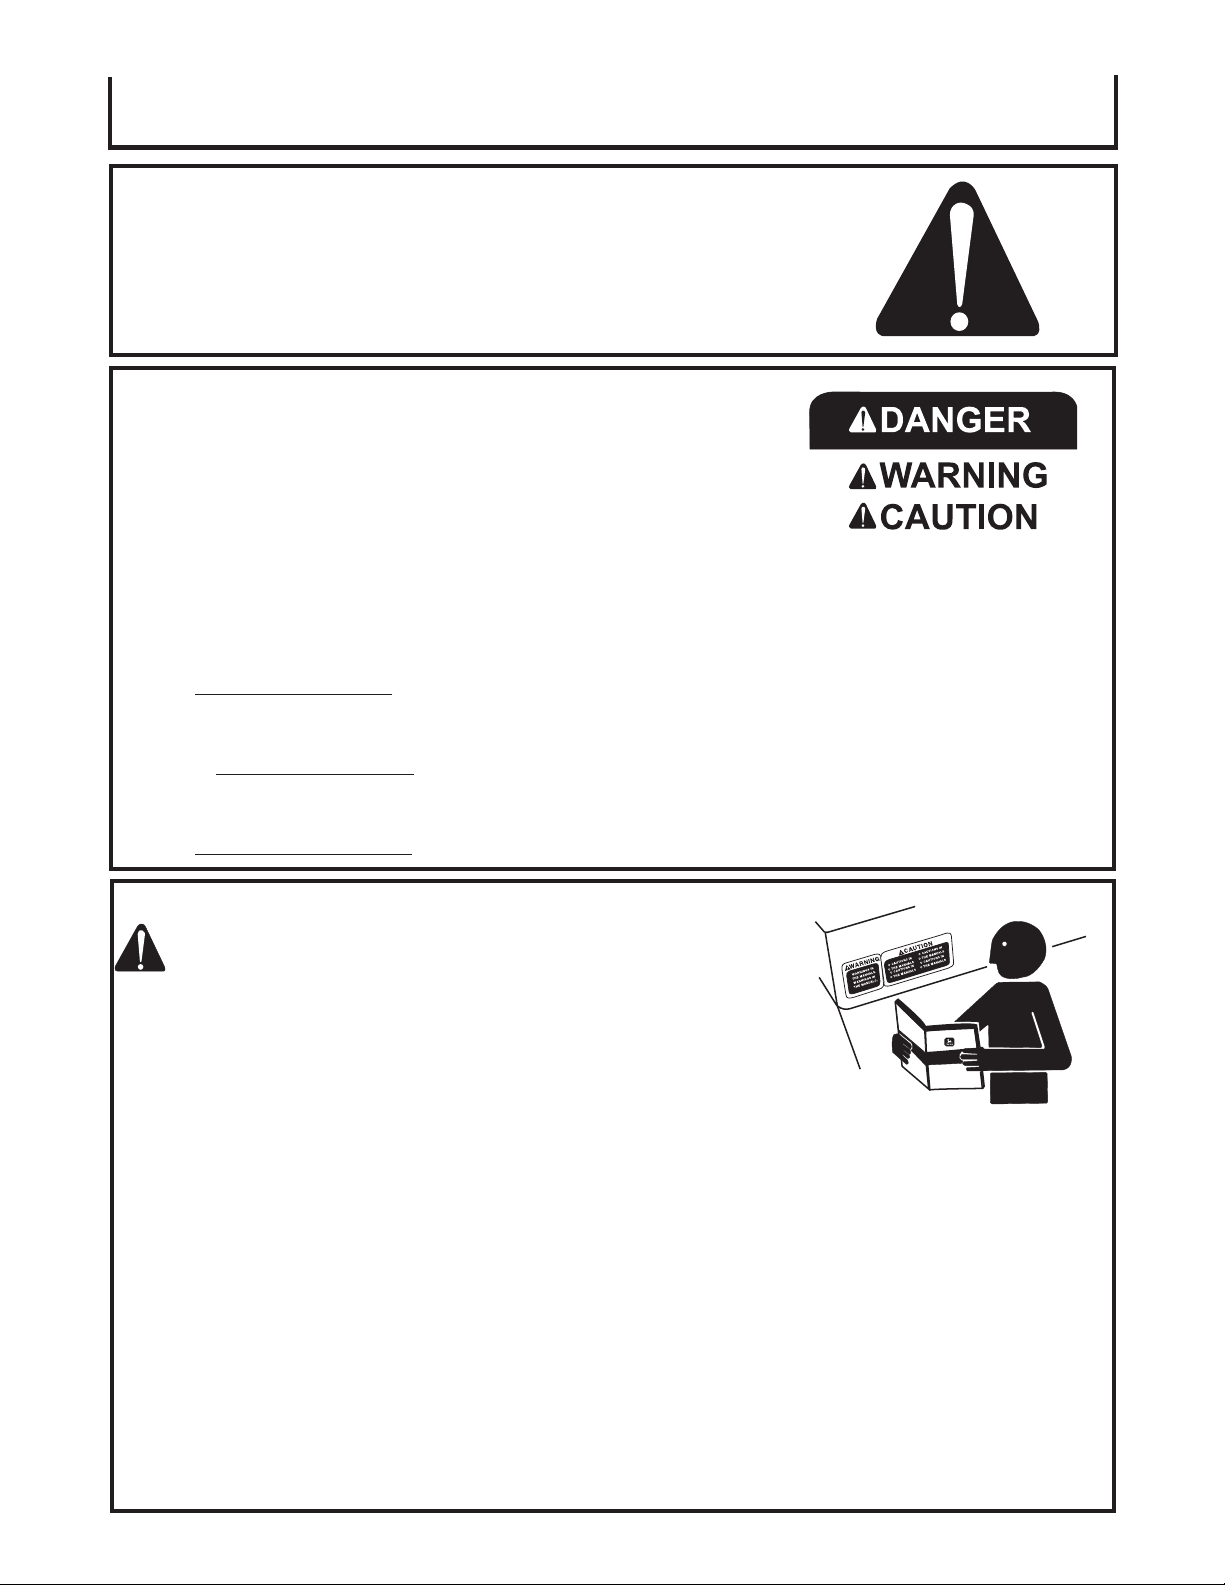
RECOGNIZE SAFETY INFORMATION
This is the safety alert symbol. When you see this
symbol on your tool or in this manual, be alert to the
potential for personal injury.
Follow recommended precautions and safe operating
practices.
UNDERSTAND SIGNAL WORDS
A "DANGER, WARNING or CAUTION" safety
warning will be surrounded by a "SAFETY ALERT
BOX." This box is used to designate and emphasize
Safety Warnings that must be followed when operating this tool.
Accompanying the Safety Warnings are "signal
words" which designate the degree or level of hazard
seriousness. The "signal words" used in this manual
are as follows:
DANGER: Indicates an imminently hazardous
situation which, if not avoided, WILL result in
death or serious injury.
WARNING: Indicates a potentially hazardous
situation which, if not avoided, COULD result
in death or serious injury.
CAUTION: Indicates a potentially hazardous
situation which, if not avoided MAY result in
minor or moderate injury.
GENERAL SAFETY RULES
WARNING: READ AND UNDERSTAND ALL
INSTRUCTIONS. Failure to follow all
instructions listed below, may result
in electric shock, fire and/or serious personal
injury.
Carefully read all safety messages in this manual and on
your machine safety signs. Keep safety signs in good
condition. Replace missing or damaged safety signs. Be
sure new equipment components and repair parts include
the current safety signs. Replacement safety signs are
available from your John Deere dealer.
Learn how to operate the machine and how to use
controls properly. Do not let anyone operate without
instruction.
Keep your machine in proper working condition.
Unauthorized modifications to the machine may impair the
function and/or safety and affect machine life.
If you do not understand any part of this manual and need
assistance, contact your John Deere dealer.
!SAVE THESE INSTRUCTIONS!
4 Metal Cutting Saw Operator's Manual
Page 5
WARNING
GENERAL SAFETY RULES:
WORK AREA
Keep work area clean and well lit.
Cluttered areas and benches invite injuries.
Do not operate power tools in explosive atmospheres,
such as in the presence of flammable liquids, gases, or
dust. Power tools create sparks which may ignite the dust or
fumes.
Keep bystanders, children, and visitors away while
operating a power tool. Distractions can cause you to lose
control.
Protect Against Noise
Prolonged exposure to loud noise can cause impairment
or loss of hearing. Wear a suitable hearing protective device
such as earmuffs or earplugs to protect against objectionable
or uncomfortable loud noises.
Operating equipment safely requires the full attention of
the operator. Do not wear radio or music headphones
while operating machine.
Metal Cutting Saw Operator's Manual 5
Page 6

WARNING
GENERAL SAFETY RULES:
ELECTRICAL SAFETY
Grounded tools must be plugged into an outlet properly
installed and grounded in accordance with all codes
and ordinances. Never remove the grounding prong or modify
the plug in any way. Do not use any adaptor plugs. Check with a
qualified electrician if you are in doubt as to whether the outlet
is properly grounded. If the tools should electrically malfunction or
break down, grounding provides a low resistance path to carry
electricity away from the user.
Avoid body contact with grounded surfaces such as pipes,
radiators, ranges and refrigerators. There is an increased risk of
electric shock if your body is grounded.
Don’t expose power tools to rain or wet conditions. Water
entering a power tool will increase the risk of electric shock.
Do not abuse the cord. Never use the cord to carry the tools or
pull the plug from an outlet. Keep cord away from heat, oil,
sharp edges or moving parts. Replace damaged cords
immediately. Damaged cords increase the risk of electric shock.
When operating a power tool outside, use an outdoor extension
cord marked “W-A” or “W.” These cords are rated for outdoor use
and reduce the risk of electric shock.
Cover of
Grounded
Outlet Box
Outlet
Ground
Grounding
Prong
Note: When using an extension cord, be sure to use one heavy
enough to carry the current your product will draw. An
undersized cord will cause a drop in line voltage resulting in
loss of power and overheating. John Deere recommends
using a minimum 12 gauge extension cord not to exceed
100 feet. The table below is supplied only as a guide to
minimum gauge for extension cords, where the smaller the
gauge number, the heavier the cord.
MINIMUM GAUGE FOR EXTENSION CORDS
VOLTS TOTAL LENGTH OF CORD IN FEET
120V 0-25 26-50 51-100 101-150
240V 0-50 51-100 101-200 201-300
AMPERAGE
0-6 18 16 16 14
6-10 18 16 14 12
10-12 16 16 14 12
12-16 14 12 NOT RECOMMENDED
RECOMMENDED WIRE GAUGE
*JOHN DEERE RECOMMENDS USING A MINIMUM 12
GAUGE EXTENSION CORD NOT TO EXCEED 100
FEET.
6 Metal Cutting Saw Operator's Manual
Page 7

WARNING
GENERAL SAFETY RULES:
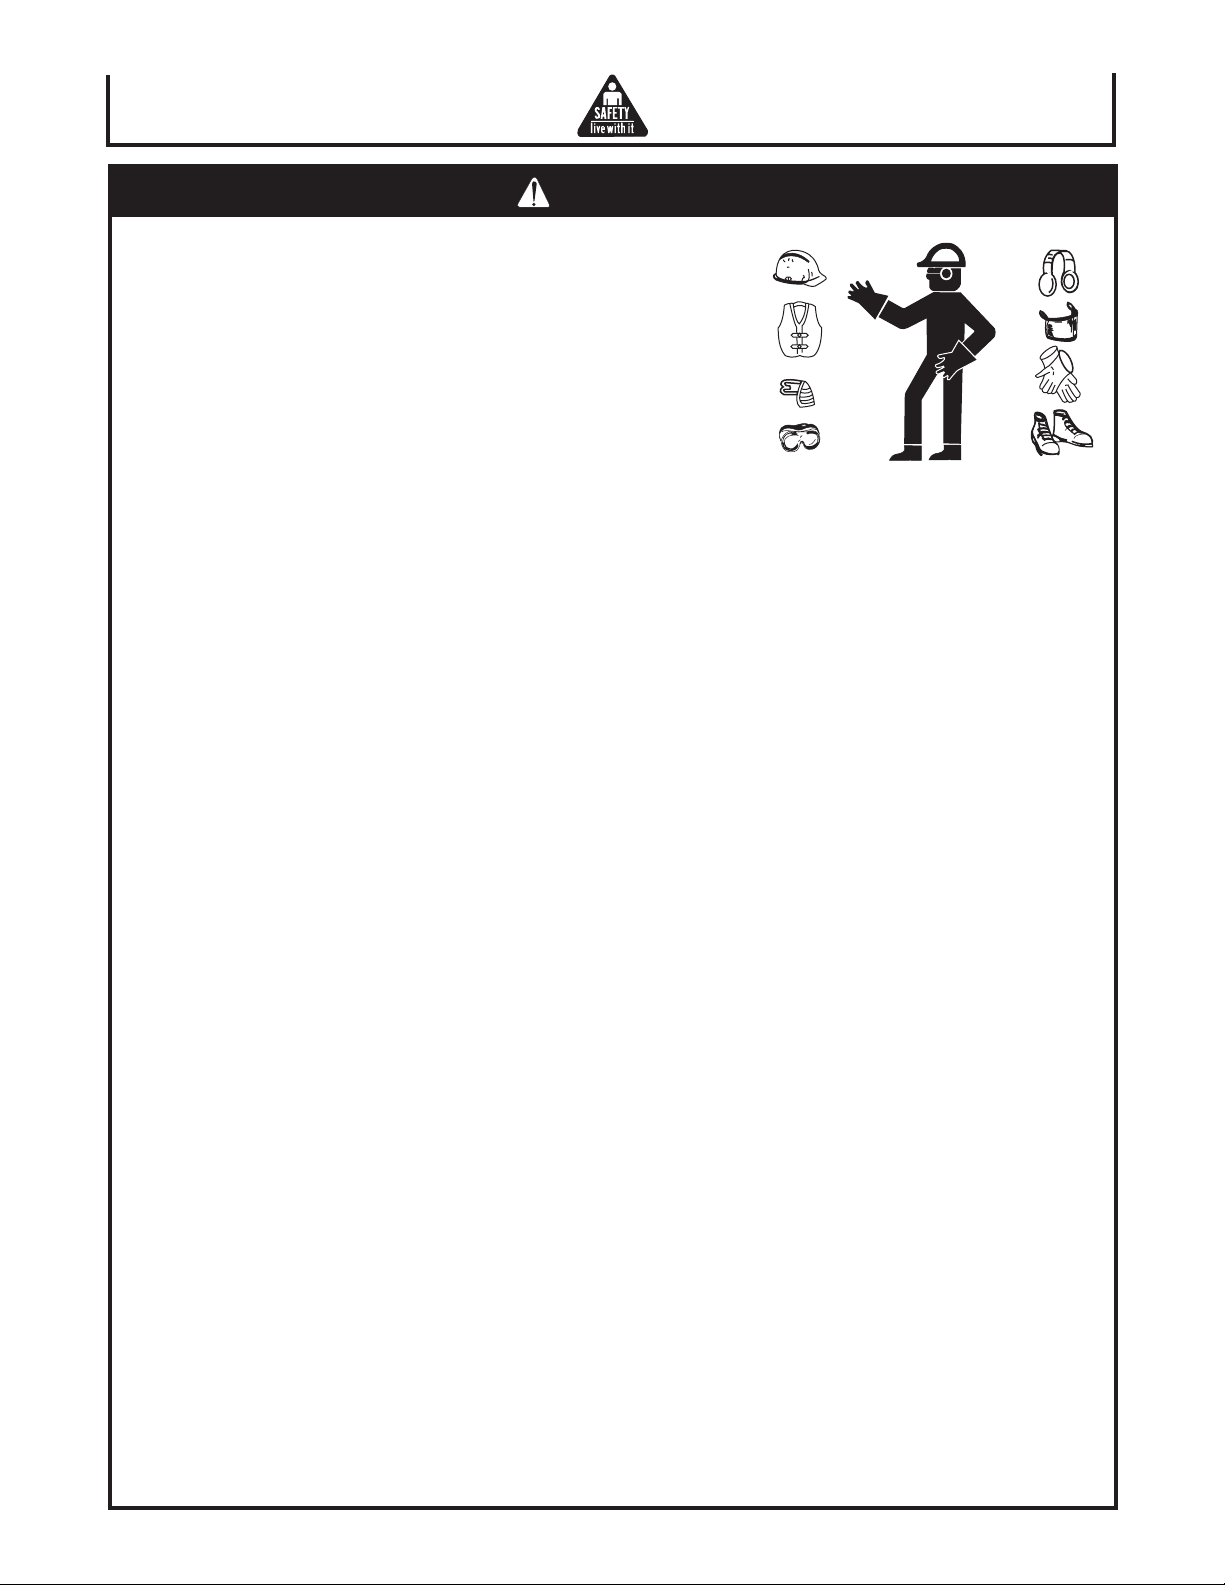
PERSONAL SAFETY
Stay alert, watch what you are doing and use common sense
when operating a power tool. Do not use tool while tired or
under the influence of drugs, alcohol, or medication. A moment
of inattention while operating power tools may result in serious
personal injury.
Dress properly. Do not wear loose clothing or jewelry. Contain
long hair. Keep your hair, clothing, and gloves away from
moving parts. Loose clothes, jewelry, or long hair can be caught in
moving parts.
Avoid accidental starting. Be sure switch is off before plugging
in. Carrying tools with your finger on the switch or plugging in tools
that have the switch on invites accidents.
Remove adjusting keys or switches before turning the tool on.
A wrench or a key that is left attached to a rotating part of the tool
may result in personal injury.
Do not overreach. Keep proper footing and balance at all times.
Proper footing and balance enables better control of the tool in
unexpected situations.
Use safety equipment. Always wear eye protection. Dust mask,
nonskid safety shoes, hard hat, or hearing protection must be used
for appropriate conditions.
Never touch the moving parts. Never touch the blade while the
power cord is connect to the power source.
TOOL USE AND CARE
Use clamps or other practical way to secure and support the
workpiece to a stable platform. Holding the work by hand or
against your body is unstable and may lead to loss of control.
Do not force tool. Use the correct tool for your application. The
correct tool will do the job better and safer at the rate for which it is
designed.
Do not use tool if switch does not turn it on or off. Any tool that
cannot be controlled with the switch is dangerous and must be
repaired.
Disconnect the plug from the power source before making any
adjustments, changing accessories, or storing the tool. Such
preventive safety measures reduce the risk of starting the tool
accidentally.
Store idle tools out of reach of children and other untrained
persons. Tools are dangerous in the hands of untrained users.
Maintain tools with care. Keep cutting tools sharp and clean.
Properly maintained tools, with sharp cutting edges are less likely to
bind and are easier to control.
Check for misalignment or binding of moving parts, breakage of
parts, and any other condition that may affect the tools
operation. If damaged, have the tool serviced before using.
Many accidents are caused by poorly maintained tools.
Use only accessories that are recommended by the
manufacturer for your model. Accessories that may be suitable
for one tool, may become hazardous when used on another tool.
Never touch the moving parts. Never touch the blade while the
power cord is connected to the power source.
Metal Cutting Saw Operator's Manual 7
Page 8

CAUTION
GENERAL SAFETY RULES:
SERVICE
Tool service must be performed only by qualified repair
personnel. Service or maintenance performed by unqualified
personnel could result in a risk of injury.
When servicing a tool, use only identical replacement parts.
Follow instructions in the Maintenance section of this
manual. Use of unauthorized parts or failure to follow Maintenance
Instructions may create a risk of electric shock or injury.
SPECIFIC SAFETY RULES AND SYMBOLS:
WARNING: DO NOT OPERATE MACHINE IF WARNINGS AND/OR INSTRUCTION LABELS ARE
MISSING OR DAMAGED. CONTACT JOHN DEERE SERVICE CENTER FOR
REPLACEMENT LABELS.
EYE
PROTECTION
REQUIRED
HEARING
PROTECTION
REQUIRED
NEVER PLACE
FINGERS NEAR
CUTTING AREA
LINE VOLTAGE
PRESENT
BEWARE OF
ROTATING
V.............. volts
A......... amperes
Hz............ hertz
min ..... minutes
s .........seconds
~ ......... alternating current
n
o
no load speed
..............
MACHINE
PARTS
8 Metal Cutting Saw Operator's Manual
Page 9

SPECIFIC SAFETY RULES:
CAUTION
DANGER: KEEP HANDS AND BODY AWAY FROM AND
DANGER: KEEP HANDS AWAY FROM CUTTING AREA
WARNING: TO REDUCE THE RISK OF INJURY, CHECK
Keep your body positioned to either side of the saw blade, but not
in line with the saw blade. KICKBACK could cause the saw to jump
backwards. (See “Causes and Operator Prevention of Kickback.”)
Do not reach underneath the work. The guard can not protect you
from the blade below the work.
Check lower guard for proper closing before each use. Do not
operate saw if lower guard does not move freely and close
instantly. Never clamp or tie the lower guard into the open
position. If saw is accidentally dropped, lower guard may be bent.
Raise the lower guard and make sure it moves freely and does not
touch the blade or any other part, in all angles and depths of cut.
TO THE SIDE OF THE BLADE. CONTACT WITH
BLADE WILL RESULT IN SERIOUS INJURY.
AND BLADE. KEEP YOUR SECOND HAND ON
AUXILIARY HANDLE, OR MOTOR HOUSING. IF
BOTH HANDS ARE HOLDING THE SAW, THEY
CANNOT BE CUT BY THE BLADE.
LOWER GUARD. IT MUST CLOSE INSTANTLY!
HOLD SAW WITH BOTH HANDS. SUPPORT AND
CLAMP WORK. WEAR EYE PROTECTION.
Check the operation and condition of the lower guard spring. If the
guard and the spring are not operating properly, they must be
serviced before use. Lower guard may operate sluggishly due to
damaged parts, gummy deposits, or a buildup of debris.
Always observe that the lower guard is covering the blade before
placing saw down on bench or floor. An unprotected, coasting blade
will cause the saw to walk backwards, cutting whatever is in its path.
Be aware of the time it takes for the blade to stop after switch is
released.
NEVER hold piece being cut in your hands or across your leg. It is
important to support the work properly to minimize body exposure,
blade binding, or loss of control.
Hold tool by insulated gripping surfaces when performing an
operation where the cutting tool may contact hidden wiring or its
own cord. Contact with a “live” wire will also make exposed metal
parts of the tool “live” and shock the operator.
When ripping always use a rip fence or straight edge guide. This
improves the accuracy of cut and reduces the chance for blade
binding.
Always use blades with correct size and shape (diamond vs.
round) arbor holes. Blades that do not match the mounting hardware
of the saw will run eccentrically, causing loss of control.
Never use damaged or incorrect blade washers or bolts. The blade
washers and bolt were specially designed for your saw, for optimum
performance and safety of operation.
Metal Cutting Saw Operator's Manual 9
Page 10

CAUTION
SPECIFIC SAFETY RULES:
CAUSES AND OPERATOR PREVENTION OF KICKBACK:
Kickback is a sudden reaction to a pinched, bound or misaligned saw blade, causing
an uncontrolled saw to lift up and out of the workpiece toward the operator. When the
blade is pinched or bound tightly by the kerf closing down, the blade stalls and the
motor reaction drives the unit rapidly back toward the operator. If the blade becomes
twisted or misaligned in the cut, the teeth at the back edge of the blade can dig into
the top surface of the material causing the blade to climb out of the kerf and jump
back toward operator. Kickback is the result of tool misuse and/or incorrect operating
procedures or conditions and can be avoided by taking proper precautions as given
below:
Maintain a firm grip with both hands on the saw and position your body and arm to
allow you to resist KICKBACK forces. KICKBACK forces can be controlled by the
operator, if proper precautions are taken.
When blade is binding, or when interrupting a cut for any reason, release the trigger
and hold the saw motionless in the material until the blade comes to a complete stop.
Never attempt to remove the saw from the work or pull the saw backward while the
blade is in motion or KICKBACK may occur. Investigate and take corrective actions to
eliminate the cause of blade binding.
When restarting a saw in the workpiece, center the saw blade in the kerf and check
that saw teeth are not engaged into the material. If saw blade is binding, it may walk
up or KICKBACK from the workpiece as the saw is restarted.
Support large panels to minimize the risk of blade pinching and KICKBACK. Large
panels tend to sag under their own weight. Supports must be placed under the panel
on both sides, near the line of cut and near the edge of the panel.
Do not use dull or damaged blade. Unsharpened or improperly set blades produce
narrow kerf causing excessive friction, blade binding and KICKBACK.
Blade depth and bevel adjusting locking levers must be tight and secure before
making cut. If blade adjustment shifts while cutting, it may cause binding and
KICKBACK.
Use extra caution when making a “Pocket Cut” into existing walls or other blind areas.
The protruding blade may cut objects that can cause KICKBACK.
10 Metal Cutting Saw Operator's Manual
Page 11

CAUTION
SPECIFIC SAFETY RULES:
SUPPORT LARGE PANELS
Large panels must be supported as shown in Fig. A to minimize the risk of blade
pinching and kickback. When cutting operation requires the resting of saw on the
work piece, the saw shall be rested on the larger portion and the smaller piece cut off.
A TYPICAL ILLUSTRATION OF SUPPORT LARGE PANELS
TO AVOID KICKBACK,
SUPPORT THE PANEL NEAR
THE CUT
(Fig. A)
USE RIP FENCE
Always use a fence or straight edge guide when ripping.
WARNING:IT IS IMPORTANT TO SUPPORT THE WORK PROPERLY AND TO
HOLD THE SAW FIRMLY TO PREVENT LOSS OF CONTROL WHICH
COULD CAUSE PERSONAL INJURY. FIG. B ILLUSTRATES TYPICAL
HAND SUPPORT OF THE SAW. WHEN OPERATING THE SAW, KEEP
THE CORD AWAY FROM THE CUTTING AREA AND POSITION IT SO
THAT IT WILL NOT BE CAUGHT ON THE WORK PIECE DURING THE
CUTTING OPERATION.
A TYPICAL ILLUSTRATION OF
PROPER HAND SUPPORT,
WORK SUPPORT, AND
SUPPLY CORD ROUTING.
(Fig. B)
Metal Cutting Saw Operator's Manual 11
Page 12

CAUTION
SPECIFIC SAFETY RULES:
CONFIRM THAT NO ITEMS SUCH AS AN ELECTRIC CABLE OR
CONDUIT ARE BURIED INSIDE
Be sure the saw will not cut through wire, cable or conduit that are
behind or under the area you are cutting. In such cases, metal parts
could become electrically live and present a serious shock hazard.
KEEP THE RIGHT PARTS IN THE RIGHT POSITION
Do not remove covers and screws which have been factory-mounted.
They perform important respective roles. Keep them in the right
positions.
SHOULD THE PLASTIC HOUSING OR HANDLE OF A POWER
TOOL BE CRACKED OR DEFORMED, DO NOT USE IT
Since cracked or deformed parts may lead to an operator receiving an
electric shock, do not use such a power tool. Immediately have it
repaired.
ALWAYS KEEP THE MOTOR AIR VENT FULLY OPENED
A constantly open motor air vent is necessary to allow air to come in
and out for cooling the motor. Do not allow it to become clogged up,
even if dust is blown through it.
OPERATE POWER TOOLS AT THE RATED VOLTAGE
Operate power tools at voltages specified on the nameplates.
STOP OPERATION IMMEDIATELY IF ANY ABNORMALITY IS
DETECTED
Should a power tool be detected as out of order or should other abnormalities be observed during operation, stop using the tool immediately.
NEVER LEAVE TOOL RUNNING UNATTENDED. TURN POWER
OFF.
Don't leave tool until it comes to a complete stop.
CAREFULLY HANDLE POWER TOOLS
Should a power tool be dropped or struck against hard materials
inadvertently, it may be deformed, cracked, or damaged.
DO NOT WIPE PLASTIC PARTS WITH SOLVENT
Solvents such as gasoline, thinner, benzine, carbon tetrachloride, and
alcohol may damage and crack plastic parts. Do not wipe them with
such solvents. Wipe plastic parts with a soft cloth lightly dampened
with soapy water.
KEEP BLADES CLEAN AND SHARP
Sharp blades minimizes stalling and kickback.
ADJUSTMENTS
Before cutting be sure depth and bevel adjustments are tight.
12 Metal Cutting Saw Operator's Manual
Page 13

IMPORTANT
SPECIFIC SAFETY RULES:
1. If you require an additional manual, please contact John Deere
Customer Service:
Mi-T-M® Corporation, 8650 Enterprise Drive, Peosta, IA 52068
1-877-JD-KLEEN / (1-877-535-5336) Fax 563-556-1235
Monday - Friday 8:00 a.m. - 5:00 p.m. CST
2. Only use specified and approved saw blades.
3. Keep saw blades securely fastened.
4. Do not use dull or broken blades.
5. Beware of chips ejected. They become HOT during the cut.
6. Always make safe provisions for handling of excess material.
7. Keep bottom of base plate free from dirt and other debris.
SAVE THESE INSTRUCTIONS AND MAKE THEM AVAILABLE TO
OTHER USERS AND OWNERS OF THIS TOOL!
Metal Cutting Saw Operator's Manual 13
Page 14

Functional Description
MODEL:
ET-3410-J 7-INCH METAL CUTTING SAW
NOTE: The information contained in this Instruction Manual is
designed to assist you in the safe operation and maintenance
of the power tool.
NEVER operate, or attempt any maintenance on the tool unless you
have first read and understood all safety instructions contained in this
manual.
Some illustrations in this Instruction Manual may show details or
attachments that differ from those on your own power tool.
SPECIFICATIONS:
NOTE: Specifications are subject to change without any obligation on
the part of JOHN DEERE.
7-INCH METAL CUTTING SAW ET-3410-J:
Height: 9.4" (239 mm)
Width: 10.59" (269 mm)
Length: 16.61" (422 mm)
Weight: 13.6 lbs. (6.2 kg)
Motor: 120V - 1200W / 240V - 1200W
50-60 Hz / 3500 RPM
Blade Arbor: 0.787" (20 mm)
Blade Diameter: 7" (180 mm)
Depth of Cut/Pipe
or Angle (max.): 2" (51 mm)
Depth of Cut/Plate
or Bar (max.): 5/16" (8 mm) Mild Steel
3/8" (9.5 mm) Aluminum
1/4" (6.5 mm) Stainless Steel
Case Dimensions: 18" (460 mm) H
21.5" (546 mm) W
11" (280 mm) D
14 Metal Cutting Saw Operator's Manual
Major Markings
15° increments
Minor Markings
5° increments
0°
Bevel Angle
Adjustment
T-knob
45°
30°
15°
Page 15

Operation
APPLICATIONS:
Cutting various types of metals.
ASSEMBLY:
WARNING: ALWAYS DISCONNECT THE SAW
FROM POWER SOURCE BEFORE MAKING
ADJUSTMENTS.
Install authorized saw blade as detailed in the
"Change Saw Blade" on page 19.
PRE-OPERATION:
PREPARE MATERIAL BEFORE CUTTING:
1. The type of material to be cut, (which determines
blade selection) thickness and position should
be determined to ensure proper performance.
2. Remove excess mill scale or rust from material to
be cut.
3. Material that has been flame cut may have become
heat treated, making it difficult to cut. Avoid these
areas if possible.
4. Material should be clean and level, free from rust,
scale, dirt and chips.
5. Material to be cut may need to be supported to
minimize the risk of the blade pinching, kickback
and blade hitting the support surface. Fasten
material securely to support surface.
SETTING BLADE BEVEL ANGLE:
WARNING: DISCONNECT POWER CORD
BEFORE ADJUSTING BLADE BEVEL
ANGLE.
1. Disconnect power cord.
2. Loosen bevel angle adjustment T-knob (A). (Fig. 1)
Pivot saw base until indicator aligns with desired
angle setting.
3. Tighten the adjusting T-knob. (Fig. 2)
The marks on the bevel angle adjustment gauge are in
5° increments.
(Fig. 1)
(Fig. 2)
Metal Cutting Saw Operator's Manual 15
Page 16

Operation
PRE-OPERATION:
SETTING BLADE DEPTH
WARNING: DISCONNECT POWER CORD
BEFORE ADJUSTING BLADE DEPTH.
1. Disconnect power cord.
2. Loosen T-knob (A). (Fig. 3)
3. Raise or lower the saw base to the desired
position. For proper depth setting, the blade should
extend no more than 6 mm (1/4 in) below the
material being cut.
4. Tighten T-knob (A).
(Fig. 3)
16 Metal Cutting Saw Operator's Manual
Page 17

Operation
OPERATION:
CUTTING MATERIAL
1. The surface you are working on should be clean and
level, free from rust, scale, dirt and chips.
2. Adjust the base plate to the desired bevel angle by
loosening and then retightening the T-knob. Be
certain depth and angle adjusting knobs are tight.
3. Adjust base plate for proper cutting depth. Secure
using depth adjustment knob.
4. Put safety glasses and hearing protection on.
5. Connect machine to power source.
6. Firmly grasp guide handle and trigger handle switch.
WARNING: NEVER START SAW MOTOR WITH
CUTTING EDGE OF SAW BLADE
CONTACTING WORK SURFACE. DO NOT
RETRACT BLADE GUARD MANUALLY.
GUARD RETRACTS AUTOMATICALLY.
7. Place saw base on material near desired cutting
area. Align saw blade with the intended line of cut on
the material.
8. Depress and hold trigger switch lockout
mechanism (A).
9. When ready, start saw motor by activating trigger
switch (B).
10. Slowly approach material edge and gently apply
pressure until saw blade has established a cutting
groove in the material.
11. During the remainder of the cut, apply smooth,
constant pressure without overloading the saw
motor. Do not force saw through material. This may
over load the motor. If the saw circuit breaker should
trip,disconnect power cord. Remove saw from
material being cut. Allow saw to cool. Press the reset
switch (C). If the circuit breaker continues to trip,
contact your John Deere dealer.
(Fig. 4)
WARNING: THIS MACHINE'S CIRCUITRY WILL
AUTOMATICALLY SHUT THE SAW MOTOR
OFF IF EXCESSIVE OVERLOAD IS
MAINTAINED. IF SAW MOTOR SHOULD
STALL OR STOP BEFORE A COMPLETE CUT
IS MADE, ALWAYS REMOVE BLADE FROM
MATERIAL BEFORE ATTEMPTING TO RE
START MOTOR. FAILURE TO DO SO COULD
RESULT IN PERSONAL INJURY.
12. After material is cut, release trigger switch to "OFF"
position and wait until the saw motor completely
stops.
13. Place saw on a secure level surface. Disconnect
power cord from receptacle.
Metal Cutting Saw Operator's Manual 17
(Fig. 5)
Page 18

Operation
OPERATION (CONTINUED):
EMPTY CHIP COLLECTOR
WARNING:ALWAYS DISCONNECT THE SAW
FROM THE POWER SOURCE BEFORE
CHANGING BLADES, CLEARING CHIPS OR
MAKING ADJUSTMENTS.
CAUTION: ALLOW SAW TO COOL BEFORE
EMPTYING CHIP COLLECTOR. CHIPS MAY
BECOME HOT WHILE CUTTING.
1. Disconnect power cord from receptacle.
2. Remove the T-knob (A) and flat washer securing
chip collector. (Fig. 6)
3. Remove chip collector from the side of the saw.
4. Empty chip collector, using a chip brush to
thoroughly remove all chips and debris from
collector and saw body.
5. Install chip collector onto the saw, add flat washer
and T-knob. Securely tighten. (Fig. 7)
(Fig. 6)
(Fig. 7)
18 Metal Cutting Saw Operator's Manual
Page 19

Maintenance and Inspection
MAINTENANCE AND INSPECTION:
CHANGING SAW BLADES
WARNING:ALWAYS DISCONNECT THE SAW
FROM THE POWER SOURCE BEFORE
CHANGING BLADES, CLEARING CHIPS OR
MAKING ADJUSTMENTS.
1. Disconnect power cord from receptacle.
2. Place saw on level, secure surface.
3. Remove two (2) saw blade housing screws and
washers (A). (Fig. 8)
4. Remove chip collector/blade housing.
5. Press in on spindle lock (B) to prevent blade rotation
during removal. (Fig. 9)
6. Using supplied 6 mm Allen wrench, loosen and
remove spindle bolt and flat washer (C).
7. Remove outer blade drive washer and saw blade.
CAUTION: USE ONLY JOHN DEERE
REPLACEMENT SAW BLADES. THE ARBOR
SHAFT ON THE SAW HAS A UNIQUE
DESIGN. NON-JOHN DEERE BLADES WILL
NOT FIT PROPERLY ON THE SHAFT AND
MAY CAUSE SERIOUS INJURY IF THE SAW
IS USED.
(Fig. 8)
IMPORTANT: BE CERTAIN ROTATION ARROW (D)
ON HOUSING AND BLADE ARE AS SHOWN.
8. Install new blade with rotation arrows as shown in
Fig. 10, outer blade drive washer (E), flatwasher and
spindle bolt. Tighten spindle bolt to specification.
Specification:
Spindle Bolt - Torque --- 6 lbs-ft
9. Install chip collector/blade housing, two screws and
washers.
(Fig. 9)
(Fig. 10)
Metal Cutting Saw Operator's Manual 19
Page 20

Maintenance and Inspection
MAINTENANCE AND INSPECTION:
WARNING: TO AVOID AN ACCIDENT OR PERSONAL INJURY, ALWAYS CONFIRM THAT THE
TRIGGER SWITCH IS TURNED OFF AND THE POWER PLUG HAS BEEN
DISCONNECTED FROM THE RECEPTACLE BEFORE PERFORMING ANY
MAINTENANCE OR INSPECTION OF THIS TOOL.
1. Inspecting the saw blade:
Always replace the saw blade immediately upon the first sign of deterioration or damage. A damaged saw
blade can cause personal injury and a worn saw blade can cause ineffective operation and possible
overload to the motor.
CAUTION: NEVER USE A DULL SAW BLADE. WHEN A SAW BLADE IS DULL, ITS RESISTANCE TO
THE HAND PRESSURE APPLIED BY THE TOOL HANDLE TENDS TO INCREASE, MAKING IT
UNSAFE TO OPERATE THE POWER TOOL.
2. Inspecting the mounting screws:
Regularly inspect each component of the power tool for looseness. Retighten mounting screws on any
loose part.
WARNING: TO PREVENT PERSONAL INJURY, NEVER OPERATE THE POWER TOOL IF ANY
COMPONENTS ARE LOOSE.
3. Inspecting the safety cover for proper operation:
Before each use of the tool, test the safety cover to assure that they are in good condition and that
they move smoothly. Never use the tool unless the safety cover operates properly and unless they are in
good mechanical condition.
STORAGE:
After operation of the tool has been completed, check that the following has been performed:
a. Trigger switch is in the OFF position.
b. Power plug has been removed from the receptacle.
c. Stored in a secure place.
When the tool is not in use, keep it stored in a dry place out of the reach of children.
SERVICE AND REPAIRS:
All quality power tools will eventually require servicing or replacement of parts because of wear form normal
use. To assure that only authorized replacement parts will be used and that the double insulation system will
be protected, all service (other than routine maintenance) must be performed by an AUTHORIZED JOHN
DEERE DEALER.
20 Metal Cutting Saw Operator's Manual
Page 21

Accessories
ACCESSORIES:
WARNING: ACCESSORIES FOR THIS POWER TOOL ARE MENTIONED IN THIS INSTRUCTION
MANUAL. THE USE OF ANY OTHER ATTACHMENT OR ACCESSORY CAN BE
DANGEROUS AND COULD CAUSE INJURY OR MECHANICAL DAMAGE.
Part # Application
AT-4423-J Mild steel cutting (solid plate or bar, 5/16" / 8 mm maximum)
180 mm x 2.0 mm x 36 teeth
AT-4424-J Aluminum cutting (solid plate or bar, 3/8" / 9.5 mm maximum)
180 mm x 1.8 mm x 48 teeth
AT-4425-J Stainless steel cutting (solid plate or bar, 1/4" / 6 mm maximum)
180 mm x 1.8 mm x 48 teeth
NOTE: Accessories are subject to change without any obligation on the part of JOHN DEERE.
Metal Cutting Saw Operator's Manual 21
Page 22

TROUBLESHOOTING:
Low Blade Life/Teeth Chipping:
- Wrong blade for the type of material.
a. AT-4423-J for mild steel up to 5/16" solid.
b. AT-4424-J for aluminum up to 3/8" solid.
c. AT-4425-J for stainless steel up to 1/4" solid.
- Aggressive contact with blade into material. Let the blade do the work.
- Too much vibration due to insufficient clamping, worn or bent blade, or worn parts (see “Saw
Vibrates” below).
Machine will not turn on:
- Check overload. If it has been tripped, it will extend out. Push in after allowing saw to cool down to
re-set. Check continuity.
- Inspect power cord for damage. Check continuity. Replace if needed.
- Inspect brushes for excessive wear. Replace if needed.
- Do not exceed 30 minutes run time without cool down of saw.
- Check trigger switch for continuity. Replace if needed.
Losing Power:
- Inspect brushes and replace if needed.
- Extension cord too long. Limit cord length to 100’.
- Extension cord too thin. Use 12 AWG or larger.
Troubleshooting
Blade Guard Sticks:
- Remove guard and remove any foreign material. Wipe any excess material from guard & face
plate. If contact surface of guard or face plate is galled, use emery cloth or fine sandpaper to
smooth out surfaces. Guard must move freely. Use light grease on mating contact surfaces to aid
in movement.
- Check guard return spring for sufficient tension. Replace if spring is weak.
- Check guard for distortion. Replace if distorted or damaged.
Blade Spins on Spindle:
- Check for proper tightness and installation. Inspect Inner blade flange and outer blade flange
centering shoulder for wear or damage. If the flanges are allowed to slip too many times, they will
no longer hold the blade properly. Replace if wear is excessive.
- Check flange mating surfaces for flatness. Replace if excessive distortion exists.
- Check to ensure flat washer and lock washer are present between bolt head and outer blade
flange.
Saw Vibrates:
- Check blade for tightness.
- Inspect inner blade flange and outer blade flange centering shoulder for wear or damage. Replace
if needed.
- Check to ensure work is properly clamped. Both primary and drop piece can cause vibration.
- Check bevel lock and depth lock for tightness.
22 Metal Cutting Saw Operator's Manual
Page 23

Notes
Metal Cutting Saw Operator's Manual 23
Page 24

24 Metal Cutting Saw Operator's Manual
#37-0746-021403
©Copyright 2003, John Deere
Manufactured for Deere & Company,
Moline, Illinois 61265
7-inch Metal Cutting Saw Operator's Manual
 Loading...