

Page 1
EmmJENN.AIR
Use and Care Manual
Gas Range
Models FCG20100, FCG20500 & FCG20510
gill[lilt
Model FCG20510
Page 2
WARNING: If the information in this manual is not
followedexactly,afireor explosionmay result causing
property damage, personal injury or death.
Do not store or use gasoline or other flammable
vapors and liquids in the vicinity of this or any other
appliance.
- WHAT TO DO IF YOU SMELL GAS
• Do not try to light any appliance.
• Do not touch any electrical switch;do not useany
phone inyour building.
• Immediatalycallyourgassupplierfrom aneighbor's
phone. Follow the gas supplier's instructions.
• If you cannot reach your gassupplier, call the fire
department.
• Extinguish any open flame.
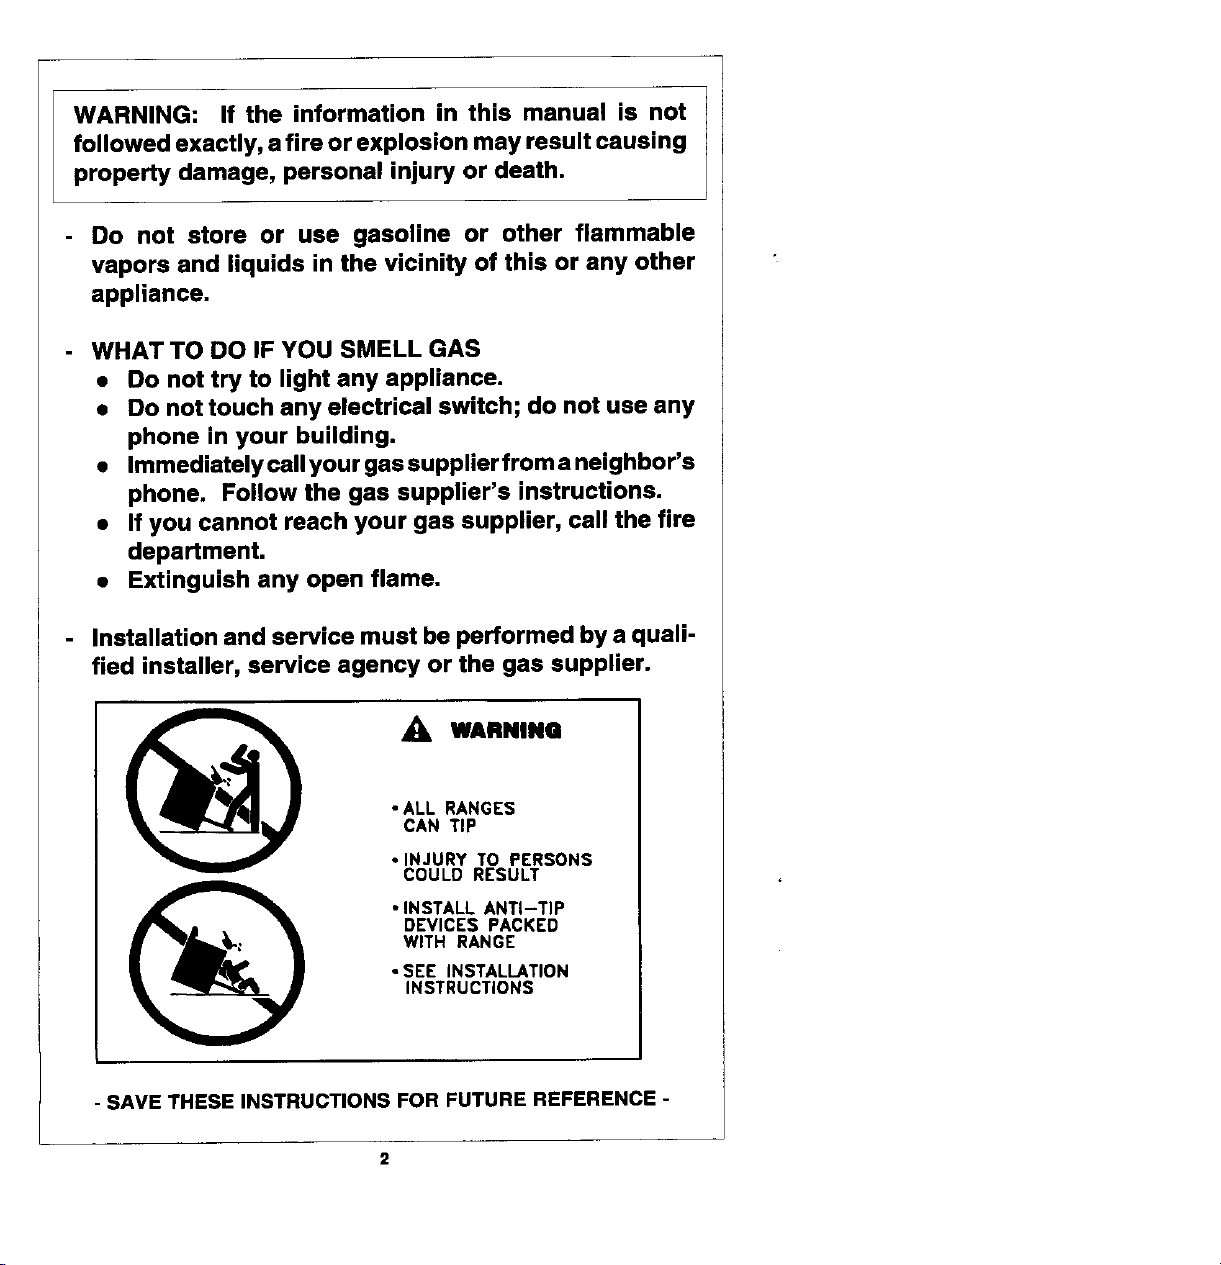
Installationand service must be performed by a quali-
fled installer, service agency or the gas supplier.
• ALL RANGES
CAN TIP
• INJURY TO PERSONS
_, WARNINa
COULD RESULT
DEVICES PACKED
WITH RANGE
• SEE INSTALLATION
INSTRUCTIONS
• INSTALL ANTI-TIP
- SAVE THESE INSTRUCTIONS FOR FUTURE REFERENCE -
Page 3
Congratulationson yourchoiceof aJenn-Airgasrange.Yourrangehas
four sealedgas burners with a self-cleaning electronic controlled oven.
As you use your new range, we know you will appreciate the many
features that provide excellent performance, ease of cleaning,
convenience and dependability.
Before you begin cooking with your new range, please take a few
minutes to read and become familiar with the instructionsin this book.
On the following pages, you willfind a wealth of information regarding
allaspects of usingyour new range.
Byfollowingthe instructions carefully, youwill be able to fully enjoy and
properlymaintain yourrangeand achieve excellent resultswith the food
you prepare.
Should you have any questions about using your Jenn-Air gas range,
write to us. Be sure to provide the model number.
Jenn-AJrCustomer Assistance
c/o Maytag CustomerService
P.O. Box 2370
Cleveland, TN 37320-2370
3
Page 4
Appliance Usage
Cooktop& Oven Controls........................................................ 9
CleaningYour Range........................................................ 32-34
OtherHintson Caringfor Your Range.............................. 35-37
AdjustingOven Temperature.............................................. 37
LightBulbReplacement...................................................... 36
Safety Precautions............................................................2, 5-8
ServiceInformation...........................................................38-39
Cooktop Usage
HowA SurfaceBurnerWorks................................................ 12
CookwareSelection............................................................... 11
SurfaceControls..................................................................... 10
Oven Usage
Baking
General Recommendations ................................................ 22
Baking Charts ......................................................................23
Broiling............................................................................... 26-27
Cleaning
Self-Cleaning .................................................................. 28-31
Oven Controls & Operations ............................... 13-14 & 17-18
Clock Controls .................................................. 15-16 & 20-21
Rack Positions..................................................................... 19
Roasting
General Recommendations ................................................24
Roasting Chart..................................................................... 25
4
Page 5
Read before operating your range
All appliances - regardlessof the manufacturer- have the potential
throughimproperorcarelessuseto createsafetyproblems.Therefore
the followingsafety precautionsshouldbe observed:
1. Be sure your applianceis properlyinstalledand groundedby a
qualifiedtechnician.
2. Never use your appliancefor warmingor heating the room. This
warningisbasedon safetyconsiderations.
3. Children should not be left alone or unattended in area where
applianceisinuse. Theyshouldneverbe allowedtositor standon
any partofthe appliance.
4. Wear properapparel. Loose-fitting or hanging garments should
neverbe wornwhileusingthe appliance.
5. Do notrepairorreplaceanypartof theapplianceunlessspecifically
recommendedinthismanual. Allotherservicingshouldbe referred
to an authorizedJenn-AirServiceContractor.
6. Do not storecombustiblematerials,gasolineor other flammable
vaporsandliquidnearrange.Thisalsoappliestoaerosolspraysand
aerosolspray cans.
7. Do notuse wateron greasefires. Smotherfire orflame or use dry
chemical or foam-type extinguisher.
8. Useonly dry potholders. Moistor damp potholderson hot surfaces
mayresult in bums from steam. Do not use atowel or other bulky
cloth.
9. Select cookware large enough to properly contain food and avoid
boilovers or spillovers. This will save on cleaning and prevent
hazardousaccumulationsoffood,sinceheavysplatteringorspillovers
left on a range can ignite. Pan size isespecially important indeep
fat frying.
10. Never leave rangeunattended at Hi heatsettings. Boilover causes
smoking and greasy spillovers that may ignite.
11.TYPE OF COOKWARE - Avoid pans that are unstable and easily
tipped, tn choosing pans, lookfor easily-grasped handles that will
stay cool. Pansthat are too heavy when filled with food canalso be
a hazard. Ifpan handles twistand cannot be tightened,discard the
pan.
5
Page 6
12. HANDLES - Always turn pan handles to the side orback of the range
- not out into the room where they are easily hit. COOKWARE
HANDLES SHOULD BE TURNED INWARD AND NOT EXTEND
OVER ADJACENT SURFACE BURN ERS to minimize burns, ignition
of flammable materials, and spillage due to unintentional contact
with the cookware.
13. CAUTION - Do not store items of interest to children in cabinets
above range-children climbing on the range to reach items could be
seriously injured.
14. Do not touch surface burner areas or perimeter area around cooktop
or interiorsurfaces of ovens. During and after use, these areas may
be hot enough to cause burns. Avoid contact with these areas by
clothing or other flammable materials untilthey have had sufficient
time to cool. Other surfaces may become hot enough to cause
burns-among these surfaces are the upper door frame and door,
oven vent opening and surfaces near the opening,and the top edge
of the control panel.
15. Do not heat unopened food containers. Build-up of pressure may
cause container to burst and result in injury.
16. Keep all controls "OFF" when unit is not in use.
17. GREASE - Grease is flammable and should be handled carefully.
Never leave any cooking operation unattended. Let fat cool before
attempting to handle it. Do not allow grease to collect around the
range or in the vents. Wipe up spillovers immediately.
18. Ifthe range is installednear a window, proper precautions should be
taken to prevent curtainsfrom blowing over burners creating a FIRE
HAZARD.
19. Do not use aluminum foil to line burner spillover bowl. Restriction of
normal air flow may result in unsafe operation.
20. Clean only parts listed in this manual and use procedures
recommended.
21. Always allow hot pans to cool ina safe place out of the reach of small
children.
22. A faint gas odor may indicate a gas leak, If a gas odor is detected,
shut off the gas supply to the range, Call your installer or local gas
company to have the possible leak checked. Never use a match or
other flame to locate a gas leak.
23. Use care when opening oven door. Let hot air or steam escape
before removing or replacing food.
6
Page 7
24. Keep ovenvent ductsunobstructed.Your rangeis ventedthrough
thebaseofthebacksplash.Neverblockovenventorairintakes.Do
notobstructtheflow ofcombustionandventilationair. Restriction
ofair flowto the burnerpreventsproperperformance.
25. Alwaysplaceovenrecksindesiredlocationwhileoveniscool.Ifrack
mustbe movedwhileovenis hot,donotletpotholdercontactoven
burnerflame.
26. Do notclean doorgasket. The doorgasketis essentialfor a good
seal. Careshouldbetaken notto rub,damage,or movethe gasket.
27. Donotuseovencleaners.Nocommercialovencleanerorovenliner
protectivecoatingof any kindshouldbe usedinoraroundany part
ofthe oven.
28. CAUTION: BEFORE SELF-CLEANING THE OVEN, REMOVE
FOOD, BROILERPAN AND OTHER UTENSILS.
29. Beforeservicingyourappliance,disconnectpowerto the range at
themainfuseorcircuitbreakerpanelandattheelectricalreceptacle.
30. Glazed cookware - only certain types of glass, glass-ceramic,
ceramic,earthenware, or other glazed cookwareare suitablefor
cooktopsurface withoutbreaking due to the sudden change in
temperature. Use only such cookware as you know has been
approvedforthis purpose.
31. Misuseofappliancedoors,suchasstepping,leaningorsittingonthe
door may resultin possibletippingofthe appliance,breakage of
door,and seriousinjuries.
32.Avoid placingthe range in a main "trafficpath" or in an isolated
locationwithnocounterspacenearby. Visualizethe oven in use
beforeselectinga location. Remember that open ovendoorsmay
blocka passagewayand createa hazard.
33.Alwaysremovesoiledbroilerpanfromthebroilercompartmentafter
cookingfor grease left In the pan may become hot enough to
ignite.
34. Do not use ovenforstoragespace.
35. PREPARED FOOD WARNING: Follow food manufacturer's
instructions. If a plasticfrozen food containerand/orits filmcover
distorts,warpsorIsotherwisedamagedduringcooking,immediately
discardthefoodanditscontainer.The foodcouldbecontaminated.
36. Be sure all packingmaterialsare removedfrom the rangebefore
operatingit to preventfire or smoke damage shouldthe packing
materialignite.
7
Page 8
37. WARNING: To reduce the risk of tipping of the appliance, the
appliance must be secured by a properlyinstalled anti-tipdevice. To
check if device is installed properly: Use a flashlight and look
underneath the range to see that one of the rear leveling legs is
engaged in the bracket slot. When removing appliance for cleaning,
be sure anti-tip device isengaged when range is replaced. The anti-
tip device secures the rear leveling leg to the floor, when properly
engaged.
38. Have the installershow you the locationofthe gas shut off valve and
how to shut itoff in an emergency.
39. Always place a pan of food on a surface burner before turning it on,
and turn it off before removing the pan to prevent exposure to the
burner flame.
40.This appliance has been tested for safe performance using
conventional cookware. Do not useany devices or accessories that
are not specificallyrecommended in this manual. Do not use eyelid
covers for the surface units, stovetop grills, or add-on convection
systems. The use of devices or accessories not expressly
recommended in this manual can create serious safety hazards,
resultinperformance problems, and reducethe lifeofthe components
of the appliance.
IMPORTANT SAFETY NOTICE AND WARNING
TheCaliforniaSafeDrinkingWaterandToxicEnforcementActof1986(Proposition65)
requirestheGovernorofCaliforniatopublisha listofsubstancesknowntotheStateof
Californiatocausecanceror reproductiveharm,and requiresbusinessesto warn
customersof potentialexposuresto suchsubstances.Usersofthisapplianceera
herebywarnedthatwhentherangeisengagedintheself-cleancycle,theremaybe
somelowlevelexposuretosomeofthelistedsubstances,includingCarbonMonoxide.
Additionally,usersarealsoherebywarnedthattheburningofgascanresultInlow-level
exposuretosomeofthelistedsubstances,includingbenzene,formaldehydeandsoot,
dueprimarilytotheincompletecombustionofnaturalgasorliquidpetroleum(LP)fuels.
ProperlyadjustedburnerswilJminimizeincompletecombustion.Exposureto these
substancescanbeminimizedbyproperlyventingtherangetotheoutdoors.
- SAVE THESE INSTRUCTIONS FOR FUTURE REFERENCE -
8
Page 9
37. WARNING: To reduce the risk of tipping of the appliance, the
appliance must be secured by a properlyinstalled anti-tipdevice. To
check if device is installed properly: Use a flashlight and look
underneath the range to see that one of the rear leveling legs is
engaged inthe bracket slot, When removing appliance for cleaning,
be sure anti-tip device is engaged when range is replaced. The anti-
tip device secures the rear leveling leg to the floor, when properly
engaged.
38. Have the installer show you the location of the gas shut offvalve and
how to shut it off in an emergency.
3g, Always place a pan of food on a surface burner before turning it on,
and turn it off before removing the pan to prevent exposure to the
burner flame.
40.This appliance has been tested for safe performance using
conventionalcookware. Do not use any devices or accessories that
are not specifically recommended inthis manual. Do not use eyelid
covers for the surface units, stovetop grills, or add-on convection
systems. The use of devices or accessories not expressly
recommended in this manual can create serious safety hazards,
resultinperformance problems, and reducethe life ofthecomponents
of the appliance.
IMPORTANTSAFETY NOTICEAND WARNING
The California Safe Drinking Water and Toxic Enfomement Act of 1986 (Proposition 65)
requires the Governor of California to publish a list of substances known to the State of
California to cause cancer or reproductive harm, and requires businesses to warn
customers of potential exposures to such substances. Users of this appliance are
hereby warned that when the range _sengaged in the self-c_ean cycle, there may be
somelowlevelexposuretosomeofthelistedsubstances,includingCarbonMonoxide.
Additionally,usersarealsoherebywarnedthattheburningofgascanresuttinlow=level
exposuretosomeofthelistedsubstances,includingbenzene,formaldehydeandsoot,
dueprimarilytotheincompletecombustionofnaturalgasorliquidpetroleum(LP)fuels.
Properlyadjustedburnerswillminimizeincompletecombustion.Exposureto these
substancescanbeminimizedbyproperlyventingtherangetotheoutdoors.
- SAVE THESE INSTRUCTIONS FOR FUTURE REFERENCE -
8
Page 10
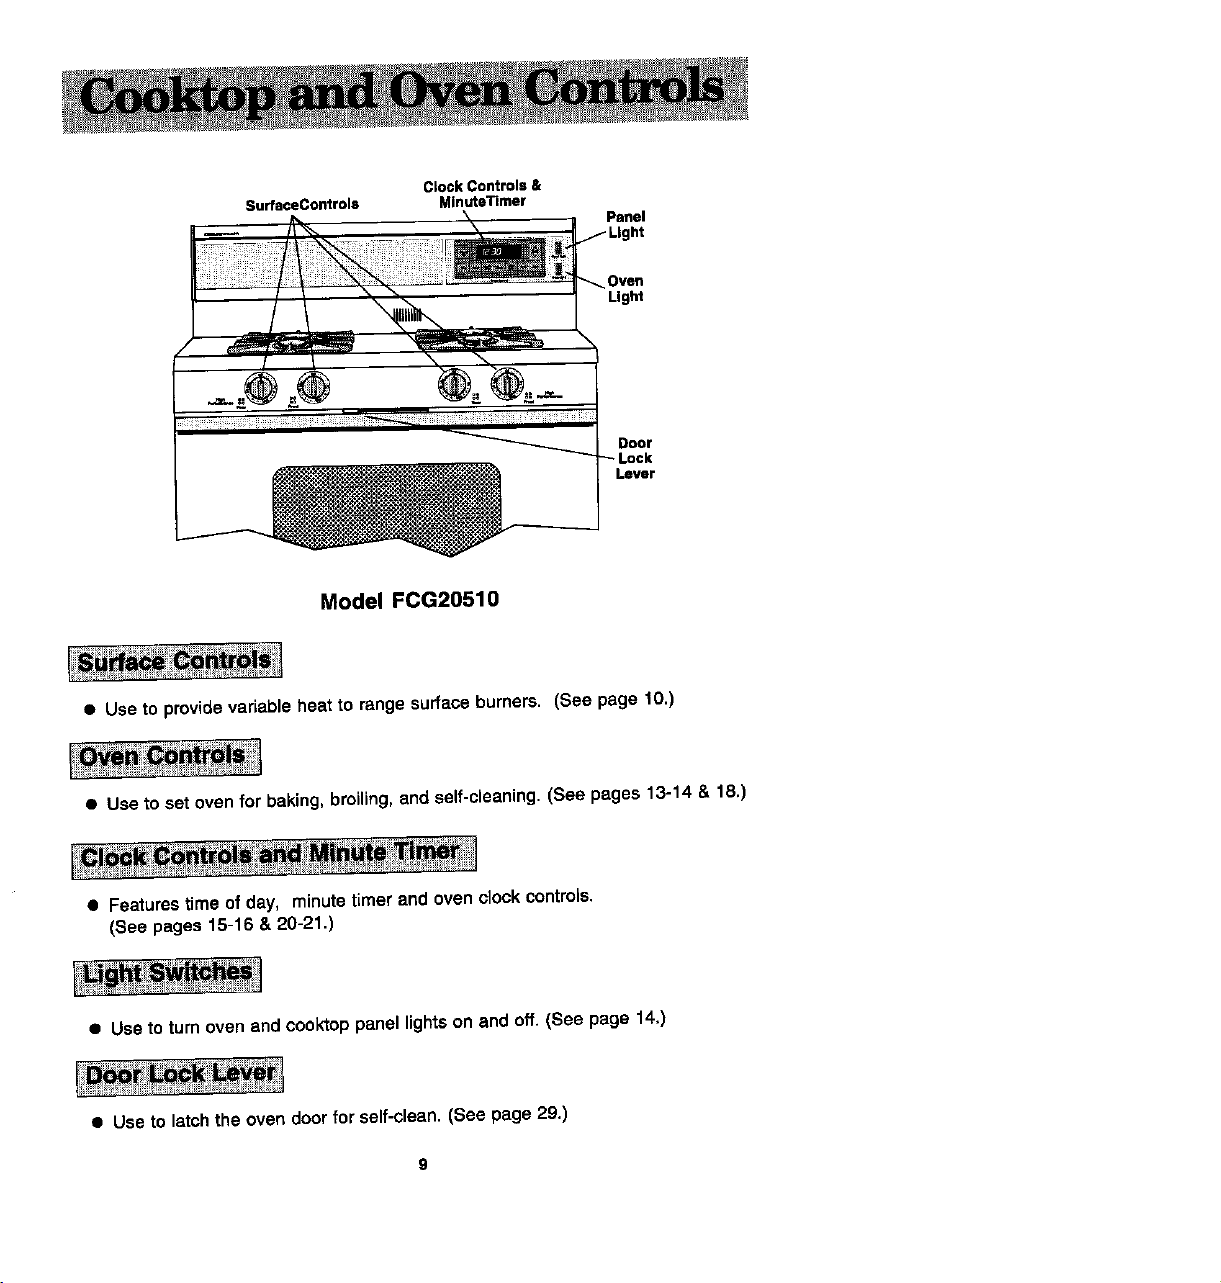
SurfaceControls MlnuteTimer
ClockControls&
Panel
Oven
Light
Door
Model FCG20510
• Use to provide variable heat to range surface burners. (See page 10.)
• Use to set oven for baking, broiling, and self-cleaning, (See pages 13-14 & 18.)
• Features time of day, minute timer and oven clock controls.
(See pages 15-16 & 20-21.)
• Use to turn oven and cooktop panel lights on and off. (See page 14.)
• Use to latch the oven door for self-clean. (See page 29.)
9
Page 11
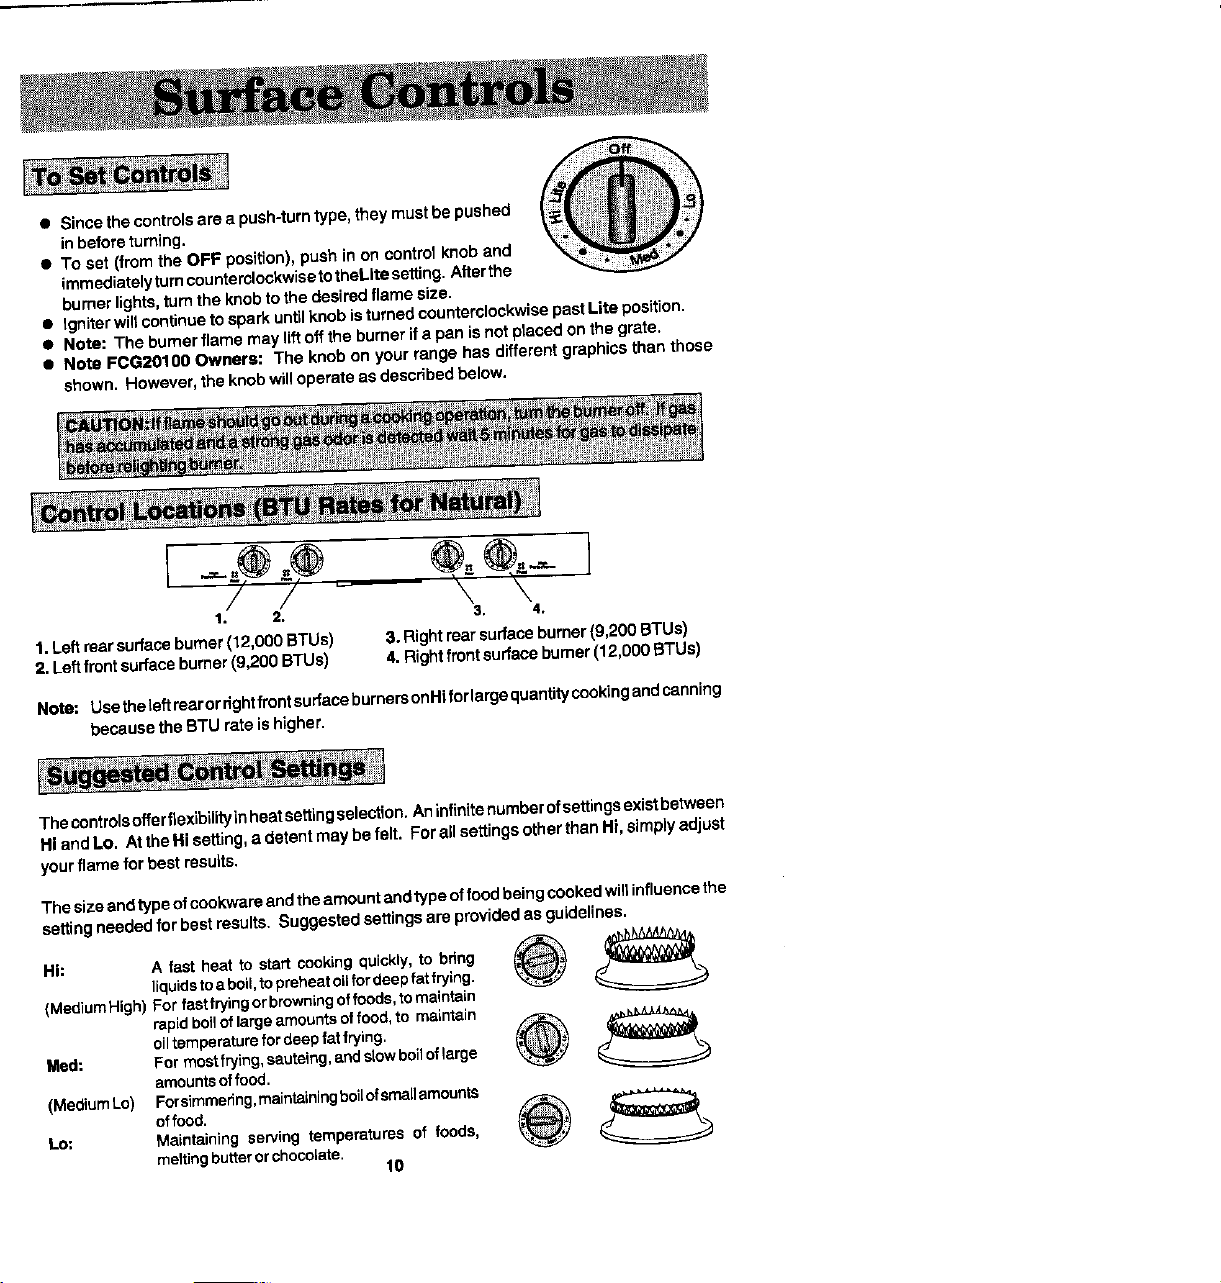
• Since thecontrolsare a push-turntype, they mustbe pushed
in before turning.
• TO set (from the OFF position),push in on control knoband
immediatelyturncountemlockwisetotheLtte setting. Afterthe
burner lights,turn the knobto the desiredflame size.
• tgniterwiltcontinuetosparkuntllknobisturnedcounterolockwisepastLiteposition.
• Note: The burner flame may lift off the burnerif a pan is not placed on the grate.
• Note FCG2010O Owners: The knob on your range has different graphics than those
shown. However, the knobwilloperate as describedbelow.
1. 2. 3, 4.
1.Left rearsurface bumer(12,000 BTUs) 3. Rightrear surfaceburner(9,200 BTUs)
2. Left frontsurface burner(9,200 STUs) 4. Rightfrontsurface burner(12,000 BTUs)
No_: Usethe]eftrearordghtfronteurfacebumereonHiforlargequantJtycookingandcsnning
because the STU rate ishigher.
The controlsofferflexibility inheatsettingselection.Aninfinitenumber ofsettingsexistbetween
HI and Lo. Atthe Hi setting,a detentmay be felt. For all settingsotherthan Hi, simplyadjust
yourflame for best results.
The size andtype ofcookware and the amount and typeoffoodbeingcooked wiltinfluence the
settingneeded for best results.Suggested se_ngs are provided as guidelines.
Hi: A fast heat to stal_ cooking quickly, to bring _
(MediumHigh) For fastfryingorbrowningoffoods,tomaintain
Meal: For mostfrying,sauteing,endstowboiloflarge
Lo: Maintaining serving temperatures of foods,
(MediumLo) ofF°rsimmering'rnaintainingb°i_°fsma_lemountSfood._
liquidstoa boil,topreheatoilfordeepfatfrying.
rapidboiloflargeamountsoffood,to maintain _
oiltemperaturefordeepfatfrying.
amountsoffood.
meltingbutterorchocolate.
f0
@
Page 12
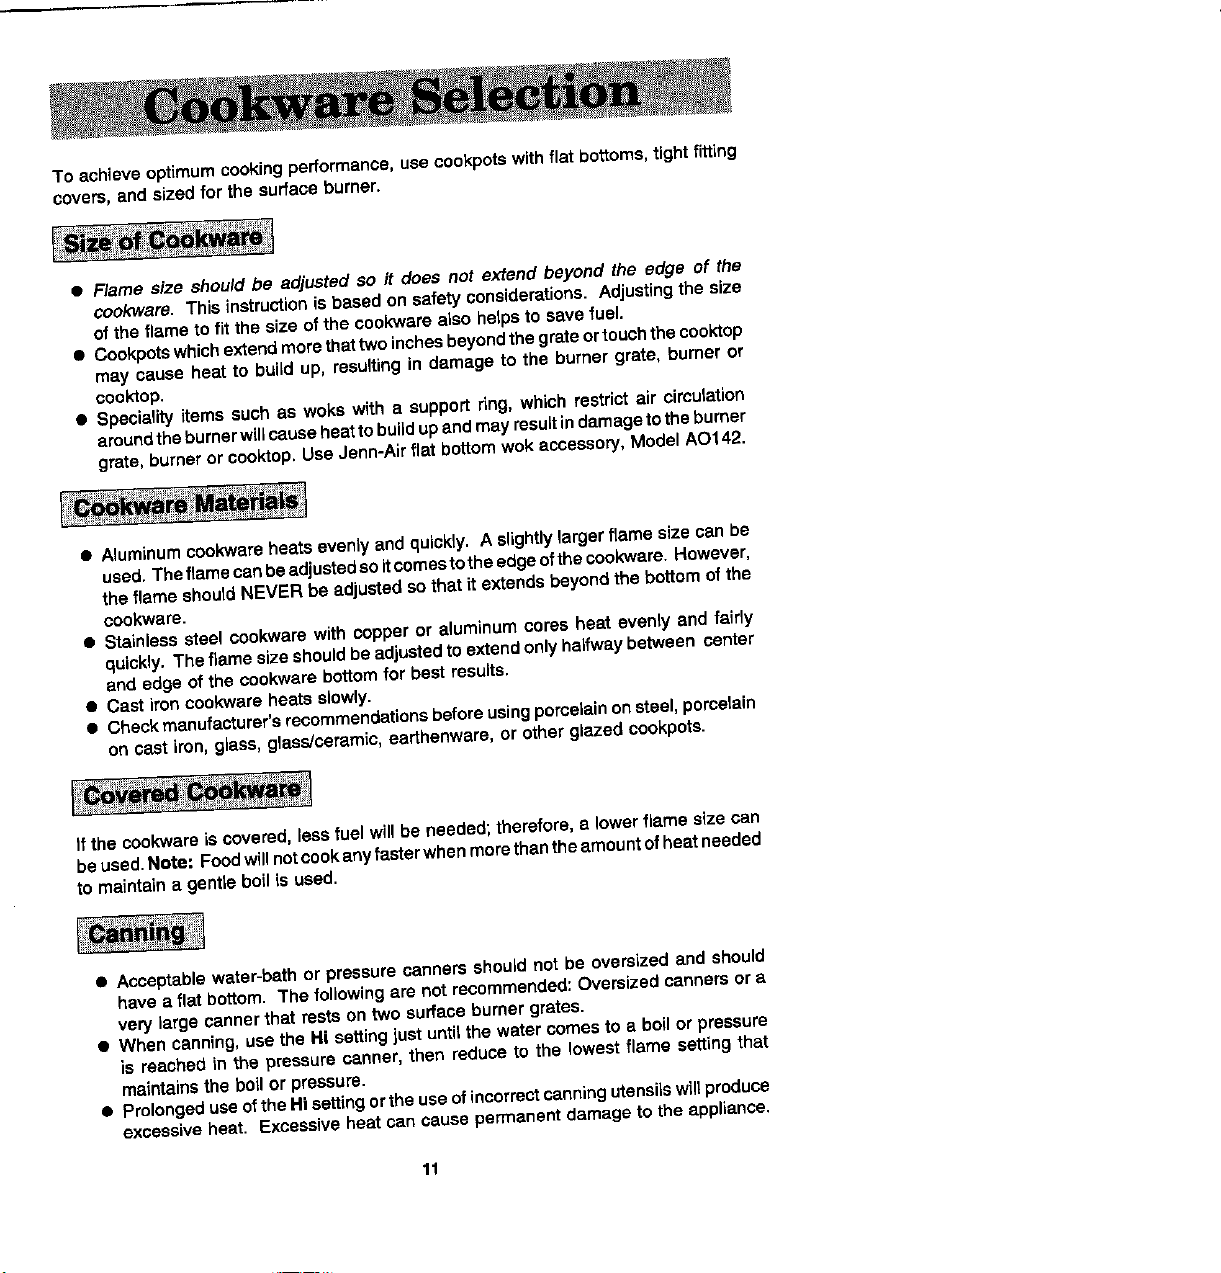
To achieve optimumcookingperformance,use cookpotswith fiat bottoms,tightfitting
covers,and sized for the surface burner.
• Flame size should be adjusted so it does not extend beyond the edge of the
cookware. This instructionis based on safetyconsiderations.Adjustingthe size
oftheflame tofit the size of the cookwarealso helpsto savefuel.
• Cookpotswhichextendmorethattwoinchesbeyondthe grateortouchtheeooktop
may cause heat to buildup, resultingin damage to the burnergrate, burner or
cooktop.
• Specialityitemssuch as wokswith a supportring,whichrestrictair cimulation
aroundtheburnerwillcauseheattobuildupandmayresultindamagetotheburner
grate,burneror cooktop.UseJenn-Air fiat bottomwok accessory,ModelAO142.
• Aluminum cookware heatsevenly and quickly. A slightlylarger flamesizecan be
used.Theflamecanbeadjustedsoitcomestotheedgeofthecookware.However,
theflame shouldNEVER be adjustedsothatit extendsbeyondthe bottomof the
cookware.
• Stainless steel cookwarewithcopper or aluminum cores heat evenlyand fairly
quickly. The flame sizeshouldbe adjustedtoextendonlyhalfwaybetween center
and edge of the cookwarabottomfor best results.
• Cast ironcookwareheatsslowly.
• Checkmanufacturer'srecommendationsbeforeusingporcelainonsteel,poree[ain
on castiron, glass, glass/ceramic,earthenware,or otherglazed cookpots.
If the cookwareis covered, lessfuel willbe needed;therefore, a lowerflame sizecan
beused.Note: Foodwillnotceokanyfasterwhenmorethantheamountofheatnaeded
to maintaina gentleboilisused.
• Acceptablewater-bathor pressurecannersshouldnot be oversizedand should
have a flat bottom. The followingare notrecommended:Oversizedcannersor a
very largecannerthat restson two surface burner grates.
• When canning,usethe Hi settingjustuntilthewatercomesto a boil orpressure
is reached in the pressurecanner,then reduce to the lowestflame setting that
maintainsthe boilorpressure.
• Prolongeduseof the Hisettingortheuseof incorrectcanningutensilswillproduce
excessive heat. Excessive heat can cause permanent damageto the appliance.
11
Page 13

WhenthecontrolknobisturnedON, gas willflowintothe bumer. The solidstateigniter
willclickuntilthegasisignited.(Note: Allburnerigniterswillsparkregardlessofwhich
burneris being operated.)
A properlyadjustedburnerwithcleanportswill lightwithina few seconds. The cone-
shapedflamewillbeclearblueincolorwitha clearlydefinedinnercone. There should
be notraceofyellowintheflame. If the burnerflameisyellow,liftsoff theports,or is
noisy,the airgas mixturemay be incorrect. Therefore,contact a service technician to
makethe needed adjustment.
The infinitesurfacecontrolsprovideflexibilityin heatsettingselection.(See page tO.)
Incaseof prolongedpowerfailure,youcanmanuallylightthesurfaceburnerbyholding
a lightedmatchnearthe burnerportsandslowlyturningthecontrolknobcounterclock-
wise(afterdepressing)tothe Lite setting.
Caution: When lightingthe surface burner, besureall ofthe controlsare in the OFF
position.Strikethe matchfirstandhold itinpositionbeforeturningtheknob
tothe Llte position.
Note: Becauseyouroverheadhoodfan iselectricit willnot workduringa power
failuresosmokeand condensationcangather,
The Lo settingshouldproducea stableflame
when turningthe knob from HI to Lo. The
flameshouldextendtotheouteredgeofthe lip
on the burner cap when adjustedfor the Lo
setting. Plus,theflamemustbe stableon all
portson Lo setting.
To adjust: Operatebumeron Hi for about5
minutesto preheat burner cap. Turn knob
backto Lo; removeknob,and insert a small
screwdriverintothe centerof the valvestem.
Adjustflamesizeby turningadjustmentscrew
ineitherdirectionwhileholdingthevalvestem
securely.
Flamemustbe of sufficientsizeto be stableonall burnerports. If flame adjustmentis
needed,adjustONLY onthe Lo setting. Neveradjustflame size on a highersetting.
Note; All gasadjustmentsshouldbedonebya qualifiedserviceronly.
12
Page 14

Display Window: Showstime of day,timer,and oven functions.
Oven Light Switch (Controt Panel): Whenthe door is closed, pushthe Oven Light
Switchtoturnovenlightonoroff. Models FCG2O500and FCG20510: The ovenlight
automaticallycomes onwheneverthe ovendoorisopened.
Cook'topPanel/Backsplesh Light Switch (Control Panel) (Model FCG20510):Push
the Panel LightSwitchto turn the backsplashlighton or off.
• Show time of day.
• Countdownof time remainingwhenusingtime functions.
• Showtemperatureofoven as it risesto roachprogrammedtemperatureandthe
settemperatureonce itis reached.
• Serveas a reminderto latchovendoorfor self-cleaningoperationwhenthe word,
door, is displayed.
• Recallprogrammedtemperatureor time when commanded.
• Flashto promptnext step.
• Indicatestatusof programmedfunction.
• Show programmedfunctionwhen recalled.
IMPORTANT
DO NOT MOVE DOOR LOCK LEVER TO THE RIGHT DURING A COOKING
OPERATION. If the door locklever is movedto the lockposition,the cooking
operation_ automaticallybecancelledand _door"willappear in the display.
14
Page 15

When electrical power is supplied or after power interruption, the last clock time
displayedbefore powerwas interruptedwillflash.Time will advance and continueto
flashuntilclockisreset.
To set time of day:
1. Touch Clook Pad.
IndicatorwordsSET TiME willflash and time digitswillappearinthe Display. (If
morethan30 secondselapse betweentouchingClock Pad andtouchingtheUp
orDownArrow Pads,theClock Padmustbetouchedagainin ordertosetclock.)
2. Touchthe Up or Down Arrow Pads in either directionuntilcorrecttime of day
appearsin Display.
Note: Three secondslater,time of daywill automaticallybe entered.
To recalltime of day when another time function is showing: TouchClock Pad.
(Note: To returnto anothertime functionpad, touchthe appropriatepad.)
To change time of day set on clock: Repeat above sequence.
Note: ClockTimecannotbechangedwhenoven hasbeen programmedforTimed
Bakeor Self-Clean. Cancelprogram before reprogrammingclock.
15
Page 16

Important: ThisintervatTimercanbe usedtoremindyouwhena period,upto9 hours
and 50 minutes,expires. It can be usedIndependently of any other even activityand
canbesetwhileanotherovenfunotionisoperating.TheTimerdoesnotcontroltheoven.
To set Timer:
1. Touch Timer Pad.
The IndicatorWordsSet Timer willflesh and ":00" appears inthe Display.
2. Touchthe Up Arrow Pad untildesirednumberof hoursand minutesappearin
Display.
Note: Ifmore than30 secondselepsebetweentouchingTimer Pad andtouching
theUp Arrow Pad, theTimer Pad mustbe touchedagain toset the numbers.
Important: Whenenteringhoursandminutes,hoursaretothe leftofthe colonwith
theHr Indicatorwordandminutesaretothe rightofcolon.Dudngthelast minute,
countdownwillbe shownin seconds.
Exemple: Touch the Up Arrow Pad untilthe Displayshows: "0HR:05" for 5
minutesor "5 HR:00"for 5 hoursand0 minutes.
Io-.os_
5 minutes
Is-00_l
5 hoursand 0 minutes
Countdownwillautomaticallystartafter3 seconds. At end oftimeset, the Timer
willbeep (prolongedbeep) 1 time.
To cancel Timer:
1. Hold in Timer Pad for 3 seconds.
OR
2. A. Touch Timer Pad
B, Touchthe Down Arrow Pad until":00" appearsin Display Window.
NOTE: TouchingCancel/Off Pad willnotcanceltimeroperationbutwillcancelALL1
selectedoven programming.
16
J
Page 17

• Your appliancefeaturespilotlessignition. A glow barwill fightthe oven burner.
• Be sure oven control is set in the OFF positionprior to supplying gas to the
appliance,
• Withthistypeof ignitionsystem,the ovenwillnotoperateduringapowerfailureor
ifthe ovenisdisconnectedfrom thewall outlet. No attempt should be made to
operate oven during a power failure.
The sizeandappearanceof aproperlyadjusted ovenburnerflame shouldbe asshown:
I
Coneincenterissmaller
-- b _ _ Coneapprox,I/2-ineh
The oventemperature is maintainedby cycling the burneron and off. After theoven
temperature has been set, there will be about a 45 second delay before the burner
ignites. This is normal and no gas escapes during this delay.
Duringthe clean cycle, and someextended oven cooking operations, you may hear a
"popping" sound when the burner cycles off. This is a normal operating sound of the
burner.
The ovenvent is locatedat the base of the backsplash. When the oven is inuse, this
area mayfeel warm or hotto the touch. To preventproblemsdonot:
a. blockthe ventopening
b. touchthe area nearthe opening
and
e. place utensils near the vent opening,
17
Page 18

To set oven on bake"
t. Place even racks on proper reck positions.(See p.19)
2. Touch Bake Pad.
indicatorWordBAKEand "000°" will appearinthe Display.
Note: If morethan30 secondselapsebetween touchingBake Pad andtouching
theUp orDownArrow Pads, the ovenisnotsetand Displaywillreturntoprevious
Display.
3. TouchtheUp orDown Arrow Pads untildesiredoventemperatureappearsinthe
Display.(Allowablerangeis170° to550°.) Note: Thefirsttap onsnArrow Padwill
giveyou350° in the Display. After3 secondsthe ovenwillbeginto preheat. The
IndicatorWordsON and BAKEwillappearinthe Display.The temperatureshown
willbe 75° orthe oventemperaturewhicheveris higher.
Example: If at 10 o'clockyouset the ovenfor350°forbaking,after3 secondsthe
Displaywillshow:
5 °
I/0:00
Duringthe preheat,the Displaywillshowa risein 5°incrementsuntilprogrammed
temperatureis reached. Whentheoven ispreheated,the ovenwillbeep, theON
and BAKE indicatorWords and programmedoventemperaturewillremaininthe
display.
Note: Ovenwillpreheatforapproximately7 to 10 minutes.
To recalltemperature set during preheat: Touchthe Bake Pad. Temperaturewill
be brieflydisplayed,thenwillautomaticallyreturnto on-goingprogram.
To change temperature set: TouchtheBake Padand touchthe Up or Down Arrow
Padsfor a newdesiredtemperature.
4. TouchCancel/Off Pad to turnoven off at end of baking.
18
Page 19

The rackpositionsnotedare generallyrecommendedforthebestbrowningrasultsand
mostefficientcookingtimes. Referto bakingand roastingsectionsforrecommenda-
tionsfor specificfoods.
C
5
rK/_// !! ! ! t i _ \ Y\',L ._._ 2
%
4-. -- -- _\; t
Use Reck Position #1:
Largecutsof meat and largepoultry, angelfoodcake, frozen fruit pie, dessert
souffle.
Use Reck Position #2:
Roastingsmallcutsofmeat,cakes(tube,bundtorlayer)custardpie,pieshell,large
casseroles,loavesof bread.
Use Rack Position #3:
Most baked goodson cookiesheets, frozen conveniencefoods,fresh fruit pie,
cream pie, cakes (sheet and layer), maindish souffle.
Use Rack Position #4:
Mostbroiling.
Use Rack Position #5:
Toastingbread.
Multiple Rack Cooking:
Two racks,use#2 and #4 or #1 and#4.
19
Page 20

*Omitsteps5 & 6 ifyou want bakingto start immediately.
To set oven to start immediately and shut off automatically:
1. Touch Bake Pad
IndicatorWordBAKE and "000°" will be shownin Display.
2. TouchtheUp or Down Arrow Padsuntildesiredoventemperatureappearsinthe
Display.After 3 secondstheoven will begin topreheat. The IndicatorWords ON
and BAKEwill appear in the Display. The temperatureshownwill be 75° or the
temperatureof the oven,whicheverishigher.
Example; Ifat 10o'clockyousetthe ovenfor350oforbaking,the Displaywillshow:
Ilo.oo
OurJngthepreheat,the DisplaywJ]lshowa riseJn5oIncrementsuntJJprogrammed
temperatureisreached. When theoven is preheated,theovenwillbeep,the ON
and BAKEIndicatorWords andprogrammedoventemperaturewillremain inthe
display.
3. TouchCook Time Pad.
IndicatorWordsSET COOK TIME willflash and Displaywill show"OHR:00".
4. Touchthe Up Arrow Pad toenter cookinghoursin5 minuteincrements.
Hoursare to left of colonand minutestoright of co/on.
(Allowablerange is 10 minutesto 11 hoursand55 minutes.)
Example: If cookingtimeselectedfor the ovenis 2 hoursand 30 minutes,after3
secondsthe Displaywillshow:
12":gO
and,theovenbeginstopreheat.
Impodant: Oven willpreheatforapproximately7 to 10 minutes.At end of
programmedCookTime,ovenwillshutoffautomatically;retainedheatwillcontinue
tocookfood.Clockcontrolledcookingisnotrecommendedforbakeditemsthat
requirea preheatedoven,suchascakes,cookies,pies,breads.Forthesefoods,
placefoodinpreheatedoven,thenuseTimertosignalend ofbakingtime.
At the end of programmedCook Time, the oven will shutoffautomaticallyand
intermittent "beeps"willsignal untilthe Cancel/Off Pad istouched.
20
Page 21

To set oven to start at future time and shut off automatically:
1.-4. FollowprecedingSteps1-4,
5. TouchStop Time Pad,
indicatorWordsSETSTOP TIME willflash. Displaywillshowthe calculatedstop
time basedoncurrenttime of day and cooktime,
6, Touch the Up Arrow Pad. A stop time can only be accepted for later intheday.
Note: Sincefoodcontinuestocookifleftinthe oven,itissuggestedthattheclock
controlsbe used primarilyto start the oven when no one is in the kitchen.
Provisionsshouldbe made to have the foodremovedas soonas the signal has
sounded.
Example: If at 10 o'clockyou set the oven for350° for bakingand 2 hoursand
30 minutescookingtime,the calculatedstoptimewouldbe "12:30". TheDisplay
willshow:
j
If youwant the stoptimeto be 1 o'clock,touchthe Up Arrow Pad until"1:00"
appearsinthe DisplayWindow, The DisplayWindowwillshow:
If youwant the DisplayWindowto returnto the currenttimeof day,touchClock
Pad, the DisplayWindowwillshow:
EIo.oo
Attheendofthedelayedperiod,the DELAY IndicatorWordwillgooffandtheoven
will begin to heat. 75°will beshown. As theoven heats,the Displaywill show
a risein incrementsof 5° untilprogrammedtemperatureis reached. At the end
of programmedCook Time, the ovenwillshut off automaticallyand intermittent
"beeps"will beheard.Touch Cancel/Off Pad to cancelbeeps.
To recall time function programmed: Touchtheappropriatetime pad.
To cancel: TouchCancel/Off Pad.
NOTE: Ifmorethan30secondselapsebetweentouchingafunctionpadandtouching
the Up Arrow Pad, the oven is notset and Displaywillreturn to previous
Display.
21
Page 22

• Whencookingfoodsfor the firsttime inyour new oven, use recipecookingtimes
andtemperaturesas a guide.
• Use testedrecipesfrom reliablesources.
• Preheatthe oven onlywhen necessary. For bakedfoodsthat riseand for richer
browning,a preheatedovenis better. Casserolescanbe star_edin a coldoven.
Preheatingtakesfrom 7 to 10 minutes;placefood inovenafter Preheat beep.
• Arrangeoven racksbeforeturningon oven. Followsuggestedrackpositionson
pages19 and 23.
• Allowabout2inchesofspacebetweentheovensidewallsandpanstoallowproper
air circulation.
• When bakingfoods in morethan one pan, placethem onoppositecornersof the
rack. b-'taggerpans when bakingon two racksso that one pan does not shield
anotherunlessshieldingisintended.(See above)
• To conserve energy, avoid frequent or prolongeddoor openings. At the end of
cooking,turn oven off before removingfood.
• Alwaystestfordoneness(fingertip,toothpick,sidespullingawayfrom pan). Donot
relyon time or brownnessasthe onlyindicators.
• Use goodqualitybakingpansandthe size recommendedinthe recipe.
• Dull,dark,enameledorglasspanswillgenerallyproduceabrown,crispcrust.Shiny
metal pansproducea light,goldencrust.
• Frozen piesinshinyaluminumpansshouldbe bakedon a cookiesheeton reck1
or be removedto a dull or glasspan.
22
Page 23

BakingChart
! ....
* The times given are based on specific brands of mixes or recipes
tested. Actual times will depend on the ones you bake.
23
!
Page 24

• Preheating is not necessary.
• Foropen panroasting,placemeatorpoultryonthe slottedportionofthetwo-piece
pan includedwiththe oven. Do notadd watertothe pan. Use open pen roasting
fortendercutsofmeat. Lesstendercutsofmeatneedto be cookedbymoistheat
in a coveredpan.
• For best results,a meat thermometeris the mostaccurate guide to degree of
doneness. The tip ofthethermometershouldbe locatedin thethickestpart of a
roast, nottouching fat, bone, or gristle. For turkeys and large poultryprOducts,
insertthe tip of the thermometer intothe thickestpartofthe innerthigh.
• Place roastfat side upto allowself bastingof meatduringroasting.
• Since meatscontinueto cookafter being removedfrom the oven, remove roast
from ovenwhen it reaches an internaltemperatureabout 5 degrees below the
temperaturedesired.
• Forlesslossofjuicasandeasiercarving,allowabout15minutesstandingtimeaffer
removingmeat from oven.
• Forbestresultsinroastingpoultry,thawcompletely.Duetothestructureofpoultry,
partiallythawed poultrywigcookunevenly.
• Minutes per poundwill vary according to the size, shape, quality,and initial
temperatureof meataswellastheelectricalvoltageinyourarea. Timesarebased
on refrigeratorcold meat.
• A largecut ofmeat will usuallyrequirefewer minutesper poundto roastthana
smallercutof meat.
• Sincethe breastmeat on a largeturkeycooksmorequicklythanthe thigharea,
placea foilcap overthe breastareaafterdesiredbrownnessisreachedtoprevent
overbrowning.(See above)
• A stuffedturkeywillrequireanextra30 to60 minutesdependingonsize. Stuffing
shouldreachan internaltemperatureof 165°F.
• Use meat roastingcharts in standard cookbooksfor recommendedtimes and
temperaturesfor roastingcutsof meat notfoundonp.25.
24
Page 25

25
Page 26

1. Placeovenrackonthe rackpositionsuggestedinthe chart. Distancefrombroiling
burnerdepends onfoods beingprepared. Rackposition#4isusuallyrecommended
unless otherwise stated.
2. Touch Broil Pad.
indicator Word BROIL and 000° will appear in the Display.
Note;/f more than 30 secondselapses between touching Broil Pad and touching
the Up or Down Arrow Pads, the oven is not set and the Display will return to
previous Display.
3. Touch the Up Arrow Pad to select Hi Broil or the Down Arrow Pad to select Lo
Broil.
UseHi Broilfor mostbroil operations. Whenbroiling longer cookingfoods such as
porkchops, poultryorthick steaks, selectLo Broil. Lowtemperature broiling allows
food to cook to the well done stagewithout excessive browning.
Three seconds later, the broil burner will come on and the IndicatorWords BROIL
and ON will remain inthe Display.
Example: If at 4 o'clock you setthe oven for broil (HI), the Display will show:
4, Placefood onbroiler pan providedwith oven. PREHEATbroil burnerfor 5 minutes.
5. Touch Cancel/Off Pad to turn off oven when food is cooked.
26
Page 27

• Tendercutof meat ormarinatedmeatsarebestfor broiling.This includesriband
loincutsofsteak,groundbeef,ham steaks, lambchops, poultrypiecesor fish, For
best results,steaksshouldbe at least 1" thick. Thinnersteaks shouldbe pan-
broiled.
• Do notcoverbroilergridwithfoilsincethispreventsfat drippingsfromdraininginto
bottomof pan.
• Beforebroiling,removeexcessfatfrommeatandscoreedgesoffat (donotoutinto
meat)to prevent meats from curling. Salt aftercooking.
• To preventdry surfaceon fishor lean meats,brushmeltedbutteron top.
• Foodsthat requireturningshouldbe turnedonly onceduringbroiling. Turn meat
withtongs to avoid piercingand lossofjuices.
Broiling Chart
(Preheated)
..........................................................................._=................. _:_ _ .......... _"_ _......_i
i .....
= , =
. o ._:
i ......................................................................,............
..............
_) _ _ ...... _ .........
....... , i
...._ _ _ i_ ,_,
...... ........= ..........
_;_ ........ _!__ i_I_i_" ,==......... _
Note=Thischartis a suggestedguide. The timesmay vary withfood beingcooked.
27
Page 28

When the ovencontrolsare set to CLEAN, the ovenheatsto temperaturesthat are
higherthanthoseusedforcooking.The hightemperaturescausefood soilto burnoff
and substantially disappear. While this occurs,a devicein the ovenvent helps to
consume normalamountsof smoke. The oven isvented atthe baseof the backsplash.
• Remove the masting/broiler pan and any other utensilsfrom the oven. These
utensils cannot withstandthe hightemperatures of the cleaning process.
• Clean spattersandspillsfrom thoseareas which will notbe cleanedduringtheself.
cleaningprocess:
- centerfront of oven and door near openingin door gasket.
- pomelainovendoorliner(area outsidethe doorgasket).
- oven frontframe.
To clean these areas, use hot water and
detergent, nonabrasive cleansers or soap
filled steel wool pads. Rinse thoroughly,
beingcarefulnottousean excessiveamount
ofwaterthat woulddampenthe doorgasket.
Soil/eft in these areas willbe more difficult to
remove after the self-cleaning process since
the high heat wit/bake on any soil that is
present.DONOTUSECOMMERCIALOVEN
CLEANERSTO CLEANTHESE AREAS.
• DO NOTATTEMPT TO CLEAN,RUB,ORAPPLYWATERTO GASKET ONOVEN
DOOR. The gasketis essentialfor a gooddoorseal. Rubbingor cleaningwill
damagethe gasket and mayaffectthe seal.
• Wipe upexcessgreaseandfoodspilloverswhichhave notbakedonthe bottomof
the oven. Large accumulationsof soilcancause heavysmokeorfire inthe oven
duringthe cleaningprocess.
• Althoughsmokeor fire inthe ovenis a normaloccurrenceand there is nosafety
problem,therewill be ventingof excessivesmokeand odor.
28
Page 29

• Theovenrackscanbe cleanedintheoven. However,theoven rockswilldiscolor,
loseshininess,andbecomedifficulttoslideinandoutif leftinthe ovenduringthe
cleaningprocess. REMOVE RACKS FROM OVEN IF THIS DISCOLORATION
WILL BE OBJECTIONABLE. As a suggestion,do notleave therocksinthe oven
duringeachself-cleaningprocessiftheydo notneedtobe cleaned sincetheywill
discolorafterthefirstcleaning.Moderatelysoiledrackscanbe cleanedwitha soapy
S.O.S. padorScotch-Britescour-pad. Stubbornstainsneedto be removedinthe
self-cleaningprocess. Be sureto read specialtipson page 31 ifovenracksare
cleanedduringtheself-cleaningprocess.
To set oven to start cleaning immediately:
2. Move doorlockleverto lockedposition. _'_' \_
1. Closethe oven door.
3. TouchClean Pad.
IndicatorWordsSET CLEAN TIME willflash and Displaywillshow :
13:.0o.
After threeseconds, the ON IndicatorWordwill come on and the oven willbegin
toclean. The LOCKIndicatorWordwillcomeonwhenthe ovenreachescleaning
temperatures.
Note: If doorleveris notin lockedposition,"door"willflash inthe Display.
4. Ifyouwishtochangecleaningtime after thewordON hasappearedinthe display,
then a) touch Clean Pad; b) touchthe Up or Down Arrow Pads,
(Rangeisfrom2 hoursfor lightsoilupto 4 hoursfor heavysoil,)
Example: If youselecttoself-cleanyourovenfor 4 hours,the Displaywillshow:
[4-.o0-.
Whentheclean function has been completed, the Indicator Words CLEAN and ON
willgooff. The Indicator WordLOCK willremain onuntil the oven hascooled down.
29
Page 30

To set oven to start cleaning at a later time:
1. Close door.
2. Move doorlock leverto lockedposition.
3. TouchClean Pad.
4. TouchtheUp orDown Arrow Padsto changedesiredcleantime.
5. TouchStop Time Pad.
IndicatorWordsSET STOP TIMEwillflashinthe Display. Thecalculatedstoptime
will also appearin Display.
6. Touchthe Up Arrow Pad to enter stoptime.
A stoptime can onlybe acceptedfor later inthe day.
Example: If at8 o'clockyou setthe oven toclean for 4 hours,thecalculatedstop
timewouldbe "12:00". The Displaywillshow:
1I .oo-
If youwantthe stoptime to be 1 o'clock,touchtheUp Arrow Pad. Threeseconds
later,theDisplaywillshowthe setstoptime. The IndicatorWordDELAYwillcome
onandthe Displaywillshow:
1.00_-
When the oven begins to clean, the IndicatorWord ON will come on and the
IndicatorWord DELAYwillgo off.
Whenthe cleantimehas beencompleted,the indicatorWordsCLEANandON will
go off.The indicatorWord LOCK willremainon untiltheoven hascooleddown.
To recall cleaning time, current time of day or stop time:Touchtheappropriatepad.
To change cleaning time or stop time before cleaning begins: TouchCancel/Off
Pad and repeatthe precedingsteps.
To cancel cleaning process: Touch Cancel/Off Pad. The ovendoorwill be locked
whiletheLOCKIndicatorWordremainsinthe Display.Dependingonthelengthoftime
the ovenhadbeenself-cleaning,it may take upto45minutesfortheoventocooldown.
AfterLockIndicatorWordgoesoutoftheDisplay,movetheDoorLockLevertotheleft.
Important: Forcingthedoorlocklevertothe leftpriortotheLOCKIndicatorWordgoing
out wilJdamagethe lockmechanism.
3o
Page 31

• A slightodormaybe detected,and if an oven is heavilysoiled,somesmokemay
be visible. Some smoke and odor during the cleaning process is a normal
occurrence. Sincethe ovenvent is at the bottomof the controlpanel, vapors,
moisture,etc. may be seencomingfrom this area.
• Dudngthe cleaningprocess,do not be alarmed if an occasionalflame is visible
throughthe oven window. This is caused by excessivefood sol)that was not
removedbeforethe oven was setto clean.
• SINCE THE DOOR AND WINDOW OF THE OVEN WILL GET WARM DURING
THE SELF-CLEANINGPROCESS, AVOID CONTACT.
• Sometypes ofsoilmaydisintegratebutleave a lightfilmorheavierdepositofash.
The amountof ashdependsonthe amount ofsoilwhichwasinthe oven.Afteroven
hascooled,thisash may be removedwitha dampsponge. If otherdarkdeposits
remainafter wipingwitha sponge,thetimeset forthe length ofcleaningwas not
enough. Increasethe cleaningtimeforfuturecleaningsor clean morefrequently.
The normalcleaningtimeis3 hours. A maximumof 4 hoursmay be selectedif
necessary.
• If rackshavebeenleft inovenduringthe cleaningprocess,theyshouldbe treated
asfollows. Afterthecleaningprocessiscompletedand theovenhas cooled,buff
theundersideofrackedgeswithSootch-Britescour-padorrub/ight/ythe underside
of rackedges with a coatingofvegetable oil. Use a lightapplicationofoilso itdoes
notsoilthe oven. This will makethe cleanedrecksslidemore easily.
• To removeoccasionalspilloversbetweencteanings,usea soap-filledscouringpad
or mildcleanser;rinsewell.
• It isbettertocleanthe ovenregularlyratherthan wait untilthere is a heavybuild-
up of soilinthe oven.
• Dudngthecleaningprocess,thekitchenshouldbewellventilatedto help eliminate
normalodorsassociatedwithcleaning.
• DO NOT USE COMMERCIAL OVEN CLEANERS.
• DO NOT USE ALUMINUM FOIL OR OTHER LINERS IN THE OVEN.
31
Page 32

Be sure all controlsare OFF and all range parts are cool beforecleaning.
The cooktopisdesignedwithtwocontouredwellswhichcontainspillsuntilthey canbe
wipedup. Unlikethe standard gas appliance,THIS COOKTOP DOES NOT LIFT-UP
NOR IS IT REMOVABLE. To preventdamagetothe gas tubingortop,do not attempt
to liftcooktop.
Neverwipeawarmorhotporcelainenamelsurfacewitha dampcloth.Forgeneraldaily
cleaningandlightsoil,washwithwarmsoapywater,rinse,and dry, To removegrease
spatters,spraywithcleanerssuchas Pantastikor409. DO NOTuse abrasiveorcaustic
cleaningagentswhich may permanentlydamage thefinish.
The surface burner grates are made of porcelainon
cast ironor stampedsteel, dependingon your model.
Therefore, the gratascan be washed in the sink with
milddetergentsanda plasticscrubberorwashedinthe
dishwasher.
Burnergratesmustbeproperlypositionedbeforecook-
ing. Do notoperatethe burnerswithouta pan on the
grate. The porce(ainfinish on the grate may chip
withouta pan to absorbthe intenseheat.
Whenreinstallingsquaregrates, place indentedsides
togetherso straightsidesare at frontand rear.
kJJ
Althoughthe burner grate is durable,it wi[( graduallylose its shine and/or discolor,
regardlessofthecareyoutakeofit. Thisisdueto itsexposureto the hightemperature
of gasflames,
To preservetheporcelainenamelfinishas long as possible, have a pan onthe grate
beforeyou turn on the burner, and lowerthe flame when food reachesthe desired
cookingtemperature.
32
Page 33

The four sealed burners are secured to the cooktopand are NOT designed to be
removed,Since the four burnersare sealed into the cooktop, boiloverswon'tseep
underneathtotheburnerboxarea. Thus, there are no hiddenspillsinthe burnerbox
areato clean.
Forease ofcleaning,removesoilfromthe burneras soonasthe burnerhas cooled, if
food boils over, remove pan to another burner, Then, cool soi_d burner end clean.
Besureburneriscoolbeforecleaningto preventdamagingtheporcelainsurface. Clean
withwarmsoapywateranda spongeordishcloth.Burnedon greasecan be removed
with a household cleaner, such as Fantastik or 409, and a sponge. To prevent
scratching,donot use abrasivecleanersor scrubbingpads.
Note: Be careful notto get water or sprayintoburnerports.
careto preventdamageto the sparkigniterwhich
is locatedat the back-sideof each burner. If a Ports
cleaningcloth shouldcatch the igniter,it could
When cleaning around the surface burner, use __ _'_ n
damage or break it. If the igniteris damagedor Iter
broken,the surfaceburnerwill notlight. Plus,the REARVIEWOFSEALEDBURNER
burnerwill not lightif the small port beneath the
igniterisblocked.
The knobson thecontrolpanelcan be removedwiththe controlsinthe OFF position.
Pulleachknobstraightfromtheshaft, Washknobsinwarmsoapywaterordishwasher;
do not useabrasivecleansersor materials. TOreplaceeach knob,matchfiat part of
knobopeningwiththe flat onthe shaft, returning in OFF position,
Important: Neverusea metalbladetopryknoboff. If knobcannotbeeasily removed,
tuckthe foldsof a clothdishtowelunderthe knobskirt and punthetowel upwardwith
steady,evenpressure.
Important: Becarefulto replacethe knobswithgentlepressure. Never hit the knob
onthe shaftwithyourhandor any otherobject.
33
Page 34

Wipewith a dampcloth. Drythoroughly. Do not usecleaningsprays,large amounts
of soap and water, abrasives, or sharp objects on the panel. They can damage it. To
prevent moisture from getting behind control panel, spray a croth with grasscleaner.
Then, wipe the panel.
Useany suitableglasscleaner or soapy water.
• Wash coolrangewithwarm soapy water and rinse. Polishwith a dry cloth.
• Do notuseabrasive orcaustic cleaning agentswhichmay permanently damagethe
finish.
• NEVERWIPE OFF A WARM OR HOT PORCELAIN ENAMEL SURFACEWITH A
DAMP CLOTH.
NOTE: The porcelainenamel usedonyour rangeisacidresistant,notacidproof.
Therefore,acid foods(suchas vinegar,tomato,milk,etc.) spilledon the
range shouldbe wiped upimmediatelywitha dry cloth.
34
Page 35

lift upon the front of the rack and pull out.
To removepull forward to the stop position; __
Protect oven bottom against excessive spilicvers
especiallyacid or sugary spillovers as they may
discolorthe porcelain, Usethe correctsize cooking
utensilto avoidboilovers. Never place cookwareor
aluminumfoil directlyon theoven bottom,
To remove:Whencool,removetheovenracks.Slide
the two catches,locatedat each rear comer of the ( _
ovenbottom,towardthefrontoftheoven.Lifttherear
edgeoftheovenbottomslightly,thenslideitbackuntil
thefrontedgeoftheovenbottomclearsthe ovenfront
frame. Removeoven bottomfrom oven.
To replace: Fitfront edge of oven bottom intofront
frame. Lower rear of oven bottom and slide the
catchesback to lock oven bottomintop/ace.
Followtheseprocedures to remove appliancefor cleaningor servicing.
1. Shut-offgassupplyto appliance.
2. Disconnectelectricalsupplyto appliance,if equipped.
3. Disconnectgas supplytubingto appliance.
4. Sliderangeforwardtodisengagerangefromthe anti-tipbracket.(See installation
Instructionsfor locationof bracket.)
5. Reverseprocedureto reinstall. If gaslinehasbeen disconnected,checkfor gas
leaksafter reconnection. (See InstallationInstructionsfor gas leak test method.)
Note: A qualifiedservicershoulddisconnectandreconnectthegassupply.To prevent
rangefromaccident_ytipping,range mustbesecuredto thefloorby slidingrear
levelingleg intoan anti-tipbracketsuppliedwiththe range.
WARNING: Possiblerisksmayresultfromabnormalusage,includingexcessiveloading
of the oven doorand of the riskof tip over, should the appliance not be reinstalled
accordingtothe installationinstructions.
35
Page 36

Before replacing bulb, disconnect power to oven at the main fuse or circuit breaker
panel Be sure that the entire oven cavity including the light bulb iscool before attempting
to remove.
TO replace light bulb:
1. Carefully unscrew the glass light lens.
2. To obtain firm grasp on bulb, wear protective rubber gloves.
light bulb with a dampcloth as bulb will break. Note: If the
bulb does break andyou wish to remove it, be certain power
supply is disconnected and wear protective gloves. You
may contact yourauthorized Jenn-Air Service Contractor for
Remove by turning bulb to the left. Do not tough a hot oven _[
service.
3. Replace bulb with a 40 watt oven-rated appliance bulb. Bulb with brass base is
recommended to prevent fusing of bulb into socket.
4. Replace bulb cover and reconnect power to oven. Reset clock.
Before replacing light bulb, DISCONNECT POWER TO RANGE.
To replace fluorescent surface light: Grasp the top of backguard with thumbs under
front edge and gently pull outward while lifting to release trim from catches at each end.
Remove bulb and replace with an 18 watt fluorescent tube. Snap top tdm back into
place, restore power and reset clock.
TOPTRIMOF
BACKGUARD FLUORESCENTTUBE
36
Page 37

The storagedraweratthebottomof the rangeis safe andconvenientforstoringmetal
glasscookware. Do NOT storeplastic,paperware,foodorflammablematerialin this
drawer.Remove drawerto clean under range.
To remove: Emptydrawerthenpulldraweroutto lrI,,_
thefirststopposition. Liftupfrontofdrawerand III I _-'3 I
pulltothesecondstopposition. Graspsidesand
I_tup andout to removedrawer.
To replace: Fitendsofdrawerglidesontorails. Lift
up drawer front and gent_ypush in to first stop
position.Liftupdraweragainendcontinuetoslide
drawerto the closedposition.
Somefloorsare notlevel. Forproperbaking,your
each corner of the base on the range. Level by
turningthe legs.
rangemustbe level. Levelinglegsare locatedon __ f
To prevent range from accidentlytipping,range
leveling leg intothe anti-tip bracket supplied with
shou,dbe secured to the f,oorbysliding rear _
the range.
The oventemperaturecanbe adjustediftheoventemperature istoo lowortoohighand
the length of time to cook ALL foods is too long or too short. DO NOT adjust the
temperature if only one or two items are not baking properly.
To adjust the oven temperature:
1. Touch Bake Pad.
2. Touchand holdthe Up Arrow Pad until500oorhigherappears inthe Display.
3. Immediately,touchand holdthe Bake Pad for several secondsuntil00° appears
inthedisplay.
4, TouchtheUp orDownArrow Pede toselectthetemperaturechangedeairad.The
oventemperaturecanbe increasedupto350orreducedbyas muchas350(display
wouldshow-35°) in 50increments.
5. Press theCancel/Off Padandthe time ofdaywill reappearin thedisplay. The oven
willnowbakeat the adjustedtemperature.
Note: It is not necessaryto readjustthe oven temperature if there is a power
interruption.
Important: The oventemperatureshouldbeadjustedno morethan 10oandthen
theovenshouldbetested, (We recommendedbaking2-9"yellowlayercakesusing
a purchasedboxmix.) If theoventemperatureisstilltoolowortoohigh,repeatthe
proceduredescribedabove.
37
Page 38

Checkthe following list to besure a servicecall is reallynecessary.
If surface burner falls to light:
• check to be sure uni_is properly connected to power supply.
• check for a blown circuit fuse or a tripped main circuit breaker.
• check to besure burner is correctly rated for your type of gas.
• check to be sure burner ports or ignition ports are not clogged.
• checktobesureigniterisdryandclicking. Bumerwillnotlightifigniterisdamaged,
soiled or wet. If igniter doesn't click, turn control knob OFF.
If the flame is uneven:
• burnerportsmay be clogged.
• flame settingmay need to be adjusted,
If surface burner flame lifts off the ports:
• checktobe sure a pot is sittingonthe grateabove,
• contact an authorizedJenn-AirService Contractor.
if surface burner flame is yellow in color:
• contact an authorizedJenn-AirServiceContractor,
If nothing on the range operates:
• check for a blowncircuitfuse or a trippedmain circuitbreaker.
• check if range is properly connected to electric circuit in house.
If clock, indicator words, and/or lights operate but oven does not
heat:
• the controlsmay have been set incorrectly,
• clock controlsmay be set for delayed start of oven.
If the oven light does not work:
• the lightbulbis loose or defective,
• oven lightdoes notwork duringself-cleaningprocess,
If oven will not go through self-cleaning process:
• controlsmay be improperlyset.
• door maynot be locked.
• checkthe"Clean"and"Stop"timesettingsandthe currenttimeofdayonthe clock.
If oven did not clean properly:
• ovenmay need longer cleaningtime.
• excessivespillswere not removedpdor to se_f-cleanlngprocess.
If oven door will not unlock:
• ovenmay nothave cooledto safe temperatureafter self-cleaningprocess.
38
Page 39

If foods do not broil properly:
• the controlmay not be set property.
• check rackposition.
If baked food is burned or too brown on top:
• food may be positionedincorrectlyin oven.
• ovennot preheatedproperly.
If foods bake unevenly:
• the ovenmay be installedimproperly.
• checkthe oven rackwith a level.
• staggerpans, do notallow pansto toucheach otheror ovenwall.
• oheok instructionsfor suggested placement of pens on oven rack.
If oven baking results are less than expected:
• the pans being used may notbe of the size or material recommendedfor best
results.
• there may notbe sufficientroomaroundsidesofthepansforproperair circulation
intheoven.
• check instructionsfor preheating,rack positionand oventemperature.
If baking results differ from previous oven:
• oventhermostatcalibrationmaydifferbetween oldand new ovens. Followrecipe
and use and care directionsbeforecallingfor servicesincethecalibrationon the
previouseven may havedrifted to a too high or too lowsetting. (See page 37 -
AdjustingOvenTemperature.)
If F plus a number appear In the Display:
• these are fault codes. If a fault code appearsin displayand a continuousbeep
sounds,pushthe Cancel/Off Pad. If the faultcode reappears,disconnectpower
tothe ovenand call an authorizedJenn-AirServiceContractor,
39
 Loading...