

Page 1

Page 2
Page 3

ENGLISH OPERATION MANUAL
OPERATION MANUA L
Thank you for buying this JB System s
operating instructions very carefully.
®
product. T o take full advantage of all pos sibilities, pleas e read these
FEATURES
• The ultimate tool f or bars , danc e scho ols, st udios , sh ops but a lso f or DJ s. Pl ays: Audi o-CDs, but also CDs
and USB-mass storage (USB-stick or hard drive) containing MP3 and WAV-files!
• Record function : record from an external analog source to lossless WAV or MP3 format (64k –
128k – 192k – 256k – 320k bit rate), even whilst playing tracks from CD or USB.
• Record monitor function: check your recorded signal instantly!
• Manual or automatic recording processor: for easy, undistorted recordings.
• The alphanumeric LCD display supports ID3V2 tags (song title, artist, album, genre & bitrate)
• Full MP3 Playback, supports both CBR and VBR bitrate modes.
• Full featured database lookup system: lightn ing fast selection of the des ired tracks while the pr evious
song is still playing! You can search on title, artist, genre, album or simply based on tracks/folders!
• Free Windows Track-Index er sof tware avai lab le via do wnlo ad!
• Jog wheel for pitch bending and precise 1/75sec frame search, also on MP3
• Improved “smart random” function with 2 different modes:
• TOTAL random: plays tracks, randomly selected from the complete USB-mass storage
• SMART random: plays only track s with certain g enre or from a certain artist or al bum (avoids m ix-up
of 2 completely different music styles: perfect for bars, clubs, restaurants, …)
• IR-remote with loop, speed control, track search/select, volume, …: perfect for dance schools!
• Balanced XLR-outputs and RCA/cinch out puts + RCA/cinch inputs for recording.
• Anti-shock Memory 20 seconds on CD, 100% anti-shock on USB-mass storage
• Seamless loop
• Key Lock (Master tempo)
• Instant start & auto cue function (-48dB)
• Pitch ranges: +/-4% +/-8% +/-16% also on MP3
• Full automatic beat counters
• 4 different speed scan
• Reads CD-DA, CD-R, CD-RW
• Selectable elapsed, remain and total remain time display
• Single/continuous play
BEFORE USE
• Before you start using this unit, pleas e check if there’s no tr ansportati on damage. Should there b e any, do
not use the device and consult your dealer first.
• Important: This device left our f actory in perfect condition and well packaged. It is abso lutely necessary
for the user to stric tly foll ow the s afety instr uctions and warn ings in th is user m anual. Any dam age caused
by mishandling is not su bje ct to warrant y. The dealer will n ot ac cept res pons ibilit y for an y res ultin g def ects
or problems caused by disregarding this user manual.
• Keep this booklet in a safe plac e for future consultation. If you sell the fixture, be sure to add this user
manual.
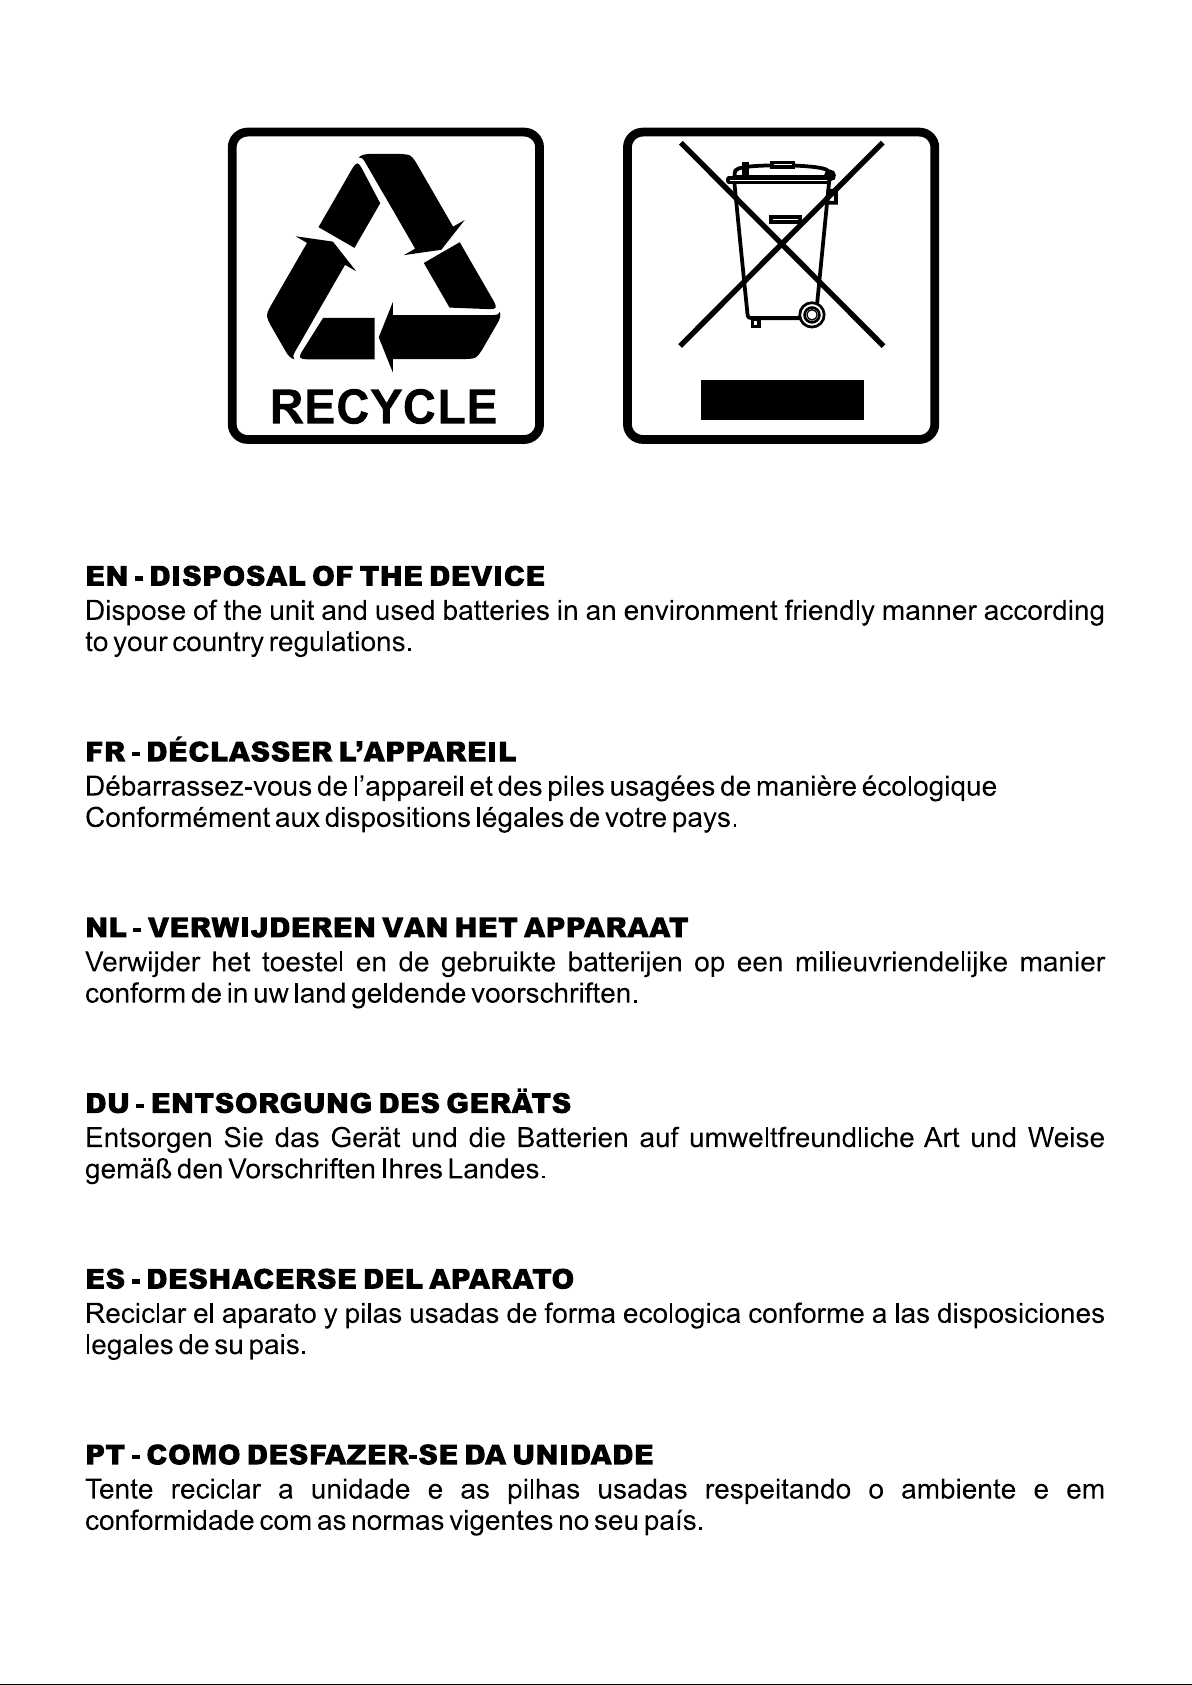
• To protect the environment, please try to recycle the packing material as much as possible.
Check that the carton contains the fo llowing items:
• USB1.1 REC player
• Operating instructions
• Pair of cinch cords
• IR-Remote controller
• 1 power cord
JB SYSTEMS® 1/15 USB 1.1 REC
Page 4

ENGLISH OPERATION MANUAL
JB SYSTEMS® 2/15 USB 1.1 REC
Page 5
ENGLISH OPERATION MANUAL
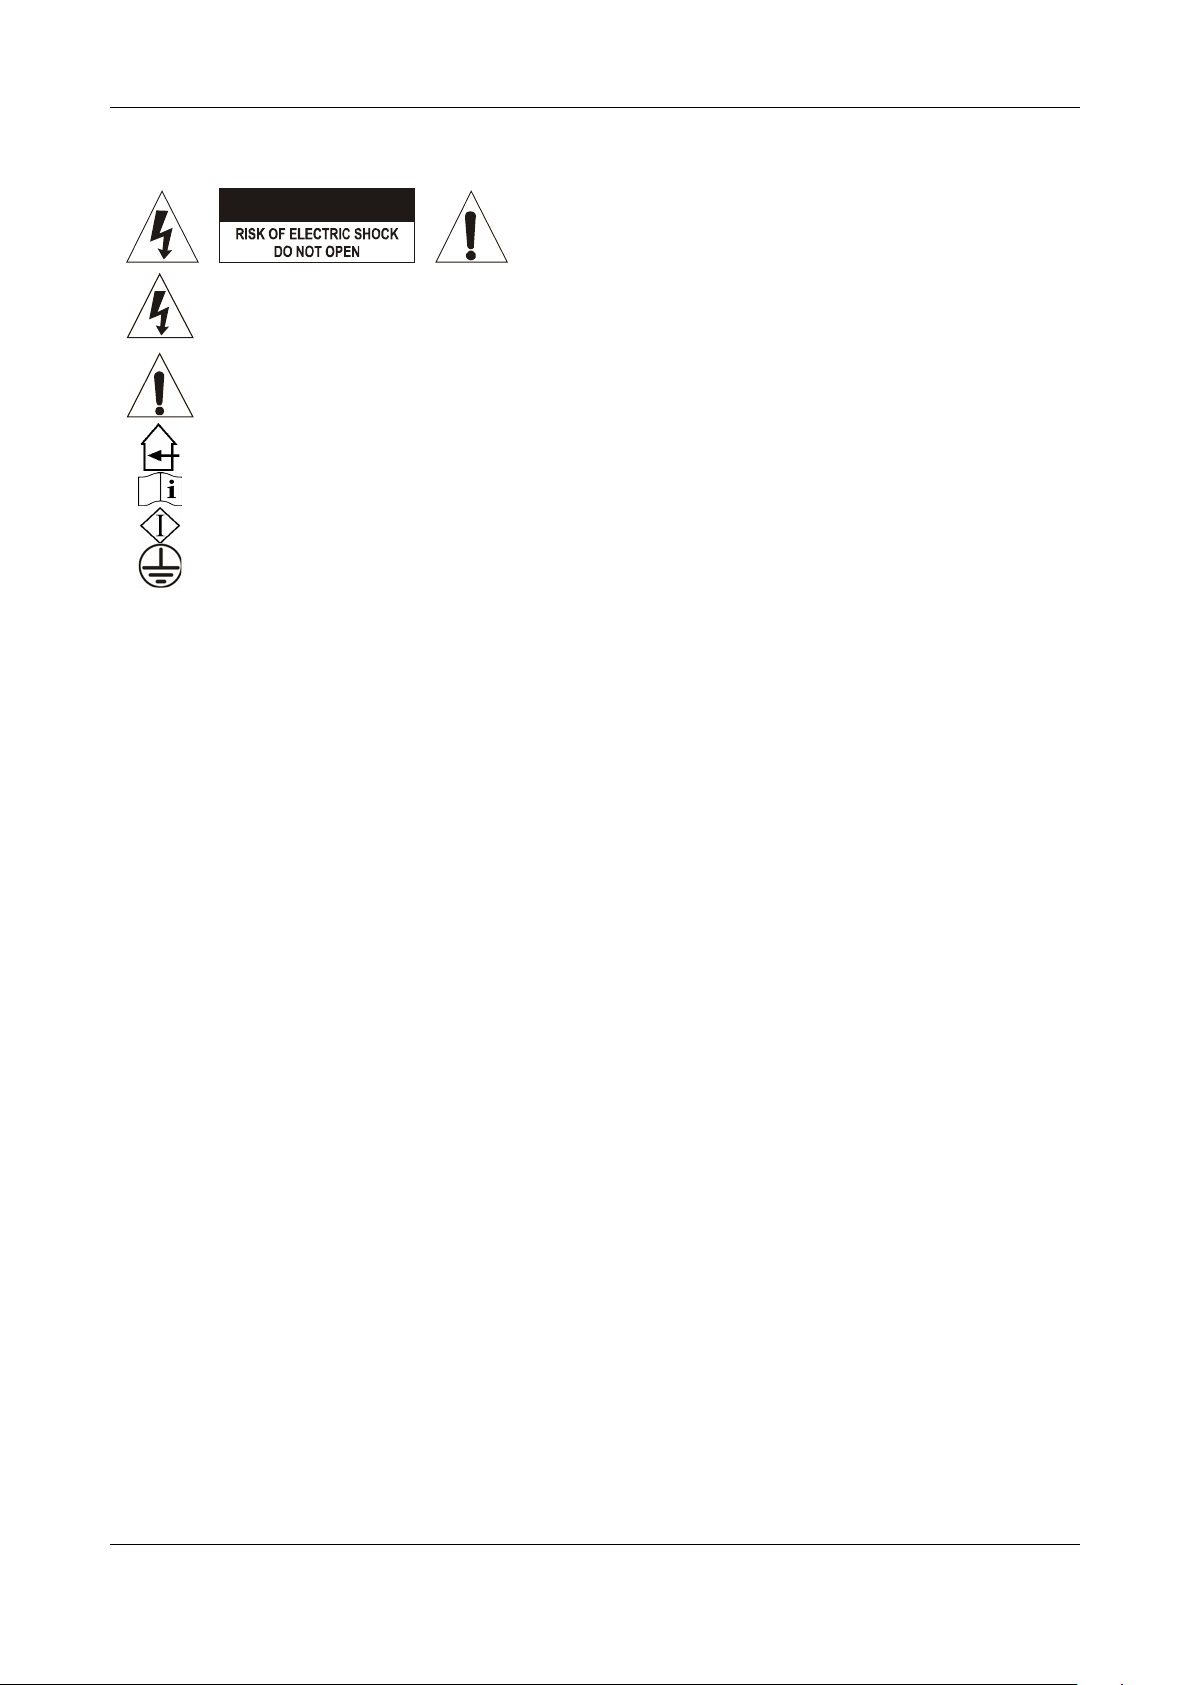
CAUTION
SAFETY INSTRUCTIONS:
CAUTION: To reduce the risk of electric shock, do not
remove the top cover. No user-serviceable parts inside.
Refer servicing to qualified service personnel only.
The lightning flash with arrowhead symbol within the equilateral triangle is intended to alert the
use or the presence of un-insulated “dangerous voltage” within the product’s enclosure that may
be of sufficient magnitude to constitute a risk of electric shock.
The exclamation point within the equilateral triangle is intended to alert the user to the presence of
important operation and maintenance (servicing) instructions in the literature accompanying this
appliance.
This symbol means: indoor use only
This symbol means: Read instructions
This symbol means: Safety Class I appliance
This appliance must be earthed in order to comply with safety regulations.
• To prevent fire or shock hazard, do not expose this appliance to rain or moisture.
• To avoid condensati on to be formed ins ide, allow the unit to adapt to t he surrounding tem peratures when
bringing it into a warm room after transport. Cond ense sometimes prevents the unit f rom working at full
performance or may even cause damages.
• This unit is for indoor use only.
• Don’t place metal obj ec ts or s pill l iqu id insi de th e u nit. N o objec ts f illed w ith liqu ids, such as vases, sh al l be
placed on this appliance. Electric shock or malfunction may result. If a foreign object enters the unit,
immediately disconnect the mains power.
• No naked flame sources, such as lighted candles, should be placed on the appliance.
• Don’t cover any ventilation openings as this may result in overheating.
• Prevent use in dusty environments and clean the unit regularly.
• Keep the unit away from children.
• Inexperienced persons should not operate this device.
• Maximum save ambient temperature is 40°C. Don’t use this unit at higher ambient temperatures.
• Minimum distances around the apparatus for sufficient ventilation is 5cm.
• Always unplug the unit when it is not used for a longer time or before you start servicing.
• The electrical instal lation should be carr ied out by qualified per sonal only, acc ording to the regulati ons for
electrical and mechanical safety in your country.
• Check that the available voltage is not higher than the one stated on the rear panel of the unit.
• The socket inlet shall remain operable for disconnection from the mains.
• The power cord should alw a ys be in perfect condition. Switch the unit immediately off when the po wer c ord
is squashed or damaged. I t must be replaced by the m anufacturer, its service agent or sim ilarly qualified
persons in order to avoid a hazard.
• Never let the power-cord come into contact with other cables!
• When the power switch is in OFF position, this unit is not completely disconnected from the mains!
• In order to prevent electric shock, do not open the cover. Apart from the mains fuse there are no user
serviceable parts inside.
• Never repair a f use or bypass the fuse holder . Always replac e a damaged fuse with a f use of the same
type and electrical specifications!
• In the event of serious operating problems, stop using the appliance and contact your dealer immediately.
• Please use the original pack ing when the device is to be transpor ted .
• Due to safety reasons it is prohibited to make unauthorized modifications to the unit.
• CAUTION: Danger of explosion if batt ery is incorrectl y replaced. R eplace on ly with the sam e or equi valent
type. The battery shall never be exposed to excessive heat such as sunshine, fire, …
JB SYSTEMS® 3/15 USB 1.1 REC
Page 6
ENGLISH OPERATION MANUAL
INSTALLATION GUIDELINES:
• Placing and using the unit for long periods near heat-generating sources suc h as amplifiers , spotlights,
etc. will affect its performance and may even damage the unit.
• Take care to minimize shocks and vibrations during transport.
• When installed in a booth or flight case, please make sure to have good ventilation to improve heat
evacuation of the unit.
• To avoid condensation to be f ormed inside, allow the unit to adap t to the surrounding tem peratures when
bringing it into a warm room after transport. Condens e sometimes prevents the unit from working at full
performance.
• Choose the place where you p ut your installation very carefull y. Avoid presence of heat sources . Avoid
places with vibrations or places that are dusty and humid.
• The player will work normally when installed on a surface with max. 15° inclination.
• Be very careful while handling CDs, do not touch them with wet or dirty hands.
• Discs that are dirty must be cleaned with special designed cloth and cleaning products.
• Do not use CDs that are badly damaged (scratched or deformed) they can damage your appliance.
• To prevent fire or shock hazard, do not expose this appliance to rain or moisture.
• In order to prevent electric shock, do not open the top cover. If a problem occurs, contact your dealer.
• Do not place metal objects or spill liquid inside the player. Electric shock or malfunction may result.
• This player uses the semiconductor laser. To allow you to enjoy music at a stable operation, it is
recommended to use this in a room of 5°C – 35°C.
• The compact disc pla yer should not be adjusted or repaired b y anyone except properly qua lified service
personnel.
• This unit may cause interference to radio and television reception.
CLEANING THE PLAYER:
Clean by wiping with a poli shed cloth slightly dipped with water. Avoid getting water insi de the unit. Do not
use volatile liquids such as benzene or thinner which will damage the unit.
CONNECTIONS
• Use the supplied cinch ca ble to connect the audio output of the player with the CD or line input on your
mixing unit. Use an optional cinch cable to c onnect the audio input of the recor der to the line output on
your recording source (mixer, other CD-player,…)
• For long audio lines or professional applications you can also use the balanced XLR-outputs.
• Connect the mains cable.
CONTROLS AND FUNCTIONS
JB SYSTEMS® 4/15 USB 1.1 REC
Page 7

ENGLISH OPERATION MANUAL
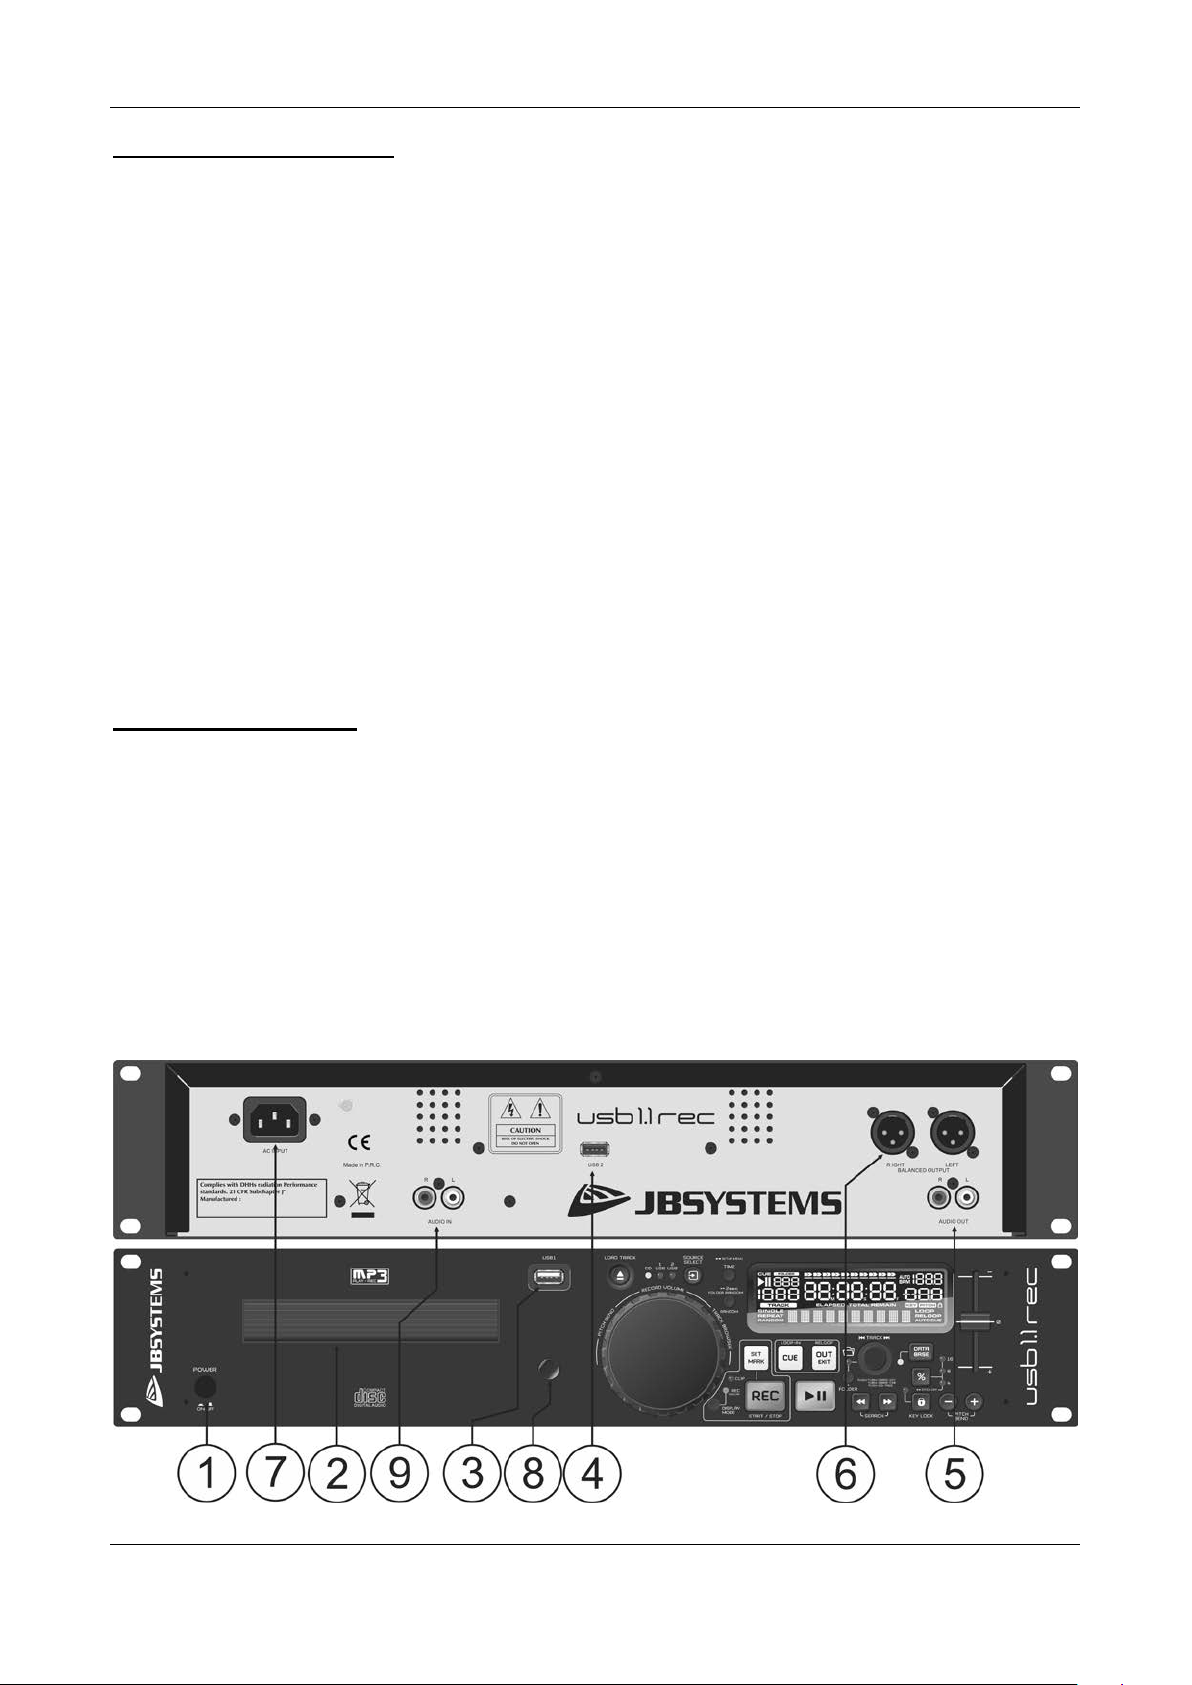
1. POWER [ON/OFF] switch: switches the player on and off.
2. DISC TRAY: Use the [OPEN/CLOSE] button to open disc tray and put the CD in place.
3. [USB 1] connection: this is the first (type-A) USB-co nnection, used to connect an y USB mass storage
device that was form atted in FAT or FAT 32. By defaul t this inp ut is used t o conn ect an occ asional USB drive like USB-sticks etc.
4. [USB 2] connection: this is the second (type-A) USB-connection, used to connect any USB mass
storage device that was f orm atted in FAT or F AT32. By def ault this in put is used t o connect a hard dis k.
Attention: because the po wer supplied by the USB -output is limited, it is h ighly recomm ended to use a
hard drive with separate power supply. HDD capacity should also be limited to 500GB max.
5. UNBALANCED AUDIO output: Output for the audio signals from the player. Use the supplied
cinch/cinch cable to connect this output to a CD/line input of your mixing unit.
6. BALANCED AUDIO output: the same audio signa l as on the cinch outputs (5) but balanced output via
XLR-connectors. To be used in case of long audio lines: us e optional good qu ality XLR/XLR cabl es for
optimal performance!
7. MAINS input: connect the player to the AC mains, using the supplied power-cord.
8. IR-receiver: make sure that this IR-rec eiver is not cov ered, other wise your wirele ss rem ote will not work
properly!
9. UNBALANCED AUDIO input : Input for the audio sig nals f rom external “line level” (1V
an optional cinch/cinch cable to connect this input to the output of a CD-player or a mixer.
) sources. Us e
max
10. [SET MARK] button: Allows you to set a marker while recording. T he recordi ng c ontinues o n a ne w
file.
11. [CUE] button: Used to set the startpoint to creat a loop. Once this startpoint is set, the button can be
pushed to create a [ST U TT ER]-effect. Keeping the b utton pushed will st art p laying the track fr om the
startpoint. Releasing t he bu tton wil l stop t he playing of the track. W hile having th e butto n pus h ed yo u
can push the [PLAY]-button (14) to continue playing the track the normal way.
12. [OUT] button: This button is used to set the endpoint of a loop. Push the button on the desired
endpoint of the loop. It will start blinking and [RELOOP] will appear on the display. Pushing the
button a second time wil l lit it an d makes the player go out of the l oop and c o nti nu e playing the track.
Pushing the button again will restart the programmed loop.
13. [REC] button: Pres sing the [REC] button start s recor ding im m ediately. Pus hing the but ton a gain will
stop the recording.
14. [PLAY/PAUSE] button: every time you press the [PLAY/PAUSE] button the player changes f rom
play to pause or from pause to play. The button blinks as long as the player is set to pause.
15. [FOLDER] button: changes the func tion of the [TRACK] knob ( 16) while the search key is set to
“Std” (standard track/folder search without Track-Indexer database).
JB SYSTEMS® 5/15 USB 1.1 REC
Page 8

ENGLISH OPERATION MANUAL
•
•
•
•
•
•
•
•
•
•
•
•
•
•
•
•
•
•
•
•
•
•
While the LED is off: the [TRACK] knob is used to browse the tracks of the selected folder.
While the LED is on: the [TRACK] knob is used to browse the folders on the USB-drive.
When pushing the button for 2 seconds, it activates the [REPEAT] function. Pushing again for 2
seconds de-activates the [REPEAT] function.
16. [TRACK] knob: this knob has different functions (also see the chapter [HOW TO USE]):
CDs or no Track-Ind exer database: depending on th e status of the [FOLDER] b utton (15) you can
browse tracks or f olders on the CD or USB-device. To increase search spee d on U SB-d ev ices with a
lot of folders/tracks, you can also turn the [JOG-WHEEL] (28) while you keep the [TRACK] knob
pressed.
Track-Indexer database search: (press the [DATABASE]-button (17) and desired search key)
Turn the knob to select the first character of the string you’re looking f or, after that use the
[JOG-WHEEL] to search for the desired track.
Press the knob while you turn it to change the sear ch ke y in the database, yo u can search
the keys:
[Art]: search for “artist names” in alphabetical order (default search key)
[Alb]: search for “album names” in alphabetical order
[Gen]: search for “Genres” in alphabetical order
[Std]: don’t use the Track-Indexer database system, just folders and tracks manually.
[tit]: search for “title names” in alphabetical order
During playback: press the knob to see the different ID3-tags on the display:
Press 1x: Artist name of the current track is shown
Press 2x: Album name of the current track is shown
Press 3x: Genre of the current track is shown
Press 4x: Bitrate information of the current track is shown
Setup menu active: while the setup menu is ac ti ve ( s ee [TIME] button (26) ) t ur n the knob to browse
the menu, press the knob to select a menu option to change it. Please refer to chapter [SETUP
MENU] for more information.
17. [DATABASE] button: a very important button if you want to find your next track easily and fast,
even while the previous track is still playing! This button works in two different ways:
NEXT TRACK function: will be used whi le searching on CDs a nd mass storage devices that don’t
have the “Track -Indexer database system” files installe d. You can only search on track and folder
numbers.
DATABASE function: will be used while searching mass storage devices that have the “Track-
Indexer database system ” files installed. You can alph abetically searc h on artist, track title, genre or
album. Very fast and no need for you to know where your files are located!
Once you have found the desired song, just press the [LOAD TRACK]-button (2 4) to load the tr ac k .
For both functions, please refer to chapter [HOW TO USE] for more information.
18. [SEARCH] buttons: used to search quickly inside a track.
19. [KEY LOCK] Button: (Master tempo) activates the Pitch Lock function. T his function allows you to
make adjustments to a track’s speed using the PITCH-slider (21) without altering the tonal pitch.
20. [PITCH (%)] button: press this button to turn the speed function on. Press several tim es to select
one of the 3 different pitch ranges (+/-4%, 8%, 16%). Press this button +/- 2seconds to turn the
speed function off.
21. [PITCH] slider: Press the PIT CH button, s o the pitc h range LED is lit. The s peed can be adapt ed up
to +/-16% by moving the fader. The speed will not change when the pitch range LED is off.
22. [PITCH BEND] buttons: T he speed rises whil e the “+ button” is pres sed and returns to the original
pitch when the button is released. The speed drops when the “– button” is pressed and returns to the
original pitch when the b utton is releas ed. These butt ons can be used to s ynchroni ze the beats of 2
tracks.
23. [RANDOM] button: you can select 2 different random play functions.
[TOTAL] random: press th e [RANDOM] butt on shortl y until the word [RAN DOM] in the LCD-display
is lit. The player now plays tracks, randomly selected from the complete USB-mass storage.
[SMART] random: you can choose to pla y only tracks from a certain directory, onl y tracks from a
certain genre, or even only tracks from a certain album or artist:
Play tracks only from 1 directory: first choose [search-k ey = St d] (folders/tracks). Now you
have to select a dir ectory, then press the [RANDOM] button for +/-2s econds until [RANDOM]
starts blinking in the display. The [USB1.1 REC] now plays only tracks from the selected
directory.
JB SYSTEMS® 6/15 USB 1.1 REC
Page 9

ENGLISH OPERATION MANUAL
•
•
•
•
•
•
•
•
•
Play tracks only from a certain genre/artist/album: choose the rig ht searc h-key and s elect a
track that corresponds to the desired genre, artist or album. After pressing the [RANDOM]
button for +/-2seconds, the player will only play tracks with the sam e genre, artist or album as
the track you’re currentl y playing. (avoids m ix-up of 2 completely diff erent music styles: perfect
for bars, clubs, restaurants, …) See chapter [HOW TO USE] for examples.
Directory random: you can choose to play onl y tracks from a certain dir ectory: first you have to
select this director y, then p ress the [RANDOM] button for 2 seconds until th e wor d [RANDO M] in the
LCD-display starts blinking. The player now plays only tracks from the selected directory. (avoids
mix-up of 2 completel y different music styles: perfec t for bars, clubs, restaurants, …) See chapter
[HOW TO USE] for examples.
24. [OPEN/CLOSE/LOAD TRACK] button: used for two different functions.
Load a track from USB-drive: when the [DATABASE]-button ( 17) is used to lookup the next tr ack,
just press the [LOAD TRACK] button to load the selected track.
Load/eject CDs: press this button t o open and close the disc tray. This butto n is disabled during
playback. If the tray is not closed after 60sec. It will close automatically to prevent damage.
25. [SOURCE SELECT] switch: us e this button to selec t the desir ed aud io source: CD, USB1 or USB2.
You can only select an other source while the player is in stop or pa use. The leds m arked USB1 or
USB2 blink when a recording is saved to the selected USB-memory.
26. [TIME] Button: has different functions:
Change time display: The TIME button switches between ela psed p la ying tim e, rem aining tim e in a
selection and total r emaining time of the dis c. ( s tan dar d = r emaining /track) T he “ total r emaining time
of the disc” is not available on MP3-tracks.
Open setup menu: press the TIME button for about 3seconds.
Close setup menu: press the TIME button shortly to leave setup.
27. LCD DISPLAY: Shows al l important inform ation needed during p layback. Ref er to the next chapter
for more information.
28. [JOG WHEEL]: This jog wheel serves 3 functions depending on the mode you are working in.
• The jog wheel acts as a slow fram e search (1/75sec) contro l when the CD is n ot playing but eit her
paused or set to a cue point. To set a new cue point, spin the wheel then press [PLAY] (14) or
[LOOP IN/CUE] (11) when you have d eterm ined th e proper positi on. Press [LOOP IN/CUE] to retur n
to the [CUE POINT].
• If the track is playing the jog wheel temporarily bends the pitch of the m usic by rotating the wheel
clockwise to speed it up or counterclockwise to slow it down. The amount of pitch change is
determined by the speed of rotation.
• During [DATABASE] lookup mode, the jog wheel is also used to browse the tracks at high speed.
• During recording: Used to adjust the analog input level (when manual recording was selected)
29. [REC DISPL AY] Button : you can switc h the display between RECORD and PLAYBACK mode at
any moment. This makes it possible to simultaneously play a track while recording another.
RECORD mode: display shows information relative to your current recording.
PLAYBACK mode: display shows information relative to the track that is currently played.
30. [Clip] LED : blinks when the level from the recording signal is too high (distorted). In that case
please lower the input level using the JOG WHEEL (28).
LCD DISPLAY
JB SYSTEMS® 7/15 USB 1.1 REC
Page 10

ENGLISH OPERATION MANUAL
•
•
•
•
1. [PLAY/PAUSE] indicators: displays the status of the player.
2. [CUE]: appears when the master cue point is programmed.
3. [SINGLE]: appears when the un it is set to p lay jus t one trac k at a tim e. When it is not shown, the pla yer
plays all tracks continuously.
4. [FOLDER/SEARCH KEY] indicator: the information depends on the lookup mode you selected.
Standard lookup: (no Track-Indexer database) the current folder number is shown.
Database lookup: the current search key (Artist, title, Album or Genre) is shown.
5. TRACK indicator: shows the number of tracks available in your current selection.
Standard lookup: (no Track-Indexer database) the track numbers in the current folder are shown.
Track-Indexer lookup: the track numbers that correspond to your Track-Indexer pre-selection.
6. [TIME BAR]: shows either r emaining or elapsed time. Starts flashing at the end of each track to alert the
user to take action. When changing to REC display, the time bar will act as a recording level meter.
7. MINUTE: Shows “minutes” time information of current track.
8. SECOND: Shows “seconds” time information of current track.
9. FRAME: Shows “frame” time information of current track. (1 frame = 1/75
10. [ELAPSED , REM AIN]: indicates that the tim e shown on the displa y is the elapsed or remaining tim e for
the playing track.
Note: for MP3 files it’s not pos sible to show the total remaining time for all trac ks on the CD or USBstorage.
11. ALPHANUMERIC DISPLAY: Shows the names of folders and ID3-tags of MP3 tracks. Acts as an
output level indicator when chang ing the out put vo lume.
12. [RANDOM]: Is lit while the player is set to [total random] mode, blinks while the player is set to [direc tory
random] mode.
13. [REPEAT]: indicates that the repeat function is activated, for more information see [REPEAT]-button
(14) on the remote control.
14. [AUTO CUE]: appears when the [auto cue] function is active.
15. [RELOOP/RELOOP]: [LOOP] shows when a loop is programmed. When a loop is programmed and
currently playing, the [RELOOP] indicator is flashing.
16. [PITCH] DISPLAY: shows the actual percentage of speed change, selected with the PITCH slider (21).
17. [KEYLOCK]: is shown when the pitch lock function (Master Tempo) is active.
18. [BPM] DISPLAY: shows the output of automatic beat-counter, measured in beats per minute.
th
sec.)
JB SYSTEMS® 8/15 USB 1.1 REC
Page 11

ENGLISH OPERATION MANUAL
•
•
•
•
•
•
•
•
IR-REMOTE CONTROLLER
1. [OPEN/CLOSE]-button: same functionality as the
[OPEN/CLOSE]-button (24) on the player.
2. [SOURCE]-buttons: same functionality as the [SOURCE
SELECT]-button (25) on the player.
3. [PLAY-PAUSE/MARK/REC]-buttons: same functionality as the
[PLAY-PAUSE/MARK/REC]-buttons (10+13+14) on the player.
[MARK]-button sets a marking point in your recording file and
continues recording in a new file.
4. [LOOP]-buttons: same functionality as the [LOOP
IN/OUT/RELOOP]-buttons (11+12) on the player.
5. [SEARCH]-buttons: same functionality as the [SEARCH]-buttons
(18) on the player.
6. [TRACK]-buttons: same functionality as the [TRACK]-knob (16)
on the player with folder switch off.
7. [FOLDER]-buttons: same functionalit y as the [TRACK]-knob (16)
on the player with folder switch on.
8. [VOLUME]-buttons: used to change the output volume.
9. [MUTE]-button: switches the output volume on/off.
10. [SGL/CTN]-button: same functionality as the single/continuous
option in the setup menu.
11. [PITCH]-buttons: wit h the +/-buttons you can ch ange playback s peed, maximum speed change is set
with the [PITCH]-butt on (20) on the player or with the [PITCH RANGE]-button (13): one of the speed
range LEDs on the player must be lit!
12. [KEY LOCK]-button: same functionality as the [KEY LO C K]-button (19) on the player.
13. [PITCH RANGE]-button: press this button to c hoose a pitch range ( 4% - 8% - 16%). Press this button
for 2 seconds to disable.
14. [REPEAT]-button: press this button to activate the repeat function. Two possibilities are available:
[REPEAT] DIRECTORY: when on the display only [REPEAT] is lit, the current directory is repeated.
[REPEAT] TRACK: when on the dis play both [REPEAT] and [SINGLE] are lit, the current track is
repeated.
15. Battery compartment: Replace only with CR202 5 or equ ivalent 3V t ype. Dang er of explosion if batter y
is incorrectly replaced.
SETUP MENU
To increase flexibility some parameters of the [USB1.1 REC] can be changed in the setup menu.
To enter the [SETUP] menu, press the [TIME] button (26) for about 3 seconds.
Use the [TRACK] knob (16) to browse the different menu options of the main menu.
Press the [TRACK] knob (16) to select the menu option you want to change:
Use the [TRACK] knob (16) to change the parameters of the selected menu option.
If the menu option has submenus, use the [JOG-WHEEL] (28) to browse these.
Press the [TRACK] knob (16) again to return to the main menu.
To save your settings: choose menu option B [(EXIT & SAVE)] and press the [TRACK] knob
1. [SLEEP TIM E]: to extend the lifetime of the laser, the unit g oes automatically to sleep mode while not
used for 15 minutes (default). In this menu option you can change, the time it takes to enter sleep mode:
Turn the [TRACK] knob (16) to select the desired time: [No SLEEP] 120 minutes.
Press the [TRACK] knob (16) to save the new value and return to the main menu.
2. [Line Mode]: you can configure how the text line shows information that is longer than 10 characters.
You can choose 3 different modes + some extra fine-tuning:
There are 3 submenus: push the [TRACK] knob (16) to select a submenu.
o
[Mode = 1]: text line scrolls and waits for a certain time before scrolling starts again.
Turn the [JOG WHEEL] (28) to select the desire d val ue :
[Dis. = 0.5s 12.0s]: waiting time in seconds.
[Run = 50ms 2000ms]: 50ms = fast speed / 2000ms = slow speed
o
[Mode = 2]: text line scrolls only one time, then stops.
JB SYSTEMS® 9/15 USB 1.1 REC
Page 12

ENGLISH OPERATION MANUAL
•
•
•
•
•
•
•
•
•
•
Turn the [JOG WHEEL] (28) to select the desire d val ue :
[Dis. = 0.5s 12.0s]: waiting time in seconds.
[Run = 50ms 2000ms]: 50ms = fast speed / 2000ms = slow speed
o
[Mode = 3]: text line scrolls continuously.
Turn the [JOG WHEEL] (28) to select the desire d val ue :
[Dis. = 0.5s 12.0s]: waiting time in seconds.
[Run = 50ms 2000ms]: 50ms = fast speed / 2000ms = slow speed
Press the [TRACK] knob (16) to save the new values and return to the main menu.
3. [SGL/CONT]: You can choose between “single track mode” and “continuous play”.
• Continuous: the complete CD/USB-drive will be played without interruption. (used in pubs)
• Single: player stops at the end of each track and waits at the beginni ng of the next track. (mostly
used by deejays)
Turn the [TRACK] knob (16) to select the desired m ode. Press the [TRACK] knob (16) to save the
new value and return to the main menu.
4. [AUTOCUE MODE]: while switched on th e player stops at the end of e ach track and waits at the first
music note of the nex t track. This means that bad ly indexed CDs will not inter fere with the instant star t
capabilities of the player, a very useful feature for deejays!
5. [REC. USB]: you can select to which USB-slot (USB1 or USB2) the recording whould be sent.
6. [REC. Bitrate]: you can choose the qualit y of your recording (WAV – MP3). Turn the [TRACK] k nob (16)
to select the desired recor ding quality: WAV, MP3-quality : from 64 kbps (lowes t quality) up to 320 kbps
(highest quality).
7. [REC. Input] : you can choose [AUTO] or [MANUAL]. [AUTO] limits the r ecording level automatically to
0dB.
8. [OUT Mode] : you can choose [PLAYBACK] or [REC MON]. ATTENTION! : when you put the [USB 1.1
REC] in [REC. M ON] mode the pl ayback signal will be interrupted and you will hear the recording
signal on the output.
9. [Version / upgrading]: use this option to check and/or upgrade the firmware versions.
Turn the [TRACK] knob (16) to select the 2 firmware parts:
o
[CON: xx]: shows the version of the control firmware
o
[DSP: xx]: shows the version of the DSP firmware
o
[Upgrade]: blinks when the unit is ready to check if there are new firmware versions
available. See “FIRMWARE UPGRADING” for more information.
Press the [TRACK] knob (16) to return to the main menu.
A. [Load defaults]: If you really messed up things, you can still reload the default setting!
While [Load Defaults] is shown on the display: press the [TRACK] knob (16) to load the defaults.
B. [Exit & Save]: if you want your changes to t he setu p m enu to be perm anentl y saved ( also af ter sw itching
the unit off) you MUST use this option!
Press the [TRACK] knob (16) : the display shows [Saving] and exits the setup menu.
FIRMWARE UPGRADING
We strongly suggest to regularly check the [USB1.1 REC] product page on www.jbsystems.be to see if new
firmware updates are available. Upgrading firmware should always be done very carefully!
Download the file containing the upgrade file(s)
Read the instructions and follow them strictly, otherwise you could damage your equipment…
Put the files on an EMPTY (important!) USB-stick.
Press the [TIME] button (26) for about 3seconds to enter the setup menu.
Use the [TRACK] knob (16) to browse to menu option [9. Version].
Turn the [TRACK] knob (16) until the display shows [Upgrade].
Use the [SOURCE SE LE CT] button (25) to select USB1 input (3).
Insert the USB-stick with firmware files in USB1-input (3)
Upgrading will start automatically: WAIT (!) until the upgrading process is finished. NEVER turn the
player off while upgrading the software!!!
If the display asks you to turn off the unit: turn the unit off, wait 3seconds and turn it back on.
Check if the software version corresponds to the version marked in the readme file that came with the
update.
JB SYSTEMS® 10/15 USB 1.1 REC
Page 13

ENGLISH OPERATION MANUAL
•
•
•
•
•
INSTALLING THE TRACK-INDEXER SOFTWARE
The USB1.1 REC works perfectly without the Track -Indexer database files but if you want to sear ch your
tracks easily and lightning f ast than you should inst all the Track -Indexer software on your c omputer! Please
note that the program currently onl y works under W indows (XP, Vista, W in7, Win10). To be sure that you
always have the latest version, you can download the software from the [USB1.1 REC] product page
on our website. Installing the program is very easy: just double-click the file and follow the instr uctions on
your screen.
USING THE TRACK-INDEXER SOFTWARE
Each time you add or remove tracks from your USB ha rd disk,
you must run the TRACK-INDEXER software again to update the Track-Indexer database files!
After the installation you will see a new program directory called “JB”. In this directory you will find 2 files:
- Uninstall (to uninstall the software)
- DbBuilder (to start the software)
Connect your USB-hard drive to your PC and check which drive
letter was assigned to it.
Click on the Track-Indexer icon to start the software: the main
screen is shown.
In the upper center choose your USB-drive.
Press the BUILD-button.
The software starts scanning the USB-drive for compatible
audio files and extrac ts the ID3-tags to build the Track-Indexer
database files, neede d to speed up the search func tion on the
player. Once the progress ion bar on the bottom is full, the dat abase buil ding proc ess is finished a nd a
short summary is shown.
The program wrote the Track -Indexer files (file extensi ons: .DBH + .dat + .DBX) to the USB-drive so now
you can remove it from your PC and connect it to the USB1.1 REC.
To achieve the best result s, please always use the latest version of the T rack-Indexer database software.
You can find the software version at the bottom left of the “About” screen.
! IMPORTANT MESSAGE FOR VISTA USERS !
Many Vista users will not be able to run the Track-Indexer software.
This problem is caus ed by the UAC (User Account Control) limitation,
a security option limiting the user pri vileges in Vista. T o overcome this
problem, right-click the Track-Indexer program icon and choose “Run
as administrator” in the popup menu. Windows will respond with the
window shown on the right: just click “Allow”.
JB SYSTEMS® 11/15 USB 1.1 REC
Page 14

ENGLISH OPERATION MANUAL
•
•
•
•
HOW TO USE …
Most of the comm on functions are explaine d in the previous c hapter “controls and functions” In this chapter
we talk about the functions that need a little more explanation.
SOME GENERAL FUNCTIONS:
SEARCH A TRACK WITH THE TRACK-INDEXER SYSTEM:
Important: before you can use the Track-Indexer s ystem, you should s can your USB-driv e so it contains
the necessary database files.
You can choose the search-k ey at any mom ent by pressing t he [TRACK]-k nob (16) while you turn it. You
can search for [Art](artist), [tit](title), [Alb](album) or [Gen](genre).
• Press the [DATABASE]-button (17) to start the lo okup function the first charac te r of the lis t you want
to search is blinking in the display.
• Turn the [TRACK]-knob (16) to change the first character.
• Selected search-ke y is [tit]: turn the [JOG WHEEL] (28) to browse the list of titles, s tarting with
the selected first character.
• Selected search-key is NOT [tit]: see the example below for search-key = [Art](artist)
• First turn the [JOG W HEEL] (28) whi le you keep the [TRACK]-knob (16) pressed to browse
the list of artists, starting with the selected first character.
• Once you have selected the desired artist, sto p pressing the [TRACK]-knob (16) wh ile you
continue turning the [JOG WHEEL] (28): now you can browse all the t itles from this artist, i n
alphabetical order.
• Once you have found the right track: press the [LOAD TRACK]-button (24).
SEARCH A TRACK WITHOUT THE TRACK-INDEXER SYSTEM:
Press and turn the [TRACK]-knob (16) to select [Std](standard lookup s ystem). If the USB-drive has no
Track-Indexer files, the player automatically selects the standard lookup system. You have tw o opt ions:
Option 1:
Simply use the combination of [FOLDER]-button and [TRACK]-knob to browse the different directories.
Option 2:
• Press the [DATABASE]-button (17) to start the l ookup function b oth the [FOLDER] and [TRACK]
displays start blinking.
• Turn the [TRACK] k nob (16) to browse the fold ers. (when the folder LED = on, you will see the folder
names while browsing)
• Turn the [JOG WHEEL] (28) to browse the selected folder at high speed.
• Once you have found the right track: press the [LOAD TRACK]-button (24).
Remark: if you want to browse you folders/tracks at high speed, you can use this method:
• Browse folders: turn the [JOG-WHEEL] while you keep the [TRACK]-knob pressed (folder LED = on)
• Browse tracks: turn the [JOG-WHEEL] while you keep the [TRACK]-knob pressed (folder LED = off)
RECORDING TO USB:
To select the desired USB-slot and recording quality: check the chapter [SETUP MENU”], points 5 + 6.
• Insert a USB-memory in the selected USB-slot.
• To start a recording: push the [REC] button (13) or simply push the REC-button on the IR-remote.
Recording starts imm ediately to the as signed US B-slot. The disp lay shows [Save to RECxxxxx.mp3”],
followed by [RECORDING]. The corresponding USB-led (25) blinks as long as the recording
continues.
• To stop recording: push the [REC] button again, the USB-led (25) stops blinking.
Repeat the above actions as often as you like to make new recordings.
Later you can always use a PC to change the original name of the MP3-file and add ID3-tags if needed.
You can change the disp lay mode by push ing the [REC DI SPLAY] button (2 9) to view the recorded track
number and the level of the incoming signal on the time bar (6 on the Display).
The [CLIP] led (30) blinks when the level of the recording signal is too high (DISTORTION!).
SLEEP MODE:
When source select is s et to CD, the CD player automatic ally shuts off the tr ansport and laser after about
5~120 minutes (selectab le in the setup menu), while in pause or c ue mode. This extends the life of your
JB SYSTEMS® 12/15 USB 1.1 REC
Page 15

ENGLISH OPERATION MANUAL
•
motor drive and laser. Dur ing sleep mode the display s hows the word [SLEEP]. To wake up the player,
just press the cue or play button, the display turns to normal and is ready to receive instructions.
• TOTAL RANDOM ON A USB-drive:
This is the simple random function where any track on your USB-drive can be played randomly:
• Open the fader for the USB1.1 REC on your audio mixer.
• Press the [SOURCE SELECT]-button (25) to choose one of the USB-drives.
• Press the [RANDOM]-button (23) shortly until the word [RANDOM] in the display is lit.
• Press the [PLAY]-button (14) to start random playback.
• “SMART” RANDOM ON A USB-drive:
This is the “sm art” random function where you have full control ov er which folder, genre, album or artist
you want to play in your random selection, perfect for back ground music in restaurants, sho ps, clubs &
bars without a dj. This is how it works:
• Open the fader for the [USB1.1 REC] on your audio mixer.
• Press the [SOURCE SELECT]-button (25) to choose one of the USB-drives.
PLAY ONLY TRACKS FROM 1 FOLDER
• Press & turn the [TRACK]-knob (16) to select the [Std] search-key.
• Press the [FOLDER] button (15), the display will show the currently selected directory name.
• Turn the [TRACK] knob (16) to select the directory you want to play files from.
• Press the [RANDOM]-button (23) for about 2 seconds until [RANDOM] starts blinking in the disp lay.
• Press the [PLAY]-button (14) to start random playback only from the selected folder.
PLAY ONLY TRACK S FROM 1 GENRE
• Press & turn the [TRACK]-knob (16) to select the [Genre] search-key.
• Press the [FOLDER] button (15), the display will show the currently selected genre.
• Turn the [TRACK] knob (16) to select the first letter of the genre you want to choose.
• Press the [RANDOM]-button (23) for about 2 seconds until [RANDOM] starts blinking in the disp lay.
• Press the [PLAY]-button (14) to start random playback only from the tracks of the selected genre.
Remark1: to play only tr ack s from a cer tain artist or al bum, j ust rep eat the ac tion s but select the ar tist
or album search-key.
Remark2: please note that the [SMART] random function will only work properly on condition that your
ID3-tags are well maintai ned. A perfect “fr eeware” ID3 -tag editor for this task is called “ MP3TAG” and
can be downloaded from www.mp3tag.de !
PITCH BENDING:
This function is used to synchronize the beats of two tracks. This can be done in two ways:
• [PITCH BEND] buttons: The speed increases or decreases respectively as long as the [PITCH
BEND+] or [PITCH BEND-] buttons (22) are pressed.
• [JOG WHEEL]: During p lay mode the [JOG W HEEL ] (28) will tempor arily bend the p itch of the music
by turning the [JOG WHEEL] clockwise to speed up or counterclockwise to slowdown. The rotation
speed the [JOG WHEEL] determines the percent of pitch bend.
• PLAYING/RECORDING CD-R and CD-RW:
Apart from normal aud io CD’s the [USB1.1 REC] can pla y both CD-R (CD recordable) an d CD-RW (C D
rewriteable). Please note that you should always use the “disc at once” a nd “track at once” disc writing
options! Although the [USB1.1 REC] is capable of readin g CD-R and CD-RW recorded at h igher speeds,
we suggest not usin g recording speeds more than x 12 to increase readabilit y. Always bu y good quality
brands for CD-R and CD-RW!
If the disc is multi session, it will only play the first session:
• if the first session is CD-DA you can only play CD-DA tracks.
• if the first session is MP3 you can only play MP3 files.
ABOUT LOOPS:
• CREATE A LOOP:
While a track is playing, pres s the [CUE] button (11) t o program the star t point of the loop. Now press the
[OUT] button (12) to program the endpoint of the loop. Then pres s the [PLA Y]-button ( 14) to star t the loop.
JB SYSTEMS® 13/15 USB 1.1 REC
Page 16

ENGLISH OPERATION MANUAL
(With some practice you will be able to cr eate perfec t loops! ) While the loop is pl aying, you can press the
[OUT] button again to exit the loop and continue the rest of the track.
• RESTART A LOOP:
When a loop is progr ammed and you left it by pressing the [OUT] button, just press the [OUT] button
again to restart the loop (RELOOP).
SPECIFICATIONS
Power Supply: AC 100-240V 50/60Hz, USB port: 5Vdc – 0.5A
Power Consumption: 13W
Battery for remote : CR-2025 (3V)
Output level (+/-0.5dB @ 1kHz,0dB): CD: 2.0Vrms USB: 2.0Vrms
Input level for recording : 1KHZ / 4dBV +/-2dBV (AUTO)
1KHZ / 0dBV +/-2dBV (MANUAL)
Frequency resp. (+/-0.4dB / +/-0.2@0dB): CD: 17-20.000Hz USB: 17-16.000Hz
THD + noise (@ 1kHz, 0dB): CD: 0.008% USB: 0.007%
S/N Ratio (@ 1kHz, 0dB (IHF-A weighted): CD: >126dB USB: >85dB
CD Short access time (next track): <2sec
CD Long access time (track 1 20): <4sec
CD Electronic tracking: Full automatic digital tracking.
MP3 FORMAT:
Possible file extensions: .mp3 ~ .MP3 ~ .mP3 ~ .Mp3 ~ .WAV
ISO9660: max. 63 character style
Joliet: max. 63 character style
CD-ROM sector format: mode-1 only
USB file system: FAT 12/16/32
Max. Hard disk capacity: 500GB
Max. Folders: CD: 255 USB: 999
Max. Tracks / Folder: CD: 255 USB: 999
Max. Files: CD: 999 USB: 9999 (Track Indexer software)
MP3 FORMATS PLAYBACK:
MPEG1 Layer3 (ISO/IEC11172-3): mono / stereo sampled at: 32 - 44,1 - 48kHz
Bitrates: 64 – 320 Kbps
Bitrate modes: CBR (Constant Bitrate), VBR (Variable Bitrate) or Xing
MPEG2 Layer3 (ISO/IEC13818-3): mono / stereo sampled at: 16 – 22,05 - 24kHz
Bitrates: 64 – 160 Kbps
Bitrate modes: CBR (Constant Bitrate), VBR (Variable Bitrate) or Xing
MPEG2,5 Layer3: mono / stereo sampled at: 8 – 11,025 - 12kHz
Bitrates: 64 – 160 Kbps
Bitrate modes: CBR (Constant Bitrate), VBR (Variable Bitrate) or Xing
MP3 FORMATS RECORDING:
MPEG1 Layer3 (ISO/IEC11172-3): stereo sampled at: 44,1kHz
Bitrates: 64 – 320 Kbps
Bitrate mode: CBR (Constant Bitrate)
Weight: 4,35kg
Dimensions:
482mm (W) X 270.5mm (D) X 88.8mm (H)
JB SYSTEMS® 14/15 USB 1.1 REC
Page 17

ENGLISH OPERATION MANUAL
Every information is subject to change without prior notice
You can download the latest version of this user manual on our website: www.jb-systems.eu
JB SYSTEMS® 15/15 USB 1.1 REC
Page 18

Page 19

Page 20

 Loading...