

JBL SUB 550P Owner's Manual
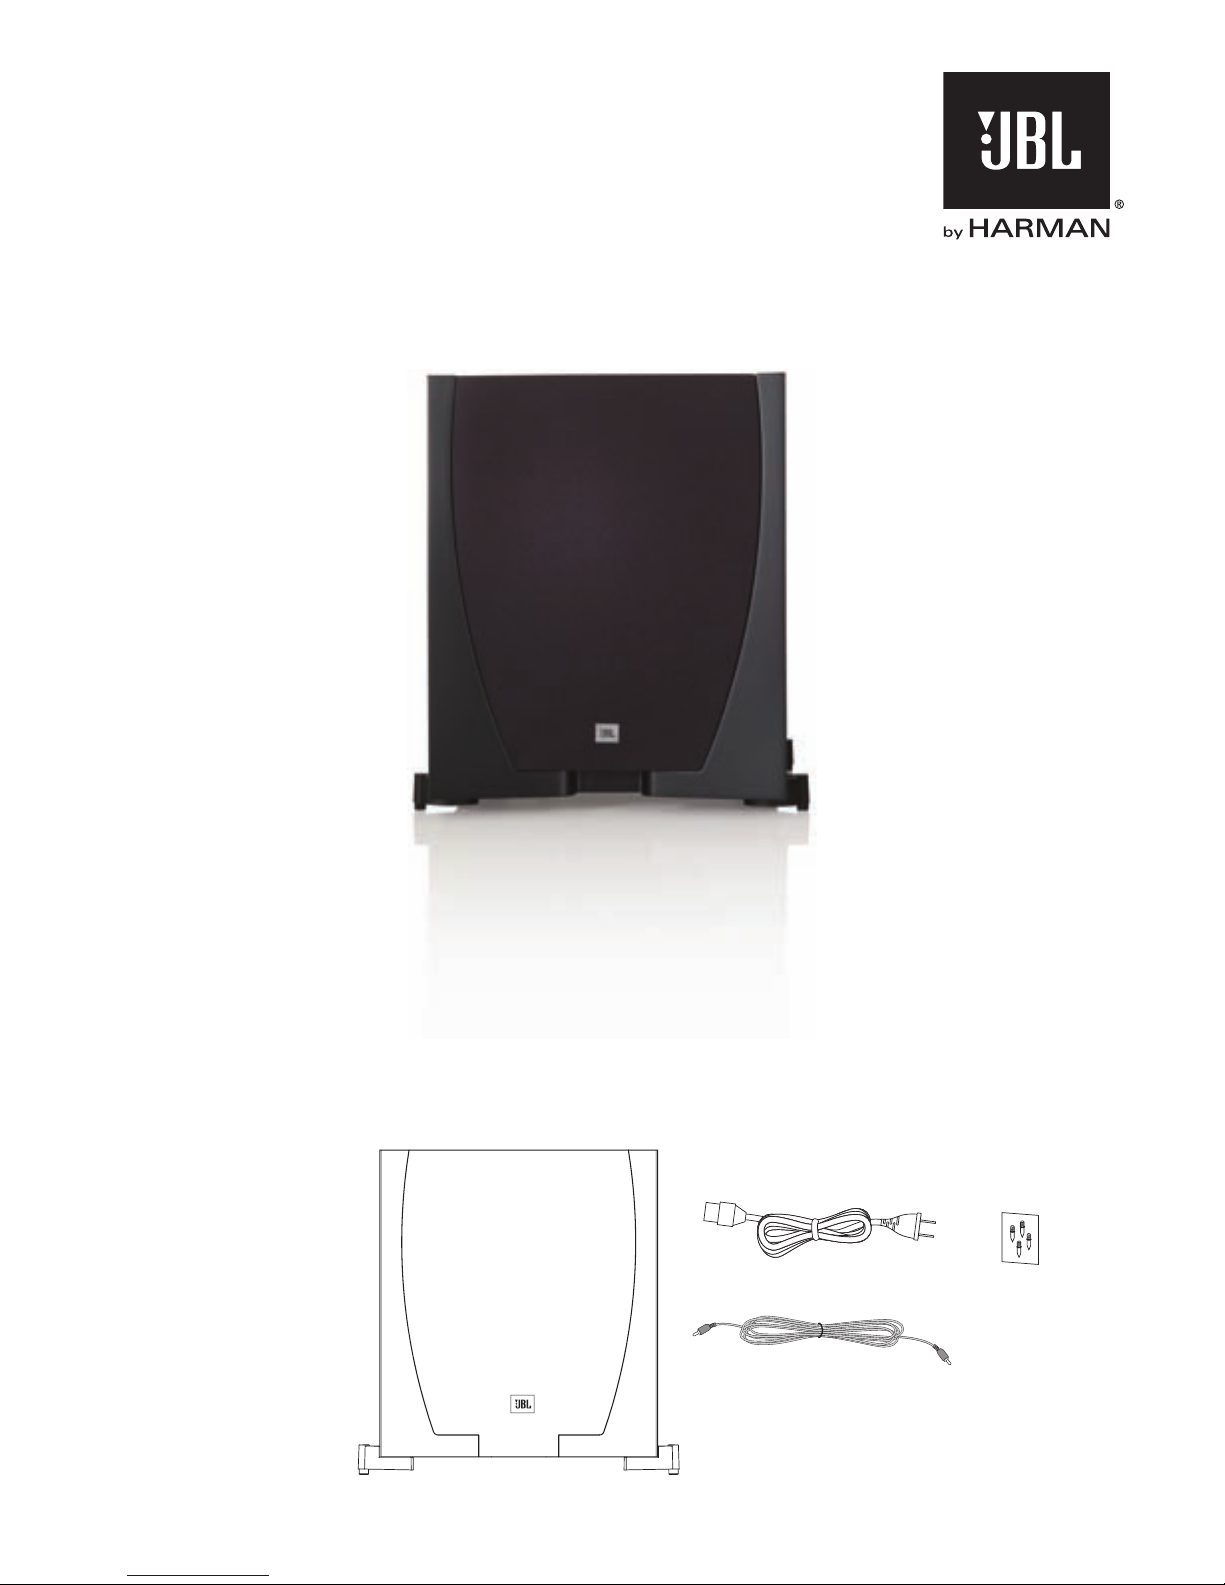
SUB 550P
300-Watt, 10" (250mm) Powered Subwoofer
thank YoU For chooSIng thIS JBl® ProdUct
Your new JBL® SUB 550P 300-watt powered subwoofer incorporates
a 10" (250mm) forward-firing cone transducer and a built-in highperformance 300-watt RMS amplifier that deliver the powerful,
dynamic and accurate low-frequency performance that makes your
film soundtracks and music come alive. And with line-level and LFE
inputs, adjustable crossover and phase controls and automatic turn
on/off, the SUB 550P is also simple to connect and set up.
We’re confident that this JBL subwoofer will provide every note
of enjoyment that you expect – and that when you think about
purchasing additional audio equipment for your home, car or office,
you will once again choose JBL products.
This owner’s manual contains all the information you need to set up,
connect and adjust your new subwoofer. For even more in-depth
information, go to our Web site: www.jbl.com.
InclUded ItemS
1X
1X
1X
1X
oWner’S manUal
2
ImPortant SaFetY InStrUctIonS
Read these instructions.1.
Keep these instructions.2.
Heed all warnings.3.
Follow all instructions. 4.
Do not use this apparatus near water.5.
Clean only with dry cloth.6.
Do not block any ventilation openings. Install in accordance with the 7.
manufacturer’s instructions.
Do not install near any heat sources such as radiators, heat registers, 8.
stoves, or other apparatus (including amplifiers) that produce heat.
Do not defeat the safety purpose of the polarized or grounding-type plug. 9.
A polarized plug has two blades with one wider than the other.
A grounding-type plug has two blades and a third grounding prong.
The wide blade or third prong is provided for your safety. If the
provided plug does not fit into your outlet, consult an electrician for
replacement of the obsolete outlet.
Protect the power cord from being walked on or pinched, particularly at 10.
the plugs, convenience receptacles and the point where they exit from
the apparatus.
Only use attachments/accessories specified by the manufacturer.11.
Use only with the cart, stand, tripod, bracket or table 12.
specified by the manufacturer or sold with the apparatus.
When a cart is used, use caution when moving the cart/
apparatus combination to avoid injury from tip-over.
Unplug this apparatus during lightning storms or when 13.
unused for long periods of time.
Refer all servicing to qualified service personnel. Servicing is required 14.
when the apparatus has been damaged in any way, such as: when
the power supply cord or plug has become damaged, when liquid
has been spilled or objects have fallen into the apparatus, when the
apparatus has been exposed to rain or moisture, when the apparatus
does not operate normally, or the apparatus has been dropped.
Do not expose this apparatus to dripping or splashing and ensure that no 15.
objects filled with liquids, such as vases, are placed on the apparatus.
To completely disconnect this apparatus from the AC mains, disconnect 16.
the power supply cord plug from the AC receptacle.
The mains plug of the power supply cord shall remain readily operable.17.
Do not expose batteries to excessive heat such as sunshine, fire or the 18.
like.
The lightning ash with arrowhead symbol, within an equilateral
triangle, is intended to alert the user to the presence of uninsulated
“dangerous voltage” within the product’s enclosure that may be
of sufficient magnitude to constitute a risk of electric shock to
persons.
The exclamation point within an equilateral triangle is intended
to alert the user to the presence of important operating
and maintenance (servicing) instructions in the literature
accompanying the product.
WARNING: To reduce the risk of fire or electric shock, do not expose this
apparatus to rain or moisture.
IMPORTANT: The subwoofer requires proper ventilation and is not to be
used in an enclosed environment.
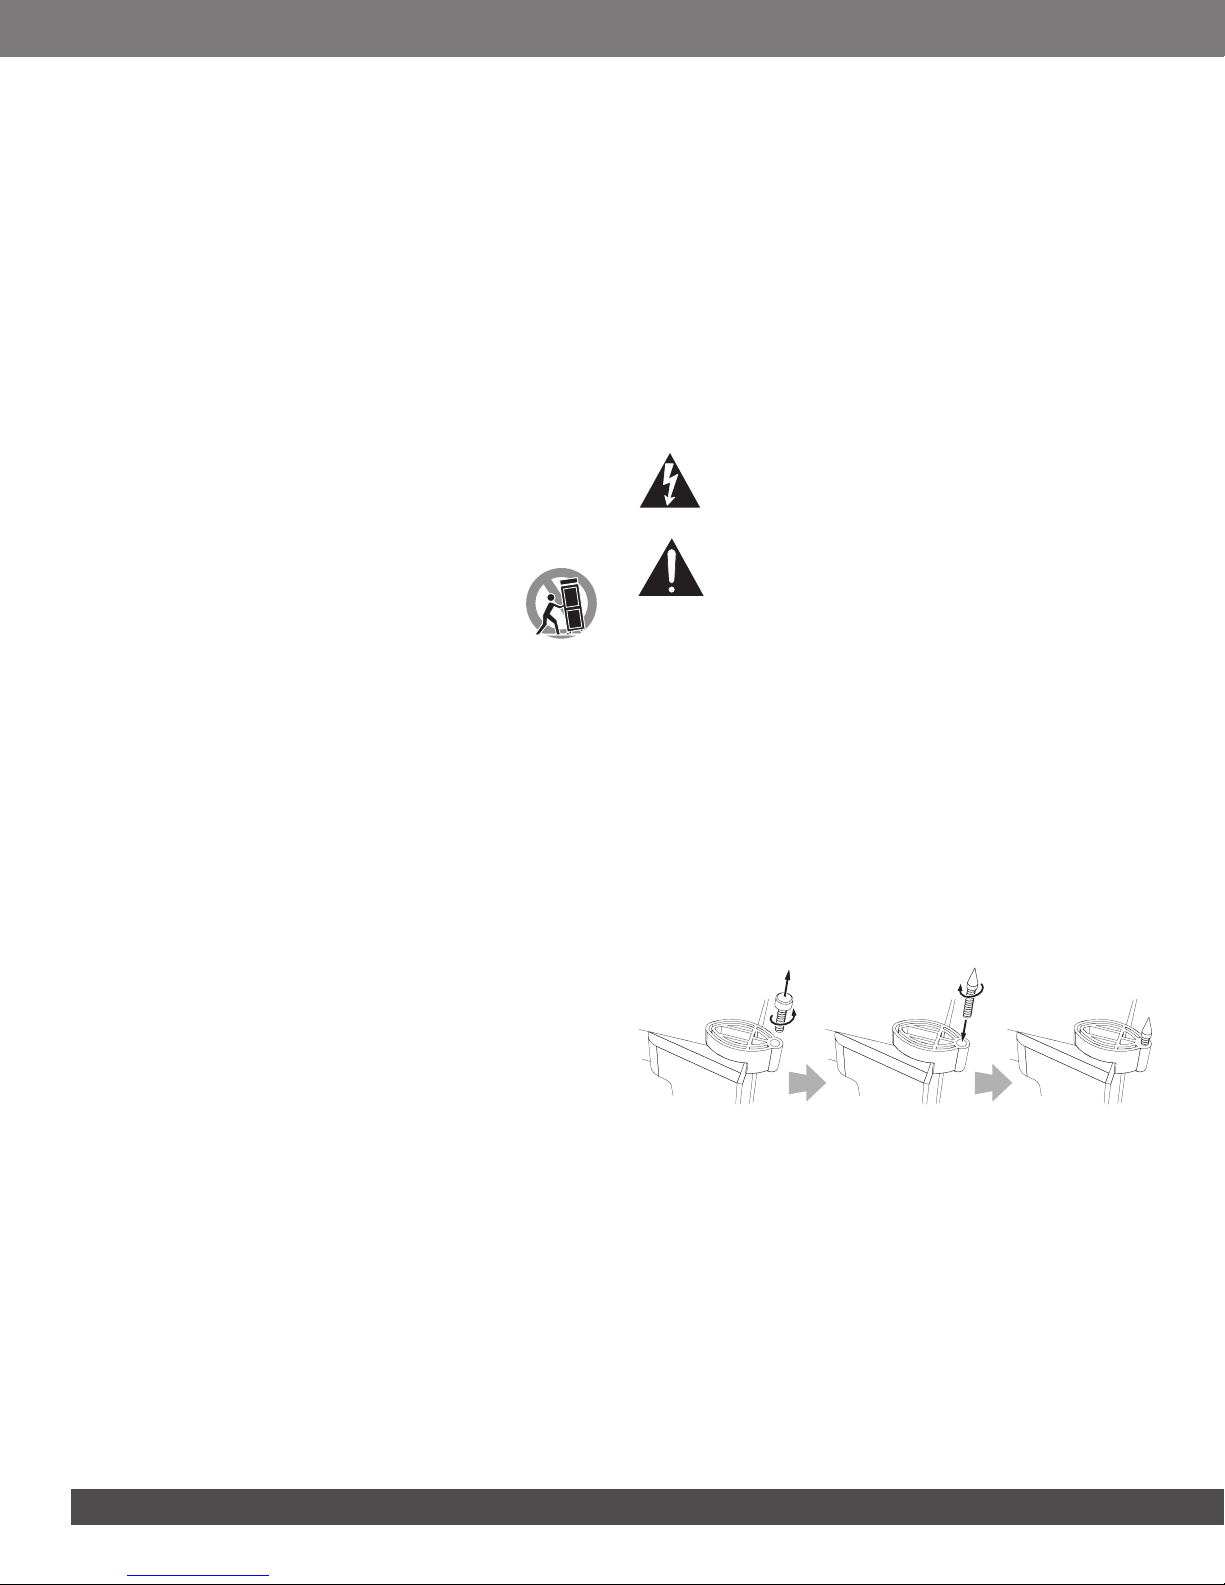
USIng the SUPPlIed SPIkeS
Four metal spikes are supplied for use when you place the subwoofer on a
carpeted surface. Using the spikes decouples the subwoofer from the oor
and prevents unwanted acoustic damping.
TO INSERT THE SPIKES:
Gently turn the subwoofer upside down on a soft, nonabrasive surface.1.
Unscrew and remove the rubber bumpers from the subwoofer’s feet.2.
Screw each spike into the threaded insert in each foot. Make sure all 3.
four spikes are screwed in completely for stability.
NOTE: NEVER drag the subwoofer to move it, as this will damage the
spikes, the feet and/or the subwoofer cabinet itself. Always lift the subwoofer and carry it to its new location.
 Loading...