

Page 1
SUB 250P/260P
Powered Subwoofer
THANK YOU FOR CHOOSING THIS JBL® PRODUCT
Your new JBL® powered subwoofer incorporates a PolyPlas™
cone transducer and built-in high-performance amplifier that
deliver the powerful, dynamic and accurate low-frequency
performance that makes your film soundtracks and music come
alive. And with line-level and LFE inputs, adjustable crossover
and phase controls and automatic turn on/off, it is also simple to
connect and set up.
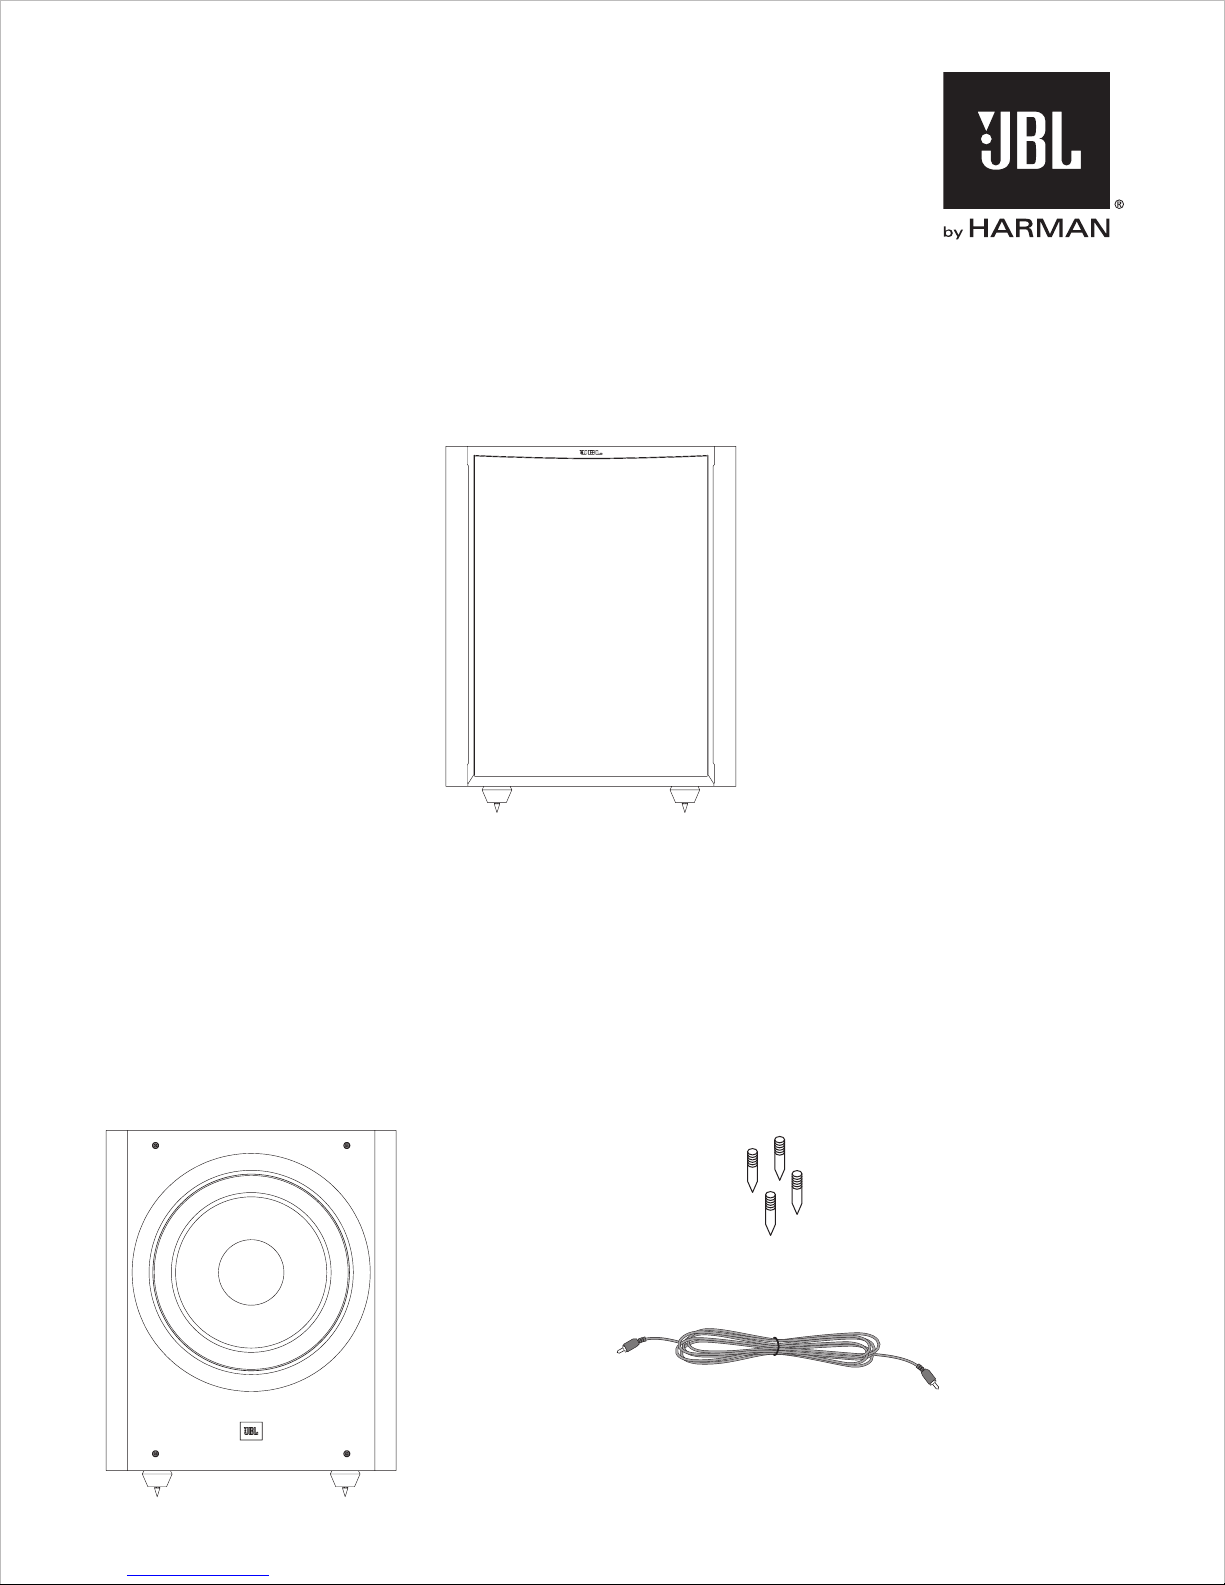
INCLUDED ITEMS
We’re confident that this JBL subwoofer will provide every note
of enjoyment that you expect – and that when you think about
purchasing additional audio equipment for your home, car or
office, you will once again choose JBL products.
This quick-start guide contains all the information you need to
set up, connect and adjust your new subwoofer. For more
in-depth information, go to our web site: www.jbl.com.
4X
1X
QUICK-START GUIDE
Page 2
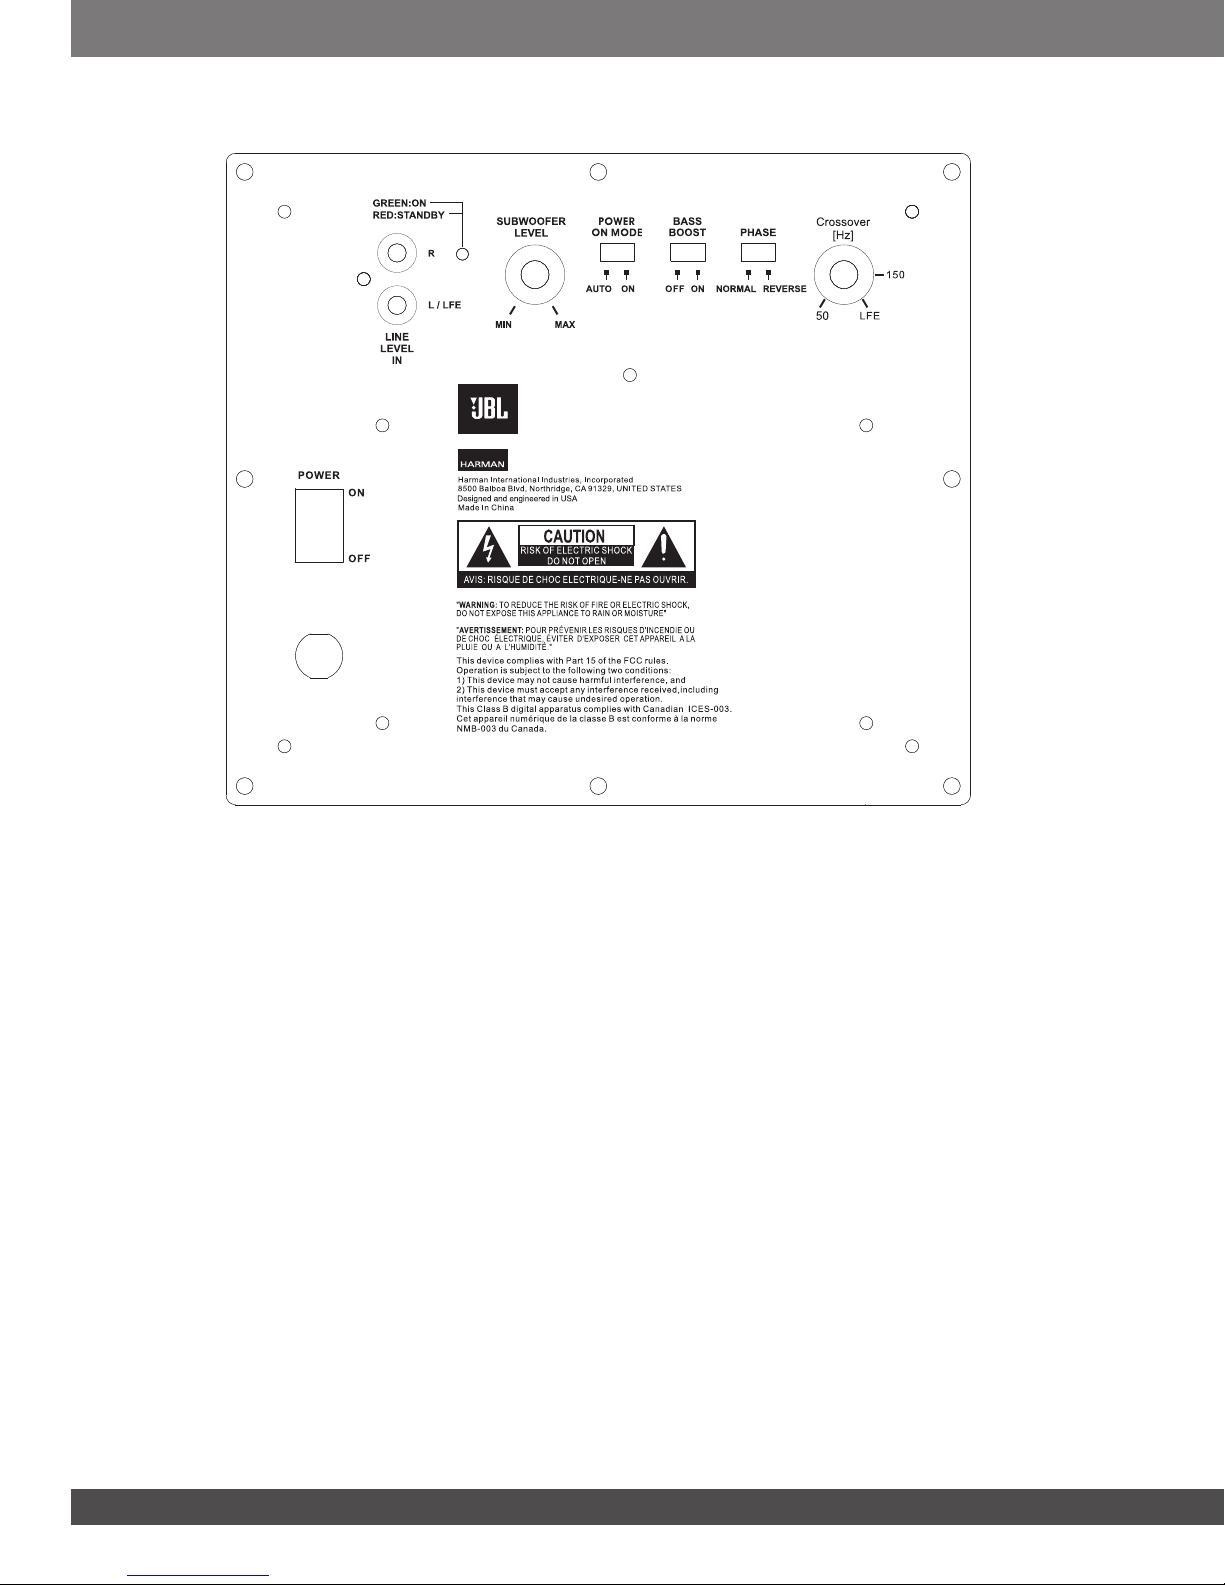
SUBWOOFER REAR-PANEL CONTROLS AND CONNECTIONS
STUDIO
SUB 250P
POWER CORD
1) Crossover Control: This control determines the highest frequency at
which the subwoofer reproduces sounds. The higher you set the Crossover
control, the higher in frequency the subwoofer will operate and the more its
bass will “overlap” that of the speakers. This adjustment helps achieve a
smooth transition of bass frequencies between the subwoofer and the
speakers for a variety of different rooms and subwoofer locations.
2) Phase Switch: This switch determines whether the subwoofer
transducer's piston-like action moves in and out in phase with the main
speakers. If the subwoofer were to play out of phase with the main
speakers, the sound waves from the main speakers could partially cancel
out the sound waves from the subwoofer, reducing bass performance and
sonic impact. This phenomenon depends in part on the placement of all the
speakers relative to the listening position and to each other in the room.
3) Bass Boost: When switched to 'On,' this boosts bass level for added
low-end power.
4) Power On Mode: When switched to 'Auto' position, the subwoofer will
then be in Standby mode. It will automatically turn 'On' when an audio signal
is detected at its inputs, and will return to the Standby mode when no audio
signal is detected by its inputs after approximately 10 minutes. Otherwise,
subwoofer will always remain powered until Power Switch is turned 'Off.'
5) Subwoofer Level: Use this control to adjust the subwoofer’s volume. Turn
the knob clockwise to increase the volume; turn the knob counterclock-wise
to decrease the volume.
6) On/Standby LED: When the Power switch is in the ‘On’ position, this
LED indicates whether the subwoofer is in the On or Standby state.
• When the LED glows green, the subwoofer is turned on.
• When the LED glows red, the subwoofer is in the Standby mode.
7) Line In/LFE Input Connectors:
• When you’re connecting the subwoofer to the dedicated subwoofer
output of a receiver/processor that has its own low-pass crossover
network, use the LFE Input connector.
• When you're connecting the subwoofer to the preamp or subwoofer
outputs of a receiver/processor that does not have its own low-pass
crossover network, use both Line In connectors and set the Input
Mode switch in the ‘Normal’ position. If your receiver/processor only
has one subwoofer output you can use either Line In connector.
8) Power Switch: Set this switch in the ‘On’ position to turn the
subwoofer on.
If you will be away from home, or will not be using the subwoofer for an
extended period, set this switch in the ‘Off’ position to conserve energy.
9) Power Cord: After you have made and verified the subwoofer’s input
connections, plug the power cord into an active, unswitched electrical outlet
for proper operation of the subwoofer.
DO NOT plug the power cord into the accessory outlets found on some
audio components.
2
Page 3
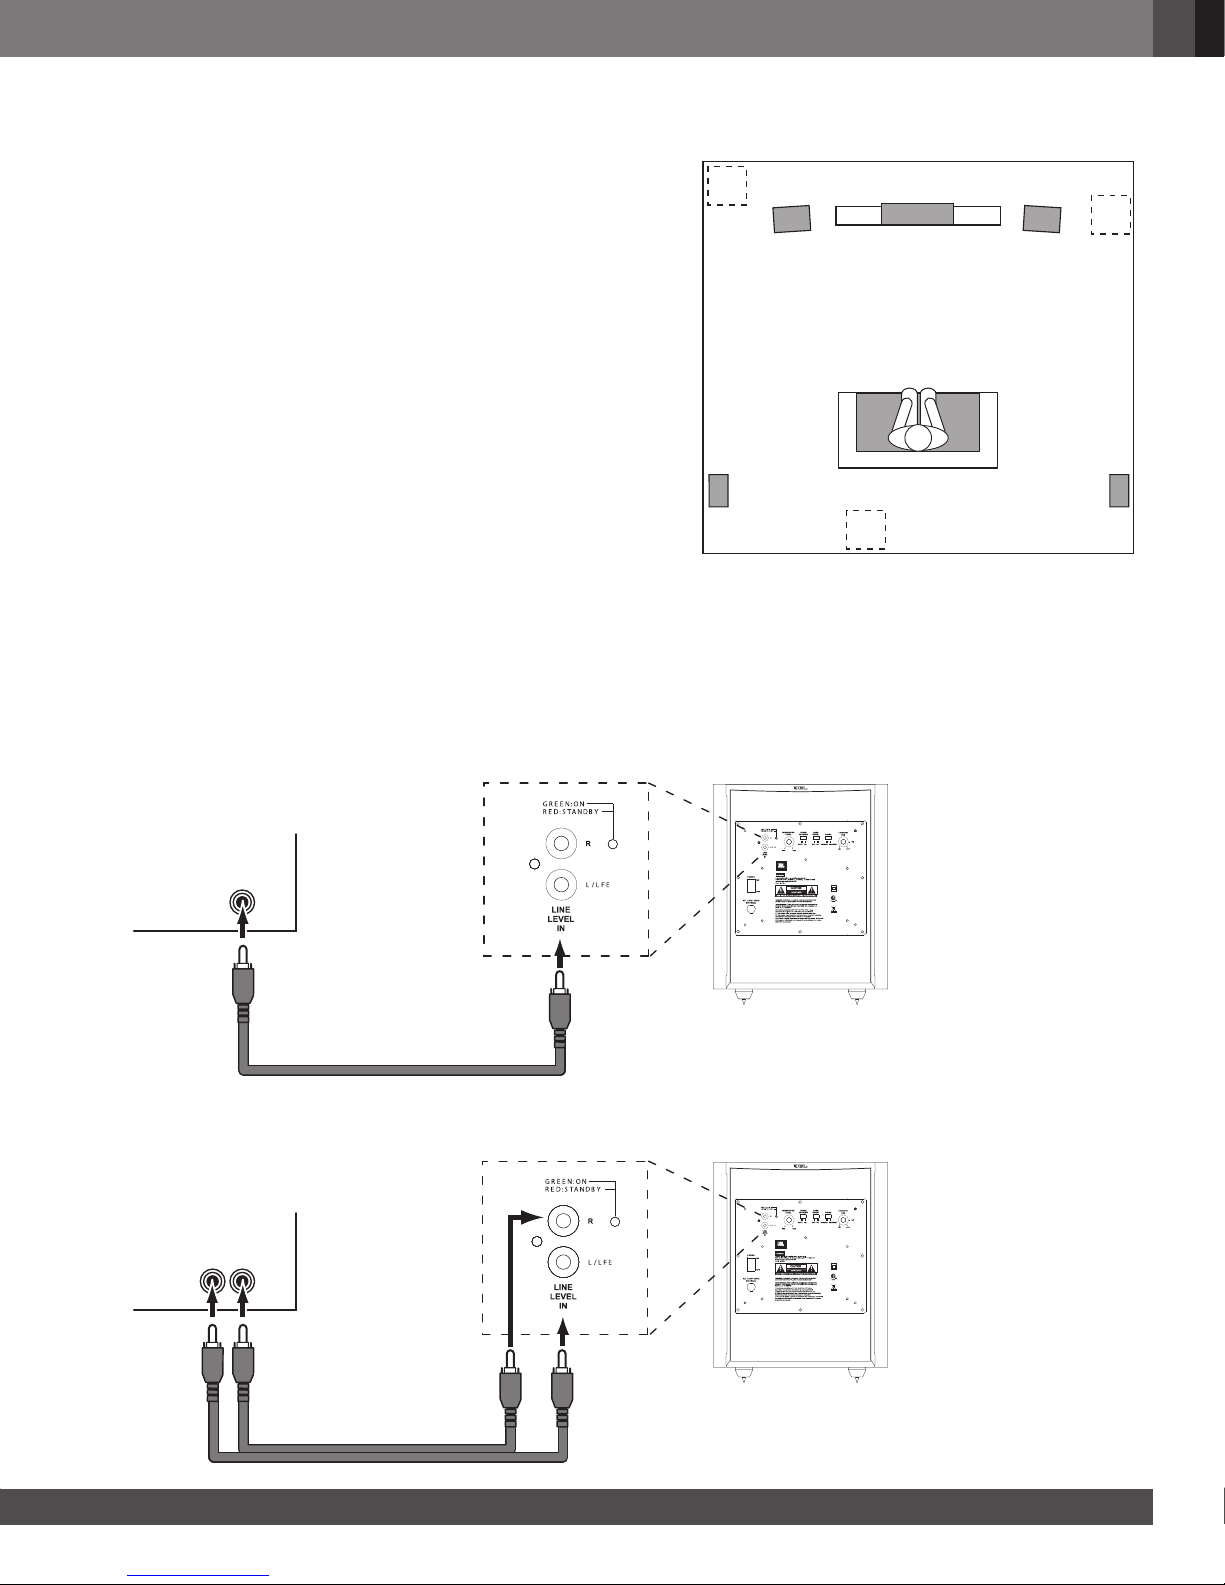
PLACING THE SUBWOOFER
English
The performance of a subwoofer is directly related to its placement in the listening room
and its physical position relative to the other speakers in the system.
While it is true that in general our ears do not hear directional sounds at the low
frequencies where subwoofers operate, when installing a subwoofer within the limited
confines of a room, the reflections, standing waves and absorptions generated within
the room will strongly influence the performance of any subwoofer system. As a result,
1.
TV
Front Left
Speaker
Speaker
the specific location of the subwoofer in the room does become important to the
amount and quality of bass that is produced.
For example, placing the subwoofer next to a wall generally will increase the amount of
bass in the room; placing it in a corner (1) generally will maximize amount of bass in the
room. However, corner placement can also increase the destructive effect of standing
waves on bass performance. This effect can vary depending on the listening position
– some listening positions may yield very good results while others may have far too
much (or too little) bass at certain frequencies.
In many rooms, placing the subwoofer along the same plane as the left and right
speakers (2) can produce the best integration between the sound of the subwoofer
and that of the left and right speakers. In some rooms, the best performance could
even result from placing the subwoofer behind the listening position (3).
Surround Left
Speaker
3.
We strongly recommend that you experiment with placement before choosing a final
location for your subwoofer. One way you can determine the best location for the subwoofer is by temporarily placing it in the listening position and playing music with strong
bass content. Move around to various locations in the room while the system is playing
(putting your ears where the subwoofer would be placed), and listen until you find the
location where the bass performance is best. Place the subwoofer in that location.
CONNECTING THE SUBWOOFER
TO A RECEIVER OR PREAMP/PROCESSOR WITH A LOW-PASS FILTERED DEDICATED SUBWOOFER OUTPUT
Center
2.
Front Right
Speaker
Surround Right
Speaker
Receiver/Processor
SUBWOOFER
LFE OUT
TO A RECEIVER OR PREAMP/PROCESSOR WITH PREAMP OUTPUTS
Receiver/Processor
PREAMP
OUTPUT
STUDIO
SUB 250P
STUDIO
SUB 250P
www.jbl.com
3
Page 4

OPERATING THE SUBWOOFER
TURNING THE SUBWOOFER ON AND OFF
Set the subwoofer’s Power switch to the ‘On’ position. Now set the
subwoofer’s Power On Mode to the ‘Auto’ position. The subwoofer will
automatically turn itself on when it receives an audio signal, and it will go
into Standby mode after it has received no audio signal for approximately
10 minutes. The subwoofer’s LED will glow green when the subwoofer is
on and will glow red when the subwoofer is in Standby.
If you will not be using the subwoofer for an extended period – for
instance, if you’re going on vacation – set the Power Switch to the
‘Off’ position.
SUBWOOFER ADJUSTMENTS: CROSSOVER CONTROL
The Crossover control adjusts the subwoofer’s built-in low-pass filter
crossover between 50Hz and 150Hz. The higher you set the Crossover
control, the higher in frequency the subwoofer will operate and the
more its bass will ‘overlap’ that of the speakers. This adjustment
helps achieve a smooth transition of bass frequencies between the
subwoofer and the speakers for a variety of different rooms and
subwoofer locations.
To set the Crossover control, listen for the smoothness of the bass. If the
bass seems too strong at certain frequencies, try a lower Crossover
control setting. If the bass seems too weak at certain frequencies, try a
higher Crossover control setting.
SUBWOOFER ADJUSTMENTS: VOLUME
Use the Level control to set the subwoofer’s volume. Turn the knob
clockwise to increase the subwoofer’s volume; turn the knob
counterclock-wise to decrease the volume. Once you have balanced the
subwoofer’s volume with that of the other speakers in your system, you
shouldn’t have to change the Level control setting.
SUBWOOFER ADJUSTMENTS: PHASE
The Phase switch determines whether the subwoofer driver’s piston-like
action moves in and out in phase with the speakers. If the subwoofer
were to play out of phase with the speakers, the sound waves from the
speakers could partially cancel out the waves from the subwoofer,
reducing bass performance and sonic impact. This phenomenon
depends in part on the placement of all the speakers relative to each
other in the room.
Although in most cases you should leave the Phase switch in the
‘Normal’ position, there is no absolutely correct setting for the Phase
switch. When the subwoofer is properly in phase with the speakers, the
sound will be clearer and have maximum impact, and percussive sounds
like drums, piano and plucked strings will sound more life-like. The best
way to set the Phase switch is to listen to music that you know well and
to set the switch in the position that gives drums and other percussive
sounds maximum impact.
USING THE SUPPLIED CARPET SPIKES
Four metal spikes are supplied for use when you place the subwoofer on
a carpeted surface. Do not use these spikes when placing subwoofer on
non-carpeted surfaces.
To insert the spikes:
1. Gently lay the subwoofer on its side (not its front or back) on a soft,
nonabrasive surface.
2. Screw each spike into the threaded insert in each foot. Make sure all
four spikes are screwed in completely for stability.
Note: NEVER drag the subwoofer to move it. Always carefully lift the
subwoofer and carry it to its new location.
Notes on Setting Subwoofer Volume:
• Sometimes the ideal subwoofer volume setting for music is too loud
for films, while the ideal setting for films is too quiet for music. When
setting the subwoofer volume, listen to both music and films with
strong bass content and find a ‘middle ground’ volume level that works
for both.
• If your subwoofer always seems too loud or too quiet, you may want
to place it in a different location. Placing the subwoofer in a corner will
tend to increase its bass output, while placing it away from any walls or
corners will tend to lessen its bass output.
HARMAN International Industries, Inc.
8500 Balboa Boulevard, Northridge, CA 91329 USA
© 2014 HARMAN International Industries, Inc. All rights reserved.
JBL is a trademark of HARMAN International Industries, Incorporated, registered in the United States and/or other countries.
PolyPlas is a trademark of HARMAN International Industries, Incorporated.
res, specifications and appearance are subject to change without notice.
Featu
Part No. 950-0501-001
www.jbl.com
 Loading...