

Page 1
CK1200/1500
GARAGE DOOR OPENER
WARNING: IT IS VITAL FOR THE SAFETY OF ALL PERSONS INSTALLING AND USING THIS OPENER TO
FOLLOW THE INSTALLATION INSTRUCTIONS AND SAFETY WARNINGS. FAILURE TO COMPLY MAY RESULT
IN SERIOUS PERSONAL INJURY AND/OR PROPERTY DAMAGE AND FAILURE OF THE OPENER SYSTEM。
Page 2
2
CK1200/CK1500
1.Functions
Micro intellectual control —— One button to control open, stop and close.
The light will turn on while opening or closing the door,
three minutes later the light will turn off automatically.
During set up the opener will automatically sense and
adjust the operating force requirements and build a
digital map of the door travel cycle.
DC motor —— Low noise, soft start, soft stop ensures smooth
operation and longevity.
LED display —— Working situation can be shown on the LED screen.
Decoding —— Rolling code secure radio transmission.
Manual Disengagement—— Open and close the door by hand in the event
of a power cut.
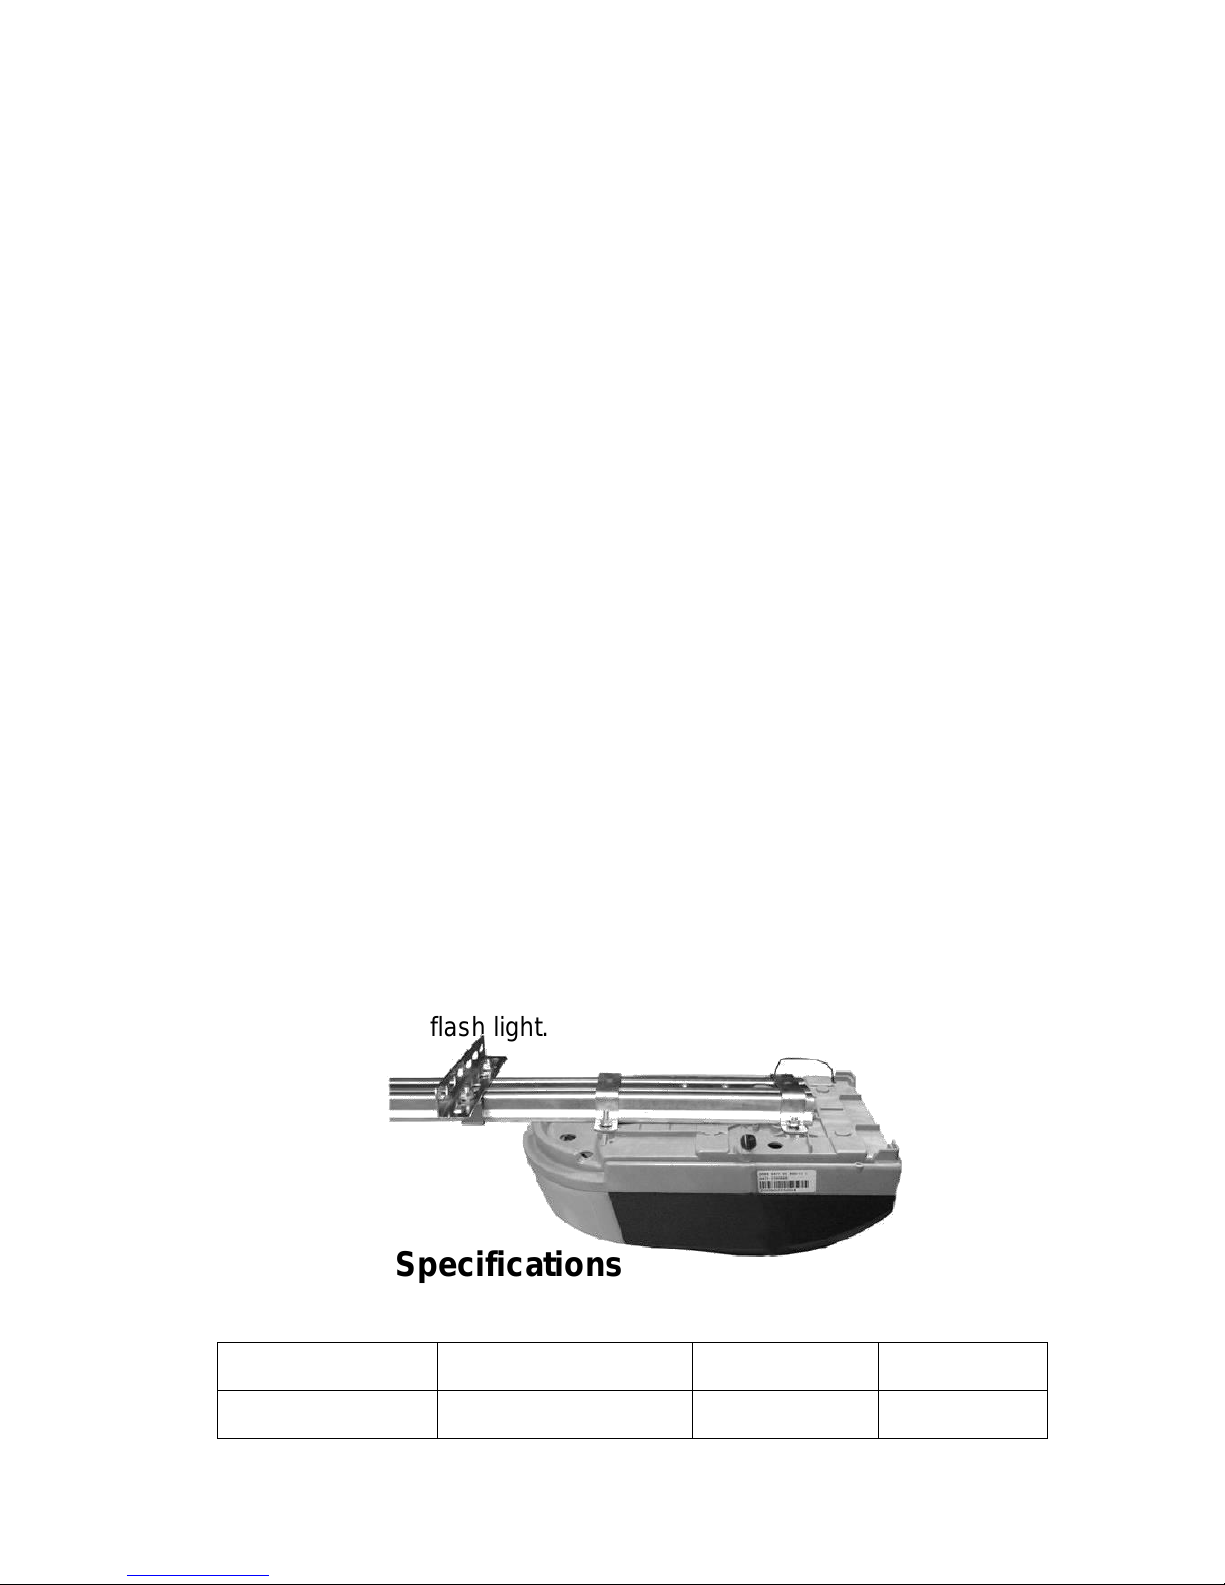
Optional Functions —— Photo beam, battery backup, wall button and
flash light.
2.Technical Specifications
Power input
220VAC±10% 50~60Hz
Reception
433.92MHz
Motor
24VDC
Decoding
Rolling code
Page 3

3
Working temperature
-20~50℃
Transmitter power
27A 12V Battery
Relative Humidity
≦90%
Globe
24V 5W
Open and close force
1200N/1500N
Courtesy light time
3 minutes
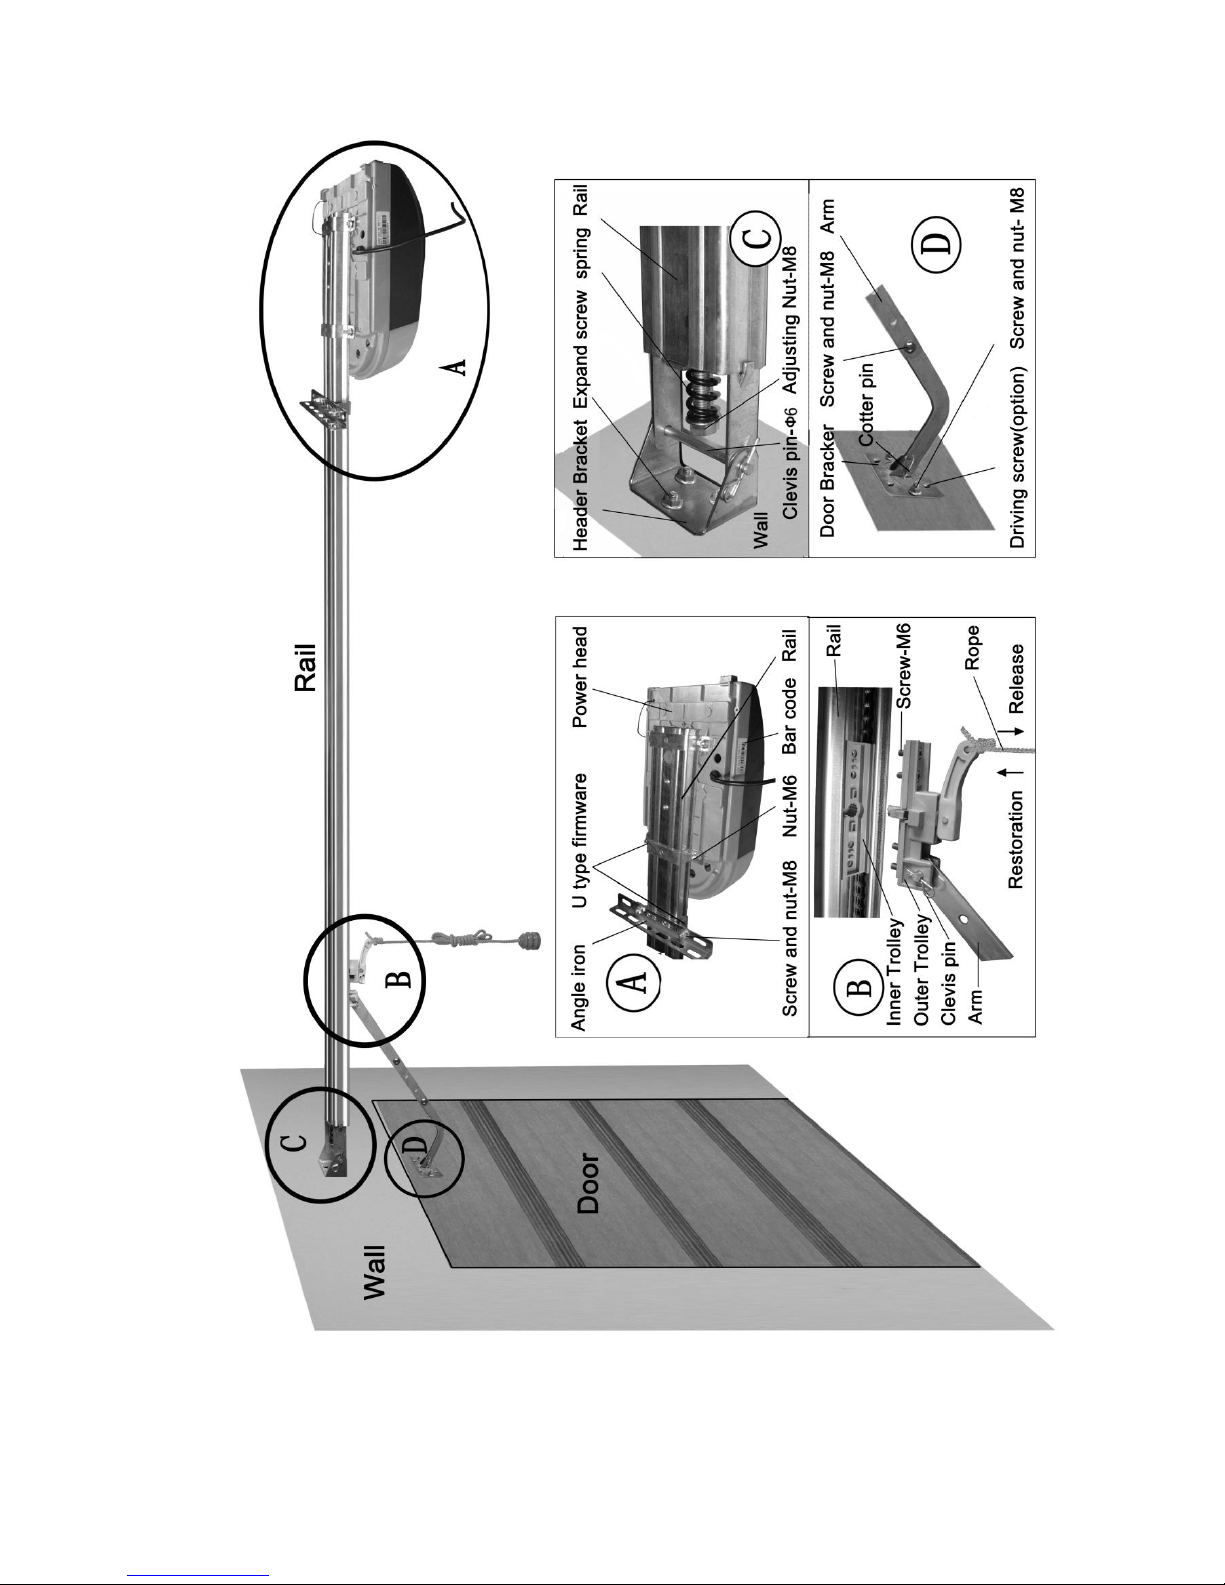
3.Installation
3.1 Recommended Tools
3.2 Installing the Operator and Rail
NO.
Tools
1
Drill
2
Step ladder
3
Ratchet
4
Tape measure, Carpenter’s level
5
Screwdriver
6
Tongs
7
Neon-electroscope, multimeter
8
Adjustable wrench
9
Hammer
Page 4
4
4.Control panel and Transmitter
Page 5

5
Button 1
Button 2
Button 3
Button 4
5.Optional Terminals and Connections
Page 6

6
6.Programming the Operator
6.1 Preparing
Page 7

7
6.1.1 To tighten the belt, turn adjusting nut-M8 in the direction
shown(picture C).Make sure the shuttle is locked, pull or push the door to
confirm the shuttle connects with the chain.
6.1.2 Turn on the power, the courtesy light will illuminate for several
seconds, the LED displays the number from 99 to 11.Then the operator
turns to standby mode.
>> >>
Turn on the power, The LED displays from 99 to 11. At last, it displays “- - ”.
6.2 Setting Open and Close Positions
>> >>
Press and hold SET until it displays “P1”, press SET, it displays “OP”. Then press UP, when the door
has reached the open position, press SET.
>> >>
It displays “CL”, then press DOWN, it displays “CL”. When the door has reached the closed
position, press SET. The door will now open and close automatically to map the open and close
sensitivity force requirements.
>>
Page 8

8
It displays “- - ” to show setting is complete.
6.3 Self Learning Transmitter
6.3.1 when the unit has stored 20 codes, The LED flashes “Fu”, or preventing coding
mistakes, it is necessary to cancel all the stored codes.
>> >>
When it displays “Fu”, press and hold CODE more than 8 seconds until it flashes “dL” , all the
codes will be cancelled.
6.3.2 Adding or Changing Transmitters
>> >>
Press CODE, it displays “Su” , press a button on the transmitter, then release and press the same
button again, “Su” flashes, then it displays “- - ” to show setting is complete.
Repeat up steps to code a maximum of 20 different transmitters’ and/or buttons.
6.4 Force Adjustments
>> >>
Press and hold SET, it displays ”P1”, press UP once, it displays”P2”, press SET once again, it will
show the current situation. Press UP to increase the force one degree and press DOWN to
decrease one degree. Maximum degree is “F9” and minimum is “F1”. Press SET to confirm. The
default setting is “F5”.
6.5 Photo Beam
Page 9

9
>> >>
Press and hold SET, it displays “P1”, press UP twice, it displays “P3”. Press SET to show current
situation. Press UP once it displays “H1”, the photo beam is enabled.
Press down once, It displays “H0”, the photo beam is disabled. Press SET to confirm and quit.
Note: If you do not use photo beam device, please make sure it displays “H0”, to
close this function.
6.6 Auto-Close ON/OFF
>> >>
Press and hold SET, it displays “P1”, press UP three times, it displays “P4”. Press SET to show
current situation. Press UP to increase the Auto-close one minute and press DOWN to decrease
one minute. Maximum degree is “b9” and minimum is “b0”. Press SET to confirm. The default
setting is “b0”. ”bo” shows auto-close off.
6.7 Lock Door
When you use uncovered transmitters, it is recommended using lock door
Page 10

10
function. When this function works, you can’t open the door until press the
“unlock” button first.
>> >>
Press and hold SET, it displays “P1”, press UP four times, it displays “P5”, press SET to show
current situation. press UP, it displays “Lc”, lock door function works, press DOWN, It displays
“uL”, the lock door function doesn’t work. Press SET to confirm the function you need.
7.Owners’ Guide
7.1 Attention in use
7.1.1 Use the transmitters only when door is in sight. Do not stand or walk
under a moving door. The transmitters should be kept out of reach of
children.
7.1.5 Check at least twice a year to make sure the door is properly
balanced and that all working parts are in good working condition. Have
the door professionally serviced annually.
7.2 Examination Guide
Problem
Causes
Solution
The door is noisy
Lack of lubrication or servicing
Call professional service
Page 11

11
The motor does not
work
The power is off or blown fuse
Check the socket
Replace the fuse
After setting open and
close positions,
the motor does not
work
The screws of fixing the Hall
components are loose
Program mistakes
Tighten the screws
Reset open and close
positions
The door can’t be
closed
Photo beam function is enabled
Door obstruction
Cancel the photo beam
function, check obstruction
The wall button works
well, but the
transmitter doesn’t
work
No transmitter learning
Transmitter battery is low
Code referring to 6.3
Change transmitter battery
Too short of
transmitter distance
The transmitter battery is low
Change transmitter battery
Jaytech 1200 Garage Door Opener Product Warranty
Page 12

12
PRODUCT WARRANTY
For 7 years from the date of installation, this product will be repaired, or replaced free of charge, if
defective in material or workmanship.
ADDITIONAL WARRANTY ON PARTS
Replacement parts for any defective parts on this product will be furnished, free of charge. Any costs for
professional installation are included.
WARRANTY RESTRICTION
This Garage Door Opener Warranty does not cover light bulbs or fuses, which are expendable parts, or
repair parts necessary because of operator abuse or negligence, including the failure to adjust and
operate this garage door opener according to instructions contained in the owners manual. This
warranty also does not cover any problems caused by interference or impact damage and does not cover
remote controls.
This warranty remains valid providing the door has been serviced at least every 2 years by any
professional garage door company since the installation of this opener. Proof of service will be
requested and failure to produce this may void your warranty.
Warranty is void if damage or premature wear to the opener is sustained by a broken, unbalanced, worn
or damaged garage door.
Original purchase receipt / Invoice is required to process a warranty claim.
If a technician is requested to attend and rectify the issue and it is reasonably deemed to be caused by
other factors other than a product fault the customer agrees that they may be charged a call out fee, plus
any parts required to complete the repair.
Liability – Australia only
Under no circumstances shall the Seller be liable for consequential, incidental or special damages arising
in
connection with the use, or inability to use, the Unit. In no event shall the Seller's liability for damages or
injury arising from breach of law or contract or for negligence, exceed the cost of repairing or replacing the
Unit or refunding the purchase price of the Unit. Under Division 2 Part V of the Trade Practices Act, 1974,
certain warranties and conditions (Implied Terms) are implied into contracts for the supply of goods or
services if the goods or services are of a kind ordinarily acquired for personal, domestic or household use
or consumption. Liability for breach of those Implied Terms cannot be excluded or limited and the
limitations and exclusions above do not apply to the Implied Terms. Except for the Implied Terms and the
warranties set out above, the Seller excludes all warranties and conditions implied by statute, at law, in
fact or otherwise.
Our goods come with guarantees that cannot be excluded under the Australian Consumer Law. You are
entitled to a replacement or refund for a major failure and compensation for any other reasonably
foreseeable loss or damage. You are also entitled to have the goods repaired or replaced if the goods fail
to be of acceptable quality and the failure does not amount to a major failure.
If you believe you have a faulty product you may submit a warranty request by contacting the company
listed below.
Page 13

13
Installation completed by
________________________________________________________________________________
Date______/______/_______
Contact Details
__________________________________________________________________________________
Notes____________________________________________________________________________
__________________________________________________________________________________
 Loading...