

Page 1
JPX-300 Series Door
Gasket Kit Installation
07610-003-14-63 A
December 13, 2005
Dishmachine Maintenance Instructions
Page 2
the kickpanel. Be careful not to pull out any gauges that may be
2. Ensure that the surface of the dishmachine is clean and free of
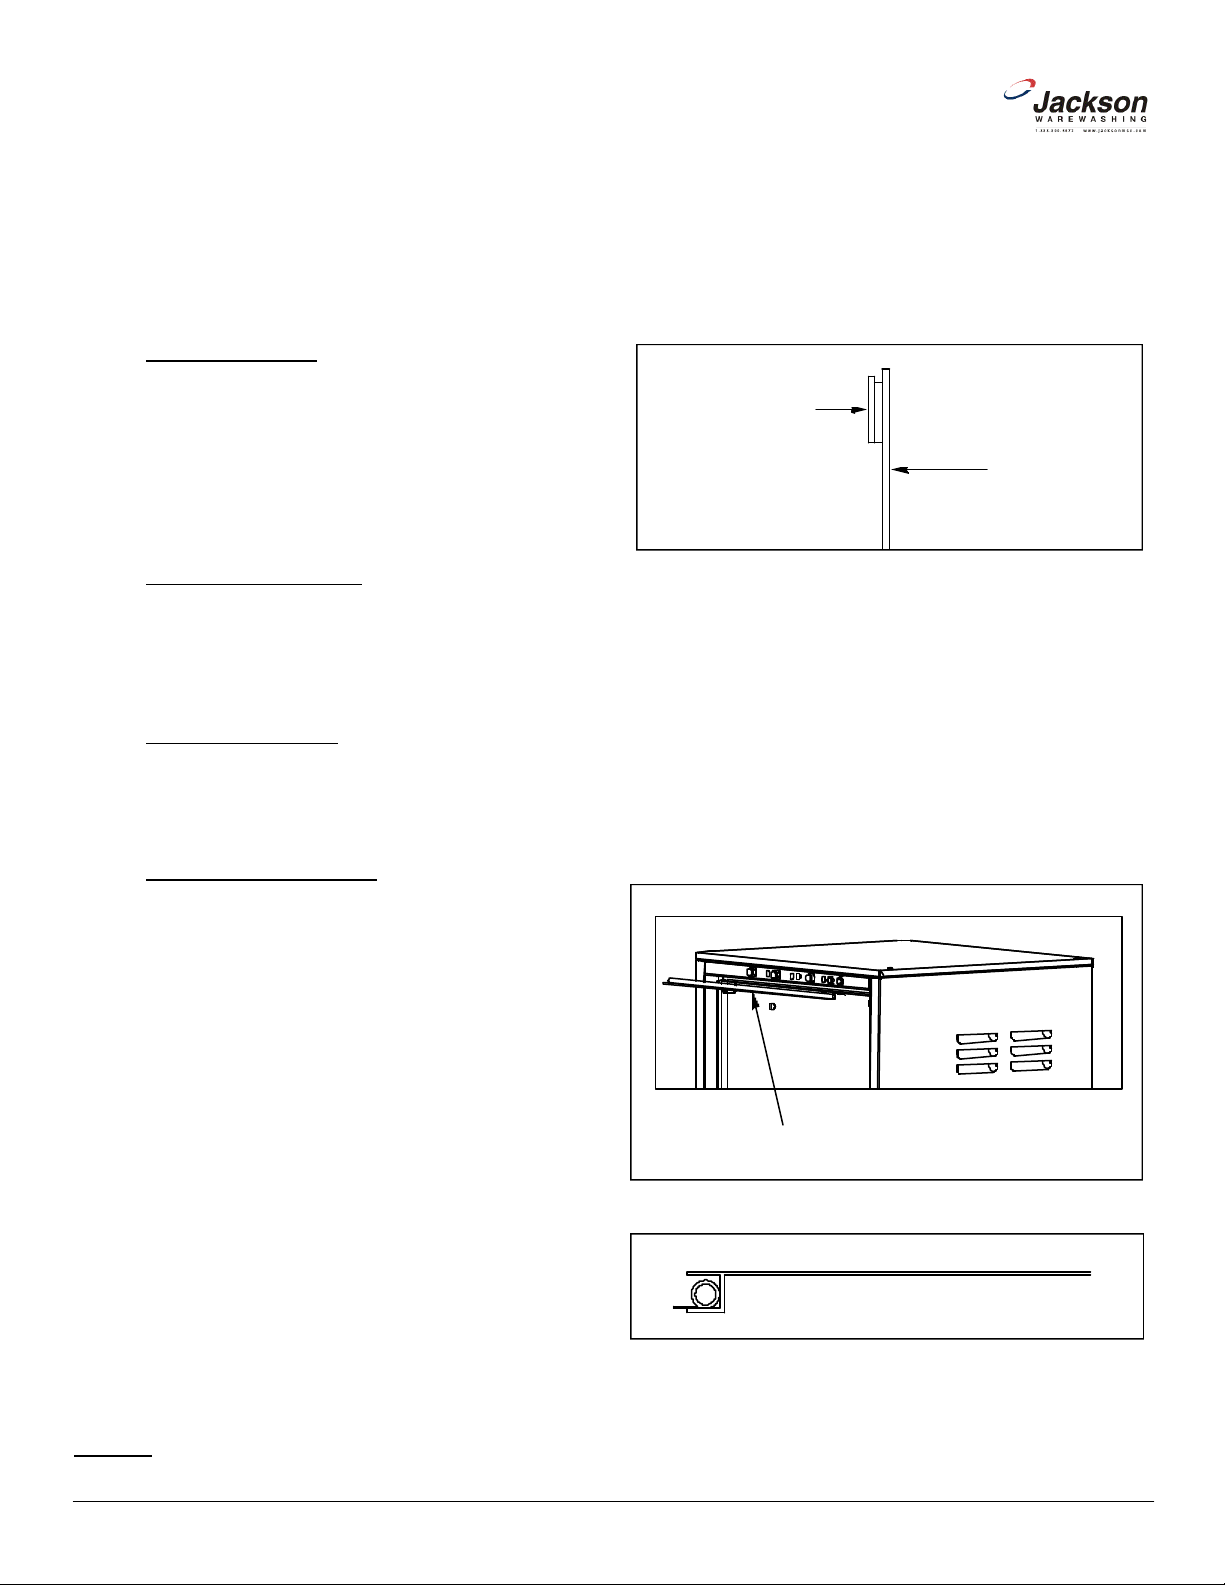
3. Place the Lower Panel Bracket assembly on the unit, ensuring it
is 1/16” below the lip of the tub. Press firmly to ensure proper
4. Open the machine door to expose the labyrinth seal. Ensure it is
5. Insert the door gasket into the top of the labyrinth seal, ensuring
that the rounded edge is facing inward and the flat edge is facing
the bottom. Some of the gasket will hang over the edge of the
www.jacksonmsc.com
The instructions provided here are for maintenance personnel only. Unauthorized persons should not attempt any of the
steps contained in these instructions.
Warning: many of the instructions and steps within
this document require the use of tools. Only authorized per sonnel should ever perform any maintenance procedure on
the dishmachine!
PREPARATION
1. Power must be shut off to the unit at the service breaker. Tag or lock out the service breaker to prevent accidental or
unauthorized energizing of the machine.
2. Ensure that incoming water to the machine is shut off.
3. The unit must be drained completely with the drain
stopper removed (if applicable).
4. Remove any and all access covers.
TOOLS REQUIRED
The following tools may be needed to perform this main -
tenance evolution:
1. Phillipshead Screwdriver
1. Using the phillipshead screwdriver, removed
connected to the panel.
any chemical residues.
Lower Panel Bracket
Lower tub wall
Placing the lower seal
placement.
TIME REQUIRED
It is estimated that it will take (1) person sixty minutes to
perform this task, not including all of the items indicated in the section entitled “PREPARATION”.
IMPORTANT NOTES
1. Read these instructions thoroughly before attempting
this maintenance task. Become familiar with the parts and what
actions need to be taken. This will save time in the long run!
free of chemical residues and debris.
labyrinth seal; it must be folded over and under the seal.
Door Labyrinth Gasket
05700-003-13-76
Installing the upper door gasket
STEPS
Side profile showing placement of “P” gasket
2
JPX-300 Door Gasket Installation Kit
Revision A (12/13/05)
Page 3
Run the machine through several cycles to ensure that
-
-
ning this or any other maintenance evolution on a unit under war
-
ranty, you should contact a certified Jackson technician or Jackson
Technical Service. You can find a list of qualified service agencies
Jackson MSC Inc. provides technical support for all of the
dishmachines detailed in this manual. We strongly recommend that
-
port staff. Please have this manual with you when you call so that
our staff can refer you, if necessary, to the proper page. Technical
support is available from 8:00 a.m. to 5:00 p.m. (EST), Monday
through Friday. Technical support is not available on holidays.
Contact technical support toll free at 1-888-800-5672. Please
remember that technical support is available for service personnel
www.jacksonmsc.com
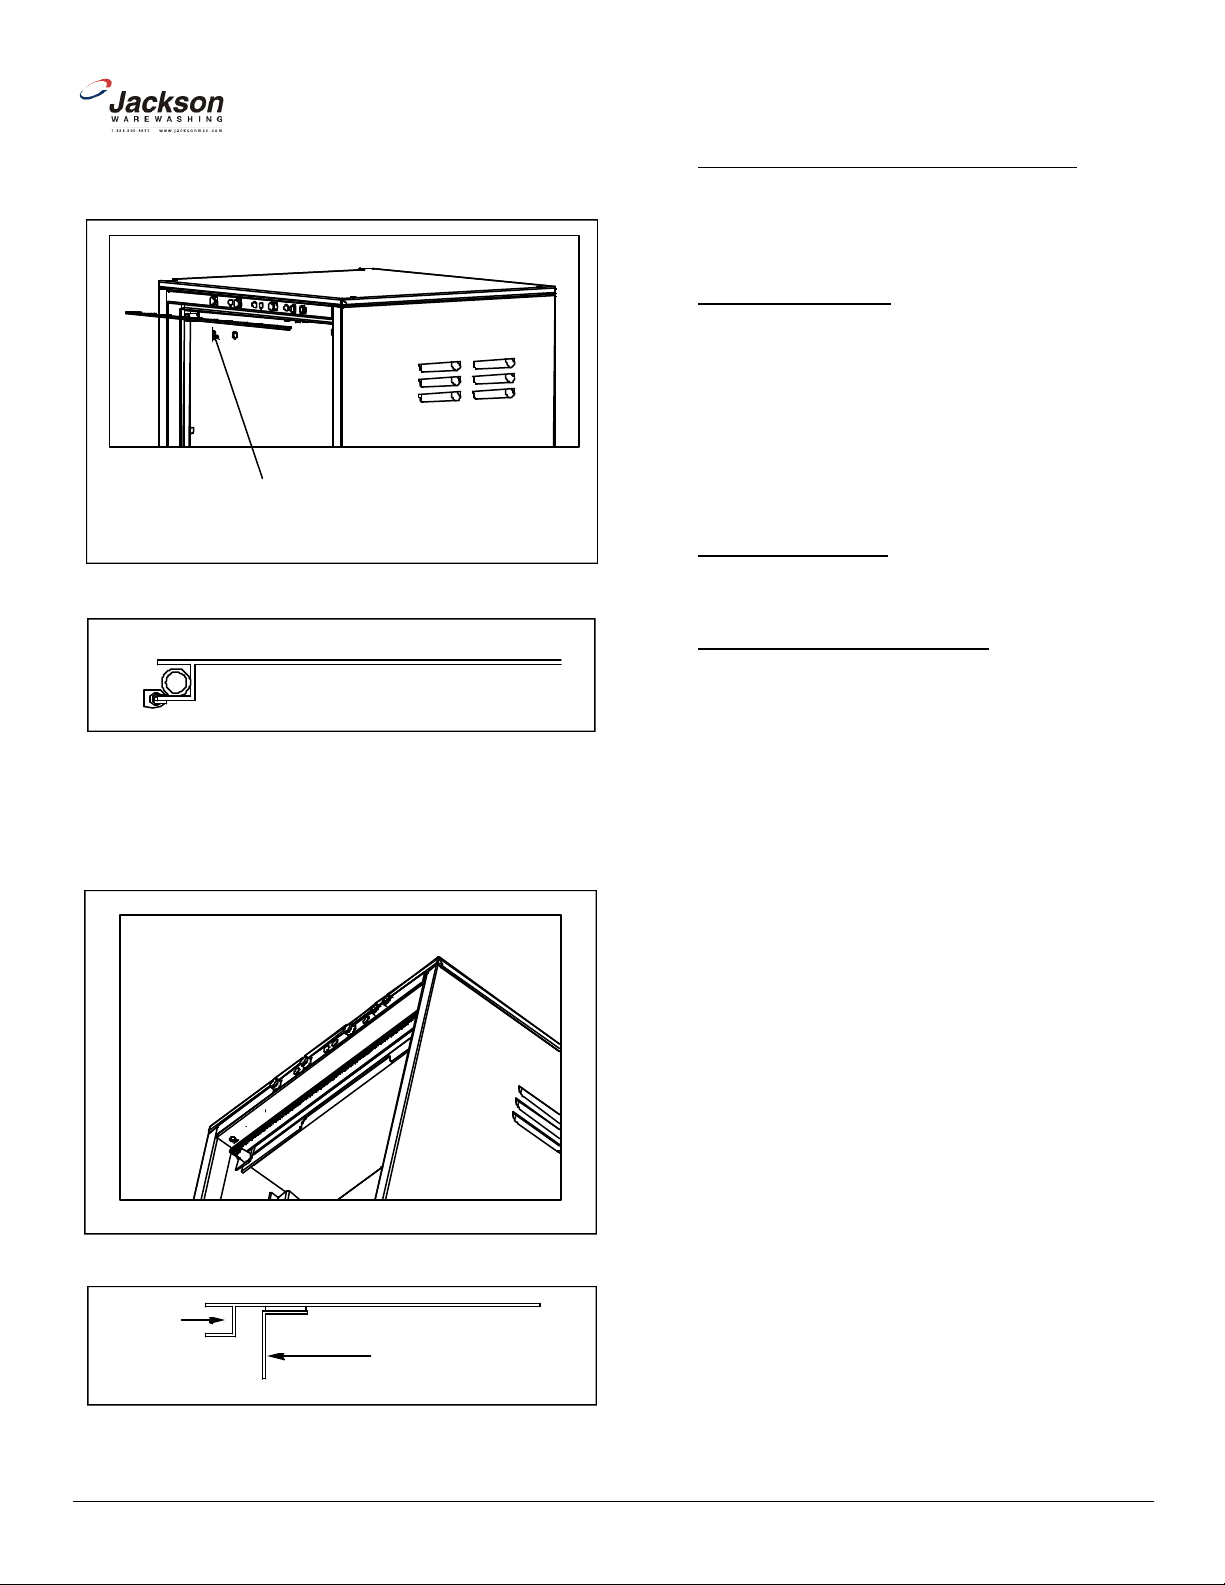
6. Take the Door Labyrinth Grommet and slide it over the portion of
the door gasket that is hanging over the seal lip.
Door Labyrinth Grommet
05700-003-13-77
Installing the door labyrinth grommet
Side profile showing placement of door labyrinth grommet
AFTER MAINTENANCE ACTIONS
the gasket is sealing properly.
SPECIAL NOTES
Work performed on Jackson dishmachines by unautho
rized or unqualified personnel may void the warranty. Before begin
in the back of you unit’s installation manual.
SPECIAL PARTS
None.
CONTACT INFORMATION
you refer to this manual before making a call to our technical sup
7. Place the Splash Shield assembly inside the tub, centered on
the door. The taped edge goes against the top of the tub so that
the 1.25” lip hangs down. Position 1/2” from the backside of the
labyrinth.
Positioning the Splash Shield inside the tub
Labyrinth
Splash shield assembly
only.
Placement of the splash shield assembly
JPX-300 Door Gasket Installation Kit
Revision A (12/13/05)
3
 Loading...