

Jabra Noise Guide, ANG001 User Manual

Noise Guide
Jabra
User manual

Made in Taiwan
Model: ANG001
Declaration of Conformity can be found on
www.jabra.com/footerpages/declarations-of-conformity
The crossed-out wheeled bin means that within the European Union the
product must be taken to separate collection at the product end of its life.
This applies not only to your device but also to any enhancements marked
with this symbol. Do not dispose of these products as unsorted municipal
waste.

TABLE OF CONTENTS
CONGRATULATIONS ON YOUR NEW JABRA NOISE GUIDE
BEFORE YOU START 5
Box Contents 5
Installing the device 5
How to insert the USB memory 6
How does Jabra Noise Guide work? 6
Mounting – Aluminum Table Stand 7
SOFTWARE SETUP 9
Software Installation 9
Set time 9
Formatting the USB-key 10
Configuration 11
1. Direct configuration 11
2. Export setup to USB 11
OPERATING THE SOFTWARE 12
QUICK Setup 12
Setup 13
• Device information 14
• Light Settings 16
• User Manual 18
• About Jabra Noise Guide 18
Measurements Data 19
• Live Measurement 19
Navigating in the Software 21
• Reading the graph 21
• Show Marker 22
• Zoom funktion 23
• Measurement Library 25
• The CSV file – what you see 26
• Import data from USB 27
Factory Settings 27
FAQ 28
MAINTENANCE 28
Desinfiction / cleaning 28
TECHNICAL SPECIFICATIONS 28
Jabra Noise Guide Software 28
Jabra Noise Guide Specifications 28
RETURN TO “ TABLE OF CONTENTS” JABRA NOISE GUIDE – MANUAL
CONGRATULATIONS ON YOUR NEW
JABRA NOISE GUIDE
We are pleased that you have chosen one of our products to help
you create a better auditive environment for yourself and others. This
manual provides you with information on how to take advantage of
your product to the fullest.
In order to fully understand the features and possibilities of Jabra
Noise Guide, we advice you to read this manual carefully before you
start using your Jabra Noise Guide.
Please find the latest software and manual updates on our web site:
www.jabra.com/support
You are also welcome to reach out to your local Jabra Support Team
for further assistance. Please go to www.jabra.com/support for
further information.
4
JABRA NOISE GUIDE – MANUAL RETURN TO “ TABLE OF CONTENTS”
INSTALLING THE DEVICE
BEFORE YOU START
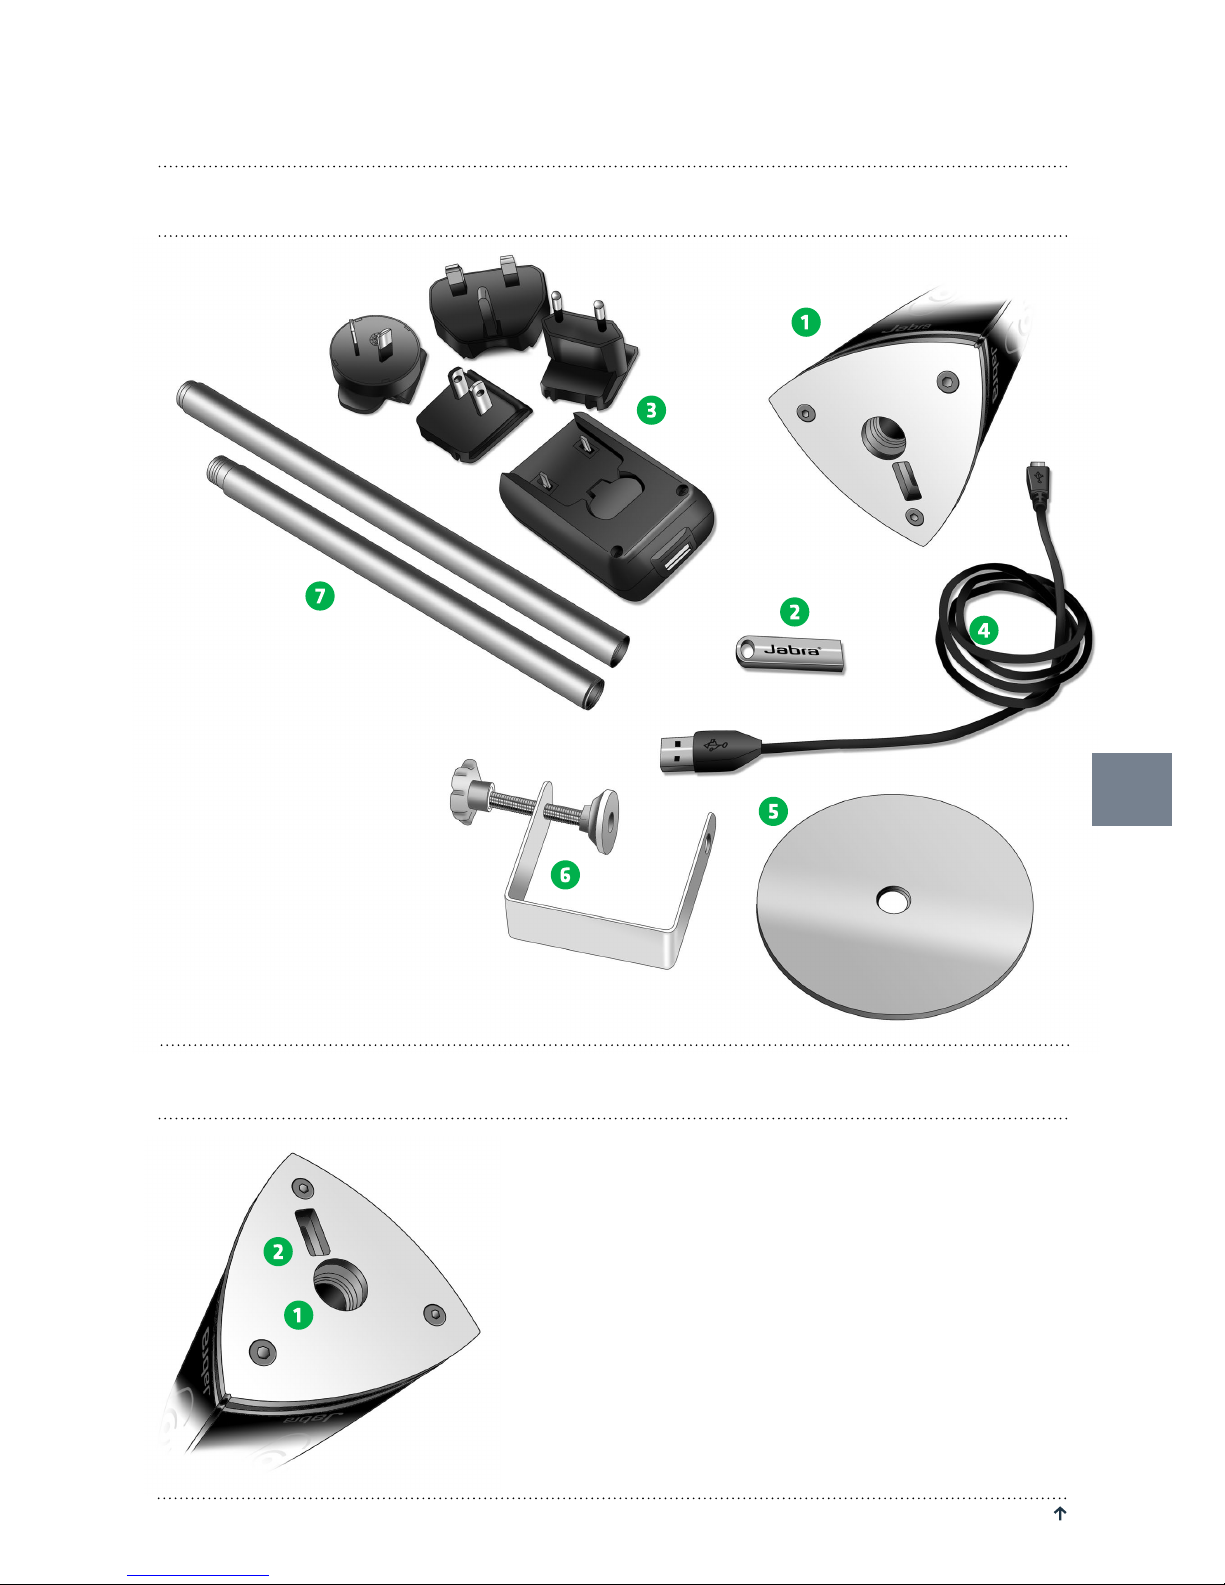
BOX CONTENTS
Jabra Noise Guide has 2 inputs at the bottom
of the device.
1) A micro USB for power supply and export of
data via a PC.
2) A standard USB input for exporting data
from the internal log memory via the USB,
and for offline configuration.
Check the box contents:
1. Jabra Noise Guide
2. USB-key with software
3. Power adaptor with
EU, US, UK and AUS plugs
4. USB adapter cable
(A-plug to micro-B)
5. Base
6. Table grip
7. Tube A and B
5
RETURN TO “ TABLE OF CONTENTS” JABRA NOISE GUIDE – MANUAL
6
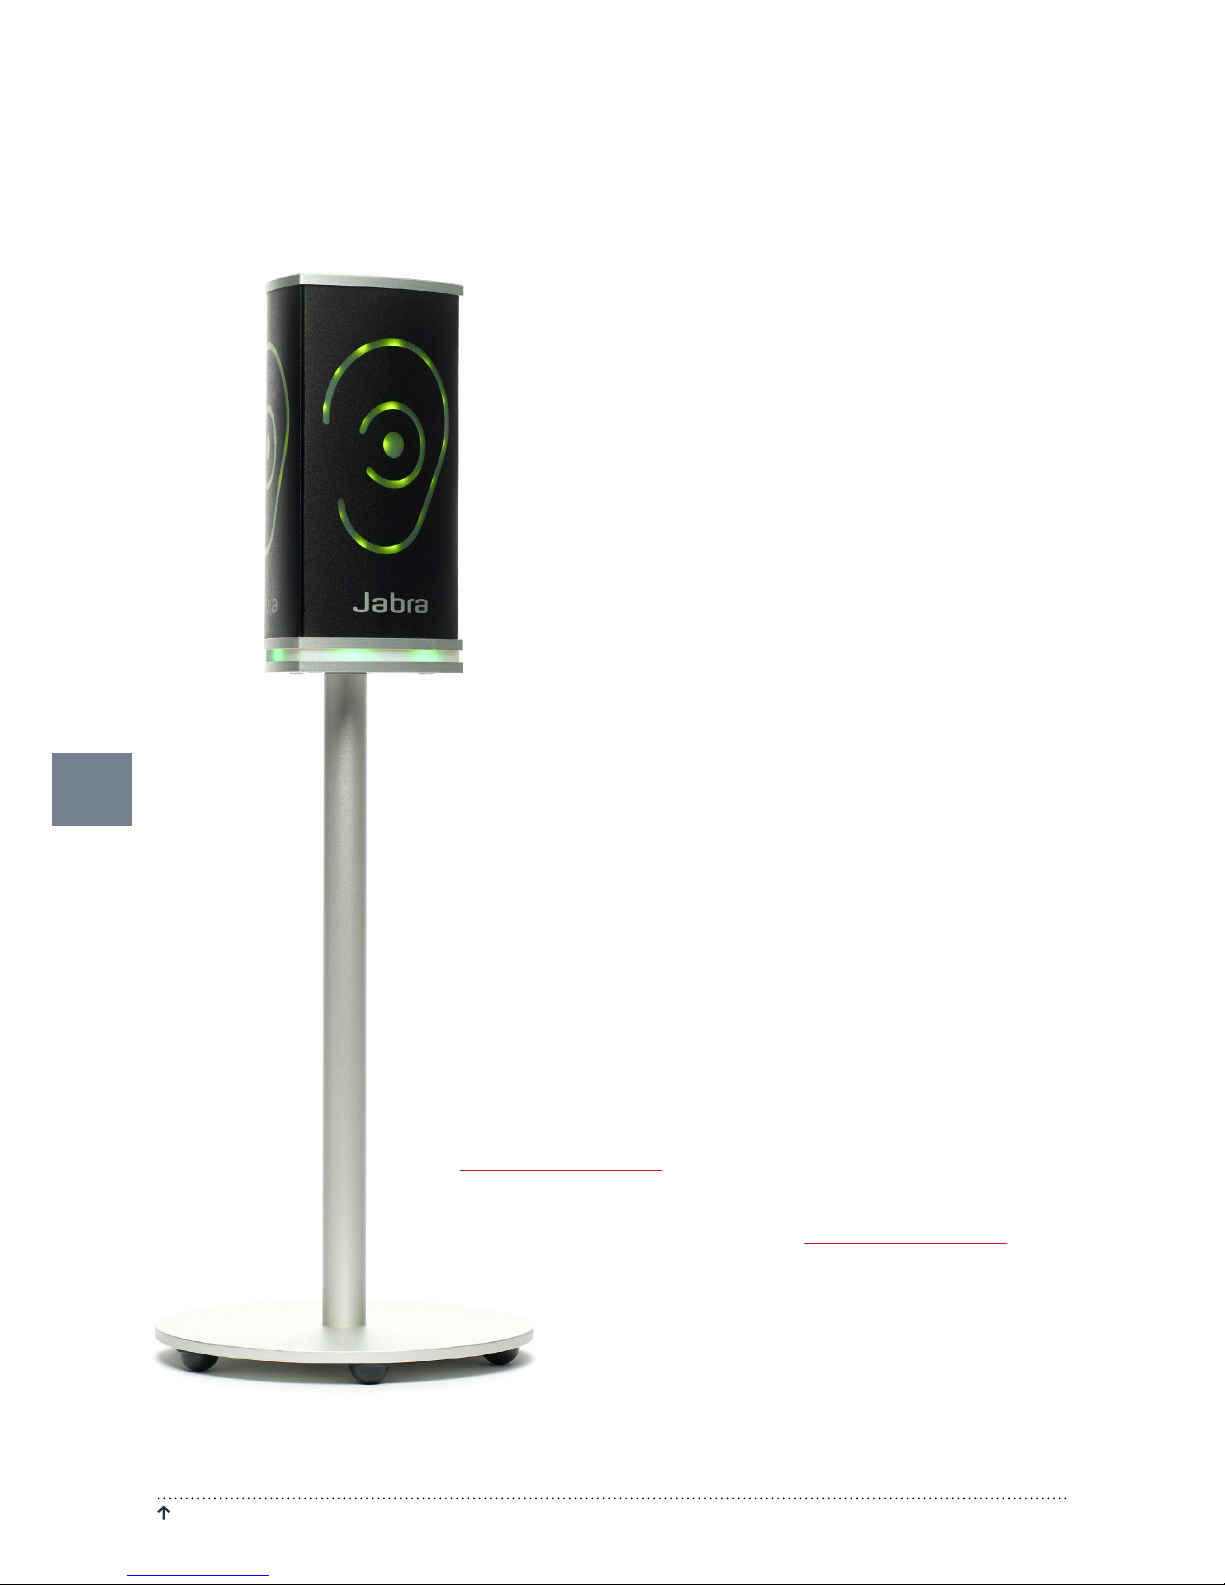
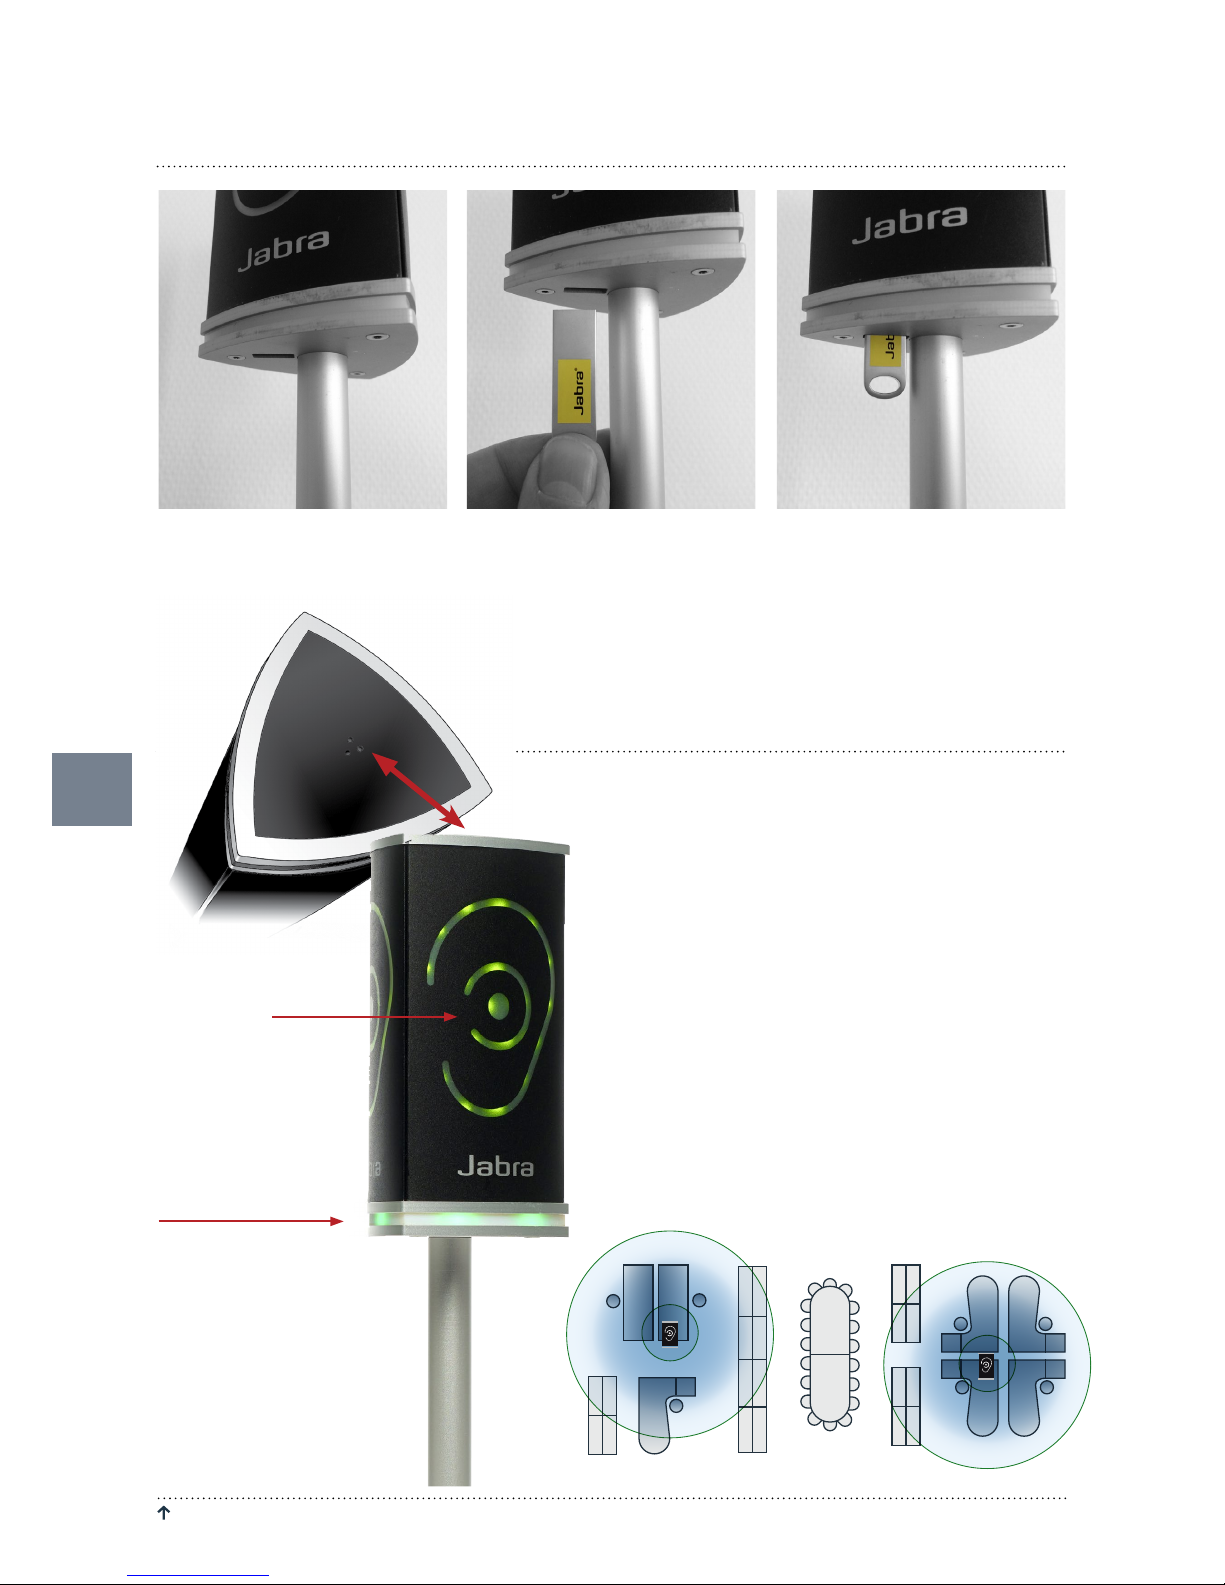
HOW DOES JABRA NOISE GUIDE WORK?
Jabra Noise Guide provides you with 2 types of measurements, simultaneously. The ear symbol indicates
the state of the current noise level while the LED panel at the bottom of the device indicates the average
noise level over the past 15 minutes. This can be adjusted to other value in the software.
MEASURING RANGE
The Jabra Noise Guide has a measuring range of approximately 5 meters – Illustration: Open Space office.
Microphone on
top of the unit
The Ear symbol
indicates the
current noise level.
The LED panel indicate the
average noise level over
the past 15 minutes. This
can be adjusted to other
value in the software.
HOW TO INSERT THE USB MEMORY STICK IN THE NOISE GUIDE
1. Face the Noise Guide, so you
have the USB port on the left
from the tube.
2. Insert the USB memory stick
with the JABRA logo facing
forward.
JABRA NOISE GUIDE – MANUAL RETURN TO “ TABLE OF CONTENTS”
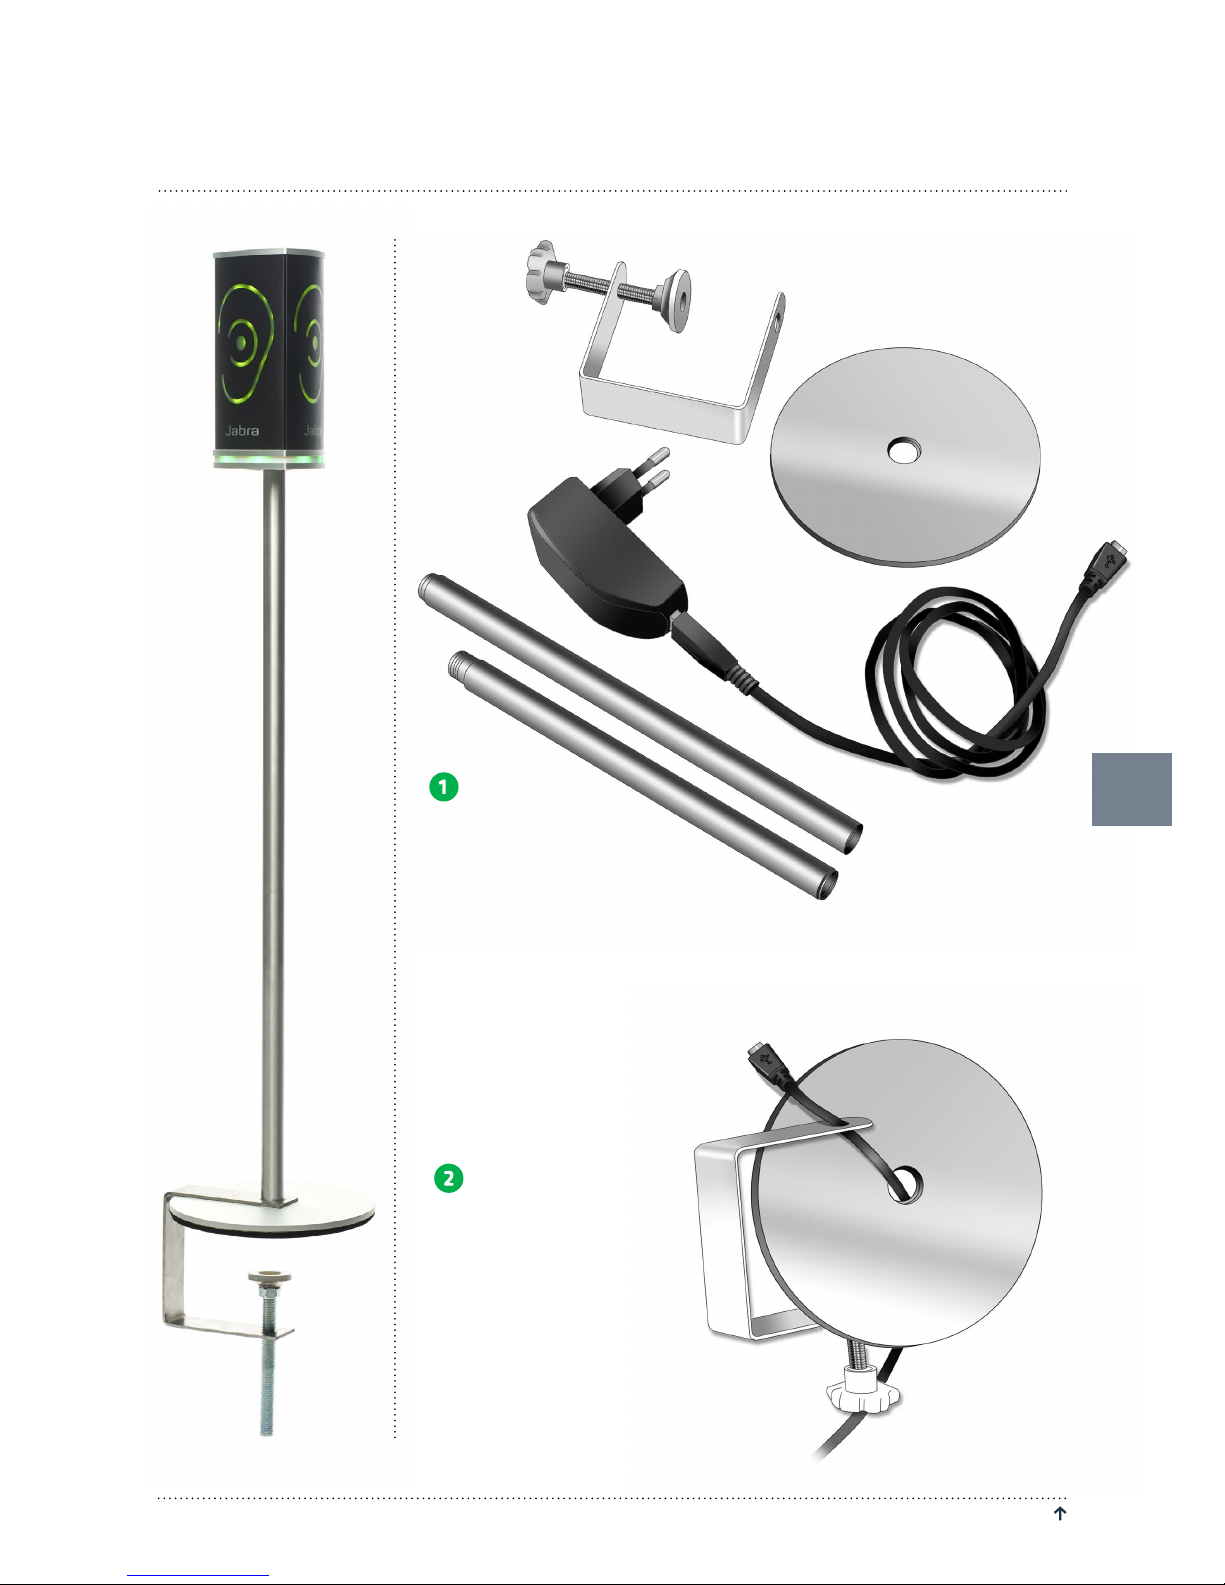
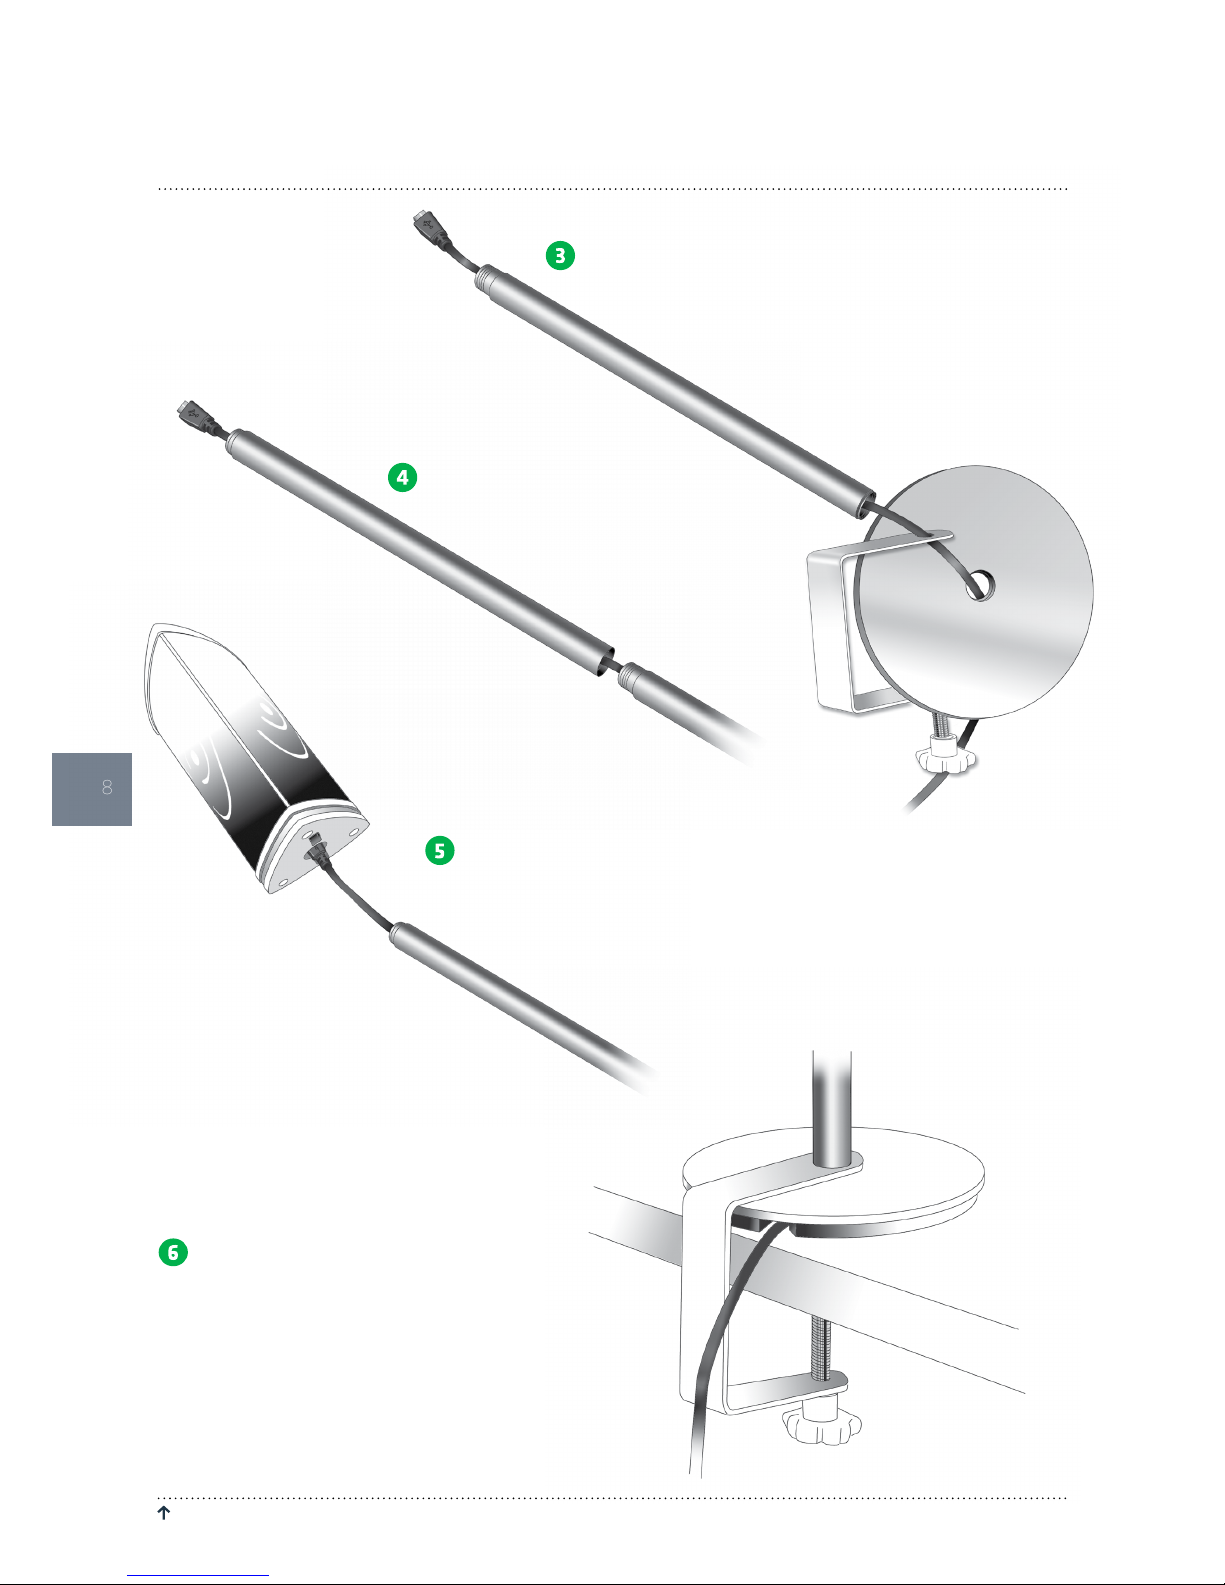
MOUNTING ALUMINUM TABLE STAND
CONTENT:
• Base
• Table grip
• Tube A
• Tube B (extension tube)
A
B
Pass the cable through
the disc base, and then
through the hole in the
table grip.
7
RETURN TO “ TABLE OF CONTENTS” JABRA NOISE GUIDE – MANUAL
8
MOUNTING ALUMINUM TABLE STAND
A
Insert the micro USB pin and pull the
cable through tube A.
B
If the exstension tube is needed,
pull the cable through tube B.
Assemble tube A and B. Screw tube AB onto the base disc
and connect the Jabra Noise Guide to the power cable.
Screw the Jabra Noise Guide onto the tube. Mout to a flat
surface as shown below.
Please ensure that the cable comes out where
there is a hole in the disc base so the cable is not pinched.
A
B

9
JABRA NOISE GUIDE – MANUAL RETURN TO “ TABLE OF CONTENTS”
SOFTWARE INSTALLATION
Please find the software on the included USB key.
When you have installed the software, make sure to check for software updates to ensure that you are always updated with the latest version. Read more about this in the chapter ”About Jabra Noise Guide” p. 17.
SET TIME
1. Connecet your Jabra Noise Guide to a PC
2. Move the cursor to the clock in the upper
right corner of the screen
3. Left click on mouse. You will see the text
”Setting time on device”.
4. The internal clock is now updated.
Note! You need to update the internal clock when you change from summertime to wintertime or vice versa.
SOFTWARE SETUP
 Loading...