

Jabra GN Contour LX-G, CONTOUR LX-G User Manual

User Guide
CONTOUR
LX-G
Introduction
Congratulations on your purchase of the GN Netcom Contour LX-G headset. This guide contains instructions for the
Contour LX-G headset. To derive maximum benefit from this product, please take a few minutes to review this user’s guide.
If after reviewing this guide you have any questions concerning the Contour LX-G headset, please call your distributor or
contact GN Netcom, Inc. Customer Service at 800-826-4656.
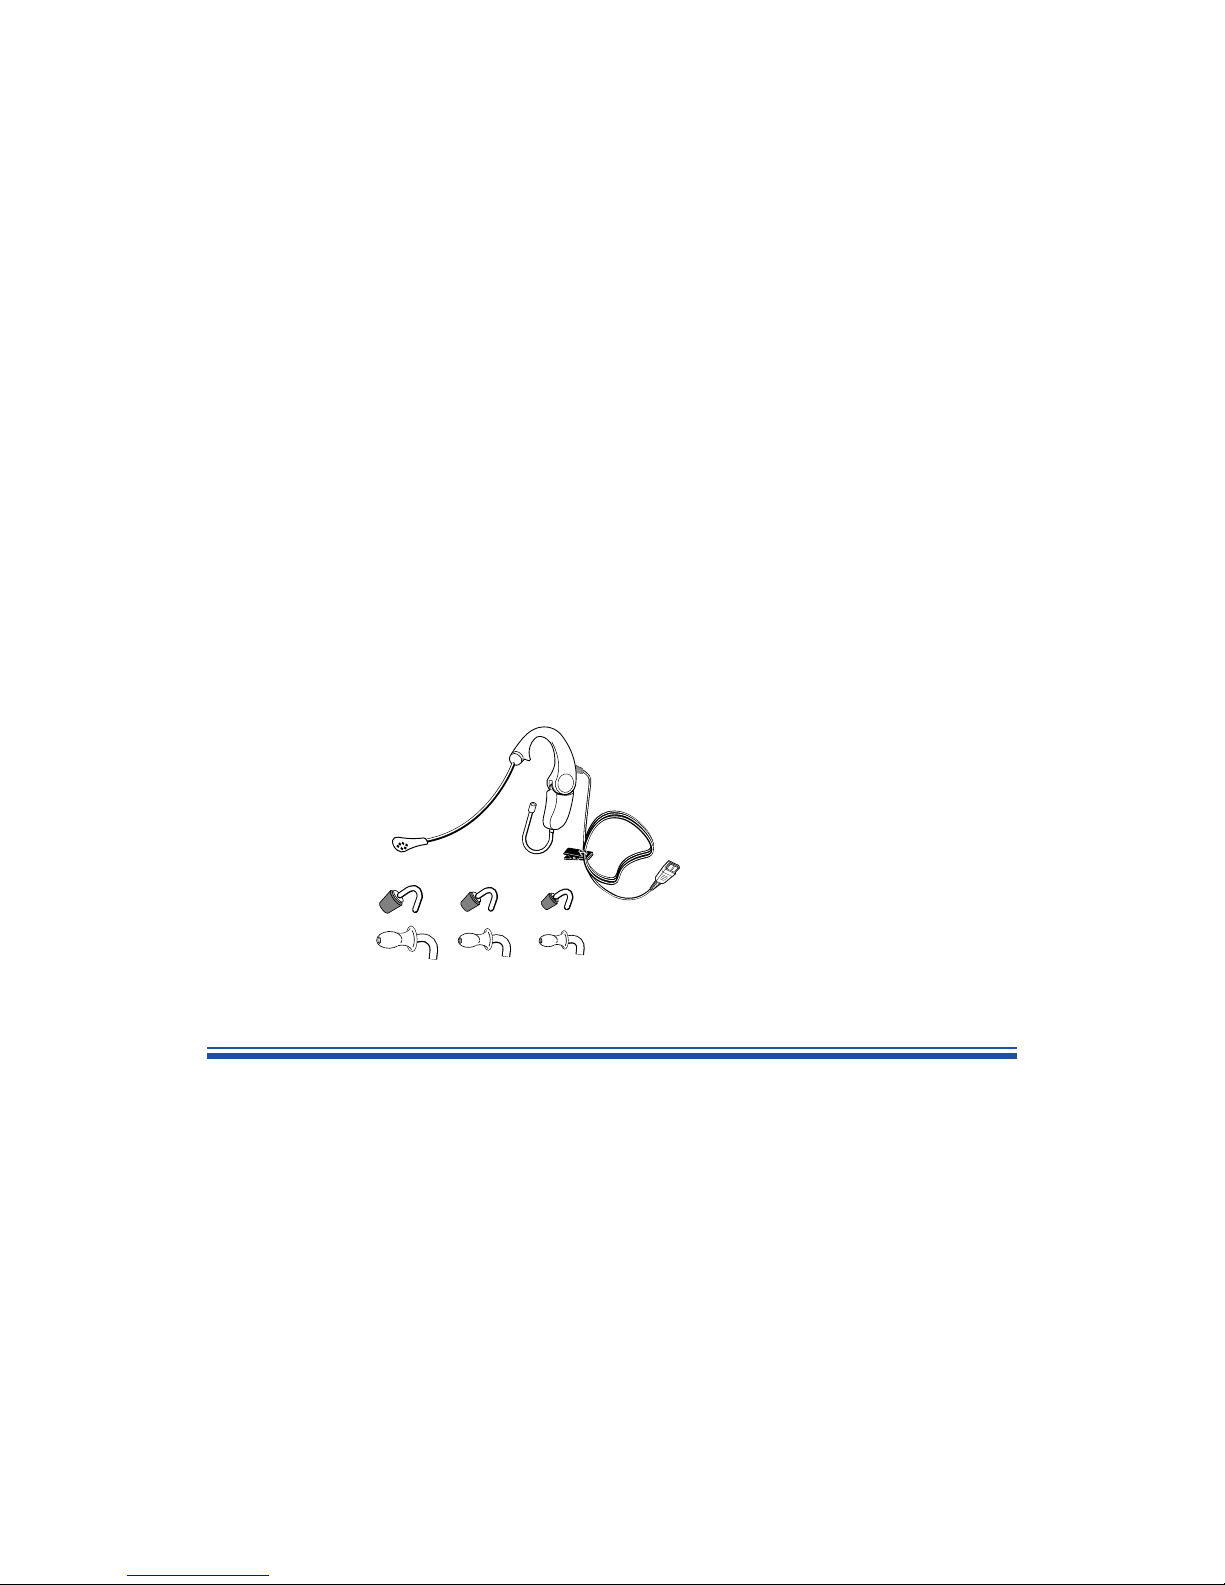
Contour LX-G Components
1. Noise Canceling Microphone
2. Flexible Microphone Boom Arm
3. Earhook
4. Adjustable Lobe Hinge
5. Ear tip Connector Tube
6. Clothing Clip
7. Quick Disconnect
8. Foam EarTiplets™
9. Latex Eartips
1.
6.
2.
4.
7.
8.
9.
5.
Figure 1
3.
LMS
1
Contour LX-G
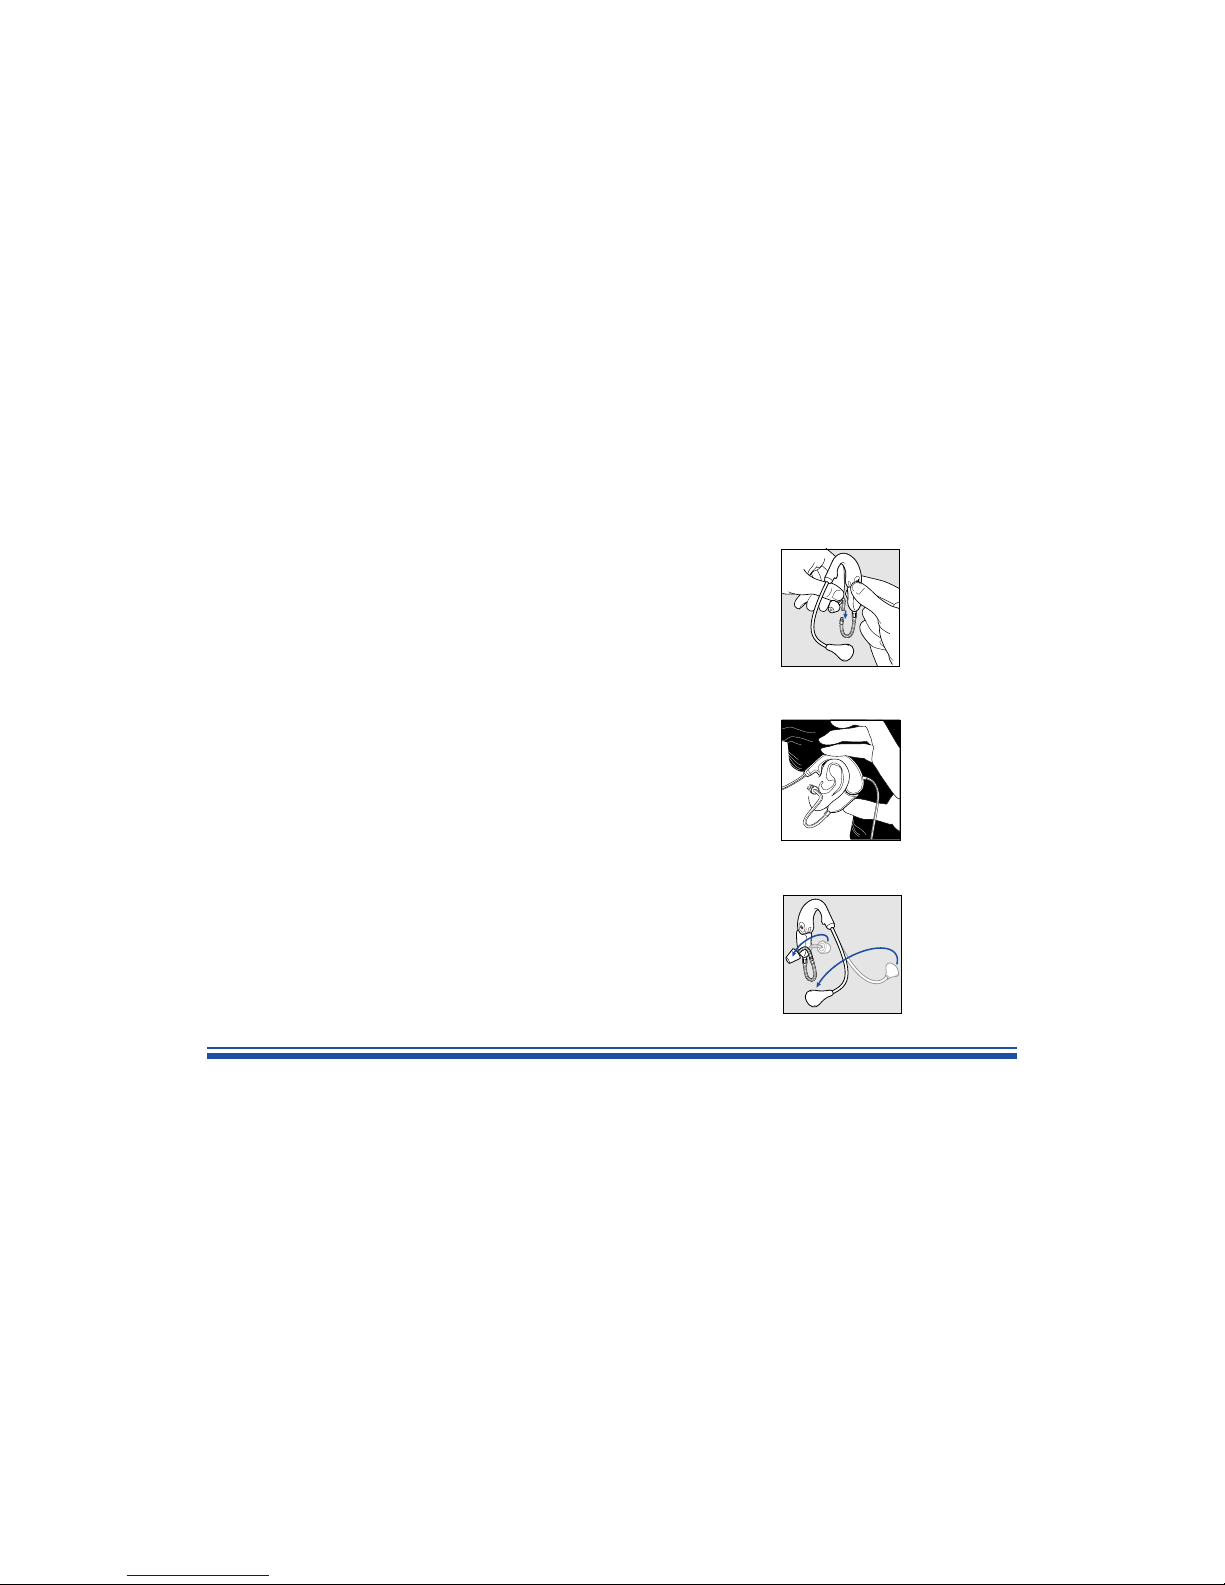
Eartip Installation
The Contour LX-G can be fitted with a choice of eartips and eartip sizes. Three
sizes each of soft latex eartips, for noisy environments, and GN Netcom
exclusive foam EarTiplets™, for moderate noise environments are provided.
Select a size that fits comfortably in the ear canal opening. Never use an eartip
that can be inserted into the ear canal or one that is smaller than that which fits
comfortably into the ear canal opening.
To install an eartip, use a twisting motion to slide the eartip tube onto the
headset connector (see Figure 2). Your headset is now ready to wear.
Wearing
To wear the Contour LX-G headset, pivot the earhook behind your ear so that
the saddle of the hook rests on the top of your ear. With your thumb, close the
ear lobe hinge until it is snug, secure and comfortable to wear, but not tight on
your ear (see Figure 3). Finally, insert the eartip into your ear canal.
Refer to the Microphone Positioning section for additional information.
Changing Ears
To accommodate left or right ear wearing styles, rotate the microphone
boom 180° so that the side of the microphone marked with an F is facing
towards you. Also rotate the eartip tube 180° so that it comfortably rests in
the outer ear (see Figure 4). Do not force the microphone boom beyond the
built in stops!
Figure 3
Contour LX-G Wearing
Figure 2
LX-G Tube Assembly
Figure 4
Changing Ears
 Loading...