


JUA310/330 Manual
USB 3.0 Display Adapter
User Manual

2
Table of Contents
INTRODUCTION .................................................................................................................... 3
GETTING STARTED –Notes for Before Installation ............................................................... 8
INSTALLATION FOR WINDOWS 8,7 .............................................................................. 9
INSTALLATION FOR WINDOWS XP .............................................................................. 18
INSTALLATION FOR MAC ............................................................................................ 27
FUNCTIONS INSTRUCTIONS: WINDOWS 8,7 ............................................................... 35
FUNCTIONS INSTRUCTIONS: WINDOWS XP ................................................................ 43
FUNCTIONS INSTRUTIONS: MAC ................................................................................. 49
TROUBLE SHOOTING .......................................................................................................... 53
TECHNICAL SUPPORT ......................................................................................................... 55
REGULATORY COMPLIANCE ............................................................................................. 56
WARRANTY OF j5 create ................................................................................................... 57

USB DISPLAY ADAPTER USER MANUAL
3
INTRODUCTION
Thank you for purchasing the j5 create (JUA310/330) USB 3.0 Display
Adapter! This adapter acts as an external video card for your MAC or PC.
It allows you to add an additional VGA/DVI(JUA310/330) monitor/display
through your USB 3.0 port. No need to open up the computer to add an
expensive video card, with the USB 3.0 Display Adapter you simply load
the drivers, plug in the adapter to the USB port, then plug in the VGA/DVI
monitor cable into the adapter and you are ready. The j5 create USB 3.0
Display Adapter supports three viewing modes. Primary mode, allows you
to have individual applications open on each monitor, vastly improving
productivity. Extended mode allows you to extend your desktop across
multiple displays, great for spreadsheets. Mirroring mode is used to clone
one screen onto another, ideal for presentations. With “Plug & Play”
functionality between your computer and 2nd monitor or projector, you
will be able to create a new visual environment in seconds.
In addition, j5 create has developed this compact design for the
sophisticated user who cares about function as well as elegance
Functions
Easily add an additional display instantly through the USB3.0 and
VGA/DVI connection.
Video playback performs at 1080P HD with a resolution of up to
2048 x 1152.
Add an additional monitor without adding an expensive, internal
video card, avoiding complicated installation
Hot swappable USB enables you to add or remove monitors
without rebooting your system
Move and view your large spreadsheets across two screens
without overlapping windows
Multitask with larger landscape/desktop space
Ideal for viewing multiple windows at the same time
Great for multitasking in a wide variety of applications including:
Phone centers, Stock Markets, Hospitals, Graphic Design, Editing,
Accounting, Etc.
A must have for surfing the web and working on your
email/facebook/twitter accounts all at the same time.

USB DISPLAY ADAPTER USER MANUAL
4
Highlighted Features
Supports display resolution:2048 x 1152 @ 32bit
Super Speed USB 3.0 up to 5 Gbit/s
Supports 1080P Video Playback
Plug-and-Play USB connectivity
Allows for up to 4 adapters in Windows
Allows for up to 2 adapters in Macs
Supports Display Modes: Primary, Extended, Mirror
Display Rotation: 0°, 90°, 180°, 270°
Aluminum enclosure that is non-toxic and recyclable
Easy driver install
Usage
Editor:
• Efficient editing of documentation on one screen and
researching reference materials on the other
Presentation:
• Use mirror mode while your laptop is plugged into a projector
through the USB 3.0 Display Adapter
• Use Primary mode to have two monitors and projector for
creative displays
Office:
• Dual display scenario: view large spreadsheets across 2 screens
with display continuity. (For example: Excel document)
• Independent: using desk space and doing multi-job at the same
time- increase efficiency.
• Read and reply to email on one screen and open
attachments on the other
Graphics Workstation:
• Design and check reference material at the same time.
• More space for tablets and photo/video editing
Entertainment:
• Watch TV/Movie while searching the program preview
• Play games online on one screen with the strategy guide on the
other screen
Stock Market Trading:
• Monitor multiple stock markets and market news simultaneously
Coding/Programming:
USB DISPLAY ADAPTER USER MANUAL
5
• Allows effective code programming on one screen and software
program companion on the other screen.
Required Environments
Microsoft Windows8, 7, XP (32-bit or 64-bit) Compatible
Mac OS X Mt Lion/Lion/Snow Leopard Compatible
Available USB port ( USB 3.0 recommended)
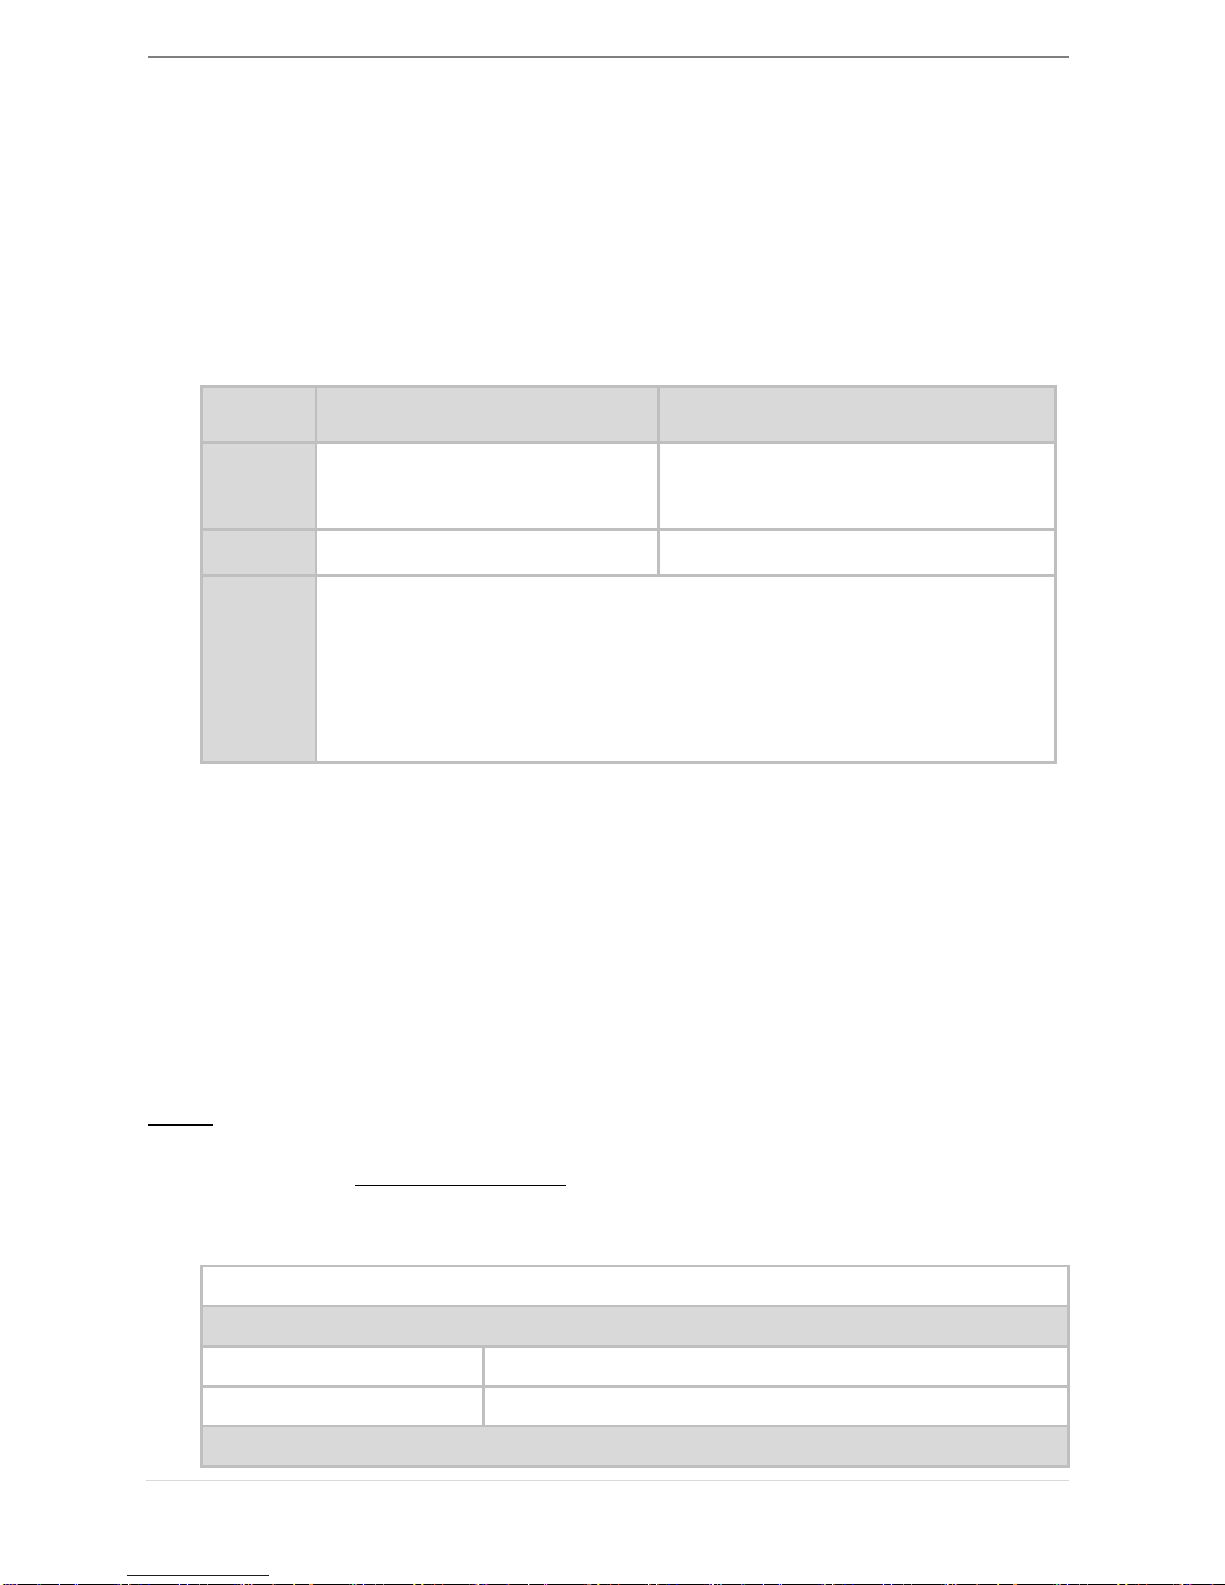
Minimum System Requirements
QTY
1~2 Dongle
3~4 Dongles
CPU
Intel 2 Quad 2.33 GHz or
above
Intel i5 3.10 GHz or above
RAM
2 GB or Higher
4 GB or Higher
Full HD
Video
Playing Video on the extended monitor
CPU: Intel Core i5 processor with 3.1 GHz or Higher
RAM: 4 GB memory or higher
※ Higher Processor recommended for Multi-Displays and
optimal performance.
Note:
USB HUB is not recommended for USB 3.0 display adapter
Note for Video Player:
*Windows 8 & 7 user: “Windows Media Player” is recommended for video
playback
* Windows XP & MAC user: Windows XP & MAC products are not supported by
USB 3.0 at this time, therefore we suggest USB 2.0 for ‘office application’ only;
Video Playback is not recommend due to USB 2.0 bandwidth limitations causing
limited video performance.
*Playing Video with multiple monitors: only “Media Player Classic” is supported.
Note:
To ensure that your device is equipped with the most current driver, please visit
our website at www.j5create.com and install the latest driver for this model.
Physical Specifications
Model: JUA 310
Interface
Host Interface
USB 3.0 Female Type-A Connector
Video Interface
VGA -DB 15 pin Female Connector
Power

USB DISPLAY ADAPTER USER MANUAL
6
Power Mode
Bus-powered or Self- Powered
Power Consumption
≦500mA
Physical Specification
Housing Material
Aluminum
Dimensions
Main body: 41(W)x 72(H)x14(D) mm
Cable length: 200 mm
Weight
Approximately 58 g
Model: JUA 330
Interface
Host Interface
USB 3.0 Female Type-A Connector
Video Interface
DVI-IFemale Connector
Power
Power Mode
Bus-powered or Self- Powered
Power Consumption
≦500mA
Physical Specification
Housing Material
Aluminum
Dimensions
Main body: 50(W)x 78.6(H)x15.25(D) mm
Cable length: 200 mm
Weight
Approximately 76 g
Resolutions and Color Depth
Aspect Ratio
Resolution
Color Depth
Wide Screen Display
16:9
2048 x 1152
16,32 bits
16:10
1920 x 1200
16,32 bits
16:9
1920 x 1080
16,32 bits
16:10
1680 x 1050
16,32 bits
16:9
1600 x 900
16,32 bits
16:10
1440 x 900
16,32 bits
16:9
1360 x 768
16,32 bits
16:10
1280 x 800
16,32 bits

USB DISPLAY ADAPTER USER MANUAL
7
15:9
1280 x 768
16,32 bits
16:9
1280 x 720
16,32 bits
Standard Display
4:3
1600 x 1200
16,32 bits
4:3
1400 x 1050
16,32 bits
5:4
1280 x 1024
16,32 bits
4:3
1280 x 960
16,32 bits
4:3
1152 x 864
16,32 bits
4:3
1024 x 768
16,32 bits
4:3
800 x 600
16,32 bits
Package Contents
USB 3.0 Display Adapter(JUA310/330)
Quick Installation Guide
Driver CD with E-Manual

USB DISPLAY ADAPTER USER MANUAL
8
GETTING STARTED –Notes for Before Installation
Install driver completely before inserting the USB 3.0 Display
Adapter USB Cable into your computer
Run the setup program as an administrator to avoid errors in
installation
Uninstall the previous driver first before updating the latest driver
Connect the VGA/DVI connector of USB Display Adapter to the
VGA/DVI cable of display device first before connecting to USB
port of computer
It is recommended to use an independent power supply for USB
Hub while multiple dongles are connected to the USB Hub
The display screen will flash during installation

USB DISPLAY ADAPTER USER MANUAL
9
INSTALLATION FOR WINDOWS 8,7
Device Driver Installation
This section illustrates the procedure for device driver installation for
Windows 7. To start, insert the Driver CD into your computer’s CD-ROM
drive. The setup program should be launched automatically. If Autorun
does not begin, go to “Computer”, Click on your optical drive, and
manually run the setup CD by double-clicking on “Setup.exe”
※Please make sure the USB cable of USB 3.0 Display Adapter is unplugged
from your PC or Notebook before executing the installation program.
1. The installation page will be launched. To start click on “ Install the
Latest Driver”. Please make sure the network is available or press “Install
Driver” to start the installation

USB DISPLAY ADAPTER USER MANUAL
10
2. After pressing the installation option, the InstallShield Wizard will launch,
click Next> to continue
3. Read the license agreement and check “I accept the terms of the
license agreement.” Click Next > to accept it and continue.

USB DISPLAY ADAPTER USER MANUAL
11
4. Driver installation proceeding…..
5. When Install Shield Wizard is complete, select “Yes, I want to restart my
computer now.” Click Finish to restart.

USB DISPLAY ADAPTER USER MANUAL
12
6. After rebooting connect the external display device (monitor/
projector) to the VGA/DVI connector of USB Display Adapter and turn
on the display device.
7. Connect the USB 3.0 Display Adapter into an available USB port of a PC
or Notebook, After Inserting the USB 3.0 Display Adapter into an USB
port, the “Installing device driver software” message will pop up.
If the Driver software was installed successfully the following message
should appear:
If you’re not going to install another USB 3.0 Display Adapter, restart your
PC. The functions of the USB 3.0 Display Adapter will be activated after
the computer restarted.
Multi USB 3.0 Display Adapter Installation
For installation of multiple USB 3.0 Display Adapters, during the “Install
Shield Wizard complete” step, select “No, I will restart my computer later.”
and click Finish to continue next step below

USB DISPLAY ADAPTER USER MANUAL
13
A. Connect all external display devices (monitor/ projector) to the
VGA/DVI connector of USB 3.0 Display Adapters and switch power on.
B. Connect the USB 3.0 Display Adapter into an available USB port of a
PC or Notebook.
After Inserting an USB 3.0 Display Adapter into a USB port, the systems
will automatically start the installation procedure and the prompt
message will pop-up on the task bar.
The Device driver software was installed properly,
if you are going to install more USB 3.0 Display Adapters, repeat step A& B
or restart computer.
The functions of the USB 3.0 Display Adapter will be activated after the
computer restarted. You might see the extend display shown on the
display device.

USB DISPLAY ADAPTER USER MANUAL
14
You can modify the corresponding position of each extend display via
display settings. Go to “START” → “Control Panel” → “Appearance and
Personalization” → “Adjust screen resolution”
※ Right-click on the desktop and go to “Screen Resolution”
When the ‘Screen Resolution’ window appears, each monitor’s number
can be identified by clicking “Identify.” Drag the monitor to the location
you want.

USB DISPLAY ADAPTER USER MANUAL
15
Verify Device Driver Installation
The following procedure helps you to verify the driver installation status of
the USB 3.0 Display Adapter.
Right-click “My Computer” “Manager” “Device Manager” click “+”
sign of “Sound, video and game controllers” & “Universal Serial Bus
controllers”
The picture below shows the installation process for a Single USB 3.0
Display Adapter

USB DISPLAY ADAPTER USER MANUAL
16
The picture below shows the installation process for a Multiple USB 3.0
Display Adapter
Device Driver Un-installation
※ Unplug the USB 3.0 Display Adapter before un-installing the driver.
1. Click “Start”→ Control Panel → Programs and Feature→ Uninstall or
Change a Program Select j5 VGA/DVI DISPLAY ADAPTER ... Click
Uninstall

USB DISPLAY ADAPTER USER MANUAL
17
2. A message will appear asking if you want to remove the selected
application. Click ‘ok’ to continue.
3. Driver un-installation proceeding….
4. When the driver uninstall is completed select “Yes, I want to restart my
computer now.” Click Finish to restart.

USB DISPLAY ADAPTER USER MANUAL
18
INSTALLATION FOR WINDOWS XP
Device Driver Installation
This section illustrates the procedure for device driver installation for
Windows XP. To start, insert the Driver CD into your computer’s CD-ROM
drive. The setup program should be launched automatically. If Autorun
does not begin, go to “Computer”, Click on your optical drive, and
manually run the setup CD by double-clicking on “Setup.exe”
※Please make sure the USB 3.0 Display Adapter USB cable is unplugged
from your PC or Notebook before executing the installation program.
1. The installation page will be launched. To begin installation click on
“ Install the Latest Driver” , please make sure the network is available or
press “Install Driver” to start the installation

USB DISPLAY ADAPTER USER MANUAL
19
2. After pressing the installation option, the InstallShield Wizard will launch,
click Next> to continue
3. Read the license agreement and check “I accept the terms of the
license agreement.” Click Next > to accept it and continue.

USB DISPLAY ADAPTER USER MANUAL
20
4. Driver installation proceeding…..
5. When Install Shield Wizard is complete, select “Yes, I want to restart my
computer now.” Click Finish to restart.

USB DISPLAY ADAPTER USER MANUAL
21
6. After your computer is rebooted, connect the external display device
(monitor/ projector) to the VGA/DVI connector of USB 3.0 Display
Adapters and turn it on.
7. Connect the USB 3.0 Display Adapter into an available USB port of a PC
or Notebook, After Inserting the USB 3.0 Display Adapter into an USB
port, the “Installing device driver software” message will pop up.
An icon ( ) will be seen on the lower right toolbar.
The message pictures below shows Driver software is installed
successfully.
If you’re not going to install another USB 3.0 Display Adapter, restart your
PC. The functions of the USB 3.0 Display Adapter will be activated after
the computer restarted.

USB DISPLAY ADAPTER USER MANUAL
22
Multi-USB 3.0 Display Adapter Installation
For installation of multiple USB 3.0 Display Adapters, during the “Install
Shield Wizard complete” step, select “No, I will restart my computer later.”
and click Finish to continue next step below
A. Connect all external display devices (monitor/ projector) to the
VGA/DVI connector of USB 3.0 Display Adapters and switch power
on.
B. Connect the USB 3.0 Display Adapter into available USB port of PC
or Notebook.
After Inserting an USB 3.0 Display Adapter into a USB port, the systems
will automatically start the installation procedure and the prompt
message will pop-up on the task bar.
The Device driver software was installed properly, if you are going to install
more USB 3.0 Display Adapters, repeat step A & B or restart computer

USB DISPLAY ADAPTER USER MANUAL
23
The functions of the USB 3.0 Display Adapter will be activated after the
computer restarted. You might see the mirror display shown on the display
device.
You can modify the corresponding position of each extend display via
display settings.
Go to “START” → “Control Panel” → “Appearance and Personalization” →
“Display Properties” →“Settings”
When Display Properties
windows appears, each
monitor’s number can be
identified by clicking “
“ identify”
Drag the monitor to the
location you want.
Note:
If your internal graphics card is Dual Display Ports…..
1. When using one USB 3.0 Display Adapter
The display device which connected to the 2nd VGA/DVI port will be
numbered 3rd monitor, the display device which connected to the USB
3.0 Display Adapter will be numbered 2nd monitor.
2. When using two USB 3.0 Display Adapter
The display device which a port to the 2nd VGA/DVI port will be
numbered 4th monitor, the display device which connected to the USB
3.0 Display Adapter will be numbered 2nd and 3rd monitor and so on…

USB DISPLAY ADAPTER USER MANUAL
24
Verify Device Driver Installation
The following procedure helps you to verify the driver installation status of
USB 3.0 Display Adapter
Right-click “My Computer” “Manager” “Device Manager” click “+”
sign of “Display Adapter” & “Universal Serial Bus controllers”
The picture below shows the installation process for a Single USB 3.0
Display Adapter

USB DISPLAY ADAPTER USER MANUAL
25
The picture below shows the installation process for a Multiple USB 3.0
Display Adapter
Device Driver Un-installation
※Unplug the USB 3.0 Display Adapter before un-installing the driver
1. Click “Start”→ Control Panel → Programs and Feature→ Uninstall or
change a program Select j5 DISPLAY ADAPTER... Click Uninstall

USB DISPLAY ADAPTER USER MANUAL
26
2. Confirm windows will pop out, Click to continue.
3. Driver un-installation proceeding….
4. When the driver uninstall is completed select “Yes, I want to restart my
computer now.” Click Finish to restart.

USB DISPLAY ADAPTER USER MANUAL
27
INSTALLATION FOR MAC
Device Driver Installation
Installing the device driver enables your computer’s operating system to
recognize the USB 3.0 Display Adapter. Be sure that you are referring to
the appropriate installation procedure before you begin installing.
※ Make sure the USB cable of USB 3.0 Display Adapter is unplugged from
your Mac Desktop or Mac Notebook before executing the setup program.
This section illustrates the device driver installation procedure for a
computer running Snow Leopard.
1. Insert the Driver CD into the CD-ROM drive
2. The installation page will be launched; To begin installation click on
start “ Get Last Driver online” , please make sure the networking is
available or Choose the OS version you are using and press “Install
Driver” to start the installation

USB DISPLAY ADAPTER USER MANUAL
28
3. Click “Continue” to proceed
4. Click “Continue” to proceed

USB DISPLAY ADAPTER USER MANUAL
29
5. Type in your password and click “OK”
6. Click “Continue Installation”

USB DISPLAY ADAPTER USER MANUAL
30
7. Installation is processing…This will take a few moments
8. Click “Restart” to complete the software installation

USB DISPLAY ADAPTER USER MANUAL
31
9. Connect the external display device (monitor/projector) to the
VGA/DVI connector of USB 3.0 Display Adapter and turn on the display
device
10. Plug the USB 3.0 Display Adapter into the USB port of your Mac
Desktop or Mac Notebook. The screen will turn on automatically, and
be in “Mirror Mode”
To change your screen preferences choose the “System Preference”>“Displays”-> “Arrangement” tab to set up the monitor position.
* please refer to the section : Function Instructions: Mac

USB DISPLAY ADAPTER USER MANUAL
32
Verify Device Driver Installation
The following procedure helps you to verify the driver installation status of
USB 3.0 Display Adapter
1. GO , select “About This Mac” and select “ More Info…”
The picture below shows the installation process for a Single USB 3.0
Display Adapter

USB DISPLAY ADAPTER USER MANUAL
33
The picture below shows the installation process for Multiple USB 3.0
Display Adapter
Device Driver Un-installation
1. Unplug the USB 3.0 Display Adapter from the USB port
2. To un-installation , please press the “Uninstall Driver” icon

USB DISPLAY ADAPTER USER MANUAL
34
3. Click “Open” to proceed
4. Click “Uninstall and restart” to proceed
5. Type in your password to allow un-installation and click “OK”
to proceed
6. Restart your system

USB DISPLAY ADAPTER USER MANUAL
35
FUNCTIONS INSTRUCTIONS: WINDOWS 8,7
This section describes the many functions provided by the USB 3.0 Display
Adapter. ‘Display device’ here means any number of things such as
CRT,LCD monitor, TV display, or projector.
Display ID
Smart Display Device ID Detection
Window 7 OS supports VESA defined DDC/EDID. It will be shown as the
Display device ID whenever it is attached to the USB 3.0 Display Adapter.
Display Resolution
Fast Access to Display Resolution setting
The resolution list will show when moving the cursor on Display Resolution.
Select the resolution you want for the USB 3.0 Display Adapter.
Default resolution: 1024 x 768 x 32 bit

USB DISPLAY ADAPTER USER MANUAL
36
Display Orientation
The Orientation allows you to turn the display device, which is connected
to USB 3.0 Display Adapter

USB DISPLAY ADAPTER USER MANUAL
37
Display Mode
Extended mode (Default)
This feature allows the display device attached to the USB 3.0 Display
Adapter to work as an “extended” display of the on-board screen.
You can adjust the position by clicking “number” of the display first and
select “Extend these displays” and click “Apply”

USB DISPLAY ADAPTER USER MANUAL
38
Mirror mode-Duplicate
This feature allows the same contents of the on-board screen to be
displayed to the screen of the USB 3.0 Display Adapter
You can select “Duplicate these displays” and click “Apply”
Note:
The resolution for the secondary and primary displays must be the same
when using Mirror Mode (This may be lower than the preferred resolution
for the display). Only 2 displays can be mirrored at the same time.
Windows 7 OS may have other limitations.

USB DISPLAY ADAPTER USER MANUAL
39
Primary mode
When you want to switch the enabled monitor as main display and
extend view to on-board screen.
Please choose the “Number” of the main display you want it to be and
check on “Make this my main display”.
Off mode
To turn one of the displays off:
Select “Show desktop only on 1” and the 2nd display will be off
Select “Show desktop only on 2” and the 1st display will be off

USB DISPLAY ADAPTER USER MANUAL
40
Super Utility
A super utility provides more options, you can find the icon on the lower
right task bar
Identify Monitors
When “Identify Monitors” is selected, a serial number will be shown at the
upper right corner of the display devices. You can see the serial number
of each display when using the Hotkey function.
Multi-Display Control Panel
This unique feature provides a simpler working experience for the multidisplay environments. A series of Hotkey setting helps move quickly
between desired display devices.

USB DISPLAY ADAPTER USER MANUAL
41
※Using Hotkeys
Default setting is Ctrl + Display No.
Click the window you want to move at the task bar to become active,
and then press Hotkey
.
※Setting Hotkeys
For example: Move window to Display03, and automatically enlarge it
to full screen.
Choose “Move Active Window to Display03”, check “Move Window
and Full screen”, and click Apply

USB DISPLAY ADAPTER USER MANUAL
42
Display Setting
Fast access to the system “Display Setting”
Fix Position
This function helps you arrange the positions of all the display locations
you have set in Display > Screen Resolution. After “Display Location
Setting”, make a “Check” in this function. All display
location will be fixed. It is great for multi-displayer user.

USB DISPLAY ADAPTER USER MANUAL
43
FUNCTIONS INSTRUCTIONS: WINDOWS XP
You can choose all the functions simply and directly only by clicking on
this icon ( ) seen on the lower right toolbar.
Display ID
Smart Display Device ID Detection
The USB 3.0 Display Adapter supports VESA defined DDC/EDID. The utility
should show the display device ID whenever it is attached to the USB 3.0
Display Adapter.
If there is no display device attached to the USB 3.0 Display Adapter the
ID will show up as “Unknown Monitor.” If the attached display device
does not support EDID, the ID will also be defined as “Unknown Monitor”.

USB DISPLAY ADAPTER USER MANUAL
44
Display Resolution
Default Resolution: 1024 x 768x 32 bit
The resolution list will show up
when you move the cursor over
Display Resolution. Select the
resolution you want.
Display Rotation
The Display Rotation allows you to
turn the display device, which is
connected to USB 3.0 Display
Adapter. It is a useful function for
some rotatable display device.
There are 4 options
available:
0 degree/ 90 degrees/180 degrees/
270 degrees under the Extended or
Primary display mode.

USB DISPLAY ADAPTER USER MANUAL
45
Display Mode
Extended (Default Mode)
A default display mode allows the
attached USB 3.0 Display Adapter
enabled display device to work as
“Extended” display of the onboard screen. This extended
working space feature improves
work efficiency.
Mirror Mode
When Mirror selected, the screen
of display device, which is
connected to USB 3.0 Display
Adapter, will be the same as the
main display, and Display Rotation
will be disabled automatically.
You can select either “Horizontal
Flip”, or “Vertical Flip”.

USB DISPLAY ADAPTER USER MANUAL
46
Primary Mode
When Primary is selected, the
display device, which is
connected to USB 3.0 Display
Adapter, will become the main
display, the display of the internal
graphics card will automatically
switch to be the extended display
and act as an extension desktop.
Off
When Off selected, it will disable
the display of the USB 3.0 Display
Adapter.

USB DISPLAY ADAPTER USER MANUAL
47
Identify Monitor
When Identify Monitors is
selected, a serial number will be
shown at the upper right corner of
attached display device.
You can use the Hotkey function
to find out the serial number of
each display.
Multi-Display Control Panel
When Multi-Display Control Panel
is selected, the Multi-Display
Control Panel window will pop-up
to enable the modification of the
Hotkeys.

USB DISPLAY ADAPTER USER MANUAL
48
※ Using Hotkey
Default setting is Ctrl + Display No.
Click the window you want to move on task bar to become active,
and then press Hotkey.
※ Setting Hotkey
For example: Move window to Display03, and automatically enlarge
it to full screen.
Choose “Move Active Window to Display03”, check “Move Window
and Full screen”, and click Apply to make it active.
Display Setting
Fast access to the system “Display Setting”

USB DISPLAY ADAPTER USER MANUAL
49
FUNCTIONS INSTRUTIONS: MAC
Display Resolution
Go to , and then “System Preferences
From “System Preferences” click on the “Display” tab. You should see this
screen.
On this screen, you can adjust the resolution, display mode and color
range.
Display Mode
Click on the “Arrangement” tab, and uncheck “mirror display” to unMirror the screen. You will automatically see another window appear on
the screen that represents the USB 3.0 Display Adapter.

USB DISPLAY ADAPTER USER MANUAL
50
You can move the menu bar to any display to assign any display to
Primary.
If you cannot see the Display window to adjust your secondary monitor
resolution, click on the “Gather Windows” button.
TIP: To simplify using the USB 3.0 Display
Adapter, click “show display in menu bar.”
You will see the display icon that you
can double-click on at any time.
Windows Arrangement
You can arrange Windows on display by “Expose & Spaces”
Go to , and then “System Preferences”
From System Preferences click on “Exposé & Spaces.” You should see this
screen.

USB DISPLAY ADAPTER USER MANUAL
51
Space
Click “Show Spaces in menu bar.” You should see the space number on
the menu bar that you can choose any space on the list at any time.
F8: you will see the Space Layout with a single keystroke. You can draw
any window to other space.

USB DISPLAY ADAPTER USER MANUAL
52
Exposé
View different windows with a single keystroke.
F9 : view all open windows
F10: view windows of the current
application only
F11: show desktop
*For more windows arrangement functions, please see Apple’s computer
user manual.

USB DISPLAY ADAPTER USER MANUAL
53
TROUBLE SHOOTING
If you have any questions about using this device, follow the instructions
below. If any further assistance is needed, please visit our website or call j5
create support hotline.
Known Issues
- The print screen function in the extend display currently is not
supported under MAC OS. 10.6.
General Recommendations
- Incompatibilities exist when using other Video over USB Devices on a
single system. Please ensure that all other Video over USB drivers are
uninstalled before continuing with j5 create installation.
- Check to make sure that the device is plugged in correctly to the
host system.
- Make sure that the USB port that you are using is USB Display Adapter.
- Unplug the USB cable of USB Display device and re-insert it.
- Check to see that the monitor is connected correctly and is
powered ON.
- Make sure to restart your computer after the driver installation.
- Try a different USB port and/or computer.
- Unplug all other USB devices from the system.
- Try connecting the USB cable of USB Display device directly to the
computer instead of through a hub.
- Reset/refresh/resynchronize your monitor.
Media Playback
- During video playback on all platforms, please do not change the
display mode, position or arrangement of the video player window
(such as dragging the video player window between the main
display and attached display). This may cause the video player to
stop playing. We suggest stopping the video playback, moving the
window to the USB graphics device attached display and then
selecting the video clip to start playing.
- Cursor movement is slower when the mouse hovers on the video
region of the Flash player,
- Downsizing your screen landscape lower than 50 % will help smooth

USB DISPLAY ADAPTER USER MANUAL
54
out Jerky video playback for videos running in Full Screen Mode,.
- You may experience poor video performance on USB graphics
devices with low spec PC systems.
- Video rendering using hardware overlays is supported.
- Some DVD playback software packages do not support playing on a
second display adapter of any kind. You may try to open the media
player in the secondary display first before you start playing the DVD.
- Your PC may lack certain media codec to support the playback of
certain video formats. Please use the link below to install license free
media codec.
K- Lite: http://www.free-
codecs.com/download/K_Lite_Codec_Pack.htm
- Video/Media players have different decoding capabilities under
different display modes. For better performance watching DVDs or
certain video formats on the attached USB graphics display
attached, it is recommended to use the following license free
software:
Media Player Classic: http://sourceforge.net/projects/guliverkli/
Others
- Some graphics card, i.e. Intel, prevents other secondary graphics
chipset from being set as the primary card. As the result of this,
primary mode might not work or the display maybe disabled.
- If you have problems during the boot up process, start your
computer in Safe Mode and uninstall the driver. Hold the CTRL key
until the Windows startup menu appears and select Safe Mode.
- To verify the driver version that you installed, please click “Control
Panel” → “Add or Remove Programs” to check the program: USB
Display Device (j5create) 9.xx.xxxx.0159 (the number means the
driver version).
- Some limitation exists in different media player on file format support.
We enclose our compliance test result in the tables according to
different operating system, main system graphics card/chipset,
media players, and the supported media format. It will be updated
periodically with new version of media players or our latest driver.

USB DISPLAY ADAPTER USER MANUAL
55
TECHNICAL SUPPORT
If you have any issue using this product please follow instruction below
before returning this product to the store.
1. The User Manual
It contains the detail instruction and troubleshooting section. Many
common issues can be easily resolved by reading the user manual.
2. Online Support
Please visit the j5 create website (www.j5create.com) to find the
latest software for your device. If you are still experiencing the same
issue, you can submit a description of your problem via email
service@j5create.com . Our j5 create technical service support
team will reply to you within the next 24 business hours.
3. Telephone Support
Please feel free to call us at 888-689-4088 and one of our support
technicians will be happy to assist you
Customer Service:
Toll free number: 888-988-0488
Technical Support:
Toll free number: 888-689-4088
Email: service@j5create.com
Please contact Technical Support during business hours. 10:00AM-6:00PM
E.S.T Monday- Friday for further assistance.

USB DISPLAY ADAPTER USER MANUAL
56
REGULATORY COMPLIANCE
FCC
This equipment has been tested and found to comply with FCC Part 15 Subpart B § 15.109/15.107 Class
B.
Operation is subject to the following two conditions:
• This device may not cause harmful interference
• This device must accept any interference, including interference that may cause undesired operation
of the device.
CE
This equipment is in compliance with the requirements of the following regulations:
EN 55022 Class B (2006),
EN 55024 (1998+A1:2001+ A2:2003), (IEC/EN 61000-4-2 (1995+A1:1998+A2:2001)/-3(2006)
C-Tick
This equipment is in compliance with the requirements of the following regulations:
EN 55022 (2006) Class B, AS/NZS CISPR22 © IEC: 2005.
VCCI
This equipment is in compliance with the requirements of the following regulations:
CISPR22 © IEC: 2005
Disclaimer
Information in this document is subject to change without notice. The manufacturer does not make any
representations or warranties (implied or otherwise) regarding the accuracy and completeness of this
document and shall in no event be liable for any loss of profit or any commercial damage, including
but not limited to special, incidental, consequential, or other damage. No part of this document may
be reproduced or transmitted in any form by any means, electronic or mechanical, including
photocopying, recording or information recording and retrieval systems without the expressed written
permission of the manufacturer.

USB DISPLAY ADAPTER USER MANUAL
57
WARRANTY OF j5 create
j5create offers a limited 2-year warranty. User’s wear & tear damage is not included.
The user shall call or email j5create customer service with defect information of the
product and obtain a return authorization number.
Users are responsible for one way return freight cost and we will take care of one way
freight back.
In order to obtain a return authorization, user should have the following information
handy when calling or emailing the service team:
(i) a copy of original purchase invoice to verify your warranty
(ii) a product serial number
(iii) a description of the problem
(iv) a return Material authorization number
(v) customer’s Name, address, and telephone number
j5create does not warrant that the operation of the product will be uninterrupted or
error-free. j5create is not responsible for damage arising from failure to follow
instructions relating to the product’s use. This warranty does not apply to:(a)
consumable parts, unless damage has occurred due to a defect in materials or
workmanship; (b) cosmetic damage, including but not limited to scratches,
dents ,and
broken plastic on ports; (c) damage caused by use with non-j5create products; (d)
damage cause by natural disasters ( flood, fire, earthquake, lighting strike, typhoon
etc.,)(e) damage caused by human misuse( lost, accident, abuse, misuse or other
external causes) (f) damage caused by operating the product outside the permitted
or intended uses described by j5create ; (g) damage caused by service (including
upgrades and expansions) performed by anyone who is not a representative of
j5create or a j5create Authorized Service Provider; (h) a product or part that has been
modified to alter functionality or capability without the written permission of j5create;
or (i) if any j5create serial number on the product has been removed or defaced.
If such a situation occurs, j5create will calculate the cost of materials and repair for
your reference.
This warranty is given by j5 create in lieu of any other warranties express or implied.
Copyright© 2011 j5create. All rights reserved. All trade names are registered trademarks of their
respective owners. Features and specifications are subject to change without notice. Product may not
be exactly as shown in the diagram

58
 Loading...