


|
|
User Manual |
M2 |
IMPORTANT SAFETY INSTRUCTIONS
TO PREVENT FIRE OR SHOCK HAZARD, DO NOT USE THIS PLUG WITH AN EXTENSION CORD, RECEPTACLE OR OTHER OUTLET UNLESS THE BLADE SCAN BE FULLY INSERTED TO PREVENT BLADE EXPOSURE. TO PREVENT FIRE OR SHOCK HAZARD, DO NOT EXPOSE THIS APPLIANCE TO RAIN OR MOISTURE.
The lightning flash with arrowhead symbol, within an equilateral triangle is intended to alert the user to the presence of uninsulated ‘dangerous voltage’ within the product’s enclosure that may be of sufficient magnitude to constitute a risk of electric shock to persons.
CAUTION
RISK OF ELECTRIC SHOCK
DO NO OPEN
WARNING: TO REDUCE THE RISK OF ELECTRIC SHOCK DO NOT
REMOVE COVER (OR BACK), NO USER SERVICEABLE PARTS INSIDE REFER SERVICING TO QUALIFIED SERVICE PERSONNEL.
!
The exclamation point within an equilateral triangle is intended to alert the user to the presence of important operating and maintenance (servicing) instructions in the literature accompanying the appliance.
1.READ INSTRUCTIONS - All the safety and operating instructions should be read before the product is operated.
2.RETAIN INSTRUCTIONS -The safety and operating instructions should be retained for future reference.
3.HEED WARNINGS - All warnings on the product and in the operating instructions should be adhered to.
4.FOLLOW INSTRUCTIONS - All operating and use instructions should be followed.
5.CLEANING - Unplug this product from the wall outlet before cleaning. Do not use liquid cleaners or aerosol cleaners.
Use a damp cloth for cleaning.
6.ATTACHMENTS - Do not use attachments not recommended by the product manufacturer as they may cause hazards.
7.WATER AND MOISTURE - Do not use this product near water - for example, near a bath tub,
wash bowl, kitchen sink, or laundry tub; in a wet basement; or near a swimming pool; and the like. This appliance shall not be exposed to dripping or splashing water and no object filled with liquids such as vases shall be placed on the apparatus.
8.ACCESSORIES - Do not place this product on an unstable cart, stand, tripod, bracket, or table. The product may fall, causing serious injury to a child or adult, and serious damage to the product. Use only with a cart, stand, tripod, bracket, or table recommended by the manufacturer, or sold with the product. Any mounting of the product should follow the manufacturer instructions, and
should use a mounting accessory recommended by the manufacturer. A product and cart combination should be moved with care -quick stops, excessive force and uneven surfaces may cause the product and cart combination to overturn.
9.VENTILATION - Slots and openings in the cabinet are provided for ventilation and to ensure reliable operation of the
product and to protect it from overheating, and these openings must not be blocked or covered. The openings should never be blocked by placing the product on a bed, sofa, rug or other similar surface. This product should not be placed in a built-in installation, such as a bookcase or rack, unless proper ventilation is provided or the manufacturer*instructi ons have been adhered to.
10.POWER SOURCES - This product should be operated only from the type of power source indicated on the marking label. If you are not sure of the type of power supply to your home, consult your product dealer or local power company. For products intended to operate from battery power, or other sources, refer to the operating instructions.
11.GROUNDING OR POLARIZATION - This product may be equipped with a polarized alternating-current line plug
(a plug having one blade wider than the other).This plug will fit into the power outlet only one way. This is a safety feature: If you are unable to insert the plug fully into the outlet, try reversing the plug. If the plug should still fail to fit, contact your electrician to replace your obsolete outlet. Do not defeat the safety purpose of the polarized plug.
12.POWER-CORD PROTECTION - Power-supply cords should be routed so that they are not likely to be walked on or pinched by items placed upon or against them, paying particular attention to cords at plugs, convenience receptacles, and the point of exit from the product.
13.NON-USE PERIODS - The power cord of the product should be unplugged from the outlet when left unused for
long periods of time.
14. OUTDOOR ANTENNA GROUNDING - If an outside antenna or cable system is connected to the product, be sure the antenna or cable system is grounded so as to provide some
protection against voltage surges and built-up static charges.
Article 810 of the National Electrical Code, ANSI/NFPA 70,provides information with regard to proper grounding of the mast and
supporting structure, grounding of the lead
-in wire to an antenna discharge unit, size of grounding conductors,
location of antenna-discharge unit, connection to grounding electrodes, and requirements for the grounding electrode. See Figure
1. 


 15. LIGHTNING - For added protection for this product during a


 lightning storm, or when it is left unattended and unused for long


 periods of time, unplug it from the wall outlet and disconnect the antenna or cable system. This will present damage to the product due to lightning and power-line surges.
16.POWER LINES -An outside antenna system should not be located in the vicinity of overhead power lines or other electric light or power circuits, or where it can fall into such power lines or other electric light or power circuits, or where it can fall into such power lines or circuits. When installing an outside antenna system, extreme care should be taken to keep from touching such power lines or circuits as contact with them might be fatal.

|
|
M2 |
User Manual |
17.OVERLOADING - Do not overload wall outlets, extension cords, or integral convenience receptacles as this can result in a risk of fire or electric shock.
18.OBJECT AND LIQUID ENTRY - Never push objects of any kind into this product through openings as they may
touch dangerous voltage points or short-out parts that could result in a fire or electric shock. Never spill liquid of any kind on the product.
19.SERVICING - Do not attempt to service this product yourself as opening or removing covers may expose you to dangerous voltage or other hazards. Refer all servicing to qualified service personnel.
20.DAMAGES REQUIRING SERVICE - Unplug this product from the wall outlet and refer servicing to qualified service
personnel under the following conditions.
a)When the power-supply cord or plug is damaged.
b)If liquid has been spilled, or objects have fallen into the product.
c)If the product has been exposed to rain or water.
d)If the product does not operate normally by following the operating instructions. Adjust only those controls that are covered by the operating instructions as an improving adjustment of other controls may result in damage and will often require extensive work by a qualified technician to restore the product to its normal operation.
e)When the product exhibits a distinct change in performance -this indicates a need for service.
21. REPLACEMENT PARTS - When replacement parts are required, be sure the service technician has used replacement
parts specified by the manufacturer or having the same characteristics as the original part. Unauthorized substitutions may result in fire, electric shock or other hazards.
22.SAFETY CHECK - Upon completion of any service or repair to this product, ask the service technician to perform safety checks to determine that the product is in proper operating condition.
23.HEAT - The product should be situated away from heat sources such as radiators, heat registers, stoves or other products (including amplifiers)that produce heat.
CAUTION!
HAZARDOUS LASER RADIATION WHEN
OPEN AND INTERLOCK FAILED OR
DEFEATED. AVOID EXPOSURE TO BEAM
PRECAUTIONS FOR UNIT
SECURITY
•Before operation, check if the voltage of the unit is in line with the local voltage.
•Hold the plug to disconnect it from the mains outlet. Do not pull the power cord.
•When the plug of the unit is connected to the mains outlet, the unit will be still connected to AC even of the power is turned off.
•Disconnect the plug as soon as liquid or objects enter the unit. The unit cannot be used until being checked by experts.
•Do not open the cabinet. Laser rays employed by the unit may damage eyes. Any servicing should be done by qualified service personnel.
PLACEMENT
•Put the unit where ventilation is good enough to prevent overheating.
•Never put the unit in direct sunlight or near heat sources.
•Place the unit horizontally, never put any heavy object on the unit.
•To protect the pickup, do not put the unit where there is a lot of dust. If there is dust on the pickup, use a cleaning disc to clean it. Refer to the operation instructions of the cleaning disc you bought.
CONDENSATION
Moisture will appear on the pickup lens in the following cases:
•The unit is suddenly moved from a cold place to a warm place.
•Use of the unit in a humid place.
In these cases, the unit will not work. Unloading the disc and leaving the unit on for about one hour will evaporate the water, allowing the unit to function normally again.
CLEANING
• Use a soft cloth with a little neutral detergent to wipe the cabinet, panel and controls. Never use abrasive paper, polishing powder or any solvent such as alcohol or gasoline.
|
|
User Manual |
M2 |
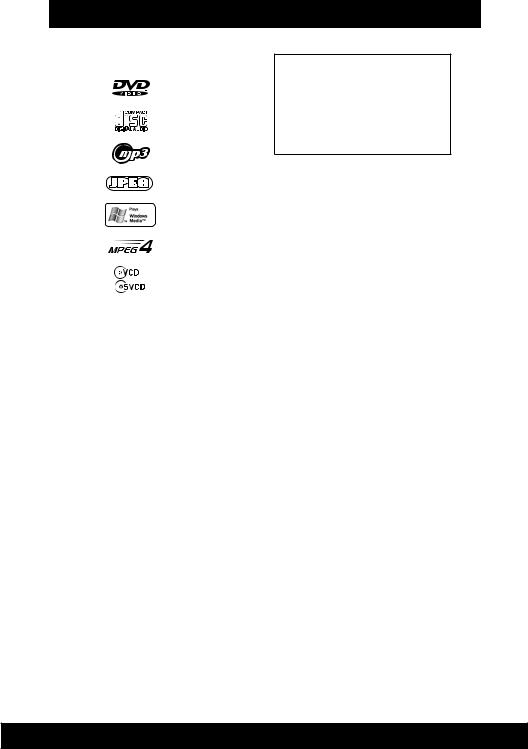
DISC INFORMATION
Supported Disc Formats
|
Disc logo |
Format/Disc type |
||
|
|
|
|
|
DVD |
|
|
|
Video DVD |
video disc |
|
|
|
|
|
|
|
|
|
|
|
|
|
|
Audio |
|
|
|
Audio |
CD disc |
|
|
|
CD, CD-DA, CD-R, CD-RW |
|
|
|
|
|
MP3 |
|
|
|
Audio |
CD disc |
|
|
|
CD, CD-R, CD-RW |
|
|
|
|
|
JPEG |
|
|
|
Kodak Picture CD, |
|
|
|
Fujicolor CD, JPEG |
|
|
|
|
|
|
Windows Media |
|
|
|
Windows Media Formats |
|
|
|
(.asf, .wma, .wmv, .wm) |
|
|
|
|
|
|
|
|
|
|
|
|
|
|
|
MPEG-4 CD, CD-R, CD-RW |
MPEG-4 Disc |
|
|
|
|
|
|
|
|
|
Video CD |
|
|
|
MPEG CD, CD-R, CD-RW |
|
|
|
|
|
Discs that this system cannot play:
•CD-ROM except for extension .mp3, .wma,
.jpg, .jpeg, .mp4, .avi.
•CD-R, CD-RW except for extension .mp3,
.wma, .jpg, .jpeg, .mp4, .avi.
•Super Audio CD
•DVD-ROM
•DVD-RAM
•CD-G (CD-Graphics)
•DVD/CD Text
•DVD-Audio
•Discs with non-standard shapes (e.g. heart, square, star) cannot be played in this unit. Attempting to do so may damage the unit.
Note about MP3 Compatibility
Supported Memory Card Formats
Secure Digital™ (SD) miniSD™ (with adapter only) microSD™ (with adapter only) Multimedia Card (MMC) Memory Stick™
Memory Stick Duo™ (with adapter only)
NOTE:
•Where “with adapter only” is mentioned, you must use the adapter to convert from the small format to full-size card format.
Attempting to use these formats without the proper adapter may cause damage to the memory card or the unit. Do not attempt to insert these cards without the proper adapter.
•Maximum supported card capacity is 2GB.
IMPORTANT: This unit does not support the following card formats. Attempted use of these unsupported formats may cause damage to the memory card or the unit. Do
not attempt to insert these unsupported cards:
•Compact Flash® (Type I and Type II)
•MicroDrive™
•Smart Media™
•xD Picture Card™
This unit is compatible with MPEG1 Audio Layer 3 (mp3) 32, 44.1 or 48kHz formats. The recording format should be in accordance with ISO9660 CD-ROM file system. MP3 file name requires MP3 or mp3 as an extension. Chinese characters cannot be displayed, although files featuring them can be played. VBR (Variable Bit Rate) files can be played, but playing time may not be shown correctly. Up to 299 tracks/folders can be played.
|
|
M2 |
User Manual |
Note about CD-R/CD-RW/DVD+R/DVD+RW/DVD-R/DVD-RW
The ability of this unit to play certain recordable discs may depend on the quality or physical condition of the disc, the quality of the recording, or characteristics of the recording device or software application. Playback cannot be guaranteed in all situations.
Note on DualDiscs
A DualDisc is a two sided disc product which mates DVD recorded material on one side with digital audio material on the other side. However, since the audio material side does not conform to the Compact Disc (CD) standard, playback on this product is not guaranteed.
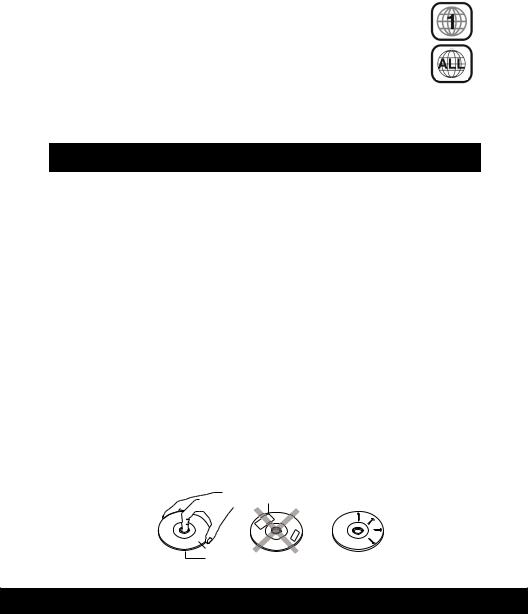
Note on Region Code
This unit is designed and manufactured for playback of Region “1” encoded DVD software. The region code on the label of some DVD discs indicates which type of player can play those discs. This unit can play only DVD discs labeled “1” or “ALL” if you try to play any other discs, the message “Check Regional Code” will appear on the TV screen. SOme DVD discs may have not region code label even though their playbac is prohibited by area limits.
Color system
This product supports NTSC and PAL color systems. Refer to section System Setup for details.
DISC HANDLING AND MAINTENANCE
Cleaning Precautions
•Before playing, clean the disc with a cleaning cloth, wipe the disc from the center out.
•Do not use solvents such as benzine, thinner, commercially available cleaners or antistatic spray intended for vinyl LPs.
Improper Disc Storage
You can damage discs if you store them in the following places
•Areas exposed to direct sunlight.
•Humid or dusty areas.
•Areas directly exposed to a heat outlet or heating appliance.
•After playing, store the disc in its case.
Handling Precautions
•To keep the disc clean, handle the disc by its edge. Do not touch the surface.
•Do not stick paper or tape on the disc.
•If there is glue(or a similar substance) on the disc, remove the glue completely before using the disc.
•Do not write on the label side with a ball-point pen or other writing utensils.
•Be careful not to drop or bend the disc.
Installing Precautions
•Do not install more than one disc on disc tray.
•Do not place the disc on the tray upside down.
•Do not try to close the disc tray when the disc is not installed properly.
Labels
 Tapes
Tapes
Label Side
Surface

|
|
User Manual |
M2 |
TABLE OF CONTENTS
IMPORTANT SAFETY INSTRUCTIONS |
2 |
PRECAUTIONS FOR UNIT |
3 |
DISC INFORMATION |
4 |
DISC HANDLING AND MAINTENANCE |
5 |
INTRODUCTION |
7 |
GETTING STARTED |
|
UNPACKING AND SET-UP |
9 |
CONNECTIONS |
10 |
CONTROLS |
|
LOCATION OF CONTROLS |
14 |
REMOTE CONTROL |
15 |
AUDIO CONTROLS |
16 |
DEVICE PLAYBACK |
|
COMPATIBLE STORAGE DEVICES |
18 |
LOADING AND REMOVING A DISC |
18 |
INSERTING AND REMOVING FLASH DEVICES |
19 |
ACCESSING DISCS AND FLASH DEVICES |
20 |
PLAYING SONGS, VIDEOS AND IMAGES |
21 |
iPod FUNCTIONS |
|
PLAYING MUSIC FROM iPod |
27 |
PLAYING VIDEO FROM iPod |
28 |
ON SCREEN DISPLAY |
|
USING THE ON SCREEN DISPLAY(OSD) |
30 |
RADIO |
|
LISTENING TO THE RADIO |
34 |
OTHER FUNCTIONS |
36 |
SYSTEM SETUP MENUS |
|
SYSTEM SETUP |
40 |
CONNECTING EXTERNAL DEVICES |
43 |
TECHNICAL SPECIFICATIONS |
45 |
iSymphony WARRANTY |
46 |
|
|
|
|

|
|
M2 |
User Manual |
INTRODUCTION
Thank you for purchasing the iSymphony M2 DVD Micro Music System with Built-in Universal Dock for iPod. The M2 is the world’s first compact DVD audio system to include a Built-in Universal Dock for iPod, a card slot for SD, MMC and Memory Stick flash memory cards and a convenient USB port for USB flash memory devices on the front panel. This unique unit gives you the flexibility watch all your favorite DVD and MPEG4 movies and to play music from CDs, radio, or in MP3 and Windows Media format from:
•iPod
•SD/MMC and Memory Stick flash memory cards
•USB flash memory drives
•Audio CDs including CD-R, CD-RW
•DVDs including DVD+R, +RW, DVD-R, -RW
•MP3 or Windows Media encoded CDs
For added convenience, you can connect the M2 to your computer and exchange songs with your iPod, and your iPod will charge while it’s docked.
Please be sure to read this manual carefully and completely to make sure you understand all of the exciting features and functions included in your new system. We have taken great care to make sure that this system was in perfect working order when it left our factory. If you experience any problem with the set-up or operation of this system please refer to the back of this manual for instructions on obtaining customer service.
The serial number of your system is located on a label on the back panel. Please take a moment now to locate the serial number and to write it in the space provided below for future reference. You may be asked to provide this number if you call for customer service.
Serial Number: _______________________________
Please also take a moment to register your product online at
www.myisymphony.com/register

GETTING STARTED

M2 |
User Manual |
UNPACKING AND SET-UP
•Carefully remove the unit from the carton and remove all packing material from the unit.
•Check to be sure that you have all the following items in addition to the main unit and two speakers:
•FM antenna (x1)
•Component video cord (x1)
•Remote control (x1)
•Batteries (x2)
If any item is missing, consult your dealer immediately.
•We suggest that you retain the original carton and packing materials in case it ever becomes necessary to return your unit for service. This is the only sure way to protect the unit from damage in transit. If you do dispose of the carton and packing materials, please do so property. We care about our environment.
•Remove any descriptive labels or stickers from the front panel of the unit. Do not remove any labels or stickers that may be affixed to the back panel of the main unit of the speakers.
•Unwind the AC cord on the back of the main unit and extend it to its full length.
•Insert two AAA batteries into the remote control while observing the correct (+) and (-) polarities as shown below.

User Manual |
M2 |
CONNECTIONS
Follow these 5 steps to complete all system connections.
1) Connect the speakers
Connect the right and left speaker cords to the speaker jacks as shown below. Make sure to connect red to red and black to black.
2) Setup and connect AM antenna, connect and extend FM antenna
3) Connect video to a TV
Use only one of the following connection methods
10
M2
Good Picture
For good picture quality, use a composite (RCA-type, included) video cable to connect.
Make sure that the sP]TJ.4409>.
Better Picture
If your TV has an S-VIDEO input, you will get a better picture quality using an S-VIDEO cable (not included) to connect.
Make sure that the system is set to interlace not P-SCAN. Composite video out will not work if the system is set to P-SCAN
• Press ANGLE/P-SCAN repeatedly until P-S disappears from the display.
Set video out to S-VIDEO using on-screen setup: 1) Press SETUP
2) Use |
to select PREFERENCES |
3) Press ENTER |
|
4) Use |
to select VIDEO OUTPUT |
5) Press ENTER |
|
6) Use |
to select S-VIDEO |
7) Press ENTER
Best Picture
If your TV has component video inputs, you will get the best picture quality using a component video cable. Be sure to connect RED to RED, WHITE to WHITE and YELLOW to YELLOW
Set video out to COMPOSITE (YCBCR) using on-screen setup: 1) Press SETUP
2) Use |
to select PREFERENCES |
3) Press ENTER |
|
4) Use |
to select VIDEO OUTPUT |
5) Press ENTER |
|
6) Use |
to select YCBCR |
7) Press ENTER
User Manual
11
|
|
User Manual |
M2 |
Consult your TV User’s Manual to find out if your TV supports Progressive Scan.
If Progressive Scan is supported, follow the TV User Manual’s instructions regarding Progressive Scan settings in the TV’s menu system.
If your TV supports Progressive Scan:
•Open the disc tray (this setting can be changed only when disc tray is opened).
•Press the ANGLE/P-SCAN button to repeatedly until appears on the display.
P-S
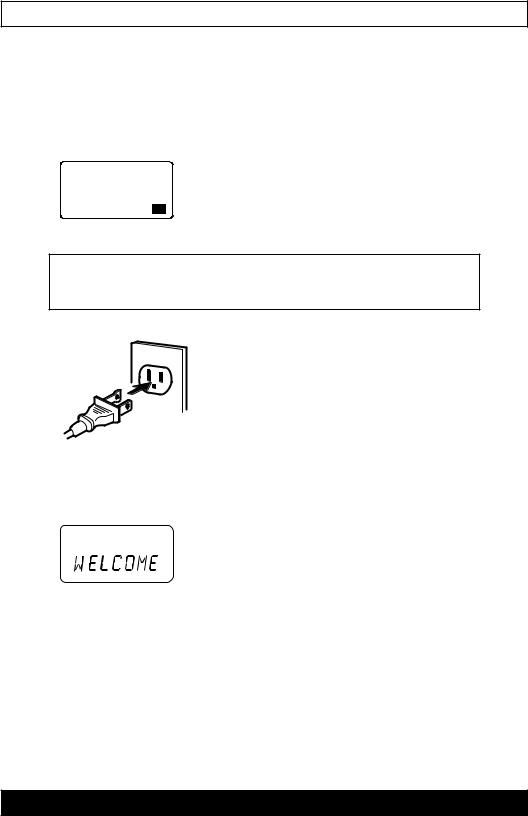
4) Connect the unit to an available 120V AC wall outlet.
IMPORTANT: This system is designed to operate on 120V 60Hz AC house current. Connecting this system to any other power supply could result in damage to the unit which is not covered by your warranty
AC outlet
Wider Hole
and Blade
Polarized AC Cord Plug (One blade is wider than the other)
5) Press the STANDBY/ON button to turn the system ‘On’.
The LCD screen shows “WELCOME” briefly and the backlights illuminate.
To connect optional components see section Connecting External Devices.
12

CONTROLS

|
|
User Manual |
M2 |
LOCATION OF CONTROLS
|
8 |
1 |
9 |
|
|
|
10 |
2 |
11 |
|
12 |
16 |
|
|
|
||
|
13 |
|
|
3 |
|
|
|
4 |
|
17 |
|
14 |
|
||
5 |
18 |
||
|
|||
|
|
||
6 |
|
|
|
|
15 |
|
|
7 |
|
|
Y |
|
|
|
|
Cb/Pb |
|
|
|
|
|
|
|
FM 75 |
AM |
Cr/Pr |
|
|
|
|
|
|
|
SUBWOOFER |
|
|
|
|
OUT |
|
|
|
|
|
LINE OUT |
COMPONENT |
VIDEO |
S-VIDEO |
OPTICAL R |
L |
VIDEO OUT |
OUT |
OUT |
DIGITAL |
|
|
|
|
OUT |
|
|
|
|
R |
L |
|
|
|
|
LINE IN |
|
|
|
+ |
+ |
R _ |
_ L |
SPEAKERS 4 |
|
AC~
27
19
20
21
22
23
24
25
26
1. STANDBY/ON |
14. VOLUME CONTROL |
2. REMOTE SENSOR |
15. DVD DOOR |
3. FUNCTION |
16. COMPONENT VIDEO OUT( Y Cb/Pb Cr/Pr) |
4. PLAY/PAUSE |
17. COMPOSITE VIDEO OUT |
5. STOP |
18. S-VIDEO OUT |
6. OPEN/CLOSE |
19. AM/FM ANTENNA TERMINAL |
7. PHONES |
20. OPTICAL DIGITAL OUT |
8. STANDBY INDICATOR |
21. SUBWOOFER OUT |
9. TUNER/BAND |
22. LINE OUT(R/L) |
10. SKIP/TUNING UP |
23. LINE IN (R/L) |
11. SKIP/TUNING DOWN |
24. SPEAKER R |
12. CARD READER (SD/MMC/MS/USB) |
25. SPEAKER L |
13. CARD INDICATOR |
26. AC CORD |
|
27. UNIVERSAL DOCK FOR iPod (UNDER COVER) |
14
|
|
M2 |
User Manual |
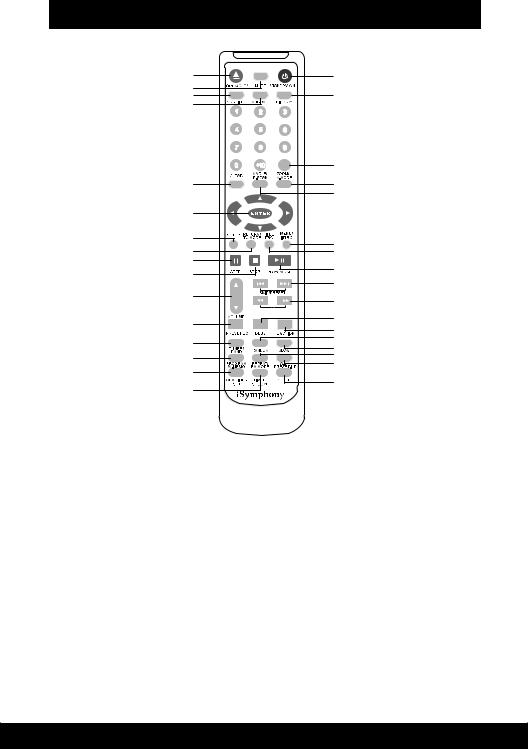
REMOTE CONTROL
1 |
15 |
|
2 |
16 |
|
3 |
||
4 |
|
|
|
GOTO/CARD |
|
|
17 |
|
5 |
18 |
|
|
30 |
|
6 |
|
|
7 |
19 |
|
8 |
||
20 |
||
32 |
31 |
|
33 |
||
|
||
|
21 |
|
9 |
22 |
|
|
||
|
SCAN/TUNING |
|
10 |
23 |
|
24 |
||
|
||
11 |
25 |
|
26 |
||
|
||
12 |
27 |
|
13 |
28 |
|
29 |
||
14 |
||
|
1. OPEN/CLOSE |
17. GOTO/CARD |
2. MUTE |
18. ZOOM/V-MODE |
3. SUBTITLE |
19. MENU/INTRO |
4. LANGUAGE |
20. TITLE/PBC |
5. CLEAR |
21. SKIP/PRESET |
6. ENTER |
22. SCAN/TUNING |
7. SETUP |
23. DBBS |
8. RETURN/TU MODE |
24. FUNCTION |
9. VOLUME |
25. RANDOM |
10. PRESET EQ |
26. SLOW |
11. TUNER/BAND |
27. REPEAT/FM MODE |
12. PROGRAM/A-MEMO |
28. A-B/PRESET UP |
13. CLK/TIMERSET |
29. SLEEP |
14. TIMER/SNOOZE |
30. ANGLE/P-SCAN |
15. STANDBY/ON |
31. PLAY/PAUSE |
16. DISPLAY |
32. STEP |
|
33. STOP |
15
 Loading...