

Page 1

Quick Start Guide
You write,
it types!
J120305-1
for Windows®, Mac®, iPhone® and iPad®
English
Français
Nederlands
Deutsch
Español
Italiano
Português
Русский
Page 2

English English
This Quick User Guide provides general guidelines for installing and using IRISNotes™
Executive. For detailed instructions on the IRISNotes
functionalities, please refer to the help le provided with your software.
The descriptions in this guide are based on the Windows
operating systems. All information is subject to change without prior notice.
Table of Contents
1.Package Contents
2.Charging the Batteries
3.Writing Notes
4.Using IRISNotes
5.Using IRISNotes
6.Reference Information
7.Tips for Writing Notes
™
™
™
Executive’s full range of
®
7 and Mac OS® X Lion™
on a Windows PC or Mac OS computer
on an iPad®, iPhone® or iPod
®
1. Package Contents
IRISNotes™ Executive installation CD-ROM.
Digital pen, receiver unit, retractable USB cable, 30-pin USB cable, three ink rells, pen
pocket
2. Charging the Batteries
BEFORE YOU BEGIN: charge the pen and receiver for at least 30 minutes.
1. Charge the pen battery:
• Open the cover at the top of the pen.
• Connect the pen to your computer with the provided USB cable.
2. Charge the receiver battery:
• Connect the receiver to your computer with the provided USB cable.
Tip: make sure the computer is on. Otherwise the batteries won’t charge. It may take up to
3.5 hours to fully charge the batteries.
Page 3

English English
3. Writing Notes
Step 1 Clip the receiver unit to a sheet of paper.
IRISNotes™ supports pages up to A4 size.
Tip: always place the unit at the top center of a page.
Step 2 Press the power button for 5 seconds to turn on the receiver.
Step 3 Start writing a note.
Important notes:
Disconnect the receiver from your computer.
While you write you should see the pen icon on the display.
Tips:
Hold the pen rmly and write normally. Try to avoid line skew.
Do not write directly below the receiver, but leave at least a 1.5 cm
margin.
Do not put your ngers between the pen tip and the receiver. This will
block the signal.
See the section Tips for Writing Notes at the end of this guide
for some more pointers.
Step 4 Press the power button to end and save the current note.
Pressing the button is required to save your notes to the receiver. The
number on the display increases by 1 each time you press the power
button after writing a note. The number shows how many notes are
saved to the receiver.
You can write up to 100 notes of A4 size.
Page 4

English English
4.Using IRISNotes™ on a Windows PC or Mac OS computer
In order to use IRISNotes™, you must rst install the IRISNotes™ Executive software.
4.1 Installing the software
1. Insert the IRISNotes™ cd-rom into the cd-rom drive of your computer.
PC Mac
Go to Computer, locate your cd-rom
drive and double-click it.
Double-click IRISNotesExecutive-
Setup.exe to start the Installation Wizard.
2. Follow the on-screen instructions to install the software.
Important note (PC): make sure to install the correct languages in which you
Once the installation is complete, you have the following applications on your computer:
write your notes.
• MyScript Ink Retriever: with this application you download notes from the receiver
to your computer.
• MyScript Trainer: this application helps you train IRISNotes
handwriting better.
• IRISNotes
™
into typed text and export them to text-processing applications or via e-mail.
Executive: with this application you manage and edit notes, convert them
Double-click the cd-rom icon on the Desktop
Double-click IRISNotes-installer.zip.
Open the folder IRISNotes-Installer and
run the IRISNotes.mpkg le.
™
to recognize your
Page 5

English English
4.2 Downloading Notes with MyScript Ink Retriever
1. Connect the receiver unit to your computer with the provided USB cable. MyScript Ink
Retriever starts automatically.
2. Type in a prex for your notes. The prex is
3. Indicate where you placed the receiver. Note
added to each note name.
that Center is recommended.
4. Click Download ink to download the notes
The notes are stored in the default location.
Tip: to delete notes from the receiver after downloading them, click the Retrieval
settings tab > Select Advanced Settings > Select the option Clear les from device after
downloading.
from the receiver.
Click the tab Retrieval Settings to see to which
folder your notes are downloaded.
4.3 Activating the IRISNotes™ Executive software
Before using IRISNotes™ you are recommended to activate it. Unactivated versions are only
available for 30 days.
1. Start IRISNotes
2. You are asked to activate the software. Click Activate to do so.
3. Enter the activation code you nd on the cd-rom sleeve, and
click Activate again.
Note that an internet connection is required to activate.
™
Executive.
Page 6

English English
4.4 Editing Notes in IRISNotes™ Executive
As soon as you downloaded the notes with MyScript InkRtriever, they are available in the
™
IRISNotes
In case you want to download notes manually:
4.4.1 Converting Notes
1. In the Conversion menu, click Conversion Settings.
2. Click OK to save the settings.
3. Double-click the note to convert, and then click the Convert button.
Executive software.
• Click the open icon.
• The default notes location opens. Go to notes > Ink Devices, and then select the notes
you want to load.
Select Text as Content type.
Select the Language
in which the notes are written.
Select the right Handwriting
style.
The converted note is displayed as editable text in the right-hand panel.
Page 7

English English
4.4.2 Editing Notes
You can freely edit both your original notes, and their corresponding converted text:
Use the editing toolbar to edit your
ink notes: select zones, erase parts,
add new text, rotate, add space, etc.
Use the Text editing toolbar to edit
the converted text: change color,
change font, add text, align, justify,
add bullets, etc.
4.4.3 Exporting Notes
To export notes, click the Export button. You can export both your original notes, and their
corresponding converted text:
Original export Text export
The originals can be exported as
image les via e-mail, pasted into
*Word and saved as image.
*Word is not available in the Mac version.
The converted text can be pasted into
an e-mail, in *Word and in a text editor.
4.5 Using IRISNotes™ as mouse
You can also use the IRISNotes™ pen as mouse. To switch to mouse mode:
• Connect the receiver to your PC.
• Hold the pen right in front of the
receiver, then press the power
button once.
PC
• Connect the receiver to your
Mac.
• IRISNotes
automatically to mouse mode.
Mac
™
switches
Page 8

English English
• Tap the pen on a piece of paper. The cursor is now being controlled by the pen.
• Hover the pen above a page to move the cursor.
• To click an object, point with the cursor to the object, then tap with the pen to click it.
• To right-click an object, point to it, then tap and hold the pen for an instant.
Note: in Windows Vista® and Windows 7, you can also use the IRISNotes™ pen to write
directly in Microsoft Ofce 2007 applications and higher. This also works on Mac OS
10.5 in iWork® ’08 applications and higher.
See www.irislink.com/support/userguides for more information.
5.Using IRISNotes™ on an iPad, iPhone or iPod
IRISNotes™ is compatible with Apple® portable devices running on iOS® 3.0 and above.
With IRISNotes™ you can upload your handwritten notes to your Apple device, make draw-
ings or write text directly on your device, annotate existing pictures, and so on.
Note that you cannot convert your notes into editable, typed text however.
5.1 Downloading the IRISNotes™ app
1. Power on the IRISNotes™ receiver and connect it
to your Apple device with the provided 30-pin USB cable.
2. You are asked to download the corresponding IRISNotes™ app from the Mac App store:
Note: for iPAD, select IRISNotes™ HD.
Note: for iPhone/iPOD, select IRISNotes
3. Download the app following the on-screen instructions.
An I.R.I.S. icon will be created on the home screen.
™
.
5.2 Uploading Notes to Your Apple Device
1. Open the IRISNotes™ app.
2. Power on the receiver unit and connect it to your Apple device.
3. Tap the lightbulb icon, then tap Upload pictures.
The notes are uploaded to the Camera Roll.
Page 9

English English
5.3 Editing, Writing and Drawing Notes in IRISNotes
Once your notes have been uploaded, you can edit them in IRISNotes™, make annotations,
send them via e-mail and so on. With IRISNotes
and annotate existing image les.
1.In IRISNotes
Camera Roll to open one of your notes.
2. To edit notes, power on the receiver and clip it to the top center
of a page. Now use the pen to write text on the page. The text will
appear directly on your note.
Tip: don’t write too close to the edges of the page. Otherwise your
Tip: to edit the writing style, use the icons on the right side of the
3.When you are done:
Tap the pencil, then select Save Picture to save it, or;
Tap the send icon, then select Send by e-mail (as PDF).
™
, tap the pencil icon, then select Open a Picture >
notes will not t on the screen of your Apple device.
screen.
™
you can also make drawings from scratch
™
6.Reference information
6.1 Overview of the receiver unit
a. Mini USB port – connect to computer through the USB
b. LCD display
c. ON/OFF button – Press and hold for about 5 seconds to
d. Reset button – Reset the device when then the unit does
d
e. Paper Clip – Clip the unit to a page or paperboard.
a
c
b
e
cable.
turn on the receiver. Press once to create a new note.
not respond.
Page 10

English English
6.2 Overview of the display
The LCD screen displays the following status indications:
Receiver unit connected to computer
(upload your les to your computer and delete them from memory)
Memory FULL
Pen low battery
Receiver unit low battery
Note mode
Mouse mode
Number of saved notes in memory
6.3 Relling the IRISNotes™ pen
The ink rell is standard and off-the-shelf, you can purchase it in a stationery store.
To rell the pen:
1. Press the pen button downward.
2. Pull the used rell out.
3. Insert a new rell and press the pen button upward to lock the rell.
Note: do not try to dismantle the pen. This may damage it.
7. Tips for Writing Notes
• Use cursive or printed letters. Avoid stylistic writing.
• Write as consistently as possible. Try to use the same size and shape each time you write a
letter or character. Also, write capital letters larger than lowercase letters.
• Leave some space between words. Try not to overlap letters or characters.
• Don’t hyphenate words at the end of a line. Instead, write the entire word on the next line
if you don’t have enough space.
• Use lined paper, so you avoid line skew.
• Use MyScript Trainer to train the software on your handwriting. For more information
on how to use MyScript Trainer go to www.irislink.com/support/userguides.
Page 11

English English
Should you experience issues when using your IRISNotes™, consult the Frequently Asked
Question on our website www.irislink.com/support/faq or contact Technical Support at
www.irislink.com/support.
Page 12

Français Français
Ce guide de démarrage rapide contient des instructions générales pour l'installation
et l'utilisation d'IRISNotes
fonctionnalités d'IRISNotes
logiciel.
Les descriptions données dans ce guide sont basées sur les systèmes d'exploitation
®
Windows
7 et Mac OS® X Lion™. Toutes les informations du présent guide peuvent être
modiées sans préavis.
Table des matières
1. Contenu de la boîte
2. Charge des batteries
3. Rédaction de notes
4. Utilisation d'IRISNotes
5. Utilisation d'IRISNotes
6. Informations de référence
7. Conseils pour la rédaction de notes
™
Executive. Pour une explication détaillée de toutes les
™
Executive, veuillez consulter le chier d'aide fourni avec le
™
sur un ordinateur Windows ou Mac OS
™
sur un iPad®, iPhone® ou iPod
®
1. Contenu de la boîte
CD-ROM d'installation d'IRISNotes™ Executive
Stylo numérique, récepteur, câble USB rétractable, câble USB 30 broches, trois cartouches
d'encre et étui pour le stylo
2. Charge des batteries
AVANT DE COMMENCER : chargez le stylo et le récepteur pendant au moins 30
minutes.
1. Chargez la batterie du stylo :
• Ouvrez le couvercle au-dessus du stylo.
• Connectez le stylo à votre ordinateur à l'aide du câble USB
fourni.
2. Chargez la batterie du récepteur :
• Connectez le récepteur à votre ordinateur à l'aide du câble USB
fourni.
Conseil : vériez que l'ordinateur est sous tension. Dans le cas contraire, les batteries ne chargeront
pas. Il faut environ 3 heures et demi pour charger entièrement les batteries.
Page 13

Français Français
3. Rédaction de notes
Etape 1 Attachez le récepteur à une feuille de papier.
IRISNotes™ prend en charge les pages jusqu'au format A4.
Conseil : placez toujours le récepteur au centre du bord supérieur de la page.
Etape 2 Appuyez sur le bouton de marche/arrêt pendant 5 secondes
pour activer le récepteur.
Etape 3 Commencez à écrire une note.
Remarques importantes :
Déconnectez le récepteur de votre ordinateur.
Lorsque vous rédigez la note, l'écran doit afcher l'icône du stylo.
Conseils :
Tenez fermement le stylo et écrivez normalement. Evitez les lignes
inclinées.
N'écrivez pas directement en-dessous du récepteur, laissez au moins
une marge de 1,5 cm.
Ne placez pas vos doigts entre la pointe du stylo et le récepteur.
Le signal serait bloqué.
Consultez la section Conseils pour la rédaction de notes à la n de
ce guide pour d'autres recommandations.
Etape 4 Appuyez sur le bouton de marche/arrêt pour terminer et sauvegarder la note
que vous venez de rédiger.
Vous devez appuyer sur le bouton pour enregistrer les notes dans le
récepteur. Le nombre afché augmente d'une unité à chaque fois que
vous appuyez sur le bouton de marche/arrêt après la rédaction d'une
note. Il correspond au nombre de notes enregistrées dans le récepteur.
Vous pouvez rédiger jusqu'à 100 notes au format A4.
Page 14

Français Français
4. Utilisation d'IRISNotes™ sur un ordinateur Windows ou Mac OS
Pour utiliser IRISNotes™, vous devez d'abord installer le logiciel IRISNotes™ Executive.
4.1. Installation du logiciel
1. Insérez le CD-ROM d'IRISNotes™ dans le lecteur CD de l'ordinateur.
PC Mac
Accédez à Ordinateur, localisez votre
lecteur de CD-ROM et double-cliquez sur
celui-ci.
Double-cliquez sur IRISNotesExecutive-
Setup.exe pour lancer l'Assistant d'ins-
tallation.
2. Suivez les instructions afchées à l'écran pour installer le logiciel.
Remarque importante (PC) : assurez-vous d'installer les langues de rédac-
Au terme de l'installation, vous pourrez accéder aux applications suivantes sur votre
ordinateur :
tion de vos notes.
• MyScript Ink Retriever : cette application permet de télécharger les notes du récep-
teur vers l'ordinateur.
• MyScript Trainer : cette application d'apprentissage permet à IRISNotes
reconnaître votre écriture.
• IRISNotes
™
les convertir en texte numérique et de les exporter vers des applications de traitement
de texte ou par e-mail.
Executive : cette application permet de gérer et de modier les notes, de
Double-cliquez sur l'icône du CD-ROM sur
le bureau.
Double-cliquez sur IRISNotes-installer.zip.
Ouvrez le dossier IRISNotes-Installer et
exécutez le chier IRISNotes.mpkg.
™
de mieux
Page 15

Français Français
4.2 Téléchargement de notes avec MyScript Ink Retriever
1. Connectez le récepteur à votre ordinateur à l'aide du câble USB fourni. MyScript Ink
Retriever s'exécute automatiquement.
2. Indiquez un préxe pour vos notes. Le préxe
3. Spéciez l'emplacement du récepteur. Notez
4. Cliquez sur Télécharge l'encre pour télé-
Les notes sont conservées dans l'emplacement
Conseil : pour supprimer les notes du récepteur après les avoir téléchargées, cliquez sur
l'onglet Paramètres de récupération> sélectionnez Paramètres avancés > sélectionnez
l'option Effacer les chiers du périphérique après le téléchargement.
est ajouté à chaque nom de note.
qu'il est conseillé de l'installer au Centre.
charger les notes du récepteur.
par défaut. Cliquez sur l'onglet Paramètres
de récupération pour spécier le dossier dans
lequel télécharger les notes.
4.3 Activation du logiciel IRISNotes™ Executive
Avant d'utiliser IRISNotes™, il est recommandé de l'activer. Les versions non activées sont
uniquement accessibles pendant 30 jours.
1. Lancez IRISNotes™ Executive.
2. Vous êtes invité à activer le logiciel. Pour ce faire, cliquez sur
Activer.
3. Indiquez le code d'activation gurant sur l'enveloppe du CD-
ROM et cliquez à nouveau sur Activer.
Notez que vous avez besoin d'une connexion Internet pour l'activation.
Page 16

Français Français
4.4 Modication de notes dans IRISNotes™ Executive
Dès que vous avez téléchargé les notes avec MyScript InkRtriever, il est possible d'y accé-
der dans le logiciel IRISNotes
Si vous souhaitez télécharger manuellement les notes :
• Cliquez sur l'icône Ouvrir.
• L'emplacement par défaut des notes s'ouvre. Accédez à notes > Ink Devices, puis
sélectionnez les notes à télécharger.
™
Executive.
4.4.1 Conversion des notes
1. Dans le menu Conversion, cliquez sur Paramètres de conversion.
2. Cliquez sur OK pour enregistrer les paramètres.
3. Double-cliquez sur la note à convertir puis cliquez sur le bouton Convertir.
La note convertie est afchée sous la forme de texte modiable dans le volet de droite.
Sélectionnez Texte comme
Type de contenu.
Sélectionnez la Langue
de rédaction de la note.
Sélectionnez le Style
d'écriture manuscrite
approprié.
Page 17

Français Français
4.4.2 Modication des notes
Vous pouvez facilement éditer vos notes originales ainsi que le texte converti
correspondant :
Utilisez la barre d'outils d'édition
pour modier vos notes manuscrites,
sélectionner des zones, effacer certaines
parties, ajouter du nouveau texte, le faire
pivoter, ajouter des espaces, etc.
Utilisez la barre d'outils d'édition de
texte pour modier le texte converti,
changer la couleur, la police, ajouter
du texte, aligner, justier, ajouter des
puces, etc.
4.4.3 Exportation des notes
Pour exporter des notes, cliquez sur le bouton Exporter. Vous pouvez exporter vos notes
d'origine et le texte converti correspondant :
Exportation de l'original Exportation du texte
Les originaux peuvent être exportés
en tant que chiers images via e-mail,
collés dans *Word et enregistrés en
tant qu'images.
*Word n'est pas disponible dans la version Mac.
Le texte converti peut être collé dans
un e-mail, dans *Word et dans un
éditeur de texte.
4.5 Utilisation d'IRISNotes™ comme souris
Vous pouvez également utiliser le stylo IRISNotes™ comme souris. Pour activer le
mode Souris :
• Connectez le récepteur à l'ordinateur.
• Tenez le stylo devant le récepteur et
appuyez une seule fois sur le bouton
de marche/arrêt.
PC
• Connectez le récepteur à
• IRISNotes
Mac
l'ordinateur.
™
automatiquement en mode souris.
bascule
Page 18

Français Français
• Tapez la pointe du stylo sur une feuille de papier. Le stylo contrôle désormais le curseur.
• Faites passer le stylo au-dessus d'une page pour déplacer le curseur.
• Pour cliquer sur un objet, pointez sur l'objet avec le curseur puis tapez avec le stylo pour
le sélectionner.
• Pour effectuer un clic droit sur un objet, pointez sur celui-ci, tapez et maintenez le stylo
pendant un instant.
Remarque : dans Windows Vista
Pour plus d'informations, consultez la page www.irislink.com/support/userguides.
™
IRISNotes
rieures. Il est également possible de l'utiliser avec le système d'exploitation Mac OS 10.5
dans les applications iWork® ’08 et ultérieures.
pour écrire directement dans les applications Microsoft Ofce 2007 et ulté-
®
et Windows 7, vous pouvez également utiliser le stylo
5. Utilisation d'IRISNotes™ sur un iPad, iPhone ou iPod
IRISNotes™ est compatible avec les terminaux Apple® exécutant iOS® 3.0 et versions
ultérieures.
™
Avec IRISNotes
créer des dessins ou écrire directement du texte sur votre terminal, annoter des images
existantes, etc.
En revanche, vous ne pouvez pas convertir vos notes en texte
numérique modiable.
, vous pouvez télécharger les notes manuscrites vers les terminaux Apple,
5.1 Téléchargement de l'application IRISNotes™
1. Mettez le récepteur IRISNotes™ sous tension et connectez-le à votre termi-
nal Apple à l'aide du câble USB 30 broches fourni.
2. Vous êtes invité à télécharger l'application IRISNotes
App Store :
Remarque : pour un iPad, sélectionnez IRISNotes
Remarque : pour un iPhone ou un iPod, sélectionnez IRISNotes
3. Téléchargez l'application en suivant les instructions qui s'afchent à l'écran.
Une icône I.R.I.S. sera créée dans l'écran d'accueil.
™
correspondante depuis le site Mac
™
HD.
™
.
5.2 Téléchargement de notes sur votre terminal Apple
1. Ouvrez l'application IRISNotes™.
2. Mettez le récepteur sous tension et connectez-le au terminal Apple.
3. Tapez sur l'icône de l'ampoule puis sur Upload pictures (Charger
les notes).
Les notes sont chargées dans le dossier Camera Roll.
Page 19

Français Français
5.3 Edition, rédaction de notes et dessins dans IRISNotes
™
Après avoir chargé vos notes, vous pouvez les modier dans IRISNotes™, faire des
annotations,les envoyer par e-mail, etc. Avec IRISNotes
dessins et annoter des chiers images existants.
1. Dans IRISNotes™, tapez sur l'icône du crayon, puis sélectionnez
Open a Picture (Ouvrir une image) > Camera Roll pour ouvrir l'une
de vos notes.
2. Pour modier des notes, mettez le récepteur sous tension puis attachez-le au centre du bord supérieur de la page. Vous pouvez maintenant utiliser
votre stylo pour écrire du texte sur la page. Le texte apparaîtra directement
sur la note.
Conseil : n'écrivez pas trop près des bords de la page sans quoi les notes
Conseil : pour modier le style d'écriture, utilisez les icônes dans la partie droite de
3. Ensuite :
Tapez sur le crayon, puis sélectionnez Save Picture (Sauvegarder l'image) pour l'enregistrer.
Tapez sur l'icône d'envoi puis sélectionnez Send by e-mail (as PDF) (Envoyer par e-mail (au
format PDF)).
seront trop grandes pour l'écran du terminal Apple.
l'écran.
™
, vous pouvez également faire des
6. Informations de référence
6.1 Présentation du récepteur
a. Mini port USB – connectez-le à l'ordinateur à l'aide du
b. Ecran LCD
c. Bouton de marche/arrêt –Appuyez et maintenant le bou-
d. Bouton de réinitialisation – Permet de réinitialiser le
d
e. Attache – Attachez le récepteur à une page ou à un carton.
a
c
b
e
câble USB.
ton enfoncé pendant 5 secondes pour activer le récepteur.
Appuyez une seule fois pour créer une nouvelle note.
dispositif lorsque le récepteur ne répond pas.
Page 20

Français Français
6.2 Présentation de l'afchage
L'écran LCD afche les messages de statut suivants :
Récepteur connecté à l'ordinateur
(téléchargez vos chiers sur l'ordinateur et effacez-les de la
Mémoire saturée
mémoire)
Pile faible (stylo)
Pile faible (récepteur)
Mode note
Mode souris
Nombre de notes enregistrées en mémoire
6.3 Remplacement des cartouches du stylo the IRISNotes
Les cartouches sont standard et disponibles dans le commerce.
Pour remplacer la cartouche :
1. Enfoncez le bouton du stylo.
2. Retirez la cartouche vide.
3. Insérez une nouvelle cartouche et relâchez le bouton du stylo pour
maintenir la cartouche en place.
Remarque : n'essayez pas de démonter le stylo. Cela risquerait
de l’endommager.
™
7. Conseils pour la rédaction de notes
•
Ecrivez en lettres et caractères cursifs ou imprimés. Evitez les écritures stylisées.
• Efforcez-vous d'avoir une écriture régulière. Essayez d'utiliser les mêmes taille et forme de
lettre ou de caractère. Les majuscules doivent être plus grandes que les minuscules.
• Laissez un espace entre chaque mot. Faites en sorte que les lettres ou les caractères ne se
chevauchent pas.
• Ne coupez pas les mots en n de ligne. Il est préférable d'écrire un mot entier sur la ligne
suivante si vous manquez d'espace.
• Utilisez du papier ligné pour garder des lignes droites.
• Utilisez MyScript Trainer pour apprendre au logiciel à reconnaître votre écriture. Pour
en savoir plus sur l'utilisation de MyScript Trainer, consultez la page www.irislink.com/
support/userguides.
Page 21

Français Français
En cas de problèmes liés à l'utilisation d'IRISNotes™, consultez la page des questions
fréquentes (FAQ) sur le site www.irislink.com/support/faq ou contactez le support technique
via la page www.irislink.com/support.
Page 22

Nederlands Nederlands
Deze Snelstartgids biedt algemene richtlijnen voor de installatie en het gebruik van
™
IRISNotes
IRISNotes
De beschrijvingen in deze handleiding zijn gebaseerd op Windows
besturingssystemen. Alle informatie kan wijzigen zonder voorafgaande kennisgeving.
Inhoudsopgave
1.Inhoud verpakking
2.De batterijen opladen
3.Notities maken
4.IRISNotes
5.IRISNotes™ gebruiken op een iPad®, iPhone® of iPod
6.Referentie-informatie
7.Tips voor het maken van notities
Executive. Gedetailleerde instructies over het complete functiebereik van
™
Executive, vindt u in het Help-bestand die bij uw software is geleverd.
®
7 en Mac OS® X Lion™
™
gebruiken op een Windows PC of Mac OS computer
®
1. Inhoud verpakking
Installatie-cd-rom IRISNotes™ Executive.
Digitale pen, ontvangereenheid, intrekbare USB-kabel, 30-pin USB-kabel, drie
inktpatronen, tasje voor pen
2. De batterijen opladen
VOOR U START: laad de pen en de ontvanger gedurende minstens 30 minuten op.
1. Laad de batterij van de pen op:
• Open het dekseltje bovenaan op de pen.
• Sluit de pen aan op de computer via de meegeleverde USB-kabel.
2. Laad de batterij van de ontvanger op:
• SluitdeontvangeraanopdecomputerviademeegeleverdeUSB-kabel.
Tip: zorg ervoor dat uw computer ingeschakeld is. Anders zullen de batterijen niet opladen. Het
duurt ongeveer 3,5 uur tot de batterijen volledig opgeladen zijn.
Page 23

Nederlands Nederlands
3. Notities maken
Stap 1 Maak de ontvanger op een blad papier vast.
IRISNotes™ ondersteunt pagina's tot A4-formaat.
Tip: plaats de eenheid altijd in het midden bovenaan van een pagina.
Stap 2 Druk de aan-/uit-schakelaar gedurende 5 seconden in om de
ontvanger in te schakelen.
Stap 3 Maak een notitie.
Belangrijke opmerkingen:
Koppel de ontvanger los van uw computer.
Tijdens het schrijven moet u het pen-pictogram op de
display zien verschijnen.
Tips:
Houd de pen stevig vast en schrijf normaal. Probeer schuine lijnen
te vermijden.
Schrijf niet direct onder de ontvanger, maar bewaar minstens 1.5 cm
afstand.
Plaats uw vingers niet tussen de penpunt en de ontvanger. Dit
blokkeert het signaal.
Zie de paragraaf Tips voor het maken van notities aan het einde
van deze gids voor meer aanwijzers.
Stap 4 Druk de aan-/uit-schakelaar in om de huidige notitie te beëindigen en op te
slaan.
U moet de knop indrukken om de notitie in de ontvanger op te slaan.
Het getal op de display verhoogt telkens met 1 wanneer u de aan-/
uit-knop indrukt na het maken van een notitie. Het aantal geeft weer
hoeveel notities er in de ontvanger zijn opgeslagen.
U kunt tot 100 notities van A4-formaat maken.
Page 24

Nederlands Nederlands
4.IRISNotes™ gebruiken op een Windows PC of Mac OS computer
Om IRISNotes™ te kunnen gebruiken, moet u eerst de IRISNotes™ Executive software
installeren.
4.1 De software installeren
1. Plaats de IRISNotes™ cd-rom in de cd-rom drive van uw computer.
PC Mac
Ga naar Computer, zoek uw cd-rom drive
en dubbelklik erop.
Dubbelklik op IRISNotesExecutive-
Setup.exe om de installatiewizard te
starten.
2. Volg de instructies op het scherm om de software te installeren.
Belangrijke opmerking (PC): zorg ervoor dat u de juiste taal installeert
Zodra de installatie voltooid is, beschikt u op uw computer over de volgende toepassingen:
waarin u de notities maakt.
• MyScript Ink Retriever: hiermee kunt u notities van de ontvanger naar uw computer
overbrengen.
• MyScript Trainer: hiermee kunt u IRISNotes
herkennen.
• IRISNotes
™
u ze in getypte tekst en exporteert u ze naar een tekstverwerker of e-mailprogramma.
Executive: met deze applicatie beheert en bewerkt u notities, converteert
Dubbelklik op het cd-rompictogram op het
Bureaublad.
Dubbelklik op IRISNotes-installer.zip.
Open de map IRISNotes-Installer en dubbelklik op het bestand IRISNotes.mpkg.
™
trainen om uw handschrift beter te
Page 25

Nederlands Nederlands
4.2 Notities downloaden met MyScript Ink Retriever
1. Sluit de ontvanger aan op de computer via de meegeleverde USB-kabel. MyScript Ink
Retriever start automatisch.
2. Tik een voorvoegsel voor uw notities in.
3. Geef aan waar de ontvanger is geplaatst.
4. Klik op Inkt downloaden om de notities uit
De notities worden op de standaard instelling
Tip: om notities van de ontvanger te wissen nadat ze ontvangen zijn, klik op de tab
Instellingen voor Ophalen > Selecteer Geavanceerde Instellingen > Selecteer de optie
Bestanden wissen van het apparaat na downloaden.
Het voorvoegsel wordt aan elke notitienaam
toegevoegd.
Midden is aanbevolen.
de ontvanger te downloaden.
opgeslagen. Klik op de tab Instellingen voor
Ophalen naar welke map de notities worden
gedownload.
4.3 De IRISNotes™ Executive software activeren
Het is aanbevolen IRISNotes™ te activeren alvorens de software te gebruiken. Niet geactiveerde versies zijn slecht 30 dagen beschikbaar.
1. Start IRISNotes
2. U wordt gevraagd om de software te activeren. Klik op
Activeren om dit te doen.
3. Voer de activatiecode in die u terugvindt op de hoes van de cd-
rom en klik opnieuw op Activeren.
Er is een internetverbinding nodig om te kunnen activeren.
™
Executive.
Page 26

Nederlands Nederlands
4.4 Notities bewerken in IRISNotes™ Executive
Zodra de notities gedownload zijn met MyScript InkRtriever, zijn ze beschikbaar in de
™
IRISNotes
Ingeval u de notities handmatig wilt downloaden:
4.4.1 Notities converteren
1. Klik in het menu Conversie op Conversie-instellingen.
2. Klik op OK om de instellingen te bewaren.
3.
Executive software.
•Klik op het pictogram Openen.
• De map met de standaard locatie opent zich. Ga naar notes > Ink Devices, en selecteer
dan de notities die u wilt laden.
Selecteer tekst als Inhouds-
type.
Selecteer de Taal
waarin de notities
geschreven zijn.
Selecteer de juiste
Handschriftstijl.
Dubbelklik op de notities die u wilt converteren, en klik dan op de knop Converteren.
De geconverteerde notities wordt als bewerkbare tekst in het paneel rechts weergegeven.
Page 27

Nederlands Nederlands
4.4.2 Notities bewerken
U kunt zowel uw originele notities als hun overeenkomende geconverteerde tekst vrij
bewerken.
Gebruik de toolbar Bewerken om
uw inktnotities te bewerken: zones
selecteren, delen wissen, nieuwe tekst
toevoegen, ruimte toevoegen, enz.
Gebruik de toolbar Tekst bewerken
om de geconverteerde tekst te
bewerken: kleur wijzigen, lettertype,
tekst toevoegen, uitlijnen, uitvullen,
opsommingstekens toevoegen, enz.
4.4.3 Notities exporteren
Exporteer alle notities door op de knop Exporteren te klikken. U kunt zowel uw originele
notities als hun overeenkomende geconverteerde tekst exporteren.
Origineel exporteren Tekst exporteren
De originelen kunnen worden
geëxporteerd als afbeeldingsbestanden via e-mail, in *Word geplakt en
opgeslagen als afbeelding.
*Word is niet beschikbaar in de Mac-versie.
De geconverteerde tekst kan in een
e-mail worden geplakt, in *Word en in
een tekstverwerker.
4.5 IRISNotes™ pen als muis gebruiken
U kunt de IRISNotes™ pen ook als muis gebruiken. Schakelen naar de
muismodus:
• Sluit de ontvanger op uw PC aan.
• Houd de pen recht voor de ontvan-
ger, druk dan een keer op de aan/
uit-knop.
PC
•SluitdeontvangeropuwMacaan.
•IRISNotes
over naar muismodus.
Mac
™
schakelt automatisch
Page 28

Nederlands Nederlands
•
Tik met de pen op een vel papier. De cursor wordt nu door de pen gestuurd.
• Beweeg de pen boven een pagina om de cursor te verplaatsen.
• Om een object aan te klikken, plaatst u de cursor boven het object en tikt u met de pen erop.
• Om rechts te klikken op een object, plaatst u de cursor boven het object, tikt u met de pen
erop en houdt u het object kort vast.
Opmerking: in Windows Vista® en Windows 7, kunt u ook gebruik maken van de IRIS-
™
Notes
penomdirectinMicrosoftOfce2007toepassingenenhogerteschrijven.Dit
werkt ook met Mac OS 10.5 in iWork
Zie www.irislink.com/support/userguides voor meer informatie.
®
’08 toepassingen en hoger.
5.IRISNotes™ gebruiken op een iPad, iPhone of iPod
IRISNotes™ is compatibel met Apple® draagbare apparaten die werken met iOS® 3.0 en hoger.
Met IRISNotes™ kunt u uw handgeschreven notities naar uw Apple-apparaat uploaden,
tekening of tekst direct op uw apparaat toevoegen, bestaande afbeeldingen beschrijven, enz.
U kunt echter uw notities niet converteren in een bewerkbare, getypte tekst.
5.1 De IRISNotes™ app downloaden
1. Schakel de IRISNotes™-ontvanger in en sluit deze met de meegeleverde
30-pin USB-kabel op uw Apple-apparaat aan.
™
2. U wordt gevraagd om de overeenkomstige IRISNotes
store te downloaden:
Opmerking: voor iPAD, selecteert u IRISNotes
Opmerking: voor iPhone/iPOD, selecteert u IRISNotes™.
3. Download de app en volg de instructies op het scherm.
Er verschijnt een I.R.I.S.-pictogram op het startscherm.
app uit de Mac App
™
HD.
5.2 Notities uploaden naar uw Apple-apparaat
1. Open de IRISNotes™ app.
2. Schakel de ontvanger in en sluit deze op uw Apple-apparaat aan.
3. Tik op het lamp-pictogram, tik dan op Afbeeldingen uploaden.
De notities worden geüpload naar de Filmrol.
Page 29

Nederlands Nederlands
5.3 Notities bewerken, beschrijven en er tekeningen op maken in IRISNotes
™
Zodra uw notities geüpload zijn, kunt u ze bewerken in IRISNotes™, wijzigingen maken,
ze verzenden via e-mail enz. Met IRISNotes
afbeeldingsbestanden becommentariëren.
1.Tik in IRISNotes™ op het potloodpictogram, selecteer dan Open een
Afbeelding > Filmrol om een van uw notities te openen.
2. Schakel de ontvanger in en maak deze bovenaan in het midden van
een pagina vast om notities te bewerken. Gebruik nu de pen om tekst op de
pagina te schrijven. De tekst zal direct op uw notitie verschijnen.
Tip: schrijf niet te dicht bij de randen van de pagina. Anders
zullen notities niet op het scherm van uw Apple-apparaat passen.
Tip: gebruik de pictogrammen aan de rechterzijde van het scherm om de
schrijfstijl te bewerken.
3.Als u klaar bent:
Tik op het potlood, selecteer dan Afbeelding opslaan om deze op te slaan,
of;
Tik op het pictogram Verzenden, selecteer dan Verzenden
via e-mail (als PDF).
™
kunt u ook tekeningen maken en bestaande
6.Referentie-informatie
6.1 Overzicht van de ontvanger
a. Mini USB-poort – sluit uw computer aan met de USB-
b. LCD-display
c. AAN/UIT-knop – Druk de knop in en houd deze
d
d. Reset-knop – Reset het apparaat wanneer de eenheid niet
e. Paperclip – Bevestig de eenheid op een pagina of stuk
a
c
b
e
kabel.
gedurende 5 seconden ingedrukt om de ontvanger in te
schakelen. Druk hem een keer in om een nieuwe notitie te
maken.
reageert.
karton.
Page 30

Nederlands Nederlands
6.2 Overzicht van het scherm
Het LCD-scherm toont de volgende statusaanwijzingen:
Ontvangereenheid aangesloten op computer
(upload uw bestanden naar uw computer en verwijder ze uit het
Laag batterijvermogen ontvangereenheid
Geheugen VOL
geheugen)
Laag batterijvermogen pen
Notitiemodus
Muismodus
Aantal opgeslagen notities in geheugen
6.3 De IRISNotes™ pen opnieuw vullen
De inktvulling is standaard. U kunt ze in een winkel voor schrijfgerief kopen.
De pen opnieuw vullen:
1. Druk de knop van de pen naar onderen.
2. Trek de gebruikte vulling eruit.
3. Plaats een nieuwe vulling en druk de knop van de pen naar boven om de vulling
te vergrendelen.
Opmerking: neem de pen niet uit elkaar. Hierdoor kan de pen
schade oplopen.
7. 7.Tips voor het maken van notities
• Gebruik cursieve of hoofdletters. Vermijd een stilistisch handschrift.
• Schrijf zo uniform mogelijk. Probeer altijd dezelfde grootte en vorm te gebruiken wanneer
u een letter of een karakter schrijft. Gebruik hoofdletters.
• Laat wat ruimte tussen woorden. Probeer letters of karakters niet te overlappen.
• Breek woorden aan het einde van een regel niet af. Schrijf het volledige woord op de
volgende regel als u niet genoeg plaats hebt.
• Gebruik papier met lijnen, zo schrijft u niet schuin.
• Gebruik MyScript Trainer om de software uw handschrift aan te leren. Voor meer
informatie over MyScript Trainer surft u naarwww.irislink.com/support/userguides.
Page 31

Nederlands Nederlands
Als u problemen ondervindt tijdens het gebruik van IRISNotes™, raadpleeg dan de
Frequently Asked Questions op onze website www.irislink.com/support/faq of neem contact
op met onze Technische Ondersteuning op www.irislink.com/support.
Page 32

Deutsch Deutsch
Diese Kurzanleitung enthält allgemeine Anleitungen zu Installation und Verwendung von
IRISnotes Executive. Detaillierte Anweisungen zur Verwendung der gesamten Funktionspalette
von IRISNotes™ Executive nden Sie in der mit der Software mitgelieferten Hilfedatei.
®
Die Beschreibungen in dieser Anleitung beziehen sich auf die Betriebssysteme Windows
®
X Lion™. Alle Informationen können ohne vorherige Ankündigung geändert werden.
Mac OS
Inhaltsverzeichnis
1. Packungsinhalt
2. Auaden der Akkus
3. Schreiben von Notizen
4. Verwendung von IRISNotes
5. Verwendung von IRISNotes
6. Bedienelemente und Anzeigen
7. Tipps zum Schreiben von Notizen
™
unter Windows oder Mac OS
™
auf einem iPad®, iPhone® oder iPod
7 und
®
1. Packungsinhalt
Installations-CD für IRISnotes Executive
Digitalstift, Empfänger, einziehbares USB-Kabel, 30-poliges USB-Kabel, 3 Nachfüllminen,
Stifttasche
2. Auaden der Akkus
BEVOR SIE BEGINNEN: Laden Sie den Stift und den Empfänger mindestens 30 Minuten
lang auf.
1. So laden Sie den Akku vom Stift auf:
• Öffnen Sie die Kappe des Stifts.
• Schließen Sie den Stift mit dem zugehörigen USB-Kabel am
Computer an.
2. So laden Sie den Akku vom Empfänger auf:
• Schließen Sie den Empfänger mit dem zugehörigen USB-Kabel
am Computer an.
Tipp: Vergewissern Sie sich, dass der Computer eingeschaltet ist. Andernfalls werden die Akkus
nicht aufgeladen. Es kann bis zu 3,5 Stunden dauern, bis die Akkus vollständig geladen sind.
Page 33

Deutsch Deutsch
3. Schreiben von Notizen
Schritt 1: Klemmen Sie den Empfänger an ein Blatt Papier.
IRISNotes™ unterstützt Papier bis zu einer Größe im Format A4.
Tipp: Klemmen Sie den Empfänger immer oben in der Mitte des Blattes an.
Schritt 2:
Halten Sie zum Einschalten des Empfängers die Ein-/
Austaste für 5 Sekunden gedrückt.
Schritt 3: Schreiben Sie eine Notiz auf.
Wichtiger Hinweis:
Trennen Sie die Verbindung zwischen Empfänger und Computer.
Während Sie schreiben, sollte das Stiftsymbol auf dem Display
angezeigt werden.
Tipps:
Halten Sie den Digitalstift fest in der Hand und schreiben Sie normal.
Vermeiden Sie schräge Zeilen.
Schreiben Sie nicht direkt unterhalb des Empfängers, sondern lassen
Sie einen Abstand von mindestens 1,5 cm.
Halten Sie Ihre Finger nicht zwischen Stiftspitze und Empfänger.
Dadurch würden Sie das Signal blockieren.
Im letzten Abschnitt dieser Anleitung nden Sie unter
Tipps zum Schreiben von Notizen noch weitere Ratschläge.
Schritt 4: Drücken Sie die Ein-/Austaste, um die aktuelle Notiz abzuschließen und zu
speichern.
Zum Speichern Ihrer Notizen auf dem Empfänger muss die Taste
gedrückt werden. Die Zahl auf dem Display erhöht sich jeweils um
1, wenn Sie nach dem Schreiben einer Notiz auf die Ein-/Austaste
drücken. Die Zahl gibt die Anzahl der auf dem Empfänger
gespeicherten Notizen an.
Sie können bis zu 100 Notizen im A4-Format schreiben.
Page 34

Deutsch Deutsch
4. Verwendung von IRISNotes™ unter Windows oder Mac OS
Um IRISNotes™ verwenden zu können, müssen Sie zuerst die IRISNotes™ Executive-
Software installieren.
4.1 Installieren der Software
1. Legen Sie die IRISNotes™-CD-ROM in das CD-ROM-Laufwerk Ihres Computers ein.
PC Mac
Doppelklicken Sie im Explorer unter
Computer auf das CD-ROM-Laufwerk.
Doppelklicken Sie auf IRISNotesExecutive-
Setup.exe, um den Installationsassistenten
zu starten.
2. Folgen Sie zum Installieren der Software den Anweisungen auf dem Bildschirm.
Wichtiger Hinweis (PC): Achten Sie darauf, dass Sie die richtigen Sprachen
Nach Abschluss der Installation benden sich folgende Anwendungen auf Ihrem Computer:
installieren, in denen Sie Ihre Notizen schreiben.
• MyScript Ink Retriever: Mit dieser Anwendung laden Sie Notizen vom Empfänger
auf Ihren Computer herunter.
• MyScript Trainer: Mit dieser Anwendung trainieren Sie IRISNotes™, damit Ihre
Handschrift besser erkannt wird.
• IRISNotes
™
konvertieren sie in Drucktext und exportieren sie in Textverarbeitungsanwendungen
oder per E-Mail.
Executive: Mit dieser Anwendung verwalten und bearbeiten Sie Notizen,
Doppelklicken Sie auf dem Schreibtisch auf das
CD-ROM-Symbol.
Doppelklicken Sie auf IRISNotes-installer.zip.
Öffnen Sie den Ordner IRISNotes-Installer und
führen Sie die Datei IRISNotes.mpkg aus.
Page 35

Deutsch Deutsch
4.2 Herunterladen von Notizen mit MyScript Ink Retriever
1. Schließen Sie den Empfänger mit dem zugehörigen USB-Kabel am Computer an.
MyScript Ink Retriever wird automatisch gestartet.
2. Geben Sie ein Präx für Ihre Notizen ein. Das
3. Geben Sie an, wo Sie den Empfänger
4. Klicken Sie auf Notiz herunterladen, um die
Die Notizen werden am Standardspeicherplatz
Tipp: Wenn Sie Notizen vom Empfänger löschen möchten, nachdem Sie diese heruntergeladen
haben, klicken Sie auf die Registerkarte Abrufeinstellungen > Erweiterte Einstellungen und
markieren die Option Dateien nach dem Herunterladen auf dem Gerät löschen.
Präx wird jedem Notizennamen vorangestellt.
angeklemmt haben. Beachten Sie, dass die
Position Mitte empfohlen wird.
Notizen vom Empfänger herunterzuladen.
gespeichert. Klicken Sie auf die Registerkarte
Abrufeinstellungen, um den Ordner
festzulegen, in den Ihre Notizen heruntergeladen
werden.
4.3 Aktivieren der IRISNotes™ Executive-Software
Es wird empfohlen, dass Sie IRISNotes™ vor Verwendung aktivieren. Nicht aktivierte
Versionen sind nur 30 Tage verfügbar.
™
1. Starten Sie IRISNotes
2. Sie werden aufgefordert, die Software zu aktivieren. Klicken Sie
dafür auf Aktivieren.
3.
Geben Sie den Aktivierungscode ein, der auf der CD-Hülle
steht, und klicken Sie erneut auf Aktivieren.
Beachten Sie, dass für die Aktivierung eine Internetverbindung
erforderlich ist.
Executive.
Page 36

Deutsch Deutsch
4.4 Bearbeiten von Notizen in IRISNotes™ Executive
Sowie Sie die Notizen mit MyScript InkRtriever heruntergeladen haben, sind sie in der
™
IRISNotes
Wenn Sie möchten, können Sie Notizen auch manuell herunterladen:
4.4.1 Konvertieren von Notizen
1. Klicken Sie im Menü Konvertierung auf Konvertierungseinstellungen.
Executive-Software verfügbar.
• Klicken Sie auf das Symbol „Öffnen“.
• Der Standardspeicherort für Notizen wird geöffnet. Gehen Sie zu notes > Ink Devices
und wählen Sie dann die Notizen aus, die Sie herunterladen möchten.
Markieren Sie als
Inhaltstyp die Option
Text.
Wählen Sie die
Sprache aus, in der Sie
Ihre Notizen schreiben.
Markieren Sie
2. Klicken Sie auf OK, um die Einstellungen zu speichern.
3. Doppelklicken Sie auf die Notiz, die Sie konvertieren möchten, und klicken Sie
anschließend auf die Schaltäche Konvertieren.
Die konvertierte Notiz wird im rechten Fenster als bearbeitbarer Text angezeigt.
den richtigen
Handschriftstil.
Page 37

Deutsch Deutsch
4.4.2 Bearbeiten von Notizen
Sie können Ihre Originalnotizen und den entsprechend konvertierten Text beliebig bearbeiten:
Verwenden Sie zum Bearbeiten Ihrer mit
dem Digitalstift gemachten Notizen die
Funktionsleiste mit den Bearbeitungsoptionen:
Bereiche auswählen, Teile löschen, neuen Text
hinzufügen, Leerzeichen hinzufügen usw.
Verwenden Sie zum Bearbeiten des
konvertierten Textes die Funktionsleiste
mit den Textbearbeitungsoptionen: Farbe
ändern, Schriftart ändern, Text hinzufügen,
Text ausrichten, Aufzählungen hinzufügen
usw.
4.4.3 Exportieren von Notizen
Zum Exportieren von Notizen klicken Sie auf die Schaltäche Exportieren. Sie können
Ihre Originalnotizen und den entsprechend konvertierten Text exportieren:
Export als Original Export als Text
Die Originale können als Bilddatei
per E-Mail exportiert, in *Word
kopiert und als Bild gespeichert
werden.
Der konvertierte Text kann in eine
E-Mail, in *Word und in einen
Texteditor kopiert werden.
*Word ist in der Mac-Version nicht verfügbar.
4.5 Verwendung von IRISNotes™ als Maus
Sie können den IRISNotes™-Stift auch als Maus verwenden. So wechseln Sie in den
Mausmodus:
• Schließen Sie den
Empfänger an Ihren PC an.
• Halten Sie den Stift direkt vor den
Empfänger und drücken Sie dann
einmal auf die Ein-/Austaste.
PC
• Schließen Sie den
• IRISNotes™ wechselt
Mac
Empfänger an Ihren Mac an.
automatisch in den Mausmodus.
Page 38

Deutsch Deutsch
• Tippen Sie mit dem Stift auf ein Blatt Papier. Der Cursor wird nun vom Stift gesteuert.
• Bewegen Sie den Stift über einem Blatt, um den Cursor zu bewegen.
• Um ein Objekt anzuklicken, zeigen Sie mit dem Cursor auf das Objekt und tippen Sie
dann mit dem Stift darauf, um es anzuklicken.
• Für einen Rechtsklick auf ein Objekt, zeigen Sie auf das Objekt und tippen Sie mit
dem Stift etwas länger darauf.
Hinweis: Bei Windows Vista® und Windows 7 können Sie mit dem IRISNotes™-Stift auch
direkt in Microsoft Ofce-Anwendungen ab Version 2007 schreiben. Dies funktioniert
auch für Mac OS 10.5 in iWork
Weitere Informationen nden Sie unter www.irislink.com/support/userguides.
®
-Anwendungen ab Version '08.
5. Verwendung von IRISNotes™ auf einem iPad, iPhone oder iPod
IRISNotes™ ist mit Mobilgeräten von Apple® kompatibel, die iOS® 3.0 und höher ausführen.
Mit IRISNotes™ können Sie handschriftliche Notizen auf Ihr Apple-Geräte hochladen,
direkt auf Ihrem Gerät Zeichnungen erstellen und Text schreiben, vorhandene Bilder mit
Anmerkungen versehen usw.
Beachten Sie, dass Sie Ihre Notizen jedoch nicht in bearbeitbaren, Drucktext
konvertieren können.
5.1 Herunterladen der App IRISNotes
1. Schalten Sie den IRISNotes™-Empfänger ein und schließen Sie ihn mit
dem zugehörigen 30-poligen USB-Kabel an Ihrem Apple-Gerät an.
2. Sie werden dann aufgefordert, die entsprechende App IRISNotes
Mac App Store herunterzuladen:
Hinweis: Wählen Sie für einen iPAD IRISNotes
Hinweis: Wählen Sie für ein iPhone oder einen iPod IRISNotes
3. Laden Sie die App entsprechend den Anweisungen auf dem Bildschirm herunter.
Auf dem Startbildschirm wird ein I.R.I.S.-Symbol erstellt.
™
™
vom
™
HD.
™
.
5.2 Hochladen von Notizen auf Ihr Apple-Gerät
1. Öffnen Sie die App IRISNotes™.
2. Schalten Sie den Empfänger ein und schließen Sie ihn an Ihr Apple-Gerät an.
3. Tippen Sie auf das Glühbirnensymbol und tippen Sie dann auf
Upload pictures (Bilder hochladen).
Die Notizen werden unter Camera Roll (Album) hochgeladen.
Page 39

Deutsch Deutsch
5.3 Bearbeiten, Schreiben und Zeichnen von Notizen in IRISNotes
Nachdem Sie Ihre Notizen hochgeladen haben, können Sie sie in IRISNotes™ bearbeiten,
Anmerkungen hinzufügen, sie per E-Mail versenden usw. Mit IRISNotes™ können Sie auch
ganz neue Zeichnungen anfertigen und vorhandene Bilddateien beschriften.
™
1. Tippen Sie in IRISNotes
a Picture (ein Bild öffnen) > Camera Roll (Album), um eine Ihrer
Notizen zu öffnen.
2. Wenn Sie Notizen bearbeiten möchten, schalten Sie den Empfänger ein und
klemmen ihn oben in der Mitte des Blattes an. Schreiben Sie jetzt Ihren Text
mit dem Stift auf das Blatt. Der Text wird direkt auf Ihrer Notiz angezeigt.
Tipp: Schreiben Sie nicht zu dicht an den Rändern des Blattes.
Tipp: Wenn Sie den Schreibstil bearbeiten möchten, verwenden Sie die
3. Wenn Sie fertig sind:
Tippen Sie mit dem Stift und wählen Sie Save Picture
(Bild speichern), um es zu speichern.
Oder
Tippen Sie auf das Sendesymbol und wählen Sie dann Send by e-mail (as PDF) (als PDF
per E-Mail versenden).
Andernfalls passen Ihre Notizen nicht auf den Bildschirm Ihres
Apple-Geräts.
Symbole auf der rechten Seite des Bildschirms.
auf das Stiftsymbol und wählen Sie Open
™
6. Bedienelemente und Anzeigen
6.1 Übersicht über den Empfänger
a.
b. LCD-Display
c. Ein-/Austaste: Zum Einschalten des Empfänger ca. 5 Sekunden
d. Reset-Taste: Zum Zurücksetzen des Geräts, wenn der
d
e. Klemme – Zum Anklemmen des Empfängers an ein Blatt Papier.
a
c
b
e
Mini-USB-Anschluss: Zum Anschluss an einen Computer über
USB-Kabel.
drücken. Zum Erstellen einer neuen Notiz einmal kurz drücken.
Empfänger nicht reagiert.
Page 40

Deutsch Deutsch
6.2 Übersicht über das Display
Der LCD-Bildschirm zeigt die folgenden Statusinformationen an:
Empfänger mit PC verbunden
(Laden Sie die Dateien auf den Computer und löschen Sie sie aus
Speicher VOLL
dem Speicher.)
Akku im Stift schwach
Akku des Empfängers schwach
Notizmodus
Mausmodus
Anzahl an gespeicherten Notizen
6.3 Einlegen einer neuen Mine in den IRISNotes™-Stift
Die Ersatzmine ist eine reguläre Kugelschreibermine, wie sie beispielsweise in einem
Schreibwarengeschäft erhältlich ist.
So legen Sie eine neue Mine ein:
1. Schieben Sie die Taste am Stift nach unten.
2. Ziehen Sie die alte Mine heraus.
Legen Sie eine neue Mine ein und schieben Sie die Taste am Stift zum Arretieren der
3.
Mine wieder nach oben.
Hinweis: Versuchen Sie nicht, den Stift auseinanderzunehmen.
Dies kann zu Beschädigungen führen.
7. Tipps zum Schreiben von Notizen
• Verwenden Sie Kursiv- oder Druckbuchstaben. Vermeiden Sie stilistisches Schreiben.
• Schreiben Sie so gleichmäßig wie möglich. Versuchen Sie Buchstaben möglichst immer
in der gleichen Größe und Form zu schreiben. Schreiben Sie Großbuchstaben größer als
Kleinbuchstaben.
•
Lassen Sie zwischen Wörtern einen Abstand. Versuchen Sie, Buchstaben und Zeichen nicht zu
überschneiden.
• Trennen Sie Wörter nicht am Ende einer Zeile. Schreiben Sie stattdessen das ganze Wort in die
nächste Zeile, wenn in der aktuellen nicht mehr ausreichend Platz ist.
•
Verwenden Sie liniertes Papier, um schräge Zeilen zu vermeiden.
• Verwenden Sie MyScript Trainer, um die Software mit Ihrer Handschrift zu trainieren. Weitere
Informationen zur Verwendung von MyScript Trainer nden Sie unter www.irislink.com/support/
userguides.
Page 41

Deutsch Deutsch
Sollten bei der Verwendung von IRISNotes™ Probleme auftreten, sehen Sie sich die häug
gestellten Fragen auf unserer Website unterwww.irislink.com/support/faq an oder wenden
Sie sich an den technischen Support unter www.irislink.com/support.
Page 42

Español Español
Esta Guía rápida del usuario proporciona instrucciones generales para instalar y utilizar
™
IRISNotes
de IRISNotes
Executive. Encontrará instrucciones detalladas sobre todas las funcionalidades
™
Executive en el archivo de ayuda entregado con el software.
Las descripciones que contiene esta guía se basan en los sistemas operativos Windows
®
Mac OS
X Lion™. Toda la información contenida en esta guía puede modicarse sin previo
aviso.
Índice
1. Contenido de la caja
2. Cargar las baterías
3. Tomar notas
4. Utilizar IRISNotes
Mac OS
5. Utilizar IRISNotes™ en un iPad®, iPhone® o iPod
6. Información de referencia
7. Consejos a la hora de tomar notas
™
en un PC con Windows PC o un ordenador con
®
®
7 y
1. Contenido de la caja
El CD-ROM de instalación de IRISNotes™ Executive
Un bolígrafo digital, una unidad receptora, un cable USB retráctil, un cable USB de 30
clavijas, tres recargas de tinta y una funda para el bolígrafo
2. Cargar las baterías
ANTES DE EMPEZAR: cargue el bolígrafo y el receptor durante un
mínimo de 30 minutos.
1. Cargue la batería del bolígrafo:
• Abra la tapa de la parte superior del bolígrafo.
• Conecte el bolígrafo a su ordenador mediante el cable USB
incluido en la caja.
2. Cargue la batería del receptor:
• Conecte el receptor a su ordenador mediante el cable USB incluido en la caja.
Consejo: asegúrese de que el ordenador esté encendido. De lo contrario, las baterías no se cargarán.
Las baterías pueden tardar unas 3 horas y media en cargarse del todo.
Page 43

Español Español
3. Tomar notas
Primer paso: je la unidad receptora a una hoja de papel.
IRISNotes™ es compatible con hojas de tamaño A4 o más pequeñas.
Consejo: coloque siempre la unidad receptora en el centro de la parte superior de la hoja.
Segundo paso: pulse el botón de encendido durante 5 segundos para
encender el receptor.
Tercer paso: empiece a tomar notas.
Avisos importantes:
Desconecte el receptor del ordenador.
Al escribir, debería ver el icono del bolígrafo en la pantalla.
Consejos:
Sujete el bolígrafo con rmeza y escriba como lo haría normalmente.
Intente evitar que las líneas queden inclinadas.
No escriba directamente por debajo del receptor: deje un margen
de 1,5 cm como mínimo.
No ponga los dedos entre la punta del bolígrafo y el receptor.
De hacerlo, bloquearía la señal.
Encontrará más consejos en el apartado Consejos a la hora de tomar
notas que hay al nal de esta guía.
Cuarto paso: pulse el botón de encendido para dar por terminada la nota actual y
guardarla.
Es necesario que pulse el botón para que las notas queden guardadas
en el receptor. El número de la pantalla indicadora aumentará en una
unidad cada vez que pulse el botón de encendido tras escribir una
nota. Este número indica la cantidad de notas que hay guardadas en el
receptor.
Podrá almacenar hasta 100 notas (u hojas) de tamaño A4.
Page 44

Español Español
4.
Utilizar IRISNotes™ en un PC con Windows PC o un ordenador con Mac OS
Para poder utilizar IRISNotes™, primero deberá instalar el software IRISNotes™ Executive.
4.1 Instalar el software
1. Introduzca el CD-ROM de IRISNotes™ en el lector de CD de su ordenador.
PC Mac
Vaya a Equipo, busque el lector de CD y haga
doble clic en él.
Haga doble clic en el archivo
IRISNotesExecutive-Setup.exe para iniciar el
Asistente de instalación.
2. Siga las instrucciones en pantalla para instalar el software.
Aviso importante (PC): asegúrese de instalar correctamente los idiomas en
los que va a escribir sus notas.
Una vez haya terminado la instalación, tendrá las siguientes aplicaciones en el ordenador:
• MyScript Ink Retriever: esta aplicación permite descargar notas del receptor al
ordenador.
• MyScript Trainer: esta aplicación le ayudará a entrenar a IRISNotes
reconozca mejor su escritura.
• IRISNotes
™
en texto impreso y exportarlas a aplicaciones de procesamiento de textos o enviarlas
por correo electrónico.
Executive: la aplicación para administrar y editar las notas, convertirlas
Haga doble clic en el icono del CD-ROM del
escritorio.
Haga doble clic en IRISNotes-installer.zip.
Abra la carpeta IRISNotes-Installer y ejecute el
archivo IRISNotes.mpkg.
™
para que
Page 45

Español Español
4.2 Descargar notas con MyScript Ink Retriever
1. Conecte la unidad receptora a su ordenador mediante el cable USB incluido en la caja.
MyScript Ink Retriever se ejecutará automáticamente.
2. Introduzca un prejo para las notas. Este
3. Indique el lugar de la hoja en la que colocó
4. Haga clic en Descargar tinta para descargar
Las notas se guardarán en la ubicación por
Consejo: para eliminar notas del receptor tras descargarlas, haga clic en la cha Ajustes de
recuperación, vaya a Ajustes avanzados y, a continuación, seleccione la opción Borrar
archivos del dispositivo después de descargarlos.
prejo se añadirá al nombre de cada una de las
notas.
el receptor. Recuerde que recomendamos la
posición Centro.
las notas del receptor.
defecto. Haga clic en la cha Ajustes de recuperación para indicar la carpeta a la que desea
que se descarguen las notas.
4.3 Activar el software IRISNotes™ Executive
Le recomendamos que active su copia de IRISNotes™ antes de utilizarla. Las copias sin
activar solo se pueden utilizar durante 30 días.
1. Ejecute IRISNotes™ Executive.
2. Se le pedirá que active el software. Haga clic en Activar para
hacerlo.
3. Introduzca el código de activación que encontrará en la funda
del CD-ROM y vuelva a hacer clic en Activar.
Tenga en cuenta que necesitará una conexión a Internet para
realizar la activación.
Page 46

Español Español
4.4 Editar notas en IRISNotes™ Executive
Nada más descargar las notas con MyScript Ink Retriever, ya podrá editarlas con el soft-
ware IRISNotes
En caso de que preera descargar las notas manualmente:
• Haga clic en el icono de abrir.
• Se abrirá la ubicación por defecto de las notas. Vaya a notes > Ink Devices y seleccione
las notas que desee cargar.
™
Executive.
4.4.1 Convertir notas
1. En el menú Conversión, haga clic en Ajustes de conversión.
2. Haga clic en Aceptar para guardar la conguración.
3. Haga doble clic en una nota que desee convertir y, a continuación, haga clic en el botón
Convertir.
La nota convertida se mostrará en forma de texto editable en el panel derecho.
Seleccione Texto como Tipo
de contenido.
Seleccione el Idioma
en el que se han tomado
las notas.
Seleccione el Estilo
de escritura manual
correspondiente.
Page 47

Español Español
4.4.2 Editar notas
Podrá editar libremente tanto las notas originales como el texto convertido correspondiente:
Utilice la barra de herramientas de
edición para editar las notas originales: seleccionar zonas, borrar partes,
añadir texto nuevo, girar el texto,
añadir espacio, etc.
Utilice la barra de herramientas de
edición de texto para editar el texto
convertido: cambiar el color y/o la
fuente, añadir texto, alinear o justicar el texto, añadir viñetas, etc.
4.4.3 Exportar notas
Para exportar notas, haga clic en el botón Exportar. Podrá exportar tanto las notas originales como el texto convertido correspondiente:
Exportación de original Exportación de texto
Los originales se pueden enviar por
correo electrónico como archivos de
imagen, pegarse a *Word y guardarse
como imágenes.
*La opción de pegar en Word no se encuentra disponible en la versión para Mac.
4.5 Utilizar IRISNotes™ como ratón
También puede utilizar el bolígrafo de IRISNotes™ como ratón. Para activar el
modo de ratón:
• Conecte el receptor al PC.
• Sujete el bolígrafo justo
por delante del receptor y, a
continuación, pulse el botón de
encendido una vez.
PC
El texto convertido se puede pegar
en un mensaje de correo electrónico,
en *Word o en cualquier otro editor
de texto.
• Conecte el receptor al Mac.
• El modo de ratón de
Mac
™
IRISNotes
automáticamente.
se activará
Page 48

Español Español
• Toque un trozo de papel con la punta del bolígrafo. El bolígrafo pasará a controlar el
cursor de su pantalla.
• Desplace el bolígrafo por encima de la hoja de papel para mover el cursor.
• Para seleccionar un objeto, dirija el cursor hacia él y, a continuación, toque el papel
con la punta del bolígrafo para hacer clic.
• Para hacer clic con el botón derecho encima de un objeto, dirija el cursor hacia él y,
a continuación, toque el papel con la punta del bolígrafo y déjelo en esta posición
durante unos instantes.
®
Nota: en Windows Vista
para escribir directamente en las aplicaciones de Microsoft Ofce 2007 y versiones
posteriores. También podrá hacerlo con las aplicaciones de iWork
posteriores) si dispone del sistema operativo Mac OS 10.5.
Encontrará más información en www.irislink.com/support/userguides.
y Windows 7, también podrá utilizar el bolígrafo de IRISNotes™
®
’08 (y versiones
5. Utilizar IRISNotes™ en un iPad, iPhone o iPod
IRISNotes™ es compatible con los dispositivos portátiles de Apple® que funcionen con iOS® 3.0 o superior.
Con IRISNotes™ podrá cargar notas escritas a mano a su dispositivo Apple, hacer dibujos
o escribir texto directamente en el dispositivo, introducir comentarios y notas a fotografías,
etc.
Sin embargo, recuerde que no podrá convertir las notas en texto editable.
5.1 Descargar la aplicación de IRISNotes
1. Encienda el receptor de IRISNotes™ y conéctelo a su dispositivo Apple con el cable USB
de 30 patillas clavijas incluido en la caja.
2. El sistema le pedirá que descargue la aplicación de IRISNotes
App Store.
Nota: en el caso de disponer de un iPad, seleccione IRISNotes
Nota: en el caso de disponer de un iPhone o un iPod, seleccione IRISNotes™.
3. Descargue la aplicación siguiendo las instrucciones que aparecen en pantalla.
Se creará un icono de I.R.I.S. en la pantalla inicial del dispositivo.
™
™
del Mac
™
HD.
5.2 Cargar notas al dispositivo Apple
1. Abra la aplicación de IRISNotes™.
2. Encienda la unidad receptora y conéctela a su dispositivo Apple.
3. Pulse en el icono de la bombilla y, a continuación, en Upload
pictures (Cargar imágenes).
Las notas se cargarán al Camera Roll.
Page 49

Español Español
5.3 Editar, escribir y dibujar notas en IRISNotes
™
Una vez haya cargado sus notas, podrá editarlas en IRISNotes™, realizar anotaciones, enviarlas por correo electrónico, etc. Con IRISNotes
añadir comentarios y notas a archivos de imagen ya existentes.
1. En IRISNotes™, pulse el icono del lápiz y, a continuación, seleccione
Open a Picture (Abrir una imagen) > Camera Roll para abrir una de
sus notas.
2. Para editar notas, encienda el receptor y fíjelo en el centro de la parte
superior de una hoja de papel. A continuación, utilice el bolígrafo para escribir
texto en la página. El texto que escriba aparecerá directamente en la nota.
Consejo: no escriba demasiado cerca de los bordes de la hoja. De hacerlo,
Consejo: para editar el estilo de escritura, utilice los iconos que hay en la
3. Cuando haya terminado:
Pulse el icono del lápiz y seleccione Save picture
(Guardar imagen) para guardar la imagen, o
Pulse el icono de envío y seleccione Send by e-mail (as PDF) (Enviar por correo electrónico como PDF).
las notas no se ajustarán a la pantalla de su dispositivo Apple.
parte derecha de la pantalla.
™
, también podrá hacer dibujos desde cero y
6. Información de referencia
6.1 Elementos de la unidad receptora
a. Puerto mini-USB – Permite conectar el receptor al
b. Pantalla LCD
c. Botón de encendido/apagado – Manténgalo pulsado du-
d
d. Botón de reinicio – Permite reiniciar el dispositivo
e. Clip sujetapapeles – Permite jar la unidad a una página
de papel o a un cartón.
a
c
b
e
ordenador con el cable USB.
rante unos 5 segundos para encender el receptor. Púlselo
una vez para crear una nota nueva.
cuando la unidad no responde.
Page 50

Español Español
6.2 Indicadores de la pantalla del dispositivo
La pantalla LCD muestra los siguientes indicadores de estado:
Unidad receptora conectada al ordenador
(transera los archivos al ordenador y elimínelos de la memoria)
Cantidad de notas almacenadas en la memoria
Memoria LLENA
Batería baja en el bolígrafo digital
Batería baja en la unidad receptora
Modo de toma de notas
Modo de ratón
6.3 Recargar la tinta del bolígrafo de IRISNotes
La tinta que utiliza este bolígrafo digital es totalmente estándar: podrá comprar recargas en
cualquier papelería.
Para recargar la tinta del bolígrafo:
1. Presione el botón del bolígrafo hacia abajo.
2. Saque la recarga usada del interior del bolígrafo.
3. Introduzca una recarga nueva y presione el botón del bolígrafo hacia arriba
para que quede bloqueada.
Nota: no intente desmontar el bolígrafo. Podría dañarlo.
™
7. Consejos a la hora de tomar notas
•
Escriba en cursiva o utilizando letra de imprenta. Evite escribir de manera demasiado estilizada.
• Sea tan sistemático como pueda al escribir. Intente que, cada vez que escribe una letra o un
carácter, tenga la misma forma y el mismo tamaño. Asimismo, asegúrese de que las mayúsculas
sean más grandes que las minúsculas.
• Deje un poco de espacio entre las palabras. Intente que las letras o los caracteres no se solapen.
• No divida palabras con un guión al nal de una línea. Si no tiene espacio suciente, escriba la
palabra entera en la línea siguiente.
• Utilice papel con renglones para evitar que se tuerzan las líneas.
•
Utilice MyScript Trainer para enseñar al software a reconocer mejor su forma de escribir.
Encontrará más información sobre cómo utilizar MyScript Trainer en www.irislink.com/support/
userguides.
Page 51

Español Español
Si tiene algún problema al utilizar su IRISNotes™, consulte el apartado de preguntas más
frecuentes de nuestro sitio web (www.irislink.com/support/faq) o contacte con el servicio de
soporte técnico de I.R.I.S. a través de www.irislink.com/support.
Page 52

Italiano Italiano
Questa Guida rapida per l'uso fornisce linee guida generali per l'installazione e l'uso di
™
IRISNotes
Executive consultare la guida in linea inclusa nel software.
Le descrizioni riportate in questa guida si basano sui sistemi operativi Windows
OS
Indice
1.Contenuto della confezione
2.Carica delle batterie
3.Scrittura di note
4.Utilizzo di IRISNotes
5.Utilizzo di IRISNotes™ su iPad®, iPhone® o iPod
6.Informazioni di riferimento
7.Suggerimenti sulla scrittura delle note
Executive. Per istruzioni dettagliate sulle funzionalità complete di IRISNotes™
®
®
X Lion™. Tutte le informazioni possono essere soggette a modiche senza preavviso.
™
su un computer Windows PC o Mac OS
7 e Mac
®
1. Contenuto della confezione
CD-ROM di installazione di IRISNotes™ Executive.
Penna digitale, unità ricevitore, cavo USB avvolgibile, cavo USB a 30 pin, tre ricariche di
inchiostro, custodia penna.
2. Carica della batterie
PRIMA DI INIZIARE: caricare la penna e il ricevitore per almeno 30 minuti.
1. Per caricare la batteria della penna:
• Aprire il coperchio sulla parte superiore della penna.
• Collegare la penna al computer utilizzando il cavo USB fornito.
2. Per caricare la batteria del ricevitore:
• Collegare il ricevitore al computer utilizzando il cavo USB fornito.
Suggerimento: accertarsi che il computer sia acceso. A computer spento, le batterie non si
caricheranno. Per caricare le batterie completamente sono necessarie circa 3,5 ore.
Page 53

Italiano Italiano
3. Scrittura di note
Fase 1 Fissare l'unità ricevitore a un foglio di carta.
IRISNotes™ supporta fogli no al formato A4.
Suggerimento: posizionare sempre l'unità in alto, al centro della pagina.
Fase 2 Tenere premuto il pulsante di accensione per 5 secondi per
accendere il ricevitore.
Fase 3 Iniziare a scrivere una nota.
Note importanti:
Scollegare il ricevitore dal computer.
Mentre si scrive, sarà possibile vedere l'icona della penna
sul display.
Suggerimenti:
Tenere saldamente la penna e scrivere normalmente.
Cercare di evitare di scrivere in direzione obliqua.
Non scrivere direttamente sotto il ricevitore, ma lasciare almeno
un margine di 1,5 cm.
Non mettere le dita tra la punta della penna e l'unità ricevitore.
Questo provoca il blocco del segnale.
Per ulteriori indicazioni, consultare la sezione
Suggerimenti per la scrittura delle note alla ne di questa guida.
Fase 4 Premere il pulsante di accensione per chiudere e salvare la nota corrente.
Per salvare le note nel ricevitore è necessario premere il pulsante. Il
numero sul display aumenta di 1 ogni volta che viene premuto il
pulsante di accensione dopo la scrittura di una nota. Il numero indica
quante note sono salvate sul ricevitore.
È possibile scrivere no a 100 note in formato A4.
Page 54

Italiano Italiano
4.Utilizzo di IRISNotes™ su un computer Windows PC o Mac OS
Per utilizzare IRISNotes™, è necessario prima installare il software IRISNotes™ Executive.
4.1 Installazione del software
1. Inserire il cd-rom di IRISNotes™ nell'apposita unità del computer.
PC Mac
Accedere a Computer, individuare l'unità
cd-rom e fare doppio clic su quest'ultima.
Fare doppio clic su IRISNotesExecutive-
Setup.exe per iniziare la procedura guidata di installazione.
2. Seguire le istruzioni a video per installare il software.
Nota importante (PC): assicurarsi di installare le lingue corrette in cui
Una volta completata l'installazione, sul computer saranno disponibili le seguenti
applicazioni:
verranno scritte le note.
• MyScript Ink Retriever: questa applicazione permette di scaricare le note dal ricevi-
tore al computer.
• MyScript Trainer: con questa applicazione sarà possibile aumentare la qualità del
riconoscimento delle note manoscritte di IRISNotes™.
• IRISNotes
™
convertirle in testo elettronico ed esportarle verso applicazioni di elaborazione testo o
via mail.
Executive: con questa applicazione potrete gestire e modicare le note,
Fare doppio clic sull'icona cd-rom sulla
Scrivania
Fare doppio clic su IRISNotes-installer.zip.
Aprire la cartella IRISNotes-Installer ed
eseguire il le IRISNotes.mpkg .
Page 55

Italiano Italiano
4.2 Download delle note con MyScript Ink Retriever
1. Collegare l'unità ricevitore al computer utilizzando il cavo USB fornito. MyScript Ink
Retriever si avvia automaticamente.
2. Digitare un presso per le note. Il presso
viene aggiunto al nome di ciascuna nota.
3. Indicare la posizione del ricevitore. Si consi-
glia l'opzione Centra.
4. Fare clic su Scarica scrittura per scaricare le
note dal ricevitore.
Le note vengono salvate nel percorso prede-
Suggerimento: per eliminare le note dal ricevitore dopo averle scaricate, fare clic sulla
scheda Impostazioni di recupero > selezionare Impostazioni avanzate > poi l'opzione
Elimina le dal dispositivo dopo il download.
nito. Fare clic sulla scheda Impostazioni di
recupero per accedere alla cartella in cui sono
state scaricate le note.
4.3 Attivazione del software IRISNotes™ Executive
Prima di utilizzare IRISNotes™ si raccomanda di procedere all'attivazione. Le versioni non
attivate sono disponibili solo per 30 giorni.
1. Avviare IRISNotes™ Executive.
2. Verrà richiesto di attivare il software. Fare clic su Attiva per
procedere.
3. Digitare il codice di attivazione riportato sulla copertina del cd-
rom e fare di nuovo clic su Attiva.
Per l'attivazione è necessaria una connessione a Internet.
Page 56

Italiano Italiano
4.4 Modica delle note in IRISNotes™ Executive
Dopo il download con MyScript InkRtriever, le note sono disponibili nel software IRISNo-
™
Executive.
tes
Se si desidera scaricare le note in modalità manuale:
• Fare clic sull'icona apri.
• Si apre il percorso predenito delle note. Accedere a notes > Ink Devices e selezionare
le note che si desidera scaricare.
4.4.1 Conversione delle note
1. Nel menu Conversione, fare clic su Impostazioni conversione.
2. Fare clic su OK per salvare le impostazioni.
3. Fare doppio clic sulla nota da convertire, quindi premere il pulsante Converti.
La nota convertita viene visualizzata come testo editabile nel riquadro a destra.
Selezionare Testo come Tipo
di contenuto.
Selezionare la Lingua
in cui sono scritte le note.
Selezionare lo Stile scrittura
corretto.
Page 57

Italiano Italiano
4.4.2 Modica delle note
È possibile modicare liberamente sia le note originali che il corrispondente testo convertito:
Utilizzare la barra degli strumenti
modica per modicare le note scritte
a mano: seleziona zone, elimina parti,
aggiungi nuovo testo, ruota, aggiungi
spazio, ecc.
Utilizzare la barra degli strumenti
Modica testo per modicare il testo
convertito: cambia colore e tipo di
carattere, aggiungi testo, allinea, giu-
stica, aggiungi elenchi puntati, ecc.
4.4.3 Esportazione delle note
Per esportare le note, fare clic sul pulsante Esporta. È possibile esportare sia le note origi-
nali che il corrispondente testo convertito:
Esportazione degli originali Esportazione del testo convertito
Gli originali possono essere espor-
tati come le di immagine via mail,
incollati in *Word e salvati come
immagine.
*Word non è disponibile nella versione Mac.
Il testo convertito può essere incollato
in una mail, in *Word e in un text
editor.
4.5 Utilizzo di IRISNotes™ come mouse
Anche la penna IRISNotes™ può essere utilizzata come mouse. Per passare alla
modalità mouse:
• Collegare il ricevitore al PC.
• Tenere la penna di fronte al
ricevitore, poi premere una volta
il pulsante di accensione.
PC
• Collegare il ricevitore al Mac.
• IRISNotes
Mac
™
automaticamente alla modalità
mouse.
passa
Page 58

Italiano Italiano
• Premere la penna su un foglio di carta. Il cursore viene ora controllato dalla penna.
• Muovere la penna sulla pagina per spostare il cursore.
• Per cliccare un oggetto, posizionare il cursore su di esso, poi premere con la penna
sull'oggetto stesso.
• Per fare clic col pulsante destro su un oggetto, posizionarsi su di esso e tenere premuta la
penna per un istante.
Nota: in Windows Vista
per scrivere direttamente nelle applicazioni di Microsoft Ofce 2007 e superiori. Questo
vale anche per le applicazioni iWork® ’08 o superiori per Mac OS 10.5.
Visitare www.irislink.com/support/userguides per ulteriori informazioni.
®
e Windows 7, è possibile utilizzare la penna IRISNotes™ anche
5.Utilizzo di IRISNotes™ su iPad, iPhone o iPod
IRISNotes™ è compatibile con i dispositivi portatili Apple® basati su iOS® 3.0 e superiore.
Con IRISNotes™ è possibile caricare le note manoscritte nei dispositivi Apple, fare disegni
o scrivere testo direttamente sul dispositivo, inserire commenti sulle foto scattate e molto
altro ancora.
Non è tuttavia possibile convertire le note in testo elettronico e modicabile.
5.1 Download di app IRISNotes
1. Accendere il ricevitore IRISNotes™ e collegarlo
al dispositivo Apple utilizzando il cavo USB fornito a 30 pin.
2. Verrà richiesto di scaricare l'app IRISNotes™ corrispondente dal Mac App store:
Nota: per iPAD, selezionare IRISNotes™ HD.
Nota: per iPhone/iPOD, selezionare IRISNotes
3. Scaricare l'app seguendo le istruzioni a video.
Nella schermata principale verrà creata un'icona I.R.I.S..
™
™
.
5.2 Upload delle note nel dispositivo Apple
1. Aprire l'applicazione IRISNotes™.
2. Accendere l'unità ricevitore e collegarla al dispositivo Apple.
3. Premere l'icona lampadina e fare clic su Carica immagini.
Le note vengono salvate in Pellicola.
Page 59

Italiano Italiano
5.3 Modica e scrittura di note e disegni in IRISNotes
™
Dopo aver caricato le note, è possibile modicarle con IRISNotes™, inserendo commenti,
inviandole via mail e molto altro ancora. Con IRISNotes
ex novo e commenti sui le di immagine esistenti.
1. In IRISNotes™, premere l'icona matita, poi selezionare Apri un'immagine > Pellicola per aprire una delle note.
2.
Per modicare le note, accendere il ricevitore e ssarlo in alto, al
centro della pagina. Ora utilizzare la penna per scrivere testo sulla pagina. Il
testo apparirà direttamente sulla nota.
Suggerimento: non scrivere troppo vicino ai bordi della pagina. In caso
Suggerimento: per modicare lo stile di scrittura, utilizzare le icone sul
3.Terminata questa operazione:
Premere l'icona matita, poi selezionare Salva immagine
per procedere al salvataggio, oppure;
Premere l'icona invia, poi selezionare Invia per e-mail (come PDF).
contrario, le note non si adatteranno allo schermo del
vostro dispositivo Apple.
lato destro dello schermo.
™
è inoltre possibile inserire disegni
6.Informazioni di riferimento
6.1 Unità ricevitore
a. Porta USB mini– collegare al computer attraverso il cavo
b. Display LCD
c. Pulsante ON/OFF– Tenere premuto per circa 5 secondi
d
d. Pulsante reset – Resetta il dispositivo quando l'unità non
e. Graffetta– Fissa l'unità a una pagina o una cartellina.
a
c
b
e
USB.
per accendere il ricevitore. Premere una volta per creare
una nuova nota.
risponde.
Page 60

Italiano Italiano
6.2 Display
Il display LCD mostra le seguenti indicazioni di stato:
Unità ricevitore collegata al computer
(caricare i le nel computer e cancellarli dalla memoria)
Memoria PIENA
Batteria penna scarica
Batteria unità ricevitore scarica
Modalità penna
Modalità mouse
Numero di note salvate in memoria
6.3 Ricarica della penna IRISNotes
La ricarica di inchiostro è standard, disponibile in commercio e può essere acquistata in
cartoleria.
Per ricaricare la penna:
1. Premere il pulsante sulla penna verso il basso.
2. Estrarre la ricarica esaurita.
3. Inserire una ricarica nuova e spingere il pulsante sulla penna verso l'alto per
bloccarla.
Nota: non cercare di smontare la penna. Potrebbe danneggiarsi.
™
7. Suggerimenti per la scrittura delle note
• Scrivere in corsivo o stampato. Evitare stili di scrittura particolari.
• Scrivere nel modo più uniforme possibile. Cercare di utilizzare la stessa dimensione e
forma ogni volta che si scrive una lettera o un carattere. Utilizzare inoltre una dimensione
più grande per differenziare le lettere maiuscole dalle minuscole.
• Lasciare spazio fra le parole. Evitare di sovrapporre lettere o caratteri.
• Non andare a capo con il trattino alla ne di una riga. Scrivere la parola intera nella riga
successiva se non si ha lo spazio necessario.
• Utilizzare fogli a righe, per evitare di scrivere in direzione obliqua.
• Utilizzare MyScript Trainer per potenziare il riconoscimento della vostra calligraa da
parte del software. Per maggiori informazioni su come utilizzare MyScript Trainer, visitare
il sito www.irislink.com/support/userguides.
Page 61

Italiano Italiano
In caso di problemi nell'utilizzo di IRISNotes™, consultare la sezione FAQ sul nostro sito
web www.irislink.com/support/faq o contattare l'Assistenza Tecnica all'indirizzo
www.irislink.com/support.
Page 62

Português Português
Este Guia de utilizador rápido fornece directrizes gerais para instalar e utilizar o IRISNotes™
Executive. Para mais informações sobre a gama completa de funcionalidades do IRISNotes
Executive, consulte o cheiro de ajuda fornecido com o software.
®
As descrições neste guia baseiam-se nos sistemas operativos Windows
Lion™. Todas as informações estão sujeitas a alterações sem aviso prévio.
Índice
1.Conteúdos da embalagem
2.Carregar as baterias
3.Escrever notas
4.Utilizar o IRISNotes
5.Utilizar o IRISNotes
6.Informações de referência
7.Sugestões para escrever notas
™
num computador Windows ou Mac OS
™
num iPad®, iPhone® ou iPod
7 e Mac OS® X
®
1. Conteúdos da embalagem
CD-ROM de instalação do IRISNotes™ Executive.
Caneta digital, receptor, cabo USB retráctil, cabo USB de 30 pinos, três recargas de tinta,
bolsa para caneta
2. Carregar as baterias
ANTES DE COMEÇAR: carregue a caneta e o receptor durante, no mínimo, 30 minutos.
1. Carregue a bateria da caneta:
• Abra a tampa na parte superior da caneta.
• Ligue a caneta ao computador com o cabo USB fornecido.
™
2. Carregue a bateria do receptor:
• Ligue o receptor ao computador com o cabo USB fornecido.
Sugestão: certique-se de que o computador está ligado. Caso contrário, as baterias não irão carregar. Pode demorar até 3,5 horas para carregar totalmente as baterias.
Page 63
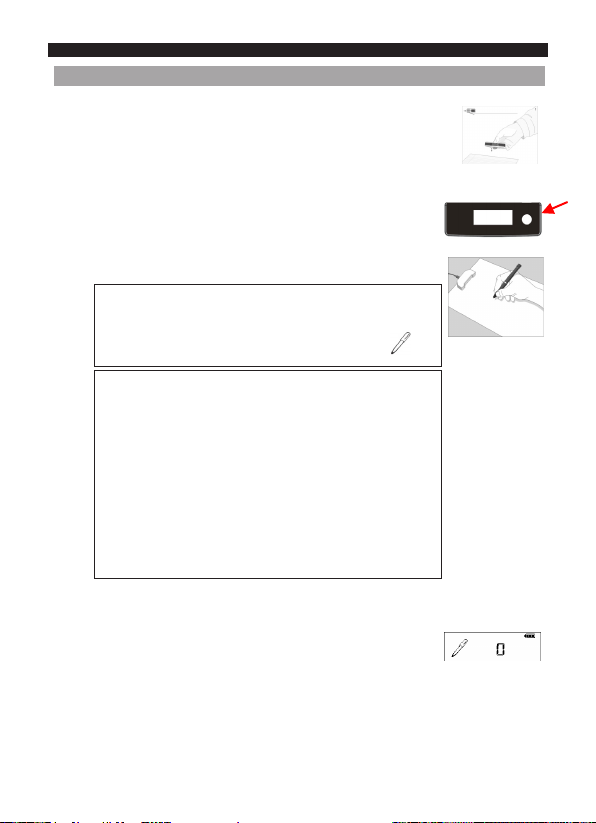
Português Português
3. Escrever notas
Passo 1 Encaixe o receptor numa folha de papel.
O IRISNotes™ suporta páginas até ao tamanho A4.
Sugestão: coloque sempre o receptor na parte superior central de uma página.
Passo 2
Prima o botão de alimentação durante 5 segundos para ligar
o receptor.
Passo 3 Comece a escrever uma nota.
Notas importantes:
Desligue o receptor a partir do seu computador.
Enquanto escreve, deve ver o ícone da caneta no ecrã.
Sugestões:
Segure bem a caneta e escreva normalmente. Tente evitar
inclinação da linha.
Não escreva directamente abaixo do receptor, mas deixe, no mínimo,
uma margem de 1,5 cm.
Não coloque os seus dedos entre a ponta da caneta e o receptor. Isto
irá bloquear o sinal.
Consulte a secção Sugestões para escrever notas no nal deste guia
para mais indicações.
Passo 4 Prima o botão de alimentação para concluir e guardar a actual nota.
É necessário premir o botão para guardar as notas no receptor.
O número no ecrã diminui por 1 sempre que prime o botão de
alimentação após escrever uma nota. O número mostra quantas notas
são guardadas no receptor.
Pode escrever até 100 notas de tamanho A4.
Page 64

Português Português
4.Utilizar o IRISNotes™ num computador Windows ou Mac OS
De modo a utilizar o IRISNotes™, tem primeiro de instalar o software IRISNotes™ Executive.
4.1 Instalar o software
1. Introduzir o CD-ROM IRISNotes™ na unidade de CD-ROM do computador.
PC Mac
Vá a Computador, situe a unidade de
CD-ROM e clique duas vezes.
Clique duas vezes em IRISNotesExecu-
tive-Setup.exe para iniciar o assistente de
instalação.
2. Siga as instruções no ecrã para instalar o software.
Nota importante (PC): certique-se de que instala os idiomas correctos nos
Assim que a instalação estiver concluída, dispõe das aplicações seguintes no seu
computador.:
quais escreve as notas.
• MyScript Ink Retriever: com esta aplicação, descarrega notas do receptor para o
computador.
• MyScript Trainer: esta aplicação ajuda a treinar o IRISNotes
sua escrita.
• IRISNotes
™
digitado e exporta-as para aplicações de processamento de texto ou através de e-mail.
Executive: com esta aplicação, gere e edita notas, converte-as para texto
Clique duas vezes no ícone do CD-ROM no
ambiente de trabalho
Clique duas vezes em IRISNotes-installer.
zip.
Abra a pasta IRISNotes-Installer e execute
o cheiro IRISNotes.mpkg.
™
a reconhecer melhor a
Page 65

Português Português
4.2 Descarregar notas com MyScript Ink Retriever
1. Ligue o receptor ao computador com o cabo USB fornecido. MyScript Ink Retriever
inicia automaticamente.
2. Introduza um prexo para as suas notas. O
3. Indique onde colocou o receptor. Lembre-se,
4. Clique em Descarregar tinta para descarre-
As notas são armazenadas na localização prede-
Sugestão: para eliminar notas do receptor após descarregá-las, clique no separador
Congurações de recuperação > Seleccione Congurações avançadas > Seleccione a
opção Remover arquivos do dispositivo após descarregamento.
prexo é adicionado a cada nome de nota.
recomenda-se no Centro.
gar as notas do receptor.
nida. Clique no separador Congurações de
recuperação para a pasta em que as suas notas
são descarregadas.
4.3 Activar o software IRISNotes™ Executive
Antes de utilizar o IRISNotes™, é aconselhável activá-lo. As versões não activadas só estão
disponíveis durante 30 dias.
1. Inicie o IRISNotes™ Executive.
2. É-lhe solicitado que active o software. Clique em Activar para o
fazer.
3. Introduza o código de activação incluído no envelope do CD-
-ROM e clique novamente em Activar.
Lembre-se, é necessária uma ligação à Internet para activar.
Page 66

Português Português
4.4 Editar notas no IRISNotes™ Executive
Uma vez que descarregou as notas com o MyScript InkRtriever, estas estão disponíveis no
software IRISNotes
Caso pretenda descarregar as notas manualmente:
• Clique no ícone Abrir.
• A localização predenida das notas abre. Aceda a notes > Ink Devices e, de seguida,
seleccione as notas que pretende carregar.
™
Executive.
4.4.1 Converter notas
1. No menu Conversão, clique em Congurações de conversão.
2. Clique em OK para guardar as congurações.
3. Clique duas vezes na nota a converter e, de seguida, clique no botão Converter.
A nota convertida é apresentada como texto editável no painel do lado direito.
Seleccione Texto como Tipo
de conteúdo.
Seleccione o Idioma
no qual as notas são escritas.
Seleccione o Estilo de escrita
adequado.
Page 67

Português Português
4.4.2 Editar notas
Pode editar livremente as notas originais e o respectivo texto convertido:
Utilize a barra de ferramentas de
edição para editar as suas notas:
seleccionar zonas, eliminar partes,
adicionar novo texto, rodar, adicionar
espaço, etc.
Utilize a barra de ferramentas Edição
de texto para editar o texto convertido: alter cor, alterar tipo de letra,
adicionar texto, alinhar, justicar,
adicionar marcas, etc.
4.4.3 Exportar notas
Para exportar notas, clique no botão Export (Exportar). Pode exportar as notas originais e
o respectivo texto convertido:
Exportação original Exportação de texto
Os originais podem ser exportados
como cheiros de imagem através de
e-mail, colados no *Word e guardados
como imagem.
*O Word não está disponível na versão Mac.
O texto convertido pode ser colado
num e-mail, no *Word e num editor
de texto.
4.5 Utilizar o IRISNotes™ como ratos
Pode também utilizar a caneta IRISNotes™ como rato. Para mudar para o modo
de rato:
• Ligue o receptor ao seu PC.
• Segure a caneta à frente do recep-
tor, de seguida, prima o botão de
alimentação.
PC
• Ligue o receptor ao seu Mac.
• O IRISNotes
automaticamente para o modo
de rato.
Mac
™
muda
Page 68

Português Português
• Toque com a caneta numa folha de papel. Agora, o cursor está a ser controlado pela caneta.
• Paire a caneta sobre uma página para mover o cursor.
• Para clicar num objecto, aponte com o cursor para o objecto, de seguida, toque com a
caneta para clicar.
• Para clicar com o botão direito num objecto, aponte para o mesmo, de seguida, segure a
caneta durante um momento.
®
Nota: no Windows Vista
escrever directamente nas aplicações Microsoft Ofce 2007 e posteriores. Isto também
funciona no Mac OS 10.5, aplicações iWork® ’08 e posteriores.
Consulte www.irislink.com/support/userguides para mais informações.
e Windows 7, também pode utilizar a caneta IRISNotes™ para
5.Utilizar o IRISNotes™ num iPad, iPhone ou iPod
O IRISNotes™ é compatível com dispositivos portáteis Apple® com iOS® 3.0 e superior.
Com o IRISNotes™ pode carregar as suas notas manuscritas para o seu dispositivo Apple,
fazer desenhos ou escrever texto directamente no seu dispositivo, anotar fotograas existentes e assim por diante.
Lembre-se, não pode converter as suas notas em texto editável e impresso.
5.1 Descarregar a aplicação IRISNotes
1. Ligue o receptor IRISNotes™ e ligue-o ao seu dispositivo Apple com o
cabo USB de 30 pinos fornecido.
É-lhe solicitado que descarregue a respectiva aplicação do IRISNotes
2.
partir da Mac App Store:
Nota: para o iPad, seleccione IRISNotes
Nota: para o iPhone/iPod, seleccione IRISNotes™.
3. Descarregue a aplicação ao seguir as instruções no ecrã.
Será criado um ícone da I.R.I.S. no ecrã inicial.
™
™
HD.
™
a
5.2 Carregar notas para o seu dispositivo Apple
1. Abra a aplicação IRISNotes™.
2. Ligue o receptor e ligue-o ao dispositivo Apple.
3. Toque no ícone de lâmpada e, de seguida, toque em Upload
pictures (Carregar imagens).
As notas são carregadas para Camera Roll (Rolo da câmara).
Page 69

Português Português
5.3 Editar, escrever e desenhar notas no IRISNotes
™
Assim que as suas notas tiverem sido carregadas, pode editá-las no IRISNotes™, tomar
apontamentos, enviá-los por e-mail e assim por diante. Com o IRISNotes
fazer desenhos e anotar nos cheiros de imagem existentes.
1. No IRISNotes™, toque no ícone de lápis, de seguida, seleccione
Open a Picture (Abrir uma imagem) > Camera Roll (Rolo da
câmara) para abrir uma das suas notas.
2.
Para editar notas, ligue o receptor e encaixe-o no topo, ao centro de
uma página. Agora, utilize a caneta para escrever texto na página. O texto irá
aparecer directamente na sua nota.
Sugestão: não escreva demasiado perto da margens da página. Caso con-
Sugestão: para editar o estilo de escrita, utilize os ícones no lado direito do ecrã.
3.Quando tiver concluído:
Toque no lápis, de seguida, seleccione Save Picture
(Guardar imagem) para guardá-la, ou;
Toque no ícone de envio, de seguida, seleccione Send by
e-mail (as PDF) (Enviar por e-mail (como PDF).
trário, as suas notas não irão caber no ecrã do seu dispositivo
Apple.
™
também pode
6.Informações de referência
6.1 Descrição do receptor
a. Porta mini USB – ligue ao computador através do cabo
b. Ecrã LCD
c. Botão LIGAR/DESLIGAR – Prima continuamente
d. Botão Reiniciar – Reinicie o dispositivo quando a unida-
d
e. Clip de papel – Encaixe a unidade numa página ou
a
c
b
e
USB.
durante cerca de 5 segundos para ligar o receptor. Prima
uma vez para criar uma nota nova.
de não responde.
cartão.
Page 70

Português Português
6.2 Descrição do ecrã
O ecrã LCD apresenta as seguintes indicações de estado:
Receptor ligado ao computador
(carregue os cheiros para o computador e elimine-os da memória)
Memória CHEIA
Caneta com pilha fraca
Receptor com pilha fraca
Modo de tirar notas
Modo de rato
Número de notas guardadas na memória
6.3 Recarregar a caneta IRISNotes
A recarga de tinta é padrão e pode comprá-la em qualquer loja.
Para recarregar a caneta:
1. Pressione o botão da caneta para baixo.
2. Retire a recarga usada.
3. Introduza uma recarga nova e pressione o botão da caneta para cima para
bloquear a recarga.
Nota: não tente desmontar a caneta. Tal poderá danicá-la.
™
7. Sugestões para escrever notas
•
Utilize letras cursivas ou impressas. Evite escrita estilística.
• Escreva de forma mais consistente possível. Tente utilizar o mesmo tamanho e forma
sempre que escreve uma letra ou carácter. Além disso, escreva letras maiúsculas maiores
do que as letras minúsculas.
• Deixe algum espaço entre as palavras. Tente não sobrepor as letras ou caracteres.
• Não coloque hifens nas palavras no nal de uma linha. Em vez disso, escreva a palavra
inteira na linha seguinte se não tiver espaço suciente.
• Utilize papel com linhas, para evitar a inclinação das linhas.
• Utilize MyScript Trainer para treinar o software de acordo com o estilo de escrita. Para
mais informações sobre como utilizar o MyScript Trainer,
visite www.irislink.com/support/userguides.
Page 71

Português Português
Caso tenha problemas na utilização do seu IRISNotes™, consulte as Perguntas frequentes no
nosso website www.irislink.com/support/faq ou contacte a Assistência técnica em
www.irislink.com/support.
Page 72

Русский Русский
В этом руководстве по быстрой установке представлены общие рекомендации по
установке и использованию IRISNotes™ Executive. См. подробные инструкции по
всем возможностям IRISNotes™ Executive в файле справки, который доступен в
программном обеспечении.
®
Описания в этом руководстве приводятся для ОС Windows
информация может меняться без уведомления.
Содержание
1. Содержимое упаковки
2. Зарядка аккумуляторов
3. Создание заметок
4.
5. Использование IRISNotes™ на iPad®, iPhone® или iPod
6. Справочная информация
7. Советы по созданию заметок
Использование IRISNotes
Windows или Mac OS
™
на компьютере под управлением
7 и Mac OS® X Lion™. Вся
®
1. Содержимое упаковки
Установочный компакт-диск IRISNotes™ Executive
Цифровая ручка, приемник, отделяемый USB-кабель, 30-контактный USB-кабель, три
стержня, чехол для ручки
2. Зарядка аккумуляторов
ПЕРЕД НАЧАЛОМ РАБОТЫ: Зарядите ручку в течение минимум 30 минут.
1. Зарядите аккумулятор ручки:
• Откройте крышку на верхней стороне ручки.
• Подключите ручку к компьютеру с помощью USB-кабеля,
входящего в комплект.
2. Зарядите аккумулятор приемника:
• Подключите приемник к компьютеру с помощью USB-
кабеля, входящего в комплект.
Совет. Убедитесь, что компьютер включен. В противном случае аккумуляторы не будут заряжены. Полная зарядка аккумуляторов может занять 3,5 ч.
Page 73

Русский Русский
3. Создание заметок
Шаг 1: закрепите приемник на листе бумаги.
IRISNotes™ поддерживает форматы до A4.
Совет. Всегда помещайте устройство на верхней стороне страницы посередине.
Шаг 2: нажмите кнопку питания и удерживайте ее в течение 5
секунд, чтобы включить приемник.
Шаг 3: начните писать заметку.
Важные примечания.
Отключите приемник от компьютера.
При написании заметки на экране должен отображаться
значок ручки.
Советы.
Крепко держите ручку и пишите как обычно. Постарайтесь
избежать наклона строк.
Не пишите непосредственно под приемником, оставьте поле
не менее 1,5 см.
Ваши пальцы не должны находиться между кончиком ручки и
приемником. Это приведет к блокировке сигнала.
См. дополнительные указания в разделе Советы по написанию
заметок в конце этого документа.
Шаг 4: нажмите кнопку питания, чтобы завершить и сохранить текущую за-
метку.
Эту кнопку необходимо нажать для сохранения заметок в
приемнике. Число на экране увеличивается на 1 при каждом
нажатии кнопки питания после написания заметки. Оно
соответствует числу заметок, сохраненному в приемнике.
Можно создать до 100 заметок формата A4.
Page 74

Русский Русский
4.
Использование IRISNotes™ на компьютере под управлением Windows или Mac OS
Для использования IRISNotes™ необходимо установить ПО IRISNotes™ Executive.
4.1. Установка программного обеспечения
1.
Вставьте компакт-диск IRISNotes™ в дисковод для компакт-дисков своего компьютера.
PC Mac
Откройте окно Компьютер, найдите
дисковод для компакт-дисков и дважды
щелкните его.
Дважды щелкните файл
IRISNotesExecutive-Setup.exe, чтобы
запустить мастер установки.
2. Чтобы установить ПО, следуйте инструкциям на экране.
Важное примечание (PC). Обязательно установите языки, на которых
По окончании установки на вашем компьютере появятся следующие приложения:
будете писать заметки.
• MyScript Ink Retriever: это приложение позволяет загружать заметки с при-
емника на компьютер.
• MyScript Trainer: это приложение помогает обучить IRISNotes
точного распознавания вашего почерка.
• IRISNotes
™
тировать заметки, преобразовывать их в печатный текст и экспортировать в
текстовые редакторы или почтовые приложения.
Executive: это приложение позволяет администрировать и редак-
Дважды щелкните значок компакт-диска
на рабочем столе.
Дважды щелкните файл IRISNotes-
installer.zip.
Откройте папку IRISNotes-Installer и
запустите файл IRISNotes.mpkg.
™
для более
Page 75

Русский Русский
4.2 Загрузка заметок с помощью MyScript Ink Retriever
1. Подключите приемник к компьютеру с помощью USB-кабеля, входящего в комплект. Приложение MyScript Ink Retriever запустится автоматически.
2. Введите префикс для своих заметок.
3. Укажите расположение приемника.
4. Нажмите кнопку Загрузить рукописный
Заметки будут храниться в папке по умолча-
Совет. Чтобы удалить заметки с приемника после загрузки, перейдите на вкладку
Параметры извлечения > выберите Дополнительные параметры > выберите
параметр Удалять файлы с устройства после загрузки.
Префикс будет добавлен к имени каждый
заметки.
Обратите внимание, что рекомендуется расположение По центру.
текст чтобы загрузить заметки с приемника.
нию. Перейдите на вкладку Параметры из-
влечения, чтобы указать папку для загрузки
заметок.
4.3 Активация ПО IRISNotes™ Executive
Перед использованием приложения IRISNotes™ рекомендуется активировать его. Неактивированные версии будут работать только 30 дней.
1. Запустите IRISNotes
2. Программа предложит выполнить активацию. Выберите
Активировать, чтобы сделать это.
3. Введите код активации, который находится на конверте с
компакт-диском, и нажмите кнопку Активировать еще раз.
Обратите внимание, что для активации потребуется
подключение к Интернету.
™
Executive.
Page 76

Русский Русский
4.4 Редактирование заметок в IRISNotes™ Executive
После загрузки заметок с помощью MyScript InkRtriever их можно отредактировать в
™
IRISNotes
Чтобы загрузить заметки вручную:
4.4.1 Преобразование заметок
1. В меню Преобразование выберите Параметры преобразования.
2. Для сохранения параметров нажмите кнопку OK.
3. Дважды щелкните заметку для преобразования и нажмите кнопку
Executive.
• Щелкните значок открытия.
• Откроется папка заметок по умолчанию. Перейдите в раздел Заметки > Устрой-
ства и выберите заметки, которые необходимо загрузить.
Выберите текст в качестве
типа содержимого.
Выберите язык,
на котором написаны
заметки.
Выберите Стиль письма.
Преобразовать.
Преобразованная заметка будет отображаться как редактируемый текст на панели
справа.
Page 77

Русский Русский
4.4.2 Редактирование заметок
Вы можете свободно редактировать исходные заметки и соответствующий преобразованный текст:
Используйте панель инструментов
редактирования для изменения
заметок: выбора зон, удаления
частей, добавления текста, добавления пробелов и др.
Используйте панель инструментов редактирования текста для
изменения преобразованного
текста: изменения цвета и шрифта,
добавления текста, выравнивания,
добавления маркеров и др.
4.4.3 Экспорт заметок
Для экспорта заметок нажмите кнопку Export (Экспорт). Вы можете экспортировать
исходные заметки и соответствующий преобразованный текст:
Экспорт исходной заметки Экспорт текста
Исходные заметки можно экспортировать в файлы изображений для отправки по электронной почте, вставить в
*Word и сохранить как изображение.
*Приложение Word недоступно в версии для Mac.
Преобразованный текст можно в ставить в сообщение эл. почты, *Word и
текстовый редактор.
4.5 Использование IRISNotes™ в качестве мыши
Ручку IRISNotes™ также можно использовать в качестве мыши. Чтобы
перейти в режим мыши:
• Подключите приемник к ком-
пьютеру.
• Поместите ручку над приемни-
ком и нажмите кнопку питания
один раз.
PC
• Подключите приемник к
компьютеру Mac.
• IRISNotes
переключится в режим
мыши.
Mac
™
автоматически
Page 78

Русский Русский
• Надавите ручкой на лист бумаги. Указатель мыши управляется ручкой.
• Двигайте ручкой по странице для перемещения указателя.
• Чтобы щелкнуть объект, наведите указатель на этот объект и нажмите ручку, чтобы
щелкнуть его.
• Чтобы щелкнуть объект правой кнопкой мыши, наведите указатель на этот объект, а
затем нажмите и удерживайте ручку.
Примечание. В Windows Vista
пользовать, чтобы писать непосредственно в приложениях пакета Microsoft Ofce
2007 и более поздних версий. Эта функция также будет работать на Mac OS 10.5 в
приложениях пакета iWork® ’08 и более поздних версий.
См. дополнительные сведения на странице www.irislink.com/support/userguides.
®
и Windows 7 ручку IRISNotes™ также можно ис-
5. Использование IRISNotes™ на iPad®, iPhone® или iPod®
Система IRISNotes™ совместима с портативными устройствами Apple® под
управлением iOS® 3.0 и более поздних версий.
IRISNotes™ позволяет отправлять рукописные заметки на устройство Apple, делать рисунки или писать прямо на устройстве, аннотировать существующие изображения и др.
Обратите внимание, что преобразование заметок в редактируемый текст
5.1 Загрузка приложения IRISNotes
1. Включите приемник IRISNotes™ и подключите его к устройству Apple
2. Система предложит загрузить соответствующее приложение
Примечание. Для iPAD выберите IRISNotes™ HD.
Примечание. Для iPhone/iPOD выберите IRISNotes
3. Загрузите приложение, следуя инструкциям на экране.
На главном экране появится значок I.R.I.S.
не поддерживается.
™
с помощью 30-контактного USB-кабеля, входящего в комплект.
IRISNotes™ из Mac App Store:
™
.
5.2 Отправка заметок на устройство Apple
1. Откройте приложение IRISNotes™.
2. Включите приемник и подключите его к устройству Apple.
3. Нажмите значок лампочки и выберите Upload pictures (От-
править изображения).
Заметки будут переданы в Camera Roll (Фотоальбом).
Page 79

Русский Русский
5.3 Редактирование, написание и рисование заметок в IRISNotes
После отправки заметок их можно отредактировать в IRISNotes™, аннотировать, отправлять по электронной почте и т. д. IRISNotes
нуля и аннотировать существующие файлы изображений.
1. В IRISNotes™ нажмите значок карандаша и выберите Open a
Picture (Открыть изображение) > Camera Roll (Фотоальбом),
чтобы открыть заметку.
2. Чтобы отредактировать заметки, включите приемник и закрепите его
посередине на верхней стороне страницы. Теперь можно написать текст на
странице с помощью цифровой ручки. Текст сразу появится в вашей заметке.
Совет. Не пишите слишком близко к краям страницы. В противном
Совет. Чтобы изменить стиль письма, воспользуйтесь значками в правой части
3. Когда заметка будет готова
Нажмите значок карандаша и выберите Save Picture
(Сохранить изображение), чтобы сохранить его или
нажмите значок отправки и выберите Send by e-mail
(as PDF) (Отправить по электронной почте (как PDF)).
случае заметки не поместятся на экран устройства Apple.
экрана.
™
также позволяет создавать рисунки с
™
6. Справочная информация
6.1 Краткий обзор приемника
a. Порт Mini USB — подключение к компьютеру с по-
б. ЖК-экран
в. Кнопка ВКЛ/ВЫКЛ — нажмите и удерживайте при-
г. Кнопка сброса — сброс устройства в ситуации, когда
д
д. Клипса — используется для крепления устройства к
а
б
в
г
мощью USB-кабеля.
мерно 5 секунд, чтобы включить приемник. Нажмите
один раз, чтобы создать заметку.
оно перестает отвечать на команды.
странице.
Page 80

Русский Русский
6.2 Обзор экрана
На ЖК-экране отображаются следующие индикаторы состояния:
Приемник подключен к компьютеру
(загрузите файлы на компьютер и удалите их из памяти)
Низкий уровень заряда аккумулятора приемника
Память ПЕРЕПОЛНЕНА
Низкий уровень заряда аккумулятора ручки
Режим записи
Режим мыши
Количество заметок в памяти
6.3 Вставка сменных стержней IRISNotes
Для ручки используются стандартные стержни, которые можно купить в канцелярском магазине.
Чтобы вставить стержень:
1. Нажмите кнопку ручки вниз.
2. Вытащите использованный стержень.
3. Вставьте новый стержень и нажмите кнопку ручки вверх, чтобы
зафиксировать его.
Примечание. Не пытайтесь разобрать ручку. Это может
привести к ее повреждению.
™
7. Советы по написанию заметок
• Используйте курсив или печатные буквы. Избегайте стилизованного письма.
• Используйте максимально единообразный почерк. Старайтесь использовать буквы
и символы одинакового размера и начертания. Кроме того, заглавные буквы должны
быть больше строчных.
• Оставляйте место между словами. Избегайте наложения букв и символов.
• Не переносите слова в конце строки. Если в строке недостаточно места, пишите все
слово на следующей строке.
• Используйте расчерченную бумагу, чтобы избежать наклона.
• Используйте MyScript Trainer, чтобы обучить ПО вашему почерку. См. дополни-
тельные сведения об использовании MyScript Trainer по адресу www.irislink.com/
support/userguides.
Page 81

Русский Русский
Если у вас возникнут проблемы при использовании IRISNotes™, ознакомьтесь с документом «Вопросы и ответы» на сайте www.irislink.com/support/faq или обратитесь в
службу технической поддержки по адресу www.irislink.com/support.
Page 82

Page 83

Page 84

Page 85

Page 86

Page 87

Page 88

Page 89

أ
ج
ب
ـه
د
Page 90

Page 91

Page 92

www.irislink.com
765010457770
I.R.I.S. Products & Technologies
I.R.I.S. - Louvain-la-Neuve (Belgium)
I.R.I.S. AG - Aachen (Germany)
I.R.I.S. Inc. - Delray Beach (United States)
I.R.I.S. HK Ltd - Hong Kong (China)
© Copyright 2012 I.R.I.S. s.a./n.v.
All rights reserved for all countries. I.R.I.S., I.R.I.S.’ product names, I.R.I.S.’ logos and
I.R.I.S.’ product logos are I.R.I.S. trademarks. All other products and names mentioned are trademarks or registered trademarks from their respective owners.
 Loading...