

iOptron SmartStar 8600A, SmartStar 8602A, SmartStar 8603A, SmartStar 8604A Quick Start Manual
Page 1
Quick Start Guide
SmartStar® A Series Systems
(8600, 8602, 8603, and 8604)
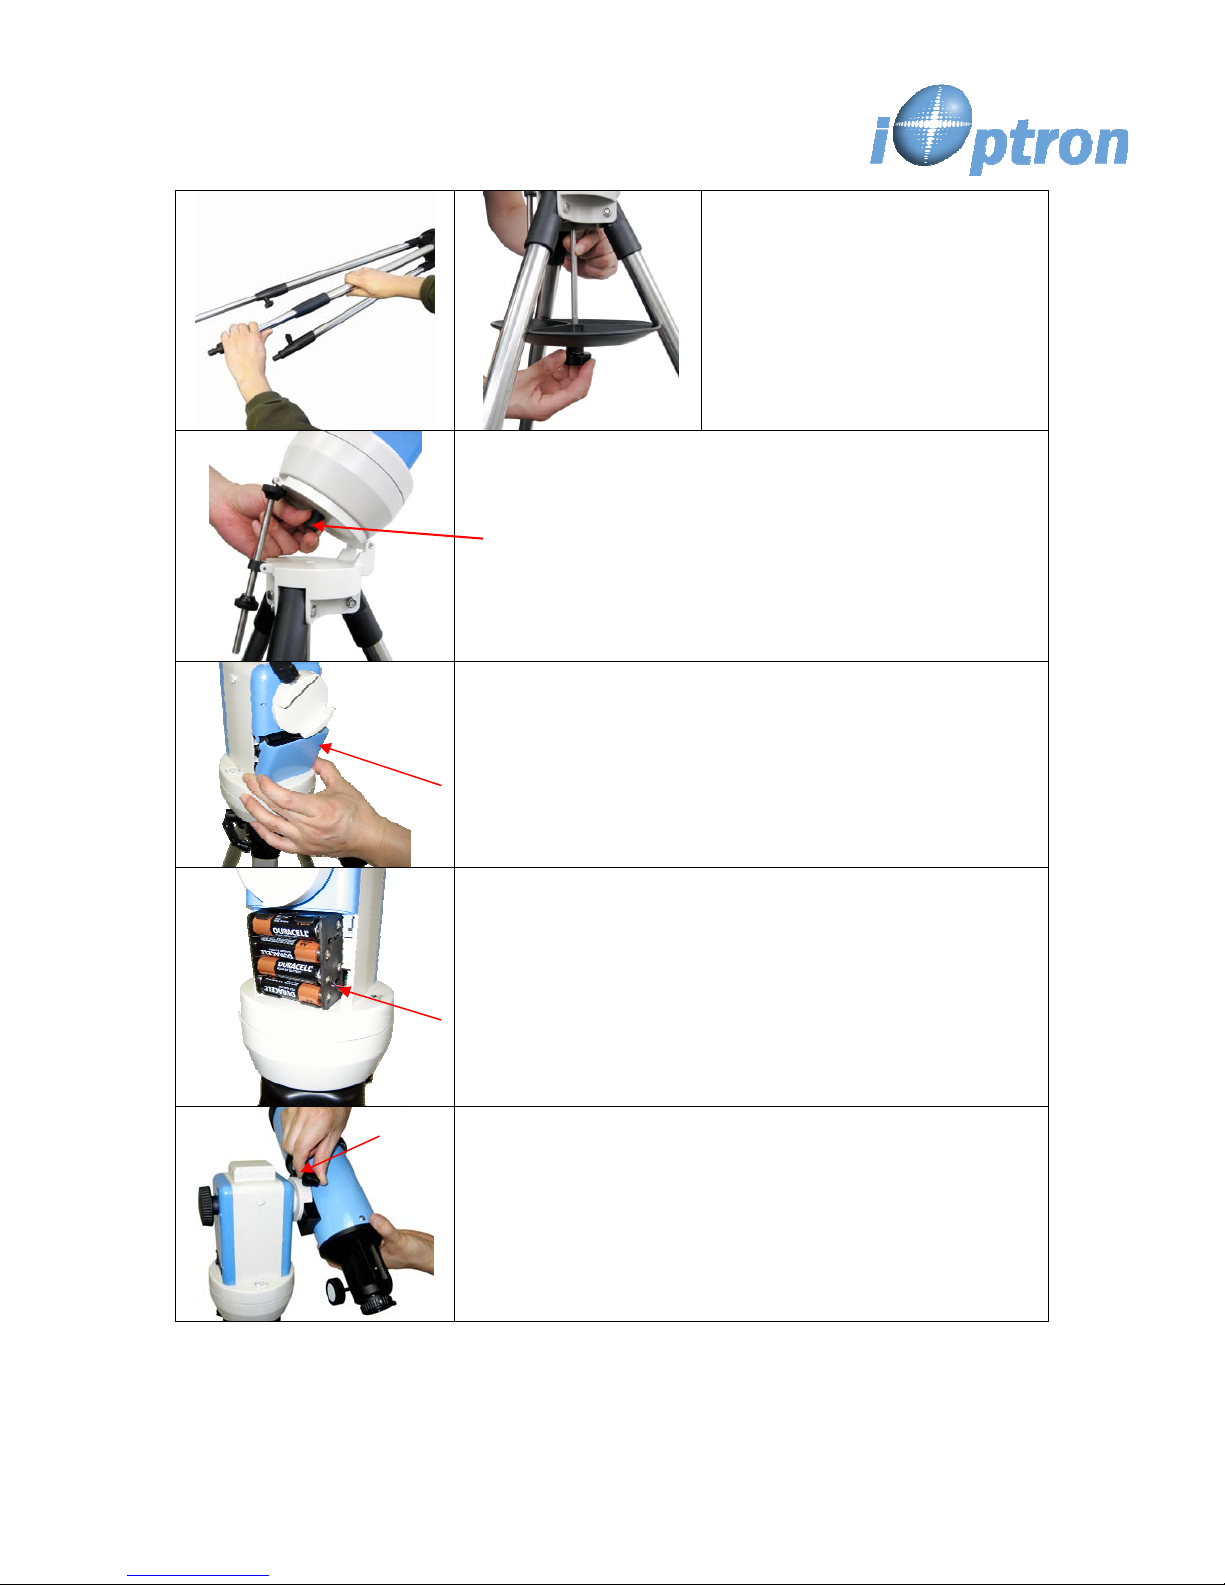
Step 1. Preparing the Tripod
1. Extend tripod legs to full
extension.
2. Slide tray on bottom of shaft
(#7). Then screw on round
black knob (#9).
#2 knob
Step 2. Attaching the Mount
1. Raise wedge plate on the tripod by turning two tilt
locks (12);
2. Attach mount to wedge plate using supplied azimuth
lock screw (10).
3. lower wedge plate to it’s lowest position by turning the
upper tilt lock upward while lightly push the mount
down. Secure the mount by tightening the lower lock.
Step 3a. Installing Batteries
Note: you may use 8 AA batteries (Step 3) or the AC adaptor
(Step 5) to operate the mount.
Pull the batteries compartment cover (shown) open.
Gently pull the batteries holder (shown next) out of the
compartment to avoid breaking the attached wires.
Step 3b.
Insert 8 AA batteries
diagram on the holder to orient the batteries properly. Replace
the holder back into the battery compartment and replace the
lid.
For reference: the battery pack fits in with wires on the bottom
right
(See arrow in photo). Use only fresh batteries. Using/mixing
old or low batteries may cause error messages.
Step 4. Attaching Telescope
Attach telescope to mount using dovetail lock knob (#2).
(Picture shows 80mm refractor. However all scopes will attach in
the same manner.)
(not included) in the holder. Refer to the
iOptron Corp. | 6E Gill Street | Woburn, MA 01801 USA | (781) 569-0200 | Toll Free (866) 399-4587 | www.iOptron.com
Page 2
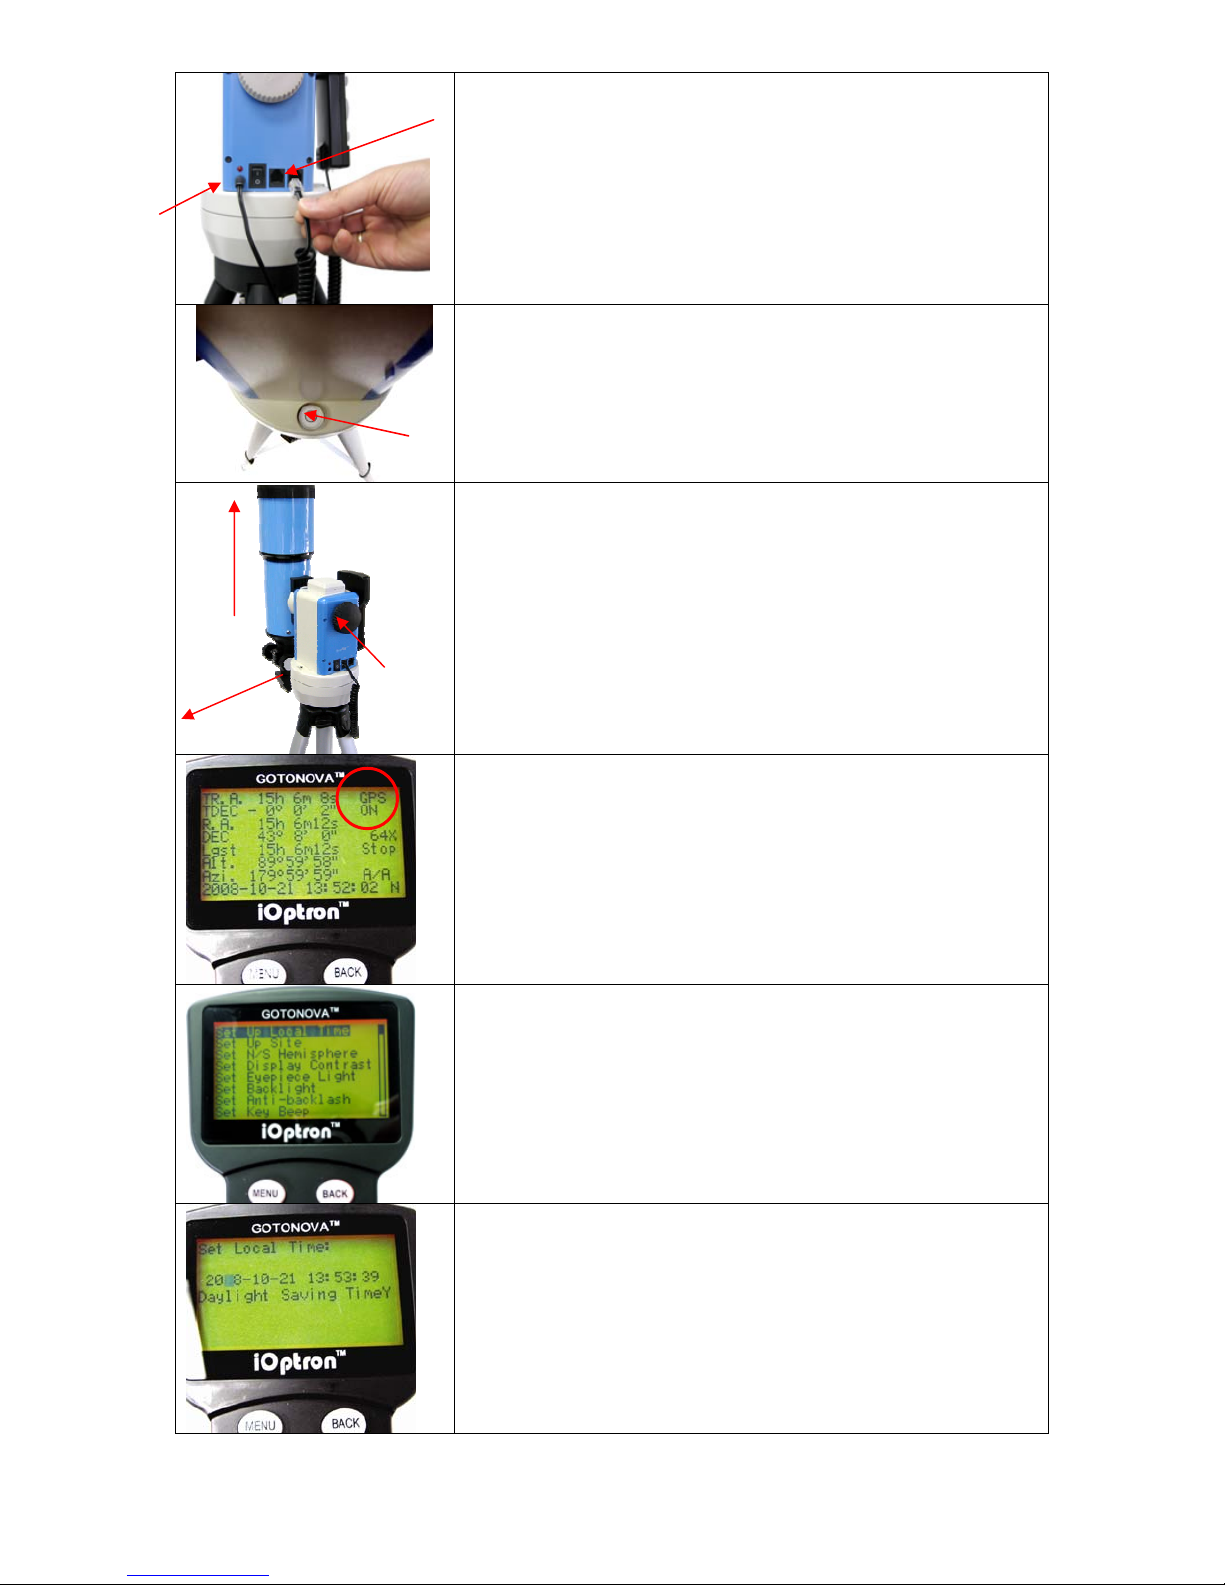
Plug in AC
adaptor
here
2) Up
1) South
#4
Alt
lock
Step 5. Plug in hand controller and AC adaptor.
Plug hand controller into either one of the two HBX ports on the
mount. Next plug in AC adaptor.
(Or use batteries—see step 3).
Turn on power (the red light should go on).
At this point you can begin observing manually. Use the 4 Arrow keys
(▲▼◄►) to rotate the scope Up, Down, Left, and Right. Use the
SPEED key to change the slew rate from the slowest (1X) to the fastest
(MAX). The next steps show you how to set up the telescope and
controller for automatic slewing and tracking.
Step 6. Set up telescope for auto-observing.
Level the mount using the bubble on side of mount by adjusting
tripod legs. The bubble should be in the middle of the circle. It is
also suggested to use additional levels (such as a torpedo level)
to assure precise leveling.
Step 7. Park Position for Altazimuth Operation
Set telescope to PARK POSITION.
(1) Position the mount so that the “SOUTH” mark is facing south
(A compass may be helpful).
(2) The telescope tube should be pointed directly up at the
zenith. If it is not perfectly straight then loosen the altitude lock
(#4) to adjust telescope.
Please refer to full manual for German equatorial operation.
Step 8. Main Screen
Turn on the mount and wait for controller to display “GPS-OK” in
top right corner —not “GPS-ON”. GPS provides Latitude,
Longitude, and current time only.
Step 9.
Press the MENU key once.
Scroll (with the ▲/▼ keys) to “Set Up Controller”
Press ENTER.
Then go to Set Up Local Time and Site in the next screen.
Select and then press ENTER.
Step 10. Set Up Local Time
Go to:
Set up Local Time (or “Local Time and Site”).
Press ENTER.
Enter date and day-light savings (Y-yes. N-no).
(Note: use arrow keys to scroll through screen and select
numbers)
iOptron Corp. | 6E Gill Street | Woburn, MA 01801 USA | (781) 569-0200 | Toll Free (866) 399-4587 | www.iOptron.com
Page 3

Step 11. Set Up Site
GPS will provide the longitude and latitude information. If GPS
signal is not available, these values can be manually entered
here.
Use ▲/▼ keys to change the numbers and letters. Use ◄/►
keys to scroll through the fields.
The last line of this screen is for setting time zone information
(add or subtract 60 minutes (Min.) per time zone).
Examples: minutes “behind” UT or “ahead of” UT
New York: 300 Min. “behind” UT
Los Angeles: 480 Min. “behind” UT
Rome: 60 Min. “ahead of” UT
Sydney: 600 Min. “ahead of” UT
Press ENTER when finished.
The mount is now ready to find (GOTO) and track objects.
Step 12. Select and Slew to an object
Press Menu button.
Scroll to “Select and Slew”
Press ENTER.
Step 13.
Select a category (ex. “Planets, Sun, Moon”) by scrolling with
the arrow keys.
Press ENTER.
Then select an object (ex. “Moon”) by scrolling with the arrow
keys. Press ENTER.
The telescope will automatically slew to the object and lock on.
It will automatically begin to track once it locks on to the object.
Step 14. Sync to Target (Use this to center and synchronize
the object selected in Step 13).
Press MENU. Scroll to “Sync. To Target”. Press ENTER.
Next use the arrow keys (▲▼◄►) to center the object in the
eyepiece. Then press ENTER again to synchronize the object
with the memory.
To slew to other objects simply repeat steps 12 and 13. You do
not need to repeat step 14 except for adjustments as needed.
(Refer to the full online manual for 1-star and 2-star alignments.
Sync to Target is similar to 1-star Alignment except that you
choose the object to align to.)
iOptron Corp. | 6E Gill Street | Woburn, MA 01801 USA | (781) 569-0200 | Toll Free (866) 399-4587 | www.iOptron.com
Page 4

This page shows specific directions for the 80mm Refractor, 114mm Newtonian,
and the 90mm Maksutov (depending on which telescope tube your unit may
come with).
.80mm Refractor (#8602)……..... ....................................... .........
Insert 45º diagonal: Insert the diagonal into the eyepiece side
of the telescope. Tighten the thumbscrews to a firm feel only.
Insert the eyepiece: Slide the eyepiece into the open end of the
diagonal. Tighten the thumbscrews to a firm feel only. Remove
45º diagonal
eyepiece
the dust cover from the other end of optical tube assembly.
Use the focus knob to bring objects into focus. You may need
to turn the focus knob quite a few turns to focus your telescope
for the first time. Always start observing using a low power
eyepiece (such as a 25mm eyepiece) to get a nice wide field of
view. Later you can change to high power if so desired. Higher
powered eyepieces have a much narrower field of view. So it’s
more difficult to initially locate objects using higher powered
Focus knob
eyepieces.
.114mm Newtonian (#8603) …….......................................... .......
Point toward open end
of telescope
Attach the red dot finder scope to the telescope tube (#1):
First remove the two washers on the tube. Then place the finder
scope onto the two bolts and re-attach the washers securely.
Bolts
The finder scope should face towards the open end of the tube
(see arrow in diagram).
Turn on the beam using the switch on the side. (note: you may
need to remove the plastic insulation placed next to the battery
Switch
underneath)
.90mm Maksutov-Cassegrain (#8604)… ……………………………….
Diagonal
Install Diagonal by screwing it onto the back end of the scope.
You can adjust the position of the diagonal by loosening the
free-spinning threader on the diagonal.
Eyepiece
Flip
switch
iOptron Corp. | 6E Gill Street | Woburn, MA 01801 USA | (781) 569-0200 | Toll Free (866) 399-4587 | www.iOptron.com
Install the Finderscope by sliding the dovetail plate onto the
sleeve (see arrow) and tightening the side screw.
The eyepiece can be placed on the end of the scope or on the
side (see next step). Secure the eyepiece using the side screw.
Use the focus knob to adjust the focus.
This picture shows the eyepiece on the side. Remove the
protective cap to insert the eyepiece. The diagonal is not used
for side viewing.
Use the flip switch to flip the internal mirror to view from the
side or the end of the scope.
 Loading...