

Page 1

PARTY ROCKER
Quickstart Guide
English ( 3 – 4 )
Guía de inicio rápido
Español ( 5 – 6 )
Guide d'utilisation rapide
Français ( 7 – 8 )
Guida rapida
Italiano ( 9 – 10 )
Kurzanleitung
Deutsch ( 11 – 12 )
Snelstartgids
Nederlands ( 13 – 14 )
Snabbstartsguide
Svenska ( 15 – 16 )
Pikakäyttöopas
SUOMI ( 17 – 18 )
Appendix
English ( 19 )
Page 2

Page 3

Quickstart Guide (English)
1
2
4
5
6
7
3
Support
For product registration, visit the ION website: ionaudio.com
For the latest information about this product, visit ionaudio.com/partyrocker
For additional product support, visit ionaudio.com/support
For safety/warranty information, visit ionaudio.com/warranty
WARNING: DO NOT splash or immerse in water or other liquids.
Not for use in rain. Use only in dry locations.
WARNING: DO NOT look directly into the dome light.
Do not sit, stand, or apply pressure on the dome light.
Quick Setup / Connection Diagram
1. Make sure all items listed in Box Contents at the beginning of this guide are included in the box.
2. READ SAFETY INSTRUCTION BOOKLET BEFORE USING THE PRODUCT.
3. For optimal performance, place Party Rocker in the center of the room so it is unobstructed by walls, furniture, etc.
4. Move Light Mode switch to OFF.
5. Turn down the Master Volume on the Party Rocker.
6. Turn on Party Rocker.
7. Connect your music player with an audio cable or Bluetooth. (see Connecting with a Bluetooth Device for more details
on this)
8. Adjust the volume on your music player and on Party Rocker as needed.
9. Adjust the Light Mode switch on Party Rocker as needed.
10. Turn off Party Rocker when not in use.
MICROPHONE
MP3 PLAYER
(not included)
TOP PANEL
Diagram and Parts Description
1. Microphone Input
with Volume Control
(1/4"): This mono
input accepts a 1/4"
input such as a
microphone, guitar, or
other musical
instrument.
3
BOX CONTENTS
PARTY ROCKER
Microphone with mic cable
Audio Cable with 1/8” (3.5mm)
connectors
Power Cable (standard IEC)
Quickstart Guide
Safety Instructions & Warranty
Information Booklet
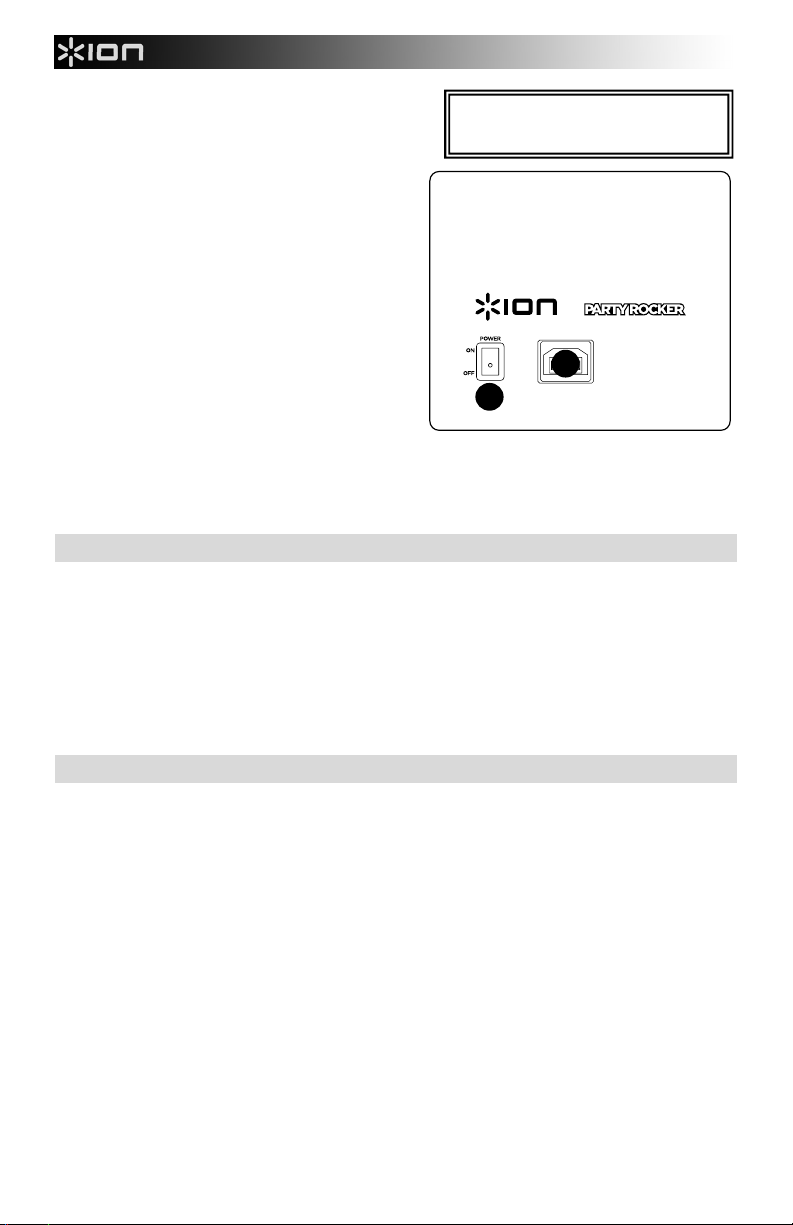
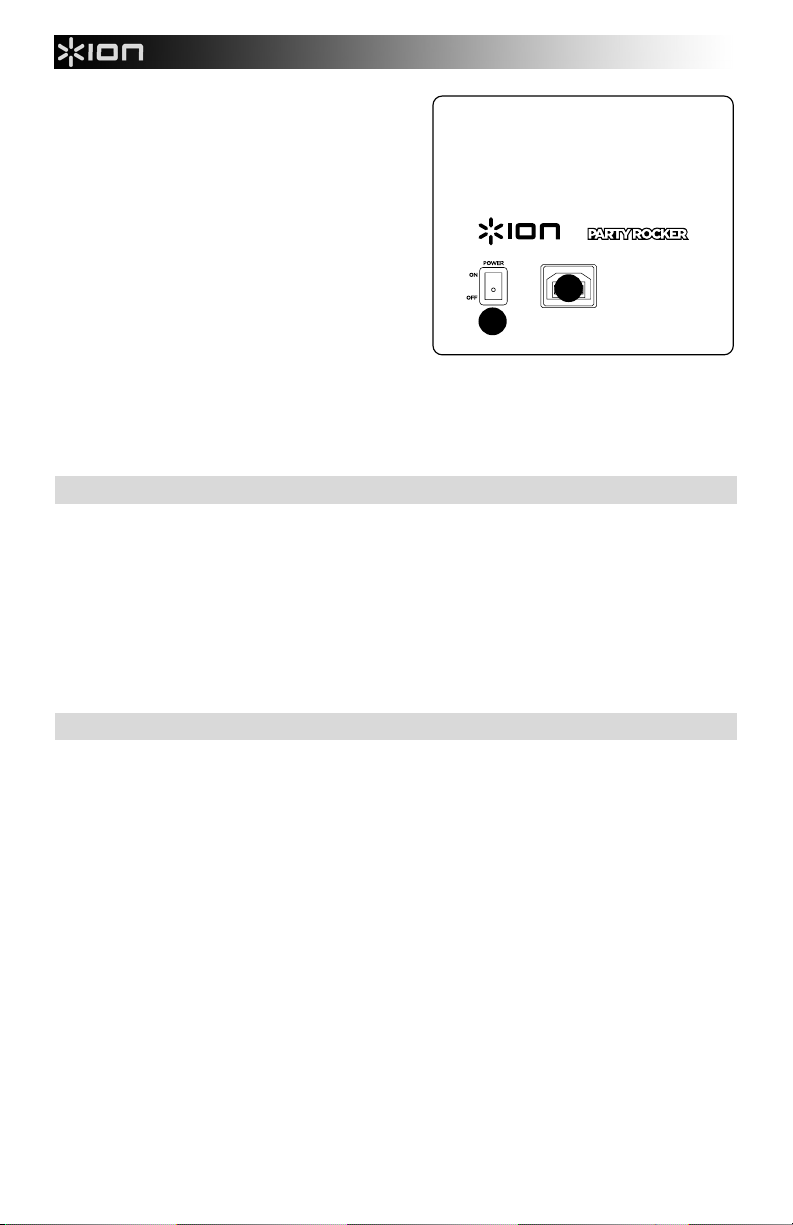
REAR PANEL
POWER
Page 4
2. Auxiliary input: This stereo 1/8” input can be used
9
8
to connect a smartphone, MP3 player, or other audio
source.
3. Bluetooth®: The Paired LED will be lit when a
device is paired to PARTY ROCKER. This LED will
not be lit when PARTY ROCKER is first powered
on (unless it was previously paired with a device).
Press the Disconnect button to disconnect a
paired Bluetooth device.
4. Master Volume Control: This adjusts the
speaker’s main mix volume, which includes
Microphone Input, Auxiliary Input, and the audio of
a paired Bluetooth device.
5. Power LED: Indicates whether PARTY ROCKER
is on or off.
6. Light Mode: There are three modes to select from
for how the strobe lights react to the music.
• Beat = the light reacts to the beat of the
music.
• Party = dome light spins and changes color
whether there is music playing or not.
• Off = the lights in the dome can spin and
7. Dome: The dome light can spin and react to the music playing (depending on the Light Mode that is
8. Power Cable Input (IEC): Insert the included power cable here to power the unit.
9. Power ON/OFF Switch: Turns PARTY ROCKER on or off.
react to the music playing (depending on the Light Mode that is selected).
selected).
*WARNING: Do not look directly into the
dome light. Do not sit, stand, or apply
pressure on the dome light.
Troubleshooting
If the sound is distorted: Try lowering the volume control of your sound source or musical instrument. Also,
try to reduce the overall volume of PARTY ROCKER.
If there is too much bass: Try adjusting the tone or EQ control on your sound source to lower the bass
level. This will allow you to play the music louder before clipping (distortion) occurs.
If there is a high-pitched whistling noise when using microphones: This is probably feedback. Point the
microphone away from the speaker.
If you can’t hear the microphone over the music volume: Turn down the music volume from your source.
Connecting with a Bluetooth Device
1. Turn on your Bluetooth device.
2. Power on PARTY ROCKER and it will automatically go into pairing mode to search for Bluetooth
devices. You will know you are in pairing mode when the LED is off.
3. If your Bluetooth device is not able to pair to the amp, press the disconnect button on the amp to break
previous Bluetooth connections and reset the Bluetooth module.
4. Navigate to your Bluetooth device’s setup screen, find “ION Speaker” and connect.
Note: If your Bluetooth device prompts for a pairing code, enter ‘
5. Paired LED will light up solid when it is 'paired'.
Note: If you experience trouble pairing or playing music, update your device's OS.
6. To disconnect pairing, press the ‘Disconnect’ button on PARTY ROCKER.
7. To connect to another Bluetooth device, repeat steps 3-4.
Note: Maximum range will be achieved when using devices with Bluetooth 4.0.
4
0000’.
Page 5

Guía de inicio rápido (Español)
1
2
4
5
6
7
3
Soporte
Para registrar el producto, visite el sitio web de ION: ionaudio.com
Para obtener la información más completa acerca de este producto, visite
ionaudio.com/partyrocker
Para soporte adicional del producto, visite ionaudio.com/support
Para información acerca de la seguridad y la garantía, visite
ionaudio.com/warranty
ADVERTENCIA: NO salpique ni sumerja el producto en agua u otros líquidos. No
lo use bajo la lluvia. Úselo sólo en lugares secos.
ADVERTENCIA: NO mire directamente a la luz del domo. No se siente, se pare o
aplique presión sobre la luz del domo.
Diagrama de instalación y conexión rápida
1. Asegúrese que todos los artículos incluidos en Contenido de la caja, al comienzo de esta guía, estén incluidos en la
caja.
2. LEA EL FOLLETO DE INSTRUCCIONES DE SEGURIDAD ANTES DE UTILIZAR EL PRODUCTO.
3. Mueva el interruptor de modo de luz a OFF
4. Baje el control de volumen maestro del Party Rocker.
5. Encienda el Party Rocker.
6. Conecte su reproductor de música con un cable de audio o Bluetooth (para obtener más detalles de esto, consulte
Conexión con un dispositivo Bluetooth)
7. Ajuste el volumen en su reproductor musical y en el Party Rocker según sea necesario.
8. Ajuste el interruptor de modo de luz del Party Rocker según sea necesario.
9. Apague el Party Rocker cuando no lo use.
MICRÓFONO
PANEL SUPERIOR
REPRODUCTOR DE MP3
(no incluido)
PANEL LATERAL
Diagrama y Descripción
1. Entrada de Micrófono con control de volumen (1/4"):
Esta entrada mono admite una entrada de 1/4" tal como
un micrófono, una guitarra u otro instrumento musical.
2. Entrada auxiliar: Esta entrada de 1/8" estéreo se puede
usar para conectar un téléphone, MP3 u otra fuente de
audio.
* ADVERTENCIA: No mire directamente a
la luz del domo. No se siente, se pare o
5
aplique presión sobre la luz del domo.
CONTENIDO DE LA CAJA
PARTY ROCKER
Micrófono y mic cable
cable de audio con conectores
de 1/8 pulg. (3.5 mm)
cable de alimentación
Guía de inicio rápido
Folleto de información sobre la
seguridad y la garantía
SUMINISTRO
ELÉCTRICO
Page 6
3. Bluetooth: El LED Paired (Apareado) se enciende
9
8
cuando se aparea un dispositivo al PARTY ROCKER.
Este LED no se enciende cuando el PARTY ROCKER
se enciende por primera vez (a menos que hubiera
sido apareado previamente con un dispositivo). Pulse
el botón Disconnect (Desconectar) para desconectar
un dispositivo Bluetooth apareado.
4. Control de volumen maestro: Este control ajusta el
volumen de la mezcla principal del altavoz, que incluye
la entrada de micrófono, la entrada auxiliar, y el audio
de un dispositivo Bluetooth apareado.
5. LED de encendido: Indica cuando el PARTY
ROCKER está encendido o apagado.
6. Modo de luz: Es posible seleccionar entre tres modos
de reacción de la luz estroboscópica a la música.
• Beat = la luz reacciona al ritmo de la música.
• Party = el domo luz gira y cambia de color ya sea
que se esté reproduciendo música o no.
• Las luces del domo pueden girar y reaccionar a
7. Domo: El domo luz puede girar y reaccionar a la música que se reproduce (en función del modo de luz
8. Interruptor de encendido/apagado: Enciende y apaga el PARTY ROCKER.
9. Entrada del cavo de alimentación (IEC): Inserte aquí el cable de alimentación incluido para alimentación la
la música que se reproduce (en función del modo de luz seleccionado).
seleccionado).
unidad.
Solución de Problemas
Si el sonido está distorsionado: Pruebe bajando el control de volumen de su fuente de sonido o instrumento
musical. Pruebe también reduciendo el volumen general del PARTY ROCKER.
Si hay demasiados graves: Intente ajustando el control de tono o ecualización de su fuente de sonido para reducir
el nivel de graves. De esta forma podrá reproducir la música con más volumen antes de que se produzca el recorte
(distorsión).
Si hay un silbido agudo cuando se usan micrófonos: Probablemente sea realimentación. Apunte los micrófono
apartándolos del altavoz.
Si no puede oír el micrófono por arriba del volumen de la música: Disminuya el volumen de la música en su
fuente.
Conexión con un Dispositivo Bluetooth
1. Encienda su dispositivo Bluetooth.
2. Encienda el PARTY ROCKER, que pasará automáticamente al modo de apareamiento para buscar
dispositivos Bluetooth. Se dará cuenta de que está en modo de apareamiento cuando el LED está apagada.
3. Si su dispositivo Bluetooth no es capaz de aparearse con el amplificador, pulse el botón de desconexión del
amplificador para romper las conexiones Bluetooth anteriores y reinicie el módulo Bluetooth
4. Navegue a la pantalla de configuración de su dispositivo Bluetooth, busque “ION Speaker” y conecte.
Nota: Si su dispositivo Bluetooth solicita un código de apareamiento, ingrese ‘0000’.
5. El Paired (Apareado) LED PARTY ROCKER se enciende con luz permanente cuando está 'apareado'.
Nota: Si tiene problemas para aparear su dispositivo o reproducir música, actualice el programa operativo de
su dispositivo.
6. Para desconectar el apareamiento, pulse el botón ‘Disconnect’ del PARTY ROCKER.
7. Para conectarse a otro dispositivo Bluetooth, repita los pasos 3 y 4.
Nota: El alcance máximo se logra cuando se utilizan dispositivos con Bluetooth 4.0.
6
Page 7

Guide d'utilisation rapide (Français)
A
1
2
4
5
6
7
3
Assistance technique
Pour enregistrer ce produit, veuillez visiter le site d’ION Audio :
ionaudio.com
Pour les toutes dernières informations concernant ce produit,
veuillez visiter le site ionaudio.com/partyrocker
Pour de l’assistance supplémentaire, veuillez visiter le site
ionaudio.com/support.
Pour de plus amples informations concernant les consignes de
sécurité/la garantie, veuillez visiter le site
ionaudio.com/warranty.
MISE EN GARDE : NE PAS exposer l’appareil aux éclaboussures ou l’immerger dans de l’eau ou autres
liquides. Ne pas utiliser sous la pluie. Utiliser seulement dans des endroits secs.
MISE EN GARDE : NE PAS regarder directement dans la lumière du dôme. Ne pas s'asseoir, se tenir debout
ou exercer une pression sur le dôme.
Démarrage rapide/Schéma de connexion
1. Assurez-vous que tous les articles énumérés dans la section Contenu de la boîte au début de ce guide
sont inclus dans la boîte.
2. VEUILLEZ LIRE LE LIVRET DES CONSIGNES DE SÉCURITÉ AVANT D'UTILISER LE PRODUIT.
3. Mettez le sélecteur Light Mode sur OFF.
4. Mettez le bouton Master Volume du Party Rocker au plus bas.
5. Mettez le Party Rocker sous tension.
6. Branchez votre lecteur de musique avec un câble audio ou par Bluetooth (consultez la section
Jumelage d’un appareil Bluetooth pour de plus amples détails).
7. Réglez le volume de votre lecteur de musique et du Party Rocker au niveau souhaité.
8. Réglez le sélecteur Light Mode du Party Rocker au mode désiré.
9. Mettez le Party Rocker hors tension lorsque vous ne l’utilisez pas.
PANNEAU SUPÉRIEUR
MICROPHONE
LECTEUR DE MP3
(non inclus)
Schéma et Description
1. Entrée microphone avec
commande de volume (1/4 po) :
Cette entrée mono peut accueillir un
câble de 1/4 po pour microphone,
guitare ou un autre instrument de
musique.
2. Entrée auxiliaire : Cette entrée
stéréo 1/8 po permettent de brancher
un lecteur de téléphone, un lecteur
MP3 ou autres sources audio.
7
CONTENU DE LA BOÎTE
PARTY ROCKER
Microphone et mic cable
Câble audio avec connecteurs 1/8’’ po
(3,5 mm)
Câble d'alimentation
Guide d'utilisation rapide
Le livret des consignes de sécurité et
des informations concernant la garantie
LIMENTATION
PANNEAU LATÉRAL
Page 8

3. Bluetooth : La DEL de jumelage sera allumée lorsqu'un
9
8
périphérique est jumelé au PARTY ROCKER. Cette DEL
ne sera pas allumée lorsque le PARTY ROCKER est
d'abord alimenté (à moins qu'il a été jumelé avec un
périphérique auparavant). Appuyez sur le d'un
périphérique Bluetooth jumelé.
4. Volume général : Ce bouton permet de régler le
volume du mix général qui comprend l'entrée
microphone, l’entrée auxiliaire, et l'audio d'un
périphérique Bluetooth jumelé.
5. Témoin d'alimentation DEL : Indique si le PARTY
ROCKER est sous ou hors tension.
6. Mode d’éclairage : Il existe trois modes d’éclairage qui
vous permettent de choisir comment les lumières
stroboscopiques réagissent à la musique.
• Beat = La lumière réagit au rythme de la
musique.
• Party = Le dôme lumière tourne et change de
couleur qu'il y ait ou non de la musique.
• Off = Les lumières du dôme peuvent tourner et
réagir à la musique (selon le mode d'éclairage
7. Dôme : Le dôme lumière peut tourner et réagir à la
8. Interrupteur Marche/Arrêt: Permet de mettre le
9. Entrée du câble d'alimentation (IEC) : Brancher le câble d'alimentation ci-inclus ici pour d'alimentation
sélectionné).
musique selon le mode d'éclairage sélectionné.
PARTY ROCKER sous et hors tension.
l'appareil.
* MISE EN GARDE : Ne pas regarder
directement dans la lumière du dôme. Ne pas
s'asseoir, se tenir debout ou exercer une pression
sur le dôme.
Guide de Dépannage
Lorsqu’il y a de la distorsion : Essayez de diminuer le volume sur l’appareil d’entrée audio ou l’instrument de
musique. Essayez également de réduire le volume général du PARTY ROCKER.
Lorsqu’il y a trop de basses fréquences : Essayez de régler le niveau de tonalité et d’égalisation sur l’appareil de
source d’entrée audio afin de diminuer le niveau des basses fréquences. Cela vous permettra d'augmenter le volume
de la musique avant que l'écrêtage se produise.
Lorsqu’il y a un sifflement aigu lors de l’utilisation des microphones : Ceci est probablement causé par l’effet
Larsen (feedback). Dirigez les microphone loin des haut-parleurs.
Si vous ne pouvez entendre le microphone au-dessus de la musique : diminuez le volume de la musique de la
source audio.
Jumelage d’un Appareil Bluetooth
1. Mettez votre périphérique Bluetooth sous tension.
2. Mettez le PARTY ROCKER sous tension et il passera automatiquement en mode jumelage afin de rechercher
les périphériques Bluetooth. Vous saurez que vous êtes en mode jumelage lorsque la DEL devient éteinte.
3. Si votre périphérique Bluetooth ne parvient pas à se jumeler à l’amplificateur, appuyez sur le bouton
Disconnect de l’amplificateur afin de supprimer la connexion à d'autres périphériques Bluetooth et remettre à
zéro le module Bluetooth.
4. Accédez à l'écran de configuration de votre périphérique Bluetooth, recherchez « ION Speaker » et lancez le
jumelage.
Remarque : Si votre périphérique Bluetooth vous demande d’entrer un code de jumelage, entrez « 0000 ».
5. La jumelage DEL du PARTY ROCKER s’allumera lorsque le jumelage est réussi.
Remarque : Si vous éprouvez de la difficulté à jumeler votre appareil ou à faire jouer de la musique, faites une
mise à jour du système d'exploitation de votre appareil.
6. Appuyez sur le bouton Disconnect du PARTY ROCKER pour déconnecter le périphérique Bluetooth branché.
7. Pour jumeler un autre périphérique Bluetooth, répétez les étapes 3 et 4.
Remarque : La plage maximale peut être atteinte avec l’utilisation d’appareils dotés de Bluetooth 4.0.
8
Page 9

Guida rapida (Italiano)
(
)
1
2
4
5
6
7
3
Assistenza
Per effettuare la registrazione del prodotto, recarsi alla pagina Web
di ION: ionaudio.com
Per conoscere le ultime informazioni in merito a questo prodotto,
recarsi alla pagina ionaudio.com/partyrocker
Per ulteriore assistenza, recarsi alla pagina ionaudio.com/support
Per informazioni sulla sicurezza/garanzia, recarsi alla pagina
ionaudio.com/warranty
AVVERTENZA: NON schizzare né immergere in acqua o in altri
liquidi. Non va utilizzato sotto la pioggia. Utilizzare il prodotto unicamente in luoghi asciutti.
AVVERTENZA: NON guardare direttamente la lampada a cupola. Non sedersi, stare in piedi, né applicare
pressione sulla lampada a cupola.
Guida rapida / Schema dei collegamenti
1. Assicurarsi che tutti gli elementi elencati nel paragrafo "Contenuti della confezione" sul frontespizio
della presente guida si trovino nella confezione.
2. LEGGERE ATTENTAMENTE IL LIBRETTO DELLE ISTRUZIONI DI SICUREZZA PRIMA DI
UTILIZZARE IL PRODOTTO.
3. Spostare l'interruttore Light Mode (modalità luce) su OFF
4. Abbassare il Volume Master sul Party Rocker.
5. Accendere il Party Rocker.
6. Collegare il lettore musicale con un cavo audio o Bluetooth (per maggiori informazioni in merito, si veda
il paragrafo Collegamento di un dispositivo Bluetooth)
7. Regolare il volume del lettore musicale e del Party Rocker come desiderato.
8. Regolare l'interruttore Light Mode (modalità luce) sul Party Rocker come desiderato.
9. Spegnere il Party Rocker quando non è in uso.
MICROFONO
PANNELLO SUPERIORE
LETTORE MP3
non in dotazione
Diagramma e Descrizione
1. Ingresso microfono con
controllo di guadagno volume
(1/4"): questo ingresso mono
accetta un ingresso da 1/4" quali
un microfono, chitarra o altro
strumento musicale.
2. Ingresso ausiliario: questo
ingresso stereo da 1/8" può
essere utilizzato per collegare un
téléphone, un lettore MP3 o altre
sorgenti audio.
9
CONTENUTI DELLA CONFEZIONE
PARTY ROCKER
microfono e mic cavo
Cavo audio con connettori da 1/8”
(3,5mm)
Cavo di alimentazione
Guida rapida
Libretto di istruzioni di sicurezza e
garanzia
PANNELLO LATERALE
ALIMENTAZIONE
Page 10

3. Bluetooth: il LED accoppiato sarà acceso quando un
9
8
dispositivo è accoppiato al PARTY ROCKER. Il LED non
sarà acceso quando il PARTY ROCKER viene acceso (a
meno che non fosse accoppiato in precedenza con un
dispositivo). Premere il pulsante Disconnect (scollega)
per scollegare di un dispositivo Bluetooth accoppiato.
4. Comando volume Master: questo comando regola il
volume principale di mix dell'altoparlante, che
comprende l'ingresso microfono, l'ingresso ausiliario
(aux), e l'audio di un dispositivo Bluetooth accoppiato.
5. LED di alimentazione: indica se il PARTY ROCKER è
acceso o spento.
6. Modalità luci: le luci stroboscopiche possono reagire
alla musica in tre modalità diverse, tra cui è possibile
scegliere.
• Beat = la luce reagisce al battito della musica.
• Party = la cupola luce gira e cambia colore sia
che sia riprodotta musica o meno.
• Off = Le luci a livello della cupola possono
ruotare e reagire alla musica suonata (a seconda
7. Dome (cupola): la cupola luce può girare e reagire alla
8. Interruttore di alimentazione ON/OFF: accende o spegne il PARTY ROCKER.
9. Ingresso cavo di alimentazione (IEC): inserire il cavo di alimentazione in dotazione per alimentazione
della Modalità luce selezionata).
musica che viene riprodotta (a seconda della modalità
luci selezionata).
l'apparecchio.
* AVVERTENZA: non guardare direttamente la
lampada a cupola. Non sedersi, stare in piedi, né
applicare pressione sulla lampada a cupola.
Risoluzione di Problemi
Il suono è distorto: provare ad abbassare il volume della propria fonte audio o dello strumento musicale. Inoltre,
provare a ridurre il volume complessivo del PARTY ROCKER.
Eccessivi bassi: provare a regolare la tonalità o il comando EQ a livello della fonte audio per abbasare il livello dei
bassi. Ciò permetterà di suonare la musica più forte prima che salti (che si verifichi distorsione).
Quando si utilizzano i microfoni si verifica un fischio ad alto pitch: si tratta probabilmente di ritorno. Puntare i
microfoni lontani dalle casse.
Se non si sente il microfono al di sopra del volume della musica: abbassare il volume della musica a livello della
fonte.
Collegamento a un Dispositivo Bluetooth
1. Accendere il dispositivo Bluetooth.
2. Accendere il PARTY ROCKER: entrerà automaticamente in modalità di accoppiamento per cercare dispositivi
Bluetooth. Siete in modalità di accoppiamento quando il LED è spenta.
3. Se il dispositivo Bluetooth non è in grado di allinearsi con l'amp, premere il tasto di scollegamento sull'amp per
interrompere precedenti collegamenti Bluetooth e resettare il modulo Bluetooth.
4. Navigare nella schermata di configurazione del dispositivo Bluetooth, trovare “ION Speaker” e collegarlo.
Nota bene: se il dispositivo Bluetooth richiede un codice, inserire ‘0000’.
5. Il accoppiato LED del PARTY ROCKER rimarrà illuminato quando è "accoppiato".
Nota bene: in caso di problemi nell'accoppiare gli apparecchi o nel riprodurre la musica, aggiornare il sistema
operativo del dispositivo.
6. Per annullare il collegamento, premere il pulsante "Disconnect" (scollega) sul PARTY ROCKER.
7. Per collegarlo ad un altro dispositivo Bluetooth, ripetere i passaggi 3-4.
Nota bene: la portata massima sarà raggiunta utilizzando dispositivi dotati di Bluetooth 4.0.
10
Page 11

Kurzanleitung (Deutsch)
1
2
4
5
6
7
3
Kundendienst
Um Ihr Produkt zu registrieren, besuchen Sie die ION-Website auf:
ionaudio.com
Die neuesten Informationen zu diesem Produkt finden Sie auf
ionaudio.com/partyrocker.
Um weitere Unterstützung zu Ihrem Produkt zu erhalten, besuchen Sie
ionaudio.com/support
Für Informationen zur Sicherheit/Garantie, besuchen Sie
ionaudio.com/warranty
ACHTUNG: VERMEIDEN Sie es, das Gerät mit Wasser oder anderen
Flüssigkeiten zu bespritzen und tauchen Sie das Gerät niemals in eine Flüssigkeit. Verwenden Sie das Gerät nicht
bei Regen. Verwenden Sie es nur in trockenen Räumen.
WARNUNG: Blicken Sie NICHT direkt in das Licht der Kuppel. Vermeiden Sie es, auf der Lichtkuppel zu stehen, zu
sitzen oder Druck auf die Kuppel auszuüben.
Schnelles Einrichten / Anschlussdiagramm
1. Achten Sie darauf, dass alle am Beginn dieser Anleitung aufgeführten Teile in der Schachtel enthalten sind.
2. LESEN SIE DIE SICHERHEITSHINWEISE, BEVOR SIE DAS PRODUKT VERWENDEN.
3. Bringen Sie den Lichtmodus-Schalter in die Position AUS
4. Regeln Sie die Gesamtlautstärke am Party Rocker herunter.
5. Schalten Sie den Party Rocker ein.
6. Verbinden Sie Ihren Musik-Player mit einem Audiokabel oder via Bluetooth (siehe Verbindung mit einem
Bluetooth-Gerät für weitere Details zu diesem Thema)
7. Stellen Sie die Lautstärke auf Ihrem Musik-Player und am Party Rocker nach Wunsch ein.
8. Stellen Sie den Lichtmodus-Schalter am Party Rocker nach Bedarf ein.
9. Schalten Sie den Party Rocker aus, wenn das Gerät nicht in Gebrauch ist.
MIKROFON
OBERSEITE
MP3-PLAYER
(nicht mitgeliefert)
Bedienelemente
1. Mikrofon Eingang mit Lautstärke-
Regler (6,3mm Klinke): Dieser Mono
Eingang ist kompatibel mit normalen
Klinkenkabeln von einem Mikrofon,
einer Gitarre oder einem anderen
Musikinstrument.
2. AUX-Eingang: Dieser 1/8"-Stereo-
Eingang kann dazu verwendet werden,
téléphone, einen MP3-Player oder eine
andere Audio-Quelle anzuschließen.
3. Bluetooth: Die Koppel-LED leuchtet,
wenn ein Gerät mit dem PARTY
ROCKER gekoppelt ist. Diese LED
leuchtet nicht, wenn der PARTY
ROCKER zum ersten Mal eingeschaltet wird (es sei denn, er wurde zuvor mit einem Gerät gekoppelt). Drücken Sie die
Taste Trennen, um ein angeschlossenes Bluetooth-Gerät zu trennen.
4. Gesamtlautstärkeregler: Regelt die Gesamtlautstärke des Lautsprechers. Dies beinhaltet den Mikrofon-Eingang, den
AUX-Eingang, und das Audiosignal eines gekoppelten Bluetooth-Geräts.
11
INHALT DER VERPACKUNG
PARTY ROCKER
Mikrofon und Mikrofonkabel
Audiokabel mit 1/8" (3,5 mm)
Anschlüssen
Netzkabel
Kurzanleitung
Broschüre mit den Sicherheits-
und Garantierichtlinien
SEITENTEIL
STROM
Page 12

5. Power-LED: Zeigt an, ob PARTY ROCKER ein- oder
9
8
ausgeschaltet ist.
6. Lichtmodus: Es gibt drei Modi, die bestimmen, wie die
Stroboskoplichter auf die Musik reagieren.
• Takt = Das Licht regiert auf den Takt der Musik.
• Party = Die Kuppel Licht dreht sich und wechselt die
Farbe, egal ob Musik gespielt wird oder nicht.
• Aus = Die Lichter in der Kuppel drehen sich und
reagieren (je nachdem welcher Lichtmodus gewählt
7. Kuppel: Die Kuppel Licht kann sich drehen und auf die
8. Power ON/OFF Schalter: Schaltet den PARTY ROCKER
9. Netzkabel-Eingang (IEC): Schließen Sie hier das
wurde) auf die gespielte Musik.
gespielte Musik reagieren (je nachdem welcher Lichtmodus
gewählt wurde).
an oder aus.
mitgelieferte Netzkabel zum Netz der Batterie an.
* WARNUNG: Blicken Sie nicht direkt in das Licht
der Kuppel. Vermeiden Sie es, auf der
Lichtkuppel zu stehen, zu sitzen oder Druck auf
die Kuppel auszuüben.
Fehlerbehebung
Der Ton klingt verzerrt: Drehen Sie den Lautstärkeregler an Ihrer Tonquelle oder dem Musikinstrument zurück.
Versuchen Sie auch, die Gesamtlautstärke des PARTY ROCKER zu reduzieren.
Zu viel Bass: Versuchen Sie, den Ton- oder EQ-Regler Ihrer Tonquelle anzupassen, um den Bass zu verringern.
Dies ermöglicht Ihnen, die Musik lauter abzuspielen, bevor der Klang verzerrt.
Bei der Verwendung von Mikrofonen tritt einer hoher Pfeifton auf: Hier handelt es sich wahrscheinlich um einen
Rückkopplungseffekt. Richten Sie es so ein, dass die Mikrofone vom Lautsprecher wegzeigen.
Wenn das Mikrofon im Vergleich zur Musik zu leise eingestellt ist: Verringern Sie die Musiklautstärke Ihrer
Quelle.
Verbindung mit Einem Bluetooth-Gerät
1. Schalten Sie Ihr Bluetooth-Gerät ein.
2. Schalten Sie PARTY ROCKER ein und das Gerät wird automatisch in den Koppel-Modus schalten, um nach
Bluetooth-Geräten zu suchen. Sie sind im Koppel-Modus, wenn die LED nicht ausgeschaltet.
3. Wenn Ihr Bluetooth-Gerät nicht an den Verstärker gekoppelt werden kann, drücken Sie am Verstärker die
Taste Trennen, um alte Bluetooth-Verbindungen zu trennen und das Bluetooth-Modul zurückzusetzen.
4. Navigieren Sie zum Setup-Bildschirm Ihres Bluetooth-Geräts, suchen Sie "ION Speaker" und verbinden Sie die
Geräte.
Hinweis: Wenn Ihr Bluetooth-Gerät die Eingabe eines Koppel-Codes anfordert, geben Sie '
5. Die gekoppelt PARTY ROCKER LED wird durchgehend leuchten, wenn die Geräte "gekoppelt" sind.
Hinweis: Wenn Sie Probleme bei der Musikwiedergabe oder beim Koppeln Ihres Gerätes haben, aktualisieren
Sie das OS Ihres Gerätes.
6. Wenn Sie die Geräte entkoppeln möchten, drücken Sie die Taste "Trennen" am PARTY ROCKER.
7. Um ein anderes Bluetooth-Gerät zu verbinden, wiederholen Sie die Schritte 3-4.
Hinweis: Die maximale Reichweite wird erreicht, wenn Sie Geräte mit Bluetooth 4.0 verwenden.
12
0000' ein.
Page 13

Snelstartgids (Nederlands)
1
2
4
5
6
7
3
Ondersteuning
Bezoek voor productregistratie de website van ION:
ionaudio.com
Surf naar ionaudio.com/partyrocker voor de laatste informatie
over dit product
Surf voor bijkomende productondersteuning naar
ionaudio.com/support
Surf voor informatie over veiligheid/garantie naar
ionaudio.com/warranty
WAARSCHUWING: NIET BESPATTEN of onderdompelen in water of andere vloeistoffen. Niet gebruiken in
de regen. Enkel op droge plekken gebruiken.
WAARSCHUWING: KIJK NIET RECHTSTREEKS in het licht van de bal. Ga niet zitten, noch staan en oefen
geen druk uit op de lichtbal.
MICROFOON
Snelle opstelling / Verbindingsschema
1. Zorg ervoor dat de doos alle voorwerpen bevat, opgesomd in Inhoud van de doos aan het begin van deze gids.
2. LEES DE BROCHURE MET VEILIGHEIDSVOORSCHRIFTEN VOORALEER HET PRODUCT TE
GEBRUIKEN.
3. Zet de schakelaar Lichtmodus in de positie UIT
4. Zet de hoofdvolumeknop van de Party Rocker op de laagste stand.
5. Zet de Party Rocker aan.
6. Verbind uw muziekspeler met een audiokabel of via Bluetooth (zie voor meer details Verbinding maken met
een Bluetooth-apparaat)
7. Pas het volume op uw muziekspeler en op de Party Rocker aan naar behoefte.
8. Pas de schakelaar Lichtmodus op de Party Rocker aan naar behoefte.
9. Zet de Party Rocker uit wanneer hij niet wordt gebruikt.
BOVENPANEEL
MP3-SPELE
(niet meegeleverd)
Diagram en Beschrijving Onderdelen
1. Input microfoon met volumebesturing (1/4"): Deze mono-
ingang accepteert 1/4"-input
zoals microfoon, gitaar of
andere muziekinstrumenten.
2. Aux-ingang: Deze stereo 1/8"ingang kan worden gebruikt om
een téléphone, mp3-speler of
andere geluidsbron te
verbinden.
13
INHOUD VERPAKKING
PARTY ROCKER
Microfoon en mic kabel
Audiokabel met connectoren van
1/8” (3,5 mm)
Stroomsnoer (standaard IEC)
Snelstartgids
Veiligheids- en garantie-informatie
ZIJPANEEL
STROOM
Page 14

3. Bluetooth: De LED Gekoppeld begint te branden
9
8
wanneer er een apparaat aan de PARTY ROCKER
wordt gekoppeld. Deze LED licht niet op wanneer de
PARTY ROCKER voor het eerst wordt aangezet (tenzij
het voorheen aan een apparaat was gekoppeld). Druk
op de knop Verbinding verbreken om een gekoppeld
Bluetooth-apparaat.
4. Hoofdvolumeregeling: Hiermee past u het maximale
volume van de hoofdmix in de luidspreker aan. Tot de
hoofdmix behoren de microfooningang, de aux-ingang,
en het geluidssignaal van een gekoppeld Bluetoothapparaat.
5. Stroom-LED: Geeft aan of PARTY ROCKER aan- of
uitgeschakeld is.
6. Lichtmodus: U kunt kiezen uit drie modi voor de
manier waarop de stroboscoop op de muziek reageert.
• Beat = het licht reageert op de beat van de
muziek.
• Party = de licht draait en verandert van kleur of
er nu muziek speelt of niet.
• Uit = De lichten op de lichtbal kunnen draaien
en reageren op de muziek die wordt afgespeeld
7. Bal: De licht kan draaien en reageren op de muziek
8. Stroom AAN/UIT schakelaar: Schakelt de PARTY ROCKER in of uit.
9. Stroomkabel-ingang (IEC): Steek de meegeleverde stroomkabel hierin om de unit op te stroom.
(afhankelijk van de geselecteerde Lichtmodus).
die speelt (afhankelijk van de geselecteerde lichtmodus).
* WAARSCHUWING: Kijk niet rechtstreeks in het
licht van de koepel. Niet zitten, staan noch druk
uitoefenen op de lichtkoepel.
Problemen Oplossen
Het geluid is vervormd: Probeer het volumeniveau aan de geluidsbron of het muziekinstrument lager te zetten.
Probeer ook om het hoofdvolume van de PARTY ROCKER te verminderen.
Er zijn teveel bassen: Probeer op de toon- of EQ-bedieningsknoppen aan uw geluidsbron het niveau van de lage
tonen te verlagen. Dit stelt u in staat de muziek luider te zetten vooraleer “afgeknipte” (vervormde) klanken optreden.
Er is een hoge fluitende pieptoon bij het gebruik van microfoons: Dit is waarschijnlijk feedback. Richt de
microfoon weg van de luidspreker.
Als u de microfoon niet kan horen boven het geluid van de muziek: Verlaag het volume van de muziek van uw
geluidsbron.
Een Bluetooth-Apparaat Koppelen
1. Zet uw Bluetooth-apparaat aan.
2. Bij het aanzetten van PARTY ROCKER zet het zich automatisch in koppelmodus, om te zoeken naar
Bluetooth-apparaten. U merkt wanneer u zich in koppelingsmodus bevindt als de LED niet uitgeschakeld.
3. Als uw Bluetooth-apparaat zich niet kan koppelen aan de versterker, druk dan op de knop Verbinding
verbreken op de versterker om de vorige Bluetooth-verbindingen te verbreken en de Bluetooth-module
opnieuw in te stellen.
4. Navigeer naar het instelscherm van uw Bluetooth-apparaat, zoek naar "ION Speaker" en maak verbinding.
Opmerking: Als uw Bluetooth-apparaat om een koppelingscode verzoekt, voer dan '0000' in.
5. Na 'koppeling' gaat de LED op PARTY ROCKER ononderbroken branden.
Opmerking: Als u problemen ondervindt bij het koppelen van uw apparaat of het afspelen van muziek, update
dan het besturingssysteem van uw apparaat.
6. Om de koppeling ongedaan te maken, drukt u op de knop 'Verbinding verbreken' op de PARTY ROCKER.
7. Om het te verbinden met een ander Bluetooth-apparaat, herhaalt u stappen 3-4.
Opmerking: Het maximumbereik wordt bereikt met apparaten die zijn voorzien van Bluetooth 4.0.
14
Page 15

Snabbstartsguide (Svenska)
1
2
4
5
6
7
3
Stöd
För produktregistrering skall du besöka ION-webbsidan:
ionaudio.com
För senaste information om denna produkt skall du besöka
webbsidan ionaudio.com/partyrocker
För ytterligare produktstöd skall du besöka webbsidan
ionaudio.com/support
För säkerhets- och garantiinformation skall du besöka webbsidan
ionaudio.com/warranty
VARNING: STÄNK INTE eller DOPPA INTE i vatten eller andra vätskor. Använd inte vid regn. Använd
endast på torra platser.
VARNING: TITTA INTE direkt i takbelysningen. Sitt inte, stå inte och tryck inte på takbelysningen.
Snabbstart/ kopplingsdiagram
1. Försäkra dig att alla delar som listas i förpackningens innehåll i början av denna bruksanvisning finns
med i förpackningen.
2. LÄS SÄKERHETSANVISNINGARNA INNAN DU ANVÄNDER DENNA PRODUKT.
3. Ställ Ljusläge-brytaren på OFF.
4. Sänk Huvudvolymen på Party Rocker.
5. Slå på Party Rocker.
6. Anslut din musikspelare med en ljudkabel eller via Bluetooth (se kapitlet Ansluta med en Bluetooth-
apparat för mer information om detta)
7. Justera volymen på din musikspelare och på Party Rocker som det behövs.
8. Justera Ljusläge-brytaren på Party Rocker som det behövs.
9. Stäng av Party Rocker om du inte använder den.
MIKROFON
TOPPANEL
MP3-spelare (ingår inte)
Diagram och Delar Beskrivning
1. Mikrofonanslutning med
volymreglering (1/4"):
Till denna
monoanslutning kan du
ansluta en apparat
försedd med 1/4"
teleplugg, t.ex. mikrofon,
gitarr eller något annat
instrument.
2. Aux-ingång: Till denna
1/8" stereo-anslutning kan
du ansluta en
téléphoneMP3-spelare
eller någon annan
ljudkälla.
15
FÖRPACKNINGENS INNEHÅLL
• PARTY ROCKER
• Mikrofon och mikrofonkabel
• Ljudkabel med 1/8” (3.5mm)
kontakter
• Nätsladd (IEC)
• Snabbstartsguide
• Säkerhetsanvisningar och
garantiuppgifter
BAKPANEL
ELANSLUTNING
Page 16

3. Bluetooth®: Indikatorlampan Paired lyser när en apparat
9
8
har parkopplats med PARTY ROCKER. Indikatorlampan
tänds inte när du slår på PARTY ROCKER första gången
(om den inte redan tidigare har parkopplats med någon
apparat). Tryck på knappen Disconnect när du vill koppla loss
en parkopplad Bluetooth-apparat.
4. Master-ljudreglage: Med detta reglage kan du justera den
totala ljudstyrkan för högtalarna, dvs. mikrofoningång, auxingång och ljudstyrkan för en Bluetooth-apparat som
parkopplats med enheten.
5. Indikatorlampa Power: Lyser när PARTY ROCKER är
påslagen.
6. Light Mode: Du kan välja mellan tre lägen för hur strobe-ljuset
reagerar på musiken.
• Beat = ljuset reagerar på musikens rytm.
• Party = ljuset roterar och växlar färg hela tiden, även när
musik inte spelas.
• Off = Ljuset i takbelysningen kan snurra och reagera på
musiken som spelar (beroende av Ljusläget som har valts).
7. Kupa: ljuset kan rotera och reagera till musiken som spelas
(enligt det Light Mode-läge du valt).
8. Nätsladdens (IEC) anslutning: Anslut den medlevererade nätsladden här.
9. ON/OFF-strömbrytare: Med denna knapp kan du starta och stänga av PARTY ROCKER.
* VARNING: Titta inte direkt in i kupolen ljus. Sitt
inte, stå eller utöva påtryckningar på kupolen ljus.
Felsökning
Ljudet spricker: Pröva på att minska på ljudkällans eller instrumentets ljudstyrka. Pröva också på att minska
ljudstyrkan för hela PARTY ROCKER.
För mycket bas: Pröva på att justera ljudkällans tonkontroll eller EQ för att minska basen. På det viset kan du spela
musik med högre volym innan ljudet börjar skära sig (spricka).
Enheten ger ifrån sig ett högt visslande ljud när du använder mikrofoner: Det är sannolikt fråga om akustisk
rundgång (feedback). Se till att mikrofonen inte är riktad mot högtalarna.
Mikrofonljudet hörs inte över musiken: Justera ned ljudstyrkan på ljudkällan.
Ansluta med en Bluetooth-Apparat
1. Slå på önskad Bluetooth-apparat.
2. Slå på PARTY ROCKER, så går den automatiskt i parläge och börjar söka Bluetooth-apparater.
Indikatorlampan lyser inte när enheten är i off.
3. Om parkoppling av en Bluetooth-apparat till enheten inte lyckas trycker du på enhetens Disconnect-knapp för
att koppla loss tidigare Bluetooth-anslutningar, och återställer Bluetooth-enheten.
4. Gå till Bluetooth-apparatens setup-display, sök där efter “ION Speaker” och anslut den.
Observera: Om din Bluetooth-apparat frågar efter en kod för parkoppling ger du koden "0000".
5. PARTY ROCKERs parkopplad indikatorlampa tänds när parkopplingen har lyckats och lyser kontinuerligt så
länge enheten är parkopplad till en Bluetooth-appoarat.
Observera: Om du stöter på problem vid parkoppling eller musikuppspelning rekommenderar vi uppdatering
av den aktuella aparatens operativsystem.
6. När du vill koppla loss en parkopplad apparat trycker du på PARTY ROCKERs Disconnect-knapp.
7. Om du vill parkoppla den med en annan Bluetooth-apparat upprepar du steg 3-4.
Observera: Bluetooth fungerar på maxavstånd när apparaterna som parkopplas är försedda med Bluetooth 4.0.
16
Page 17

Pikakäyttöopas (Suomi)
1
2
4
5
6
7
3
Tuki
Vieraile tuotteen rekisteriin liittyen ION-verkkosivustolla osoitteessa:
ionaudio.com
Uusimmat tiedot tästä tuotteesta löytyvät osoitteesta
ionaudio.com/partyrocker
Tuotteeseen liittyvää lisätukea löytyy osoitteesta ionaudio.com/support
Turvallisuutta ja takuuta koskevat tiedot löytyvät osoitteesta
ionaudio.com/warranty
VAROITUS: ÄLÄ roiskuta tai upota veteen tai muihin nesteisiin. Älä käytä
sateessa. Käytä vain kuivissa paikoissa.
VAROITUS: ÄLÄ katso suoraan kattovalaistukseen. ÄLÄ istu, seiso tai kohdista painetta kattovalaistukseen.
Pika-asennus / kytkentäkaavio
1. Varmista, että kaikki tämän oppaan alussa mainitut laatikon sisältöön kuuluvat tarvikkeet ovat mukana.
2. LUE TURVAOHJEET ENNEN TUOTTEEN KÄYTTÖÄ.
3. Siirrä valon tilakytkin arvoon OFF (POIS PÄÄLTÄ)
4. Käännä Party Rocker -laitteen äänenvoimakkuutta alas.
5. Kytke Party Rocker päälle.
6. Kytke musiikkilaitteesi äänikaapelilla tai Bluetoothilla (katso lisätietoja kohdasta Kytkeminen Bluetooth -
laitteella)
7. Säädä musiikkilaitteesi ja Party Rocker -laitteesi äänenvoimakkuutta tarvittaessa.
8. Säädä Party Rocker -laitteen valon tilakytkintä tarvittaessa.
9. Kytke Party Rocker pois päältä, kun sitä ei käytetä.
MIKROFONI
Laitteen Osat
1. Mikrofoniliitäntä, jossa
äänenvoimakkuuden säätö
(1/4"): Tähän mono-liitäntään
voit liittää 1/4" liittimellä
varustetun laitteen, kuten
mikrofonin, kitaran tai muun
soittimen.
2. AUX-tulo: Tähän 1/8" stereoliitäntään voit liittää
téléphoneMP3-soittimen tai
muun äänilähteen.
3. Bluetooth®: Paired merkkivalo palaa, kun jokin
laite on liitetty pariksi PARTY
ROCKER in kanssa.
Merkkivalo ei syty, kun kytket
PARTY ROCKER -laitteen
virran päälle ensimmäisen kerran (ellei laitetta ole jo aikaisemmin liitetty pariksi jonkin laitteen kanssa). Paina
Disconnect-painiketta, kun haluat kytkeä pariksi liitetyn Bluetooth-laitteen irti.
YLÄPANEELI
MP3-soitin (ei kuulu
toimitukseen)
17
PAKKAUKSEN SISÄLTÖ
• PARTY ROCKER
• Mikrofoni ja mikrofonikaapeli
• Äänitaajuuskaapelin 1/8” (3,5
mm) liitin
• Virtajohto (IEC)
• Pikakäyttöopas
• Turvallisuusohjeet ja takuutiedot
TAKAPANEELI
SÄHKÖLIITÄNTÄ
Page 18

4. Master-äänenvoimakkuuden säädin: Tällä säätimellä
9
8
säädetään kaiuttimien kokonaisäänenvoimakkuutta, eli
mikrofonituloa, aux-tuloa ja yksikön kanssa pariksi liitetyn
Bluetooth-laitteen ääntä.
5. Virran merkkivalo: Palaa, kun PARTY ROCKER on
päällä.
6. Light Mode: Laitteessa on kolme valo-tilaa, joista voit valita, miten
valot reagoivat musiikkiin.
• Beat = valo reagoi musiikin tempoon.
• Party = kupu valo pyörii ja vaihtaa väriä koko ajan, silloinkin
kun musiikki ei soi.
• Off = Valot kuvussa voivat pyöriä ja reagoida toistettavaan
7. Kupu: Kupu kupu valo pyörii ja vaihtaa väriä koko ajan, silloinkin
8. Virtajohdon (IEC) liitäntä: Liitä mukana toimitettu liitäntäjohto
9. ON/OFF-virtakytkin: Tällä voit kytkeä PARTY ROCKER in päälle
musiikkiin (valitusta valon tilasta riippuen).
kun musiikki ei soi. on pyörivä ja se reagoi soitettavaan musiikkiin
(sen mukaan, minkä Light Mode -tilan olet valinnut).
tähän.
ja päältä pois.
*VAROITUS: Älä katso suoraan valokupuun.
Älä myöskään istu tai seiso valokuvun päällä tai
paina sitä millään tavalla.
Vianetsintä
Jos ääni säröilee: Kokeile pienentää äänilähteen tai soittimen äänenvoimakkuutta. Kokeile pienentää myös koko PARTY
ROCKER in äänenvoimakkuutta.
Jos bassoa on liikaa: Kokeile säätää äänilähteen äänensävysäädintä tai EQ:ta vähentääksesi bassoa. Näin pystyt
soittamaan musiikkia kovempaa ennen kuin ääni alkaa leikata (säröillä).
Jos laitteesta kuuluu korkeaa viheltävää ääntä, kun käytät mikrofoneja: Kyse on todennäköisesti akustisesta kierrosta
(feedbackistä). Suuntaa mikrofoni poispäin kaiuttimista.
Jos mikrofonin ääni ei kuulu musiikin äänen yli: Säädä äänilähteen äänenvoimakkuutta pienemmälle.
Bluetooth-Laitteen Yhdistäminen
1. Kytke haluamasi Bluetooth-laite päälle.
2. Kytke PARTY ROCKER päälle, niin se siirtyy automaattisesti pariksi liittämistilaan ja alkaa etsiä Bluetooth-laitteita. Kun
yksikkö on pariksi liittämistilassa, merkkivalo ei pyörii.
3. Ellei Bluetooth-laitteesi liittäminen pariksi yksikön kanssa onnistu, paina yksikön Disconnect-painiketta kytkeäksesi irti
aiemmat Bluetooth-yhteydet ja kytke Bluetooth-yksikkö päälle ja päältä pois.
4. Siirry Bluetooth-laitteen setup-näytölle, etsi sieltä “ION Speaker” ja liitä se.
Huomaa: Jos Bluetooth-laitteesi kysyy tunnusta pariksi liittämistä varten, anna koodi "0000".
5. PARTY ROCKER pariksi in merkkivalo syttyy, kun pariksi liittäminen on onnistunut ja palaa koko ajan, kun laite on
parina jonkin Bluetooth-laitteen kanssa.
Huomaa: Jos sinulla on ongelmia pariksi liittämisen tai musiikin toiston kanssa, suosittelemme käyttämäsi laitteen
käyttöjärjestelmän päivitystä.
6. Kun haluat kytkeä pariksi liitetyn laitteen irti, paina PARTY ROCKER in Disconnect-painiketta.
7. Jos haluat liittää sen pariksi jonkin muun Bluetooth-laitteen kanssa, toista vaiheet 3-4.
Huomaa: Bluetooth toimii maksimietäisyydellä, kun pariksi liitettävissä laitteissa on Bluetooth 4.0.
18
Page 19

Appendix (English)
Specifications
Dimensions: (L X W X H): 10” x 15” x 20.4"; 254 mm x 381 mm x 517 mm
Weight: 19.40 lbs.; 8.73 kg
Input Voltage: North America Units - 100-120VAC, 50/60 Hz; EU Units - 220-240VAC, 50/60 Hz
Output Power: 50W Peak
Frequency Response: (±3dB): 59 Hz-25.5 kHz (Aux)
Microphone type: Dynamic microphone
Supported Bluetooth Profile: A2DP
Bluetooth Range: Up to 100 feet*
Specifications are subject to change without notice.
*Bluetooth range is affected by walls, obstructions, and movement. Best performance is achieved in a wide
open area.
Trademarks and Licenses
The Bluetooth word mark and logos are owned by the Bluetooth SIG, Inc. and any use of such marks by ION
Audio is under license.
All other product or company names are trademarks or registered trademarks of their respective owners.
For the electrostatic discharge (ESD) test of EN301 489-1/17, it was found that manual operation is needed to
resume normal operation as intended after the test.
19
Page 20

www.ionaudio.com
MANUAL VERSION 1.3
 Loading...