

Page 1

Page 1
CONTROL PANEL
Mini Control Panel is a tool that enables you to access and customize your Iomega®Mini USB drive through the Mini Control
Panel Console. Messages and prompts guide you through the short Mini Control Panel installation setup that will make your
Iomega Mini USB drive more personal and fun. For the latest information about your Iomega Mini USB drive, visit our web site:
(http://www.iomega.com).
TABLE OF CONTENTS
REQUIREMENTS . . . . . . . . . . . . . . . . . . . . . . . . . . . . . . . . . . . . . . . . . . . . . . . . . . . . . . . . . . . . . . . . . .2
INSTALLATION . . . . . . . . . . . . . . . . . . . . . . . . . . . . . . . . . . . . . . . . . . . . . . . . . . . . . . . . . . . . . . . . . . .2
MINI CONTROL PANEL CUSTOMIZATION . . . . . . . . . . . . . . . . . . . . . . . . . . . . . . . . . . . . . . . . . . . . . . .3
Preferences . . . . . . . . . . . . . . . . . . . . . . . . . . . . . . . . . . . . . . . . . . . . . . . . . . . . . . . . . . . . . . .3
Hide/Show . . . . . . . . . . . . . . . . . . . . . . . . . . . . . . . . . . . . . . . . . . . . . . . . . . . . . . . . . . . . . . . .3
Help . . . . . . . . . . . . . . . . . . . . . . . . . . . . . . . . . . . . . . . . . . . . . . . . . . . . . . . . . . . . . . . . . . . . .3
About . . . . . . . . . . . . . . . . . . . . . . . . . . . . . . . . . . . . . . . . . . . . . . . . . . . . . . . . . . . . . . . . . . . .3
Visit our web site . . . . . . . . . . . . . . . . . . . . . . . . . . . . . . . . . . . . . . . . . . . . . . . . . . . . . . . . . . .3
Check for Newer Version . . . . . . . . . . . . . . . . . . . . . . . . . . . . . . . . . . . . . . . . . . . . . . . . . . . . .3
Exit . . . . . . . . . . . . . . . . . . . . . . . . . . . . . . . . . . . . . . . . . . . . . . . . . . . . . . . . . . . . . . . . . . . . . .3
MINI CONTROL PANEL POPUP MESSAGES . . . . . . . . . . . . . . . . . . . . . . . . . . . . . . . . . . . . . . . . . . . . .4
MINI CONTROL PANEL CONSOLE . . . . . . . . . . . . . . . . . . . . . . . . . . . . . . . . . . . . . . . . . . . . . . . . . . . . .4
LCD Display . . . . . . . . . . . . . . . . . . . . . . . . . . . . . . . . . . . . . . . . . . . . . . . . . . . . . . . . . . . . . . .5
Buttons . . . . . . . . . . . . . . . . . . . . . . . . . . . . . . . . . . . . . . . . . . . . . . . . . . . . . . . . . . . . . . . . . .5
PERSONALIZING YOUR IOMEGA MINI USB DRIVE . . . . . . . . . . . . . . . . . . . . . . . . . . . . . . . . . . . . . . . .5
Mini Control Panel Personal Icon . . . . . . . . . . . . . . . . . . . . . . . . . . . . . . . . . . . . . . . . . . . . . .5
Mini Control Panel Personal Sound . . . . . . . . . . . . . . . . . . . . . . . . . . . . . . . . . . . . . . . . . . . .5
Mini Control Panel Personal Label . . . . . . . . . . . . . . . . . . . . . . . . . . . . . . . . . . . . . . . . . . . . .5
Mini Drive Version . . . . . . . . . . . . . . . . . . . . . . . . . . . . . . . . . . . . . . . . . . . . . . . . . . . . . . . . . .5
ADVANCED FEATURES . . . . . . . . . . . . . . . . . . . . . . . . . . . . . . . . . . . . . . . . . . . . . . . . . . . . . . . . . . . . .6
Login/Logout Privacy Zone . . . . . . . . . . . . . . . . . . . . . . . . . . . . . . . . . . . . . . . . . . . . . . . . . . .6
Enable/Disable Write Protection . . . . . . . . . . . . . . . . . . . . . . . . . . . . . . . . . . . . . . . . . . . . . . .6
Synchronization Options . . . . . . . . . . . . . . . . . . . . . . . . . . . . . . . . . . . . . . . . . . . . . . . . . . . . .6
First Time Folder Synchronization . . . . . . . . . . . . . . . . . . . . . . . . . . . . . . . . . . . . . . . . . . . . . .6
Subsequent Folder Synchronization . . . . . . . . . . . . . . . . . . . . . . . . . . . . . . . . . . . . . . . . . . . .7
Folder Synchronization Rules . . . . . . . . . . . . . . . . . . . . . . . . . . . . . . . . . . . . . . . . . . . . . . . . .8
Create Personal Folders . . . . . . . . . . . . . . . . . . . . . . . . . . . . . . . . . . . . . . . . . . . . . . . . . . . . . .8
Send to Mini Drive . . . . . . . . . . . . . . . . . . . . . . . . . . . . . . . . . . . . . . . . . . . . . . . . . . . . . . . . . .8
Autorun . . . . . . . . . . . . . . . . . . . . . . . . . . . . . . . . . . . . . . . . . . . . . . . . . . . . . . . . . . . . . . . . . .9
Page 2

REQUIREMENTS
• Pentium II 266MHz
• 1.7MB free hard drive space
• Operating Systems: Windows®98SE*/ME/2000/ XP
• Administrative privileges for Windows 2000 and XP
• Web access
• Recommendations: Graphic accelerator that supports 24-bit color depth for best-quality graphics
* Windows 98SE requires a driver. Download from the Iomega website at: www.iomega.com
INSTALLATION
Download the latest version of Mini Control Panel from the Iomega web site: www.iomega.com
1. To install Mini Control Panel, double-click the Mini Control Panel icon.
MINI CONTROL PANEL READY FOR INSTALL
2. To create a shortcut to Mini Control Panel on your desktop check the box. A shortcut to Mini Control Panel and Uninstall
Mini Control Panel is automatically created in the Start menu.
3. Click
Finish to start using Mini Control Panel, or Cancel to abort the installation.
NOTE: Mini Control Panel is automatically loaded with Windows. You can disable this option from the Settings window.
INSTALL SCREEN
Wait a few moments until the Mini Control Panel icon is added to the system tray on the taskbar. Use this icon for the
easiest and fastest access to all Mini Control Panel functions.
TRAY ICON
CONTROL PANEL
Page 2
Page 3

MINI CONTROL PANEL CUSTOMIZATION
To access Mini Control Panel functions, right-click the Mini Control Panel icon on the taskbar. Select any of the following
options:
•
Preferences– Click here to set the Mini Control Panel settings.
• Hide/Show—Click either Hide or Show to turn off or display the Mini Control Panel Console.
•
Help—Opens the Mini Control Panel FAQ web page.
• About—Provides information about the current version, which is necessary when you contact Technical Support with a
request for help.
• Visit our web site—This selection takes you to the Iomega web site.
•
Check for Newer Version—This selection takes you to the Iomega software download web site. Check here for the most
current version of your software.
• Exit—Click here to exit Mini Control Panel. Iomega®Mini USB drive quick access and advanced functionality will be
disabled.
Preferences– The options are described below. Click any option to enable/disable it.
MINI CONTROL PANEL RIGHT CLICK MENU
MINI CONTROL PANEL SETTINGS
• Visual Indication—Check this option if you want the Mini Control Panel Console to appear on the desktop each time
you insert your Iomega Mini USB drive into a USB connector.
• Audio Indication—Check this option if you want an audible indication when you insert your Iomega Mini USB drive
into your computer’s USB port.
• Splash Screen—Check this option if you want a splash screen to display while Mini Control Panel is loading.
SPLASH SCREEN
CONTROL PANEL
Page 3
Page 4
• Autorun Process—Check this option to automatically launch various applications based on autorun instructions set on
your Iomega®Mini USB drive, similar to a CD-ROM autorun.
•
Load with Windows—Check this option to load Mini Control Panel when Windows starts, enabling Iomega Mini USB
drive advanced features. If you disable this feature, you will need to start Mini Control Panel manually from the Start
menu.
•
Create Desktop Shortcut—Check this option to create a Mini Control Panel shortcut on your desktop.
•
Always on Top—Check this option to keep the Mini Control Panel Console in front of all windows for quick and easy
access. If you disable this feature, the Mini Control Panel Console becomes a normal window.
•
Select Your Language–Select your language from the dropdown menu. Only the supported languages are shown.
Correct display of the selected language depends on the specific Windows version you are using and the system location you select.
If Windows does not support the language you have selected, a "?" is displayed instead of the language name.
Make sure that you can read the welcome message displayed next to the language selection box. If yes, click
OK. Close
the Mini Control Panel to implement the language change. All screen shots and text will change according to the language selected.
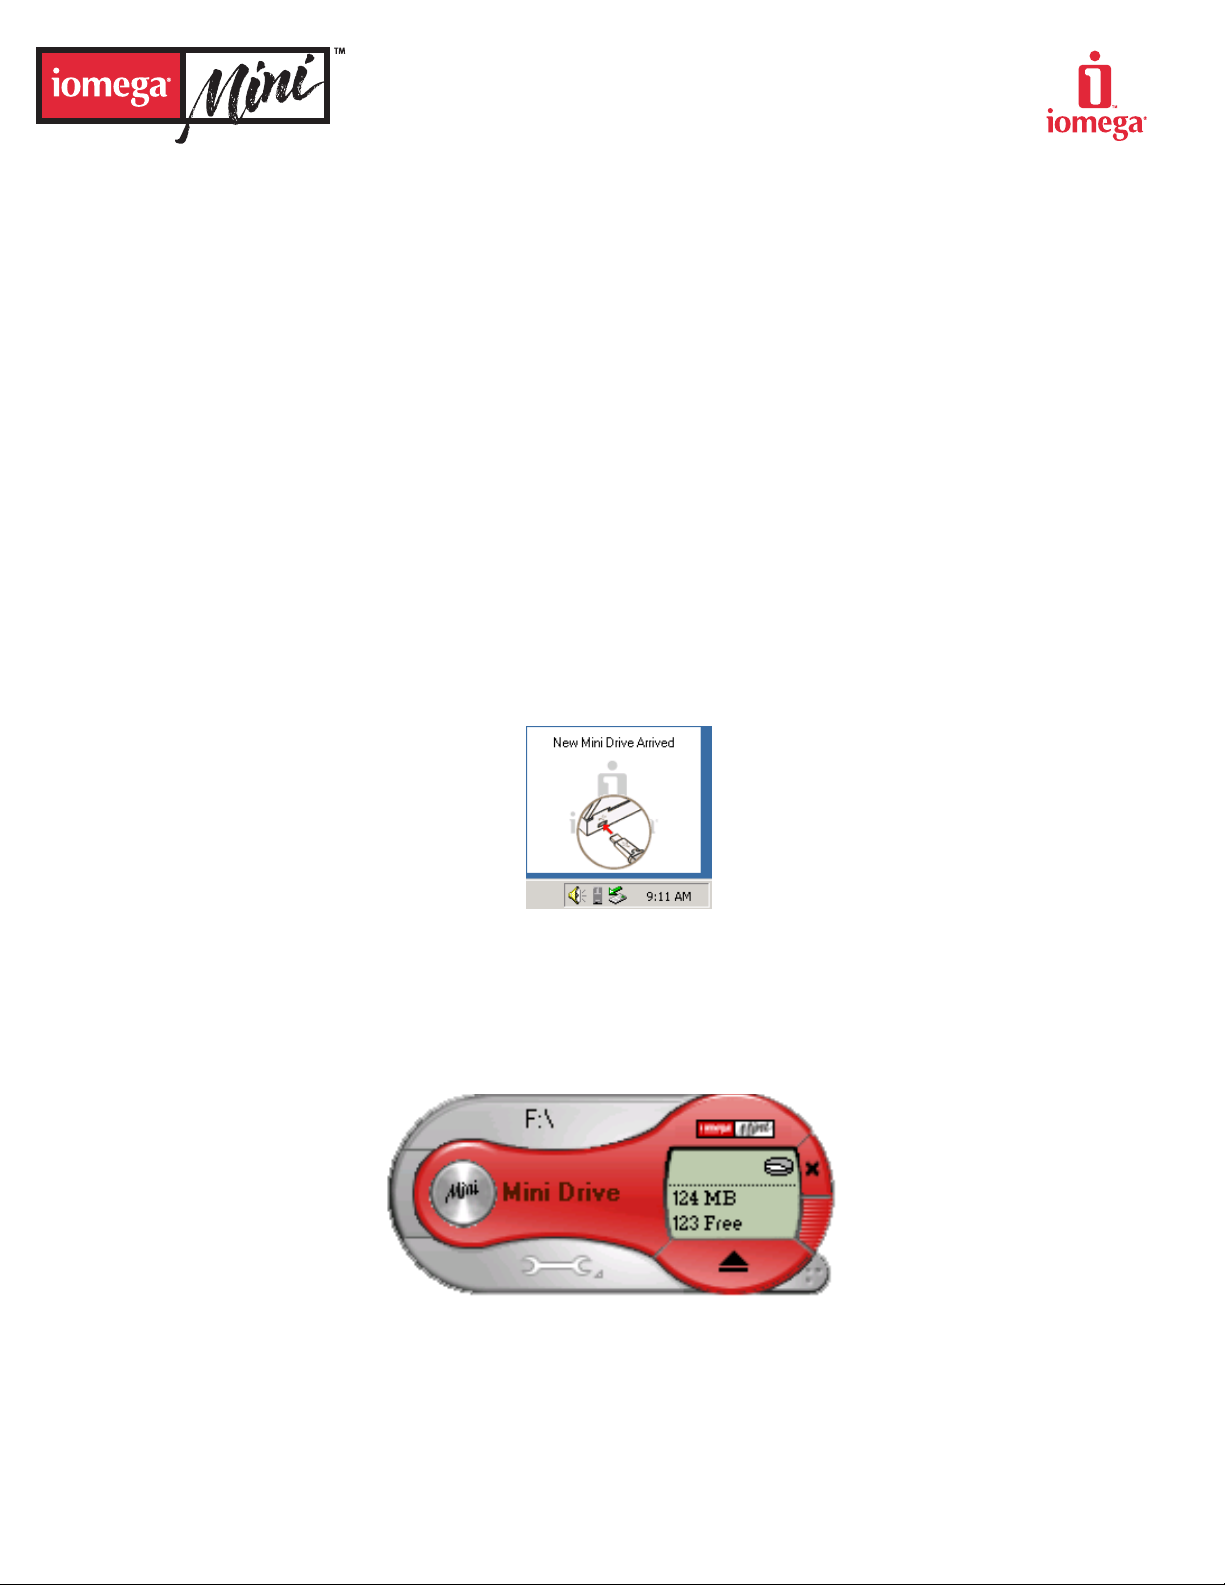
MINI CONTROL PANEL POPUP MESSAGES
Mini Control Panel uses Popup messages to provide information or to inform you of Iomega Mini USB drive events. The message automatically disappears after a few seconds, or you can click to close.
EXAMPLE OF POPUP MESSAGE
MINI CONTROL PANEL CONSOLE
The Mini Control Panel Console enables you to access your Iomega Mini USB drive to store and retrieve files, launch installed
applications and customize your Iomega Mini USB drive.
The Mini Control Panel console displays the Iomega Mini USB drive logo, drive letter and label. To change this display to your
personal icon or label, see Personalizing Your Iomega Mini USB Drive. Click and drag to move the Mini Control Panel Console
to another location on your desktop.
MINI CONTROL PANEL CONSOLE
CONTROL PANEL
Page 4
Page 5
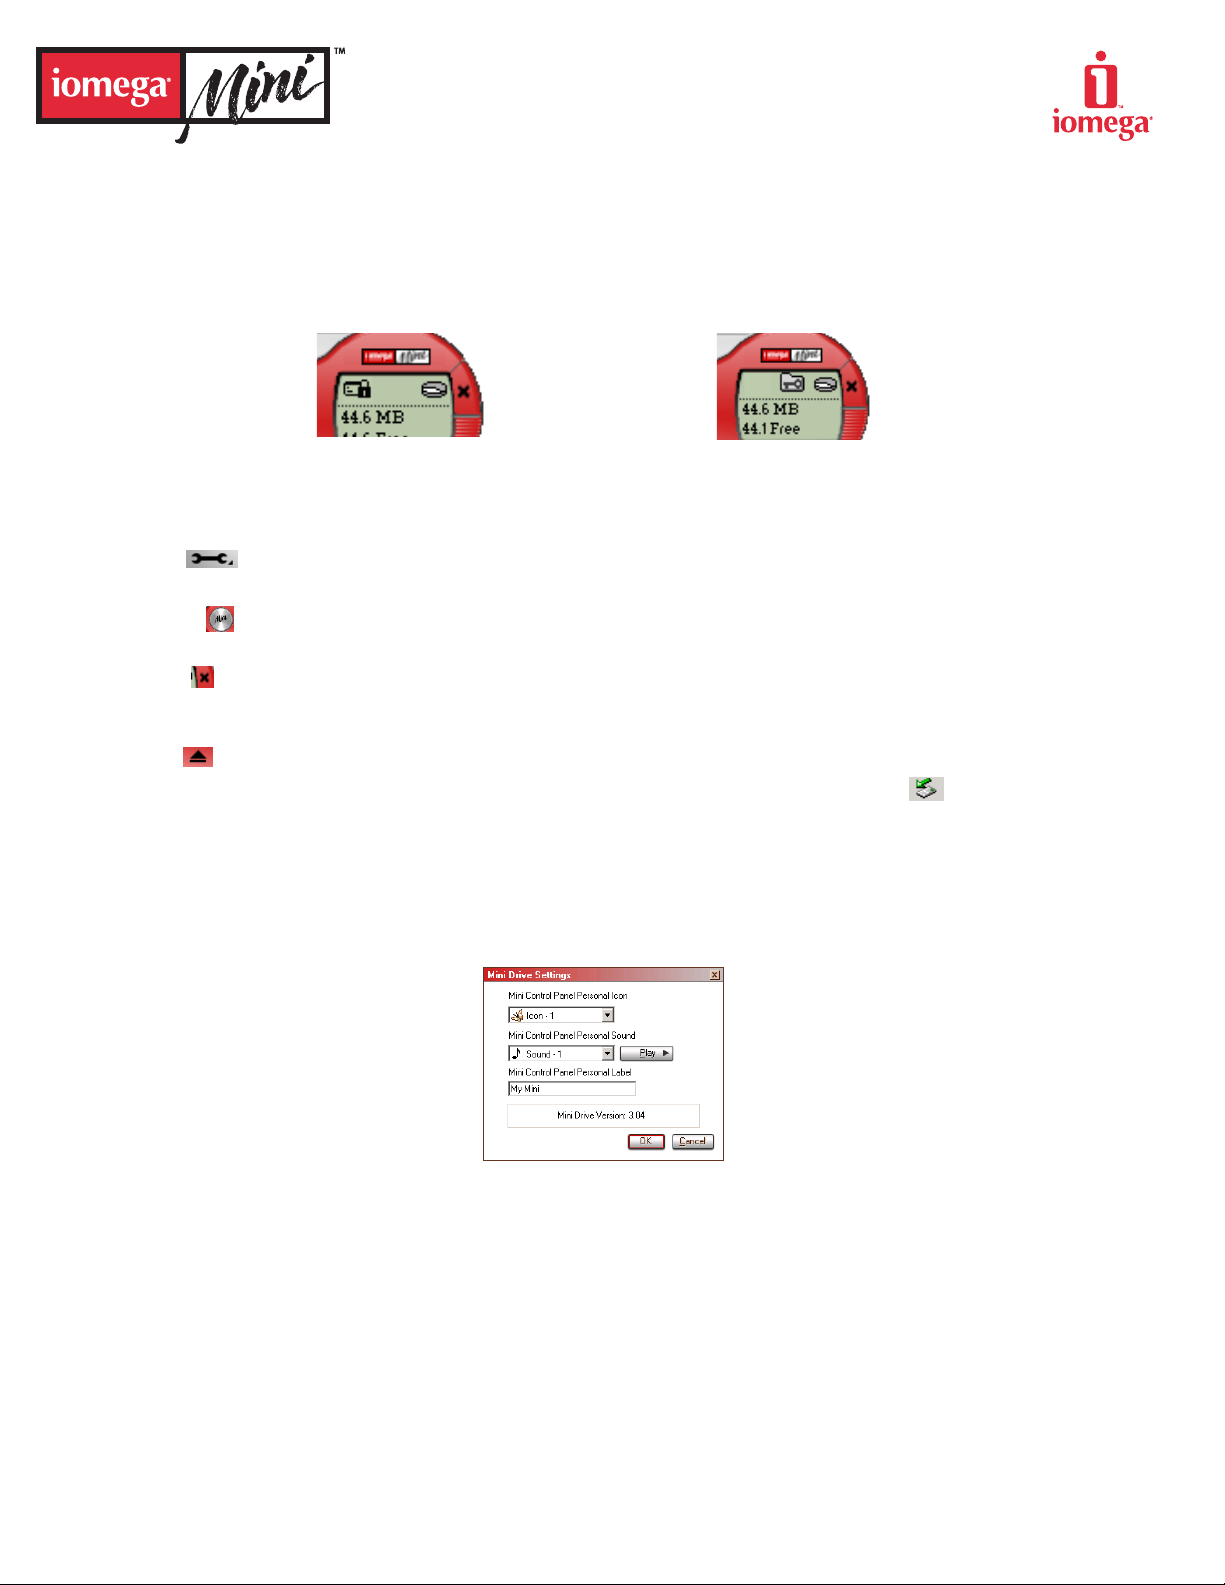
LCD Display
The LCD display shows your Iomega®Mini USB drive total capacity and free space. The free space indicator turns red when 5%
or less of your total disk space is free. The LCD display also indicates if your Mini drive is write protected or contains a privacy
zone.
Mini Lock: If you are using Mini Lock and have logged into your Privacy Zone, it will show in the LCD on the Mini Control Panel
Console. For further details on Mini Lock, go to the Iomega web site: www.iomega.com.
PRIVACY ZONE INDICATION WRITE PROTECTION INDICATION
Buttons
Click any of the buttons described below to use them.
•
Tools— The Tools button opens the Mini Control Panel Console menu. This menu contains the Mini Control Panel
Console settings, advanced features, and personal folders.
• Browse— Click on the Browse button to open the Iomega Mini USB drive in Windows Explorer and to access all your
files.
• Close— Click X to hide the Mini Control Panel Console. The console will disappear from the desktop and a message
will be displayed, advising you that the program will continue to run in the taskbar. To re-open the Mini Control Panel
Console, double-click the tray icon or select Show from the Mini Control Panel right-click menu.
• Eject— The Eject button allows for the safe removal of your Iomega Mini USB drive.
NOTE: Windows 2000/XP users, you can also double-click the Safely Remove Hardware icon in the taskbar to
remove your Iomega Mini USB drive.
CAUTION! Removing your Iomega Mini USB drive without using one of these options can result in data loss!
PERSONALIZING YOUR IOMEGA MINI USB DRIVE
To personalize your Iomega Mini USB drive with your own icon, a special sound, or your own label, click the Tools button on
the Mini Control Panel Console and select Settings.
MINI DRIVE SETTINGS WINDOW
• Mini Control Panel Personal Icon–Using the dropdown menu, select any of the icons included with Mini Control Panel.
Click OK to apply the change.
NOTE: This operation will fail if the Iomega® Mini USB drive is write-protected.
• Mini Control Panel Personal Sound–Using the dropdown menu, select any of the sounds included with Mini Control
Panel. You can listen to any of the sounds you select by clicking Play. Click OK to apply the change.
NOTE: This operation will fail if the Iomega Mini USB drive is write-protected.
• Mini Control Panel Personal Label–To personalize or identify your Iomega Mini USB drive, enter a label name, (up to 18
characters).
• Mini Drive Version–Your Mini drive version is the last item listed in the Settings window. You will need this information
when contacting Technical Support.
CONTROL PANEL
Page 5
Page 6
ADVANCED FEATURES
When Mini Control Panel is running, you can access a number of advanced features that make your Iomega®Mini USB drive
easier to use. Click the
Tools button and then click an option in the Advanced Features menu.
ADVANCED FEATURES MENU
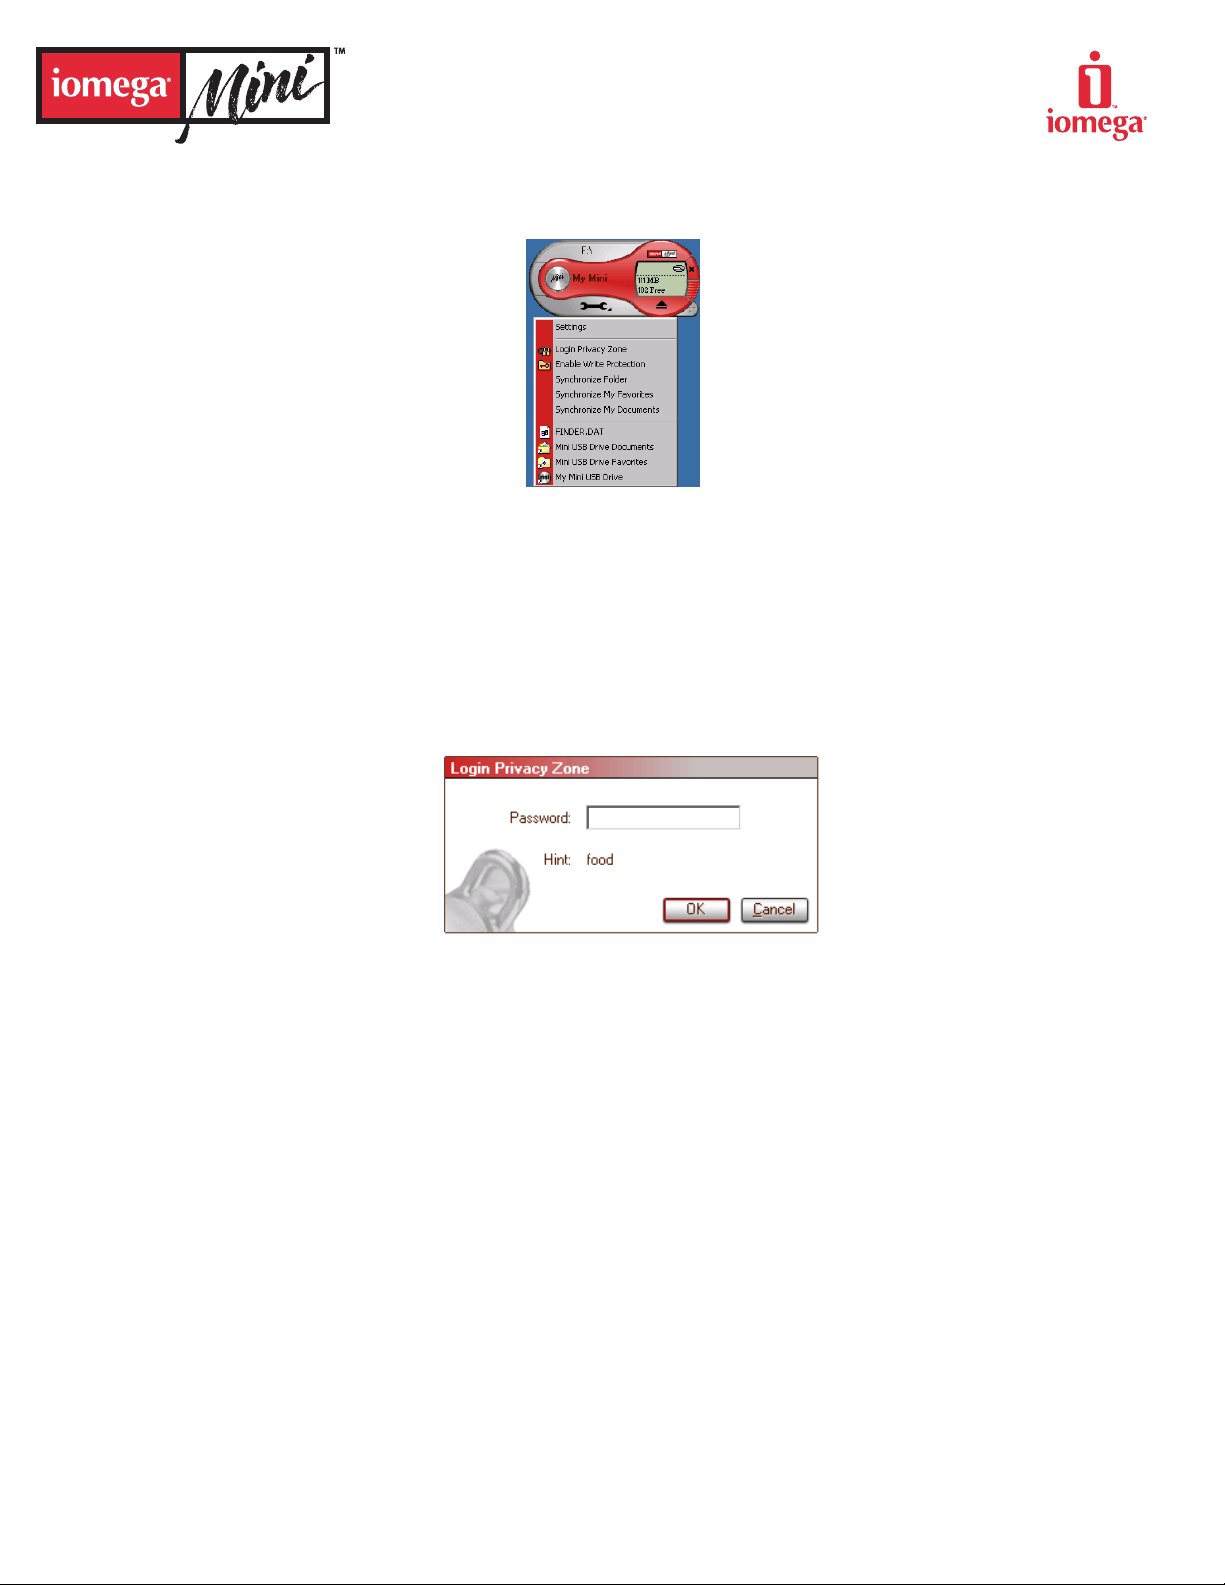
Login/Logout Privacy Zone
If you have created a Privacy Zone on your Iomega Mini USB drive using Mini Lock, you can login to this zone easily by
clicking Login Privacy Zone and entering the correct password in the Login Privacy Zone window.
NOTE: After a fifth unsuccessful attempt to login, Safe Eject your Iomega Mini USB drive, reinsert it, and try logging in
again.
After you have successfully logged into your Privacy Zone, the text in the Advanced Features Menu changes to Logout
Privacy Zone. To logout, just click this option.
LOGIN PRIVACY ZONE WINDOW
Enable/Disable Write Protection
To protect your Iomega Mini USB drive from viruses or data loss when plugging it into a computer whose security and
integration are questionable, Mini Control Panel enables you to write-protect your Iomega Mini USB drive. Write-protection will not let you delete or alter any files on the drive.
Synchronization Options
Mini Control Panel synchronization options speed up and simplify the process of synchronizing your work between two
or more computers, or simply backing up files. Available options include:
• Synchronize Folder: Synchronizes specific folders and sub-folders.
•
Synchronize My Favorites: Synchronizes the My Favorites folder on your computer and the Iomega Mini USB
drive Favorites folder.
• Synchronize My Documents: Synchronizes the My Documents folder on your computer and the Iomega Mini USB
drive Documents folder.
First Time Folder Synchronization
To enable folder synchronization for the first time on a new computer or with a new Iomega Mini USB drive, follow the
steps below:
1. Select Synchronize Folders from the Advanced Features Menu. The Synchronization Settings window is displayed.
2. Select the folders you would like to synchronize. The first folder must be an existing local folder. The second folder must be an existing Iomega Mini USB drive folder.
CONTROL PANEL
Page 6
Page 7
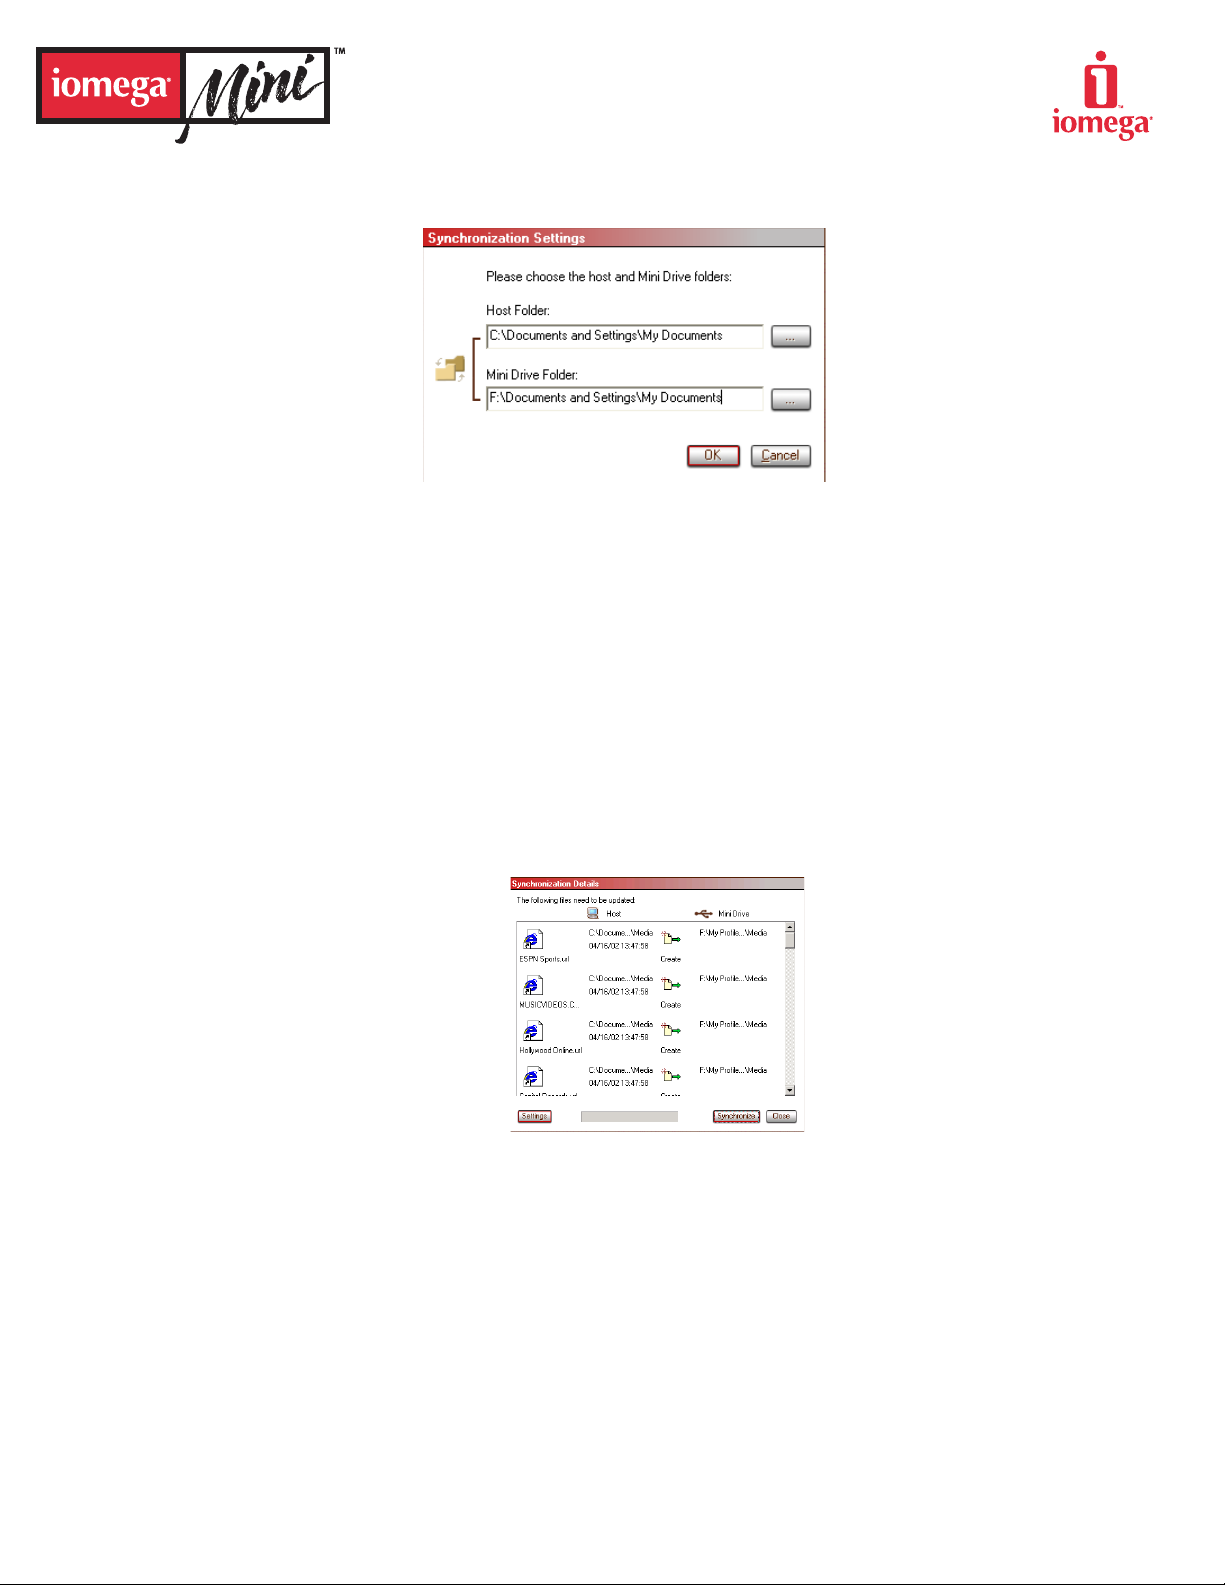
NOTE: If identical files exist in both your local folders and the Iomega Mini USB drive folders, Mini Control Panel will
not know which file is the most up-to-date version. Rename one of the files.
SELECT FOLDERS TO SYNCHRONIZE SCREEN
3. Click
OK to start the synchronization process.This opens the Synchronization Details window. A list of the
required actions, awaiting your approval, is displayed.
4. Click Settings to view/change the synchronization settings.
5. Click Synchronize to authorize all file operations (you cannot select a partial list).
6. If an error occurs during a file operation (e.g. disk is full, bad path or file), an error message is displayed. Click
OK
to continue synchronizing the remaining files, or Cancel to stop the process.
7. Click OK when a message is displayed indicating synchronization completion.
Subsequent Folder Synchronization
1. Select Synchronize Folders from the Advanced Features menu. This opens the Synchronization Details window. A
list of the required actions, awaiting your approval, is displayed.
2. Click
Settings to view/change the synchronization settings.
3. Click Synchronize to authorize all file operations (you cannot select a partial list).
SYNCHRONIZE ACTIONS SCREEN
4. If an error occurs during a file operation (e.g. disk is full, bad path or file), an error message is displayed. Click
OK
to continue synchronizing the remaining files, or Cancel to stop the process.
5. Click
OK when a message is displayed indicating synchronization completion.
CONTROL PANEL
Page 7
Page 8
Folder Synchronization Rules
The following rules apply to the synchronization process:
• New files—If a new file is created in a synchronized folder, Mini Control Panel will create the same file in the folder on your Iomega®Mini USB drive.
• Deleted files—If a file is deleted in a synchronized folder, Mini Control Panel will delete the file in the folder on
your Iomega Mini USB drive.
•
Modified files—If a file is modified in a synchronized folder, Mini Control Panel will replace the file in the folder
on your Iomega Mini USB drive. If the file is modified in both folders, Mini Control Panel will skip this file without
performing any operation.
•
Renamed files—Renaming a file is the same as creating a new file. The rule for "Deleted files" applies.
Create Personal Folders
Personal folders are file folders that help you to categorize/organize your files for quick retrieval.
To create a personal folder, select Create Personal Folders from the Advanced Features menu, then click OK.
The My Profile folder is automatically created on your Iomega Mini USB drive. Within this folder are the following folders:
• My Mini USB Drive–This folder is similar to your Desktop and stores general files that you access frequently.
• Mini USB Drive Documents–This folder is similar to your My Documents folder and stores work files. This folder
stores files from the Synchronize My Documents operation.
• Mini USB Drive Favorites–This folder is similar to your Favorites folder and stores your favorites. This folder stores
files from the Synchronize My Favorites operation.
• Start Menu–This folder holds shortcuts to the My Mini USB Drive, Mini USB Drive Documents, and Mini USB
Drive Favorites
folders.
To access any files in your personal folders, you can either open your My Profile folder using Windows Explorer or
click the Tools button and select a personal folder from the Advanced Features Menu.
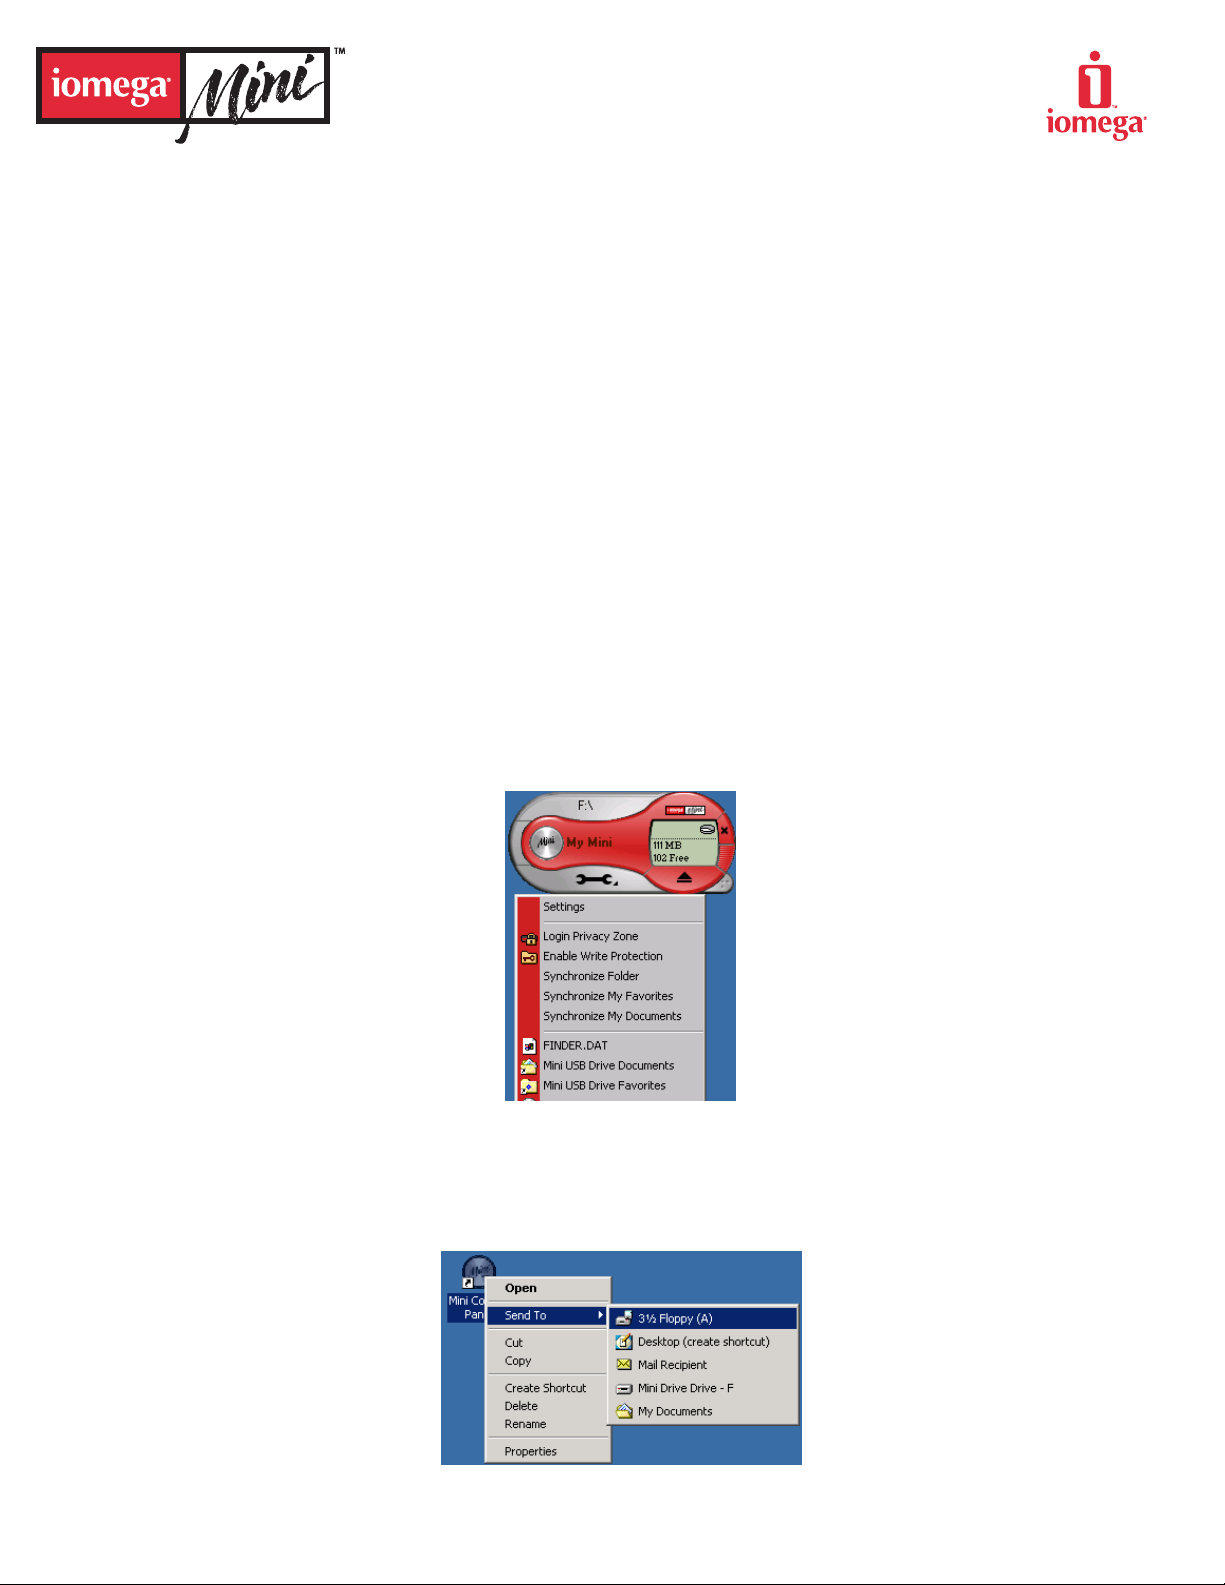
QUICK ACCESS TO PERSONAL FOLDERS
Send to Iomega Mini USB drive
Your Iomega Mini USB drive is automatically added to the Send To menu. You can right click a file and save it to your
Iomega Mini USB drive using the Send To menu item.
SEND TO MENU
CONTROL PANEL
Page 8
Page 9

Autorun
The Mini Control Panel Autorun function enables you to automatically launch a wide variety of files, such as HTML web
pages, when you connect your Iomega Mini USB drive.
The Mini Control Panel runs and executes the Iomega Mini USB drive autorun.ini file. You can disable the Autorun function in the Mini Control Panel Settings dialog box.
NOTE: The Mini Control Panel Autorun function has a slightly different and more extended syntax than the CD-ROM
autorun syntax.
A typical AUTORUN.INF file contains two lines in text format (ASCII) as shown in the following examples:
Example 1:
The syntax of the AUTORUN.INF file that launches the yahoo web page would look like:
[launcher]
open=www.yahoo.com
Example 2:
The syntax of the AUTORUN.INF file that launches the windows calculator (calc.exe) would look like:
[launcher]
open=calc.exe
How to Contact Us
Web site: http://www.iomega.com
Copyright © 2002 Iomega Corporation. All rights reserved. Iomega, the stylized “i” logo, Mini Lock, Mini Control Panel, and the Iomega Mini USB Drive brand block are either registered trademarks or trademarks
of Iomega Corporation in the United States and/or other countries. Mac is a trademark of Apple Computer, Inc. and may be registered in the United States and other countries. Windows is either a registered
trademark or trademark of Microsoft Corporation in the United States and/or other countries. Certain other product names, brand names and company names may be trademarks or designations of their respective owners.trademark of Microsoft Corporation in the United States and/or other countries. Certain other product names, brand names and company names may be trademarks or designations of their respective
owners.
CONTROL PANEL
Page 9
 Loading...