

inVue LTO4905 Instruction Manual
Instruction Manual
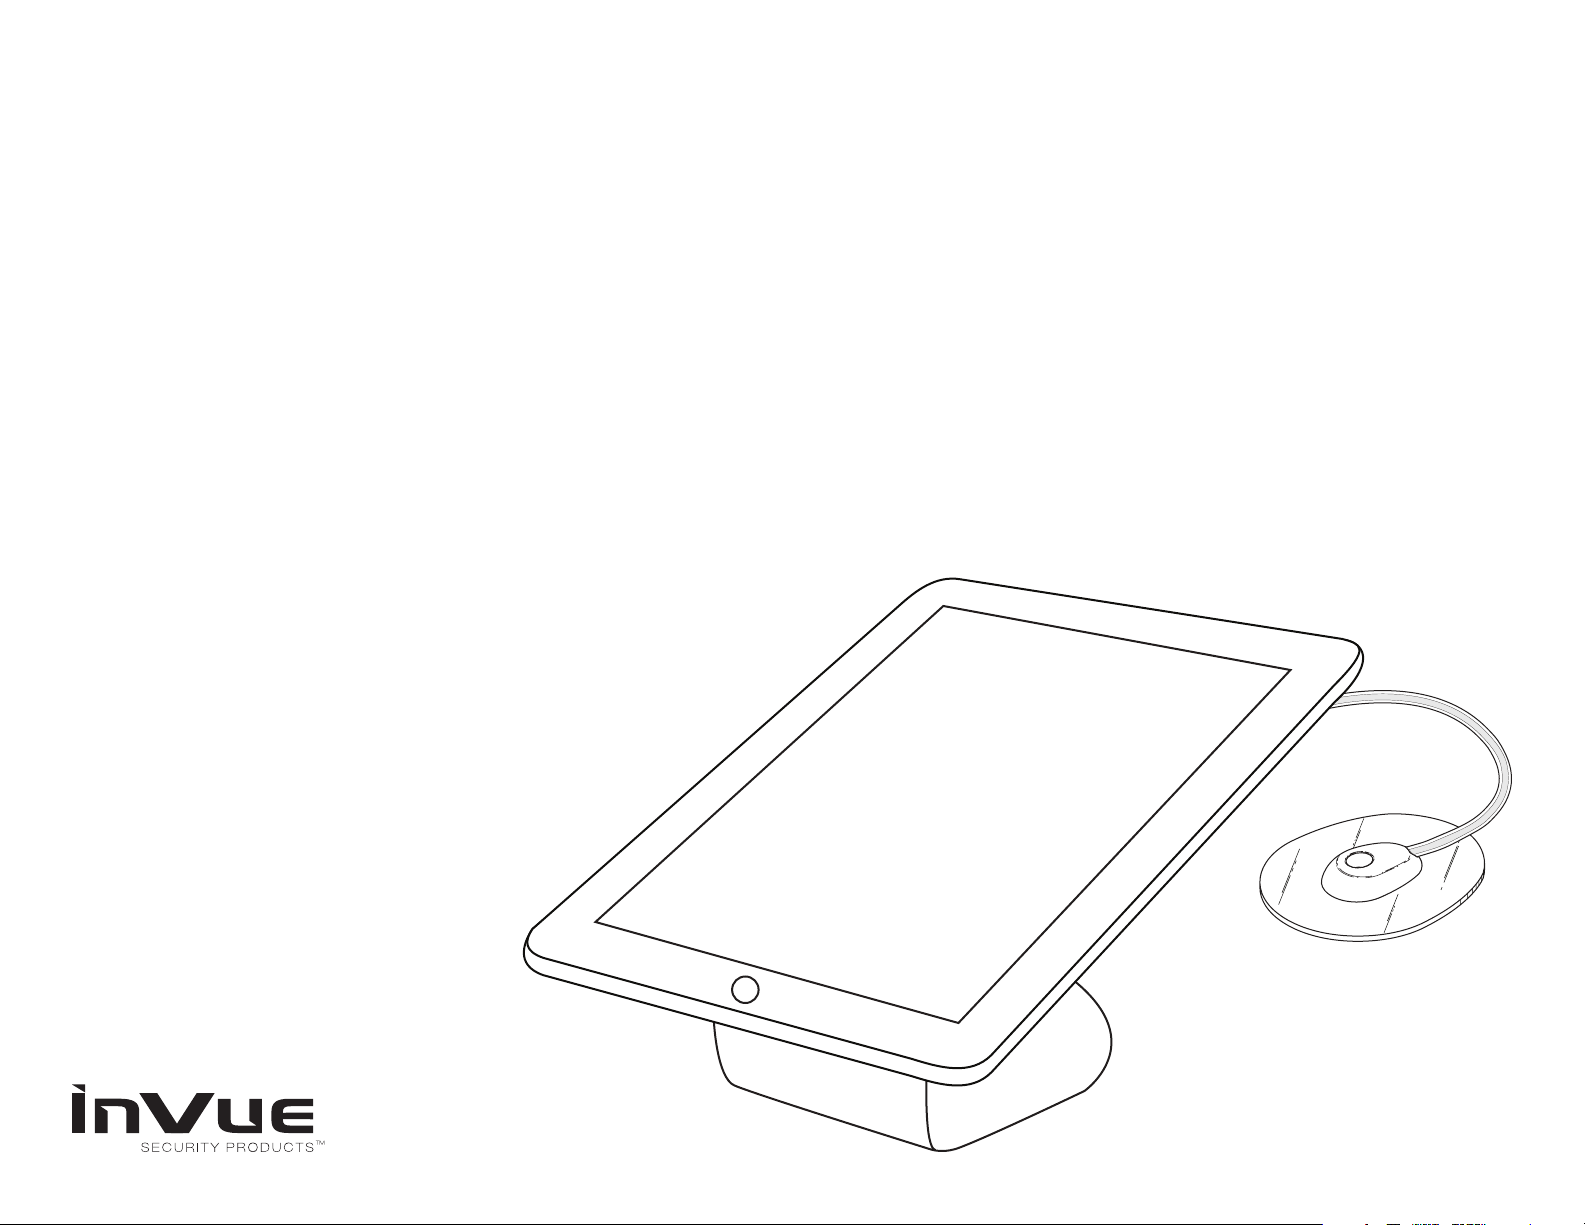
LTO4905 › LTO with Power Pass
Getting Started Create secure, powered-up displays in 3 easy steps:
1 Mount LTO module to merchandise and LTO anchor
to xture counter.
Mounting Options:
a. Adhesive Mounting
b. Screw Mounting
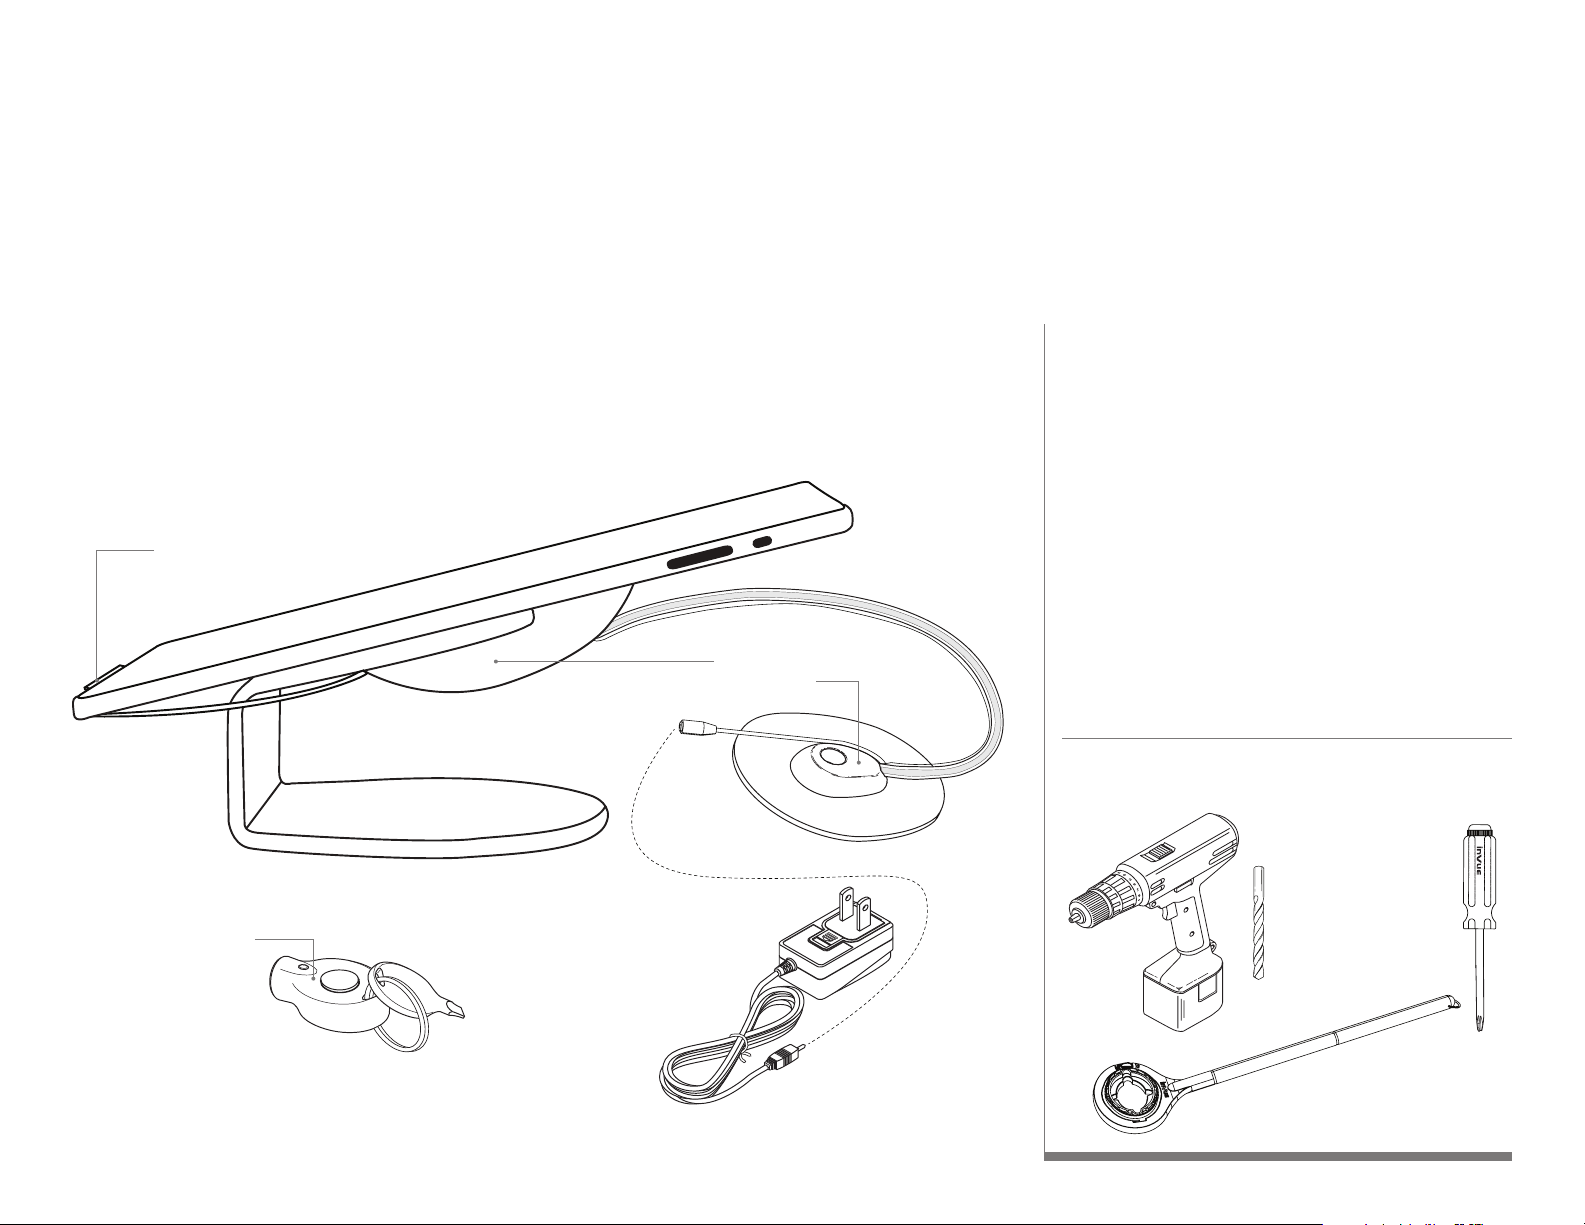
2 Plug power connector into merchandise and LTO
module. Plug power supply into LTO anchor and
outlet to power-up merchandise.
3 Power Connector
1 LTO4905
LTO Module
LTO Anchor
Power-up Options:
a. USB charging compliant
b. other tablets
3 Arm LTO4905 with programmed IR key.
4 IR Key
AF4400
2a Power Supply
AF4413 (US)
AF4415 (EUR)
AF4416 (UK & AUS)
2b Power Supply
Use OEM power
supply if over USB
charging spec.
Tools Needed (Screw Mounting Option Only)
1/8"
(3 mm)
Multi Tool
AF6313
POD Removal Tool
AF 6314
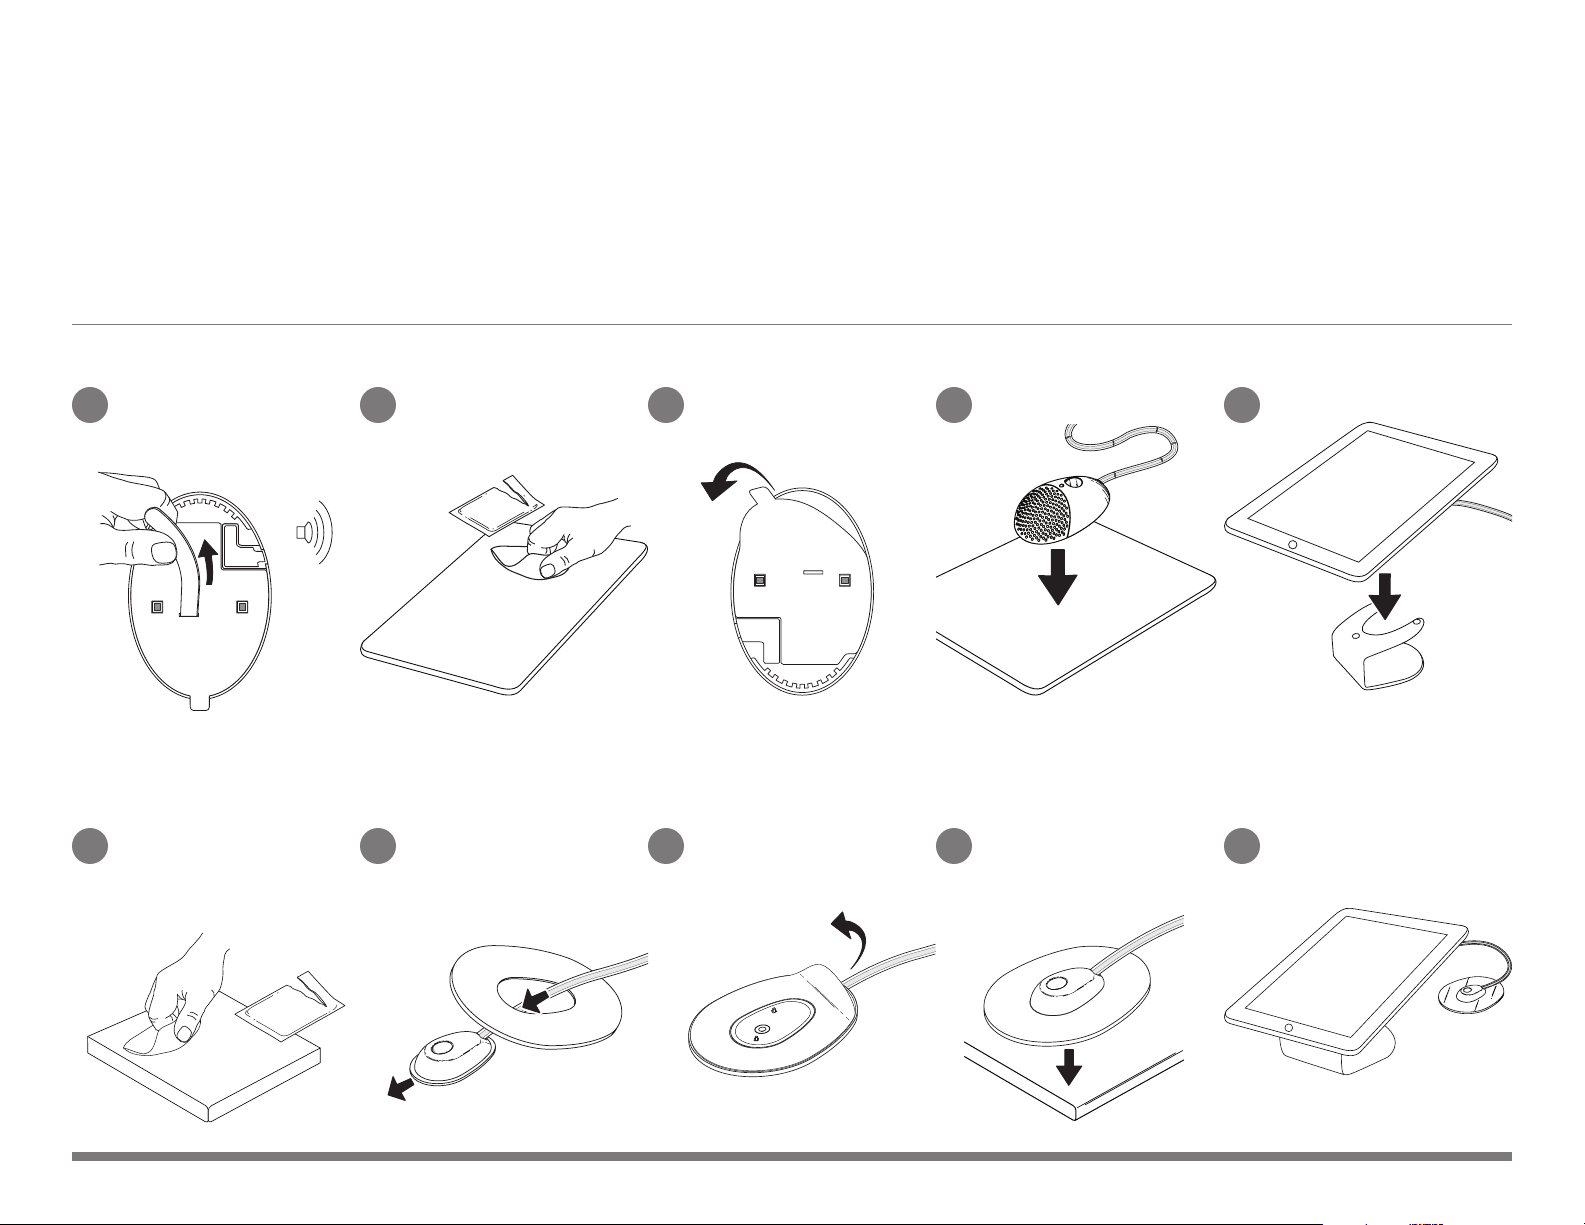
1a Mounting Options Adhesive Mounting
1
Let alcohol dry completely.
6
x1
KEEP OUT OF REACH OF
KEEP AWAY FROM EYES
DIRECTIONS: Apply topically as
needed to cleanse surface mounting area.
AND FIRE
CONTENTS: One pad saturated in 75%
Isopropyl Alcohol
FOR EXTERNAL USE ONLY
CHILDREN
2
CONTENTS: One pad saturated in
Isopropyl Alcohol
FOR EXTERNAL USE ONLY
KEEP OUT OF REACH OF
75%
KEEP AWAY FROM EYES
CHILDREN
DIRECTIONS: Apply topically as
needed to cleanse surface mounting area.
AND FIRE
Remove adhesive lm.Let alcohol dry completely.
3
Press rmly for 10 seconds.
4 5
(top)
(bottom)
7
8 9 10
Press rmly for 10 seconds.Remove adhesive lm.
 Loading...